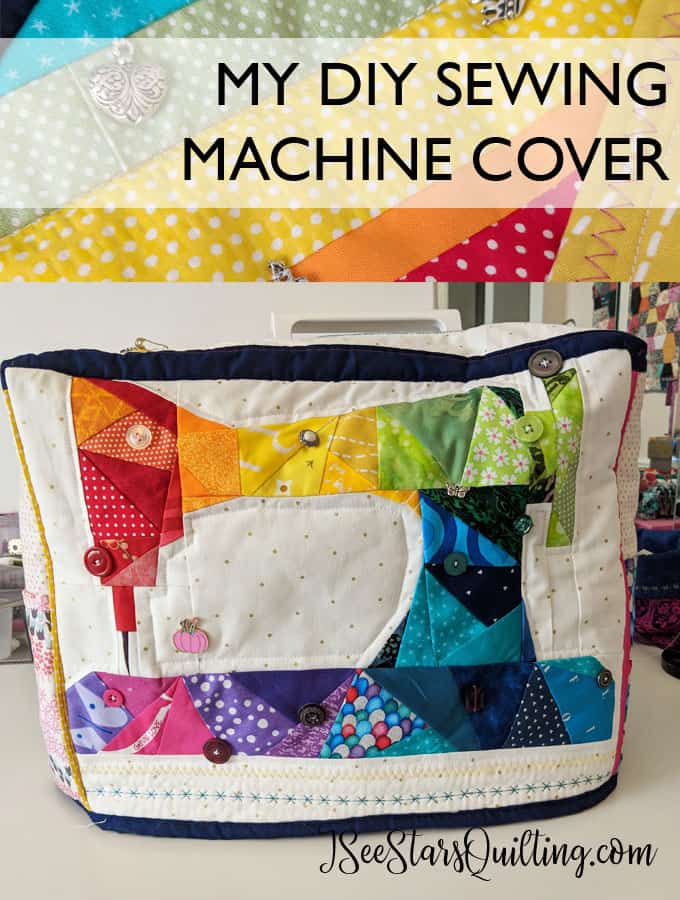
Hey there! Guess what? I made a cover for my sewing machine! I have seen a few at sewing events that I admired. Last weekend, I decided that it was my time. I knew that I wanted a DIY sewing machine cover and that I didn’t want to make a plain jane boring boxy cover… I wanted it to be grand and amazing and so much FUN!
I love having my machine sitting out all the time in my office where I can sit down and sew at a moments notice (because, as a mom sometimes you only have a moment or two before its time to get up and go again, right?)
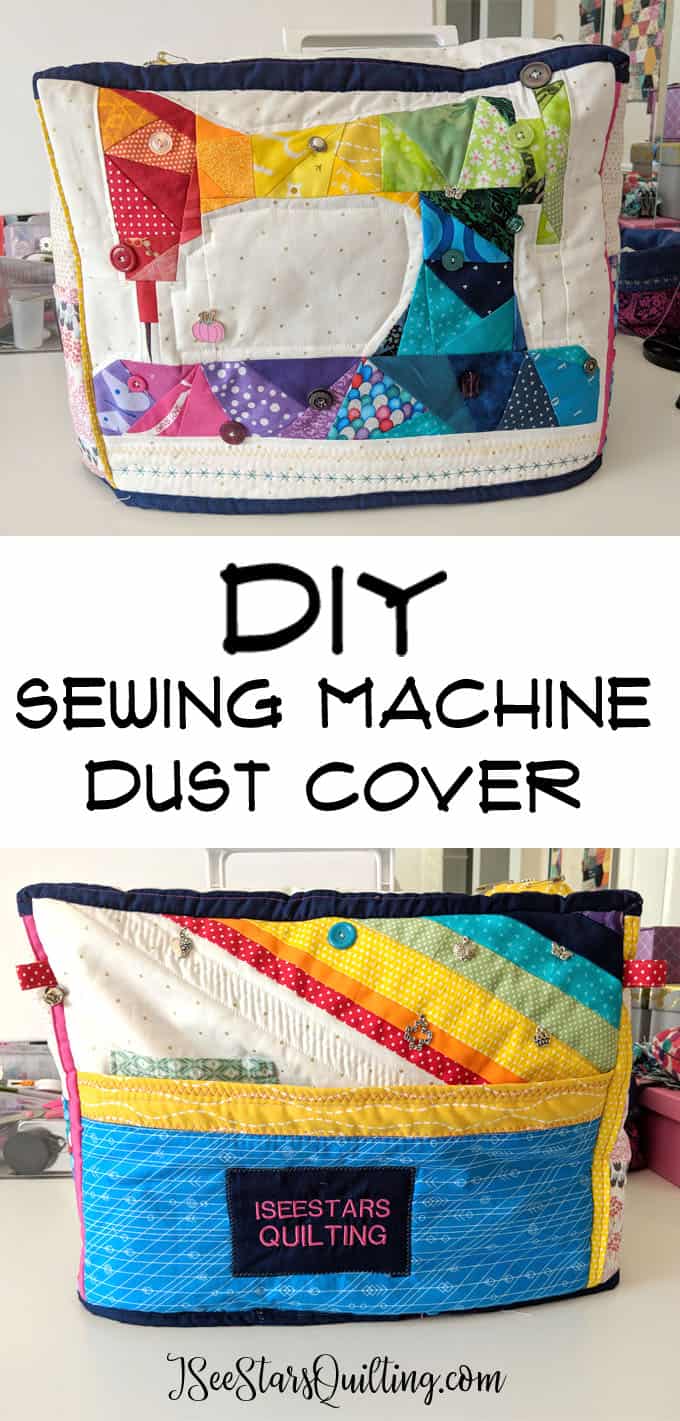
This is what I came up with, and I am absolutely in love with it!
I shared it on my Instagram just as soon as I finished it and I had so many compliments and several people asking for more detailed pictures of all the little sections (do you follow my Instagram? You should. We have fun sharing little bits of behind the scenes on all my works in progress!)
(Look down under the pictures if you are looking for tips to make your own sewing machine cover.)
It started with a cute paper piecing panel from QuietPlay – You can buy the pattern here. It was fantastic and easy to work with. The instructions were simple, and it came together in just under a few hours – An easy morning sew.
I held up my finished panel and realized it was JUST the right size for the front of my sewing machine. *angels singing* yay! This spurred on another several hours spent at the sewing machine and me not getting the laundry done as I had hoped… who am I kidding? A fresh sewing project was a happy distraction from the housework I didn’t want to do in the first place!
The Front
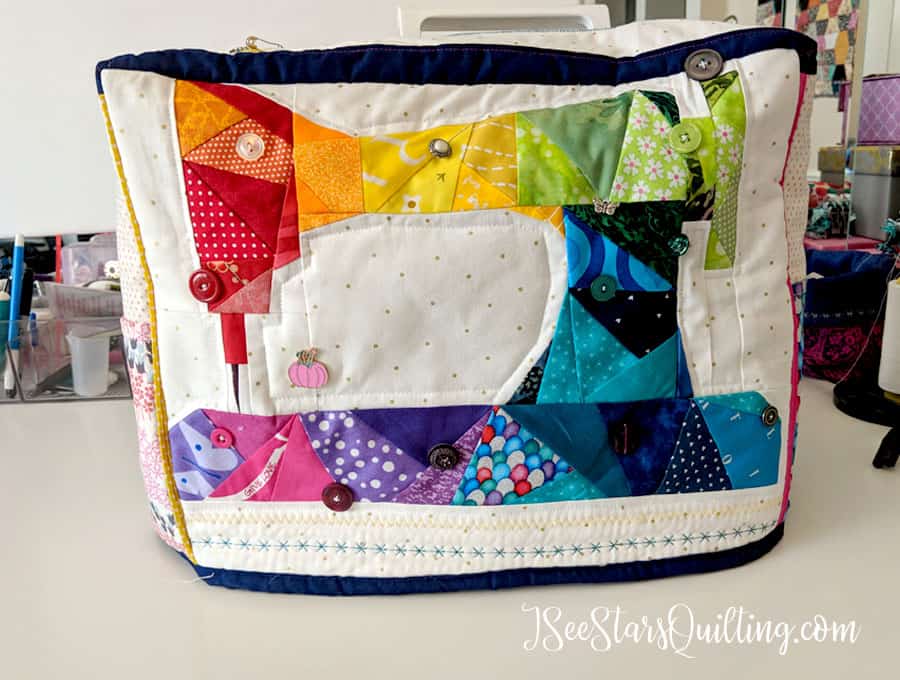
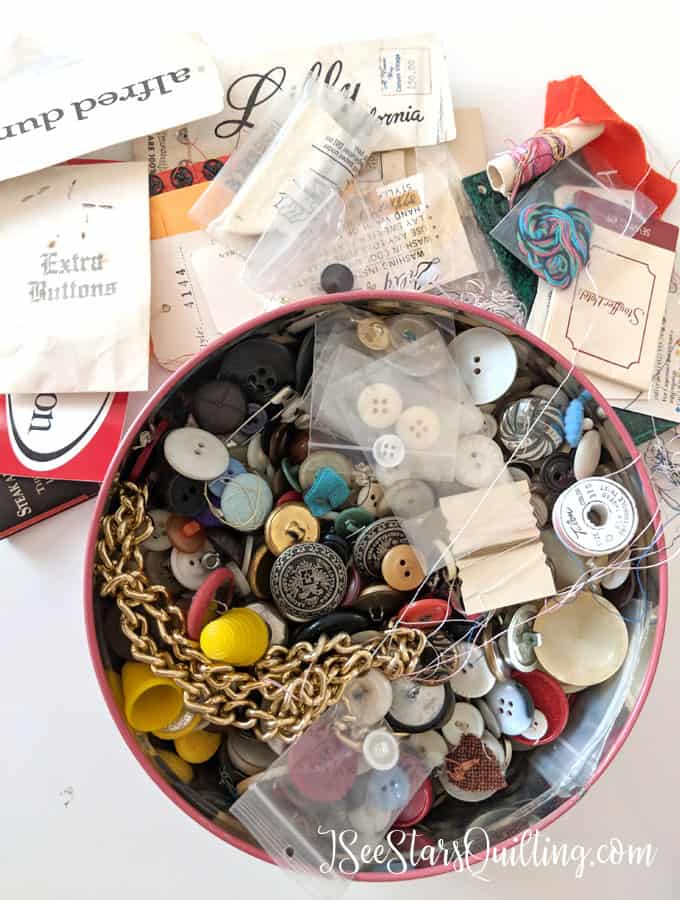
I received a tin from my grandma a while back. It is an old round tin that is full of buttons and little bits of sewing supplies. So many buttons. Most of them just normal buttons, but there are some that are really pretty and fancy as well.
My best guess for her button hoarding collection is just the depression-era mentality. Over the years, she clipped and saved every single button she could. She told me that if she was going to throw out a sweater or a blouse got a hole that couldn’t be fixed, she clipped the buttons off of it because… “you just never know.” You can even see the fabric still attached to some of the button backs in the photo below.
Isn’t this collection just beautiful?
I didn’t intend on this sewing machine cover as a piece of family history but I wanted to embellish my sewing machine cover. The two women who mean the most to me in this world happen to be my mom and my grandma. I went digging through collections of tiny things to find the perfect rainbow color button matches.
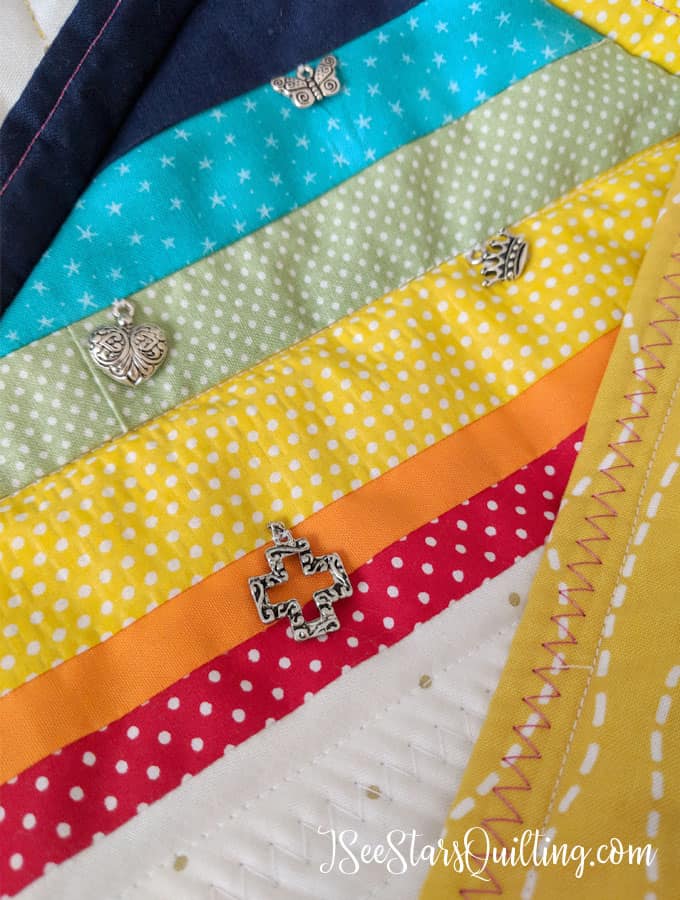
The Back
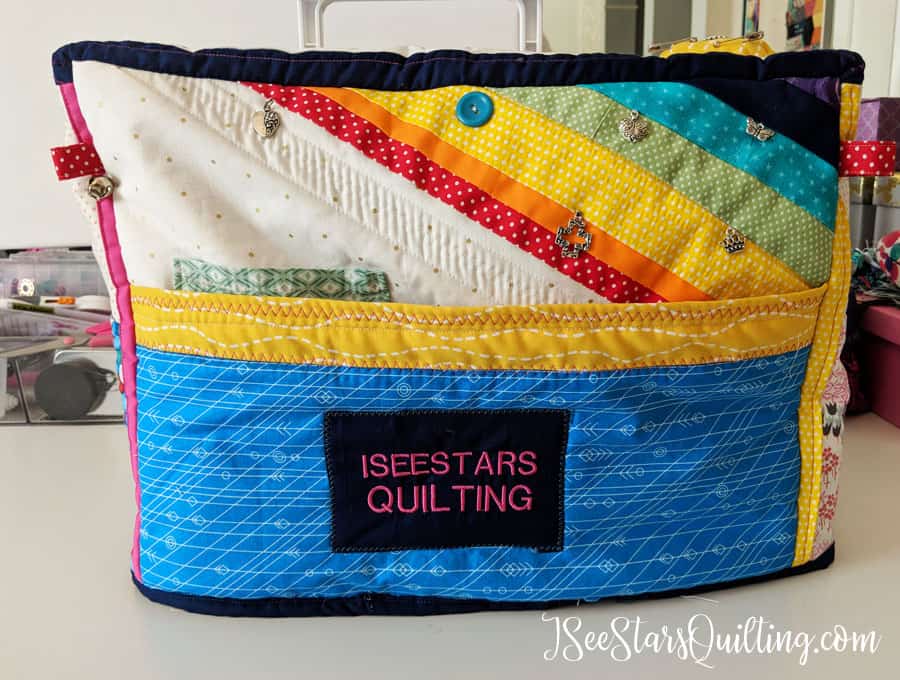
As for the little pieces donated by my mom on my DIY sewing machine cover, I pulled out a collection of crafty charms that she had given to me.
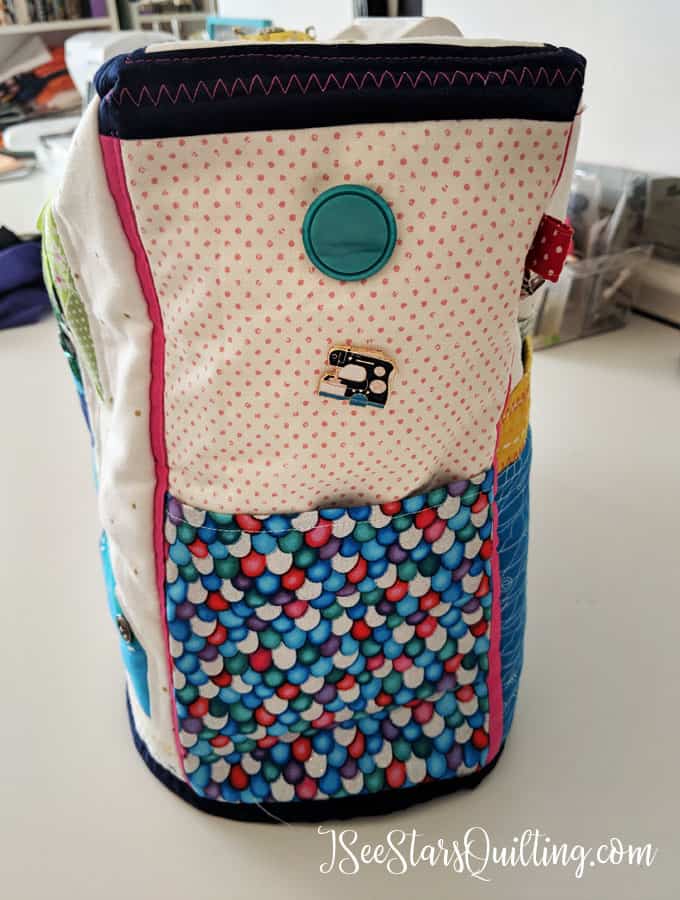
Pockets are, like, SO important. I may have gone a little overboard, but you know what? I’m prepared for anything. This totally takes me back to the diaper bag days where that bag held my life, and I was ready for anything unexpected at a moments notice. *hands up mommas who have it together!*
The big back pocket can hold my pedal and my power cords. The smaller pocket can hold my rotary cutter and any markers or smaller rulers.
The Sides of my DIY Sewing Machine Cover
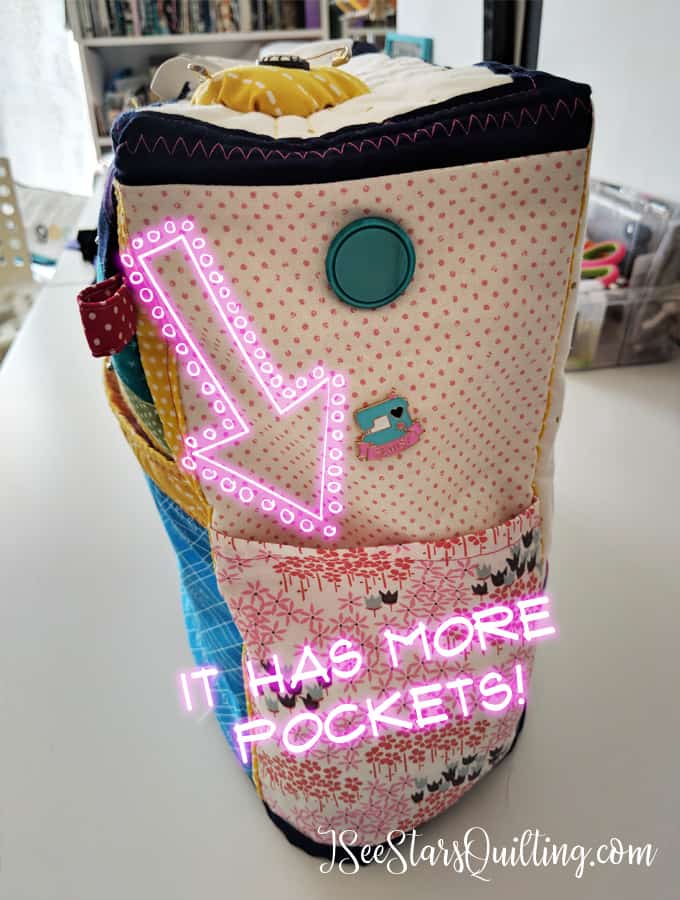
If you like the little sewing machine lapel pins, you can purchase them from my shop! They’re so cute and make such a fun addition to a quilt swap or a gift for a sewing friend!
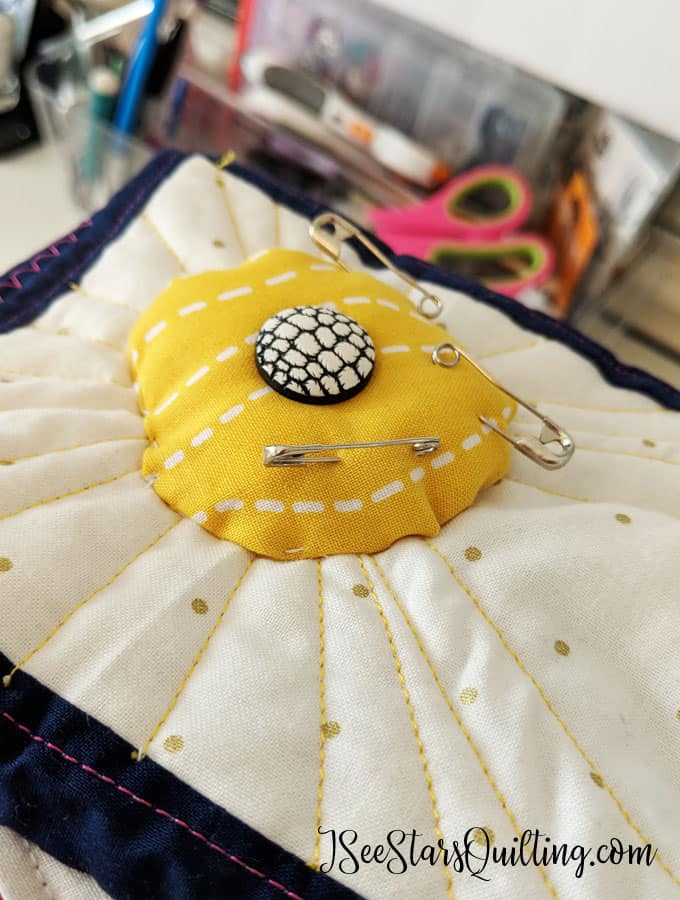
The Top
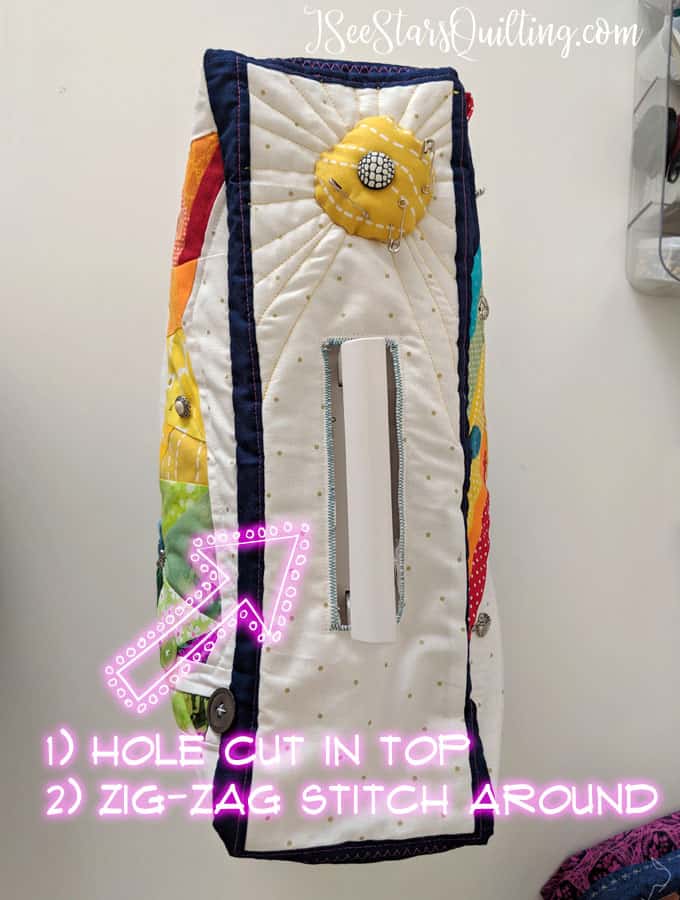
The top was probably the most complicated part of the whole project. I eyeballed most of this part and it took several tries to get the hole just big enough. Then I zig-zag stitched around the cut fabric to keep it from fraying.
Another detail that I added was this fun little pin-cushion on top. (A little bit more sunshine!) I don’t see it actually being useful for sewing pins, but a few extra safety pins laying around are always necessary. And it helped make this beautiful button *POP*!
If you’ve come here looking for ideas for a DIY sewing machine cover, you’re in the right place! Most quilters and sewists really like to put their own personal fingerprint on their sewing machine covers. I’ve never seen two exactly the same… just like us quilters. We’re such a fun breed, aren’t we? 🙂
TIPS TO DIY YOUR OWN SEWING MACHINE COVER
I highly suggest that you:
- Pull out your scrap fabrics! Find the ones that call out to you. That tiny bit of pink you just couldn’t let go of? This is the perfect project for it! Find a way to bring in all the ones that you love! Who cares if they don’t all match perfectly.My cover was made with scrap fabric only. The rainbow motif created itself, honestly.
- Decide on what sewing technique brings you the most joy. Is it paper piecing? Or is it random modern crazy stitching? Maybe you like things to be precise and meticulous with perfect piecing? This is the best place to showcase your favorite techniques!
- Look for little embellishments to add on! Little loops, ruffles, charms, pins, and buttons! 3D little fabric banners? Yes, please 🙂 Even embroidery is fair game! Add it all and then some!
- You can start out with a calculated plan or you can just start sewing and see where you end up. There are no rules.
- Do not get caught up in making it absolutely perfect! If you want it to be perfect, I guarantee you it never will be. But if you roll with the mistakes and make the most of it, you’ll grow as you sew and love the results!
- A fun suggestion is to ask some of your sewing friends for pieces of scrap fabric to add in. If they’re making covers too, donate some of your scraps. Share the love!
- Have fun! Do not let this frustrate you as you’re working on it. Focus on completing the bits of inspiration as they come to you!
- Consider using decorative stitches to add a fun flair.
- Measure Measure Measure. See Below! You’ll want to make sure that you measure correctly before cutting and add in a little grace room so that your cover will not fit so snugly around your machine.It is a dust cover, not a dust girdle!
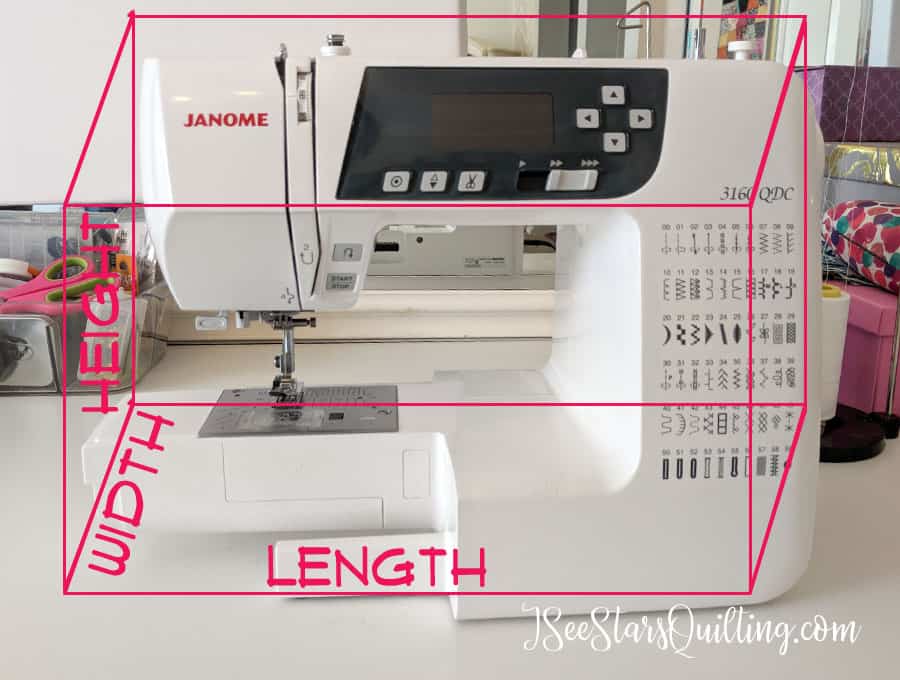
The most important rule is to have fun with it 🙂 Measure properly and then play with the fabric from there! Let me know if you have any questions or if you’re inspired to create your own DIY Sewing Machine Cover.
Happy Sewing!
I love the way this turned out, and how you have a little bit of 3 generations there! 🙂 So cute!
This is SEW cute! I love it! Just happened to find you because someone shared this on Facebook!
Hi Karen! Thank you 🙂 I’m so glad that you found me!
Hi so happy I found this ! Just LOVE that sewing machine cover , the personality you’ve got on it really makes it the best ?. Trying to make my own here also , with my grandson we both seem to like buttons on it ! Oh happy day big fat bright colors , quite adorable ?. Thanks for the post !
Hey Kim! Thank you for your sweet compliment! I’ve absolutely enjoyed my machine cover and all of it’s bright happy colors! Have fun with the buttons! 🙂