Start Here – Quilting 101

New to quilting? Looking for some help with the basic skills and terms? Start here! Quilting tips tricks and little bits of inspiration for the newbie to intermediate quilter.

  • Essential Quilting Rulers & Why You Need Them

    How Do I Know Which Ruler To Buy?

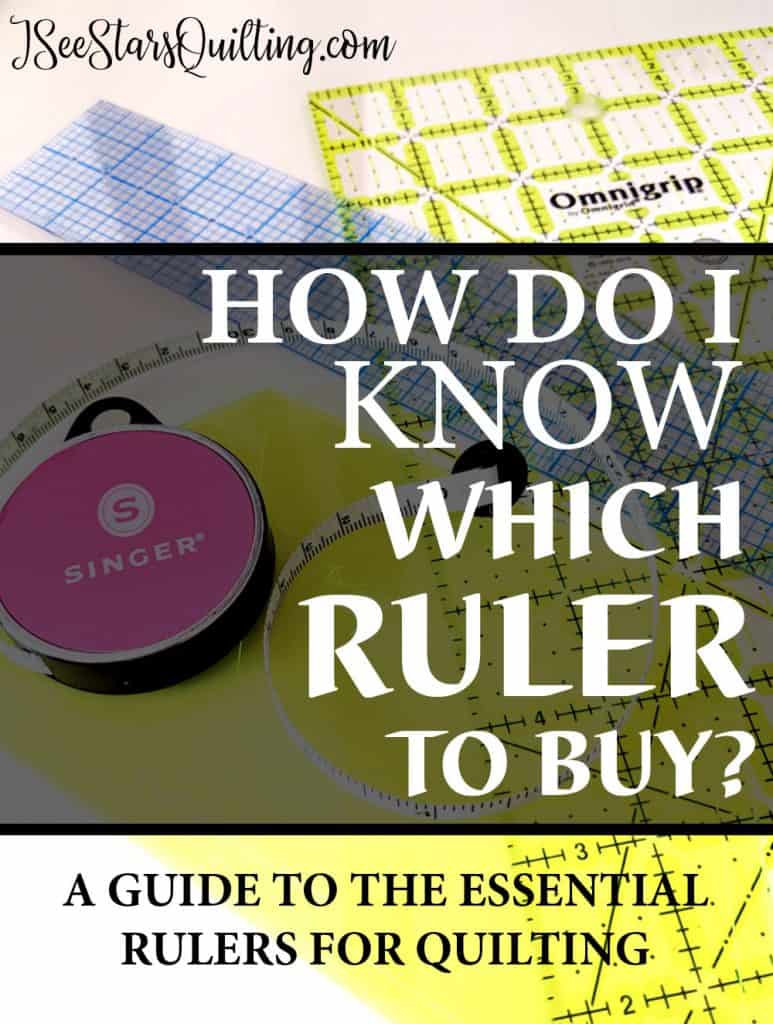
    Why do you need quilting rulers? Which ones should you buy?

    Did you know that quilters of past generations used to use cardboard templates and scissors to cut their precise pieces of fabric? I’m amazed at the accuracy they achieved with that! I don’t know about you, but I feel like its ok to admire their abilities and realize that I ain’t got time for that all in the same breath.

    Modern quilting techniques, mean more modern tools. (yay!) I love my quilt rulers and acrylic template pieces. And me and my rotary cutter? We are total BFFs. (fun fact: the rotary cutter was invented in 1979!Thank you, Yoshio Okada!)

    When I first started out quilting and rotary cutting, I was intimidated by all the ruler options out there – little ones, triangle shaped ones, rulers so big I have no idea where to store it, rulers for curves etc etc. And guess what? Those rulers are EXPENSIVE. Even with all your fancy  40% off coupons, a large ruler can cost you close to $20. You’ll be lucky to find any of them less than $10. Costs can quickly add up.

    So, what do you actually NEED?

    [This post contains affiliate links. I receive a small commission for each sale at no extra cost to you. I own all of these rulers and purchased them myself, so I would not recommend them if I did not believe they were of good quality!]

    The wondering and confusion ends now.

    We’re going to go over The Essential quilting rulers!

    First of all, you do not need 47 of them right now!  – Your essential rulers will serve two basic purposes and they will get you through many many quilts without having to keep buying more (unless you want to).

    1. Rulers will help with cutting quilt pieces to the correct size
    2. And trim blocks to the correct size before final assembly into a completed quilt top

    There is no need to go clean out the entire ruler isle. You can totally start with just 1 or 2 rulers and work your way up as you begin to desire more advanced quilting techniques.

    Decide which one is going to be the most versatile for your quilting level and then add the others to your Christmas wish list down the road.

    Rulers with the best bang for your buck:

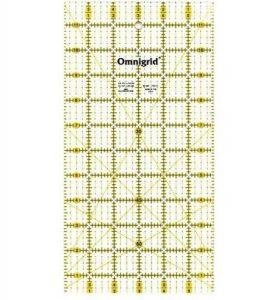
    A Small Rectangle Ruler

    I use this 6″ x 12″ ruler daily for all kinds of projects. I love this one for cutting smaller shapes and strips. The brightly colored lines are easily visible on every single fabric that I’ve tested it with. It’s super lightweight and small enough that I can keep it next to my machine for quick trims or over on my cutting table.
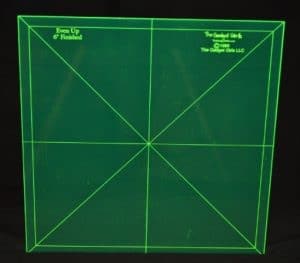
    Even Up Blocks

    Though not technically a “ruler”, I use this 6″ x 6″ even up for measuring a lot of my quilts. When I’m making quilt blocks and I want to make sure my corners are square, I pull out this baby.  It helps me make sure that my blocks are all exactly the same size before piecing them all together. (something I’ve learned NOT to just assume because if you’re wrong, you will spend time with your seam ripper later when things don’t line up) It comes in several other sizes too! (Side note: I love everything that The Gadget Girls carry. The quality of their quilting gadgets and their customer service is out of this world. I highly recommend taking a look at their website.)
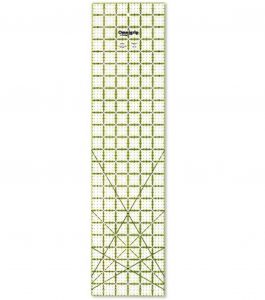
    The “Big One” Ruler

    This ruler is a biggie!  Most of your fabric bolts are 44″wide (then they fold them in half ).  This 6″ x 24″ ruler is handy for cutting strips along the whooole width. You can certainly take careful measurements and move your smaller ruler up and down the fabric but this just makes life easier and leaves less room for error. Once you get used to using this ruler, you’ll wonder how you went without it before.

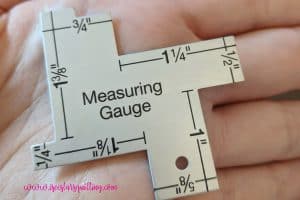
    The “Itty Bitty one” Ruler

    I have like 5 of these things floating around because I could never find the one when I needed it, but I misplace the 5 of them just as often haha. I love this little guy to double check my seams and smaller measurements. It is a cheap one that is easily affordable and indispensable in your sewing arsenal.

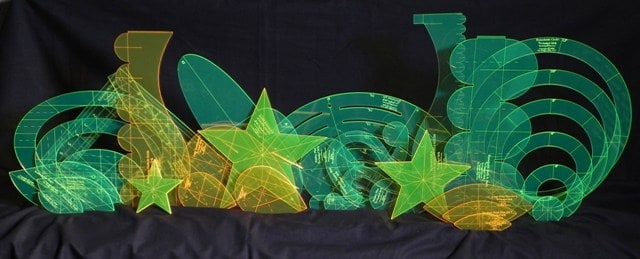
    The ruler that is designed for your project

    Sometimes, there is just no way around it. When you want specific results in a particular project, you need to have the right tools. I’ve botched my way through several projects, making due with what I had on hand and fudging my way around here and there. You know what? I should have just bought the darned $15 ruler. I would have saved myself a lot of headaches and frustration. If you can’t afford it right now, borrow from a friend or look up quilt patterns that use the rulers you have on hand.

    What about you? Do you have a favorite ruler that you just can’t live without? Tell me about it in the comments so we can all share the essential quilting rulers!

  • Scrappy Holiday Table Decorations

    What do you do with all your scraps? – Turn them into scrappy Table Decor!

    I have a few dear quilting friends that I share scraps and fabric odds and ends. (Bless those girls!). We share quilting knowledge and desserts too. – good, sweet girls.

    One of them gave me this Valentine themed scrap of fabric. It’s cute, so I can’t get rid of it obviously… Into my stash, it went. You never know when it will come in handy. (I’m totally being sarcastic right now, but seriously I just can’t bring myself to throw away fabric) *Fabric hoarders unite*

    Inspiration struck late one night and ta-da! Enter this versatile little tiny quilt. I’ve never had a thing for table runners but this… this I like. Small enough to make it easy to store when it’s not cupids holiday and yet festive enough to sit out the month of February. Bonus: It came together in 1/2 an evening using other scraps I already had. This came together so easy… its hard not to be absolutely in love with it.

    I keep saving every spare piece of usable fabric, because ‘someday I’m going to make a huge scrappy quilt!’ and its true. Someday I will. 🙂 What are some of your most favorite projects and uses for scraps?

    If you are relatively new to quilting, these little projects are PERFECT for beginners! You can download my free quilting pattern here if you’re wanting something a bit more challenging, but still beginner & Intermediate level friendly!

  • How to master the quarter inch seam

    Mastering the Quarter Inch Seam

    The quarter inch seam. One of the most tedious techniques to master in quilting. I can’t stress enough what a difference it makes when your seam allowances are consistent and your pieces are precisely trimmed! That alone can make the difference of a professional looking quilt vs. an amateur.

    Why is it Important to Sew an Accurate Quarter Inch Seam?

    All professional quilters use it. Your pieces will line up correctly when your seam allowances are even. If seam allowances are off, pieces will not match-up with each other when it’s time to sew everything together.

    Here are a few helpful tips to help you master the quarter inch seam.

    The QUARTER-INCH FOOT

    Y’all, this was a game changer for me. When I got my new Janome machine, it came with a big collection of sewing feet. My old machine had 1… ONE FOOT and then I purchased the walking foot so I could quilt. I didn’t know what all the others were for… I found that this foot makes your quarter inch seams almost effortless! Most newer machines will come with a quarter inch foot, but many older machines do not. It is worth the investment if you do not have one. You can pick up your own quarter inch foot for under $10 on amazon by clicking here. This is what you’re looking for:

    The quarter-inch foot allows you to line up fabric with the edge of the foot to achieve a quarter-inch seam. See how nice that is in the photo below?

    TAPE YOUR MACHINE

    A quarter-inch foot will help your seam allowances, but if you don’t have one or you can’t get one… no worries, just tape your machine. This is a total cheap and easy fix you can do RIGHT NOW. I use washi tape (because its pretty!). It doesn’t leave any residue when you want to pull it up. You can use whatever you have on hand. Mark from the edge of your machine all the way leading up to the foot. Then just stay in the lines and make sure you are lining up your fabric right. Be meticulous about it!

    With just a little extra effort, your seams will be perfect! The best way to ensure that you have a real quarter inch seam is to measure what you’ve sewn and improved upon it until you’ve got it right. It may be frustrating at first, but pretty soon you’ll be a pro and the quarter inch seam will be second nature to you.

    Want a new pattern to try out your quarter inch seam guidelines on? Click here. You can join my e-mail list and I’ll send you a beautiful quilt pattern for FREE. It is suitable for the beginner and intermediate level quilter and will have you looking so impressive with your sewing skills!

    _______________________________________________________________________________________________

    *This post contains affiliate links. That means that (at no extra cost to you) if you purchase a product that I link on my website, I will receive a small commission of that sale. I would never recommend a product that I do not already own or LOVE 100%.*