Tutorials

Step by step tutorials for quilting and sewing projects from ISeeStarsQuilting.

  • Are Walmart Fabrics Worth it for Quilters?

    I’m often asked, “Are Walmart fabrics worth it for quilters,” and I know I’m going to get flack however I respond. So, I’d like to begin this article by saying I want this to be a friendly conversation with you.

    Readers ask — what types of fabric should I buy? Is it okay to spend less than $15 a yard on fabric? Is it okay to buy the cheap stuff? What if I find something on sale? — so, I want to know what you think, and if your opinion is different from mine.

    If this is your first time here, my name is Christen. I love modern quilting and sharing my tips, tricks, and tutorials.

    If you’d rather watch than read, I have a short video on this subject as well.

    My Pioneer Woman/Walmart fabric purchase!

    The first thing you need to know is I’m from Texas. I love being Southern and country, and I also really love the Pioneer Woman. I love her recipes, and now she has a whole new line of fabric at Walmart that I had to take a look at.

    Since I have been making quilts with the intention of them being high quality and lasting longer than myself, I have always gone for the more expensive fabrics. When I buy cheaper materials, I typically use those on zipper pouches or smaller projects.

    The image below is similar to what I bought from the Pioneer Woman’s fabric range. 

    These stacks of Southern fabrics, featuring pretty flowers and vibrant colors, are absolutely beautiful! 

    Let me do a quick calculation here. If you buy a collection of 30 fat quarters from this range, the price comes out at around $1.25 apiece. This is really inexpensive when you consider that quarters from a higher quality fabric shop run between $2-3 apiece.

    Are Walmart Fabrics Worth it when you're looking to create a high-quality quilt, or is it better to pay a little more to get the quilt shop quality fabric?

    Potential issues with lower-cost quilting fabrics

    The first thing I must say is the quality of fabric and dyes have come a very long way. However, there is always the possibility of color bleed.

    Of course, this could be prevented by pre-washing your fabrics. Although some people feel very strongly about this, I personally don’t pre-wash … ever. To be honest, I’m lucky to keep on top of the regular laundry without adding fabric pre-washing to my list of chores — it’s just not one of my priorities.

    Instead, I rely heavily on the Shout Color Catcher Dye Trapping Sheets when I wash my quilts and try to make sure I use high-quality fabrics that aren’t going to bleed.  

    When I look at the range of fabrics in the Pioneer Women stacks, I notice there are some very strong colors alongside fabrics that are essentially white. There is potential for these strong dyes to leak into the washing machine water and get absorbed by the paler fabrics. The end result might not be exactly what you envisioned!

    This is the exact reason Color Catchers are so important. If I had a quilt with a deep magenta fabric next to a light floral, I might use up to 10 Color Catcher sheets on the first wash.

    Durability & longevity of quilts made from affordable fabrics

    I have nothing against buying cheaper fabrics if that’s what allows you to enjoy quilting and do what you love. But you might notice cheaper material is less tightly woven and not as thick as more expensive cloth.

    Will a quilt made from Walmart fabric last a long time? I don’t know. Time will tell.

    When I’m creating a quilt from more affordable fabrics, I’m probably not going to create a quilt that’s the most amazing I’ve ever made. With cheaper material, the pattern I choose might not be super-complicated, and it might be the type of quilt we use outside for picnics or at the beach, guilt-free. The quilt is still handmade with a lot of love, but it’s designed to take more of a beating from the weather and the kids’ dog.

    If I’m going to invest 600+ hours into making a quilt, I’m going to buy the best quality cloth I can afford to ensure the quilt will wash well and last a long time.

    Perspectives on low vs. high-quality quilt fabrics  

    I would really love to know your thoughts on this subject.

    ·         What is your budget per yard of fabric? Do you spend $10-12 or $3-4?

    ·         Do you like a bargain or go for the highest quality available?

    ·         Do you stick to your budget or do you fall in love with a color/design and think about price later?

    ·         Is there really a difference between lesser and higher quality cloth?

    ·         What do you think about the Pioneer Woman line?

    Please let me know in the comments. I’d love to hear your thoughts.

    I know everyone’s opinion is different, but if we’re all nice, we can have a polite discussion about this interesting topic. I’m looking forward to hearing from you.

    Are Walmart Fabrics Worth it when you're looking to create a high-quality quilt, or is it better to pay a little more to get the quilt shop quality fabric?

    Next steps

    If you’re looking for more quilting tips, tricks and tutorials to improve your work and increase your confidence, be sure to check out my Quilty Tutorials playlist on YouTube.And if you really want to get better in the quickest time possible, have a look at my foundation skills quilting course, Modern Quilting Made Easy designed especially for people just starting out.

  • How To Successfully Travel With Your Sewing Machine

    If you’re getting ready to embark on a sewing retreat across the country or just a quick trip for a sewing class down the street, you’ll want to brush up on these quick tips on how to travel with your sewing machine successfully!

    It’s a little overwhelming when you first start to navigate the big move… but I promise, you’ll be an expert in no time!

    Before you leave home:

    1. Put your presser foot down on a piece of fabric.  To protect your presser foot and ensure machine stability during shipping or just general bumps of the travel process, keep it in the down position on a piece of fabric. The piece of fabric in between is to make sure that your feed dogs do not scratch up your presser foot and prevent any damage due to bumps or other transportation issues.

      Removing the presser foot is an option, but I’ve seen women accidentally show up to a class without a presser foot! woops… That pretty much kills the sewing day, even if your machine did make it safely. Keeping the foot attached and in one piece lessens the opportunity for something to get separated or lost.
    2. Don’t travel with your needle down.  Just in case you hit a bump, it’s better not to have that needle down near your bobbin case.
    3. Box it up!  If you’re flying, it’s preferable to re-pack your machine in the original foam and box. The styrofoam is specially formed to fit around your machine and protect it during shipping. it is meant to be supportive and protective. If you’re brave, you can even check your sewing machine in its original box instead of carrying it on.

      If you do not have the original box, definitely opt for the hardshell case or look for an aftermarket bag that is specifically for traveling with a sewing machine.
    4. Car seatbelts for travel! When you’re going across town or taking a driving trip, it’s important to make sure your machine is secure. It could be beneficial to invest in a trolley case and place the machine either on the floor of your car or securely strapped down in the backseat so that nothing can tip over while driving.

      Make sure to cushion it with fabric (no sharp scissors sticking out to accidentally slice your car seats!) for an extra layer of protection. That way, when you arrive at your destination, everything will be exactly as you left it – safe and sound. 

      Another note is to safely cover any computer screens with a soft cloth to prevent any rubbing or scratches during travel.
    5. The Smart/Easy Way! For easy carrying and less lugging of heavy machine parts… it’s a really good idea to have a trolley or rolling cart for your machine. I’ve seen women DIY all kinds of contraptions from foldable wagons to luggage! This protects your machine from bumps and other things but also is less stressful on your ability to safely carry your machine.
    6. Don’t forget your power cord!  This is very important- Obviously, your machine won’t work without it, but it is one of the most common items forgotten!

      This goes for extra bobbins and a bobbin case too.
    7. Should you carry on when traveling by plane? In short… this is a session that you have to make. There is the benefit of knowing that you’re the only one handling your machine and you don’t have to worry about seeing it tumble down the luggage rack at baggage claim in a few pieces… but you also have the be the muscle that carries it through the airport and keeps tabs on it while traveling.

      People who travel with their sewing machines and do carry-on store their machines in the overhead luggage compartment. You may need to scout out a tall, handsome stranger to help you load it overhead, but it is the safest place for your machine if you don’t end up with an empty seat next to you.

    Usually, when you’re meeting up with a group of quilters… everyone will understand a few forgotten items! You may be close enough to a quilt shop to replace what you need quickly and not lose too much sewing time… or another quilter will lend you the item you forgot if she has an extra.

    When you get to your second location:

    1. Ask for help You’ve already schlept your machine through multiple locations and loaded and unloaded it multiple times. Others available will be happy to help you remove your sewing machine and help you get settled.

      Everyone would much rather chip in and help than have you make it this far, struggle and end up with a loud crack as your machine tumbles out of the car at the doorstep of your destination…
    2. Set up your space and re-thread your machine.  Before you jump into your projects and get on your sewing buzz… do a good once over on your machine and your supplies. Make sure it all made it with you. You’ll also want to give a good once-over to your machine and threads. You may have left with it threaded correctly, but any travel trip is bound to jiggle things more and bounce things out of place slightly. Check your tension and thread for any tangles.
    3. Uh oh… You Forgot____ Really? after all that planning, list checking and thinking about what you needed to bring, and you STILL forgot something?

      It’s ok. It really is. We all realize how easily someone can make a quick mistake with so much to pack and bring with you. The only sewers who never ever forget something are people who travel with their machines often or they are very big type A people who have it down to a science because they’ve stressed about it already.

      You can check the area to see if there are any quilt shops nearby that you can pop into quickly (likely, as most retreats and classes are hosted close to quilt shops). You can ask around to see if anyone has an extra you could borrow (and then make sure you return it after use). Or you can check with the retreat host or class instructor to see if they an assist or come up with an alternative solution with you.
    Going somewhere? Make sure you read these tips to successfully travel with your sewing machine! - Whether you plan to drive or fly, you'll need to think ahead to keep your machine safe!

    Tips for traveling through airport security

    It is always wise to check the TSA website prior to traveling with anything unfamiliar just to lessen the stress and hassle while you’re standing in line and feeling the prying eyes of those behind you…. ugh… the stress!

    Essentially, with my experience, I’ve discovered that small hand-sewing needles are fine to travel with in a sewing kit.

    Scissors should be in your checked baggage unless they are shorter than 4 inches – embroidery scissors are ok.

    If you do happen to need to travel by air with your machine, here are a few tips:

    1. Take the lightest machine you own (only because it’ll be easier for you to carry through the airport. Most airlines don’t weigh carry-on bags). You may be tempted to take your beautiful big sewing machine, but a trip through a large airport will take a lot of strength out of your sewing arms!
    2. Be patient as you travel. (Actually, that’s just a good rule in general.) It is easy to forget that your stressful day traveling is only really your problem. The TSA officers are just doing their jobs and sometimes they have different interpretations of what is or is not allowed. Also regulations change from time to time and while they may seem like they’re just being difficult… their number one priority should be to keep other travelers safe – no matter how non-threatening you look in your crocheted sweater!
    3. Your sewing machine is best stored as a carry-on item in the upper luggage compartment on the airplane. Look for someone who can help you lift it up there if you are unable.
    4. Check into a rolling cart or storage bag for your sewing machine. I like the ones down below.

    Congratulations! Now that you have prepared and reviewed what is necessary to take your sewing machine on the road, you are set for an exciting adventure. Your diligent commitment to making sure it is safely packaged and ready for transport will give you peace of mind as you travel with confidence.

    The satisfaction of knowing that all components of the packing process have been taken care of will allow you to enjoy every moment of your sewing retreat. Don’t forget to take some time for yourself to reflect and savor your creative processes. Remember, this journey isn’t just about results but about experiences too! Once again good luck in your journey, if ever in doubt look at this blog post as a reference guide along the way!

    Also, leave a comment below if you have any other thoughts or suggestions….happy travels!

  • Swag Gear For Your Creative Business: A Detailed How To Guide To Get Started

    If you’re looking for a way to create personalized swag for your creative business, look no further! No matter where you are in your business, it is a good time to start researching swag gear for your creative business!

    Swag is a great way to show your customers that you appreciate their support. It also helps to promote your brand and create a connection with your customers. In this blog post, we will discuss the different types of swag that you can create, as well as the importance of having professionally created swag gear.

    What exactly is swag? Swag is a term that is often used in the business world to describe promotional products or items. In most cases, swag is given to customers or potential customers as a way of thanking them for their support or as a way of advertising your brand.

    Thinking about Swag Gear For Your Creative Business?? You're in luck! I'm sharing my favorite ideas and process for finding the perfect match!

    What You Need To Know: Small Business Swag

    Yay for you! You found a way to take a passion/hobby of yours and turn it into a business where you can make money AND get to create beautiful things! What a great combination! This is like the ultimate holy grail of crafting wishes – To have something that you love doing and have someone pay you for it!

    What can swag gear do for your creative business?

    Swag can do a lot for your business, but let’s start with the basics. It is a tangible item that you give to someone in order to promote or show gratitude towards them. Swag can also be seen as a bribe – “Hey if you buy my thing I’ll give you this cool thing!”

    Simply put, swag promotes your brand for you. Two things to remember: People love free stuff and they LOVE to show off the companies that they love.

    It is a good way to keep your name in front of your customers so they remember you and remember to return to you and your shop.

    You can increase exposure.

    When people see swag from companies they love, they are more likely to share that swag with others (and tell them where they got the swag!).

    Swag provides memorability. People love swag because it’s fun and interesting. They also like to show off the companies that they love, which means more exposure for you.

    The point of swag isn’t just getting free stuff; It’s creating an opportunity for connection between businesses and customers by giving them something useful or meaningful that represents who they are as a business owner/company representative while building trust among consumers through customized promotional products showcasing their personal style choices too

    There are many different types of swag gear for your creative business that you can create for your customers. Some of the most popular items include tote bags, hats, stickers, patches, and T-shirts. However, there are many other options available, so be sure to explore all of your possibilities. When choosing what type of swag to create, it’s important to consider your customer – what would they like to have? let’s look at a few companies that have been doing this for a while and see what their strategy is.

    What are some of the most recognizable swag gifts?

    Some of the most recognizable swag gifts are coffee mugs, mousepads, and pens. These swag ideas are great for those on a budget or who just want to keep things simple. It’s easy to create swag items that will catch people’s attention without breaking the bank!

    Does it have to cost a lot to order in bulk?

    Absolutely not! There are many options for swag gear for your creative business available at a low cost. It is important to keep in mind that swag should be fun and unique, so don’t get too caught up in trying to find the perfect swag item. The most important thing is that your customers enjoy it!

    Thinking about Swag Gear For Your Creative Business?? You're in luck! I'm sharing my favorite ideas and process for finding the perfect match!

    How much should I spend on each swag gear for my creative business?

    There is no set answer to this question – it really depends on what type of swag you choose and how many you order. It also depends on the size of your business. However, as a general rule, it is best to keep your costs low so that you can order more swag (and give it away to more people)!

    What swag gifts should I look for?

    What does your audience like? Do you know what do they need? Better yet, what can you afford to give away without breaking the bank? When looking for swag gifts, it’s important to consider all of these factors. If you’re not sure what your audience would like, ask them! Survey customers or hold a contest on social media to see what type of swag they would most like to receive.

    If you’re not sure, ask them! Contact a few family members or friends and help them brainstorm with you. They should be more than happy to give you some ideas or at least give you a second opinion.

    Why is swag important for a small business?

    Swag is an important part of any marketing strategy, but it’s especially important for small businesses. Small businesses often don’t have the same resources as larger companies, so they need to grow in every way shape and form to maintain success.

    The best way to share about your company is through word of mouth.

    It is also important to have swag because it shows people who you are as a company while helping build relationships with customers through personalized promotional products showcasing their personal style choices too!

    Thinking about Swag Gear For Your Creative Business?? You're in luck! I'm sharing my favorite ideas and process for finding the perfect match!

    The big question – Does swag gear for your creative business help with customer loyalty?

    Ok so now we know that it doesn’t have to cost a TON of money to get started with a little swag, but… does swag actually work?

    It can feel counterproductive at first… to SPEND more money (part of your profits even!) to purchase swag that you’re going to give away for free.

    But swag is an important part of marketing, and it’s a great way to show your customers that you appreciate them. Studies show that a customer is more likely to stick with you if they feel like they’re a part of something special.

    Swag can play an important role in your business by reinforcing customer loyalty, as well as helping to attract new customers. It also provides a way for you to connect with your customers on a personal level. As we all know, people do business with those they know, like and trust!

    But… What if I am just starting out?

    If you are just starting out, it is important to think about what the swag gear for your creative business can do for you. Swag can help increase brand awareness and exposure, connect with customers on a personal level, and create customer loyalty.

    When selecting swag items, be sure to choose something that is fun and unique. Something that will make your personality (or the personality of your business) shine through. You want something that someone looks at and makes them think of you and the lovely experience they had working with you!

    Thinking about Swag Gear For Your Creative Business?? You're in luck! I'm sharing my favorite ideas and process for finding the perfect match!

    *How to find the right Swag*

    1. Try to find something that your customer will likely use every day. (Do you see why promotional pens are such a popular idea?)
    2. Try to look for something that isn’t so so common that it’ll just get thrown in the endless pit that is the junk drawer. Eventually awaiting the next time someone cleans it out to throw it in the trash.
    3. Research companies that specialize in promotional swag gifts. and see where your budget falls. Obviously, there is a greater discount if you order in bulk… but maybe you don’t need 600,000 flashlights with your name on them for your craft booth??

    It is a careful balance based on what you can use and what will serve your business just right.

    My Personal Two Cents: My Favorite Swag Product recommendations:

    I love swag products that are useful and practical. If you can’t find something practical that your customer will want to keep and use and is in your budget… The other option is to make your swag gift something that your customer will want to proudly display.

    I don’t like to feel like a walking billboard. If a product isn’t useful, it needs to be pretty. (absolute bonus if it is both!) I would suggest staying away from items with your logo on it. These tend to be thrown in the trash after a few uses… or lost forever before they’re even used once! PS – Read the example below. You’ll understand why it is good to steer clear of using your logo.

    You could have a graphic artist create a design that speaks to a common interest or a popular mantra/phrase.

    Let me share an example from one of my marketing projects years ago (before I was a quilt blogger, I was a marketing director and freelance graphic artist)

    Thinking about Swag Gear For Your Creative Business?? You're in luck! I'm sharing my favorite ideas and process for finding the perfect match!

    Put yourself in your customer’s shoes.

    A Marketing Example:

    Let’s say you visit a local farmers market. A farmer gives you one of their new FREE stickers with your purchase: It has the farm logo on it. It’s cute. It feels fresh and updated as their trying to rebrand their company. You take it and say thank you.

    When young et home and you put away your peaches, you pull out the sticker… Do you have room for a random sticker from the farmer that you just met and purchased peaches from? He was nice, but unless you’re absolutely obsessed with peaches or you’re an avid follower of the farmer… I’m going to guess the answer is that the sticker is going to be lost or trashed eventually.

    You might keep it for a little while. It is a perfectly good sticker and you feel guilty throwing it away, but ultimately… it will end up in the trash. (This is so absolutely me. I hate to let things go to waste!)

    This situation is super familiar to me from my marketing days.

    Now let’s imagine a different scenario… you go to buy peaches and the nice farmer has the same excellent and knowledgeable customer service. As you check out with your fruit bounty, he hands you a FREE sticker that is a gift. It is just a token of his appreciation for your support. It has a cute colorful picture of a peach and a catchy well designed phrase that reads, “Life is just peachy”.

    You think it is a super clever saying and you absolutely love the cute peach design. You put it on your laptop, water bottle, or in one of those special places in your office (like a favorite journal or planner).

    The next time someone sees this sticker, they ask about it… because after all – how could you not? It’s adorable! And then you share about the day you stumbled upon this random pop-up farmers market and bought fresh fruit for your picnic that weekend.

    Do you see the difference in the two situations above? It’s the exact same product but the frame of focus is completely different. One sticker is completely focused on the farmer and his rebranding. The other sticker is focused on the customer experience and the farmer’s genuine appreciation for loyal business.

    The second sticker will be kept, used, and admired. It becomes a conversation starter and helps to build brand loyalty because the customer feels appreciated. The customer continues to enjoy their sticker. They feel like they are part of something special. Being associated with a cool farmers market that has an original design/phrase on their swag gear.

    There is no wrong answer when it comes to choosing swag products for your customers – as long as you put yourself in their shoes! What would THEY love to receive? What would make THEM feel special and appreciated?

    If you can nail down the perfect swag gift for your customers, they will love you for it (and tell all their friends too!)

    So… What companies work with smaller quantity orders, but still deliver stellar customer service?

    I’ve worked with a ton of companies throughout my marketing career and again as a business owner.

    I love a company that doesn’t make me feel like just another $ dollar $ sign on their monthly revenue. If I have a question about my order, I don’t want to feel like I’m emailing an endless void hoping for some poor intern to stumble across it… (I know, my standards are high, right? 😂)

    The point is that I feel like what I do matters and I want to support a company that feels the same way.

    I like sharing the companies and products that I have used and loved myself. Allow me to introduce another gem that you’re going to love. Sticker Mule. After you’re done reading this… go ahead and go visit their site. You’ll love it. They are so much more than stickers, but since we went into great detail with the farmer story above and the peach sticker… check out their superior sticker ordering process here.

    So much more than stickers. They are a company that specializes in customizing just about anything you could need for your creative company!

    The Takeaway:

    When creating swag for your customers, think about what they will want to use and/or display. If it isn’t practical or pretty, your swag could get tossed aside eventually. Try to find a balance between the two that fits well within your budget! And don’t forget to say thank you! 🙂

    Thank you for reading! I hope this gives you some ideas on how to create personalized swag for your customers. Whether it’s custom keychains, t-shirts, or laptop stickers​, swag gear is a great way to show your appreciation and build brand loyalty. What are your favorite swag ideas? Share in the comments down below – I would love to hear from you! 🙂 Have a wonderful day! 🙂

  • 6 Habits That Make More Time For Creativity!

    How is your schedule feeling lately?

    Are you running around crazy busy or are you feeling settled, happy and balanced?

    Every year I fall into the trap of thinking that “once summer break is over”… “once the kids go back to school”… “once I get caught up on all the things I put off over the summer”… THEN I’ll have more time to play and create.

    Yes, it is allllll good for about a day and then I start to feel the pressure of after-school activities and strict schedules to adhere to and you know what?… the holiday season is just around the corner too… I had better start thinking about getting organized for that! 🤷‍♀️ It is an endless trap

    Don’t let yourself get trapped!

    Start re-evaluating your thought process today with these 6 steps. If you can’t FIND time for creativity… you have to MAKE it happen 🤩

    6 Habits To Make More Time For Creativity

    1. Decide which area of being creative brings you the most joy.

    I love to dabble in a lot of different areas of crafting. I do. But it makes it really hard to be successful in any of them if I get to them only a few times a year. I suggest picking a few main areas of focus and occasionally subbing in a new interest every now and then.

    2. Get to bed early.

    I’ve had my fair share of super late-night creativity parties! That used to be my “power hour”. They’re wonderful when you’re in the moment and inspired and having a blast… but morning eventually comes and your next day going to work or dealing with errands/chores can feel like it drags on and on. – Get your rest so that creativity time doesn’t cause such an interruption to the rest of your life.

    3. Schedule a regular date with yourself.

    Mark it on your calendar and treat it like you would any other important appointment. This can be a weekly evening sewing hour or a Friday afternoon after you’ve picked up the house. Don’t cancel it. 

    4. Take 5 minutes to clean up your space before you get all creative.

    Creating in a messy zone is something we’ve become accustomed to, but it can hinder your energy and ability to reach your full productive self! Check out: How to quickly clean your sewing space

    5. Really encourage your friends and family to do things that matter to them.

    Be that cheerleader. Encourage them to take care of themselves and practice self-care. The more you see the need for it in other people, the easier it is to see the need for it in yourself.

    6. Don’t feel guilty.

    Don’t do it. You can’t let yourself go down that path of feeling like you’re not cut out for it. If you have a calling to be creative and it brings you joy… ENJOY IT! Don’t make time for it and then feel guilty that you did it. That’s a harsh cycle to fall into, isn’t it?   … This brings me a great video that I created 🥳 It’s a good one!

    I hope that these 6 habits to make more time for creativity are helpful to you! I hope that you work your schedule around so that you have more time to be creative!

    Leave me a comment down below if you have more ideas to add. I would love to hear them!

    I’ll talk to you soon!

    –Christen

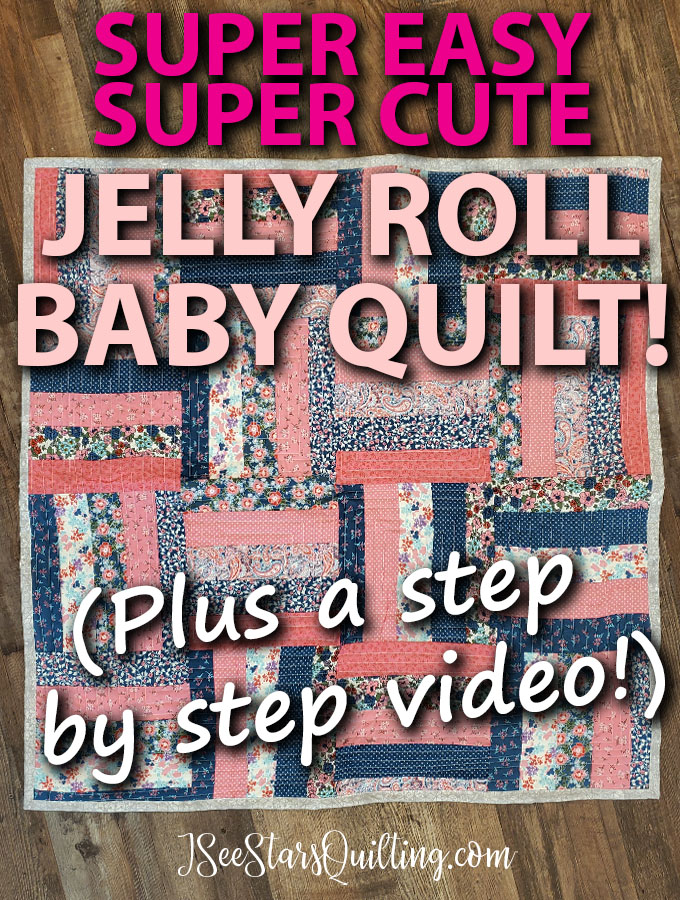
  • An Easy & Quick Jelly Roll Quilt Pattern

    If you’re looking for a super cute and easy Quick Jelly Roll Quilt Pattern. This is it. You’re going to love this!

    There isn’t a “pattern” exactly… mostly just guidelines for some structure to your quilt with room to make it all your own.

    I even created a video so you can see the process of this quilt come together. Check down below for the video step by step instructions!

    Here is what I started with: A small Jelly Roll with 10 Fabrics/20 strips (2.5″xWOF)

    I’ve had this cute little mini Jelly Roll for a while. I found it at Joanns Fabric. In case you’re wondering… I have seen it recently in stock again. It must be a fairly popular one.

    I fell in love with the colors and the sweet print. I knew it would make an adorable denim baby quilt someday… but then it sat on my shelf!

    Jelly Roll Month

    Real quick, I have to tell you…

    I’ve been sharing my tips, tricks, and tutorials for using up your Jelly Roll precut stash this month (April 2021)

    I love to collect them and “save them” for the right occasion but I have never actually sat down and decided what any of those occasions would be haha… so it is definitely time to use those quilt precuts up! Make sure you follow me you Youtube and check out my other videos!

    Back to the cute quilt… 🤩

    Here is the finished quilt. It is a super fast pattern with lots of tips and tricks to share to make this quilt a no-fuss pattern.

    I love the way these colors just ooze sweet little baby cuddles! Maybe it is because I am a born and raised southern/country girl, but the mix of of denim blues, sweet pinks and touches of floral and paisley make me want to squeal! haha.

    And I love it even more because I know that the recipient of this beautiful little quilt is going to do the same thing!

    I added this gorgeous (and over the top girly) flannel unicorn backing on the quilt to add a touch of softness. The colors matched perfectly!

    Here is a few closer looks at the quilting. I chose to do a really simple quilting. Just straight lines.

    I chose a nice light grey fabric for the binding… if I had some extra denim laying around I would have LOVED to add a chunky wide binding to it… perhaps next time!

    You might not be able to see it, but my quilting lines are not perfectly straight.

    I didn’t use a ruler or let the slight curve/wonkiness of the lines bother me as I was quilting. I think the little uneveness of quilting lines add a lot of character to the piece.

    Quilting Tips & Reasons

    If you’re looking for some quilting ideas for a piece this size, I made a rough diagram of how I decided to quilt this one… it is rough lol But there is a method to it!

    I like when people share their “easy” quilting patterns, because I almost always learn something new.. so here you go!

    (The blue dots are where I started my needle when quilting the straight lines.)

    I also was able to use the straight edges of my jelly roll seams for guidelines while sewing.

    First, I worked on the center squares (pink lines) because it is always best to start in the center of your quilts and work your way out. It helps for a more even distribution of the quilt top to your batting and helps ensure you don’t have any shifting from the backing while you’re working.

    Second I worked my way around the quilt to give it a faux border quilting look. (the purple lines) Again, I started close the the center design and worked my way out so knew the fabric didn’t bunch up or move around on me.

    How long did this quilt take?

    I honestly finished this entire quilt in one afternoon-ish.

    I add the “ish” because I was filming, photographing and being a mom all while working on the quilt. I had to stop and take breaks and make lunches and take puppy breaks to play.

    If left completely undisturbed, I could have finished this quilt in a few hours easy.

    But such is life and I was still really happy to have this quilt done so quickly!

    The Finished Quilt

    The finished size is 40″x40″. I only used the fabric from the jelly roll, then added backing and binding! Check out the step by step video below!

    Want to see one last picture?

    OK sure 🙂 Because any time we get down on the floor the dogs automatically assume we’re ready to give undivided attention… here is one of our puppies aka current quilt model stand in. 🤣

    FYI: His name is Butters 🙂

    A few FAQs

    Could you make it bigger?

    Yes, absolutely! I used a smaller Jelly Roll to make this quilt. Remember a standard Jelly Roll has 40 strips. This one only had 20. So this size is big enough for a small child/baby wrap up quilt or maybe a nap quilt.

    If you wanted to make it bigger, you could go with the larger jelly roll size to start out with (same exact process but more strips).

    You could also add a wide thick border all the way around your quilt or even add sashing in between each block to increase the size.

    What if I didn’t use a jelly roll?

    You can always create your own strips from yardage of fabric! I’ve done that with scrap quilts!

    You can also choose to make the size of your strips a little wider if you want to add a bit more width to each strip.

    Where can I buy Jelly Rolls?

    You can grab them from most of your local fabric shops.

    I like Fat Quarter Shop or Fabric.com for their selection when I shop online.

    Want more information on Jelly Rolls?

    Check out my Youtube channel for more Jelly Roll Celebration Month videos!

    If you have any other questions, please feel free to comment down below or contact me. I’m happy to answer your questions!

  • What Stitch Length Should I Use?

    *This post was updated on 1/19/2020*

    Hey! If you’re looking for answers to what in the world stitch length is and why you need to pay attention to it…. we’re going to get to the bottom of it today!

    For those of you who want a quick and easy answer, I created a video that summarizes the high points and gives you the quick answers. Be sure to scroll down a bit to check it out.

    For all you sewing, quilting & math nerds… I added a section at the bottom of this post with some educational content for you.

    Stitch Length – What is the easy answer?

    Your machine has all these bells and whistles and it can be hard to know what you’re changing when you start playing with them all.

    What is Stitch Length?

    Sewing machines indicate stitch length in millimeters. A 2.8 stitch length means each stitch will be 2.8 mm long.

    My Janome 3160QDC display is as follows:
    Janome 3160QDC-B Quilters Decor Computer Sewing Machine

    Janome3160 Screen Explanation

    When you adjust the stitch length, it’s not the needle that is changing; it’s the feed dogs (the little fabric grippers in the center of the needle plate below the presser foot). The machine alters how much fabric the feed dogs will move before making the next stitch. Your needle will always do its thing and work steadily in a vertical motion.

    Sewing machine with hands

    Your sewing machine’s manual may likely have a handy stitch chart of suggested settings and uses for your model.

    The key thing you need to understand is this:

    The smaller the stitch length number, the smaller the stitch. The larger the number, the bigger the stitch.

    A longer stitch length is typically used for basting (temporary stitches), sewing with heavyweight fabric, or for defining a topstitch.

    The smaller stitches are used for piecing fabric together and in situations where delicate fabric is less likely to come apart.

    What Stitch Length Do I use?

    Decorative stitches vs. foundational stitches

    Foundational stitches are the ones I like to refer to as the ones that hold everything together. Like, your piece wouldn’t hold together without this line of stitches. It is essential in the makeup and necessary in holding everything together.

    Decorative Stitches are the stitches that may very well help hold everything together but they also are there to add a little sparkle too. Just a little extra. Worst case scenario, you wouldn’t HAVE to have the stitch to hold your piece together, but it helps. You can use decorative stitching to add in your own flair or your own personal style. You can even use some of the fancy stitches that may have come pre-programmed on your machine.

    What stitch length you should use varies by project and purpose…

    Here are the most common stitch lengths so you can choose the right one.

    Most Common Stitch Situations!

    To reinforce a seam or make it stronger

    Use a tight (smaller number) stitch. This is also the case if you are sewing with silk or sheer fabrics. The exact length is not as important as making sure it looks well and gives your seams the strength it needs. Start with somewhere between a 2-2.5 on a test piece or scrap piece of fabric and decide from there. If your stitches still pull apart too much or seem to put pressure on the seams, go a little tighter

    Quilt Piecing

    Piecing is one of my favorite parts of the quilting process!

    I used to think that the bigger the stitches were the more comfortable to rip out if (when) I made a mistake.

    That is true, however… when you think about all the times your quilt is going to go through the wash and all the hours you spent making the quilt… you want those seams to hold up!

    What Stitch Length should I use?

    Use a stitch length of 1.8-2.0 when piecing fabrics for quilting.

    Tinier stitches are a pain to rip out when you have to correct a mistake, but working with the overall quilt piece is much easier with the smaller stitches.

    What Stitch Length Should I use?

    Basting

    This one is easy… whatever the longest stitch is on your machine… use that one! I like a 5 stitch length.

    The whole purpose of basting is that it is a temporary stitch. Therefore you want to make it easy to pull out.

    These are stitches you will either remove later or are just used to reinforce your quilt sandwich until you can go back with better stitching.

    Stretchy Fabric

    Oh, how I love jersey knit fabrics! I have been trying to learn more to sew with it, but there has been a learning curve for sure.

    If you’re using a stretchy fabric, you’ll want to use a longer stitch. Shorter stitch lengths can pull and pucker your fabric. You’ll know it when you see it. The fabric almost ruffles up when you aren’t even touching it. If you find that your stitches are puckering on a particular fabric, try adjusting the stitch length to allow for longer stitches.

    Your stitches should be nice and smooth without altering the fabric underneath.

    Quilting or Decorative Stitches

    Decorative stitches such as topstitching or quilting will be visible on the finished project, a long stitch length is usually more desired. Long stitches tend to be more attractive than short stitches.

    My personal preference… When I quilt, I usually will go with a 2.8-3.5 depending on the look that I am wanting.

    When quilting, the finished result is that your quilt sandwich (backing, batting, top quilt) stays together when you use it and wash it. Keep your stitches small enough that you don’t have to worry about them coming out, but large enough that it isn’t going to take you 90 million hours to quilt it.

    Those tiny stitches take a lot more time!


    To summarize…. the stitch length is really going to be determined by how your fabric responds. It’s always a good idea to run a test piece and pull on the fabric a little bit to see how it reacts.

    As a general guideline…

    For durability, use short stitch lengths; for artistic looks use the stitch length that you like.

    I hope you found this information useful. If you have any questions, feel free to let me know! I’m happy to answer your questions.

    Happy Sewing!

    PS for more Quilting tips and helpful charts, check out this post on Quilting Cheat Sheets that will save you hours!

    These helpful Cheat Sheet Charts will be your secret weapon in the sewing room! - And they're so cute too!

    The Math Explanation of it

    For those beautiful math nerds out there who love to know the reasons WHY things are what they are… here is how to unlock the secrets behind what those numbers on your machine are.

    There are 25.4 millimeters in one inch. The formula is this:
    25.4 divided by the metric length of the stitch such as 2.5 equals the number of stitches per inch.

    To go the opposite direction, if a pattern requests 10 stitches per inch, divide 25.4 by 10 to get the millimeter setting of 2.5.

    The average machine quilting stitch length chosen is between 10 and 11 stitches per inch. That is equivalent to a stitch length of 2.5mm