Quilting

So much Modern Quilting! Oh, I love it! Let’s talk about my favorite quilting tips, tricks, and how-tos! Learn something new or improve on an old skill.

  • 5 Things I WISH Someone Had Told Me As A New Quilter
    Are you a new quilter? Then make sure to read this post for some words of wisdom that you might not be hearing enough!

    If this is your first time here, I’m Christen and I love sharing tips, tricks, and tutorials for the modern quilter. Here you’ll find everything I’ve learned from my own quilting mistakes and disasters, so you don’t have to make those mistakes yourself. 

    Here are my top 5 tips for brand-new quilters. 

    Tip #1: Doing is your best teacher

    Don’t fall into the trap of thinking that if you watch YouTube videos and do a lot of research, you’ll learn all you need to know and skip the beginner stage. It’s not going to happen. You have to do the work and make mistakes in order to get better at your craft. Sadly, there are no shortcuts. 

    Tip #2: You can’t avoid making mistakes

    The only way you are going to learn and get better is by making mistakes, undoing them, and then doing things correctly. After the third time you’ve made the same mistake, you’ll learn how not to make it a fourth time. 

    But even then you’re not done, because it’s highly likely you’ll make the same mistake sometime in the future. It’s always a land of the unknown when you start working on a new quilt pattern.

    Tip #3: Don’t compare your beginning to someone else’s middle

    Don’t compare the beginning of your journey in the quilting world to the middle of another experienced quilter’s journey. They’ve dealt with things you haven’t seen yet, and they know how to do things because they’ve done them many, many times (and made their share of mistakes too).

    Keep quilting, keep going. Eventually, you’ll leave the frustration of the beginner stage behind.

    Tip #4: Don’t have too many teachers

    There comes a point when you can have too many teachers because there are many ways to do the same task. If you’re learning from YouTube or you have a group of quilters in your neighborhood, they might all be teaching you different ways to do the same thing. 

    It’s awesome to know there are different ways of doing things, and it’s good to figure out which way works for you, but you don’t have to know absolutely everything to do one task. Once you’ve figured out what works for you, follow that. 

    Find the 10-15 people that are most like you and what you want to be, and gain knowledge from them. 

    Learn their tips, tricks, and methods they use, and stay focussed on them because that’s going to get you closer to your end goal. Let the others fall into the background. 

    Quilters are generous with their advice, but while all that knowledge is good to have, too much information can be overwhelming. You don’t need to know everything all at once. 

    Choose to learn piece by little bitty piece. The rest will be there whenever you’re ready for it.

    Tip #5: Accuracy is in the details

    I know there are a lot of moving parts to a quilt, from choosing fabrics to cutting and everything in between, but accuracy is crucial. Paying attention to the details like a quarter-inch seam or ensuring your pieces are cut accurately makes all the difference to the end product. 

    When I first started quilting, I couldn’t understand why my piecing was off when I came to the end of the quilt. But when someone explained it to me, I realized I wasn’t being 100% accurate with my seam allowance and cutting. Even a tiny bit of extra fabric can add up when you have multiple pieces. 

    If you’re struggling with accuracy, practice on simpler patterns to get those skills under your belt before moving on to bigger ones.

    Quilting can be a daunting task, but with practice and these tips, you can become a confident quilter. Don’t be afraid to get your hands dirty, make mistakes, go at your own pace, focus on the quilters you want to learn from, and pay attention to the details. Happy quilting!

    Next steps

    Make sure your first finished project stays looking as beautiful as the day you completed it with our Quilt Care 101 Guide. Download this FREE resource at https://stitch.academy/quilt-care-101.
    Are you a new quilter? Then make sure to read this post for some words of wisdom that you might not be hearing enough!
  • Is Dollar Tree Fabric Worth the Bargain? A Picky Shopper’s Honest Opinion

    It looks like there’s a new fabric spot to add to our sewing projects – Dollar Tree!

    I’ve been hearing some rumors and other quilters have told me that Dollar Tree now carries fabric. At first, I thought some of you were making it up, since the craft section at Dollar Tree is usually quite small… but it turns out they’ve grown their selection and now have all kinds of materials for our creative ideas. Let’s get ready — time to stock up on some fun fabrics from Dollar Tree. Who said you can’t find quality material while shopping on a budget?

    A picky fabric shopper shares opinions on fabric purchased at Dollar Tree. Find out if Dollar Tree fabric is worth the bargain or if it falls short of expectations.

    My Dollar Tree fabric purchases

    So, off I went to Dollar Tree to buy some fabrics to test them out, and to be honest, the first fabrics I saw weren’t cute at all. However, after looking a bit harder, I did find some 18” x 21” fat quarters in a fun fiesta design. Although the fabric felt a bit rough and a bit on the thin side, it was still 100% cotton, and only cost $1.25.

    I’m not saying I would buy 30 of these to make a quilt out of instead of going to my local fabric store or online shop, but for the price, they’re pretty good. 

    I also checked out the 20pc fabric rolls of block colors, 2.5” x 42” strips, and found most of them around the $5 mark. If you’re thinking of using this for a table runner or a gift, rather than something that gets a lot of use, this type of roll would be perfect.

    Also at the $5 mark were packs of fat quarters (18” x 21”) with 5 different prints. The one that caught my eye had a French metro vibe featuring the Eiffel Tower, hot air balloons, cityscapes, coffee and cupcakes, and macarons. 

    While the fabric feels like regular fun fabric and not high-quality quilting cotton, it’s still a good deal. These work out to $1 a piece for each fat quarter and would be perfect for making zipper bags, small trinkets, or microwave bowls. 

    What to look for in discount fabrics

    When you’re looking at fabric in budget stores like this, you want to make sure it’s 100% cotton and doesn’t have glitter on it because I guarantee glitter is going to wash off and flake off on everything. You certainly don’t want to make any microwave bowls out of that because glitter in the microwave doesn’t work out very well. 

    Final thoughts

    I was ecstatic to discover a hidden treasure trove of fabric at Dollar Tree! It looks like they’re rapidly expanding their craft section, and it’s truly fantastic news. The quality is outstanding considering the very low price – definitely suitable for crafting multiple projects in my opinion. All things considered, this has been an incredible buy; what a great find!

    Next steps

    If you’re looking for more free quilting tips, tricks and tutorials to improve your work and increase your confidence, be sure to check out all of my courses and classes.

    And don’t forget to subscribe to my YouTube channel so you never miss a hot quilting tip from the Queen of Quilting (me! 🙂)

    A picky fabric shopper shares opinions on fabric purchased at Dollar Tree. Find out if Dollar Tree fabric is worth the bargain or if it falls short of expectations.
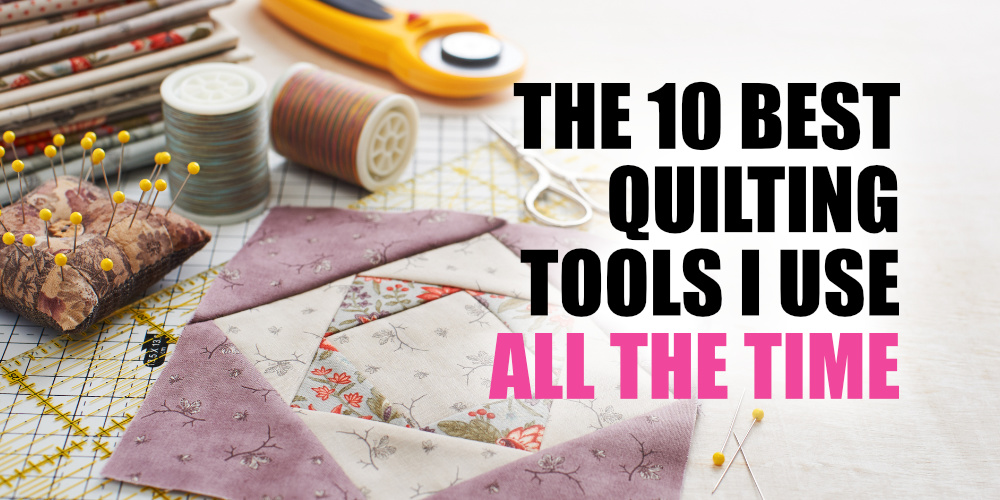
    Patchwork block on craft mat, stack of fabric, sewing accessories on white wooden surface
  • The 10 Best Quilting Tools I Use ALL THE TIME

    When I first started quilting, I remember feeling overwhelmed by all the different tools and gadgets available. It was hard to know which ones I actually needed, and which ones would stand the test of time.

    Now, as an experienced quilter, I want to share my top 10 quilting tools I use all the time, and wish I had known about when I first started quilting.

    Scroll down to see this post in video format!

    :: SEWING TOOLS THAT I USE & LOVE :: https://www.amazon.com/shop/iseestarsquilting

    10 Best quilting tools that are the must-haves for every quilter. From scissors to rulers, these tools make quilting easier and more fun!

     1. Magic Clips

    The first item I cannot live without as a quilter are these magic clips. They are absolutely irreplaceable. I use pins nearly all the time, but some days I want a change. On those days, when I need something else to hold and keep my pieces together, these clips do the job.

    I now own several sets of them, but even starting out with one set should help you stay organized and keep your quilting pieces together.

    2. The Right Seam Ripper

    The second thing I can’t live without is a seam ripper, and your ordinary starter model will never compete with this guy.

    At first, I thought this one was a joke because it’s on the ugly side. But it turns out, I can’t live without this odd-looking seam ripper.

    The secret to this tool is the rubbery, almost eraser-like end to it.

    When you’re ripping out seams, this end grips onto threads and pulls them out. Now you don’t have to pinch with your fingers to try and pull out all the tiny threads. It’s fantastic.

    3. Ergonomic Rotary Cutter

    Another tool you’ll want to invest in is an ergonomic rotary cutter

    Although they all promise to be ergonomic, you want to select the one that suits your hands and fingers. You’ll discover some cutters are easier on the wrists, while others may have extra padding. 

    As with most things, it’s better not to base your choice on the price. Safety is essential, as is how comfortable the cutter feels when you’re working with it.

    4. Lasers for Sewing Machines

    This one was a game changer for me.

    These lasers are amazing. I have a full tutorial video on this product here:


    I explain everything they do, why they’re so awesome, and why it took me so long to try them out. 

    But honestly, I use them every single time I sew and I love them. They have been absolutely phenomenal in helping me get accurate points and create precise seam lines.

    5. Square Up Block Rulers

    The fifth tool I highly recommend investing in is a set of block rulers, also known as ruler blocks. These rulers are set at exact sizes so you can square up your blocks. 

    It’s easy to use the lines on your cutting board or an all-purpose ruler, but having specific sizes can be very helpful. One of the first things I invested in was a 6×12 ruler block, and I still use it all the time. 

    There’s a great set on Amazon, it’s pink, super cute and is well-priced. Although it doesn’t cover every size, it has the most common ones and it’s a really good starter set. 

    6. That Purple Thang

    The next handy tool I always keep in the drawer next to my sewing machine is That Purple Thang. It’s a really helpful gadget with a point on one end that can be used for reaching tight spaces or when you don’t want to put your finger close to the needle. 

    The other end is a bit sturdier and I use it to poke out corners of my bags and other projects. 

    And if you look closely, you’ll see the square end has a quarter-inch measurement on the side, which makes it useful for measuring, fixing bindings or other detailed work. 

    It’s a really handy tool to keep nearby when you’re working on your quilting projects.

    7. Project Boxes, Baskets & Bins

    Individual project boxes are one of my favorite ways to organize. Over the years, I’ve switched from using baskets to boxes, but the container itself doesn’t matter as much as the method. 

    I put everything I need for a particular project in its own box — pattern, fabric, cut fabric, instructions, choices I’ve made etc. When it’s time to clean up, I put all the components in the box, put on the lid and store it on a shelf.

    The key is that everything for that project is in one place and can be easily accessed when needed. 

    This way, I don’t have multiple projects out at once, and it helps keep my sewing room tidy. Once the project is complete, I have an empty box for another project, and I can reuse them over and over.

    8. Thread Stand

    My thread stand is irreplaceable in my sewing room. 

    I love this device because, while most sewing machines come with a built-in thread holder, they can only hold small spools of thread. This extra stand lets me use larger spools of thread which is more economical as I can buy in bulk. 

    It also provides me with better control over my threading process, making it easier to change thread colors and types.

    I love this thread stand because it allows me to use my next tool — a larger spool of thread. 

    9. Larger Spool of Thread

    Buying a larger spool of thread is not only more cost-effective because you get more thread for your money, but it also makes sense for quilters who use a lot of thread.

    The spools I usually buy are around 6,000 yards although you can get spools way bigger than that. I like to have a variety of different color threads, so the 6,000-yard size is perfect while I build my collection. 

    You should try to buy higher quality thread, as it goes hand in hand with the quality of fabric you’re investing in.

    I always stock up on white thread in large quantities because it’s essential for piecing, which needs long-lasting and reliable thread.

    10. Pre-cuts

    I absolutely love pre-cuts. The reason I didn’t use them as much when I first started quilting was that I thought I knew better. I assumed they were for people who didn’t know what they were doing. But I was wrong, and I regret not jumping on this train earlier. 

    Now I love pre-cuts and I collect them. Even though I don’t have all the time in the world to use them, I still love having them as an option.

    I hope these top 10 quilting tools will be a great addition to your quilting toolbox. 

    Remember, quilting is about having fun, so don’t stress about not having every tool under the sun. Start with the basics and as you become more comfortable with quilting and know what you need, you can add to your collection. Happy quilting!

    Next steps

    If you’re looking for more quilting tips, tricks and tutorials to improve your work and increase your confidence, be sure to check out my Quilty Tutorials playlist on YouTube.

    And if you really want to get better in the quickest time possible, have a look at my foundation skills quilting course Modern Quilting Made Easy designed especially for people just starting out. 

    10 Best quilting tools that are the must-haves for every quilter. From scissors to rulers, these tools make quilting easier and more fun!
    Patchwork block on craft mat, stack of fabric, sewing accessories on white wooden surface
  • Are Walmart Fabrics Worth it for Quilters?

    I’m often asked, “Are Walmart fabrics worth it for quilters,” and I know I’m going to get flack however I respond. So, I’d like to begin this article by saying I want this to be a friendly conversation with you.

    Readers ask — what types of fabric should I buy? Is it okay to spend less than $15 a yard on fabric? Is it okay to buy the cheap stuff? What if I find something on sale? — so, I want to know what you think, and if your opinion is different from mine.

    If this is your first time here, my name is Christen. I love modern quilting and sharing my tips, tricks, and tutorials.

    If you’d rather watch than read, I have a short video on this subject as well.

    My Pioneer Woman/Walmart fabric purchase!

    The first thing you need to know is I’m from Texas. I love being Southern and country, and I also really love the Pioneer Woman. I love her recipes, and now she has a whole new line of fabric at Walmart that I had to take a look at.

    Since I have been making quilts with the intention of them being high quality and lasting longer than myself, I have always gone for the more expensive fabrics. When I buy cheaper materials, I typically use those on zipper pouches or smaller projects.

    The image below is similar to what I bought from the Pioneer Woman’s fabric range. 

    These stacks of Southern fabrics, featuring pretty flowers and vibrant colors, are absolutely beautiful! 

    Let me do a quick calculation here. If you buy a collection of 30 fat quarters from this range, the price comes out at around $1.25 apiece. This is really inexpensive when you consider that quarters from a higher quality fabric shop run between $2-3 apiece.

    Are Walmart Fabrics Worth it when you're looking to create a high-quality quilt, or is it better to pay a little more to get the quilt shop quality fabric?

    Potential issues with lower-cost quilting fabrics

    The first thing I must say is the quality of fabric and dyes have come a very long way. However, there is always the possibility of color bleed.

    Of course, this could be prevented by pre-washing your fabrics. Although some people feel very strongly about this, I personally don’t pre-wash … ever. To be honest, I’m lucky to keep on top of the regular laundry without adding fabric pre-washing to my list of chores — it’s just not one of my priorities.

    Instead, I rely heavily on the Shout Color Catcher Dye Trapping Sheets when I wash my quilts and try to make sure I use high-quality fabrics that aren’t going to bleed.  

    When I look at the range of fabrics in the Pioneer Women stacks, I notice there are some very strong colors alongside fabrics that are essentially white. There is potential for these strong dyes to leak into the washing machine water and get absorbed by the paler fabrics. The end result might not be exactly what you envisioned!

    This is the exact reason Color Catchers are so important. If I had a quilt with a deep magenta fabric next to a light floral, I might use up to 10 Color Catcher sheets on the first wash.

    Durability & longevity of quilts made from affordable fabrics

    I have nothing against buying cheaper fabrics if that’s what allows you to enjoy quilting and do what you love. But you might notice cheaper material is less tightly woven and not as thick as more expensive cloth.

    Will a quilt made from Walmart fabric last a long time? I don’t know. Time will tell.

    When I’m creating a quilt from more affordable fabrics, I’m probably not going to create a quilt that’s the most amazing I’ve ever made. With cheaper material, the pattern I choose might not be super-complicated, and it might be the type of quilt we use outside for picnics or at the beach, guilt-free. The quilt is still handmade with a lot of love, but it’s designed to take more of a beating from the weather and the kids’ dog.

    If I’m going to invest 600+ hours into making a quilt, I’m going to buy the best quality cloth I can afford to ensure the quilt will wash well and last a long time.

    Perspectives on low vs. high-quality quilt fabrics  

    I would really love to know your thoughts on this subject.

    ·         What is your budget per yard of fabric? Do you spend $10-12 or $3-4?

    ·         Do you like a bargain or go for the highest quality available?

    ·         Do you stick to your budget or do you fall in love with a color/design and think about price later?

    ·         Is there really a difference between lesser and higher quality cloth?

    ·         What do you think about the Pioneer Woman line?

    Please let me know in the comments. I’d love to hear your thoughts.

    I know everyone’s opinion is different, but if we’re all nice, we can have a polite discussion about this interesting topic. I’m looking forward to hearing from you.

    Are Walmart Fabrics Worth it when you're looking to create a high-quality quilt, or is it better to pay a little more to get the quilt shop quality fabric?

    Next steps

    If you’re looking for more quilting tips, tricks and tutorials to improve your work and increase your confidence, be sure to check out my Quilty Tutorials playlist on YouTube.And if you really want to get better in the quickest time possible, have a look at my foundation skills quilting course, Modern Quilting Made Easy designed especially for people just starting out.

  • How To Successfully Travel With Your Sewing Machine

    If you’re getting ready to embark on a sewing retreat across the country or just a quick trip for a sewing class down the street, you’ll want to brush up on these quick tips on how to travel with your sewing machine successfully!

    It’s a little overwhelming when you first start to navigate the big move… but I promise, you’ll be an expert in no time!

    Before you leave home:

    1. Put your presser foot down on a piece of fabric.  To protect your presser foot and ensure machine stability during shipping or just general bumps of the travel process, keep it in the down position on a piece of fabric. The piece of fabric in between is to make sure that your feed dogs do not scratch up your presser foot and prevent any damage due to bumps or other transportation issues.

      Removing the presser foot is an option, but I’ve seen women accidentally show up to a class without a presser foot! woops… That pretty much kills the sewing day, even if your machine did make it safely. Keeping the foot attached and in one piece lessens the opportunity for something to get separated or lost.
    2. Don’t travel with your needle down.  Just in case you hit a bump, it’s better not to have that needle down near your bobbin case.
    3. Box it up!  If you’re flying, it’s preferable to re-pack your machine in the original foam and box. The styrofoam is specially formed to fit around your machine and protect it during shipping. it is meant to be supportive and protective. If you’re brave, you can even check your sewing machine in its original box instead of carrying it on.

      If you do not have the original box, definitely opt for the hardshell case or look for an aftermarket bag that is specifically for traveling with a sewing machine.
    4. Car seatbelts for travel! When you’re going across town or taking a driving trip, it’s important to make sure your machine is secure. It could be beneficial to invest in a trolley case and place the machine either on the floor of your car or securely strapped down in the backseat so that nothing can tip over while driving.

      Make sure to cushion it with fabric (no sharp scissors sticking out to accidentally slice your car seats!) for an extra layer of protection. That way, when you arrive at your destination, everything will be exactly as you left it – safe and sound. 

      Another note is to safely cover any computer screens with a soft cloth to prevent any rubbing or scratches during travel.
    5. The Smart/Easy Way! For easy carrying and less lugging of heavy machine parts… it’s a really good idea to have a trolley or rolling cart for your machine. I’ve seen women DIY all kinds of contraptions from foldable wagons to luggage! This protects your machine from bumps and other things but also is less stressful on your ability to safely carry your machine.
    6. Don’t forget your power cord!  This is very important- Obviously, your machine won’t work without it, but it is one of the most common items forgotten!

      This goes for extra bobbins and a bobbin case too.
    7. Should you carry on when traveling by plane? In short… this is a session that you have to make. There is the benefit of knowing that you’re the only one handling your machine and you don’t have to worry about seeing it tumble down the luggage rack at baggage claim in a few pieces… but you also have the be the muscle that carries it through the airport and keeps tabs on it while traveling.

      People who travel with their sewing machines and do carry-on store their machines in the overhead luggage compartment. You may need to scout out a tall, handsome stranger to help you load it overhead, but it is the safest place for your machine if you don’t end up with an empty seat next to you.

    Usually, when you’re meeting up with a group of quilters… everyone will understand a few forgotten items! You may be close enough to a quilt shop to replace what you need quickly and not lose too much sewing time… or another quilter will lend you the item you forgot if she has an extra.

    When you get to your second location:

    1. Ask for help You’ve already schlept your machine through multiple locations and loaded and unloaded it multiple times. Others available will be happy to help you remove your sewing machine and help you get settled.

      Everyone would much rather chip in and help than have you make it this far, struggle and end up with a loud crack as your machine tumbles out of the car at the doorstep of your destination…
    2. Set up your space and re-thread your machine.  Before you jump into your projects and get on your sewing buzz… do a good once over on your machine and your supplies. Make sure it all made it with you. You’ll also want to give a good once-over to your machine and threads. You may have left with it threaded correctly, but any travel trip is bound to jiggle things more and bounce things out of place slightly. Check your tension and thread for any tangles.
    3. Uh oh… You Forgot____ Really? after all that planning, list checking and thinking about what you needed to bring, and you STILL forgot something?

      It’s ok. It really is. We all realize how easily someone can make a quick mistake with so much to pack and bring with you. The only sewers who never ever forget something are people who travel with their machines often or they are very big type A people who have it down to a science because they’ve stressed about it already.

      You can check the area to see if there are any quilt shops nearby that you can pop into quickly (likely, as most retreats and classes are hosted close to quilt shops). You can ask around to see if anyone has an extra you could borrow (and then make sure you return it after use). Or you can check with the retreat host or class instructor to see if they an assist or come up with an alternative solution with you.
    Going somewhere? Make sure you read these tips to successfully travel with your sewing machine! - Whether you plan to drive or fly, you'll need to think ahead to keep your machine safe!

    Tips for traveling through airport security

    It is always wise to check the TSA website prior to traveling with anything unfamiliar just to lessen the stress and hassle while you’re standing in line and feeling the prying eyes of those behind you…. ugh… the stress!

    Essentially, with my experience, I’ve discovered that small hand-sewing needles are fine to travel with in a sewing kit.

    Scissors should be in your checked baggage unless they are shorter than 4 inches – embroidery scissors are ok.

    If you do happen to need to travel by air with your machine, here are a few tips:

    1. Take the lightest machine you own (only because it’ll be easier for you to carry through the airport. Most airlines don’t weigh carry-on bags). You may be tempted to take your beautiful big sewing machine, but a trip through a large airport will take a lot of strength out of your sewing arms!
    2. Be patient as you travel. (Actually, that’s just a good rule in general.) It is easy to forget that your stressful day traveling is only really your problem. The TSA officers are just doing their jobs and sometimes they have different interpretations of what is or is not allowed. Also regulations change from time to time and while they may seem like they’re just being difficult… their number one priority should be to keep other travelers safe – no matter how non-threatening you look in your crocheted sweater!
    3. Your sewing machine is best stored as a carry-on item in the upper luggage compartment on the airplane. Look for someone who can help you lift it up there if you are unable.
    4. Check into a rolling cart or storage bag for your sewing machine. I like the ones down below.

    Congratulations! Now that you have prepared and reviewed what is necessary to take your sewing machine on the road, you are set for an exciting adventure. Your diligent commitment to making sure it is safely packaged and ready for transport will give you peace of mind as you travel with confidence.

    The satisfaction of knowing that all components of the packing process have been taken care of will allow you to enjoy every moment of your sewing retreat. Don’t forget to take some time for yourself to reflect and savor your creative processes. Remember, this journey isn’t just about results but about experiences too! Once again good luck in your journey, if ever in doubt look at this blog post as a reference guide along the way!

    Also, leave a comment below if you have any other thoughts or suggestions….happy travels!

  • How to Look Like an Expert Quilter in 5 Easy Steps

    When you first start out quilting, there is so much to learn, and the only way to get good at a new craft is to practice.

    Slowly going from project to project is guaranteed to increase your skills, but that’s not the part we like, right?

    Right from the beginning, you want to create a professional-looking quilting project and feel good about gifting it to somebody else (or keeping it for yourself).

    Here are a few tips I picked up while I was learning to help you avoid mistakes, improve your skills, and increase your confidence.

    Here’s how to go from beginner to expert quilter in 5 simple steps.

    Are you a beginner quilter looking to up your game and look like an expert? Don't worry, it's easy! First, make sure you have the right tools. Invest in a high quality cutting mat and rotary cutter or top-notch scissors. Next, perfect your 1/4 inch seam allowance. This will ensure all of your pieces fit together perfectly with clean edges. Third, practice using various quilting stitches like straight line and diagonal to add texture and design to your quilts. Fourth, try out new patterns and techniques to expand your skillset. Finally, buy some good quality quilt batting for a professional finish. Follow these simple steps and you'll be on your way to expert quilter status in no time!

    (PS – To get the info from this post in video form, scroll down to the bottom!)

    1. Don’t stitch in the ditch

    I know stitching in the ditch is everybody’s first quilting project, but here’s why I don’t recommend it.

    If you squiggle (that’s what I call it when your quilt wiggles while you’re sewing), what’s the first thing you notice? Your eye is going to go to where your needle went crooked. It’s not going to matter that you did it flawlessly on all the other seams, you’re going to see that mistake.

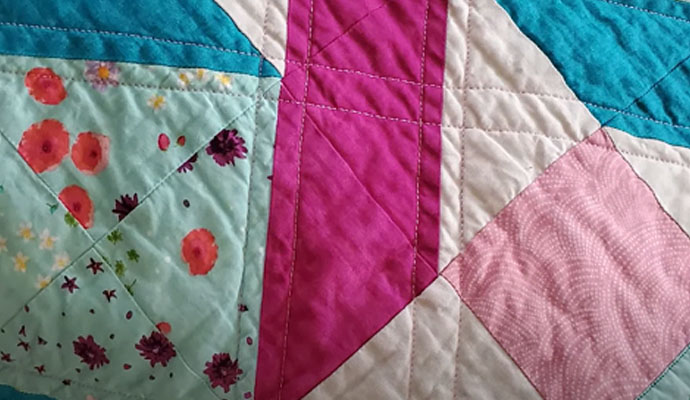
    If you’re trying to look like a more professional quilter, here’s what you need to do instead — echo your piecing seams as I have in this example.

    You can see I’ve stitched a quarter of an inch on either side of my seam. I didn’t stitch right in the middle, so it ends up looking decorative without having to do anything special.

    If I get a little bit off, no-one will notice it.

    You can do this technique on all different shapes. Choose to echo those seams rather than stitch in the ditch.

    2. Make a plan – mark your quilting fabric

    If you want to create straight lines or perhaps try a diagonal, make a plan first and then mark up your quilting fabric with a chalk pencil or crayon. One of my favorites is the Clover brand chalk marking tool with little teeth to make the line crisp and clear.

    Once you’ve finished sewing, the chalk dust has usually brushed away, or you can remove it by giving it a tap. You could also try the Frixion marking pens that erase with heat.

    Another way to make straight or diagonal lines on your quilt is using low tack painters’ tape you can buy from a hardware store. You could also use Washi tape if you have some on hand (although it is a little more expensive).

    With tape, you simply stick a piece between point A and point B on your quilt and then sew right next to it. This is the perfect solution if you’re not following a seam or if you have a big panel you are trying to quilt.

    Tape can gum up your needle so be sure to sew next to the tape, not on top of it.

    3. When you want to experiment, practice on a sample piece

    When you have put together a gorgeous piece you’re proud to have made, don’t decide to try something creative and new on your actual quilt.

    If you want to experiment, give yourself an opportunity to practice first.

    Make small quilt sandwiches that are 12 x 12 or 15 x 15 or use an orphan block that didn’t make the final cut into your finished quilt. Please don’t be tempted to practice on your final quilt piece.

    Yes, you can pick out those stitches if you mess up, there’s nothing wrong with that, but my advice for beginners is to practice somewhere it doesn’t really matter in the big scheme of things.

    4. Make sure you have the right quilting tools on hand

    You don’t have to buy an entire aisle of notions, but if you are frustrated and things aren’t working right, it could be you don’t have the right tools. You can’t make a cake if you don’t have flour, and it’s the same in the sewing room.

    The first tool I recommend is a walking foot attachment.

    When you’re at your sewing machine, a walking foot has an extra cog that helps move your fabric under the needle. When you have thick layers of material to work with, the only way to stop them moving out of alignment is to use a walking foot. This one single tool will transform your quilting experience.

    The second thing I recommend are quilting gloves. They are similar to gardening gloves, except they have a textured surface on the palm area that grips the fabric while you’re sewing. There are different styles from full gloves to Velcro wraps, so you are sure to find something that feels comfortable for you. You can find quilting gloves at your local craft store or on Amazon.

    Of course, there are a million different quilting tools you can buy, but to start with, a walking foot and some quilting gloves are the essentials.

    5. Make it look like your quilting mistakes are on purpose

    The last tip is perhaps the most important. Make everything look as though it was on purpose.

    Always say, “I meant for it to look like that.”

    If you’re trying something new and you get a squiggle, or you can’t sew in a straight line to save your life, that’s okay — make it look like you meant to do it that way.

    Create a unique design or some wavy lines in different places so your eye can travel around to those spots. When somebody says, “Wow, that’s really abstract, really pretty, and she’s added her own flair to it,” that’s awesome, right?

    Nobody has to know it’s a total mess up. The only way they will know is if you tell them.

    The more you quilt, the better you’ll get!

    The more you quilt, the more you piece, and the more you do this craft, the better you’ll get.

    Be sure to keep these 5 steps in mind while you’re learning, and that’s going to help your quilting get better.

    If you’re looking for more quilting tips, tricks, and tutorials to improve your work and increase your confidence, be sure to check out my Quilty Tutorials playlist on YouTube.

    And if you really want to get better in the quickest time possible, have a look at my foundation skills quilting course, Modern Quilting Made Easy designed especially for people just starting out.

    You’re going to be amazing. I cannot wait to see what you create!