When you first start out quilting, there is so much to learn, and the only way to get good at a new craft is to practice.
Slowly going from project to project is guaranteed to increase your skills, but that’s not the part we like, right?
Right from the beginning, you want to create a professional-looking quilting project and feel good about gifting it to somebody else (or keeping it for yourself).
Here are a few tips I picked up while I was learning to help you avoid mistakes, improve your skills, and increase your confidence.
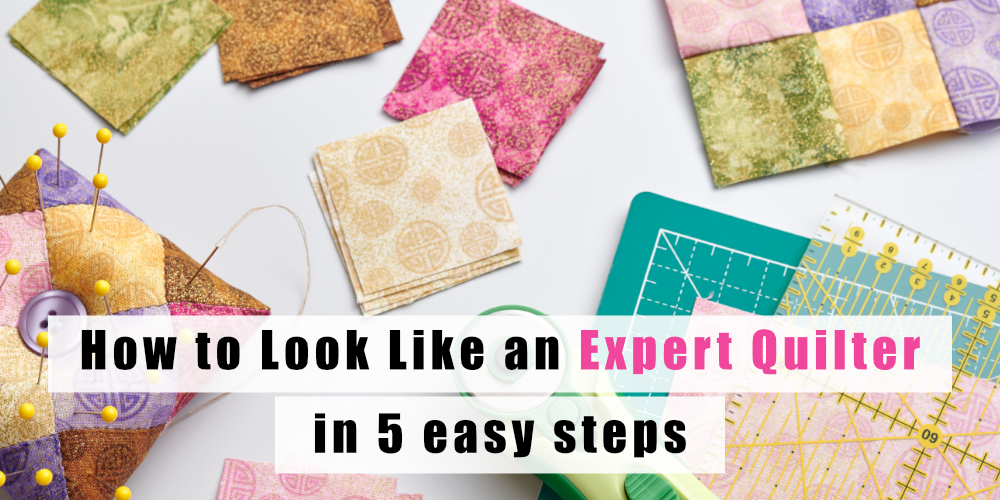
Here’s how to go from beginner to expert quilter in 5 simple steps.
(PS – To get the info from this post in video form, scroll down to the bottom!)
1. Don’t stitch in the ditch
I know stitching in the ditch is everybody’s first quilting project, but here’s why I don’t recommend it.
If you squiggle (that’s what I call it when your quilt wiggles while you’re sewing), what’s the first thing you notice? Your eye is going to go to where your needle went crooked. It’s not going to matter that you did it flawlessly on all the other seams, you’re going to see that mistake.
If you’re trying to look like a more professional quilter, here’s what you need to do instead — echo your piecing seams as I have in this example.
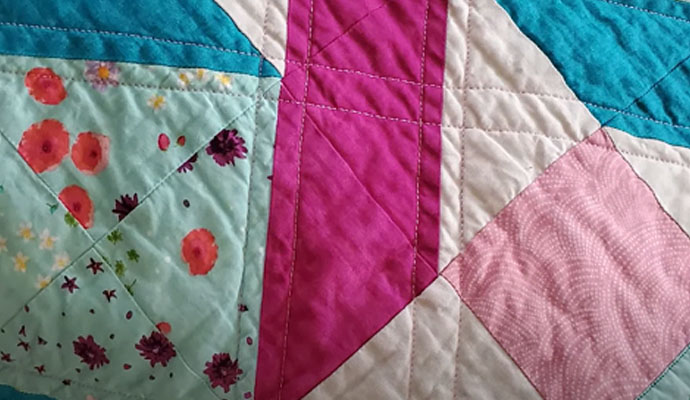
You can see I’ve stitched a quarter of an inch on either side of my seam. I didn’t stitch right in the middle, so it ends up looking decorative without having to do anything special.
If I get a little bit off, no-one will notice it.
You can do this technique on all different shapes. Choose to echo those seams rather than stitch in the ditch.
2. Make a plan – mark your quilting fabric
If you want to create straight lines or perhaps try a diagonal, make a plan first and then mark up your quilting fabric with a chalk pencil or crayon. One of my favorites is the Clover brand chalk marking tool with little teeth to make the line crisp and clear.
Once you’ve finished sewing, the chalk dust has usually brushed away, or you can remove it by giving it a tap. You could also try the Frixion marking pens that erase with heat.
Another way to make straight or diagonal lines on your quilt is using low tack painters’ tape you can buy from a hardware store. You could also use Washi tape if you have some on hand (although it is a little more expensive).
With tape, you simply stick a piece between point A and point B on your quilt and then sew right next to it. This is the perfect solution if you’re not following a seam or if you have a big panel you are trying to quilt.
Tape can gum up your needle so be sure to sew next to the tape, not on top of it.
3. When you want to experiment, practice on a sample piece
When you have put together a gorgeous piece you’re proud to have made, don’t decide to try something creative and new on your actual quilt.
If you want to experiment, give yourself an opportunity to practice first.
Make small quilt sandwiches that are 12 x 12 or 15 x 15 or use an orphan block that didn’t make the final cut into your finished quilt. Please don’t be tempted to practice on your final quilt piece.
Yes, you can pick out those stitches if you mess up, there’s nothing wrong with that, but my advice for beginners is to practice somewhere it doesn’t really matter in the big scheme of things.
4. Make sure you have the right quilting tools on hand
You don’t have to buy an entire aisle of notions, but if you are frustrated and things aren’t working right, it could be you don’t have the right tools. You can’t make a cake if you don’t have flour, and it’s the same in the sewing room.
The first tool I recommend is a walking foot attachment.
When you’re at your sewing machine, a walking foot has an extra cog that helps move your fabric under the needle. When you have thick layers of material to work with, the only way to stop them moving out of alignment is to use a walking foot. This one single tool will transform your quilting experience.

The second thing I recommend are quilting gloves. They are similar to gardening gloves, except they have a textured surface on the palm area that grips the fabric while you’re sewing. There are different styles from full gloves to Velcro wraps, so you are sure to find something that feels comfortable for you. You can find quilting gloves at your local craft store or on Amazon.
Of course, there are a million different quilting tools you can buy, but to start with, a walking foot and some quilting gloves are the essentials.

5. Make it look like your quilting mistakes are on purpose
The last tip is perhaps the most important. Make everything look as though it was on purpose.
Always say, “I meant for it to look like that.”
If you’re trying something new and you get a squiggle, or you can’t sew in a straight line to save your life, that’s okay — make it look like you meant to do it that way.
Create a unique design or some wavy lines in different places so your eye can travel around to those spots. When somebody says, “Wow, that’s really abstract, really pretty, and she’s added her own flair to it,” that’s awesome, right?
Nobody has to know it’s a total mess up. The only way they will know is if you tell them.
The more you quilt, the better you’ll get!
The more you quilt, the more you piece, and the more you do this craft, the better you’ll get.
Be sure to keep these 5 steps in mind while you’re learning, and that’s going to help your quilting get better.
If you’re looking for more quilting tips, tricks, and tutorials to improve your work and increase your confidence, be sure to check out my Quilty Tutorials playlist on YouTube.
And if you really want to get better in the quickest time possible, have a look at my foundation skills quilting course, Modern Quilting Made Easy designed especially for people just starting out.
You’re going to be amazing. I cannot wait to see what you create!