Quilting

So much Modern Quilting! Oh, I love it! Let’s talk about my favorite quilting tips, tricks, and how-tos! Learn something new or improve on an old skill.

  • 5 Ways To Set Up Your Best Creative Life

    Amazing life changes aren’t only allowed to start during the month of January. Your best creative life can start today.

    I hope you know that. Logically it makes sense, but also we’re kind of conditioned to believe that January is the best “Monday” of the year to start thinking about how to get our stuff together for the rest of the year, right?

    Kind of funny, if you ask me.

    In today’s post… I’m going to tell you 5 ways you can get your footing and set up the best creative life starting at any point during the year!
    5 Ways To Set Up Your Best Creative Life

    1. Look at what all you have going on right now in your life.

    There are great times in your life to shake things up and do something different or go all in an activity that you’ve never done before!

    …And then there are times where you have to take an honest look at your life and get a few things in order BEFORE embarking on a life-changing creative adventure.

    It might be a hard thing to hear but I’d rather you take this moment of reflection before you cause more stress than necessary by trying to be everywhere at once.

    Taking care of your sanity is always number one!
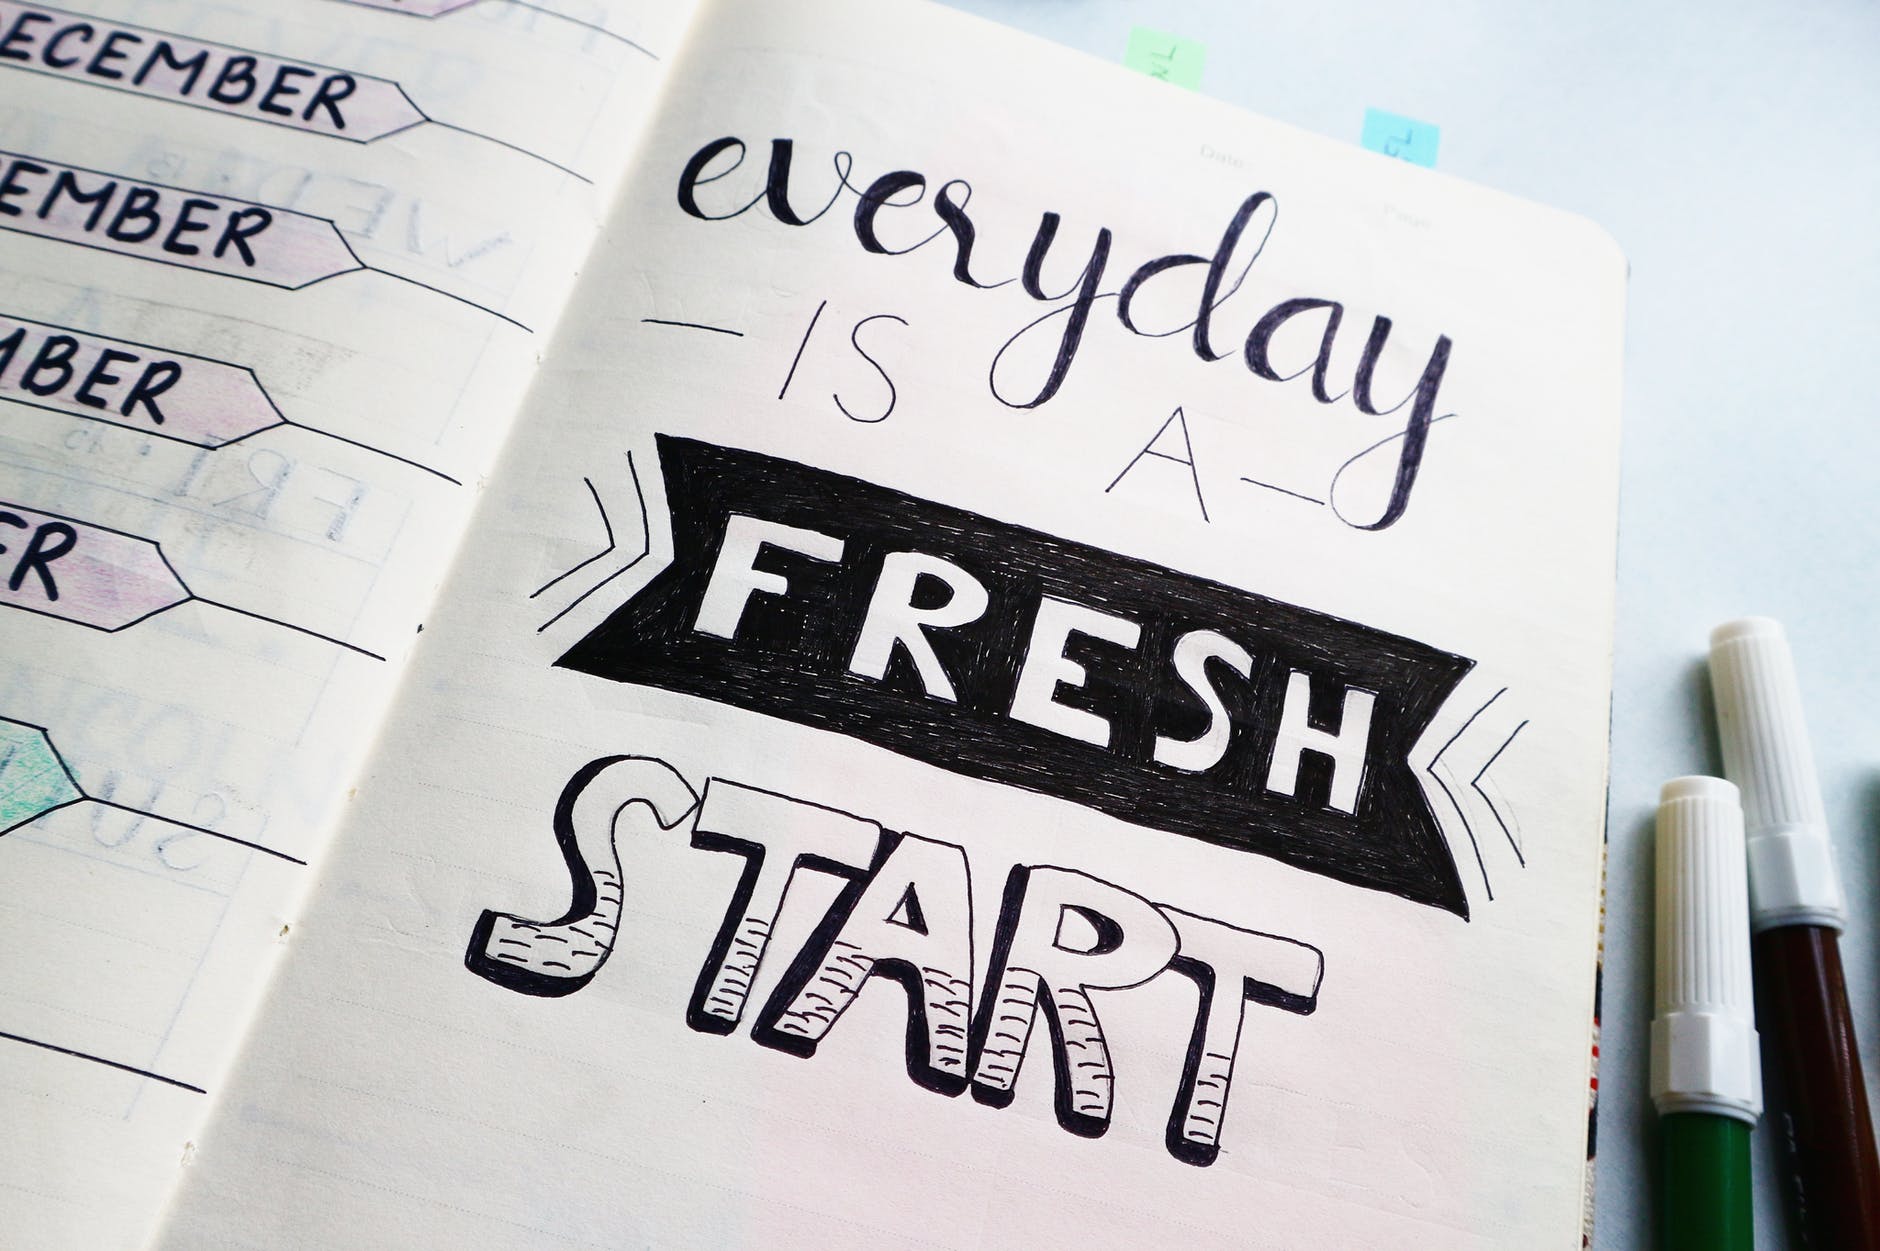
    inspirational quotes on a planner

    2. Decide what you want to pursue!

    If you didn’t already know, I am very much a planner and a goal achiever!

    I love my check-lists and knowing what I’m getting myself into.

    I also know my personality doesn’t jive well with starting 100 projects and never completing any of them. (we’re all wired differently)

    You may be happy just playing with different ideas and enjoy the creativity in each moment more than the actual finished project.

    You are the only one who can decide what you’re comfortable pursuing and what is going to bring your heart the most joy!

    So when you’re trying to plan what you want to do… start to narrow it down by what sparks your interest but also what you have room for in your life, like we talked about above.

    If you’re stretched thin by work and kids and just general busy life… You may find that a creative outlet is a good way to buy back some of your sanity points at the end of the day. That’s awesome!

    Maybe start with a journal and some brand new markers or watercolors to doodle out some inspiring ideas instead of taking on your first hand stitched king size quilt project, you know?

    Or if you have a little bit more time to give, look at taking a few creativity classes!

    A few quick and super satisfying project tutorial ideas for you to check out:
    Image Design with a Link to check out more tutorials on my Youtube channel

    3. Purposely book an appointment time with yourself

    Schedule out time daily, weekly or at the very least a few times a month to pursue what it is you want more of in your life.

    I can 99% guarantee that if you wait for those lazy afternoons or just pockets of free time in your life to show up… you’ll be waiting a very long time and see very little progress with your creative endeavors.

    You have plan for it! Even if it takes marking off every Tuesday/Thursday evening on your calendar! Give yourself the time to focus without a lot of distraction around and the pressure of only having 5 minutes to yourself before something else pulls you away.
    Check out my detailed course with a specific plan and training to add more creative time to your life. This link will take you to a page with a coupon code 🤗
    Which brings me to…

    4. Do not let yourself cancel these appointments!

    OK Ok… I know… things come up and schedules aren’t set in concrete and things DO shift around.

    I’ve heard people use the phrase “You wouldn’t be a no-show to a doctor appointment you made or just bail on dinner plans with a client!”

    It is easier to put the needs of others before our own when it comes to self-care or creative endeavors!

    To live in the world we are in today, you have to be somewhat flexible to survive. (um hello, year 2020)

    You just have to realize one thing:

    If you aren’t willing to make yourself a priority and GIVE yourself the time to focus on your creativity… it will not happen on its own.

    You don’t have to let go of flexibility to keep your creativity a priority!

    If you have to shift things around, make sure that your time for yourself doesn’t get tossed out simply because it is the easiest thing to throw out.

    Other things will always get in the way. There will always be someone else or something else that you can focus on.

    Our attention is pulled in so many different directions via advertisements, social media, work, family matters, worldly news etc etc.

    Work around it!

    5. The perfect time to start focusing on your creativity is TODAY

    (Or perhaps this weekend if you need to do a little shopping prep beforehand!)

    If you’ve been waiting for things to be right to start focusing on your creative talents… You could be waiting for a long time. 🙄

    I started quilting when my kids were very young. Being a really busy mom, I had this grand idea that things would get easier when they got older and I would have more time when they went off to school. I just had to make it through those hard years, right?

    Well, guess what? My days still seemed to fill up quickly even with them gone most of the day when that time came… I just had a different set of responsibilities and expectations on myself than I did years before.

    The best day to start your creative journey is today.

    Like, we talked about earlier… now may not be the best time to start on that king-sized quilt project, but you can do SOMETHING creative that will still bring your heart joy TODAY!

    picture of sea placed on white table and illuminated by sunlight

    YOU are the one who is in charge of your best creative life!

    Here is a bonus tip!

    Grace.

    Grace is always something that you need to give yourself in every area of your life. 🥰

    It isn’t always easy, and it isn’t something that is ever actually “done”. You have to always continue to pursue your best creative life and keep it as a priority in your life.

    For further reading, I highly suggest the post below because I share a few more nuggets of my learning moments and what I have learned in pursuing my best creative life.

    Stuck in a rut? This is an open letter to all quilters that has some really solid advice on self care and how to be a better quilter.
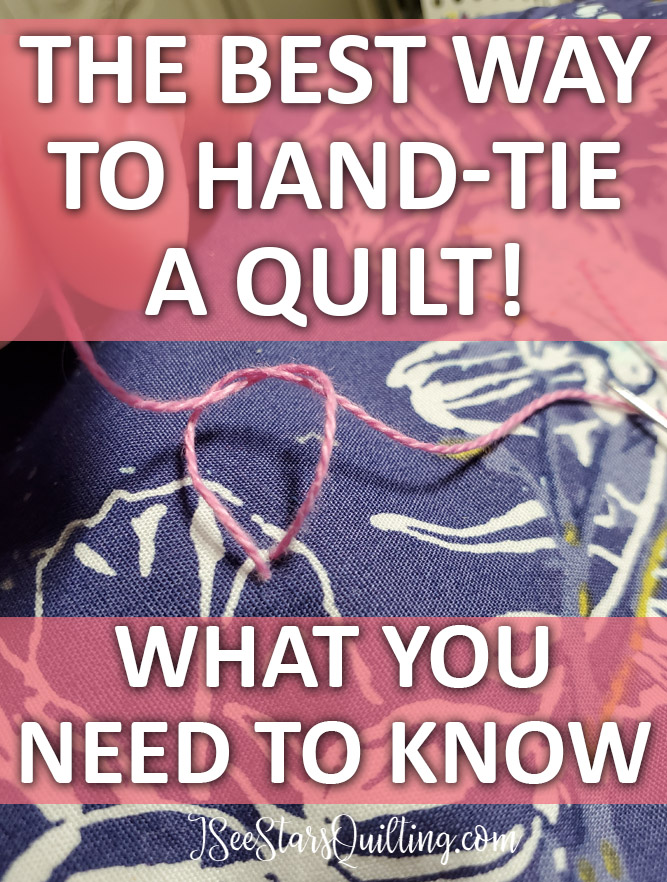
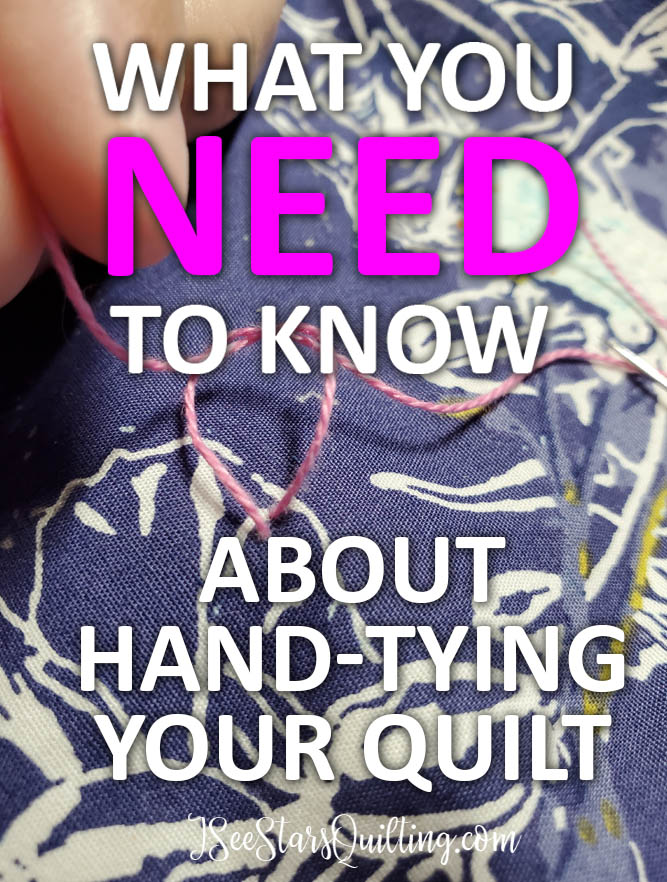
  • The best way to hand-tie a quilt! What you need to know.

    One of the easiest ways to finish up a quilt – and has a classic “handmade with love” look is to hand-tie your quilt. It’s an old art that sometimes loses its spotlight to the fancy free-motion quilting designs, but hand-tying shouldn’t be overlooked or underestimated! Let’s take a look at the best way to hand-tie a quilt and answer all of your questions!

    What is hand-tying?

    Hand-tying is the process of hand-tying one stitch through all three layers of your quilt sandwich (the backing, batting and quilt top) and knotting the thread on the quilt top surface or even on the back of the quilt. This is done by hand without the use of a sewing machine.

    The purpose of the knot is to keep your quilt layers together without having to machine quilt your piece.

    Why would you choose to hand-tie a quilt?

    There are many reasons people choose to hand-tie a quilt.

    This finishing technique is really great for beginner quilters – or seasoned quilters who have way too many quilt tops to quilt!

    It might be because machine quilting isn’t one of your favorite parts of the quilting process and you want to avoid it if possible? It might be because hand-tying gives your quilt more of a handmade/artisan look?

    Historically, hand-tying was an easier task than hand quilting in some cases and still accomplished the same goal. If you didn’t have access to a fancy sewing machine, you could hand-tie your quilt to finish it.

    In modern quilting, hand-tying is more of an aesthetic choice. Tying a quilt by hand gives it a different finish to machine quilting.

    You can give it a modern and artistic twist by choosing to focus on fun, colorful, or interesting textures in addition to the fabrics you choose.

    How do you hand-tie a quilt?

    I have a whole tutorial and video on this!

    I love the look of a beautiful hand-tied quilt! Check out the post that I wrote that goes into a little more detail about how to tie a quilt.

    Does it matter which batting I use?

    Not really, no. The batting does not affect the hand-tying process.

    However, your batting choice can change the overall look of your quilt. A thicker batting will lead to a thicker quilt and create more of a “hill and valley look” in the areas where you hand-tie your quilt. A thinner or more compact batting will have less of a difference in texture between the tied areas and open sections.

    More thoughts on quilt batting

    What should you use to hand-tie a quilt?

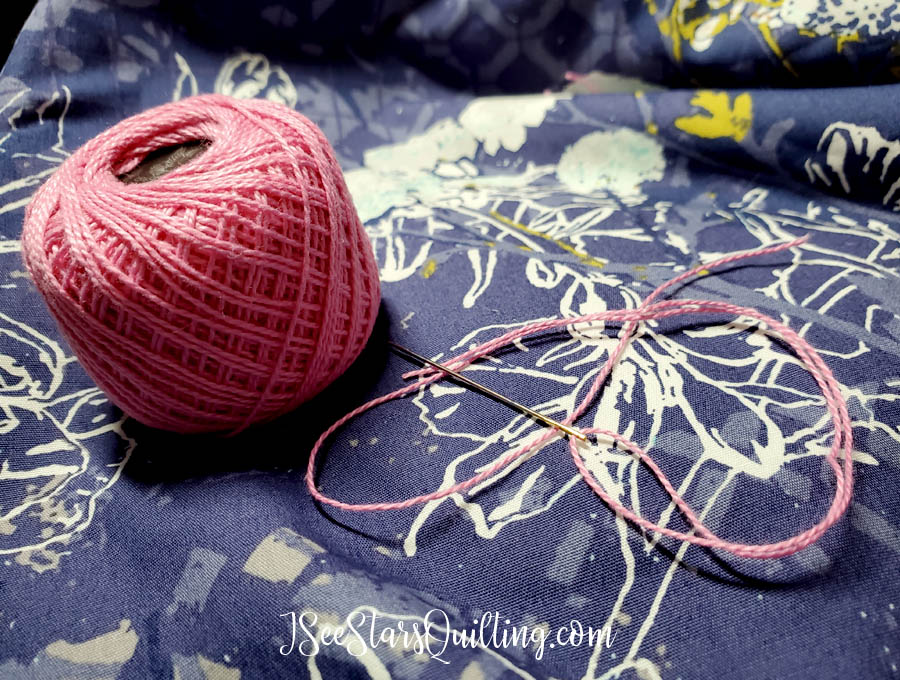
    Simple supplies to tie a quilt
    1. Embroidery needle
    2. Cute embroidery scissors (or just regular ones, but it is more fun to be cute!)
    3. Needle threader (optional but extremely helpful)
    4. Cotton Thread

    A note about cotton thread: I prefer to use Pearl Cotton Thread No. 8. It is what I like to hand quilt with. You can use something thicker… as thick as you want. You can even use yarn to tie your quilt!

    Why use cotton? – A good question! I’m assuming your quilt is made mostly with cotton fabric. Because different materials wash differently within your washing machine (some stretch and shrink differently) it is a good practice to try to keep the number of different materials to a minimum. It will help with the lifeline of your quilt over time.

    I have also used embroidery thread/floss to tie quilts because of the availability of the color I was looking for!

    Can I add buttons?

    Absolutely! Buttons are a really fun way to add texture and a funky personality to your modern quilt. Bonus: It can also hide the knot of your hand-tying if you are strategic about it!

    Note: It is never safe to add anything that could potentially be a choking hazard to a quilt for a child. No matter how well you sew on buttons, the best practice is to steer clear if the intended use is for a young child.

    A full review of the Painted Ladies Quilt Pattern - what I liked and didn't like - as well as LOTS of photos of the finished quilt. Fabric Line is from Alison Glass
    This is a quilt pattern called Painted Ladies. See more images here

    Should you tie your quilt before adding the binding?

    Binding a quilt is always the final step to finishing a quilt. Before you bind your quilt you need to ensure that your layers are secure and will note be moving, shifting or getting some weird bubble that is forever going to be an annoying flaw to you

    Secure your layers first either with quilting, hand-tying or a combination of both if you prefer. Then, you can add the binding.

    How far apart do my ties need to be?

    Where you choose to tie your knots really is a personal preference.

    The distance you should leave between your knots depends on the type of batting that you’ve chosen. This distance is usually indicated on your batting’s label.

    Check the packaging and pay close attention to that during purchase.

    I like to use Warm and Natural batting. It has a guide of 8-10 inches being the minimum distance… It is a nice and generous amount, but I usually stitch closer.

    If you’ve lost the packaging and don’t know the brand or can’t find the information, I would stick to working within 4 to 5 inches between your stitches as your minimum. You can always work closer!

    Should I use a quilt frame?

    Embroidery hoops or larger quilt frames are a helpful tool for layering your fabrics while hand-tying.

    You don’t HAVE to use them, but it doesn’t hurt.

    I like to secure my quilt layers with safety pins before I tie my quilt. That way I know the layers will not be shifting and I can still work in small sections at a time.

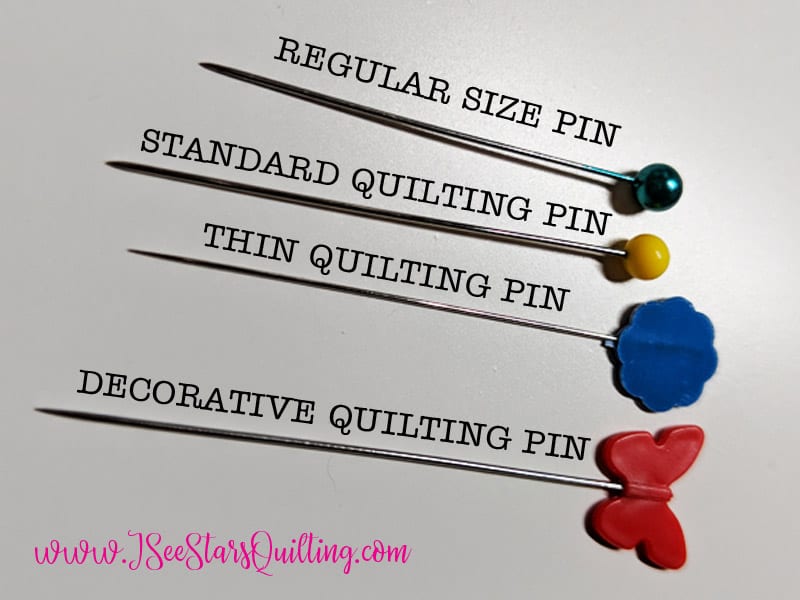
    little details like this make all the difference in a sewing room with personality. which pins are the ones you simply MUST have on hand? Read here www.iseestarsquilting.com
    These are my favorite pins for Quilters

    Does this add or take away from the value of my quilt?

    There is a lot that goes into deciding the final value of your quilt. The cost of fabric and your time involved is just the beginning!

    As far as the finishing quilting touches – I would be more concerned with the overall look of the quilt and what the design is calling for. You are the artist, you tend to have a gut feeling about what your quilt needs.

    If you’re looking for a quick fix for a really fun quilt, hand-tying is a great choice!

    If your quilt pattern is very detailed and you’ve put TONS of hours of sewing into it and worked on your piecing skills and you’re thinking it is quite possibly the greatest thing you have ever made… Maybe you’re feeling like it deserves a more sophisticated quilting treatment?

    I urge you to go with your gut when it comes to your quilt design choices!

    The overall value of your quilt is going to be determined by these choices altogether. No one choice, in particular, is going to be the deciding factor.


    Whew, I hope that helped you in your quest for knowledge on the best way to hand-tie a quilt!

    If you have any more questions, feel free to reach out to me or comment below. I’m happy to help!

  • Get Your Sewing Machine Ready for 2021!

    Whew! I hope you have been doing a TON of sewing these past few months! I tend to sew heavier in the later months of the year getting things ready for the holidays and finish up the projects I said I would finish by the end of the year (and find myself WAY far behind on). Anyways, your sewing machine could probably use a little extra pampering right about now, right?… Here is how to quickly get your sewing machine ready for more sewing!

    4 ways to tune up your sewing machine!

    4 things to do to get your sewing machine in tip/top shape!

    New year, new season, new projects and LOTS of creativity on the horizon? Then it is time for you to get your sewing machine ready! Let’s take just a few minutes to set yourself up for success!

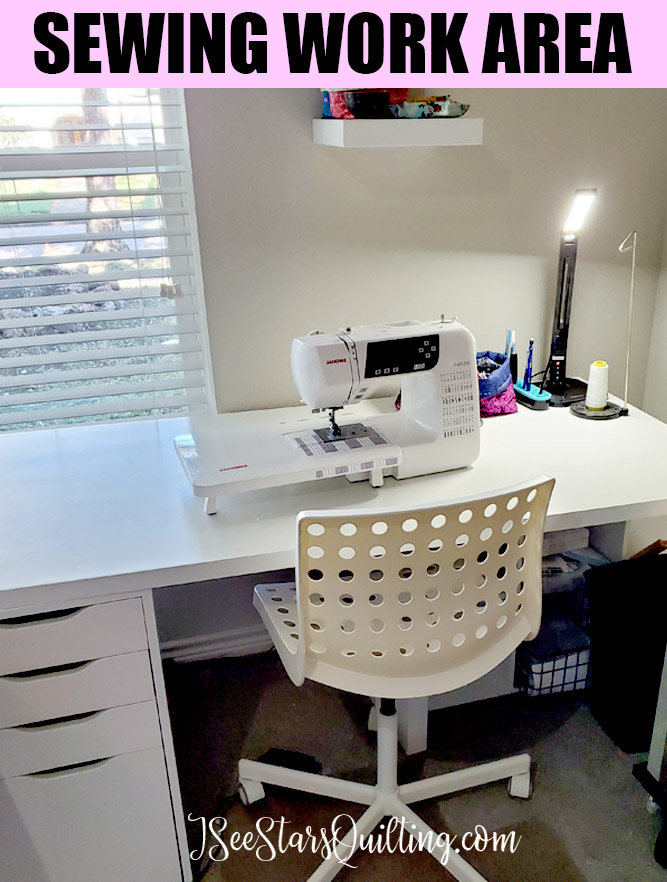
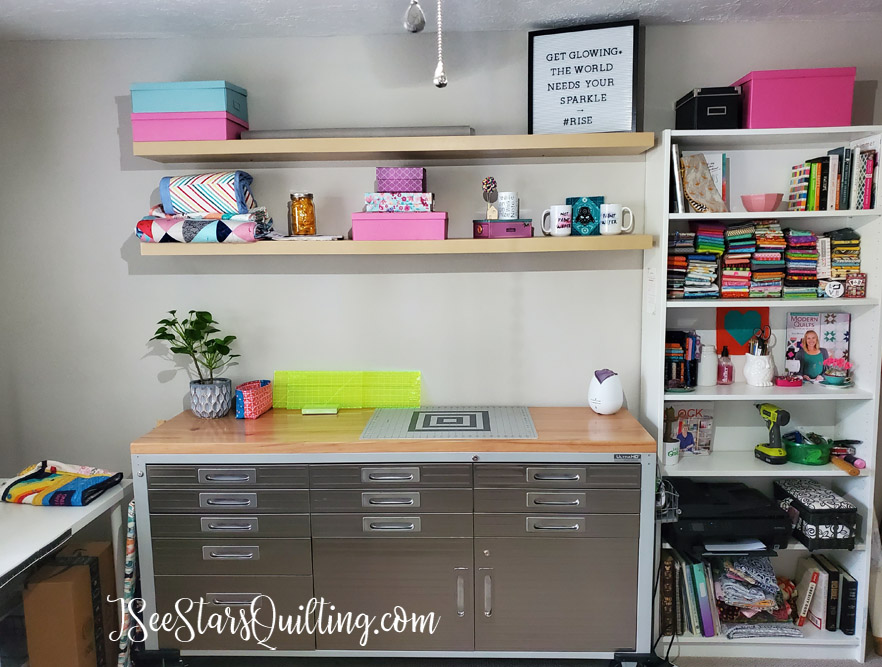
    image of my sewing work area with clean workspace.
    Tour My Sewing RoomSewing Room Renovation! – Before & After Pics

    1. Give your machine and work area a good dusting!

    I know… we work and work and work and *sometimes* it is easy to just ignore the mess that we’ve created. You can even go blind to it! – As in, you may not even see it as a mess or clutter anymore. It’s just the way it always is.

    1. Take a second to step back and look at your space. Really look at it and what you have in it.
    2. Look at the table/work surface your sewing machine is on. Is it big and open with room for you to work on your projects? or is it 90% occupied with tools, baskets, piles and work to be completed?

      Consider cleaning off your workspace and re-arranging things to give you a little more room. A change in perspective and surroundings can make way for all sorts of new inspiration to come your way!

      Take a light dusting cloth and go over your machine. I don’t use any cleaning products other than water when needed or if there are any smudges to remove.
    3. Dust and wipe your work surface clean. Pick up any little bits of thread or fabric clippings and maybe even give your room a once over with a little air freshener. It doesn’t have to be a complicated huge overhaul or spring cleaning! Just do a light cleaning to bring in some good creative energy!

    2. Open up your machine and clean the insides!

    When was the last time you cleaned out your machine?

    This can either be a really fun, or horrifying task. If you want more tips on how to clean your machine, you can check out this post: How often should you clean your sewing machine? + A How To

    I recently discovered a SUPER handy tool – that totally blew my mind. I would have never thought it would be my favorite for this task and also… it is super inexpensive! Absolute win/win!

    Check it out in the video below!


    MORE HELPFUL READS:


    *Check your manual on other cleaning tips. Each model sewing machine varies on the recommended practices. Only add oil if your manual suggests it. Do not unscrew or take off pieces that you are not familiar with.

    3. Change your needle!

    Part of getting your sewing machine ready means making sure it is in the best possible shape, right? An easy part to change out regularly is your needle!

    Changing your needle is easily overlooked, especially if you’re excited to jump right into a new project and you’re used to having your trusty machine do whatever you ask of it! However, if you are sewing with a dull needle, you are adding extra wear and tear on your machine that you may pay for down the line.

    A good general rule (which can widely vary based on who you ask and the age of your machine) is a new needle every 10-12 hours of sewing.

    Personally, I think measuring sewing time is really weird, right? Like, who does that?

    If most quilting projects average around 9-15 hours (some more, some less)… you should look to change your needle at the start of every project-ish. I’m adding that ish in there because this is just a guideline, not a hard rule. You are the only one who knows what projects you work on…

    If it has been a while since you changed your needle, just start with a new one now and try to keep up with it from now on.

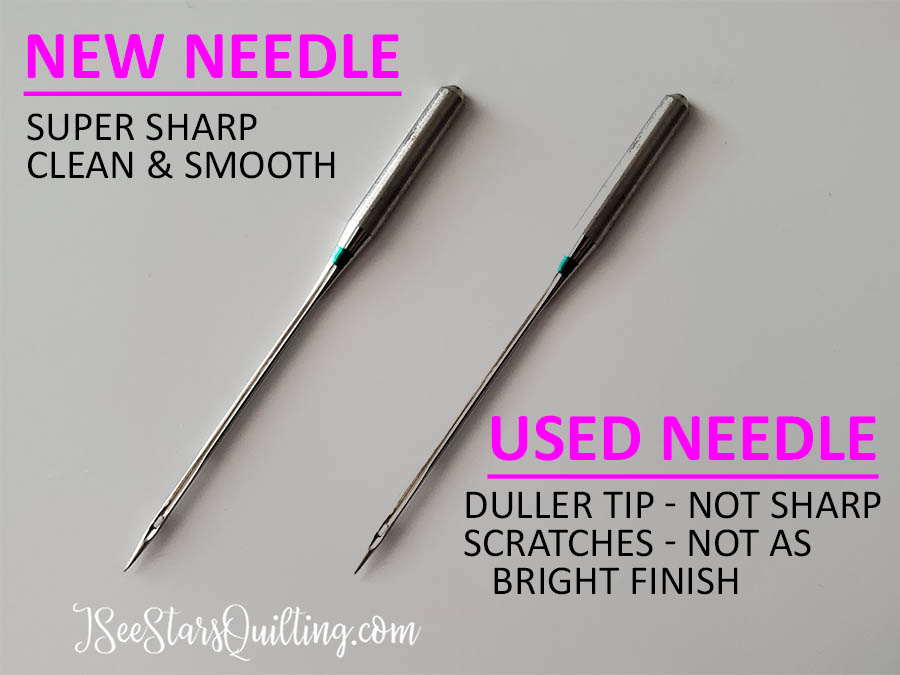
    Leaving your machine to push a dull needle through multiple layers of fabric and batting over and over again is a hard job. A sharp pointy needle sews so much better!

    comparison side by side of a brand new sewing machine needle and a used sewing machine needle

    Also, another note… next time you’re shopping for needles, take into consideration what kinds of projects you’re working on. Thicker and more durable fabric such as denim sews better with a more durable needle than thin cotton fabric!

    4. Consider if it is time to take your machine in to be serviced by a professional

    I know quilters who are like clockwork about taking their machines in to be serviced and cleaned up. I know quilters who’s machines haven’t seen the inside of a professional store since the day it was purchased.

    There is no judgement either way!

    I tend to fall into the category of every 2-3 years… depending on how much sewing I am doing and if I notice anything weird going on.

    I like to take mine in because I plan on using it for a very long time. Even with all the manual cleanings I do myself and trying to keep my machine in tip-top working mode… there are places that you just can’t reach within your machine without taking it all apart.

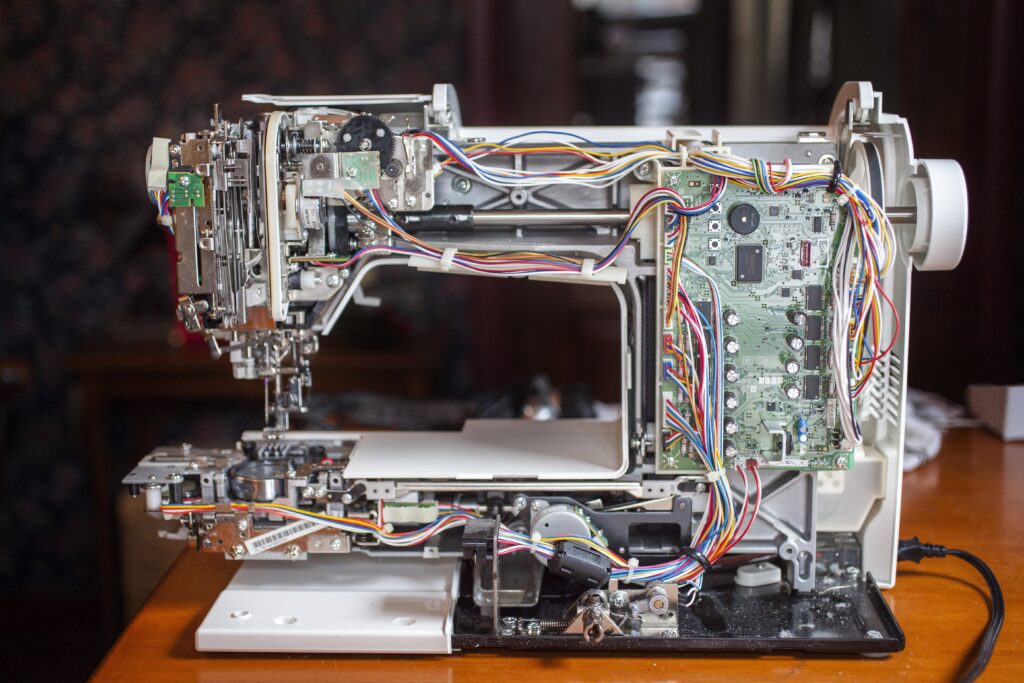
    the inside view of a sewing machine with wires and motherboard exposed.
    (😲Note: This is NOT my sewing machine!)

    I definitely DO NOT recommend taking it all apart on your own unless you know what you’re doing! Leave that to the professionals, please. The last thing you want to do is show up at the repair shop with a bag full of parts that used to be a working machine and have to pay the extra hours of service while he tries to put it back together again!

    If you’re doing regular cleanings on your own, there is no reason why your machine shouldn’t last you a really good long time… that being said, if while you’re sewing you notice the tension keeps getting off or things just aren’t working properly… there is a weird knocking noise or a squeak every now and then that won’t go away… I would recommend taking it into a repair shop, just to make sure whatever is going on doesn’t get worse.

    If you aren’t aware of a sewing machine repair shop, check around for vacuum repair shops (don’t ask me why… they’re often linked together). Or you can check with your local fabric or quilt shop to point you in the right direction.

    What you’ll need to do: Call and ask what their turnaround time is right now (i.e. how long you’ll be without your machine) and how soon you would be able to bring your machine in for a tune-up. They may ask when the last time it had a tune-up was and if anything specific is wrong with it at the moment.

    Should they find anything else wrong with your machine while it is in the shop, you can specify for the repairman to call you with estimates before the added work is completed.

    a link to a blog post on how much does it cost to get my sewing machine serviced?

    WRAP IT UP: Getting your sewing machine ready!

    1. Dust and clean off your machine and sewing area.
    2. Open it up and clean the insides.
    3. Change your needle.
    4. Consider if your machine needs to be serviced by a professional.

    I don’t know about you, but I am SUPER PUMPED up about all the fun projects I have in mind for the next year… so many wonderful things lie ahead to create!

    So get to it! Go get your sewing machine ready to create more beautiful things!

    If you need more help to plan out your next year, check out this popular resource: Framework for a Creativity Audit – How to plan for more creativity

    Creativity Audit Featured Image - to set new creative goals

    Lastly, I hope you have a wonderful start to the new year or new season… or new week (depending on when you get around to reading this!) Talk to you again soon!

  • Framework for a Creativity Audit – How to plan for more creativity

    As we close out and get ready to say goodbye to another year, I want to share with you today my end of year ritual that helps me walk into the new year with a plan and a clearer sense of purpose. My Creativity audit time is something that I use to plan for more creativity in the coming months.

    This is something that I haven’t shared with you before. There are plenty of things that I shout from the rooftops about tools and gadgets etc.

    This is a formula that I’ve developed and fine tuned over the years to get clarity on what really matters in my life so that I can set my goals accordingly.

    It isn’t exactly rocket science and there are probably variations of this same line of thought out there on the web somewhere.

    If you are wanting to shake off the dust from the past year (month, week, etc… this really doesn’t have hard rules!) I want you to give this a shot and let me know what you think! 🙂

    So pull on your comfy pants (oh, you’re already wearing them?! *high five* – me too, to be honest.) Grab the free download sheet below – Just tell me where to send it and I’ll shoot it your way…

    Check out the following tips below and watch the video that I created that gives a little more explanation to implement this audit.

    DOWNLOAD YOUR

    FREE PDF GUIDE!

    A step by step worksheet to decide your goals!

      Creativity Audit Featured Image - to set new creative goals

      WHY SHOULD YOU DO AN END OF YEAR CREATIVITY AUDIT?

      2020 has been something else, huh? Maybe the time you spent at home allowed you to be more productive than ever? Maybe you were one of the beautiful people who sewed HUNDREDS of masks for friends and loved ones?

      We got closer to our families and our comunities and yes, it was hard and emotional… but you know what? You’re still here. You’re reading this.

      I am very thankful for you.

      And I am very proud of you.

      We’re going to take the knowledge that we learned last year and keep moving forward with a perspective that we did not have before.

      I developed this ritual of a quiet reflection at the close of every year. I call it my “Creativity Audit”. It isn’t something that I usually share because it isn’t something that anyone else has any say in. It is just for my knowledge and creative growth.

      I also keep it separate from my other life goals that usually deal with finances, business growth, family goals or personal growth.

      This year, my creativity audit looked a little different than it has in the past. In some ways, I feel like I’ve lived a thousand lives… and in others, I don’t even understand how the calendar is passed March already? So many of the days and weeks blurred together.


      For more project ideas, check out these blog posts:


      Coffee mug with the words Just... begin

      Here is how I like to set the mood to plan for more creativity during my audit:

      Of course, the act of sitting down with a chunk of time where I can be without distractions is a good place to be in… but I start to set things up even before I reach that point! Schedule out a time where you can plan for more creativity and really nail down your goals.

      I’ll usually set aside a few hours the day before to really clean up my space. I put everything away and leave a beautiful blank slate that is a reflection of my openness for progress forward and being open to learning new ideas.

      If you want to learn my biggest cleaning hack, click here.

      I love to light candles and cozy up in my favorite sweater and a quilt too! I love to make a warm mug of tea and put on some soft music in the background.

      Choose whatever puts your in a good mood and sets the tone for amazing quality goal setting time with yourself! If you are the type to grab a giant iced coffee and put on really loud dance music… then by all means, go for it!

      Pro tip: If you have young kids around… give your husband a heads up several days in advance that you’d like a few moments to yourself. Leave him in charge of the house and the kids. You can order pizza or something easy to keep everyone fed… then, I suggest you say a quick prayer and lock the door behind you. 😉

      Watch the video that goes with the free printable!

      Once you have yourself set up, go ahead and watch this video. I go into a little more detail about my audit process and why I do it.

      Then… let it all marinate in your brain for a bit. Sometimes, you need a little time to let things settle or think about your goals.

      Image of brown craft paper with text "what is next?" written on it

      Think about it in terms of:

      • What do you want to experience in the next year of your life and what you want to do?
      • What would you love to create and bring to life in the next year?
      • WHY do you want to plan for more creativity? What would it mean for you?
      • How are you going to feel when you see these dreams come to life?

      And then I want to you to start to get excited about the upcoming year!

      Get yourself hyped up and jazzed about all the wonderfulness of it all! Your planning for more creativity is going to explode your world!

      To all my naysayers that will ask “But I don’t have a guarantee that it is going to be the best year ever!”… To you I say, You don’t have any proof that says it isn’t going to be the best year ever either!! 🥳

      This little ritual is a beautiful way to set yourself up for success in the new year!

      As I mentioned before, this is what works for me… please feel free to change things up or alter your own way of doing things. Do what works for you so long as it leads to positive vibes and uber feelings of success coming your way! 😘

    • What I Have Around Me When Sewing!

      It is no secret that if you have chosen sewing and/or quilting as a hobby… you are going to amass a rather large collection of gadgets and tools rather quickly. And no matter how many you have… there is always more that you COULD add to your collection! Today I’m going to give you a quick tour of the items I keep close by and what I have around me when sewing.

      If you prefer to watch the video to get the rundown, you can catch that and a few other side notes from me in the video below. 😘

      Follow me on YouTube to keep up with the latest modern quilting tips & tricks.

      In my sewing room, there is quite a bit that can be considered “occasional use” items. A few tools have their specific purpose and that is it. They have their moment to shine and the rest of the time they spend waiting around in a drawer.

      The tools that I use most often and find myself reaching for over and over again have a special place right next to my sewing area.

      So, let’s dive into the tools I have around me when sewing…

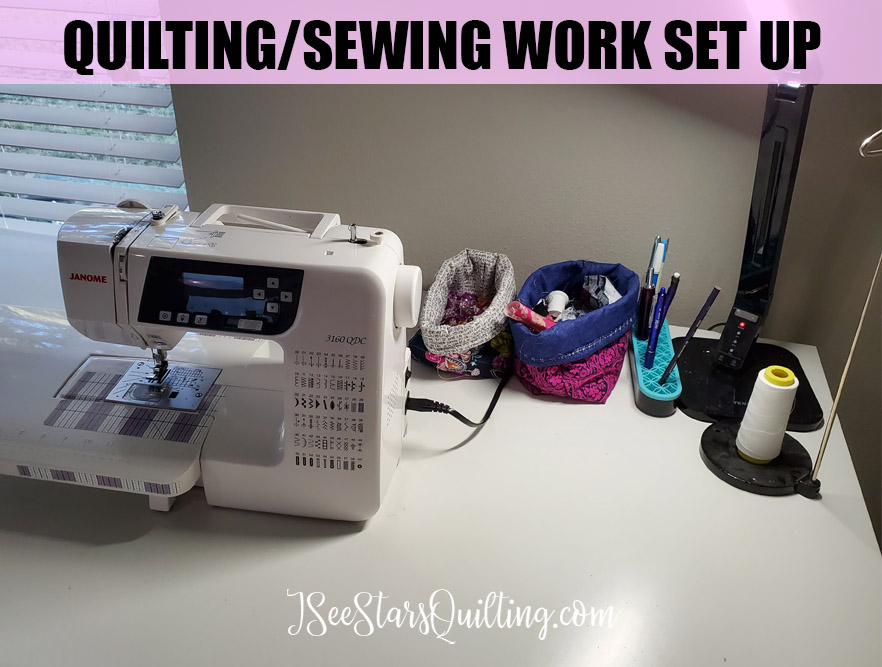
      This is where I sew = where the magic happens 😍

      I have a large table area that is roughly 30″ x 60″ (exact IKEA Linnmon table top is 59″ x 29.5″).

      My table is held up on one side by an IKEA Alex drawer set that hold a lot of my sewing machine tools. The other side has a small 4 cube shelf that holds… what I like to call my oddball crafts – jewelry making, beading etc. The things I don’t get into very often, but I still enjoy having it around and accessible.

      On my right hand side is where most of my cutting and ironing is done at a counter height table so I have access to that via my spinning chair if I run out of counter space or need a little more room to spread out.

      After Sewing room Renovation picture

      If you’d like to see a full tour of my sewing room and the setup, check out this post! Sewing Room Renovation! – Before & After Pics

      I also have details on the furniture and organizational products I use in these posts:


      The top of my work area…

      I do require a lot of space to spread out while working. (I don’t think that it’s a bad thing, is it? 🤷‍♀️🤣)

      This table area was designed with SPACE in mind so I keep what is on top of my table to a very minimum. (It doesn’t always look like this… sometimes if I am in the middle of a large project you wouldn’t even know that there is a desk under all of the mess!)

      Creativity can get pretty messy, can’t it?

      Usually the only things that remain on top of my sewing table (when it is clean) are these items:

      I know. It isn’t much… The only reason I can get away with these few tools is because I have the drawer set to my left that holds and organizes a few more of my tools!

      I tried to find the equivalents of my favorite storage items on Amazon for you.
      Most of them were purchased from either Amazon or Target.

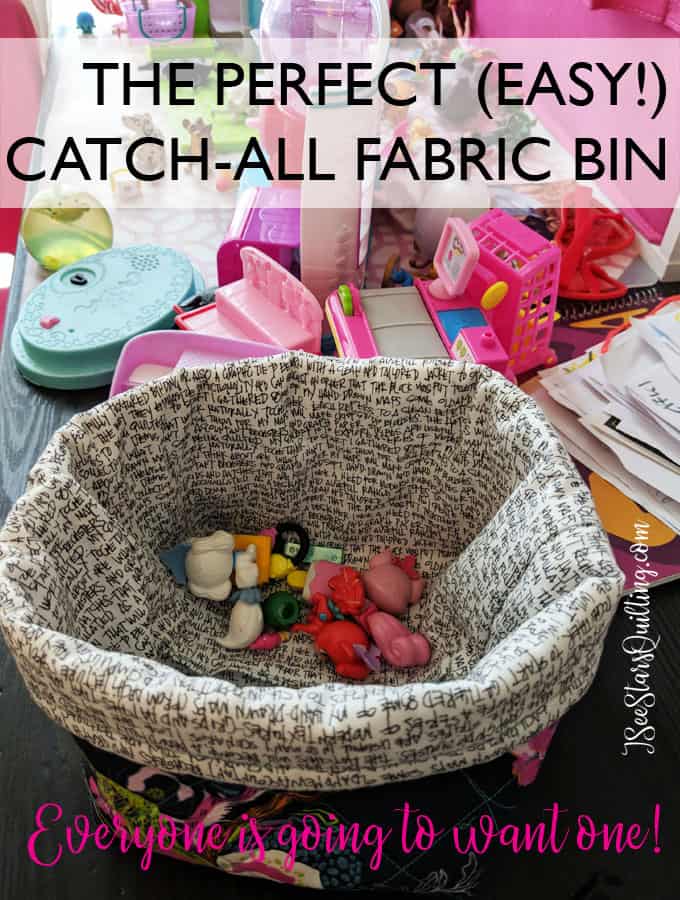
      If you’re wanting to make the cute little fabric baskets that I keep my scraps and my little plastic clips in, you can view the FREE full tutorial post below. The Perfect (Easy!) Catch-the-MESS Fabric Bin

      This cute fabric bin can be made in an hour and can be used all over the house! No extreme sewing skills required... its so easy!

      I use these bins all over my sewing room because 1) they are useful 2) I get to display my favorite pretty fabrics where I can see them – and 3) I can usually make them using scraps of batting so it is a way to save money on organizing bins. Win. Win… and um… Win!

      Ok let’s look down into the drawers that I keep on my left-hand side!

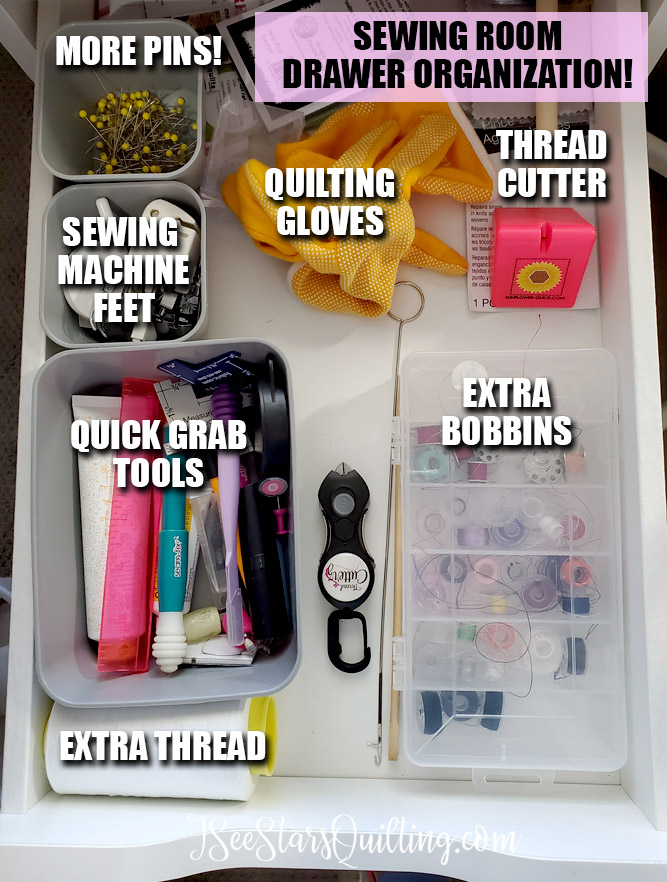
      The top drawer holds my MOST used items – bobbins, extra thread spools, all of my sewing machine feet, my seam rippers etc.

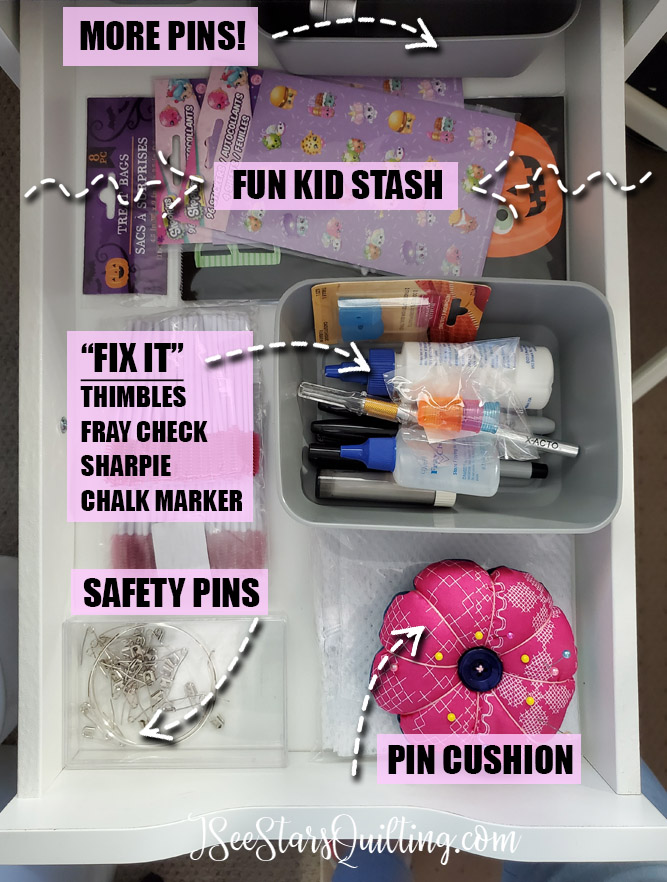
      The second drawer holds the lesser-used items, but still, things that I want to keep close – Pincushions, thimbles, safety pins for basting, and a few other tools.

      Where do I keep my other tools?

      Just to clear up any confusion… no, this is NOT ALL OF MY SEWING SUPPLIES! It is however, the MOST USED tools of my sewing supplies.

      I do have other tool storage solutions around my sewing room.

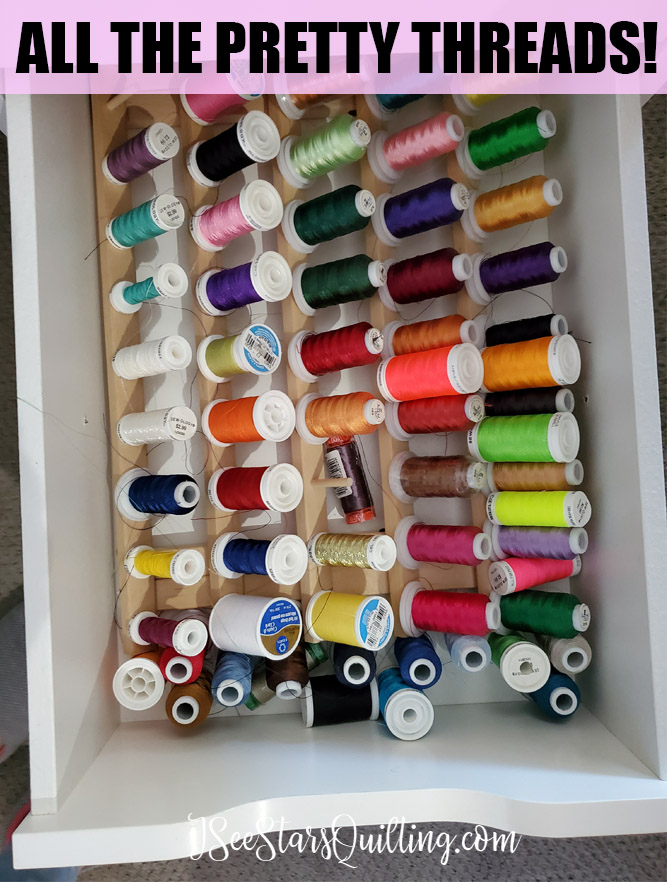
      For example, this drawer that lives over by my Embroidery machine. It houses my thread collection that at one point used to hang on the wall.

      I have found that finding/making drawer space for my tools not only drastically reduced the clutter in my space but allowed for a more streamlined and open canvas for creativity to flow too.

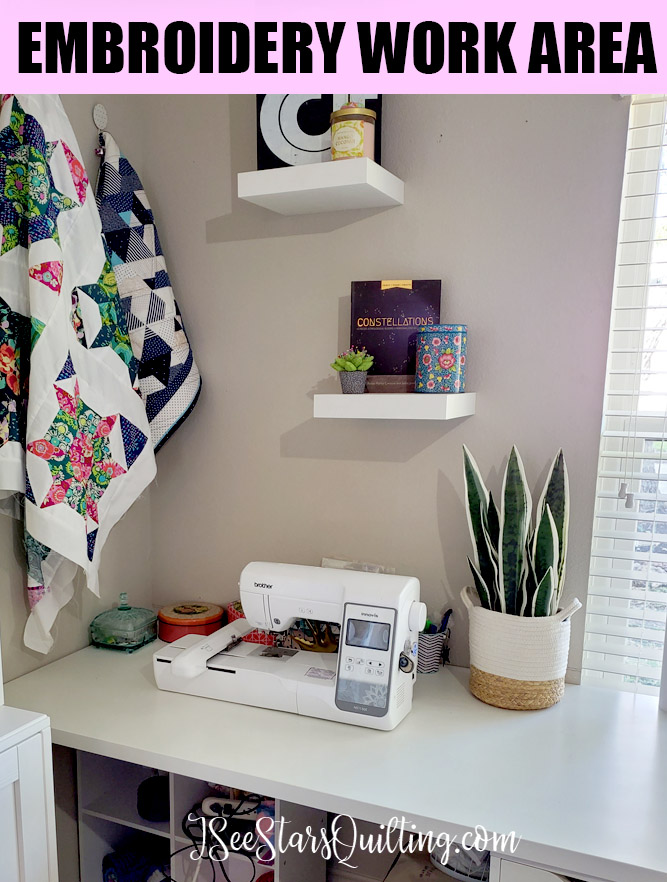
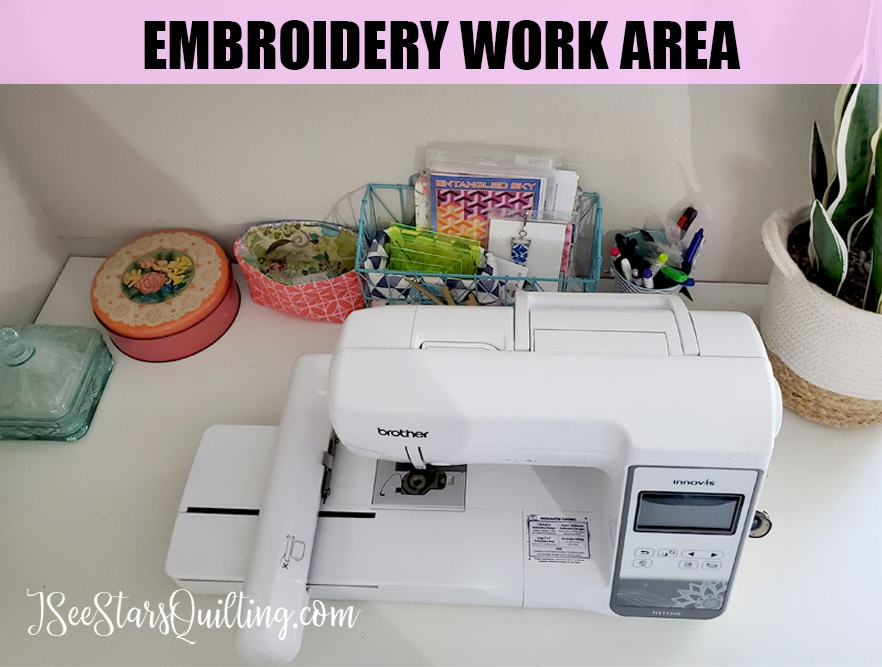
      My embroidery machine/area mirrors my sewing area in my “T” shaped work area. So it is set up similar to my sewing machine area but with the IKEA ALEX drawers on my right instead of my left.

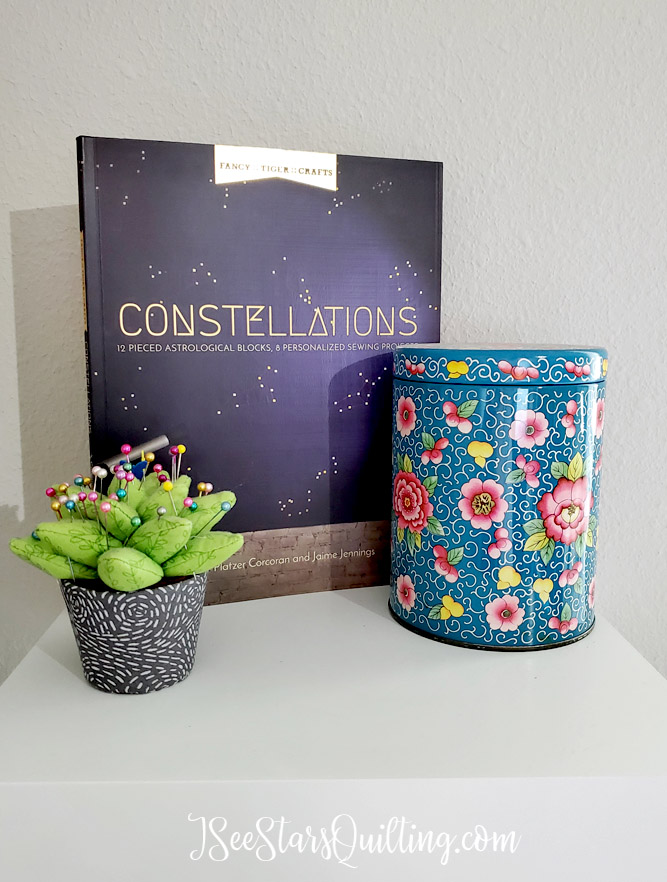
      The desktop is also similar with just a few essentials on top, but because I tend to need less workspace here than on my sewing machine where I do a lot of my quilting… I have a few extra knickknacks and treasures on display that I like to keep where I can see them.

      And that is pretty much it… I have a few other areas where I keep tools organized and stored but I like having only the essentials around me when sewing.

      I also organize my tools based on where I use them within the room. Example: Cutting tools are stored with the cutting table, embroidery needles are stored by the embroidery machine, seam rippers are stored… everywhere! haha, just kidding, but I do have several of them around.

      What about you? what do you keep on hand and within reach while sewing?

    • Sewing Room Renovation! – Before & After Pics

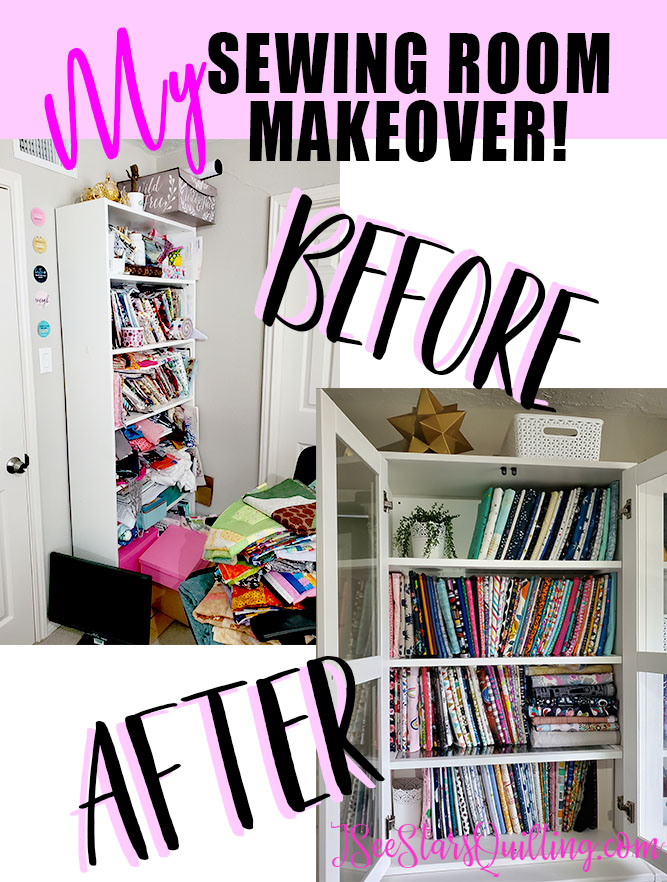
      Hey hey! So it feels like I’ve been hinting at this sewing room renovation going on behind the scenes for like all of 2020 with little progress to show for it. This year has been rough in a lot of ways – but I finally have the official Sewing room Reveal before and after pics to show you!

      Get ready because even I am quite shocked at the difference in the photos!

      Before and After Pictures Sewing Room Renovation

      If you want to see more of the planning stages of this Sewing room renovation, check out this post: Sewing Room Face Lift: Planning Stages

      It has been a really long project but it was definitely worth the sweat and the tears to get to this point. I hope that you get a little inspired and walk away with some ideas for your own space!

      If you prefer to watch rather than scroll…

      I have a couple YouTube videos where you can walk through it with me!

      And because everyone loves a good makeover that shows all the icky parts in between – and oh yeah, that shot of me kicking in the wall and being all cool (Chip Gaines style)… I made a second video to document the journey and show you what happened behind the scenes! Enjoy!

      Make sure you subscribe to my channel on YouTube so you can stay up to date with all the fun and wonderful tips, tricks, and tutorials that I share!

      I am happy to finally be able to share the whole process with you. I think it’s really important to see all the not so pretty parts just as much as the final “wow” moment everyone loves to see.

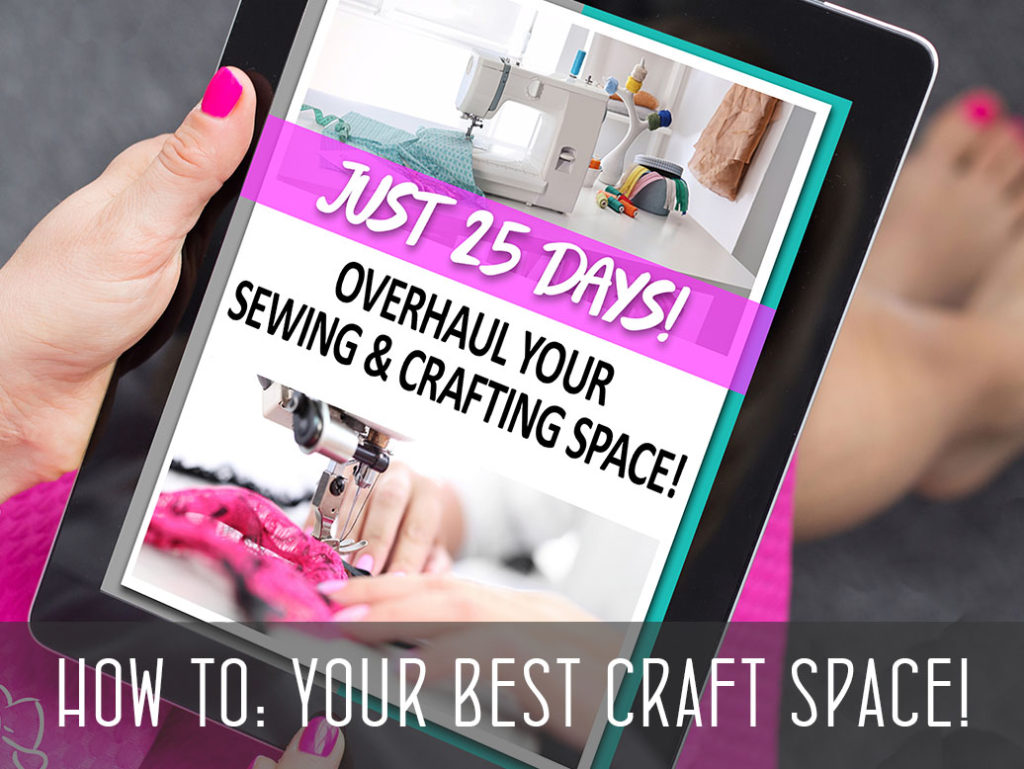
      Check out one of my most popular guides that takes you through a simple step by step process to create the space of your dreams! Just25 Days!

      How long did my sewing room renovation take?

      Ok, so like I said… this process has been going on for a while. I made it way more complicated by doing a full purge, acquiring new furniture, selling things, knocking out walls, and waiting on the mailman to bring me my favorite organizing tools instead of going out and shopping a lot… oh and in the middle of a pandemic…

      I officially started thinking about making this room renovation a reality around April/May-ish? And completed it about September-ish… while putting the finishing touches and little “sparkly” touches to it (calling it officially FINISHED) in October.

      Holy cow, right? It has been a heck of a year and a LONG time living in a state of disaster. In hindsight, I could have made this easier on myself in a lot of ways…

      Now, every renovation doesn’t have to take as long as mine did obviously!

      I had many reasons for it taking an extra long time:

      • I bought several new pieces of furniture that needed to be assembled. (Looking at you, IKEA…)
      • I cleaned out A TON of my belongings and parted ways with many craft supplies I was holding on to for “someday” – This included selling and gifting purges. 👏
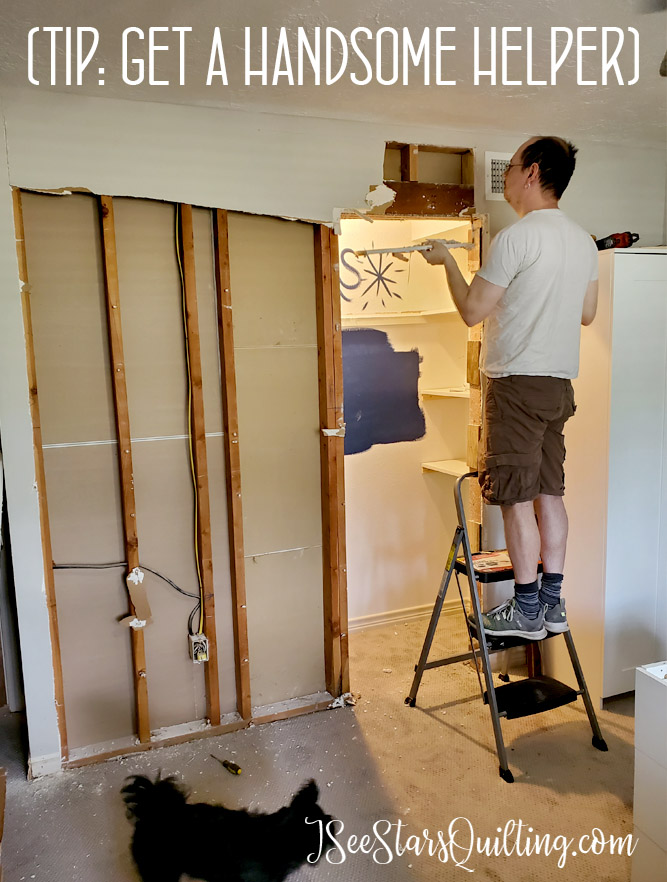
      • We took out a wall and did some remodeling to absorb a closet into my space.
      • I took my time to make sure I was solving my storage solutions for the long term needs and not just the short term
      • Not everything I wanted was in stock and I had to put things on hold for a while.
      • aaaaand the theme of 2020 taken into account – unexpected is just a way of life.
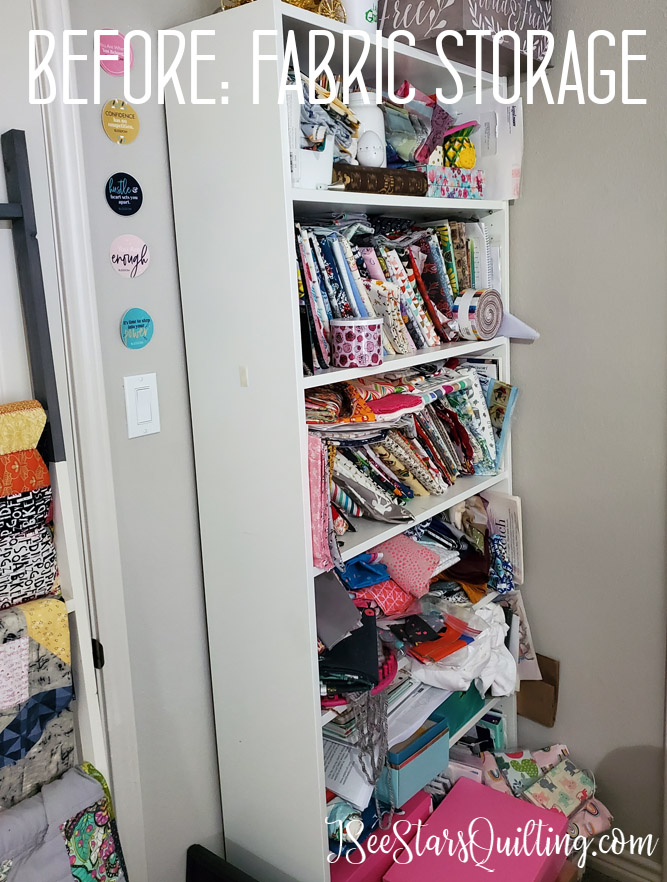
      • We also had several other home projects that took priority including: re-doing an upstairs shower that leaked into our downstairs ceiling, working on our laundry room, replacing the windows in our house, and several other things I don’t even want to remember right now. It’s just been a long year lol

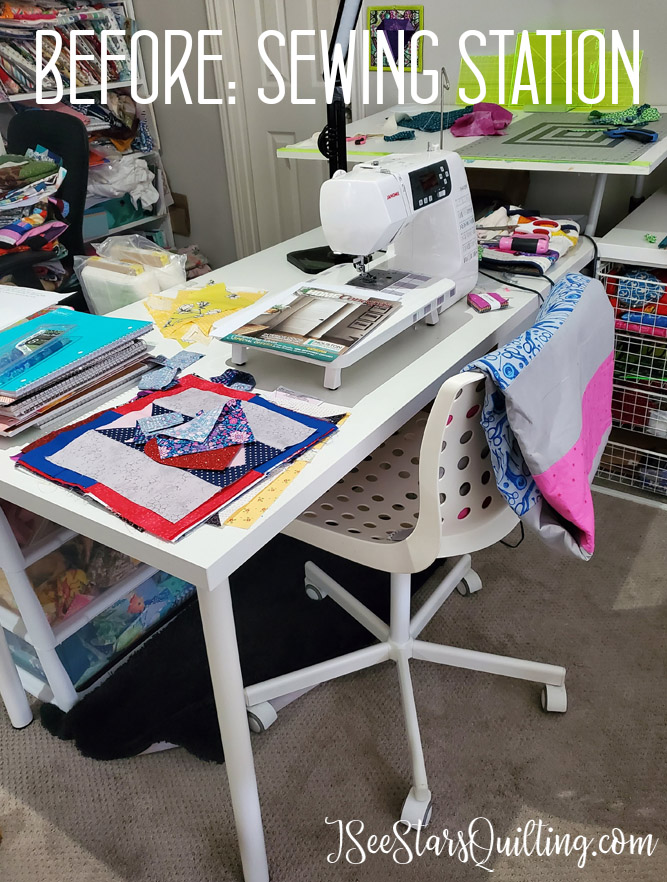
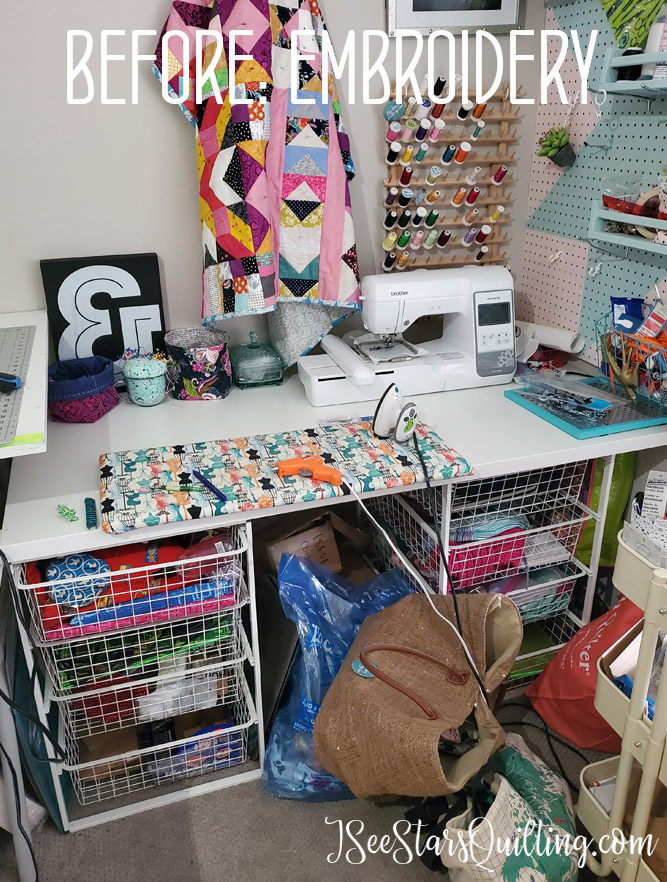
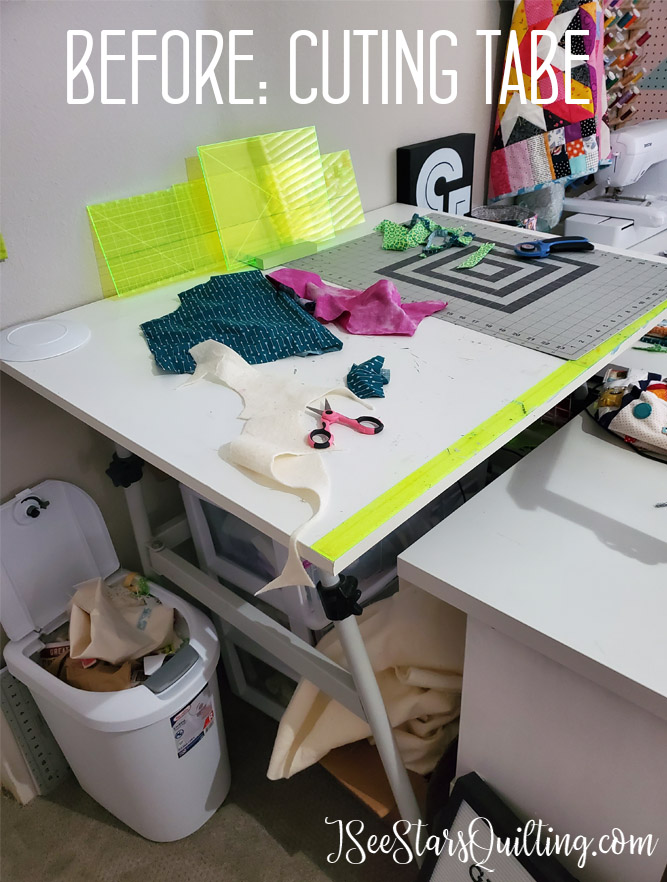
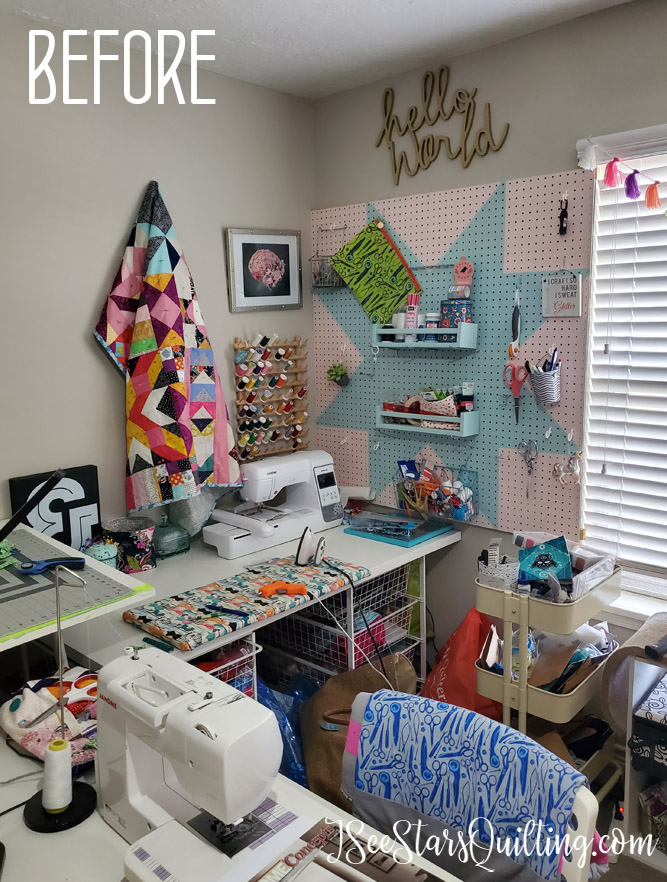
      Let’s take a look at the before pictures!

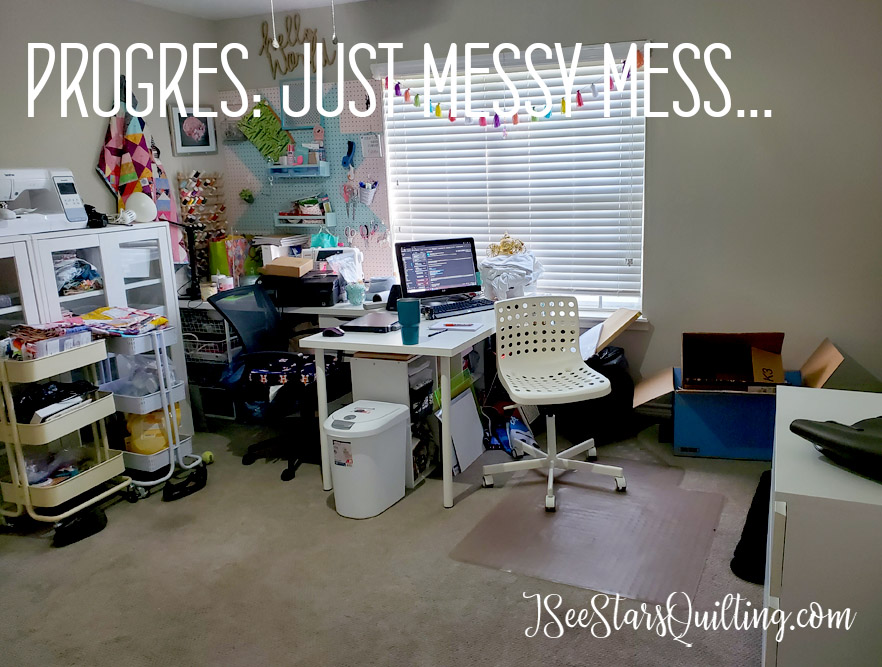
      This is where we started. A functional space, yes. but pretty? not so much.

      I realize that having a space like the extra bedroom that I have is a blessing. If you want to see what my sewing space looked like in our old house and why I LOVE this new space, check out these posts:

      Tour of My Sewing Room

      Sewing Room Face Lift: Planning Stages

      Fabric Storage: What Works For Me + A Video!

      Keeping A Clean Sewing Space: A How to

      Sewing Room Tour! (what it looked like after we moved!)

      So, while I really was enjoying my new space with a door I could close and keep separate from the rest of the house, I felt like I wasn’t doing the space any favors by just using it as a storage room.

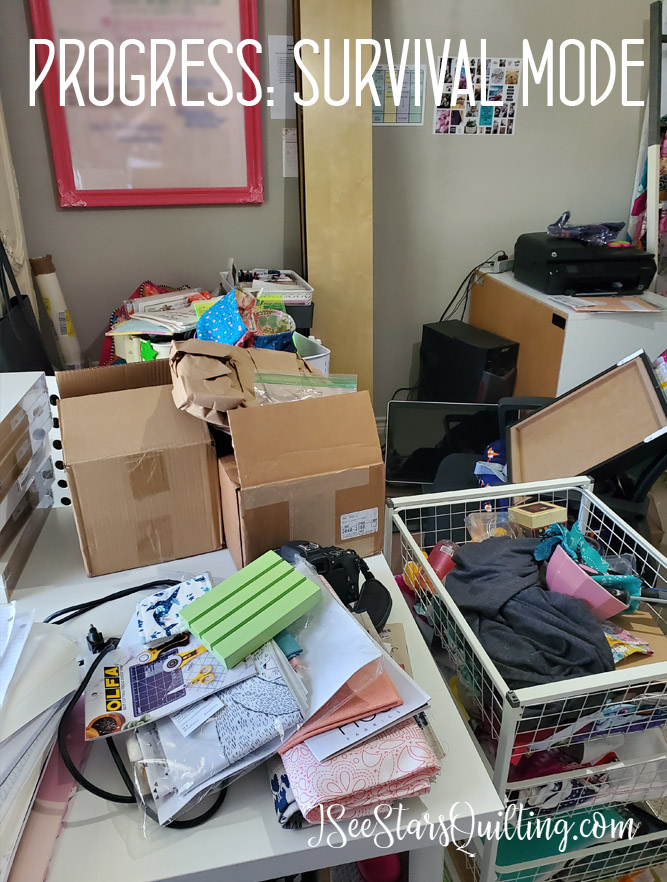
      Can you really call it your zen zone if it is a disaster 80% of the time and gives you anxiety with all the piles laying around?

      This is what I walked into every single day. I love the things in it, but I didn’t love that it felt cluttered all.the.time.
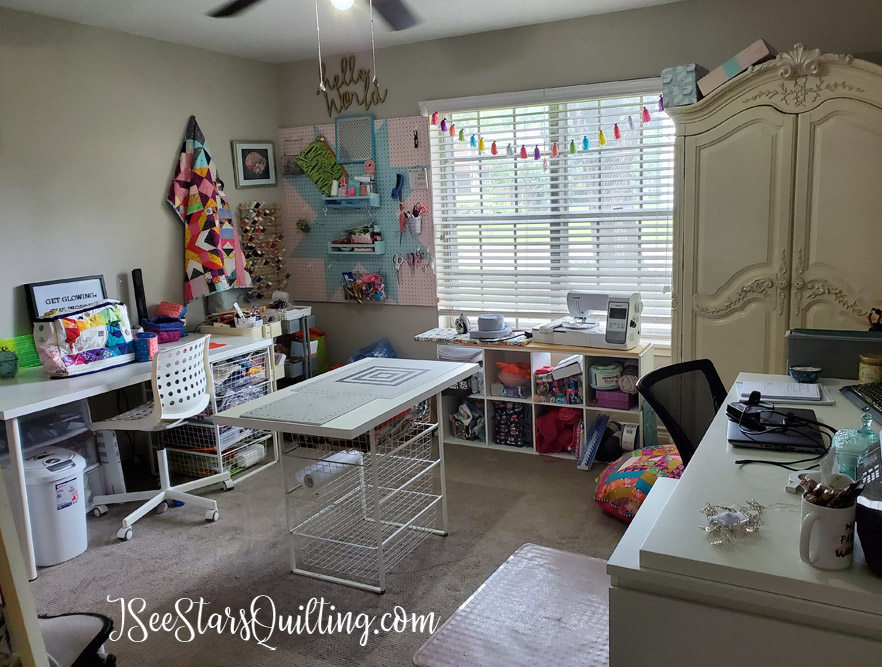
      On one hand, it fills my heart with glee to see all my pretty crafty things around me. On the other hand, I felt like I was suffocating in constant clutter.
      This “creative zone” is a really good and comfortable spare bedroom size room. I felt like I was working within tight confines and trying to come up with storage solutions constantly. – If you have a good size collection of crafty things… you KNOW it adds up fast, right?

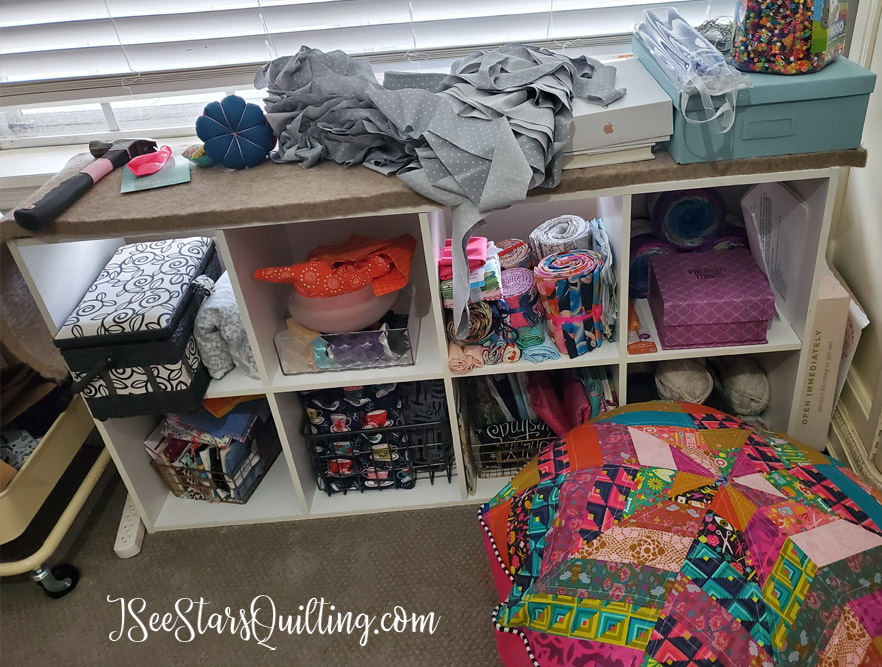
      I really have no excuse for my fabric collection before – It was beautiful and organized before and then one day, I just didn’t take the 2 seconds to fold things nicely, and slowly it dissolved into… whatever this leaning tower of fabric is.

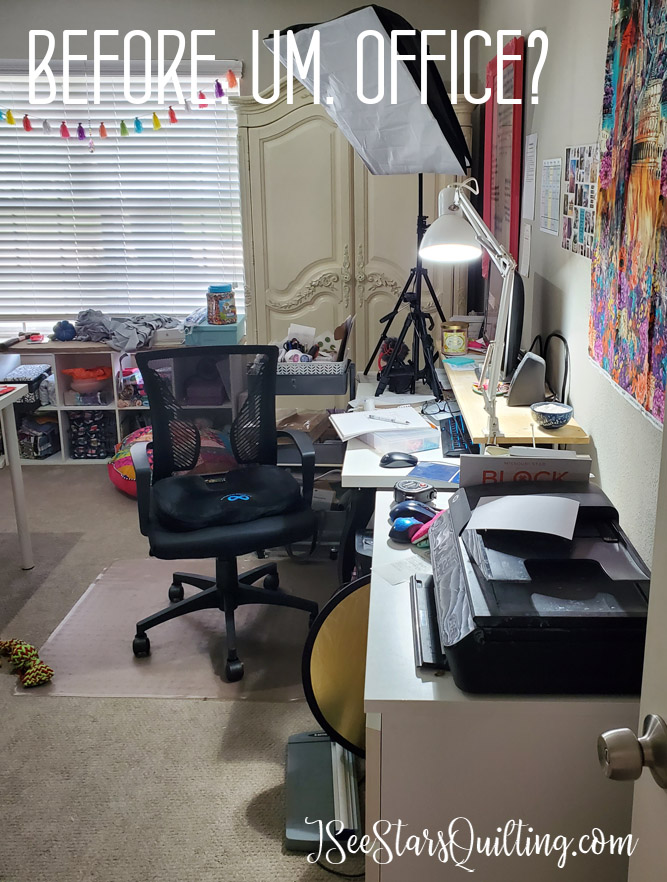
      This space also serves as my office/video zone/editing room. So, while on one side I have my sewing space, this is what was on the other side. Functional? Yes. Absolutely. Pretty? – Nope. Not a bit.

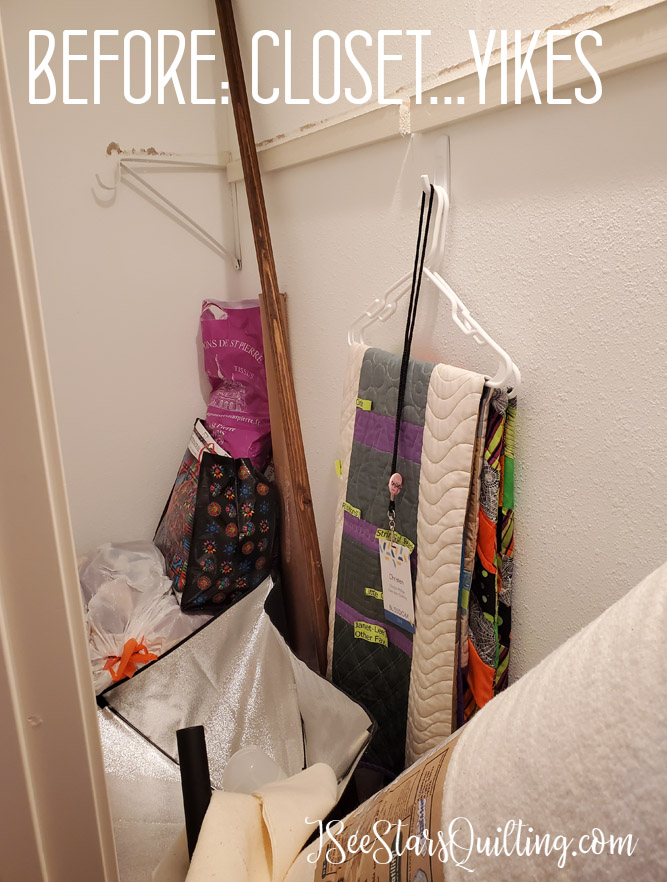
      The last “before” picture that I am going to share is of the closet for the room. It was a very long, skinny and awkward design that made it nearly impossible to organize anything but perhaps seasonal clothing, if this were a bedroom… But for sewing supplies, it was a black hole of disaster. This was the largest project of the sewing room renovation

      Deciding on priorities:

      When re-organizing your space, it is important that you decide exactly what it is you want. I mean EXACTLY – specific achievable goals… not just a vague idea of a space that makes your heart flutter.

      My “Must Have” needs for this room…

      • Obviously, a crafty zone where I can spread out and be free to create!
      • Multiple zones: sewing, embroidery, cutting/ironing area
      • Storage.storage.STORAGE – At the risk of sounding like a broken record, I wanted a place for everything and I didn’t want it to be out on display all the time.
      • Clean and minimal feel with lots of open countertops
      • Business/blogging area where I can handle office work and video editing – separate from my sewing area.

      Things I would still like to add down the line… because no creative space is ever “finished”, right?

      • Can lights in the ceiling for more light all over the room – for now, my table lamps are working just fine.
      • Beautiful quilts stacked everywhere! I love using my quilting projects as a useful decor item – I’m working on this one 😉
      • Super cushy/girly seating that would be approved by Elle Woods. PINK and comfy, yet also supportive for optimum posture is ideal.

      (FYI – that’s a reference to the move Legally Blonde, if you’re wondering…😂)

      The in-between stages: Sewing Room Renovation Progress Pics

      While I was knee-deep in other projects going on around the house (more on the hic-up project in a minute) I played with rearranging my office space and sewing room to see what layout felt like it suited the room and my needs the most.

      For example, Did I want an island in the room? There are so many cute ones on pinterest! But I also really like having floor space… so I opted out of that scenario and ultimately decided on a T-Shaped work area.

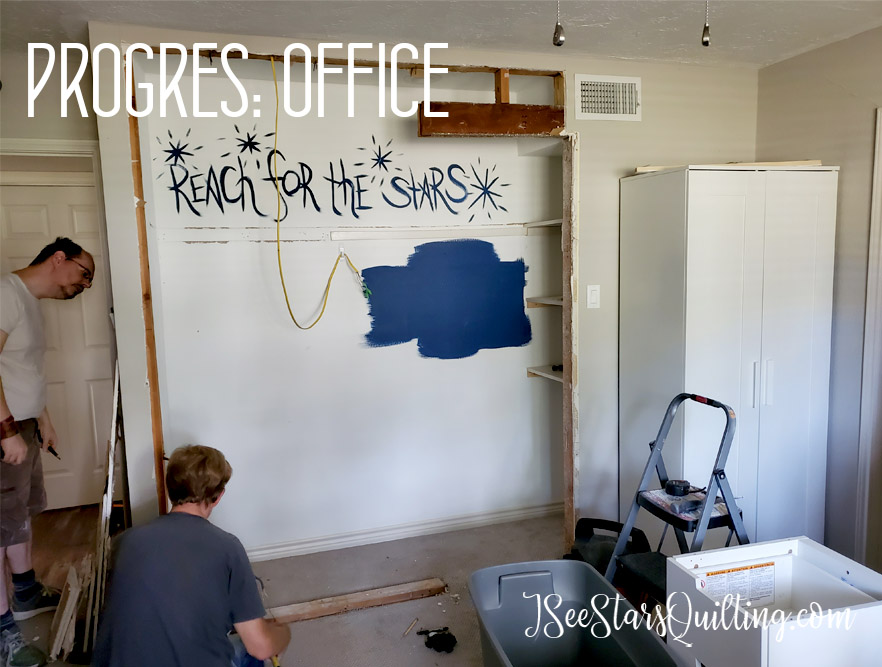
      When it came to taking out the closet… it is beyond my skill set, so I enlisted the help of my 2 favorite guys. My dad and my husband were absolutely essential in this project and I couldn’t be more happy with how it came together!

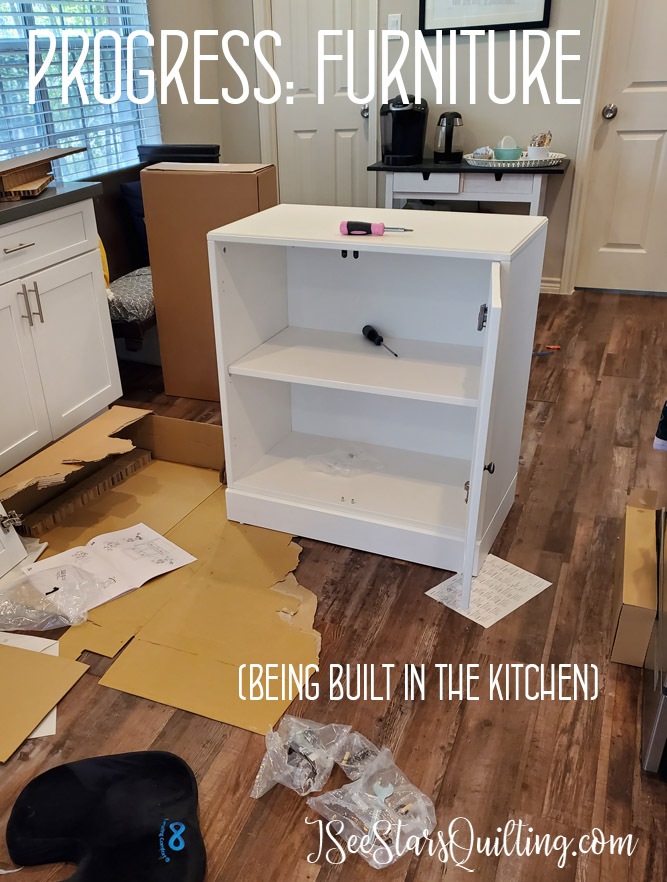
      I remember at one point I was questioning what in the world I had gotten myself into because there just wasn’t any more floor space in my house and we were covered in cardboard boxes and bits and pieces of ikea hardware all over the place. This picture below was taken in my kitchen because I was that desperate at that point. 😜

      Note: The message on the back of the closet wall – On every single wall that I paint, I like to paint an inspirational secret message. It serves no purpose whatsoever as it gets painted over. I like to think that it adds a little extra magic to the room. 😍

      I’ve done it for as long as I can remember. My kids knew about the ones that I painted in their rooms and will occasionally bring it up in conversation… Originally, I was considering a navy blue paint color for that nook but changed my mind thinking it would make that corner of the room feel too dark and closed in with the beautiful dark granite counter-tops. (I found them for a steal of a price through my neighborhood website!)

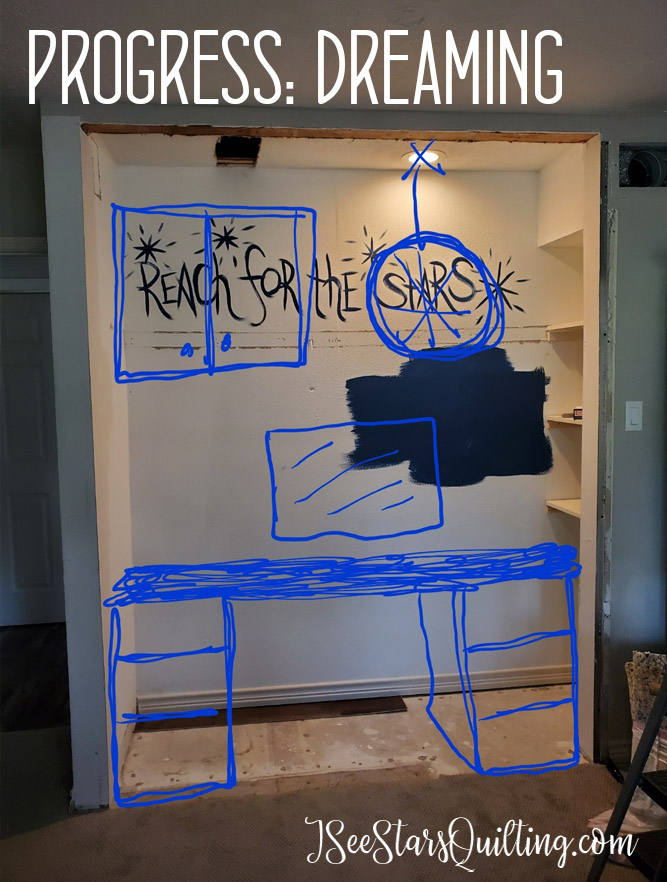
      The pic below was my dreaming phase/sketch of how I wanted my desk area to look. See the shelves on the right? We kept those from the closet before. It is perfect storage for my camera, microphone and other office books! Accessible, yet out of the way so I have plenty of room to work.

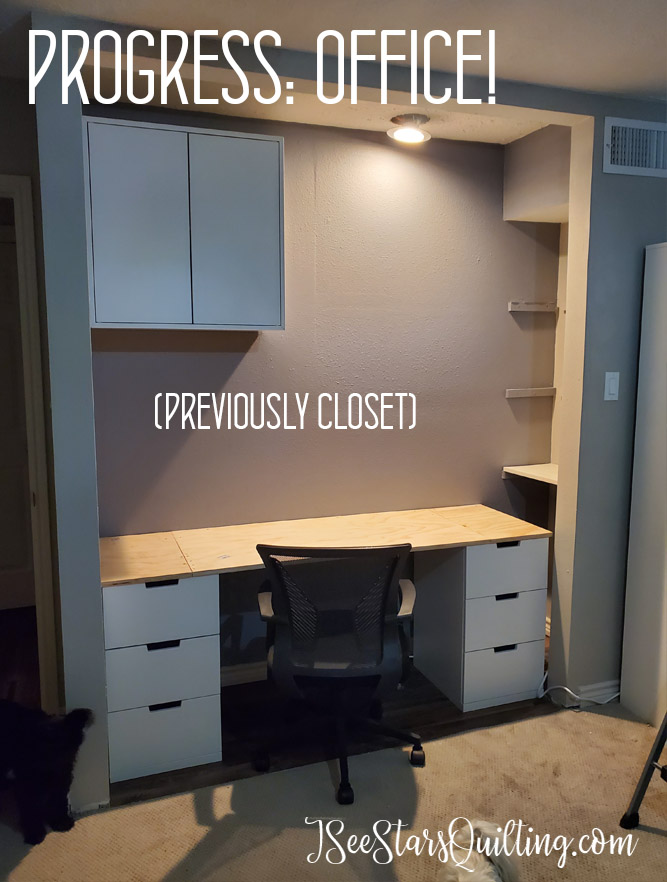
      And here is the progress all painted and cabinets installed, plus the beautiful flooring!

      What the rest of the room looked like…

      The behind the scenes was like a sewing war zone. It was an explosion of boxes and a very odd collection of piles everywhere

      About that hic-up that I mentioned earlier. My Sewing Room renovation often got put on the back burner of home projects. We also ended up dealing with working on our laundry room, organizing various closets and other home sanity projects as well as new windows on our house. Oh yeah, and the pandemic too. It has been a weird year…

      Before and After Pictures Sewing Room Renovation

      The After Pictures

      For a full tour, make sure you check out the full video on Youtube.

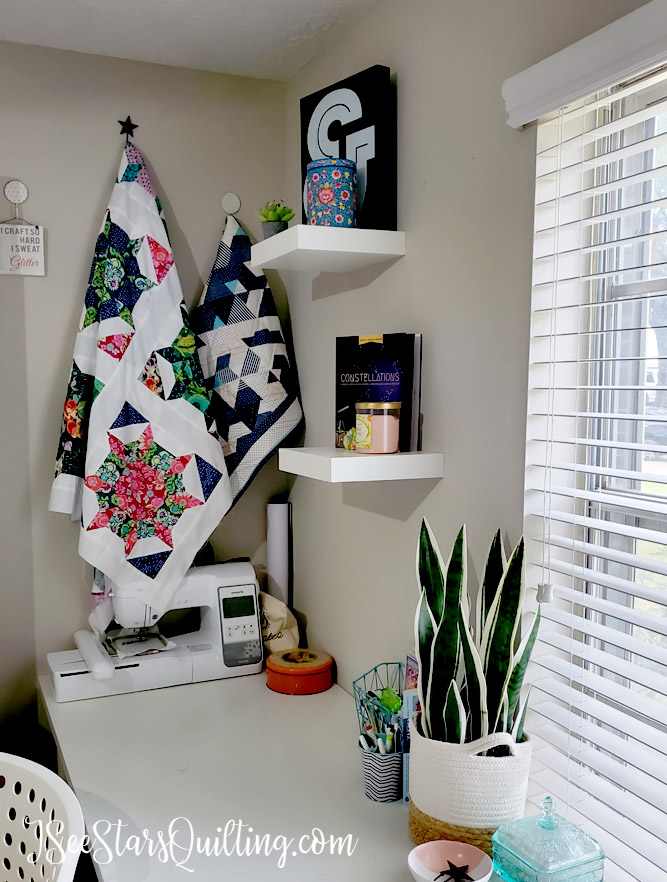
      I am loving creating in this space now. It serves every single one of my goals and I can’t wait to walk in here every single day! 🙌😘

      After Sewing room Renovation picture
      After Sewing room Renovation picture
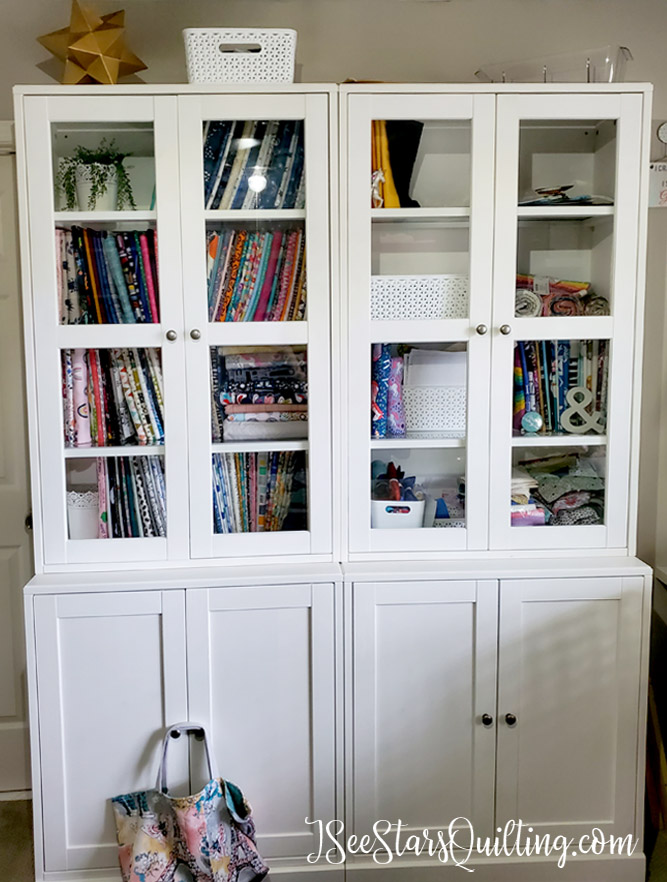
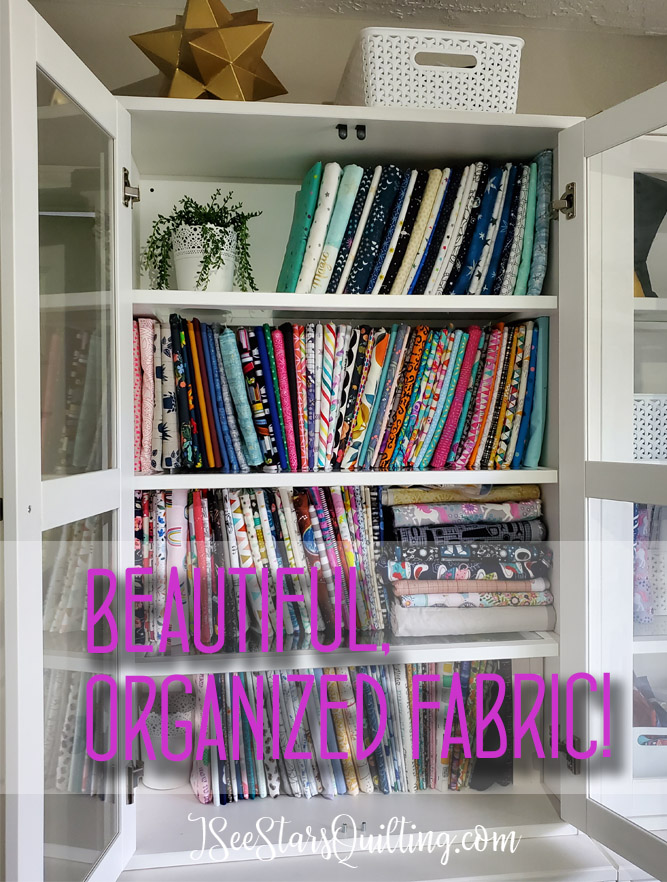
      After Sewing room Renovation picture - Fabric Storage
      After Sewing room Renovation picture - Fabric storage

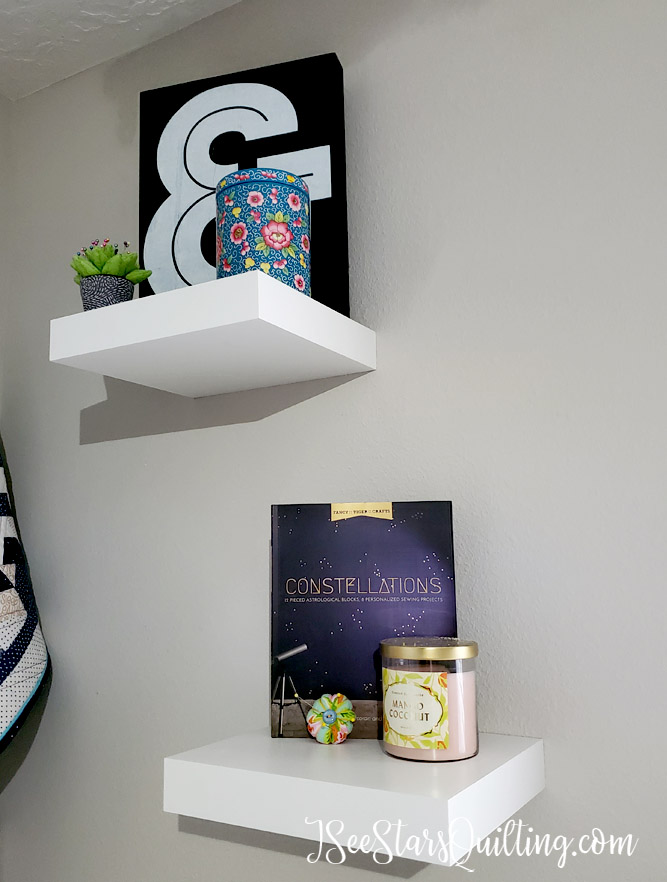
      I made sure that I had display space for my most favorite décor items and books. Oh, how I love all of my art/craft books!

      After Sewing room Renovation picture - Decorative items

      What I did to save money while renovating

      I have several tips on saving money as a crafter. Everything from 8 Tips for Quilting on a Budget and Cheap Sewing Room Storage to Fabric Shopping – The Smart Way To Do It in 6 Steps.

      I did a lot of research online and IKEA seemed to have the best reviews for durability, versatility, and cost overall.

      My favroite Ikea Products for the sewing room

      I also constantly scrolled websites that has second-hand furniture in my area (be careful that you do this safely!)

      Utilizing websites with used furniture was a big help. I found a few gently used pieces for FREE and I was able to sell a few of my pieces of furniture to turn around and invest back into the space.

      If you have any questions, feel free to leave them below. I’m happy to answer them for you and go into detail on anything you wish to know more about.

      It is a little hard to sit down and write absolutely everything that happened over the past 5 months or so. It was a long process, but well worth the sweat, mess, dust & tears!