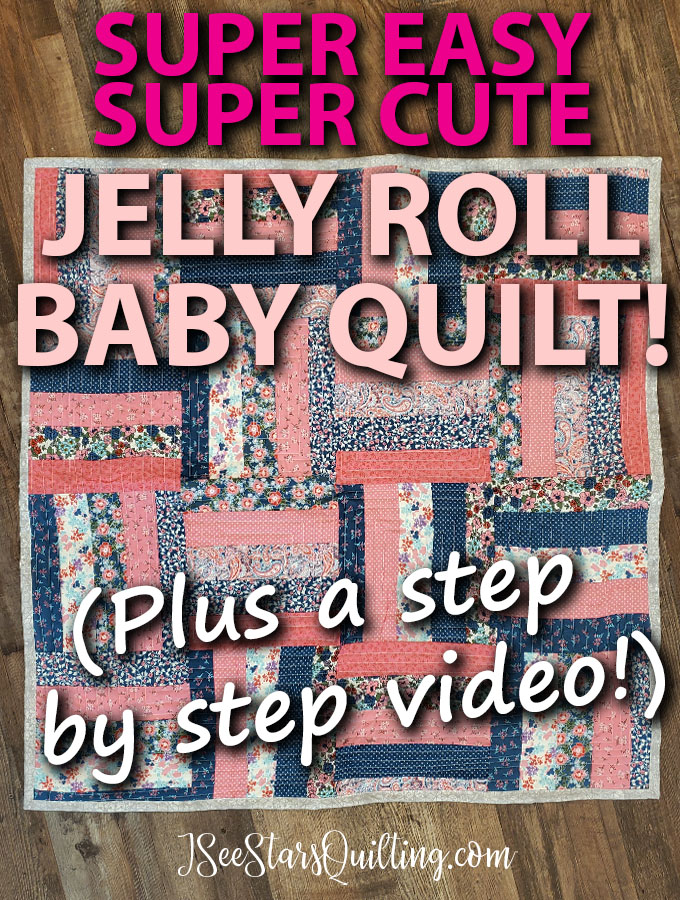
If you’re looking for a super cute and easy Quick Jelly Roll Quilt Pattern. This is it. You’re going to love this!
There isn’t a “pattern” exactly… mostly just guidelines for some structure to your quilt with room to make it all your own.
I even created a video so you can see the process of this quilt come together. Check down below for the video step by step instructions!
Here is what I started with: A small Jelly Roll with 10 Fabrics/20 strips (2.5″xWOF)
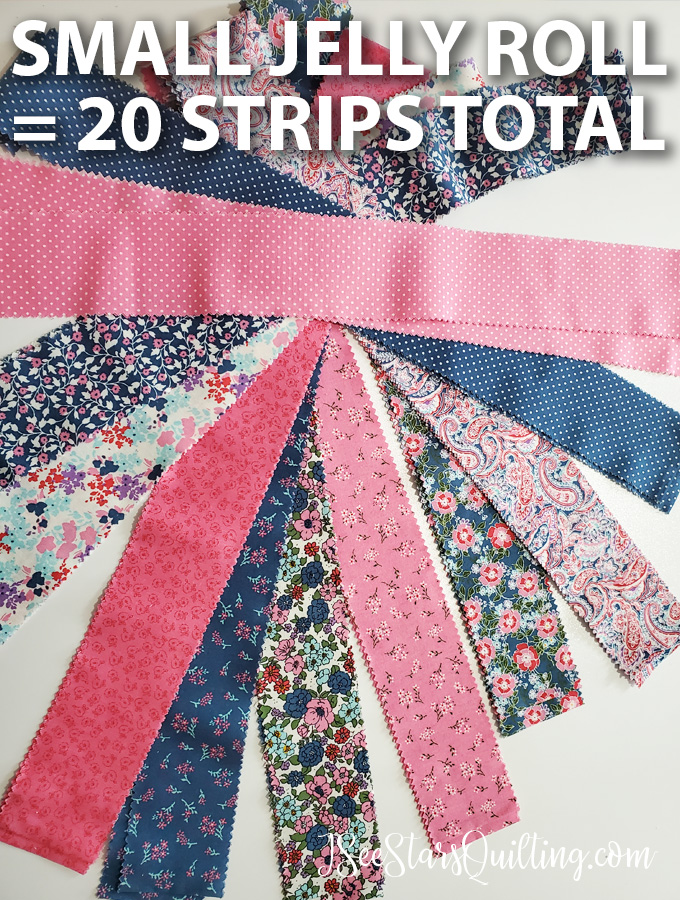
I’ve had this cute little mini Jelly Roll for a while. I found it at Joanns Fabric. In case you’re wondering… I have seen it recently in stock again. It must be a fairly popular one.
I fell in love with the colors and the sweet print. I knew it would make an adorable denim baby quilt someday… but then it sat on my shelf!
Jelly Roll Month
Real quick, I have to tell you…
I’ve been sharing my tips, tricks, and tutorials for using up your Jelly Roll precut stash this month (April 2021)
I love to collect them and “save them” for the right occasion but I have never actually sat down and decided what any of those occasions would be haha… so it is definitely time to use those quilt precuts up! Make sure you follow me you Youtube and check out my other videos!
Back to the cute quilt… 🤩
Here is the finished quilt. It is a super fast pattern with lots of tips and tricks to share to make this quilt a no-fuss pattern.
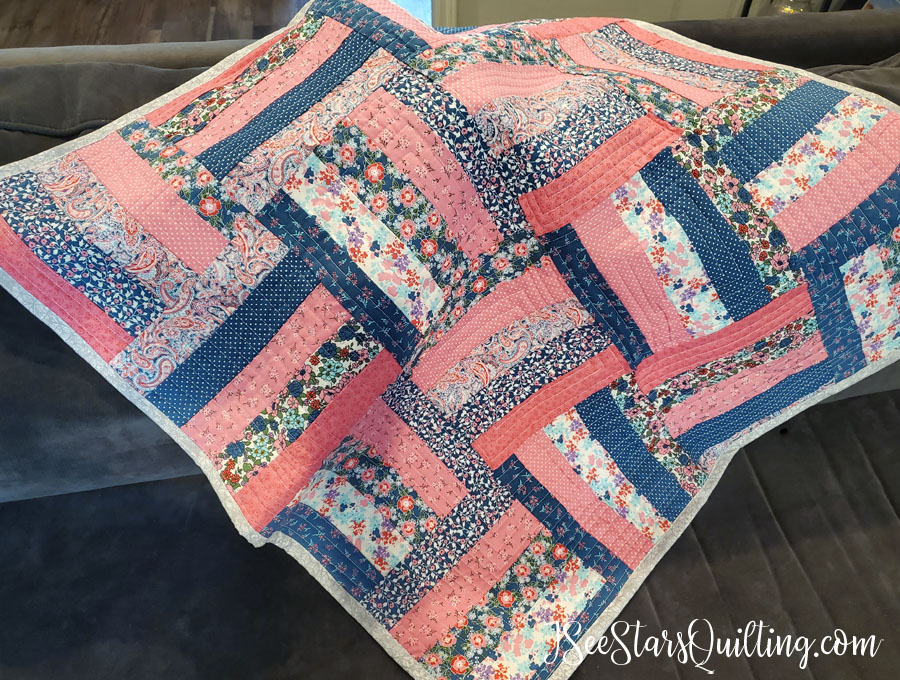
I love the way these colors just ooze sweet little baby cuddles! Maybe it is because I am a born and raised southern/country girl, but the mix of of denim blues, sweet pinks and touches of floral and paisley make me want to squeal! haha.
And I love it even more because I know that the recipient of this beautiful little quilt is going to do the same thing!

I added this gorgeous (and over the top girly) flannel unicorn backing on the quilt to add a touch of softness. The colors matched perfectly!
Here is a few closer looks at the quilting. I chose to do a really simple quilting. Just straight lines.
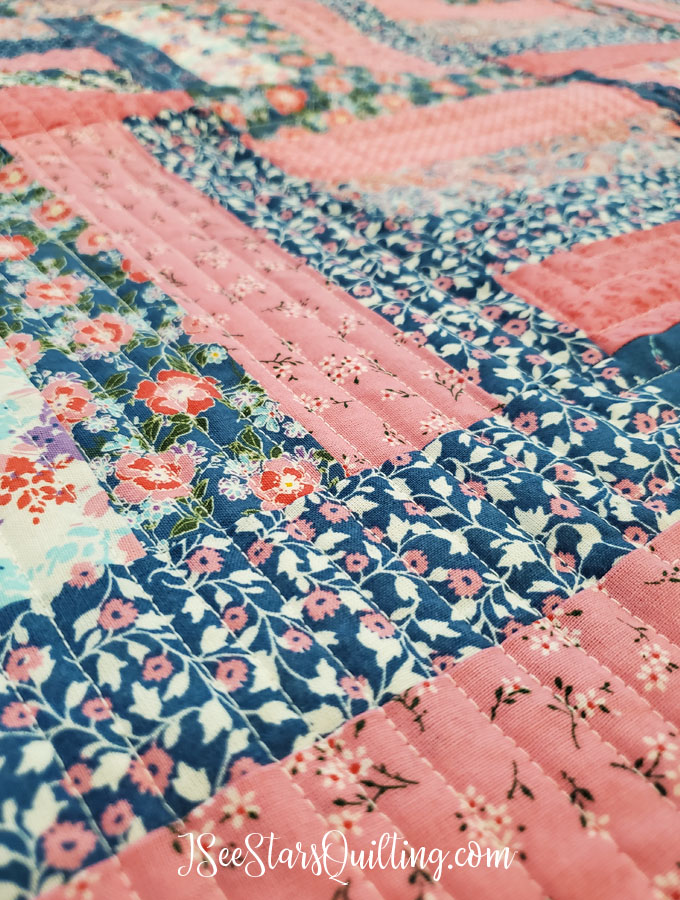
I chose a nice light grey fabric for the binding… if I had some extra denim laying around I would have LOVED to add a chunky wide binding to it… perhaps next time!
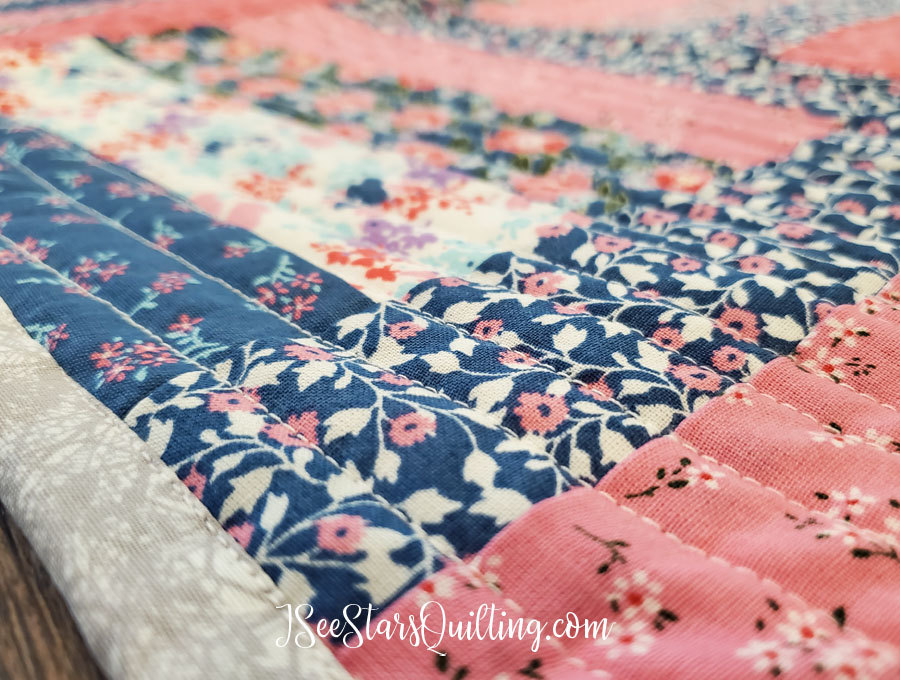
You might not be able to see it, but my quilting lines are not perfectly straight.
I didn’t use a ruler or let the slight curve/wonkiness of the lines bother me as I was quilting. I think the little uneveness of quilting lines add a lot of character to the piece.
Quilting Tips & Reasons
If you’re looking for some quilting ideas for a piece this size, I made a rough diagram of how I decided to quilt this one… it is rough lol But there is a method to it!
I like when people share their “easy” quilting patterns, because I almost always learn something new.. so here you go!
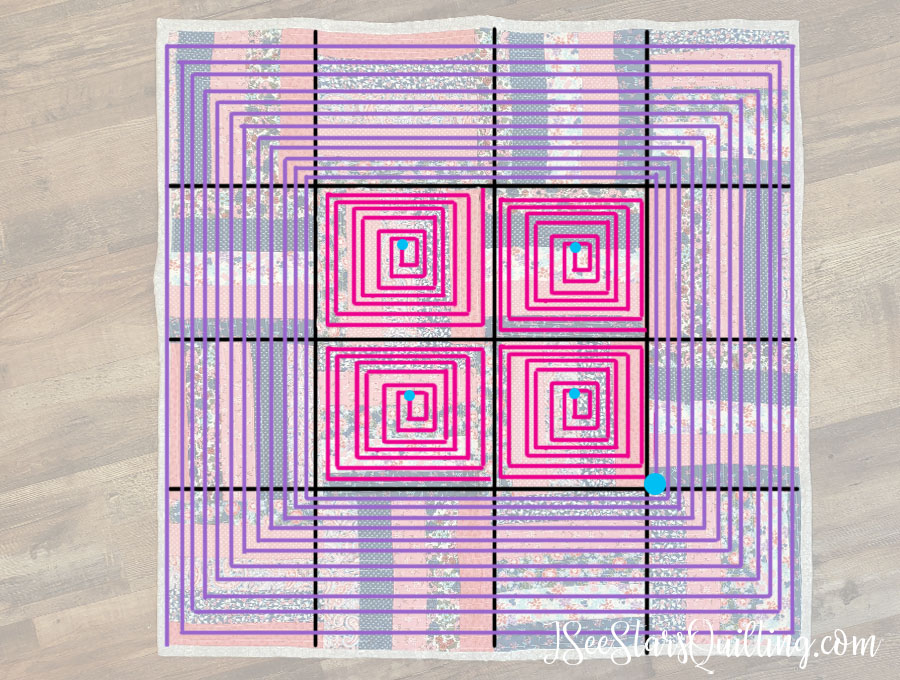
(The blue dots are where I started my needle when quilting the straight lines.)
I also was able to use the straight edges of my jelly roll seams for guidelines while sewing.
First, I worked on the center squares (pink lines) because it is always best to start in the center of your quilts and work your way out. It helps for a more even distribution of the quilt top to your batting and helps ensure you don’t have any shifting from the backing while you’re working.
Second I worked my way around the quilt to give it a faux border quilting look. (the purple lines) Again, I started close the the center design and worked my way out so knew the fabric didn’t bunch up or move around on me.
How long did this quilt take?
I honestly finished this entire quilt in one afternoon-ish.
I add the “ish” because I was filming, photographing and being a mom all while working on the quilt. I had to stop and take breaks and make lunches and take puppy breaks to play.
If left completely undisturbed, I could have finished this quilt in a few hours easy.
But such is life and I was still really happy to have this quilt done so quickly!
The Finished Quilt
The finished size is 40″x40″. I only used the fabric from the jelly roll, then added backing and binding! Check out the step by step video below!
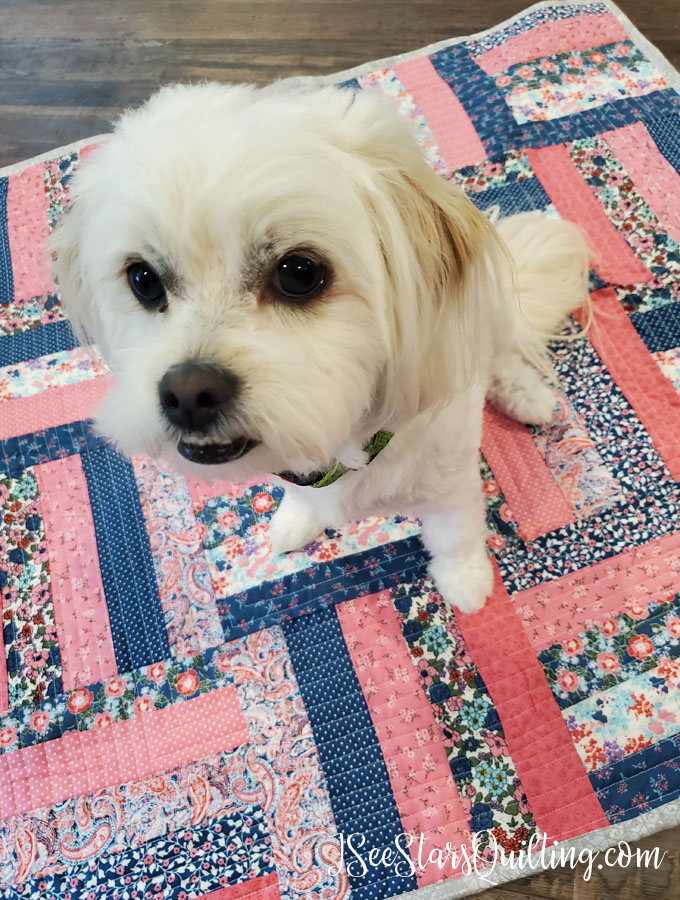
Want to see one last picture?
OK sure 🙂 Because any time we get down on the floor the dogs automatically assume we’re ready to give undivided attention… here is one of our puppies aka current quilt model stand in. 🤣
A few FAQs
Could you make it bigger?
Yes, absolutely! I used a smaller Jelly Roll to make this quilt. Remember a standard Jelly Roll has 40 strips. This one only had 20. So this size is big enough for a small child/baby wrap up quilt or maybe a nap quilt.
If you wanted to make it bigger, you could go with the larger jelly roll size to start out with (same exact process but more strips).
You could also add a wide thick border all the way around your quilt or even add sashing in between each block to increase the size.
What if I didn’t use a jelly roll?
You can always create your own strips from yardage of fabric! I’ve done that with scrap quilts!
You can also choose to make the size of your strips a little wider if you want to add a bit more width to each strip.
Where can I buy Jelly Rolls?
You can grab them from most of your local fabric shops.
I like Fat Quarter Shop or Fabric.com for their selection when I shop online.
Want more information on Jelly Rolls?
Check out my Youtube channel for more Jelly Roll Celebration Month videos!
If you have any other questions, please feel free to comment down below or contact me. I’m happy to answer your questions!