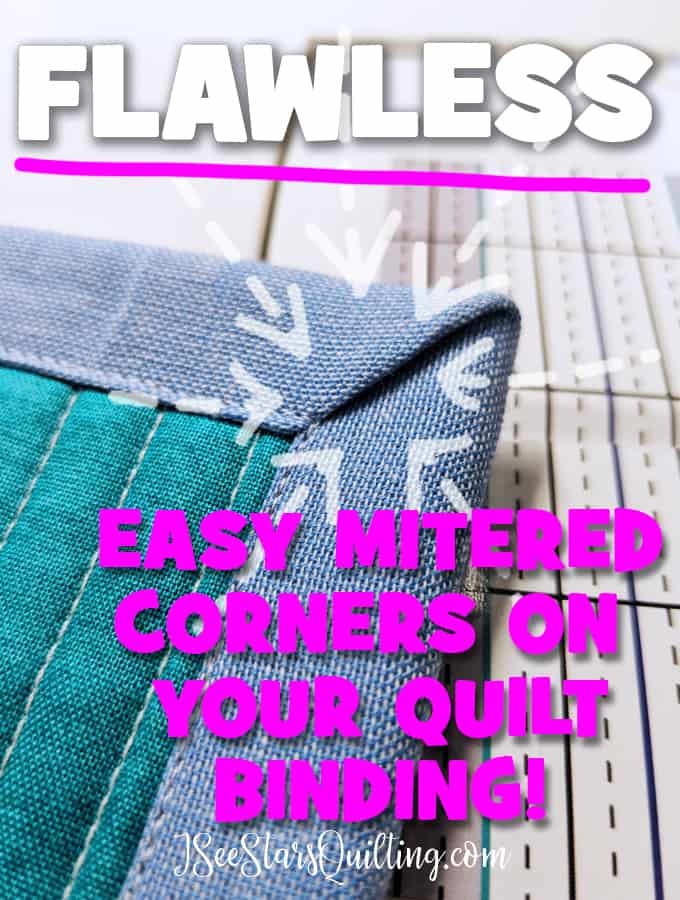
In the beginning days of your quilt journey, every single step of the quilt-making process is new and kind of confusing. You marvel over details of beautiful stitching and perfectly matched pieces! I’m going to show you how to create a mitered corner in your quilt binding.
It is actually really easy once you know the steps. (So don’t panic when you see all the photos below… I just like to be thorough in my tutorials!)
Creating a mitered corner in your quilt binding is a really important step to learn!
Seriously, after you’ve worked so hard on the piecing and all the quilting and who knows how many times you had to pull out the seam ripper?!
A sloppy quilt binding is just giving up when you’re so close to the end of making a beautiful quilt!
First of all, if you aren’t comfortable with sewing on your binding with a machine yet, you need to watch this video. It details out step by step – the whole binding process!
It is the exact steps that I go through for every quilt binding that I sew.
How to Create A Mitered Corner In You Quilt Binding
NOTE: I use a 2.5″ Binding strip to start out with.
1. Begin sewing your binding to the BACK of your quilt. (Start in the middle of one of the sides of your quilt)
2. When you come close to the corner of your quilt, stop sewing 1/4″ from the edge of the quilt.
3. Leave your needle down. Rotate your quilt 45-degrees. The corner should be pointing towards you.
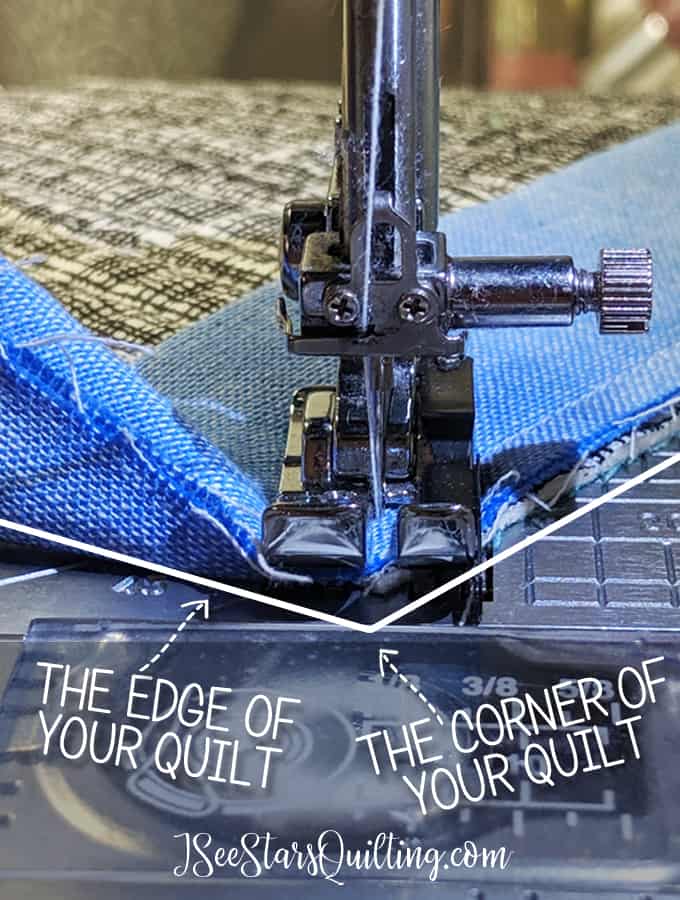
4. Sew straight through the corner of your quilt.
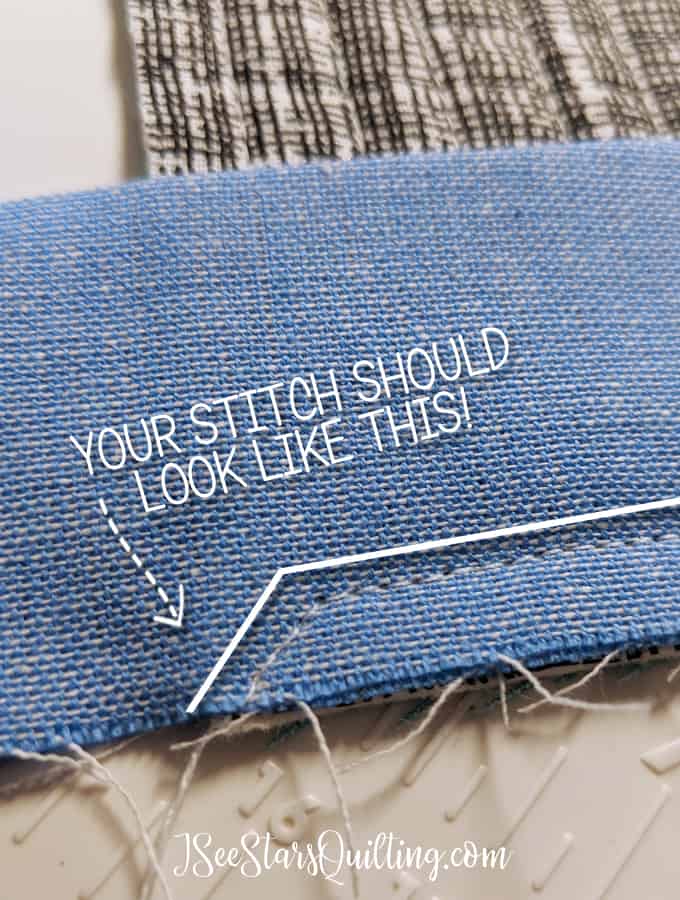
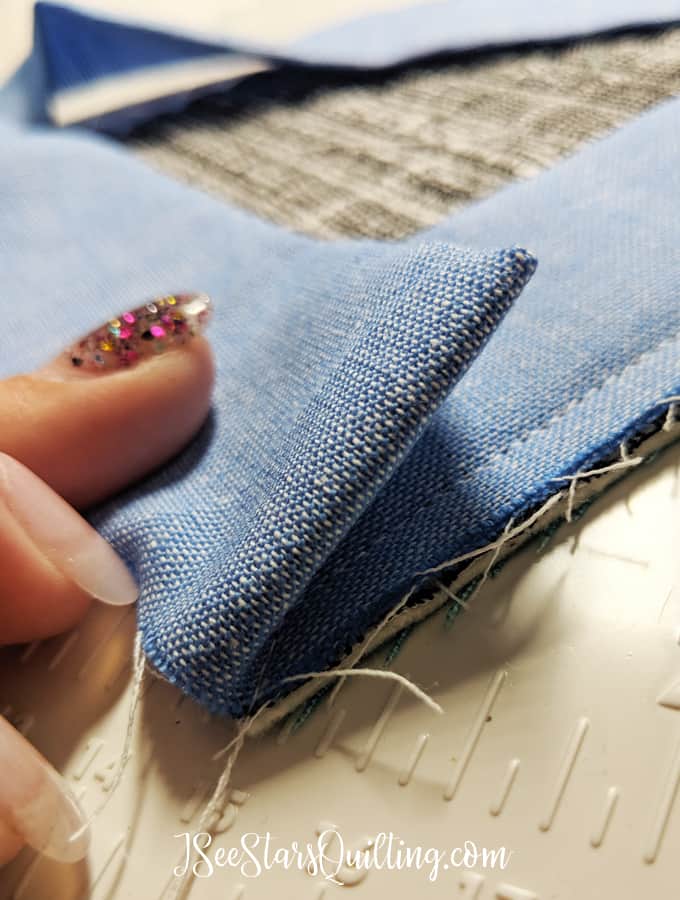
5. Take your quilt off the machine and flip your fabric up along the 45-degree line you’ve just sewn.
6. Keeping the 45-degree line tucked under.
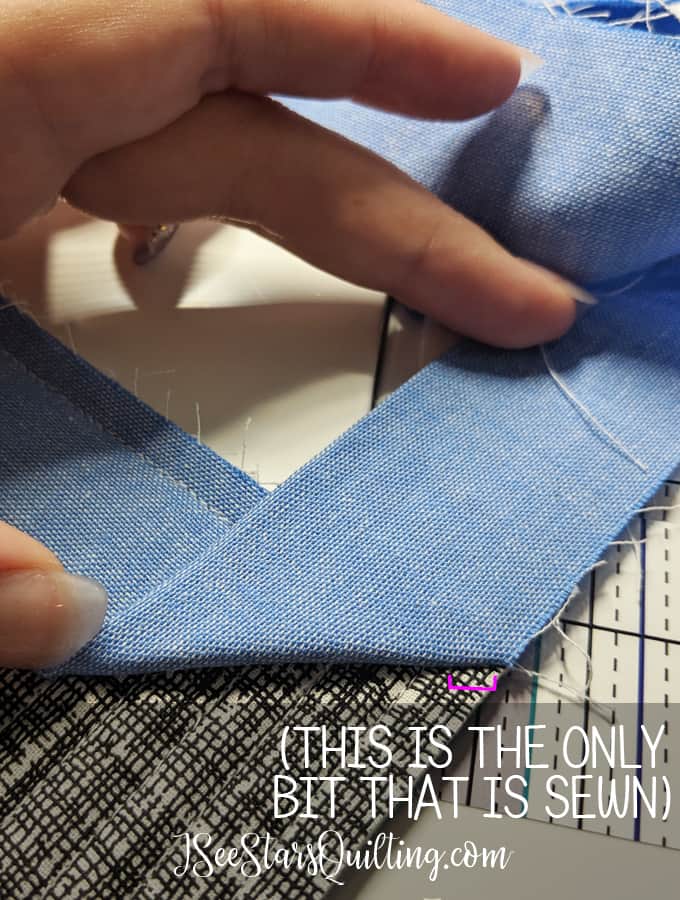
Fold your binding line down where the raw edges of the fabric match up with the raw edge of your trimmed quilt.
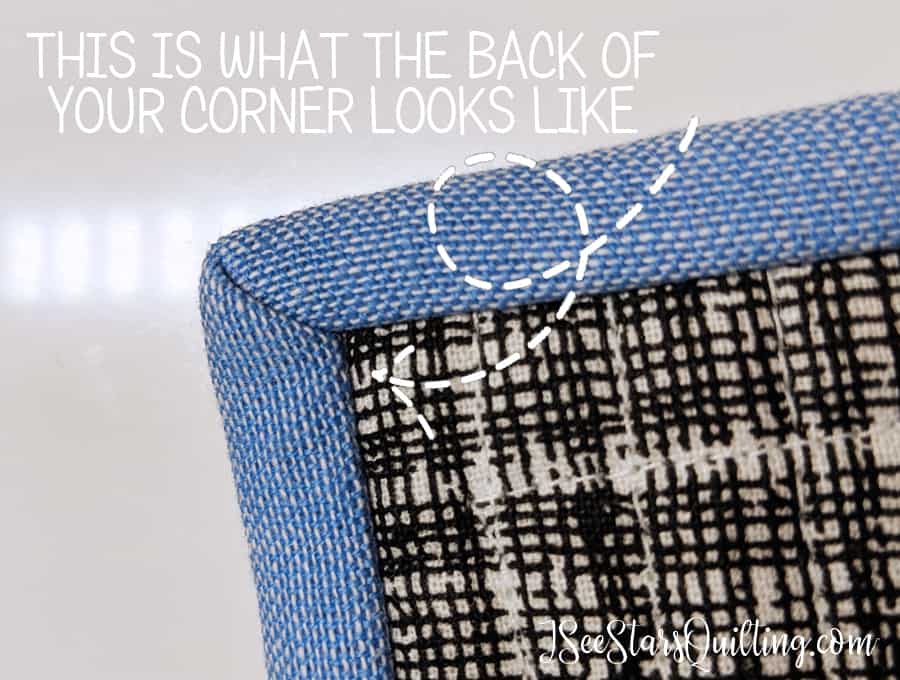
Notice in the photo how the folded edge aligns with the top edge of the quilt?
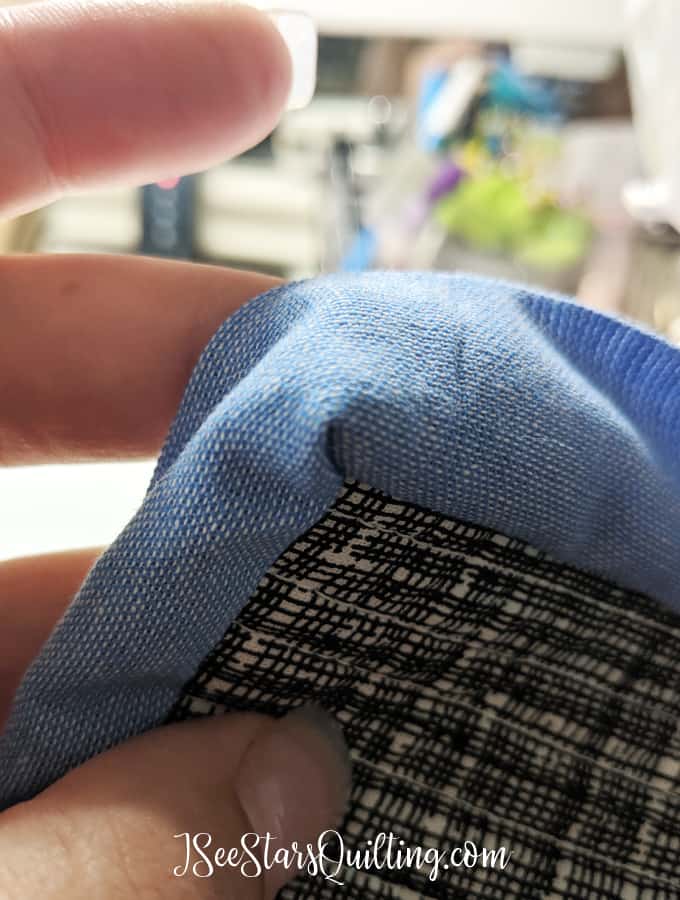
Here is another angle of the same folded corner.
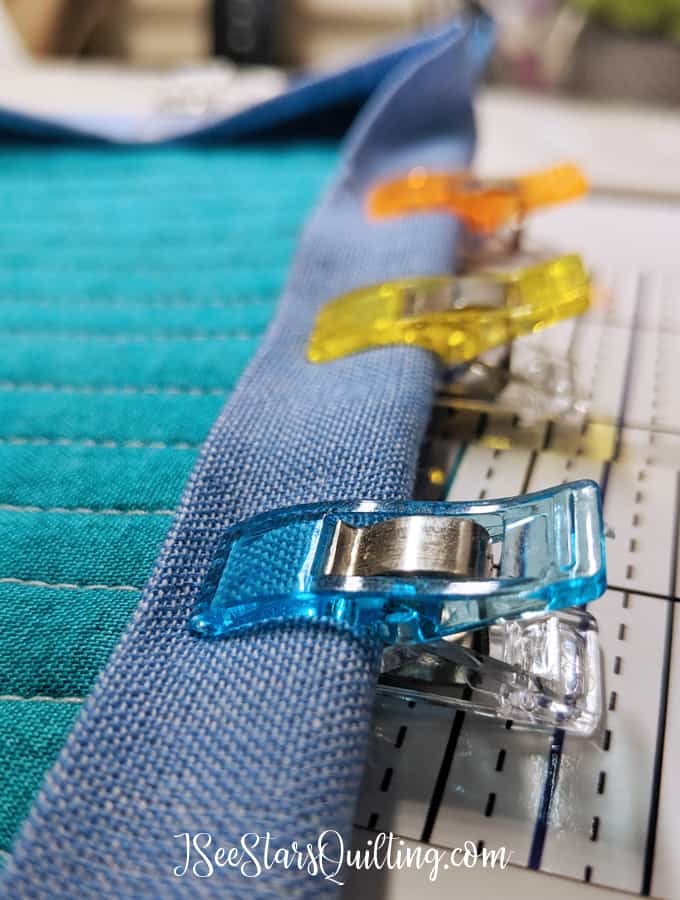
7. Pinch the quilt to keep the layers from moving and put the quilt back in your sewing machine. Sew the same 1/4″ stitch line all the way down until you get to the next corner.

8. Repeat until 4 your quilt corners are sewn. Flip your quilt over. Now it is time to fold the binding around the edges.
I like to use these Wonder Clips to hold everything in place while I sew. (They actually are amazing all over your sewing room!)
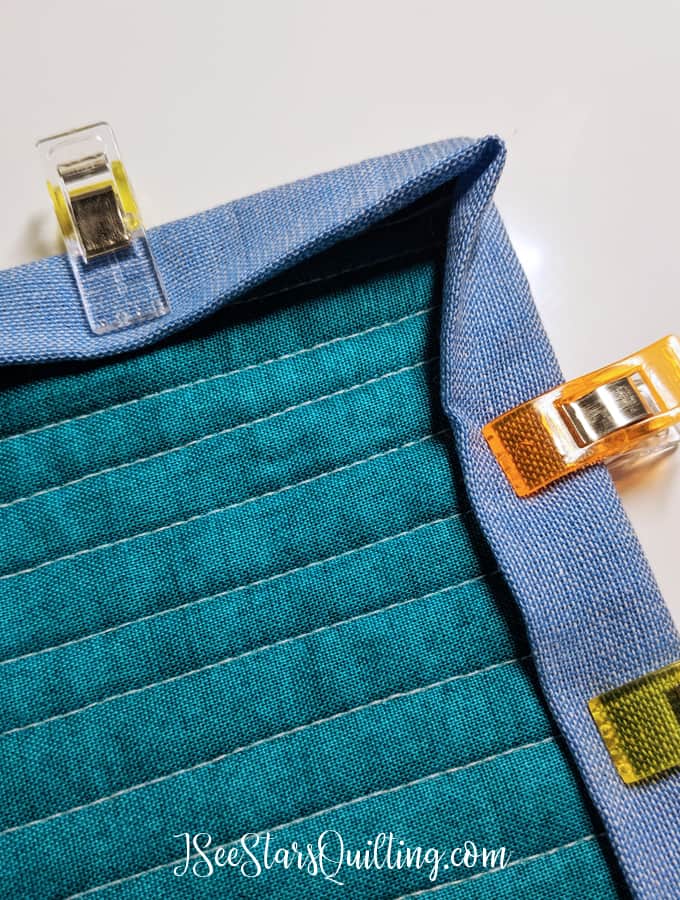
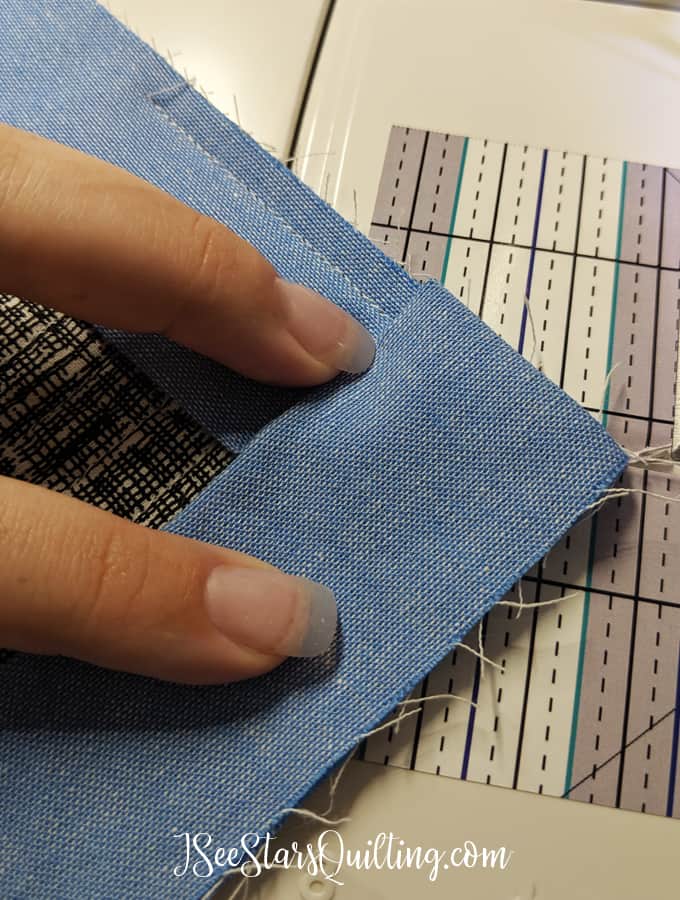
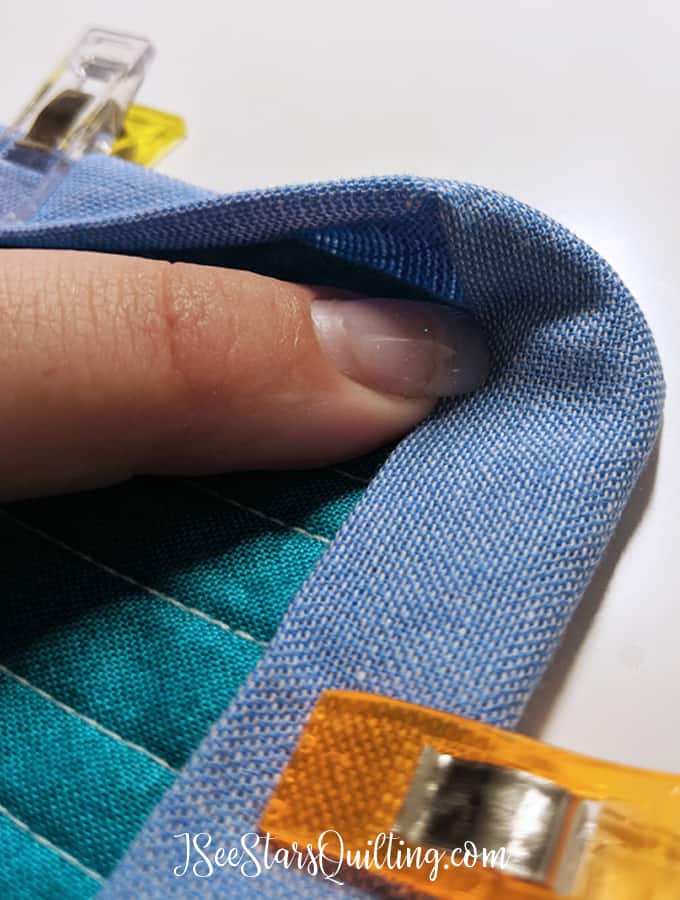
9. To fold your quilt corner into a mitered corner, you’ll want to fold in one side of the binding like the photo below. Tuck it all the way flat up in the corner. This will create a 45-degree angle with your other binding strip/
It might take a little practicing to get the mitered corner perfect, but you can do it! Keep at it. I believe in you!
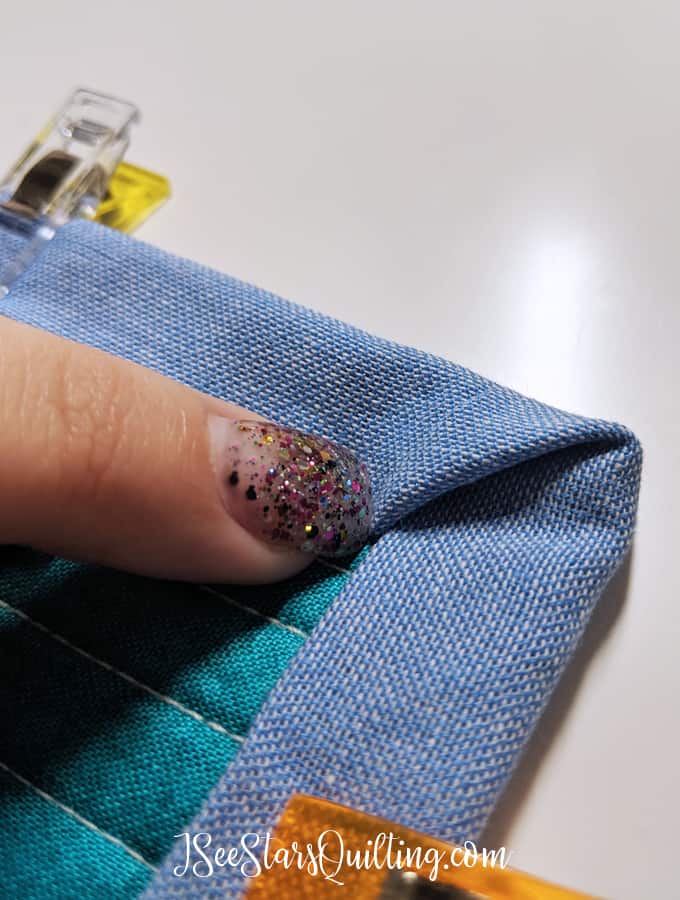
10. Holding the fabric in place, the next thing you want to do is to fold the top fabric over.
You’ll want to make sure the first fabric that you folded down stays in place so you can create that 45-degree angle in your second fabric.
I like to use my seam ripper or the other end of my seam ripper which has a pointy end (the official name for this tool escapes me at the moment. If you know what it is called, hit me up in the comments!)
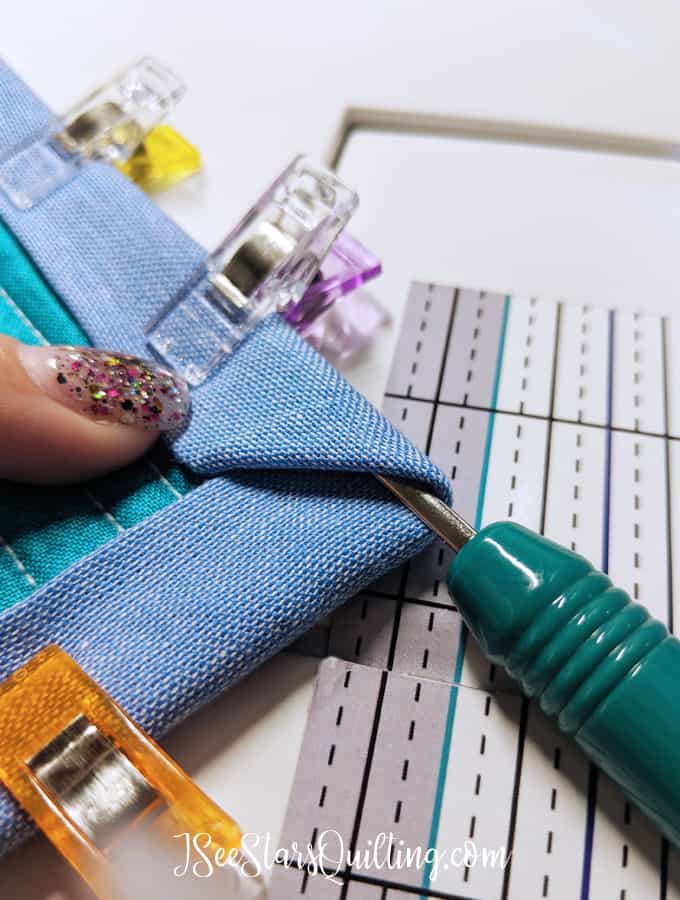

11. You’ll know that you’ve got it right when the edges of your folded fabric line up perfectly.
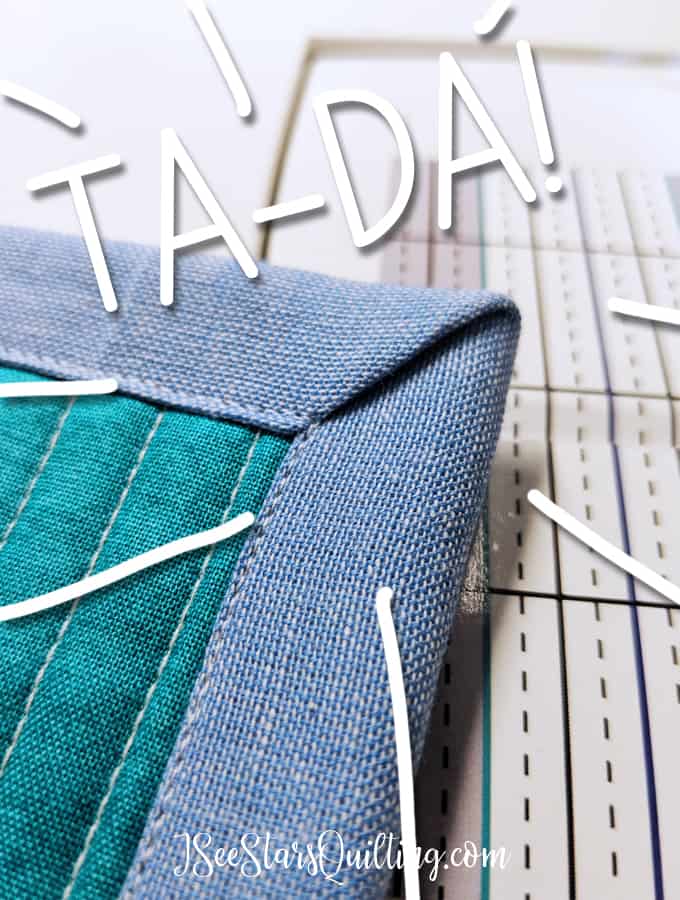
12. Sew your binding on the front using your sewing machine – or- you can sew it on by hand if you prefer! …Voila! 🙂
Hopefully, that wasn’t as painful as you thought it was going to be!
It does take a little practice to get the feel of how to manipulate the fabric, but I assure you that it gets easier with each quilt you create!
So, how did you do when you tried to create a mitered corner in your quilt binding? Were you successful? Do you need to work with your fabric a little bit more? Let me know in the comments.
For more tutorials and ideas for basic quilting tasks, check out my blog category Quilting 101. I have so many tutorials already posted and I’m adding new ones all the time 🙂 If you have a suggestion or a question, please contact me and let me know!