I have found myself in this position before. It is kind of a circular theme in my life. And I may have overcommitted myself… again? Yay Adulthood! I promised a lot of quilts by the end of the year… and when you look at “just one more” it isn’t so bad, but 5 of those just one more projects and yikes. It becomes quite a pickle. In case you ever find yourself in this situation, I thought I would share with you my six tools for faster quilting!
I have a few options. I could sit down and cry. I could not get any sleep for a few weeks. I could go back on my word and tell people I can’t do it (a viable option if push comes to shove)… or I could prioritize and get to work doing what I do and using the tip, tricks, and tools I’ve learned over the years to streamline the quilting process. (I’ll take door number 4, please!)
This post is going to go beyond telling you that an organized workspace makes all the difference. I love a well-organized space, and everything in its place certainly makes things run more smoothly, but we’re going to talk about actual tools that make you WORK FASTER.
6 Tools for Faster Quilting
- Ditch those pointy pins!
If you haven’t yet discovered wonderclips, you don’t know what you’re missing! These were my absolute favorite purchase from the quilt show a few years back. I swear by these no matter what sewing project I’m working on. They securely grab and hold on to whatever you want them to. No sharp pokes or sticks either so it is totally fine to put down your work and throw it in a corner to come back to later without having to worry about losing sharp pins in your carpet or stabbing yourself when you pick it up again.
Wonderclips are also a timesaver in the fact that placing pins into seams takes two motions – one to insert the pin down into the work and another to pop the pin back up to the top of the work. It may sound like a petty fraction of a second to complain about, right? When you add it up to the hundreds of times you insert a pin, it takes time. Clipping takes one motion, and that’s it. This busy momma doesn’t have time to waste, and I LOVE my clips! - A Quarter Inch Sewing Foot will save your tail
Most seams in quilting are a quarter inch. It is like the unspoken golden rule in sewing. It is standard sewing law, and anything less or more makes you look like you don’t have a clue what you are doing. There are ways of getting the perfect quarter inch seam. I even wrote an entire post about it. You can read it here – How to Master the quarter inch seam.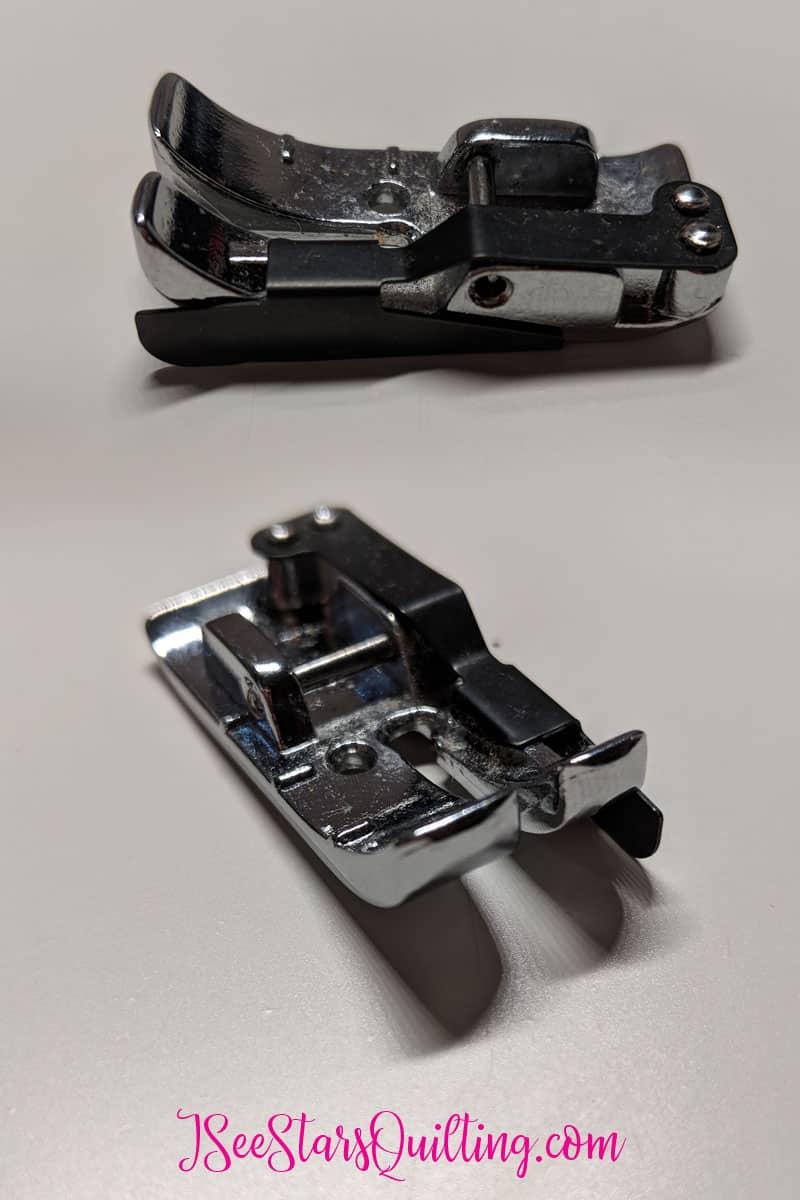
A dedicated quarter inch sewing foot makes your sewing faster. You do not have to watch a line on your sewing machine or keep an eye on your fabric. The quarter inch foot will do the fabric guiding for you. I use mine all the time for my quilt top piecing and general sewing. You can pick one up on Amazon for less than $10 by clicking here.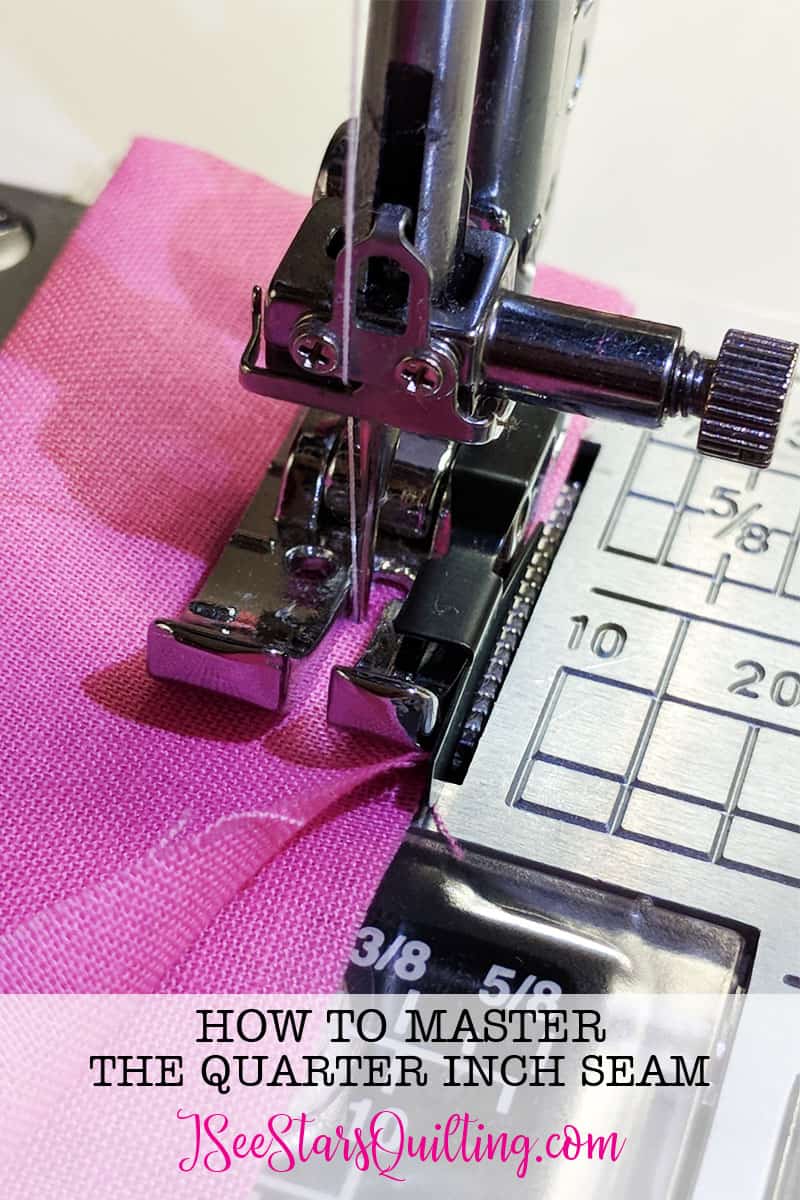
- The Walking foot
Speaking of sewing feet, you are going to want to invest in one of these babies too. If I am not using my quarter inch sewing foot, I am using my walking foot. I use my walking foot when I am quilting or sewing several thick layers of fabric together at once. You can read more about a walking foot in this post that I wrote – What is a walking foot?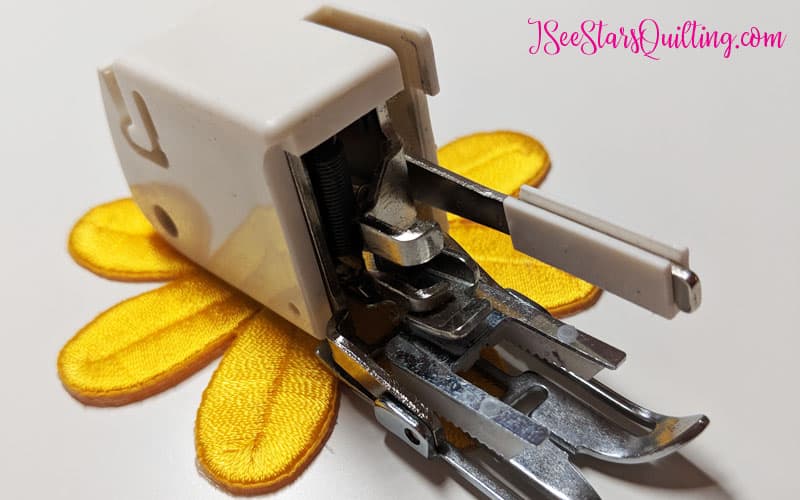
Essentially, when you’re quilting, the feed dogs can move the bottom layer of fabric at a different pace than the top layer of fabric. As you can imagine, this is NOT ok. A walking foot takes care of this pesky issue when quilting and things turn out beautifully! - Rulers that are the right size
When cutting squares or trimming blocks, it is a time-saving investment to buy square grid rulers in sizes you use the most. I have square grid rulers in just about every size from 2.5″ up to 13″. I know. It is obsessive and wonderful at the same time, but I use my 4″-8″ square blocks the most. If I need to trim up my blocks before piecing, I don’t have to worry about lining up grid lines and making sure my measurement is correct. I just cut along the ruler block, and that’s it. Saves SO much time. Try trimming 100 blocks that need to be 5″ with a 6.5″ grid ruler. It takes forever. Try trimming 100 blocks that need to be 5″ with a 5″ ruler. You’ll be finished in no time. I really love all of The Gadget Girl’s products. Seriously, quality items and superior customer service. Check them out!
I’ve tried a lot of thrifty ways of getting around this one over the years. I even used dry erase markers on my rulers so I wouldn’t have to count my lines over and over again (which is a decent way to save yourself some time if you aren’t able to get the rulers just yet.).When it comes to cutting and trimming your blocks to be the right size, having tools already in the right size works better 1,000% of the time. - A reasonable expectation – Evaluate your patterns
This may seem obvious, but it is worth saying… Real life comparison example: If you’re expected to bring the dessert to the next book club meeting, and you are short on time and not the best cook to begin with… now is not the time to experiment with cooking a decadently rich and finicky cheesecake. Most of us know our limits and would search for “quick and easy dessert recipes” on Pinterest, right? Get the job done and experiment with the cheesecake another day.Right.
So in quilting, if you do not have copious amounts of free time and do not want a quilt that is going to be your life’s work… pick a pattern that is reasonably suited to your time constraints and to your level of skill! You’ll be less like to end up frustrated and wanting to throw in the towel. If on the other hand, you’re looking for a bit of a challenge, read these tips on how to up your game without losing your mind – How to challenge yourself in quilting. - Sticky Notes and Managing your time in batches
I use this method all over my house and my life to up productivity… I’m a productivity junkie, I admit it, but I love it and if I can improve an area of my life for the better by changing my behavior… I’m game. (that is a whole different post, but it applies a little here so I’ll briefly explain)Rather than bounce around your sewing spacelike a distracted gremlin cutting and sewing little bits at a time, reading the pattern and re-reading it again and again… take 5-10 minutes to make a plan.

Commit to finishing what you’ve started.
-Pick your pattern
-Gather/purchase your fabric in the right amounts required by the pattern
-Cut all your pieces in one sitting if you can (all of them!) and label them in an organized manner so you can easily find them when you need them – this is especially helpful if you only have a small window of time to sew. Sticky notes are wonderful for writing a quick note on where you left off. Yes, I highly suggest writing notes to yourself. This momma’s brain runs on sticky notes.
-Sew when you can. Even if its only 10 minutes while you wait for the kids to get their shoes on. (why can my kids always only find one shoe? I do not understand how in the world this happens and yet we do it every single day) Progress is progress, and little bits can add up to a lot. It also feels like less pressure if you’re only sitting down for 10 minutes than if you block off an entire day and spend it being in the shadow of your looming to-do list.
I hope this list of 6 tools for faster quilting is helpful to you! Even if you try to put into practice one or two of these tools and it speeds up your work time, it will have been worth it. 🙂
Please comment below and let me know if you have any amazing tips that you use to speed through your quilts!