The Waterfalls Quilt Pattern is finished, and I’m sharing it with you now!
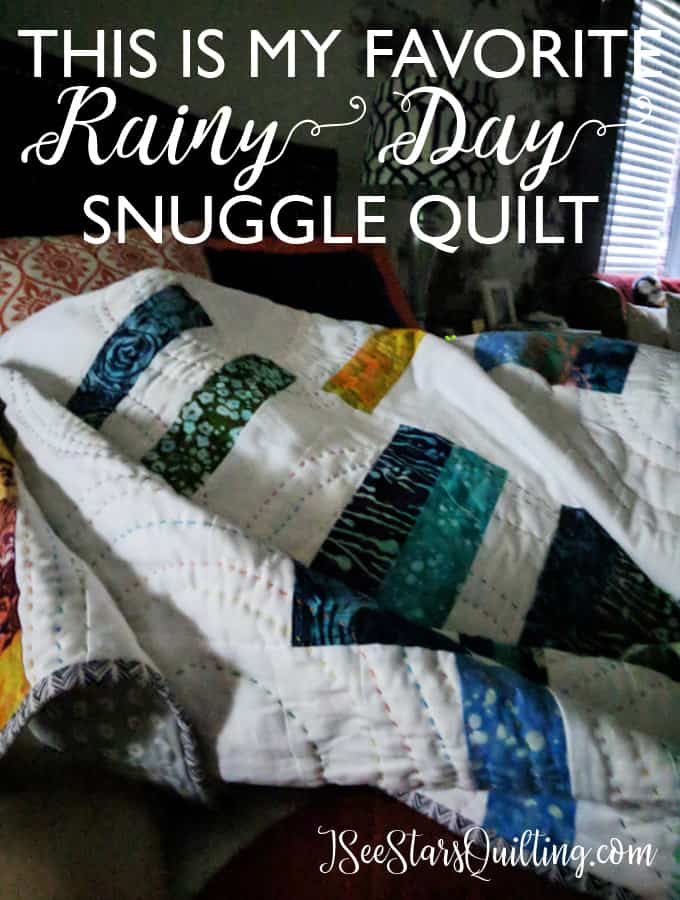
If I could cover you all up in this quilt with me in one big giant snuggly quilt nap, I absolutely would.
The Waterfalls Quilt Pattern started out as a simple creation to showcase this amazing jelly roll fabric that I found slowly turned into something that would be one of my favorite creations thus far. I just love it!
Make sure you scroll down at the end because I’m going to share my binding hack that you can totally copy!
Waterfalls Quilt Patter is now for available for digital download! Click here!
This pattern is fun and comes together quickly, and while you still need to keep your 1/4″ seams, you don’t have to fuss with perfectly matching corners if you don’t want to. It is truly a beginner friendly, quick sew pattern!
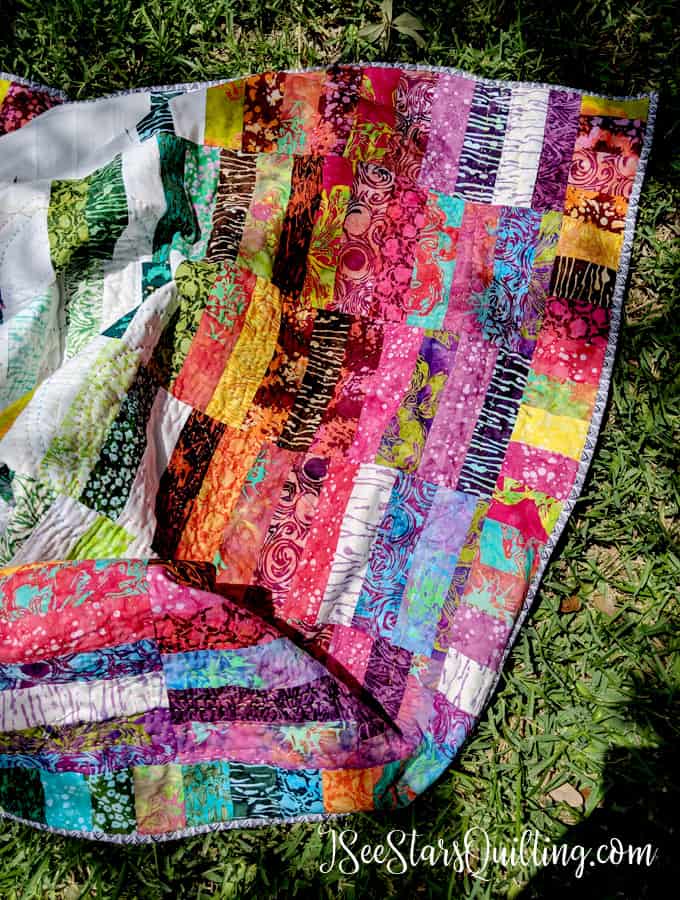
This monstrosity of a quilt is what I like to refer to as a double throw size. Know why? Because I made it JUST big enough that my husband and I can snuggle up on the couch and share the blanket without World War III happening. Plenty of quilt to share! 🙂
However, I also discovered that this double throw is the best nap quilt I have ever had. Ever. Seriously. Give me a rainy day, and all I want is this quilt. (I’m not saying that is what happens… I am a mom. I apparently am not awarded with naps. It happened, like, once? Yeah. And for 20 minutes, but it was glorious.)
I also love to get both my kids up under this quilt with me. They have already used it to make numerous forts. It is a great size. Even though it is a bit oversized, it is not so large that it is tough to manage when folding. If you couldn’t tell, I’m rather in love with this size!
But just in case the double throw does not suit you, I have also since made a smaller regular throw size that is perfect for one! I included the details in my Waterfalls Quilt Pattern here.
Ok, on to more photos! 🙂
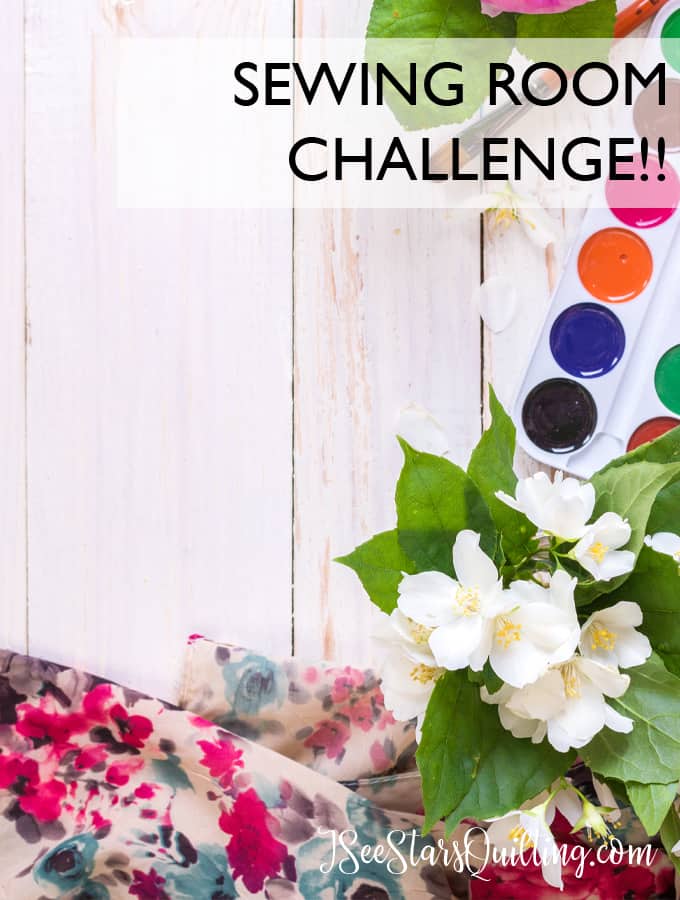
I actually debuted this beauty in my post Part 2: The Sewing Room Challenge. You can see some of the reasons why I took on this challenge and really pushed beyond my comfort zone in the sewing room to finish up the biggest projects I had waiting for me in the WIP corner. (WIP = Work in progress)
Fair warning. Lots of pictures for this quilt because it is literally the longest that I have ever worked on a quilt. The pattern and the piecing actually comes together really quick.
The only thing that made it more difficult and a longer process was… me.
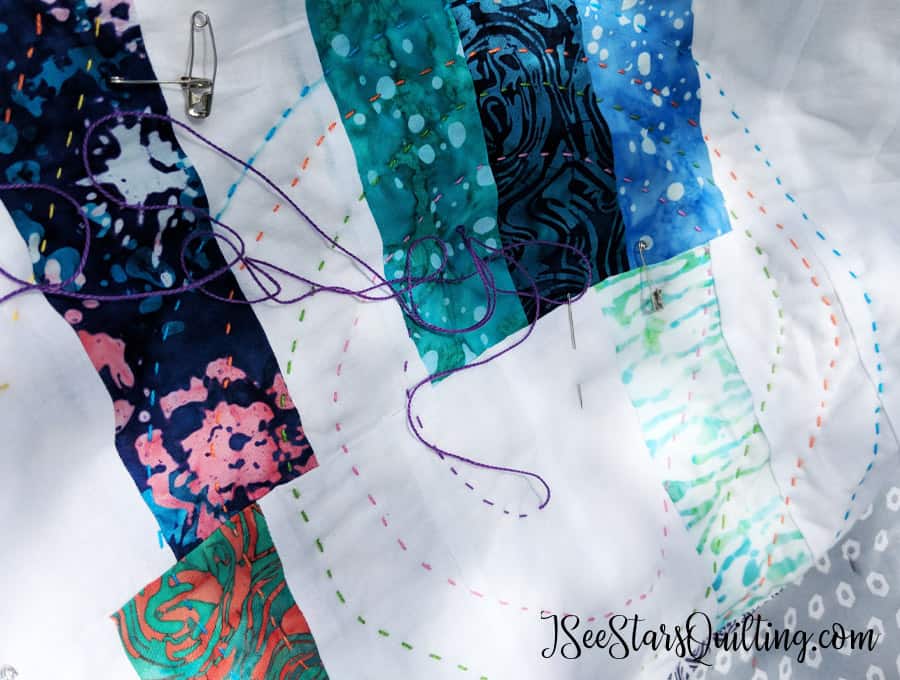
Uh-huh. I took it upon myself to decide that THIS was going to be the quilt that I took on hand quilting. This giant quilt was going to be my first hand quilted quilt. My brain: “Start small and maybe try it out a bit?” My heart: “No way! Go big!”. The heart wants what it wants. And its so beautiful, but boy did I set myself up for some long nights with this one.
Anyways, yes. The girl who has never hand quilted before and is absolutely in love with her sewing machine found a cute box, filled it with beautiful hand quilting things and set out to hand quilt every single spare moment of every day.

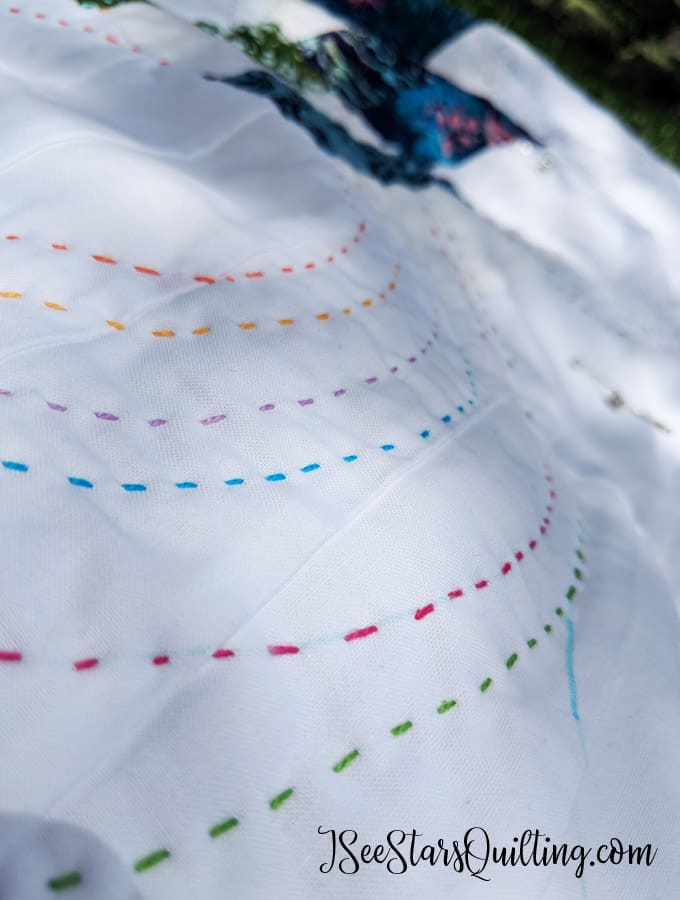
I decided on a pattern of circles like water droplet ripples to further carry the Waterfall quilt pattern theme. And rainbow thread because it just made me so happy to see this big box of colors and choose which one I wanted to work with each day.
Anyone can see that my stitches are not perfectly even and a bit wonky. I gave up perfection and went for whimsy even though this might make the seasoned hand quilter shudder. (Please forgive me… I tried, and I’m learning!)
I am not the best at hand quilting. Nor do I ever expect to be. I really enjoyed this process and love to see how my stitches progressed from the first ripples to the last ones.
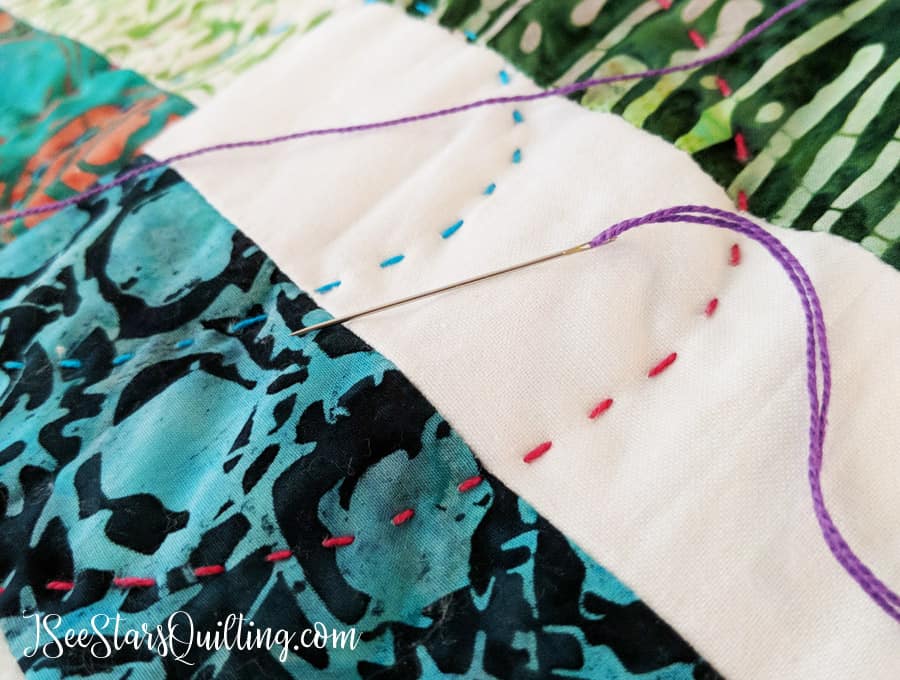
I drew a few circles with a washable fabric pen by tracing various kitchen bowls that I had. Real scientific, I know. Use what you have! Creative genius doesn’t have time to print templates! And then I free handed the rest of the echoing outer and inner rings from it. They are a little uneven and add a fun wobbly texture to the look of the quilting.
Looking at modern quilting trends, bindings are making a statement of their own in recent years.
Have you noticed this trend too?
I chose a funky, graphic, black and white printed fabric for the binding.
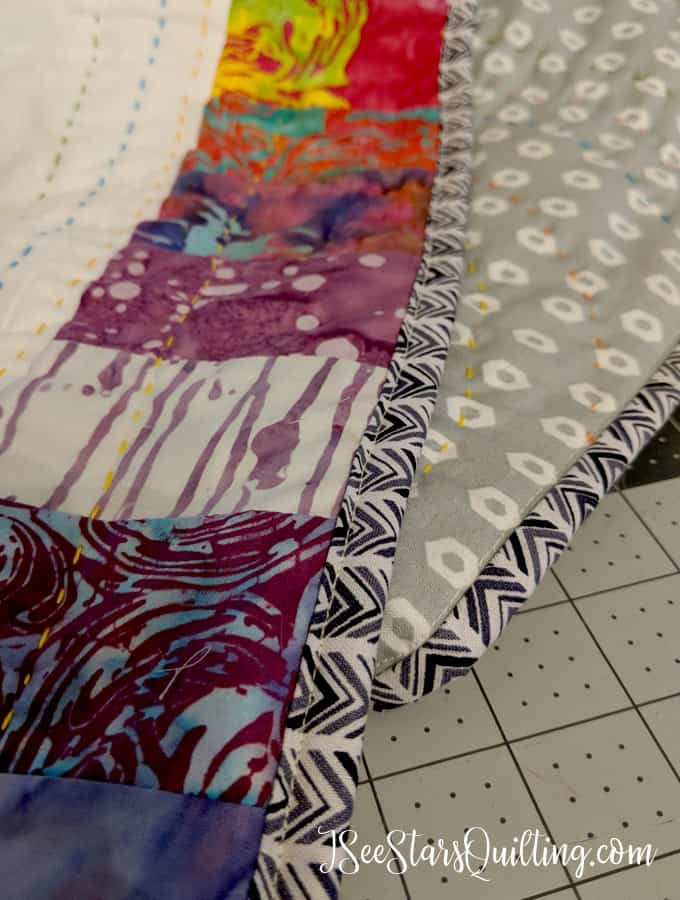
Did you catch a peek at the backing fo the quilt? I went with subtle because well… the front is loud and proud enough, I think. 🙂 But the hand quilting with multiple colors of threads show through on the backing and makes a really fun rainbow ripple pattern!
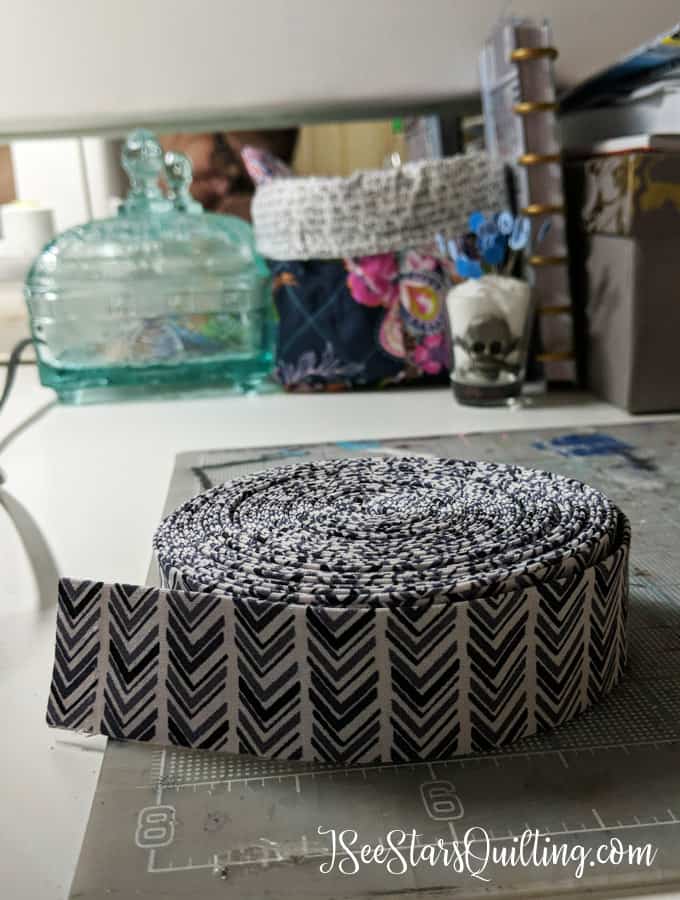
My Easy Binding Hack
When you have a lot of binding… it usually ends up a big long mess or tangled around my legs while I’m sewing or it takes me forever to pin/clip around my quilt just to get it up and out of my way. This time, I got smart!
This is totally something you can do too. It’s so simple, I hesitate to call it a hack, but its made my life so much easier during this step in the quilting process!
First, the binding… all pressed in half and neatly rolled up!
Next, a screw driver or dowel or pencil… whatever you have laying around that you can work with!…
Now… Do THIS with it and go. No more tangles. No more wrapping around my legs and twists and yanking or pulling.
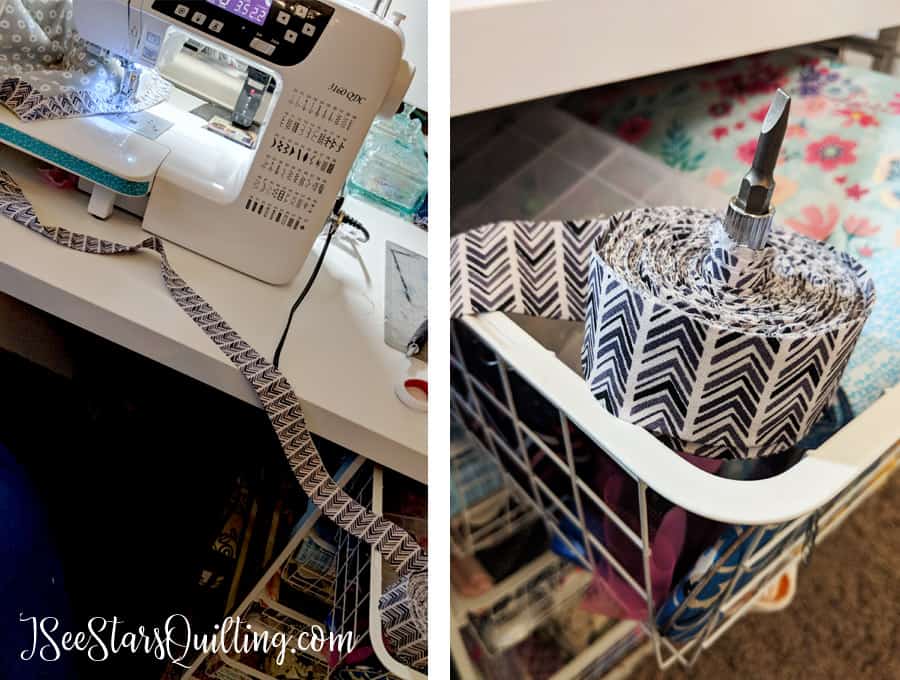
I might not save the world today, folks, but I was pretty impressed with my DIY hack. No special or extra purchases required. 🙂
Happy sewing!
Thanks for reading all the way down here. — Until next time, my friends 🙂