Start Here – Quilting 101

New to quilting? Looking for some help with the basic skills and terms? Start here! Quilting tips tricks and little bits of inspiration for the newbie to intermediate quilter.

  • Tricks to Sewing Straight Seams

    Sometimes I wish for the simplest things in life – like sewing a line with your sewing machine and expecting it to be straight. That shouldn’t be too much to ask, right?… wrong. – But fear not! – For today I am going to share with you my tricks to sewing straight seams!

    When it doesn’t happen the way you want it to, you have to find ways to make it happen.
    Frustrated with wavering seams? Try these 3 tricks to sewing straight seams and go live your happy carefree life!

    Sewing straight and even lines when you’re piecing a quilt or following a sewing pattern is kind of… how can I put it nicely?

    Absolutely positively non-negotiable… yeah. Exactly that.

    Even the slightest waver of your stitches and you’re suddenly the queen of fudging it to make things right and hoping no-one notices.

    Or you just have to come to terms with the fact that this beautiful piece that you dreamed of in the planning stages just isn’t going to perfect. You either have to learn to live with it, or dramatically crumple it up and put it in the corner to collect dust until you have the patience to pull it out again.

    I mean, maybe its because I am a mom and therefore I sometimes have the defiant mentality of a toddler, but I am the boss of my quilts… not the other way around. Sometimes there are tantrums too, but that’s a whole different post.

    Frustrated with wavering seams? Try these 3 tricks to sewing straight seams and go live your happy carefree life!

    Anyways, today I am going to share with you a few different tricks to sewing straight seams so you won’t have to throw a tantrum yourself!

    You’re welcome πŸ™‚

    It is worth mentioning that if your fabric cuts are not straight and even… you might as well quit reading now.

    How can you judge the straightness of your seams if your fabric is all wonky?

    Being able to have a clear guide for your fabric is one of the biggest keys in sewing straight lines.

    Here is a fact: Your needle sews a straight line… Always.

    It only goes up and down… so the real culprit in your wonky sewing lines is your fabric.

    If your fabric is moving around, your lines are going to be off and not straight.

    You need to find a way to tame your fabric so you can feed it into your sewing machine correctly.

    I have a few helpful suggestions for you!

    HOW TO SEW STRAIGHT SEAMS

    The first one I’m going to share with you is an invention of my own creation because I got fed up with following the faded and almost nonexistent lines on my sewing machine.

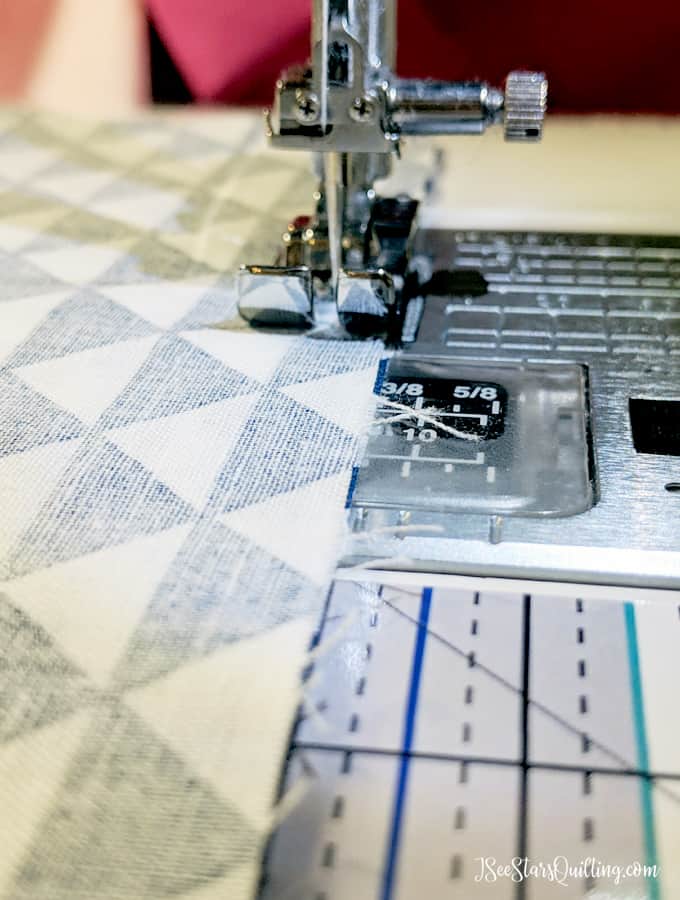
    The Straight Sewing Guide

    In a quick moment of inspiration, my designer background served me well and I created this Straight Sewing Guide. I know I’m not the only one who struggles with this so I made it available to us all!
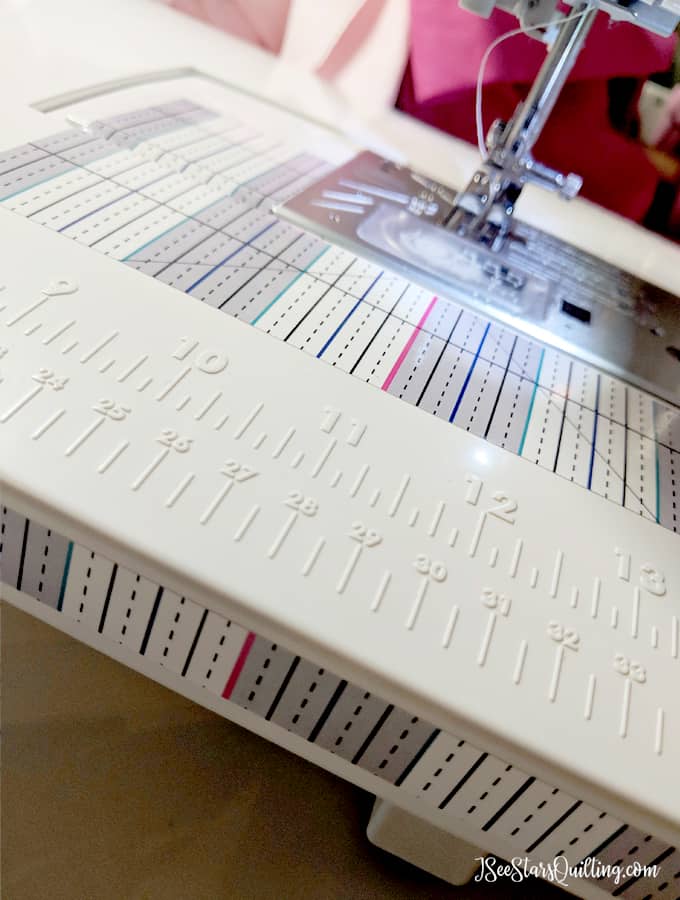
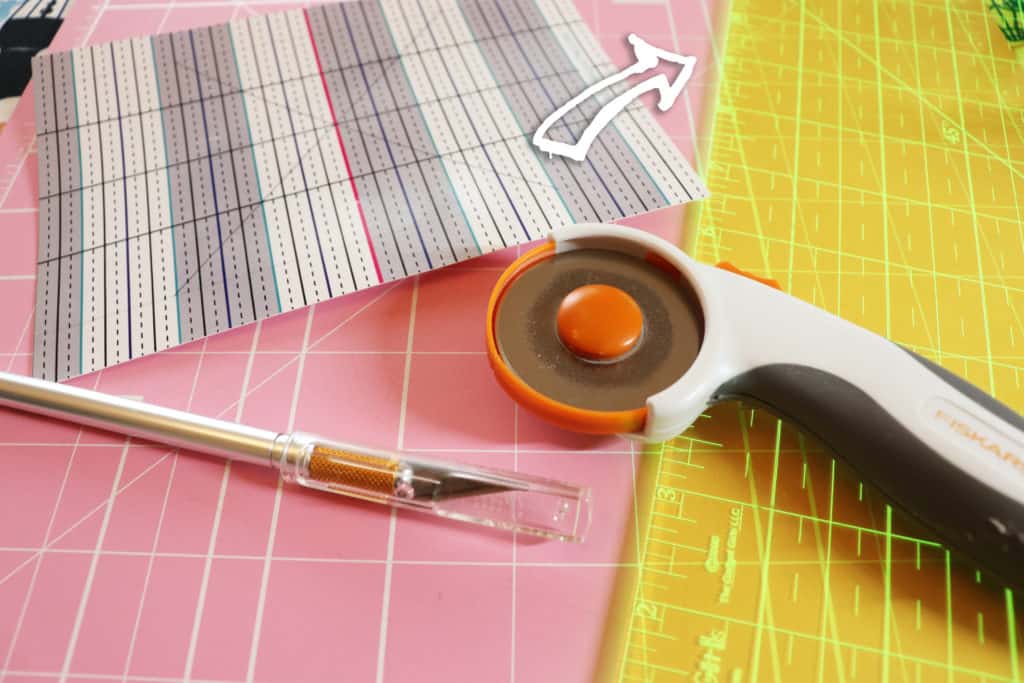
    It is a vinyl sticker that you adhere to your sewing machine. It gives you longer guidelines, allowing you to keep your fabric straight while sewing.

    [Notice the front, middle and back guidelines!] –Yes! I love them too!

    You can grab your very own Straight Sewing Guide in my shop! Also, I am offering worldwide free shipping for my sewing friends around the globe! πŸ™‚

    WASHI-Tape Guidelines

    Another trick that I used for a long time was simple line of Washi-tape.

    It may not be fancy, but hey… it did its job. If you’re not yet a fan of washi-tape… it is an amazing low-tack decorative tape that is super popular in the craft circles… just… imagine the possibilities of pretty tape!

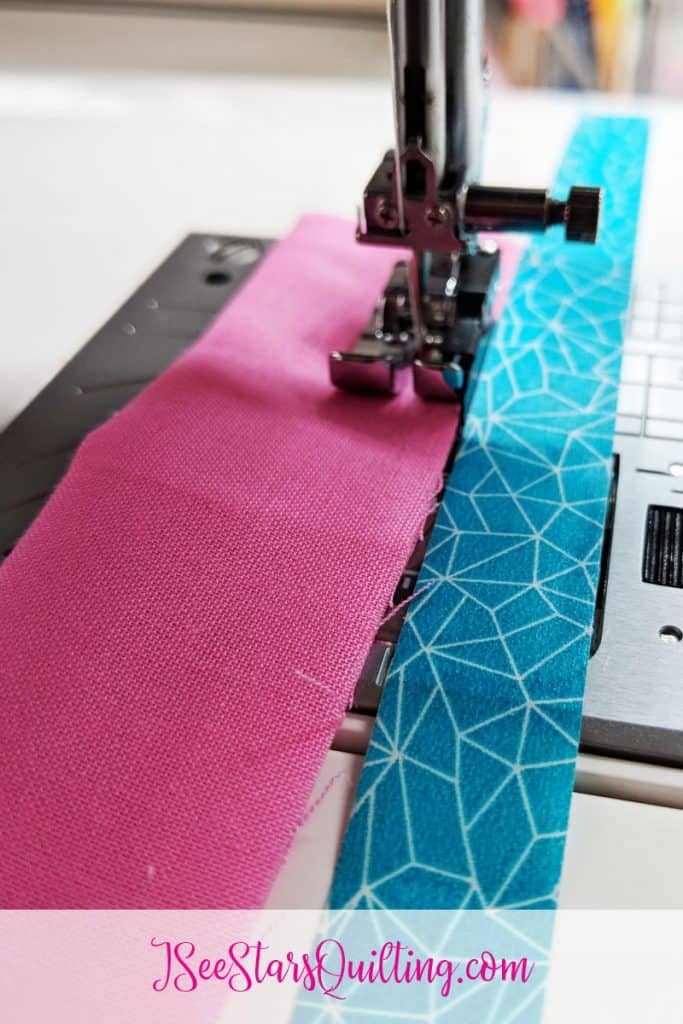
    I used the washi-tape to to make my 1/4″ seam guide on my sewing machine. This gives you a guideline to keep your fabric aligned to.

    Provided your cuts are accurate, your seams will also be straight.
    How to MASTER the quarter inch seam. Want to improve your beginner/intermediate sewing skills? do this and you'll be well on your way

    As you can see in the image above, I had to take the tape off every single time I wanted to change out my bobbin thread, but you could just use a craft knife and make a few slits in the tape to make it easier on yourself.

    Quarter Inch Machine Foot

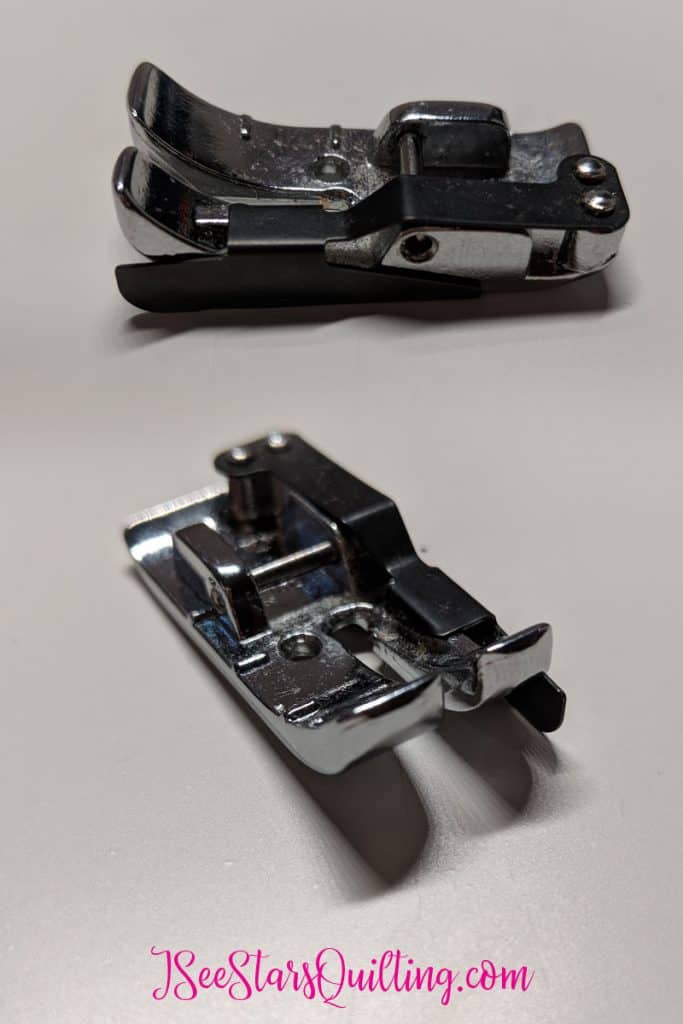
    This is a little more focused than just a straight seam, but if you’ll notice on the quarter inch foot, there is a little guide that keeps your fabric in check.
    How to MASTER the quarter inch seam. Want to improve your beginner/intermediate sewing skills? do this and you'll be well on your way

    As long as your fabric stays nicely aligned with the little guide, you should have beautiful quarter inch seams!

    I wrote another post on Mastering the Quarter Inch Seam. It goes into more detail about why you should and also shares some other tips for how you can really be the master of your quarter inch seams!

    I hope these Tricks to Sewing Straight Seams help you master it.

    Remember…

    You are the boss of your quilt… not the other way around! πŸ™‚

    Happy Sewing!
    Frustrated with wavering seams? Try these 3 tricks to sewing straight seams and go live your happy carefree life!
  • What Quilting Rulers Should I buy?

    Yay for you! The decision to buy the right quilting tools is a big step towards being a really great quilter! But “which quilting rulers should I buy?” is often the very first questions most people ask.

    *If you are more advanced in quilting, I have suggestions for FMQ (free motion quilting) and longarm quilting rulers towards the bottom of this post!*

    I mean honestly, when you’re staring at a hundred different shapes and sizes… circles and squares, normal looking rulers and ones that look like they’re straight out of some sci-fi fiction glowing universe… yeah, it can totally get overwhelming. I get you…

    If you need help deciding what rulers are the best bang for your buck in quilting, you are in luck! :) These are the essentials that I use on every single quilt.

    I’m going to go through the reasons you should own at least a few (hint: you don’t need ALL of them!), exactly which ones you absolutely should own and what to expect cost wise because…

    Quilting tools can add up real fast if you’re easily swayed into buying everything that is pretty and promises to make you the greatest quilter alive. So let’s not forget that aspect! Unless you’re a billionaire chances are most likely that budgeting is something that you keep in check.
    (if you are a billionaire can we be friends? I make really great cookies and I’m totally a hilarious wing woman.)

    So let’s go through it, shall we?

    Why do I need Quilting Rulers/Guides?

    With the right tools, you’ll find that your work is easier and your skills and accuracy will soar skyward! – I am not even joking.

    If you’ve quilted for even a little bit, you’ll know that accuracy is important… no, wait. It is the golden key to quilting, because if you’re off even a little bit… The puzzle pieces don’t line up. Things can get all askew…. Then you are spending time with the darn seam ripper again and… and…. aaaannnddd…. ARGH!

    *Don’t even get me started….*

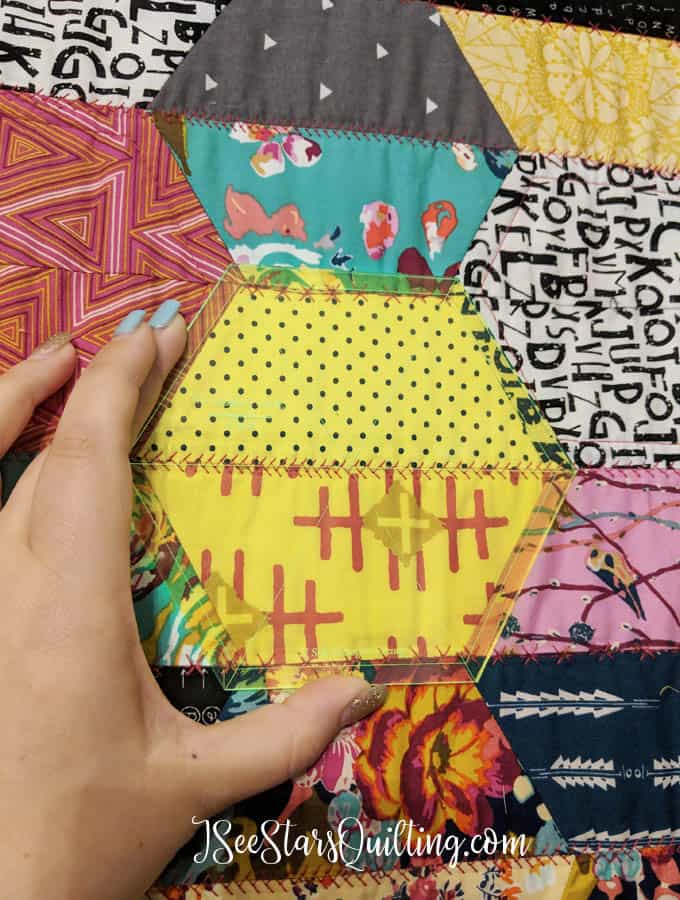
    • Quilting Rulers are clear. You can see through them to get precision that is un-matchable to whatever straight edge you can find in your house that you’ve been telling yourself will ‘work for now‘.
    • Fussy cutting is a breeze when you can see straight through your ruler… oh yes, it is magical! πŸ˜‰
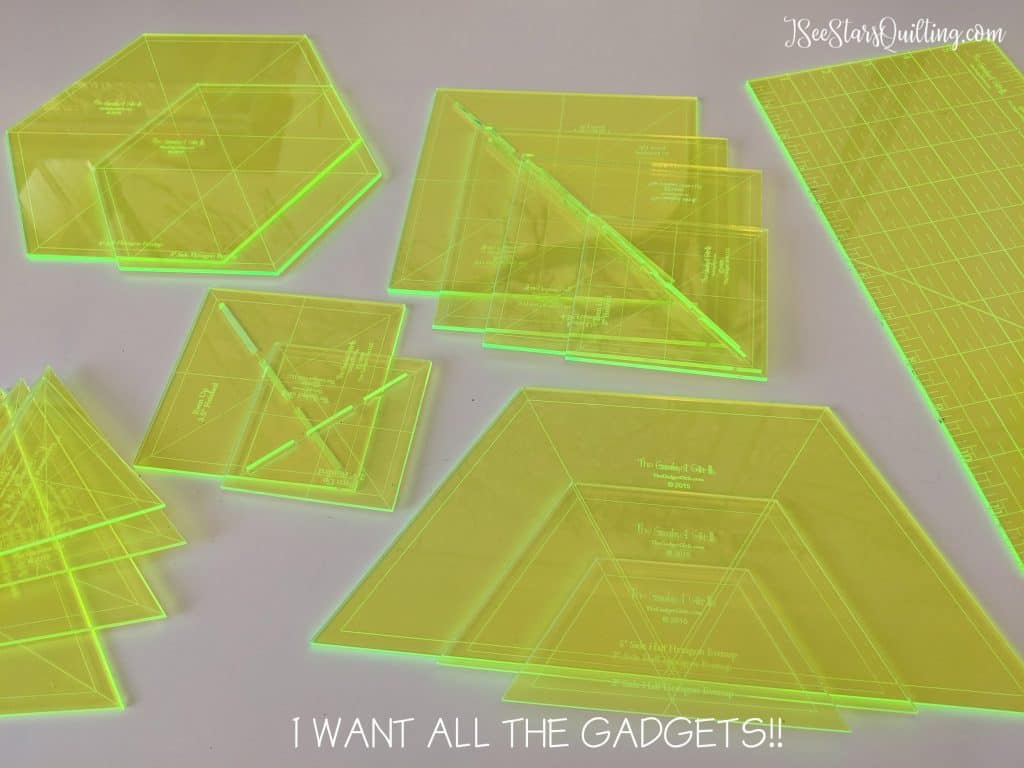
    • The measurements and guides are marked clearly and are easy to follow. – My personal favorites are the neon tools, from The Gadget Girls (http://www.thegadgetgirls.com). Not only are they bright and fun colors, but the markings are actually etched into the tools so the guides actually glow nice and bright no matter what fabric you have behind it!
    • I don’t have scientific reasoning for this but when you have the right tools… you just work better, smarter and more efficient. Your brain energy isn’t spent trying to figure out how you can DIY this or that or get by without… you have the focus to put into your quilting!
    I held off for the longest time on purchasing quilting rulers. Being a young mom – (baby formula will eat your budget alive!) I felt guilty spending even more money on myself because I was already conservatively buying fabric when I could. I just couldn’t justify it… until… another quilter friend said:

    How are you going to cook if you don’t have a stove? You could go build a fire in the backyard and get by, yes, but wouldn’t the investment on proper cookware be worth more than getting by and dealing with the current limits and frustration?

    Of course, you don’t need a stove to quilt, (and we’re well equipped in our kitchen thanks to the foodnetwork making my husband and I feel like we could totally kill it on Iron Chef) but I heard her loud and clear.

    I was wasting time using things around the house to cut my straight edges – and if you know me, then you know that Christen does NOT like to waste time. At all. I like to be a productive machine and live my life to the fullest volume possible! Any wasted time away from my family is unacceptable.

    I was blinded by the thought of not wanting to spend a little money on myself and my passion: quilting.

    Do you hear me on this?

    **PS – I’m going to link these to the rulers on the Gadget girls website because I really feel like of all the rulers that I have owned, they are the best quality and my personal favorite πŸ™‚

    Ok, so… Bare Minimum – What do I need?

    Let me make this next part clear…. you don’t have to go out and buy everything in the world or spend a fortune right this very second. And I’m not just saying that to make you feel good. I mean it. Don’t think you have to spend a ton of money to be good at quilting! You can do a whole lot with just a little!

    If you want to start your collection of rulers and you are ready to make that jump, here is what I suggest. Pick and choose a la carte what fits your needs:

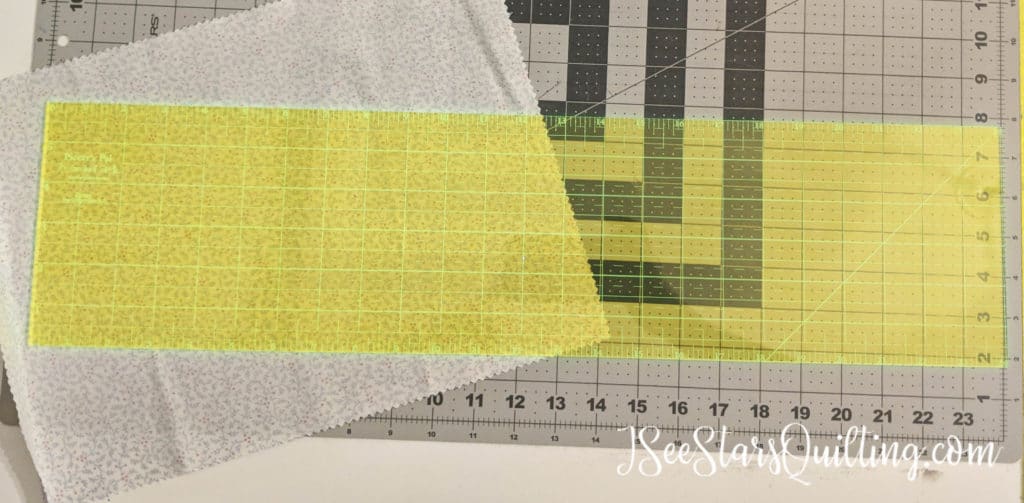
    6″x12″ Ruler – This ruler is probably my best friend in the sewing room (but don’t tell the others that, ok?) It is an easy size to square up your littles and make those quick cuts. All the guidelines are invaluble!

    6″x24″ Ruler – I know what you’re thinking… “Isn’t that almost like the 6″x12″?” and yes, you’re right EXCEPT that your fabric is 40″ wide and folded in half, I can use this big daddy ruler to make one single clean cut all the way across my fabric… I am like a genie. It is AMAZING. I have never once regretted purchasing this ruler. I also use it to help square up my quilt. – It gets used on every single quilt i make.

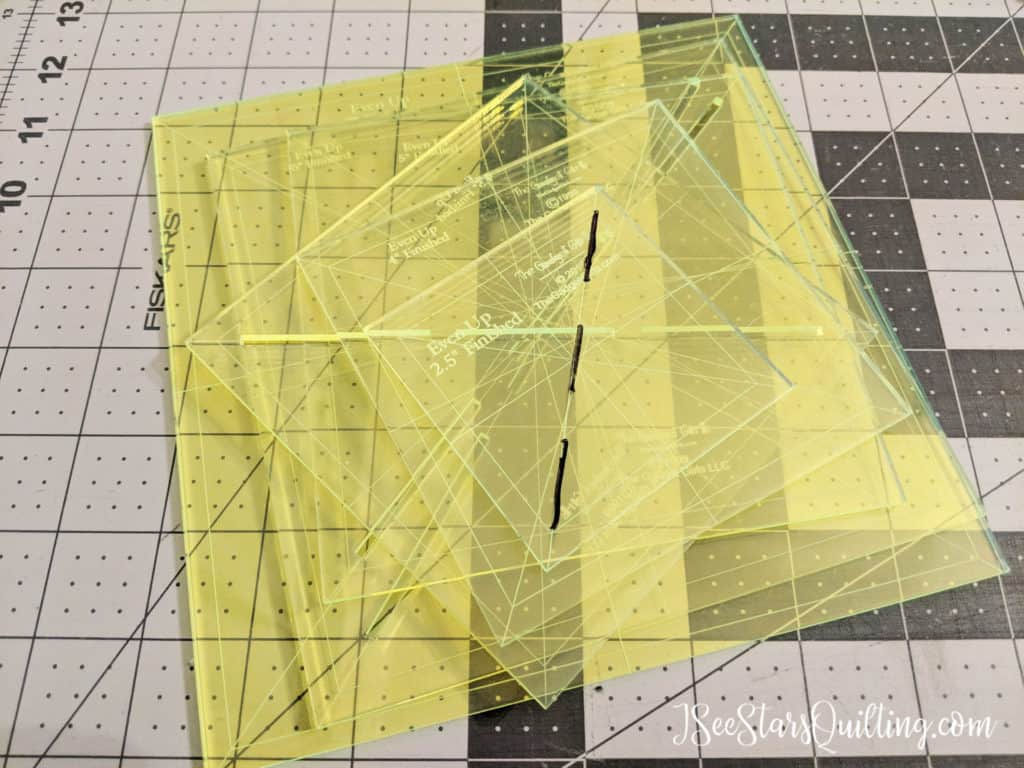
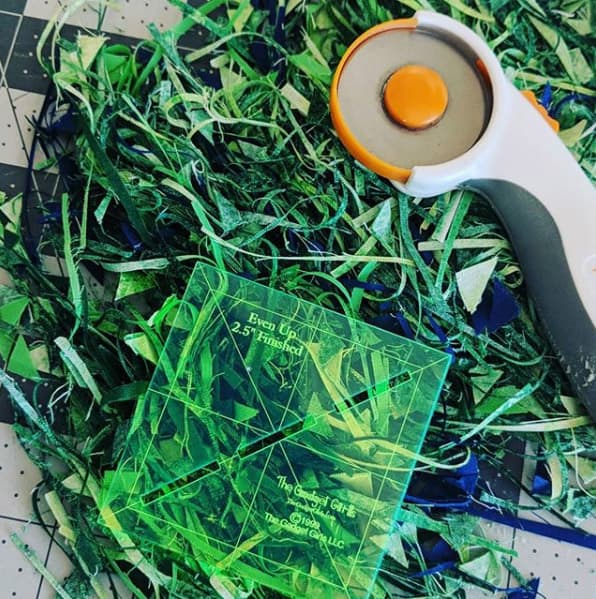
    Even-ups or Square Rulers – These beauties are pretty much the crown jewels of my quilting blocks. They come in a variety of sizes and shapes. As you can see, they already have the seam allowance accounted for and they make squaring up 458 (yep…I did that…) 2″ blocks and HST a breeze.

    I would suggest at minimum buying the even measurements – 2″, 4″, 6″, and 10″ or 12″ – You can buy every size in between and even larger for t-shirt quilts that you want to make as easy as possible.

    Pssst: they also come in triangles and hexagons AND half-hexies! (you have to scroll through the diff pages on the website to see them all) – *Swoon* OMG! I know, girl. Perfect triangles with like no effort… surely we must be dreaming, but no. It is totally real and it is totally wonderful.

    How much should I look to spend?

    This is always a question people ask and this is always where I have a hard time answering.

    Usually, rulers are anywhere from $12-$30ish each. Some are more, it just depends on the purpose and the size of the ruler.

    Honestly, buy what you can out of the list I mentioned above. If you can’t buy them all, don’t sweat it. There are so many different ones out there but you will be doing great with just the essentials!

    Start with the 6″x12″ and really work that ruler! If you use it for a little bit, you may get a better idea of what you should buy next based on what your most used size pieces are.

    Is a holiday coming up? Your Birthday? Christmas? …um… Arbor day, perhaps? Ask someone you love for what you need (nicely)! I don’t want to hurt any feelings but none of us NEED another pretty candle, do we?

    I really hope you found this guide to rulers useful. If you are hungry for more, I will be making a video on rulers really soon. I’ll be including the ways I use my rulers plus some tips to store them and keep them essential in your sewing room!

    You can check out my YouTube channel here.

    A Word to my FMQ and Longarm Quilters…

    If you're looking to up your quilting game with some new tools, you're in luck! Don't just go buy what you THINK is going to be useful... read this first so you KNOW from a seasoned quilter what is going to be the best bang for your buck!

    YOU! My lovely beautiful creative quilters, you…. You are amazing and I am truly inspired by the beauty that you create… are you looking to up your quiling ruler collection a little bit too?

    FMQ does not have to be impulsive or make it up as you go – You can make it a little more structured with quilting rulers that you trace around either with your needle or a fabric marker.

    You’ll get drool worthy perfect quilting patterns that you can then quilt on your machine! The classic baptist fan pattern? A cinch when you have this right here.

    Check out the remarkables section on the Gadget Girl’s website for every shape you could possibly imagine!

    With these tools, your quilting is going to be so lit… which means really really awesome.

    Let me know what you think!

    These are 6 Quilting tools that I can't live without in my sewing room!
  • Fool-proof Quilt Binding Method (A how-to + Video)

    So you’ve got your quilt 85% complete and you are rocking this whole “quilting thing”! Congratulations! … now it is time for the binding. You may be feeling a little uneasy about it all, possibly even dreading this step because you haven’t figured out a method that really works flawlessly for you, yet? Would you laugh and say that a fool-proof quilt binding method doesn’t exist? — oh it does, and I’m going to show you how!

    How to bind your quilt - A no fail easy approach to quilt binding

    With my first several quilts, I struggled with the binding so much. There are so many different ways to do it and everyone claims their way was ‘fool -proof‘ — which really left me to wonder just how big of a fool I am if I couldn’t do it, right? yikes.

    So I did what I normally do and became hyper-obsessed with figuring out how to hack this quilt binding method thing into something I could do without stress.

    I really do love quilting, but it’s not ok to gift someone an 85% finished quilt! I knew I would have to figure it all out eventually…

    If you struggle with quilting binding, you are not alone! I'll show you how I learned to hack this step in the quilting process and make it fool-proof (I promise!) so you never struggle with it again!

    So, I started doing my research, I watched video after video on youtube. This also included looking at other bloggers that I admired to try and gain their wisdom.

    I asked all my quilting friends and I even approached a stranger in the fabric store that looked like she really knew her stuff (totally true story).

    What I wound up with was a quilt binding method that wasn’t complicated. It didn’t require me doing any gymnastics or pulling out my magic wand. It isn’t rocket science and I certainly didn’t re-invent the wheel here!

    But it works. And it works well… every single time. Flawlessly.

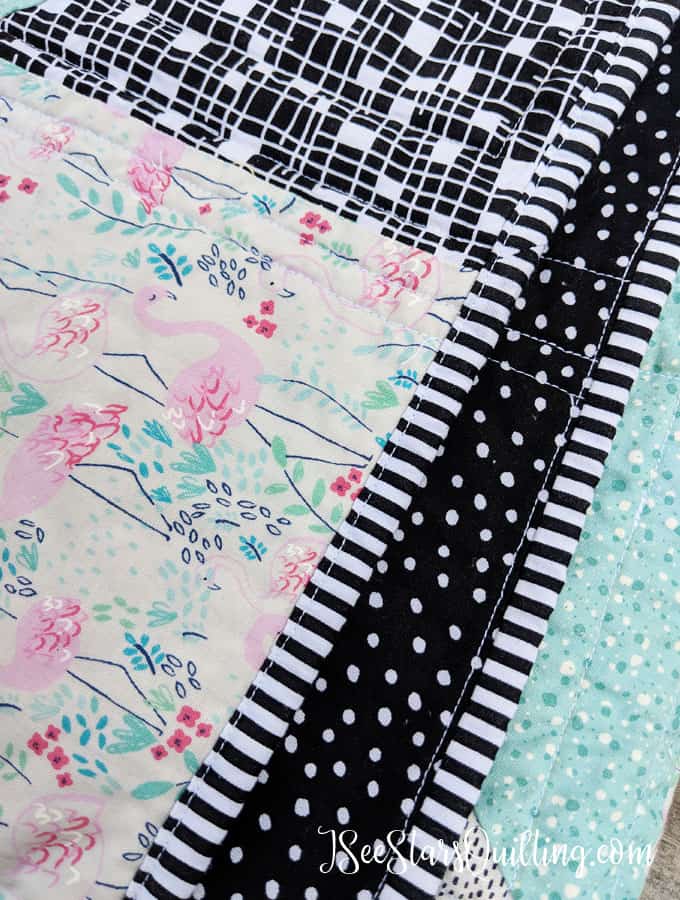
    This sweet baby quilt pattern is a FREE download that I designed to be easy fro all levels of quilting! Just look at this sweet flamingo print! Its adorable! Did I mention the FREE pattern? ;) Check it out, download it and save it for later!

    So what is my secret no stress, Fool-proof binding method?

    If all of the above rings true for you and you’re maybe starting to feel a little defeated by this whole quilting world… I want you to stop. Stop it right now.

    Sit up a little straighter and puff out your chest a bit.

    Do it.

    I don’t know why, but if you can fake a little confidence, you actually really do gain just a little bit. Fake it till you make it! πŸ˜‰

    You got this. I promise!

    You know that I have a desire to make all the complicated hard parts of quilting accessible and attainable for the beginner quilter. – Everyone should really enjoy quilting!

    I made this video that goes over step by step – everything you need to know – detailed explanation of how to sew your quilt binding on. No extra fluff stuff, I promise. πŸ™‚

    Video highlights:

    • Calculating fabric needs
    • Common binding sizes
    • Connecting binding pieces together
    • Attaching it to your quilt
    • How to be the boss of those corners – perfect corners every time!
    • Alternatives to sewing a straight seam
    • Ideas on ways to make it your own!

    Really, this is THE video you need to watch on quilt binding. πŸ™‚

    Check it out. Let me know what you think! Leave me a comment that lets me know your thoughts. Give my fool-proof quilt binding method a try and see if you stress a little less with your next quilt binding!

    If you would like other tips on how busy people fit quilting into our days, check out the FREE download below! It is one of my most popular downloads! You can also join the ISeeStarsQuilting Community and stay up to date on all the fun tips and videos that I share as well as when a new pattern is released πŸ™‚

  • How to Wash & Care For Your Quilt + Free Printable

    How wonderful and sweet the gift of a handmade quilt is! It is the gift that can live on for a lifetime… Today we’re going to discuss how to wash and care for your quilt so that it does last a lifetime!

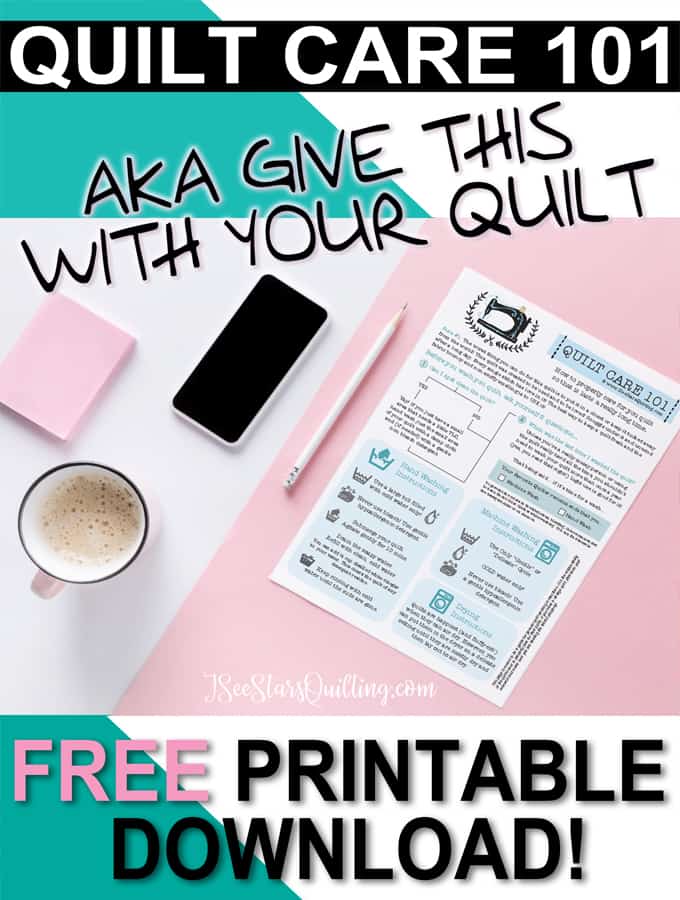
    I’ve also included a FREE printable card with quilt instructions that you can download and print out that you can gift with your quilts! [you’ll find it at the bottom of this post!]

    Many quilts can live on to be heirloom/family quilts… unless you don’t care for them properly, in which case it can end up ruined… πŸ™ – But don’t let that scare you! The worst care I’ve ever seen for a quilt is being tucked away in a closet where no one will ever see it or use it! *gasp* Absolutely tragic, I tell you!

    The fact is that most people who aren’t like you and me… you know… “quilters” simply don’t understand. And we can’t fault them for that, but we can educate them!

    There is no way to gently tell the person that you’re giving a quilt to how MUCH WORK goes into make a quilt. Like, so much work. Hours are spent planning and shopping, prepping and cutting before you even put one single stitch into that fabric.

    These sassy printable gift tags are available for FREE download! Perfect for use on every single gift DIY gift!

    (I created these Honest Gift tags that add a little sass (and a lot of truth) to the handmade gift item that you’re giving! And they’re a free download too!)

    Truth is, you are not doing all this hard work to have someone mistreat your quilt!

    Here are a few things you need to tell your incredibly lucky new quilt owners.

    1) I want you to use this quilt!

    The best way to keep a quilt fresh and the fabric bouncy and non-stuffy smelling is to USE it! Keep it out in the open air and touch it. Just walk past it and pet it from time to time. Snuggle it!

    This quilt is heirloom quality, meaning it will last a really long time, but please don’t seal it up and stuff it into a closet where it will never see the light of day! That is not what it was made for.

    Quilts are best appreciated if you cover up with it and unwind after a long day.

    2) If you have to wash it… ask yourself this…

    Its totally ok to wash your quilt! (actually, gross if you thought otherwise) I have kids. For years my husband and I joked “this is why we don’t have nice things” when any of us trip or spill things… myself included. Believe me, if a quilt can survive toddler years at my house… you’re going to be just fine

    Can I spot clean the quilt?

    If you just have a little are where the quilt got some juice on it or grubby cheeto hands thought it was a napkin, try to spot clean your quilt first. (See Below for suggestions on products to use)

    When was the last time I washed the quilt?

    Unless you’re just a really messy person or using the quilt really hard all the time… you shouldn’t need to wash your quilt more than once a year. (Yes, you read that right.)

    By all means, if it smells… please wash it – or hit it with a light spray of fabreeze if you’re just not ready for a single piece more of laundry. I won’t judge.

    3) Can I machine wash it?

    Yes! If you’ve decided that your quilt HAS to be fully washed, then you can do it by machine.

    Set your washer on the most delicate setting it has, usually “gentle cycle”. And only use cold water.

    Hot water will encourage those colors to bleed and we don’t want that.

    Can I put it in the dryer too?

    If you have the time and space, airdrying is preferred.

    However, I usually put mine in the dryer on the delicate setting and get it MOSTLY dry. I’ll pull it out while it is still a little damp and then lay it out where it can air dry the rest of the way. It seems much flufflier this way to me.

    4) What soap should I use?

    Definitely no bleach. I shouldn’t have to say that… but you never know… so again, no bleach! You’ll want to use a mild detergent.

    I’ve listed links to a few of my favorite brands and ones that I’ve seen other quilters swear by.

    5) What do I do if I am worried about the Fabric Dye Bleeding?

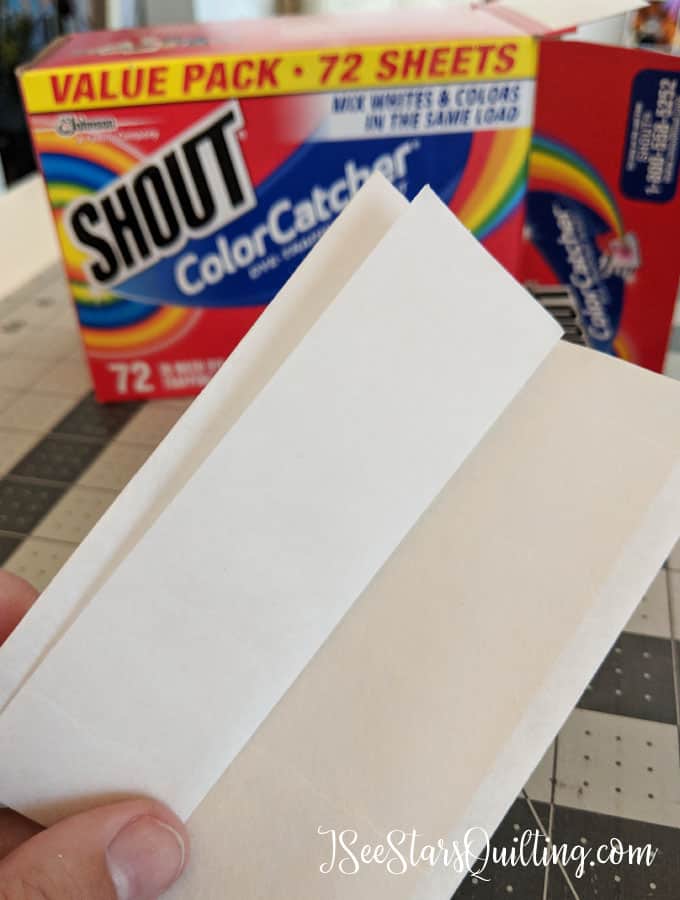
    This is never a fun experience to go through! Please make sure that if you have a really bright and colorful quilt (or do it even if you don’t have wild colors just to be safe) throw in a few Shout Color Catchers or Retayne in your wash. It is just a little insurance policy that will save your tail should the worst start to happen while the quilt is washing.

    It is always a good idea to make a little quilt care package when you give it away to it’s new home. If you own some of the special quilt soap, add a few tablespoons to a marked container as well as a few color catchers! Your new quilt parents will be much more likely to use them if they have them laying around!

    Have you ever made a quilt and then stopped to cry when you realized the fabrics were bleeding after being washed? - Relax! I have the solution you've been looking for! This little secret will save your fabric sanity!

    Shout Color Catchers look a bit like a dryer sheet. It catches dye that bleeds into the wash water and traps it on the color catcher so it sneaky bleed into your lighter colors. Retayne helps to seal dye into the fabric.

    For more info on how to stop a bleeding quilt, read this post on How to stop a bleeding quilt.

    6) What if I prefer to hand-wash my quilt?

    Yay you! Hand washing is actually really easy and I think the quilts actually prefer this method over being thrown in a big spinny machine!

    If you have a vintage quilt or a quilt that is hand quilted with applique, you’ll definitely want to hand wash to increase the lifetime of your quilt.

    • You will need a big tub. Fill it with cold water and gentle detergent.
    • Completely submerge your quilt under the water. Agitate it gently for about 10 minutes.
    • Drain the soapy water, and then refill your tub with clean cold water again.
    • You can add Β½ cup of distilled white vinegar to your water. The vinegar clears the quilt of any detergent residue.
    • Keep rinsing with cold water until the suds are gone.

    Lastly…

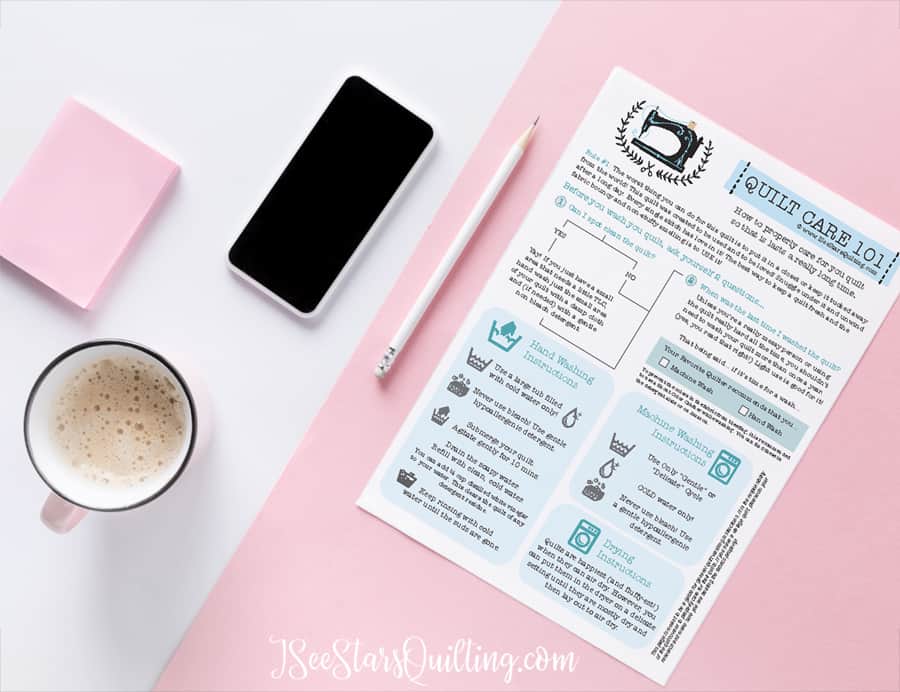
    I made this PDF download. It has all your quilt care and washing suggestions handy in 8.5″ x 11″ sheet that you can print over and over and gift along with your quilt!

    I’ve also included a “history of your quilt” page as well. It is a wonderful place to explain why you made the quilt or chose certain fabrics and it helps ensure that the story of the quilt will not be lost with you.

    I often find that it is really tough to remember what all I wanted to say when I’m giving away a quilt… mostly because I’m just so excited to finally see the quilt in their hands that I get distracted and forget! So I’ve been trying to take a few minutes and write down what I want to say on the card. It’ll be another treasured keepsake to keep with the quilt πŸ™‚

    For more ideas on what to gift with a quilt, check out this post. 4 Important things to include when you gift a quilt.

    Let me know what you think about the download and if you have any other questions! I’m happy to help!

  • Quilting Tools I Can’t Live Without

    Look, I admire the quilting women of generations passed who just needed a needle (and it didn’t even have to be all that sharp) and some fabric to create a beautiful work of art…. but I just can’t do that. I LOVE all my modern quilting tools! There are so many that make my life easier and allow me to work more efficiently and save me time! SO I thought I would share them with you today. These are the Quilting tools I can’t live without!

    These are 6 Quilting tools that I can't live without in my sewing room!

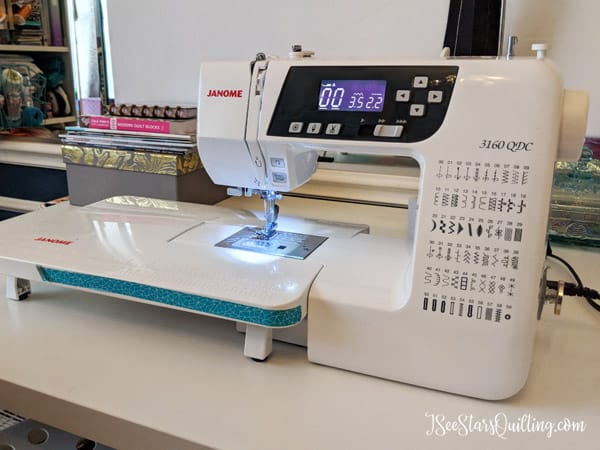
    1) First off – My Sewing Machine!

    This beautiful machine is my sewing BFF. We’ve been together for a few years now and it has been worth every single penny of my investment and then some!

    Overwhelmed with the sheer amount of accessories you can have in the sewing room? - Read this list for the top 13 Must-Haves in the sewing room!

    I have the Janome 3160QDC. She is as absolute dream home quilting machine without going too deep into your pockets!

    Sewing machines are kind of like cars… some people prefer Ford, some people like Toyota. It is still going to run and do the job it set out to do, but some brands have a few more bells and whistles than others.

    Whatever you decide is “your” beloved brand, do yourself a favor and really consider where you want your skills to be in 3-5 years. When you buy your sewing machine, make sure it has those capabilities because, with regular care, you two will be besties for life!

    2) Wonder Clips

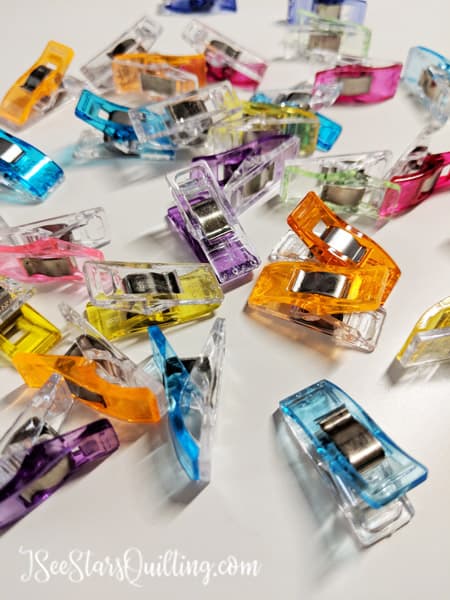
    If you’re the boss of your sewing space, these babies are like your personal assistant – behind the scenes keep everything together and organized.

    Must-Haves for the Sewing Room

    Also, bonus, they won’t stab you like their pointed job counterparts… I’m looking at you single pin that fell down in the carpet and was found later by my foot. ouch!

    3) Rotary Tools and Accessories

    My suggestion is if you invest in only one single tool, it needs to be one of these. Scissors just ain’t going to make the cut for modern quilting patterns and templates. (I mean scissors WILL cut… but not well… you know what I mean)

    I can’t even imagine being able to cut accurately without my rotary cutter!

    Overwhelmed with the sheer amount of accessories you can have in the sewing room? - Read this list for the top 13 Must-Haves in the sewing room!

    The one I use the most is this one. It is a Fiskars brand rotary cutter. I also have an Olfa brand one that I like, but the fiskars one just fits ergonomically in my hand better.

    Make sure you get one with an easy closing blade and make sure you train yourself to close it after every.single.cut. Sometime I will share with you what happened when my rotary cutter slipped off of my cutting table and fell on my barefoot. It didn’t hurt at all. In fact, I barely felt it… but the cut, and the blood…. close your rotary blades, ladies!

    I also highly suggest investing in a good self-healing cutting mat. Wait no, not a suggestion. You have to get one of these as well. Otherwise, you will destroy whatever other surface you have in your sewing room, as well as the rotary blade itself.

    6) My Rulers!

    This goes hand in hand with the rotary tools, but rulers easily are a category of their own.

    Overwhelmed with the sheer amount of accessories you can have in the sewing room? - Read this list for the top 13 Must-Haves in the sewing room!

    Your standard crafting and dollar store rulers will be sufficient for a while but they will show wear. When I bought quilting rulers for the first time… oh man, never again will I use anything else as a straight edge to cut with. (I truly was super budget in the beginning and I used a lot of amazon boxes as my templates and rulers! … gasp… I know!)

    My favorite brand is The Gadget Girls rulers. Besides being just absolutely wonderful people, their products are amazing quality and the selection is vast enough that if you’re looking for a specific function ruler… you will find it! http://www.thegadgetgirls.com

    You can also read my post Essential Quilting Rulers and why you need them.

    5) My Tiny Iron

    I wrote a whole different post on irons because they are essential in the sewing room (you can read the iron post here – Which Iron should you be using?)

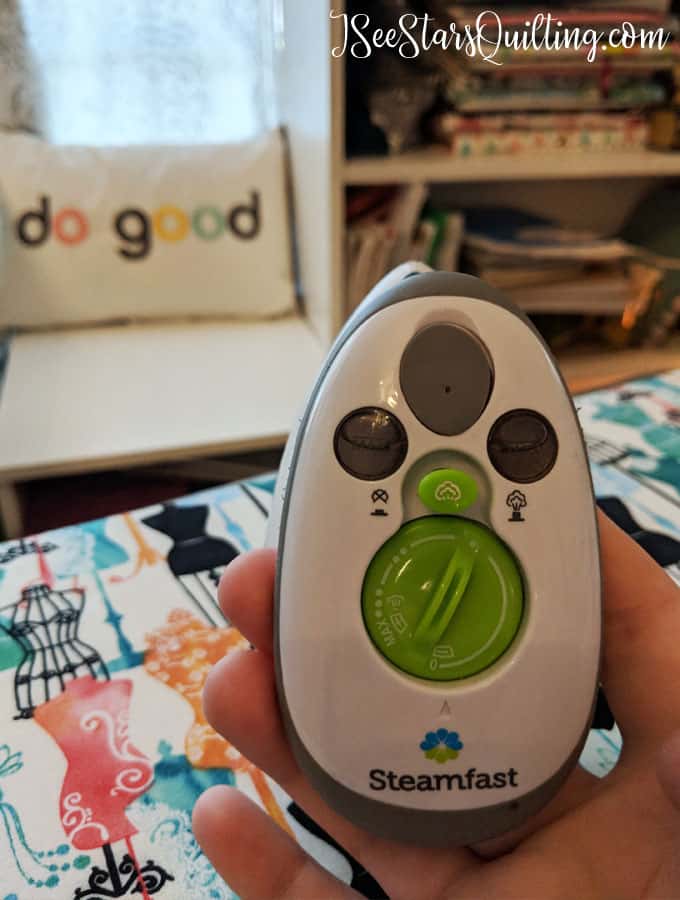
    This little one is my favorite! – No, it doesn’t replace my big guns iron. But the little girl does a fine job of ironing my seams and not blasting hot hot steam all over my little fingers while working in tight areas!

    Tiny in size but powerful in uses and easily near the top of the list as most useful tool in your sewing room. Read more why THIS iron is my favorite...

    6) My SeamRipper

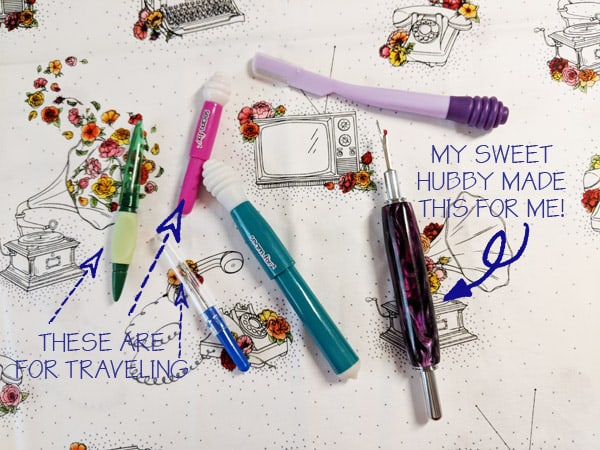
    Yes, something I wish I didn’t hold near and dear to my heart….. yes, my seam ripper is absolutely essential in my sewing room because… I don’t know, sometimes I’m a total spaz and I make terrible sewing decisions or even just spaced out silly mistakes. *shrugs* Thats just life. What are you going to do?

    My husband MADE me a good sturdy one. (Yes, ladies. The mister of the house is a crafty one too!) It makes a frustrating moment a little less terrible knowing that he loves me. πŸ™‚

    Overwhelmed with the sheer amount of accessories you can have in the sewing room? - Read this list for the top 13 Must-Haves in the sewing room!

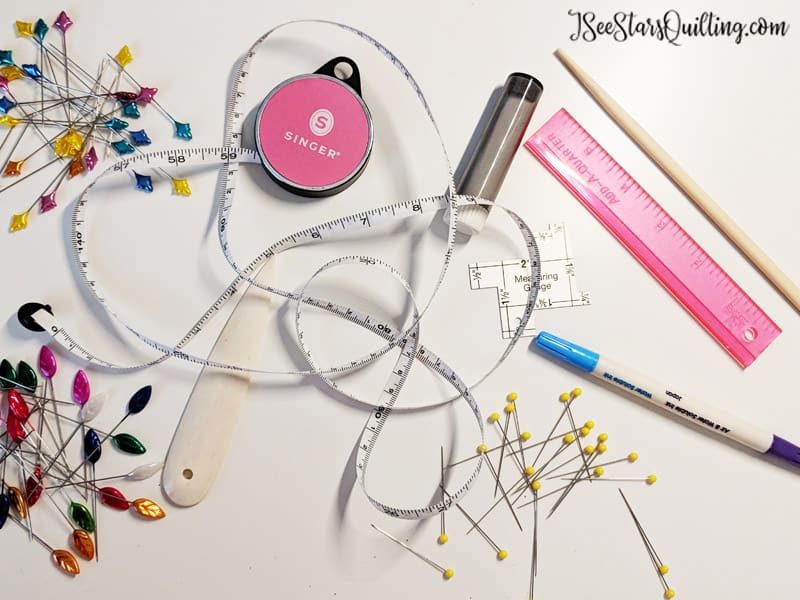
    7) Misc Notions

    To be honest, if I ONLY had the 6 items above… I would be able to survive just fine in my quilting room!

    You don’t need a ton of extra fluff and tools. But there are a few times where if my budget has allowed, I splurged on a few extras.

    Overwhelmed with the sheer amount of accessories you can have in the sewing room? - Read this list for the top 13 Must-Haves in the sewing room!

    These extras have included pretty pins, organizational bins and trays, Different sewing feet for my machine etc… but mostly just pretty little things that I find (and of course, have a coupon for it, so why not, right?)

    Fill your space with things you love!

  • Why You Should Nest Your Seams

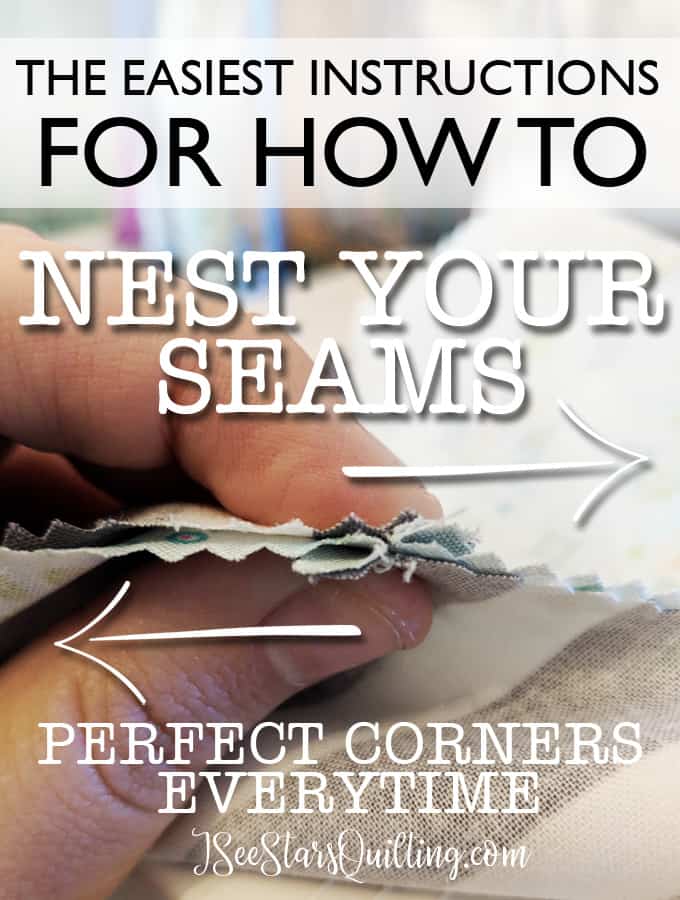
    This is powerful-quilt-skill-altering-stuff here today, happy people! We’re going to learn one of my favorite tricks in quilting: How to Nest Your Seams.

    (If you’re impatient, there is a quick video at the bottom of this post!)

    Nesting your seams is a VITAL tool in quilting. It will help you get that finished and polished look on your quilt and cut out those rookie mistakes where your corners shift and seams don't line up. This is an easy trick that any quilter can use! Try it out on your next quilt. You won't be sorry!

    Are you ready for this? Because It is going to be great!

    We’re going to dive into the what, why and how of it all.

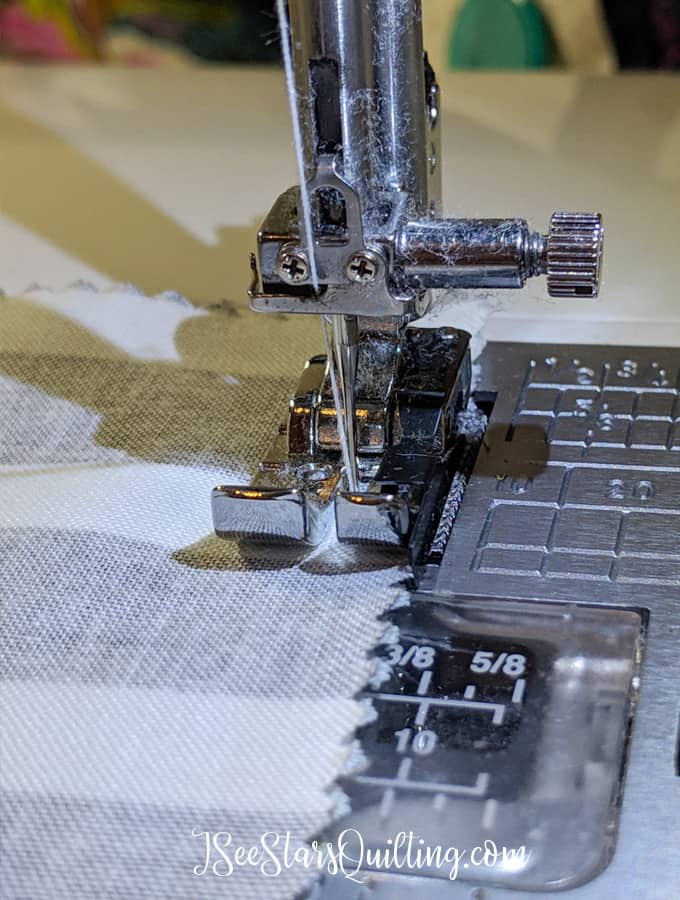
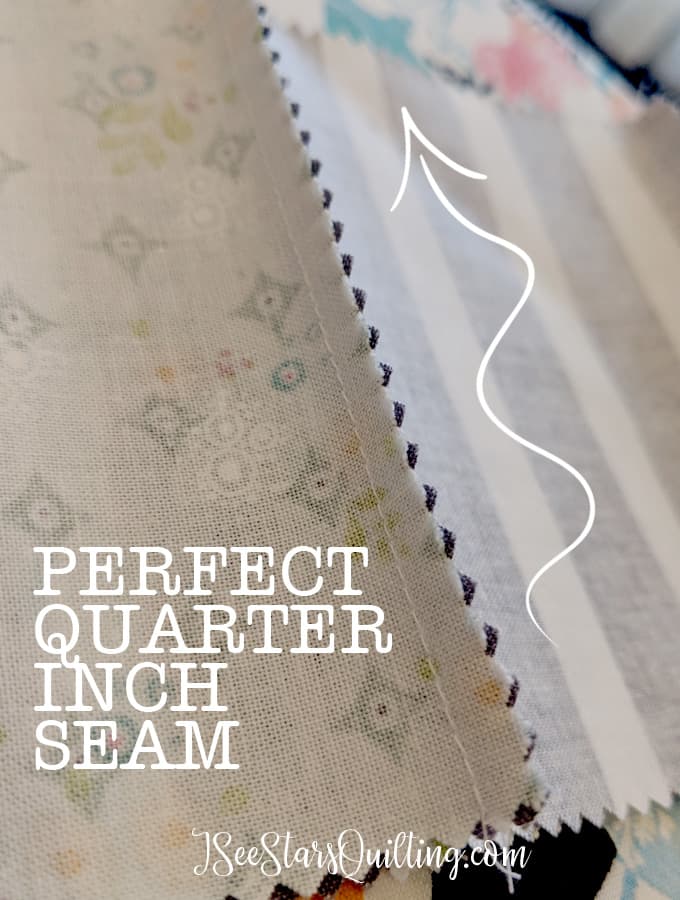
    First… make sure your seam allowances are all the same measurement. Your seams will not line up if you’re off in your seam allowances! For tips on that, you can read more about mastering that skill in this post: Mastering The Quarter Inch Seam

    *Yikes! Look at all that fuzz!*

    What is nesting your seams?

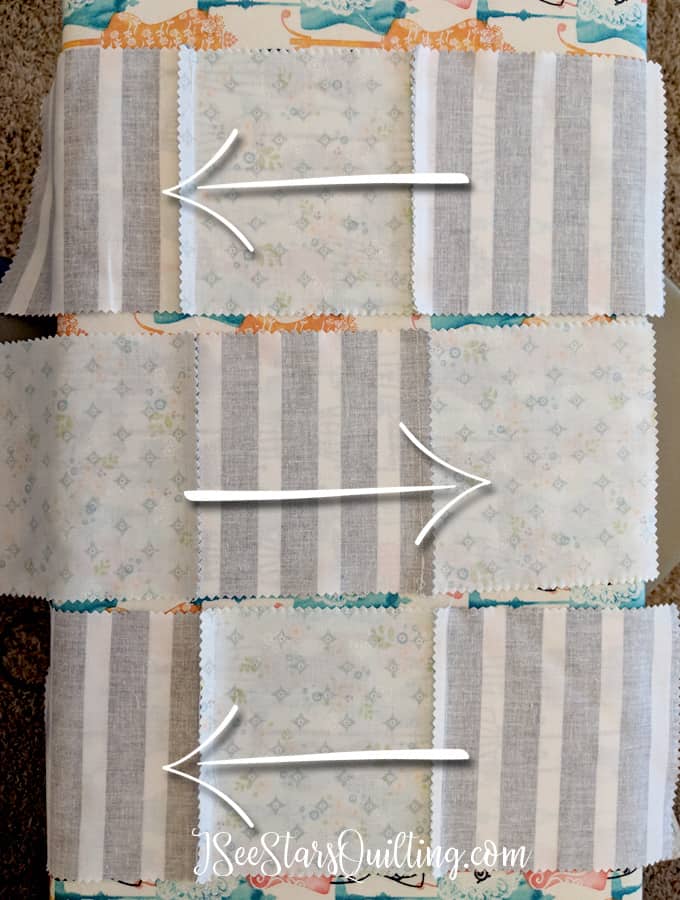
    Nesting your seams starts with how you press your seams after you sew.

    Yes, I’m going to be one of those pesky quilters that tells you how important it is! A few years ago, I was on the opposite side of the fence and you couldn’t make me touch an iron on each and every seam. I learned my lesson and my quilting has improved so so much since then! So I don’t want to hear your whining. Just suck it up and do it, ok?

    Some quilters prefer to press their seams open to make the quilt top lay flatter… it is a personal preference, but I usually press my seams to one side, which allows me to nest my seams and have nice tight hold between my seams without using pins. 

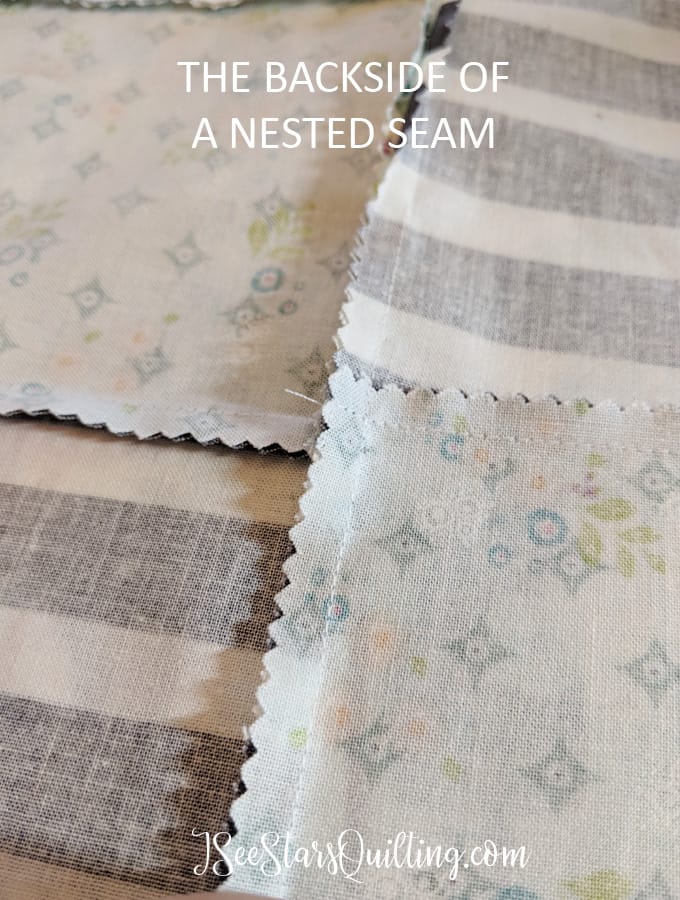
    Ok now that we’ve all decided that ironing is best…. Start by ironing all your seams like the picture below. Each row will alternate seam pressing directions.

    Next, you’re going to sew your rows/columns together!

    Why Should you Nest Your Seams?

    I think this one is obvious and probrobly why you came to my site in the first place, but really… we want out quilts to be as perfect as we possibly can get them to be, right?

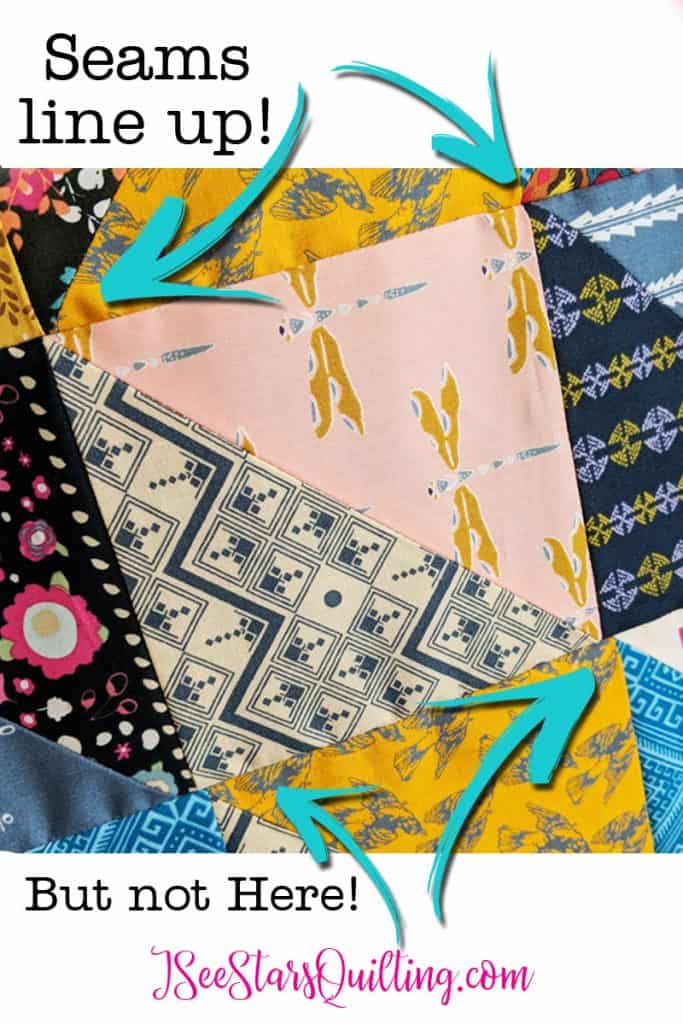
    Take a look at this quilt I did a while back, you will see the glaringly obvious error. And we don’t want our seams to be off, right? I COULD argue that its supposed to be that way… modern quilting does allow us a lot of liberties in the name of art, but you and I both know the pattern didn’t call for it to be that way.

    How to MASTER the quarter inch seam. Want to improve your beginner/intermediate sewing skills? do this and you'll be well on your way

    How to Nest Your Seams?

    So let’s get to fixing it so the above issue doesn’t sneak up on you!

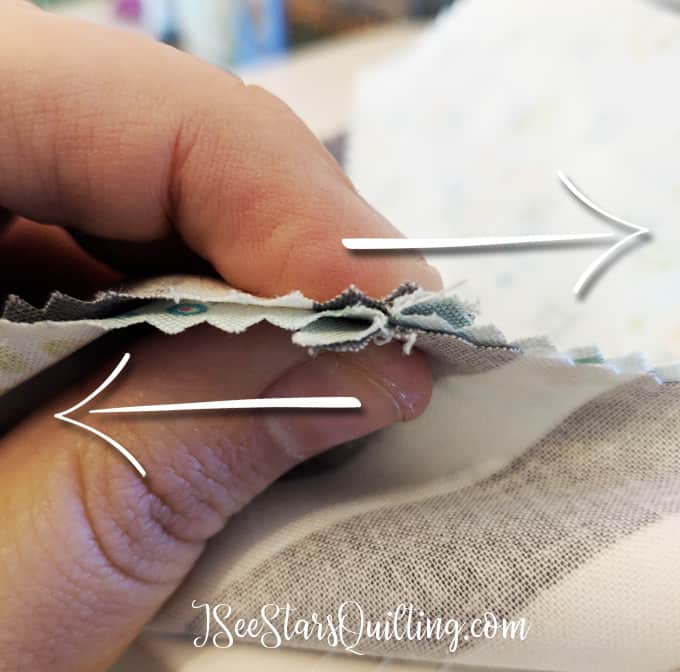
    With your fingers, I want you to line up the seams. Rub it between your fingers just slightly. You’ll be able to feel it when that seam finds its sweet spot! The seams will nestle in right next to each other.

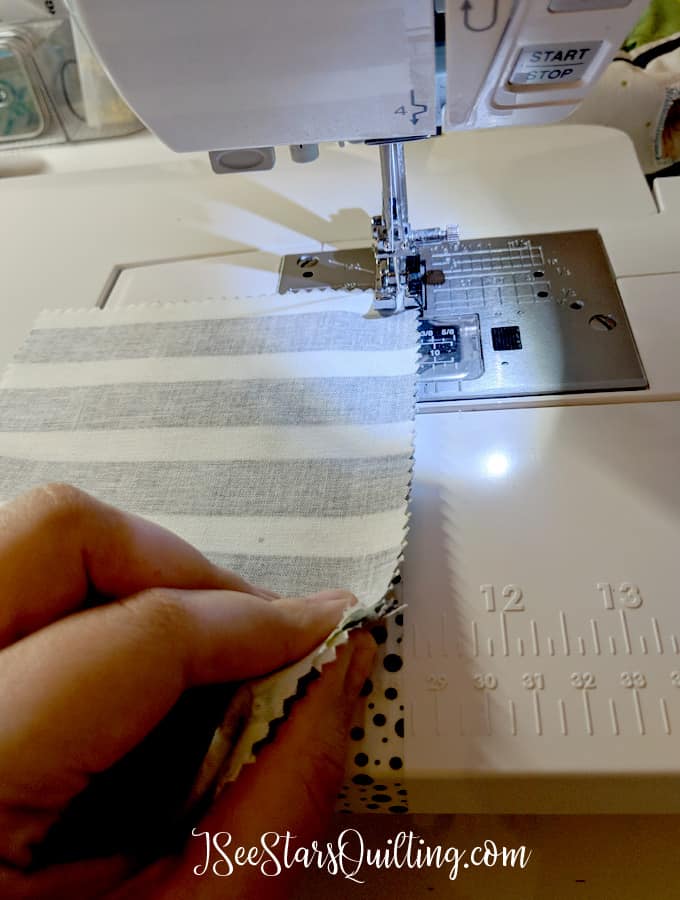
    You can put a pin in it if you like but I want you to still hold onto it with your fingers when you sew because its the absolute worst to sew a whole long line of a seam only to find out a few of the little guys have shifted and then out goes the seam ripper (and my grumpy side).

    Pinch the seam between your fingers while you’re sewing so that it’ll be perfect and the fabric will be evenly distributed in between each little nest.

    When you come to it, make sure the fabric doesn’t shift. This may take a few times to get comfortable with but I rarely have to check this anymore because I’ve got this and it is like second nature.

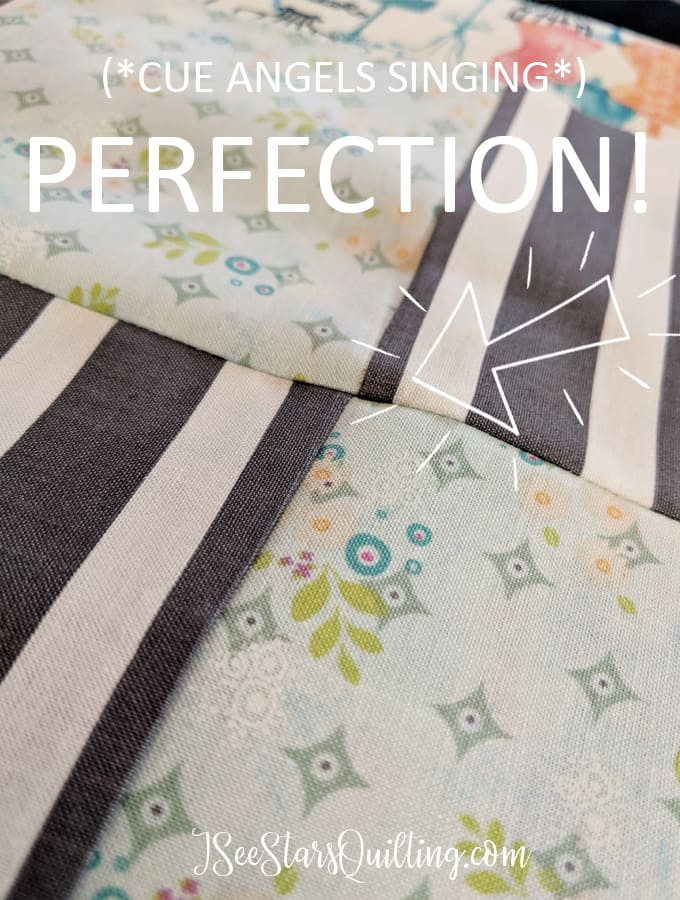
    Flip it over, press your new seam anyway you like and VOILA!

    This little trick will save you so much time and really help to give your quilt that polished look! (one more rookie mistake will vanish from your future quilts!)

    Let me know what you think in the comments after you give this a shot, won’t you? I love to hear from you!