Are you a beginner quilter? Feeling overwhelmed with the sheer amount of knowledge out there that you have no clue about? Listen up. I’m going to tell you the 8 sewing skills every quilter should know.
If you are looking towards improving your skill as a quilter or are a beginner quilter, you are going to love this post. Focus on learning these 8 skills and you’ll be an amazing quilter in no time!
There are affiliate links within this post. Please find my full disclosure here
The 1/4 Inch Seam -aka- The Quarter Inch Seam
A quarter inch seam isn’t exactly “law” in a quilter’s world, but… it kind of is. You’ll want to brush up on this and practice it if you aren’t already. Quilters are known to use 1/4″ seam, always, unless otherwise mentioned in your pattern. Clear as mud? Good. Let me explain a little further.
The quarter inch seam may appear small, but keeping the seam allowance thin allows us to save fabrics! Everything on the inside of the quilt will remain unseen so we waste as little as possible.
It also eliminates extra bulk behind the quilt top. Image if instead of the 1/4″ seam, you used a 1/2″ seam. Can you see the amount of extra fabric that would be behind the quilt top? When it comes time for quilting, you’ll have more areas of your quilt with multiple layers of fabric vs sticking with the 1/4″ seam.
Is it REALLY important to have a precise 1/4″ seam?
The quilting teacher in me screams “YES!” … but I also remember starting out with quilting and not having my ducks in a row yet and I was still so-freakin’-proud of my first several quilts, flaws and all. I believe I called myself a ‘free-spirited quilter’… which was code for, rules don’t apply, I do what I want. (And actually meant that I learned several things the hard way)
However, the realist in me is going to give you this advice: Yes, in fact, 1/4″ seams DO matter BUT don’t let it yourself get caught up in all the strict rules if you are just starting out quilting. It is a skill that you acquire as you go, like so many others. Just keep it in the back of your mind and as you’re learning more about quilting, try your best to stay consistent with your seams.
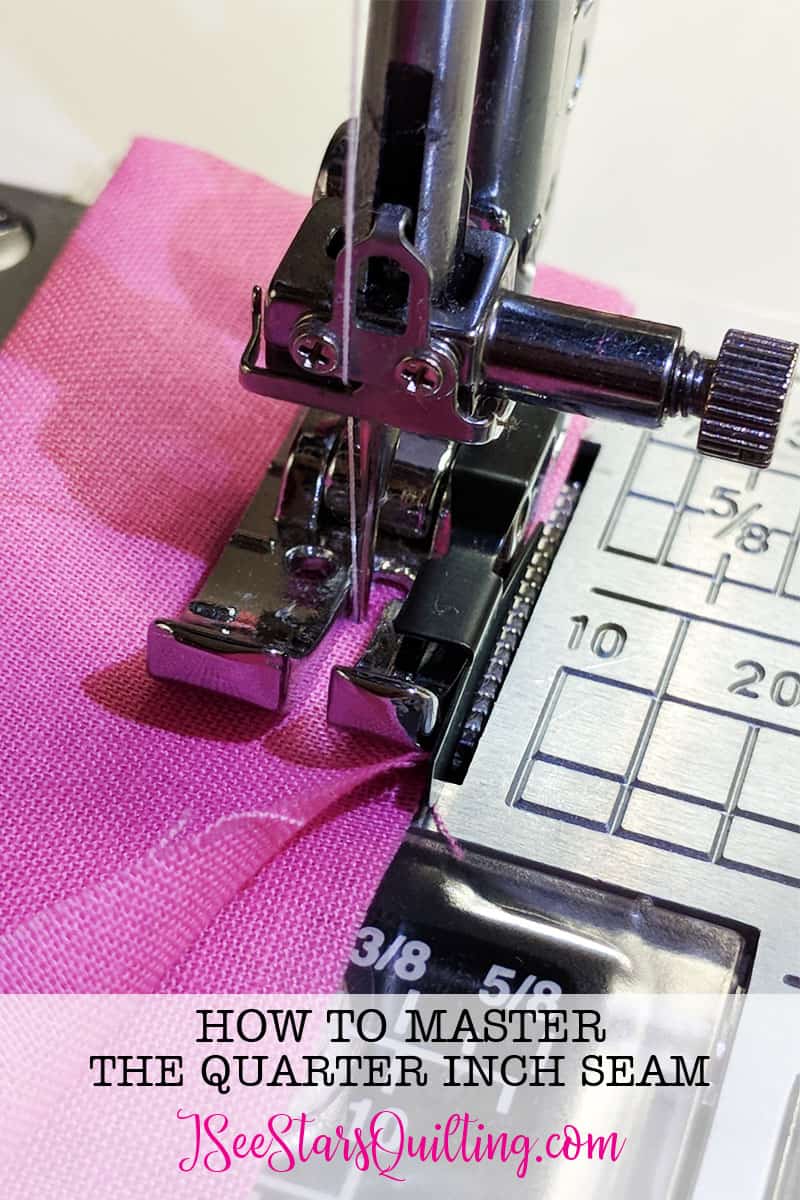
In a simple all-squares grid-like quilt, it is not that necessary. As long as all the seams are pretty much the same size, you can still end up with a pretty good quilt at the end. Points will mostly match.
In a more complex pattern, you’ll find that the seam allowance is key to making all your pieces line up correctly. A little give and take in the sewing and you’ll find yourself in a mess of mismatched points.
For more help with the 1/4 inch seam check out this link:
Save your Scraps!
*This is not permission to be a hoarder. (Though your definition and my definition of the term may be different)
When I first started quilting, I wouldn’t see the need for little pieces of fabric leftover from a project. I didn’t have the room to store things and I was more than happy to toss it. Then, I discovered “scrappy quilts”. Oh man, was I wrong to let go of so many pieces of fabric that had yet to live up to their full potential?
A scrappy quilt is exactly what you think it is. It is made from scraps of fabric. A scrappy quilt can be intricate and detailed. It could be wild and completely improv sewing or it could be something that takes you years to sew just a tiny bit at a time. But what it is, is beauty in what otherwise would have no further purpose.
As a DIY addict, I love that.
And when money is tight or your husband questions why you HAVE to go to the fabric store because he just doesn’t understand… you can make everyone happy by digging through your leftover fabric and creating something out of nothing!
For ideas on storing your scraps, check out this link:
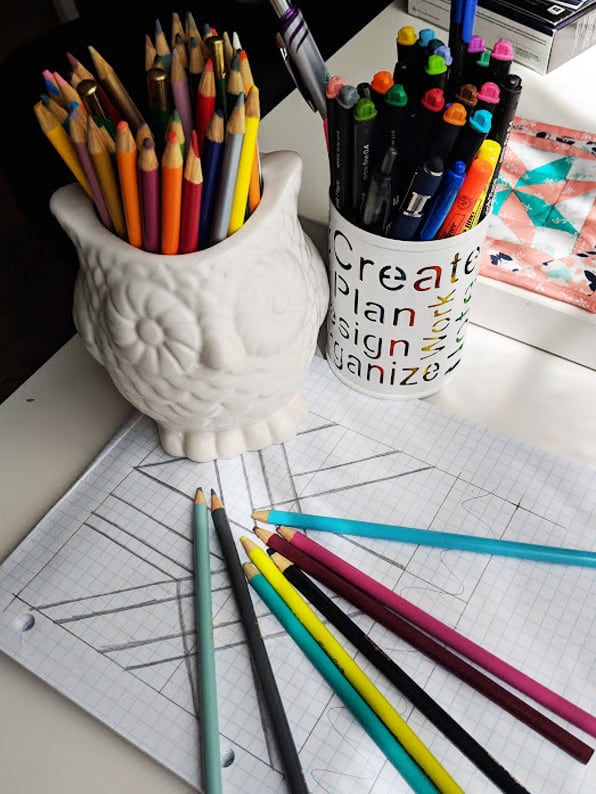
Learn to Play with Color and Patterns
As a self-described free spirit and freelance designer, this comes easily to me, but I know it doesn’t for everyone.
If you know that you love blues and cooler hues… quilt with it. Playing with what you love is going to make the job fun. But don’t be afraid to try something new if another fabric catches your eye. Keep things interesting by changing up your normal.
Thinking about the colors before you begin cutting can play a big role in making sure a quilt stands out and is pleasing to the eye. The distribution of colors across a quilt can make a big difference.
There are quilt programs out there for your computer so you can do everything digitally and print it out in fancy precision. I know several quilters who swear by it and love planning a quilt that way… personally, whenever inspiration strikes, I pull out my colored pencils and graph paper. Do not underestimate the contents of your child’s art drawer! They can be just as useful in envisioning your finished quilt.
For more information on working with colors for quilting, see the link below:
Cutting Precise Pieces
I know… there is THAT word again… ‘precise’. I get it. It’s like ropes and chains for all the free-spirited artists out there.
I didn’t want to be the one to tell you, but if you will listen to me, I will tell you nicely… I’m going to be real with you and share that It took me a long time to learn this on my own because I didn’t listen to anyone else who told me… You’re just going to have to let it go and follow this rule. It doesn’t have to break your spirit! What will break your spirit is ignoring this and thinking you can end up with the same results as all the other more advanced quilters out there.
Ok, now back to precise cutting…
Cutting the right size is the key to perfect piecing. There, I said it… Simple and straightforward. Maybe you’ll take my advice.
Always measure twice before cutting. You don’t want to end up finding out beyond the point of no return that you’re working with incorrect pieces and THATS why things aren’t coming together right. It’s frustrating and usually a waste of time of money too.
Use a rotary cutter and a cutting mat. It makes cutting fabrics so much easier and faster.
Change your blade often to keep your cuts precise and sharp. If you have to go over it a few times to cut through your layers you risk the fabric shifting and being ‘almost precise’.
Also, buy a blade that has a protective closure to maintain safety. Get into the habit of closing it after EVERY.SINGLE cut! NOT after every single project.
Lesson time: I once knocked my rotary blade off of my cutting table and it hit the top my foot. It didn’t hurt. I barely noticed it in fact, but it did cut really deep and it bled like I would image a bullet wound would. That was not a fun moment. I’m so glad it was me and not one of my kids or the dog that was in the line of fire. The lesson is to be careful. ALWAYS. I have known friends who are missing sections of digits thanks to exacto and rotary blades. Safety first. (again) ALWAYS!

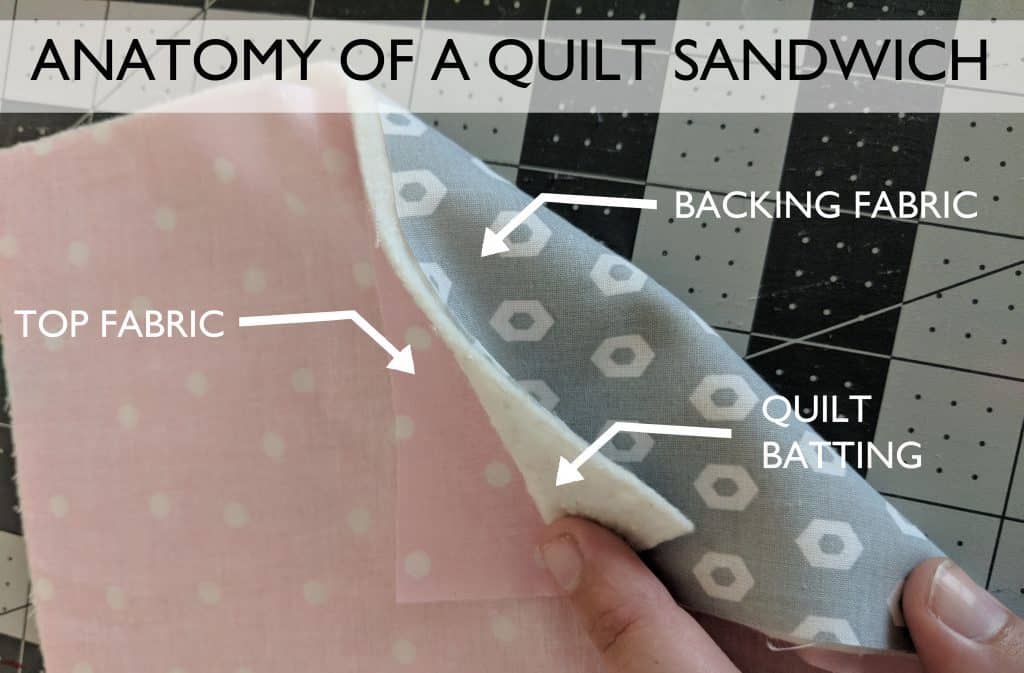
Basting a Quilt
This is a fun monster to tackle when you’re first growing your quilting skills.
I love basting with a 
I can’t decide for you what basting method that you are going to prefer, but it is really important to keep your quilt sandwich from shifting while you are stitching and keep the fabric as flat as possible.
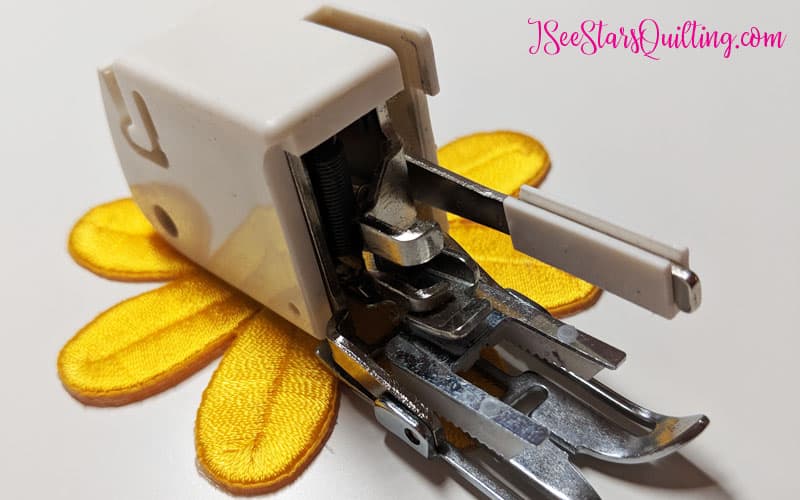
Quilting With A Walking Foot
90% of sewing CAN be done with your standard sewing machine foot. No changes necessary.
Sure, there are projects where the other 9,000 different sewing feet can come in handy, but absolutely NONE of them can do the job of quilting better than the walking foot. have this walking foot, which is just kind of a generic one, but each machine company should have their own that was designed specifially for your machine.
Sometimes you have a quick quilt that you’re making for a gift and you just need it done fast. You can quilt by hand, but quilting by machine is beautiful in its own way and is something that I believe all quilters should know how to do.
For more information on the Walking Foot, you can read this link:
Square Up A Quilt
This is tough to master when starting out because a lot of your skills as a quilter come from time spent at the machine and not from reading fun blog posts you come across on Pinterest. (you can follow me here though! I love to share fun tutorials and projects)
Ouch, right?
Sometimes a wonky quilt will leave you trimming more and more off leaving it smaller and smaller as you try to square up the final quilt.
You know when you try to fold a fitted sheet and it just doesn’t want to be folded because there are no corners to line up? Your quilt will need those rigid corners to line up and look nice and neat. Sure, a wonky quilt will still be a good snuggle and will keep you warm on the coldest of nights, but it will never look nicely folded unless it is squared up properly!
This means that the top and bottom are the exact same length and the left and right sides are the same length. Your corners are also 90 degrees and other cuts are level and straight.
Quilt Binding
To complete your quilt, you’ll need to add binding to hide any raw quilt sandwich edges. This also makes a nice frame for your quilt… your beautiful masterpiece of art!
I like to do my binding completely by machine. I suggest learning this method first because honestly… it is faster and sometimes it’s just nice to get.things.finished! Once you get that down, you can try out different types of binding such as hand sewing which can give you a more precise look with a hidden stitch.
For more tips on Binding, you can check out this link:
To wrap things up…
Taking time to master the skills in quilt making is going to make quilting so much more enjoyable for you in the long run!
You have to practice… but don’t look at it as lessons and strict schoolwork.
Make it fun! Go find some beautiful fun fabric and start making things for the people that are going to love everything you make, no matter what it is! Remember how your mom used to ‘ooh’ and ‘ah’ over your crayon scribbled drawings? Not because you were a deep and soulful savant artist… she loved them because YOU made them for her!
Make something for your kids. If you don’t have any kids, make some for a niece or nephew, a cousin or a friend’s kid. pick out fabric with something they love on it and I swear… you’re a golden hero. *gasp!* ‘you MADE that?’ “wow, I could never do that’ ‘I’m-totally-keeping-this-forever-and-ever-and-you-are-now-my-favorite-grown-up-of-all-time!’ (that was the kid in the last comment if you couldn’t tell, but I’ll be really proud and jump up and down in a really excited energy filled dance for you too if you want!)
NO one is going to notice that your seams aren’t EXACTLY right. They won’t be able to tell that your angle is off or you mis-cut and had to improvise.
My grandma has the quilt that I made for her on display in her house like a fancy art piece. no one is allowed to use it, which frankly defeats the purpose, but I love that she loves it so much to treat it with such care…. flaws and all, (which no one but me sees).
I believe that practice is key in all skills, so just keep on quilting!