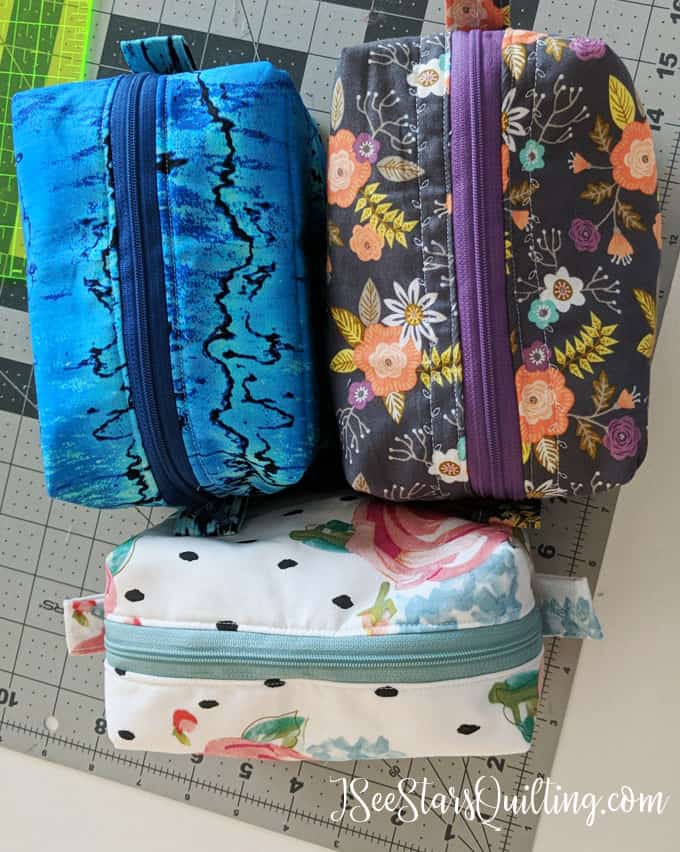
The other day I was talking to a friend of mine about this zipper box pouch tutorial and how I’ve been making a bunch of them because they are so fast and fun and I’m going through my big scraps like water. It is just perfect, right? And the time to complete each one has gone just under an hour to only 35 minutes each. Yeah, I’ve been making a bunch of them so it goes pretty quick now.
Easy gifts? Um, yes! (To my Mom: Still act surprised when you get one of these for Christmas ok?)
You may have caught a sneak peek at some of these in the works on my Instagram account. Instagram my favorite way to share updates on the many projects that I have going on right now. Follow me!
So as I was saying, I was all proud of the progress I had made… and just when I thought I had everything figured out, she showed me a different way to make the corners of this box pouch. Say what?! Yeah… and it was kind of mindblowing, honestly.
So I’m adding a quick alternate ending to the tutorial for the zipper box pouch. It was really cool to go about it completely different and still get the same results. I just had to share it with you!
Check them both out and see which way you prefer!
(Side note: Both ways work out with exactly the same results… It is just a different technique.)
If you haven’t read the first part of the tutorial, click here and then come back 🙂 I’ll add a link on that post as well!
Alternate ending tutorial for the Zipper Box Pouch
Ok so where we left off in the other tutorial, you should be looking at a pouch that is flat just like this one, and the sizes are zig-zag stitched just like this one too. Got it? Good!
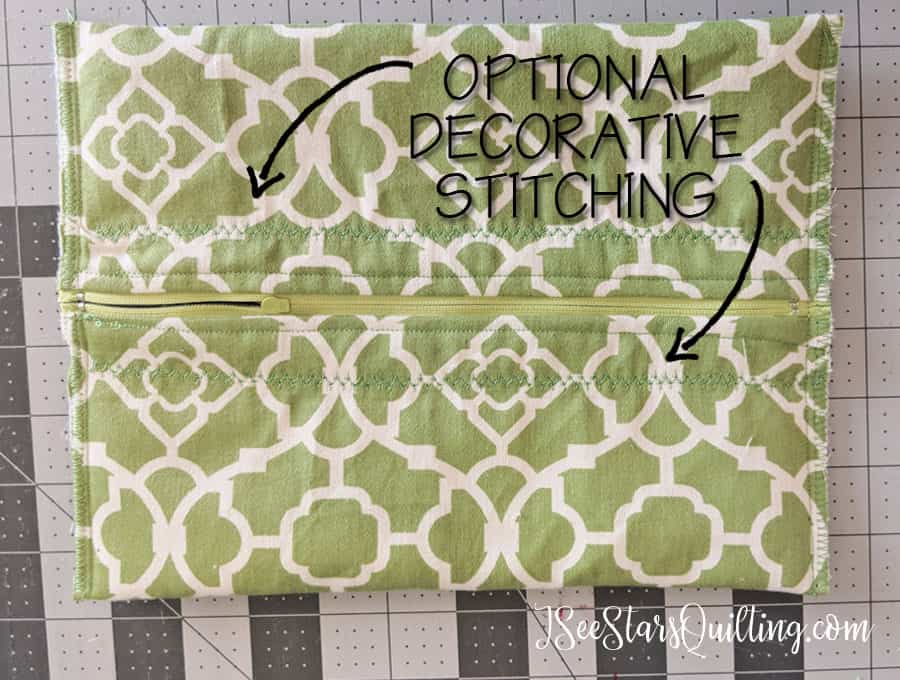
Please see my note at the bottom of this post about decorative stitching ideas. It is something new that I started after I made the tutorial
In the previous tutorial, I had you measure up 2 inches on your folded sides. Take your ruler, fabric marker or light pencil and draw a 2″ square in each corner of your rectangle.
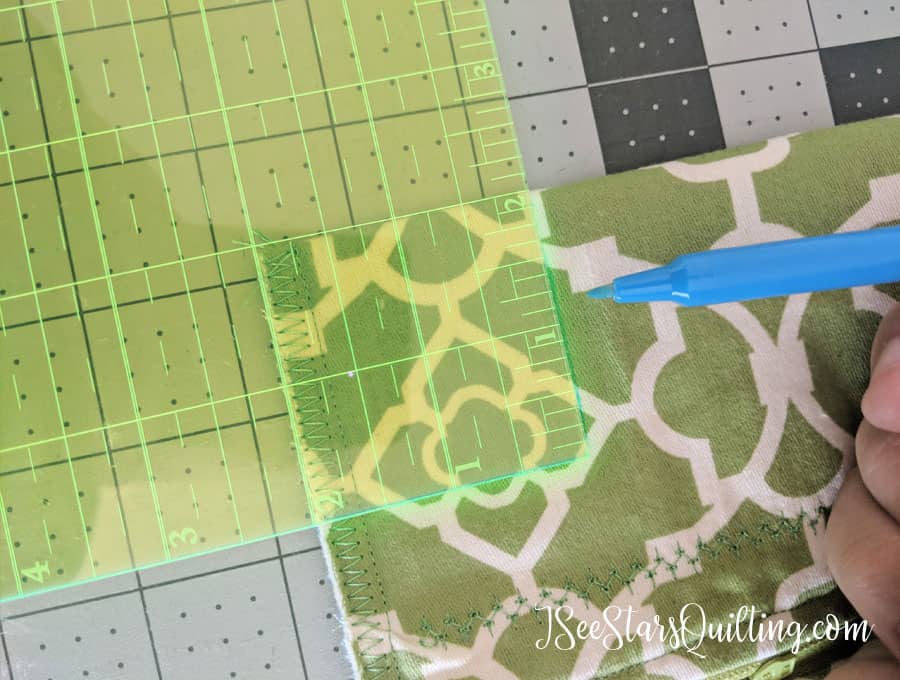
Then carefully using your rotary cutter and a ruler as your guide for a straight line, cut those squares away from your fabric.

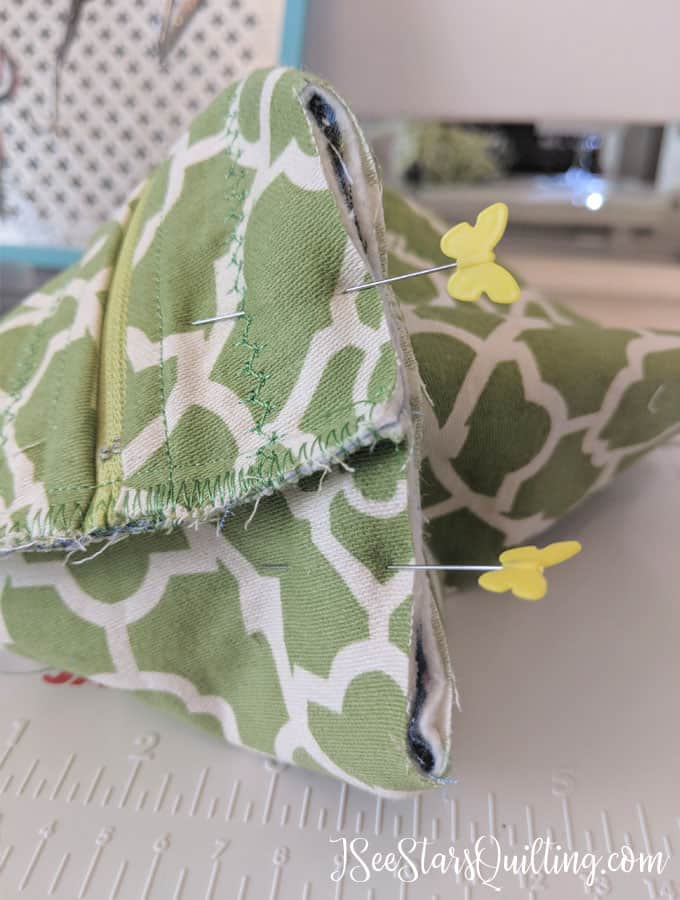
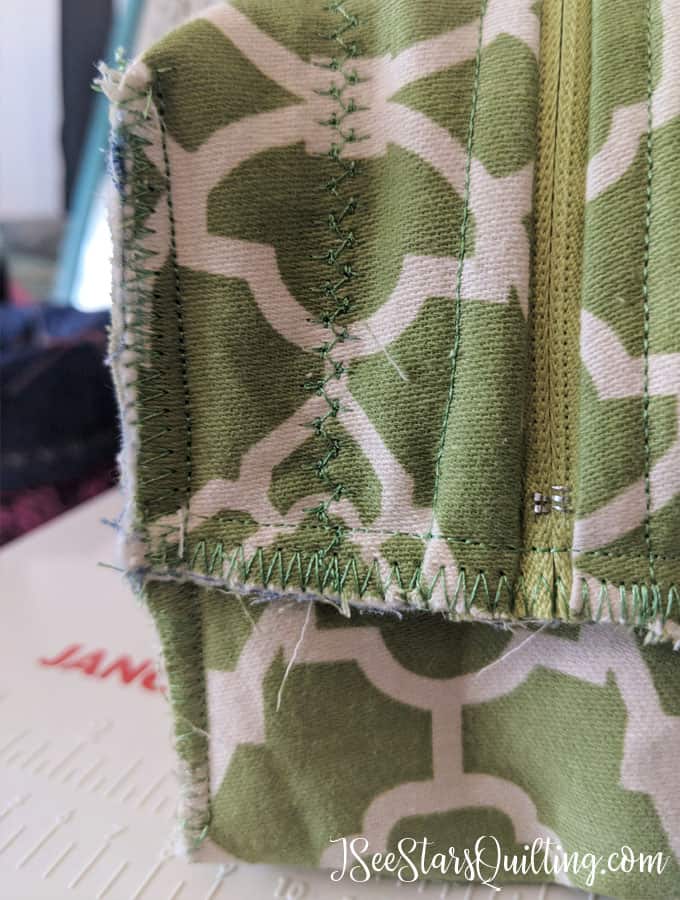
Next, open the square cuts and pin with edges even. I think pictures speak louder than any words, but to explain a little further, the center of the 90-degree cut you just made will be the top and bottom points on the seam you’re about to sew.
A little more clarification (skip along if you’ve got this) I want to make sure no one is left confused 🙂
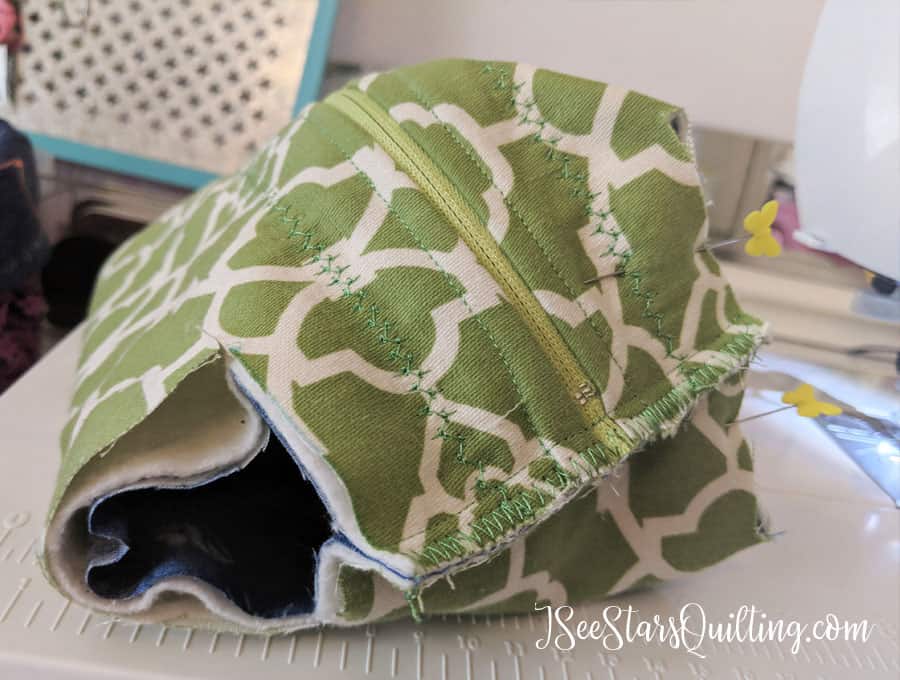
Sew a 1/4 inch seam allowance down your newly pinned seam, then zig-zag stitch to prevent any further fraying of fabric.
Do this step for all four corners.
Before I call my zipper pouch “finished” I take a pair of embroidery scissors and trim any stray wild threads in the interior for a more finished look.
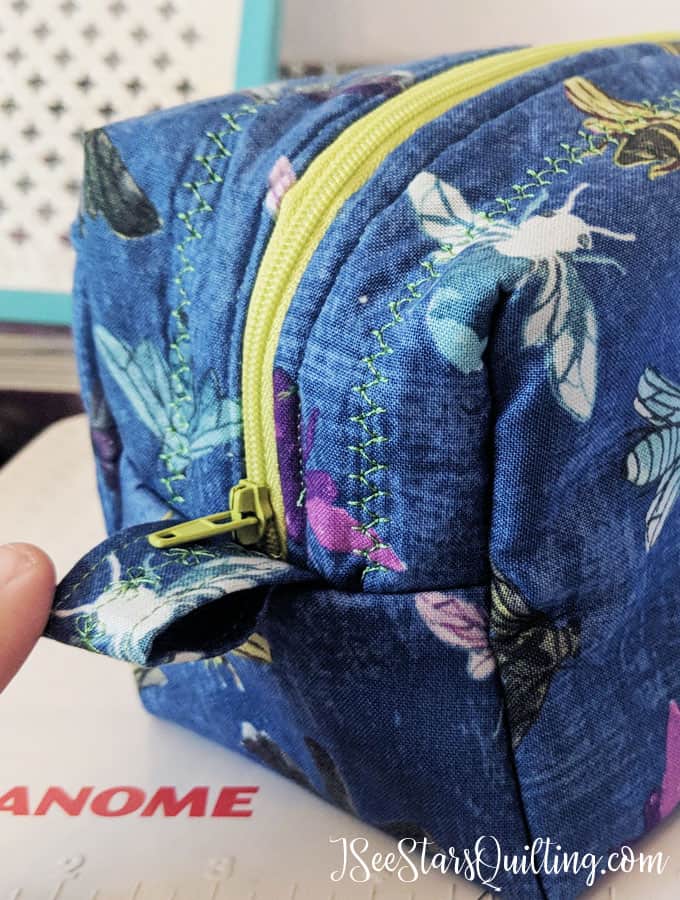
Turn the bag right side out, and you are finished! Ta-da! Isn’t it cute?
Adding Decorative Stitches
This is just a little something extra you can add if your home machine has the options of decorative stitches. I love picking contrasting thread for my bags, and this is the perfect venue to show it off.
Right after you stitch your zipper sides, sew another line of decorative stitches about 1-1.5 inches away from your zipper line. You can’t add it in later, Sorry. Experiment with a few and see what you like.
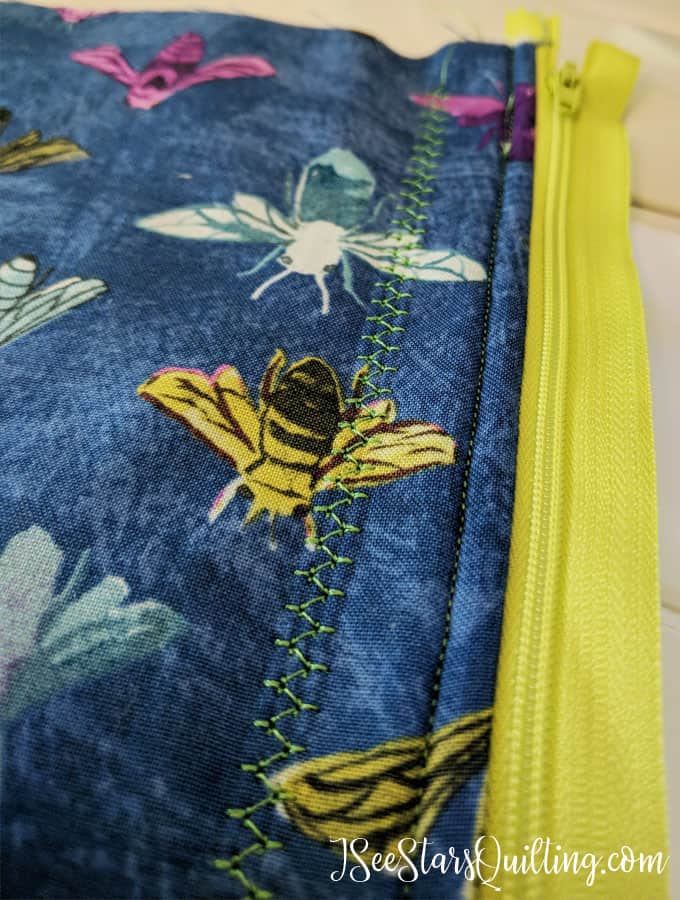
Do not stitch too far away from your zipper or your stitching will fall into the sides of your bag. The 1-1.5″ area is just enough to frame out your zipper and still show up on the top of your bag.
On this particular bag (which I called the bug bag the entire time I was working on it because… like, I don’t even like bugs, but I love this fabric and combination with the green zipper. Weird right?) I also added a little detail stitching on the zipper pull tabs. See the flowers? I did a line of decorative stitching down the center before I trimmed it in half and added it to my bag.
I hope you can see how easily customizable this box zipper pouch really is… there are so many possibilities out there, and you can really make it your own.
Do me a favor and let me know in the comments if you make this? I would love to see your projects! You can tag me @iseestarsquilting or #iseestarsquilting
Happy sewing and have fun with this one! You’ll be making tons of them soon enough like I am… you have been warned! 🙂