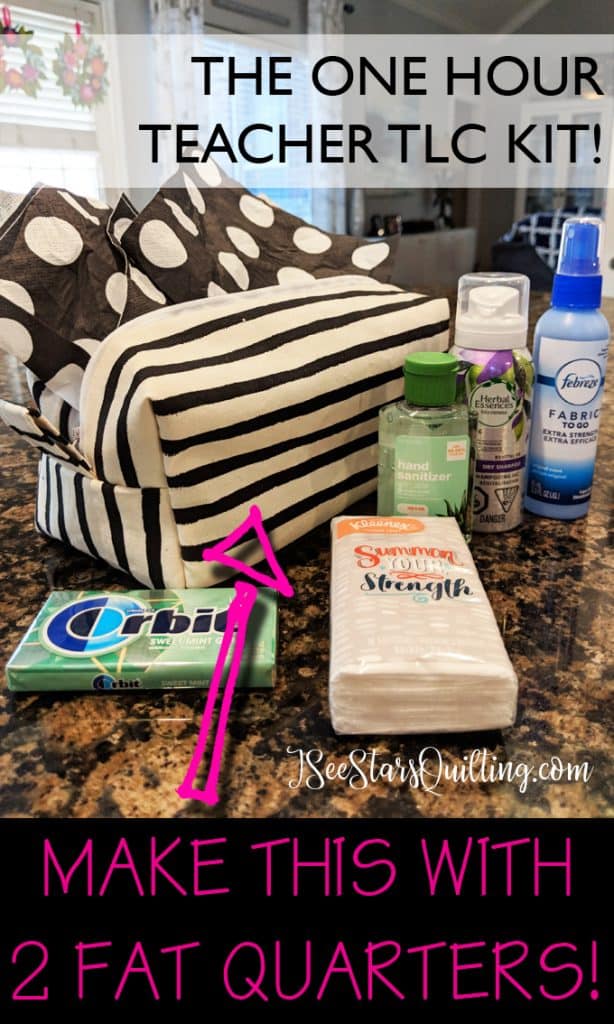
Is summer coming to an end already? Yikes… Meet the teacher is next week for us. I love to spoil my kid’s teachers because honestly… their dedication is worth celebrating every.single.day. I had a brilliant idea to create these little TLC bags AKA One-Hour Zipper Box Tote for the kid’s teachers on the first day of school.
First, I’ll let you in on what essentials I packed the bags with, then we’ll get to the tutorial so you can make your very own!
This started with a little trip to Target (….like so many of my other adventures do?) I love the travel container aisle. All the cute little bottles and fun sized soaps. Things are so much cuter when they are tiny, right?
Each of these was also under $2 each, most were $1. So, you can easily stock up on several essential items and remain within a decent budget. I’m a huge believer that you shouldn’t have to spend a fortune to make someone feel special… just being thoughtful can go a long way. Here was the haul that I scored for these gifts. The total for these items was $5.83

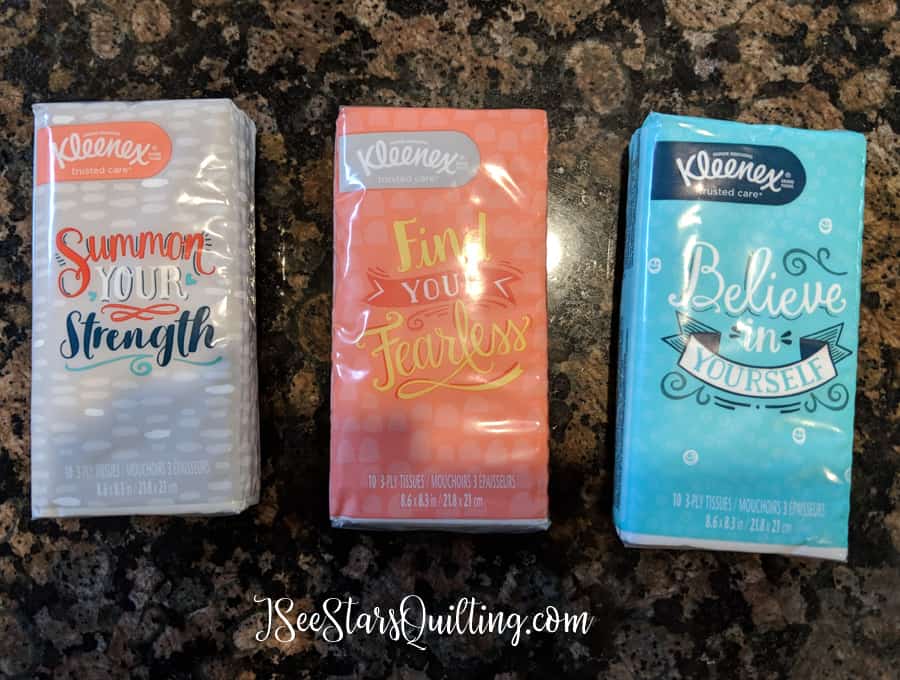
The Kleenex came in a pack of 3 for $1. Look at these designs! Oh, I just fell in love and had to grab them! Now that I look at them, I don’t know if the messages refer to germs or to kids… but… same thing, right? ha!
Ok, now onto the making of the Zipper Box Tote!
I love love love this pattern! It’s really quick and easy to pull together. All you need is 2 fat quarters, and about an hour (less if you practice a few of these… you’ll be cranking these babies out like a machine!)
This post may contain affiliate links, for more information you can click here.
DIY Teacher TLC kit – AKA The One Hour Box Zipper Pouch
What you’ll need:
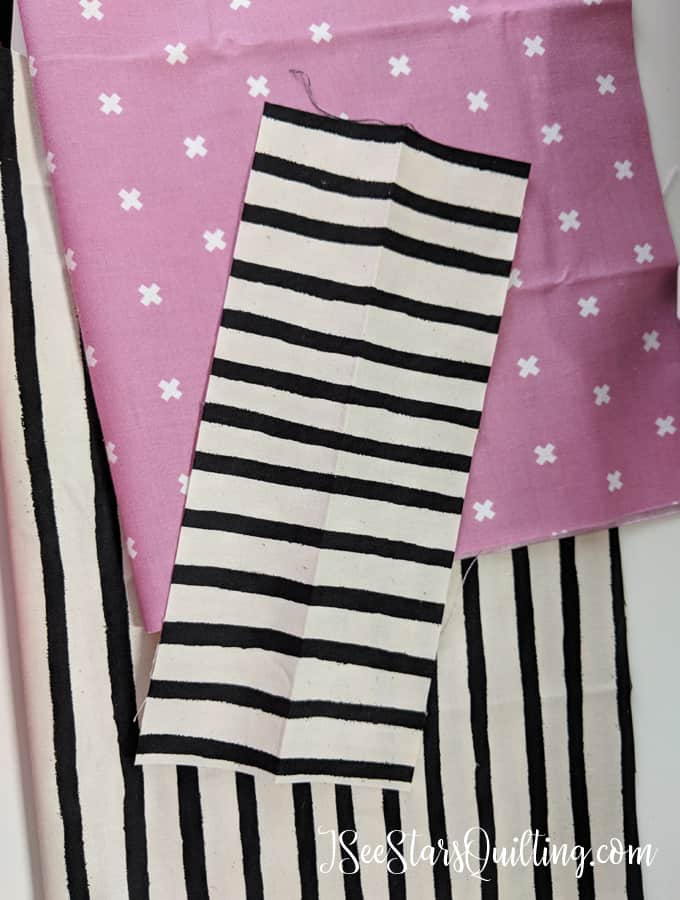
2 fat quarters (1 for the lining, one for the exterior of the bag) FYI The prints I used are from Cotton + Steel. I love them and wrote a whole post that you can read here if you are interested!
12 Inch Zipper
Quilt Batting or interfacing fabric
Cuts to make:
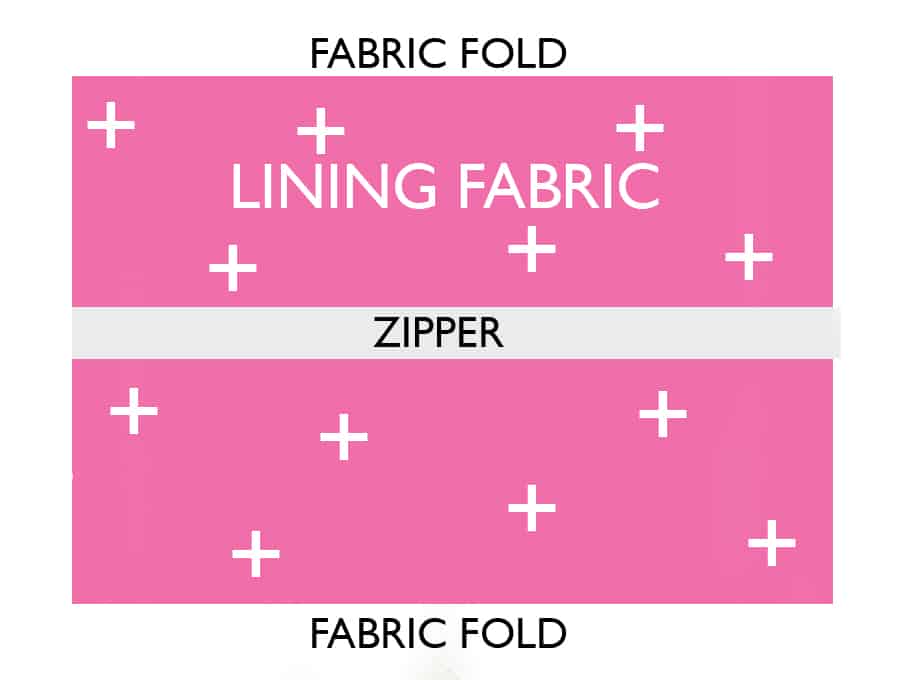
Lining Fabric – 13″x17″
Exterior Fabric – 13″x17″ AND 4″x7″ for pull tab pieces
Quilt Batting – 13″x17″
****Note: Do not use a directional print with these cuts. This pattern works best with a non-directional print. ****
Assembly:
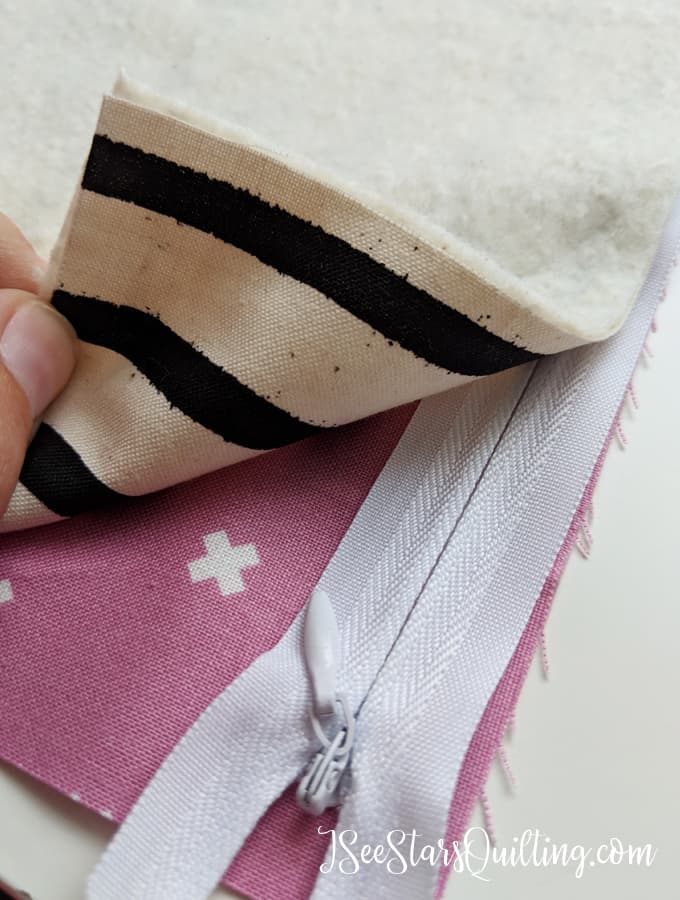
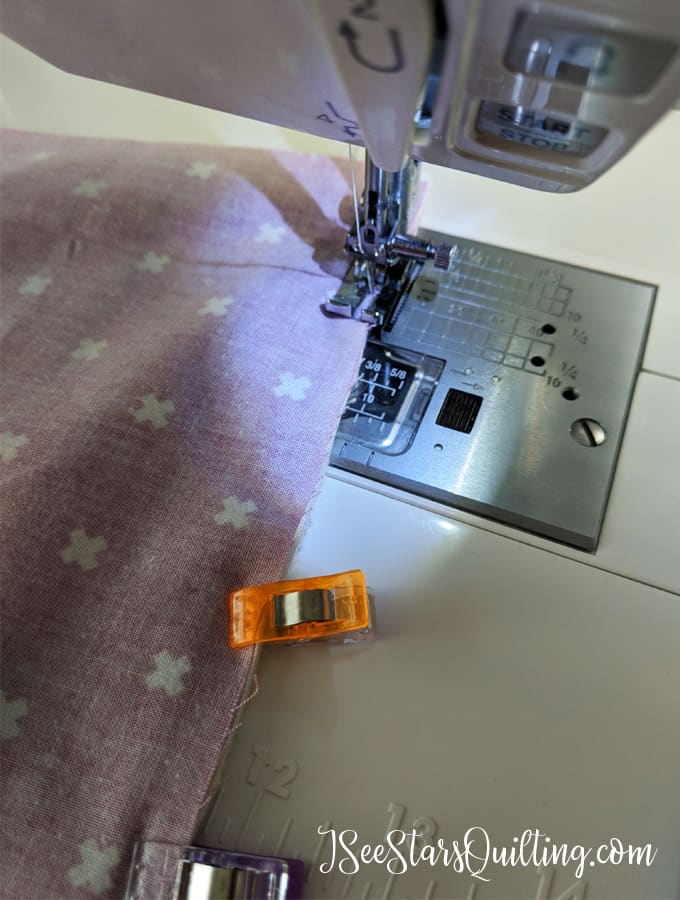
- It is time to make your zipper sandwich! Place your lining fabric right side up. (mine is the pink cross fabric) Then, line up one side of your zipper with the edge of your lining fabric on the 13″ side Make sure you lay the zipper right side up! Don’t mess this part up or you’ll have an upside-down zipper and quite a mess.
- Next, layer your exterior fabric followed by your batting fabric. If you’re having trouble with the layers, you can pin the exterior fabric to the batting, just remember to take the pins out after it is secure.
- I use clips to keep everything in place while I sew. It’s much easier than pins in my opinion… but, whatever floats your boat and makes you feel more comfortable! Use a 1/4″ seam allowance and stitch all the way down one side of the zipper STOPPING about 1″ from the zipper pull. DO NOT sew the area where the zipper pull is.
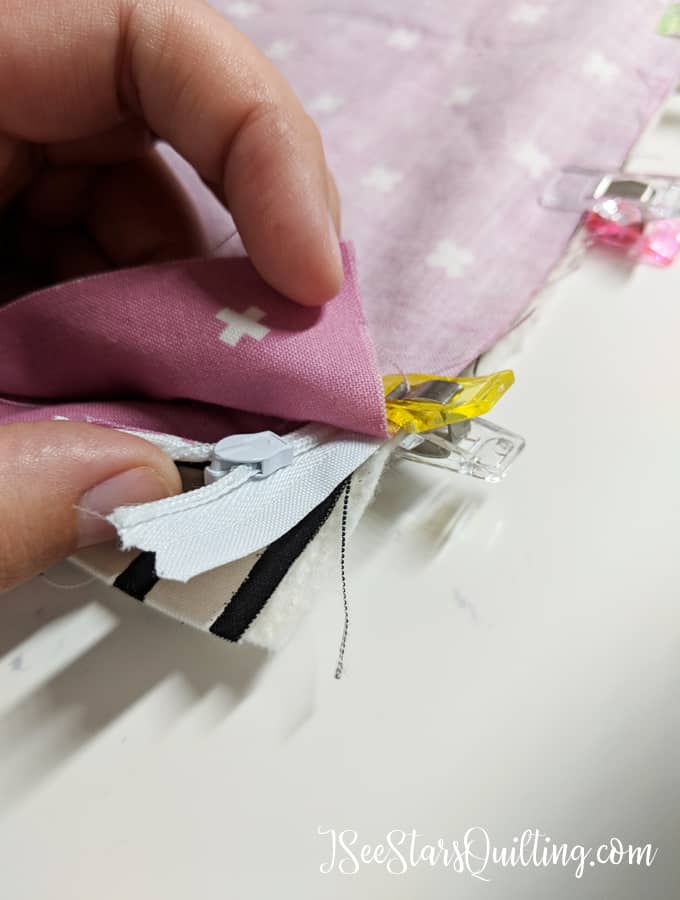
- Take your fabric off the machine and unzip the zipper pull past the area where you have just sewn. This will make it easier to get an even straight seam. Finish sewing where you left off. This makes it easier and yields a cleaner, more even result along your zipper. I usually will do just a short backstitch to keep the threads in place and secure the zipper as it gets a lot of use and you want the fabric to withstand the wear and tear of the zipping.
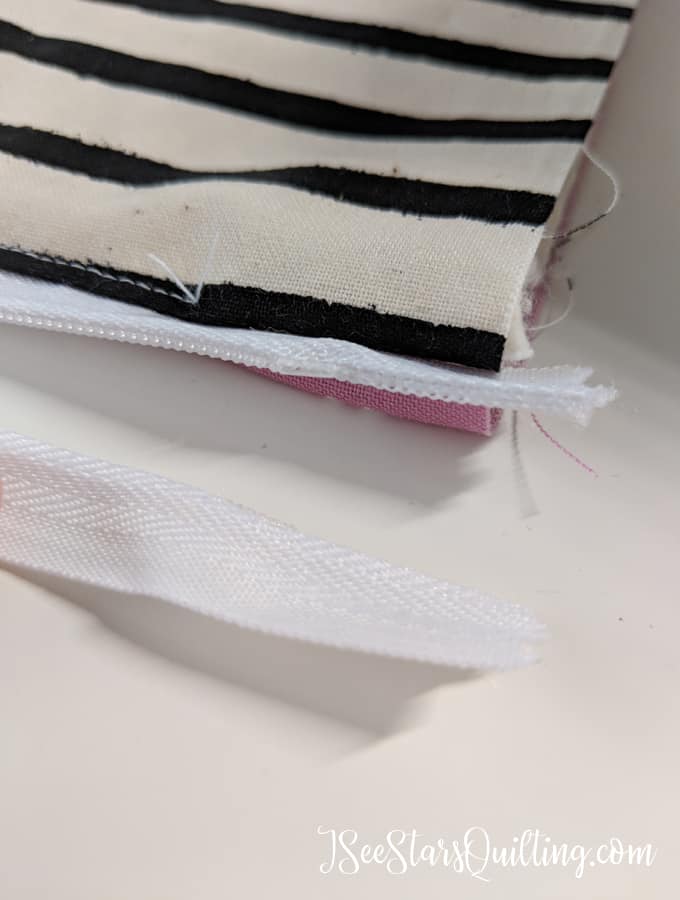
- Next, we will be topstitching! Press your fabric away from your zipper. I suggest using an iron for this. You don’t want the fabric to get bunched up around the zipper or have an excess because it will look less professional. PLEASE be careful… metal zippers get hot under the iron… ahem… or so I have heard… — just a friendly warning! And if you have a plastic zipper… do NOT iron on it. duh.Go back to the machine and stitch just next to your newly pressed fabric. About 1/8″ from the fold. This looks really sharp on your zipper pouch and adds another layer of security to keep your pieces together. I just love top stitching!
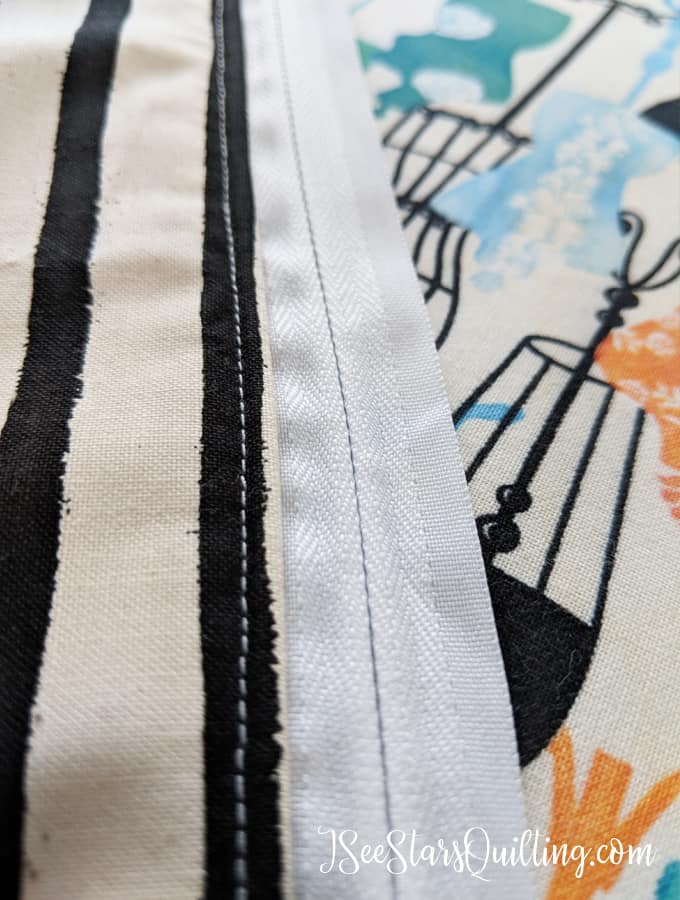
- Now it is time to repeat this same zipper stitching process on the other side of the fabric. Layer the lining right side up, the zipper and then the exterior fabric right side down. The fabrics will make a “w” shape with the zipper being at the center of the middle peak… it can be a little confusing the first time you do this, but after you get it, it will all make sense. Trust me and persevere! Use your clips or pins to keep things steady and in place while sewing.
- Stitch all the way down your zipper. If you choose to the side where your zipper pull is, just skip down to about an inch below your pull and start sewing there. You can go back and unzip like before to finish it out. Your seam allowances will be nice and even if you don’t try to sew around the pull part! Do yourself a favor and just take the extra 3 seconds for this step!
- Again, Press the fabric away from the zipper gently and top stitch down the side. I unzipped as far as I could go without letting the zipper slide out for this part. It can get a bit tricky to maneuver the fabric “tube” that you have created but doable. Just go slowly and ensure that the rest of your fabric doesn’t get snagged and drawn in by the machine.
- Turn your pouch wrong (lining) side out and then flatten the pouch so that the zipper (zip it up again!) is centered on top and the exterior sides are facing inside. **Forgive me, I thought I got a picture of this, but apparently, I got excited and forgot or it didn’t save somehow. I’ll try to illustrate so you can understand. I’m sorry!**
 I typically eyeball it and don’t mess with rulers or measuring on this step. It’s not an exact science kind of moment. Place a few Pins on either side of the zipper. I really recommend pins over clips here because you do not want this to shift around.
 - Unzip your zipper about halfway. Do it right now and DO NOT SKIP THIS STEP. Do it. Do it Do it. Unzip it about halfway.
- Did you unzip your zipper? Good.
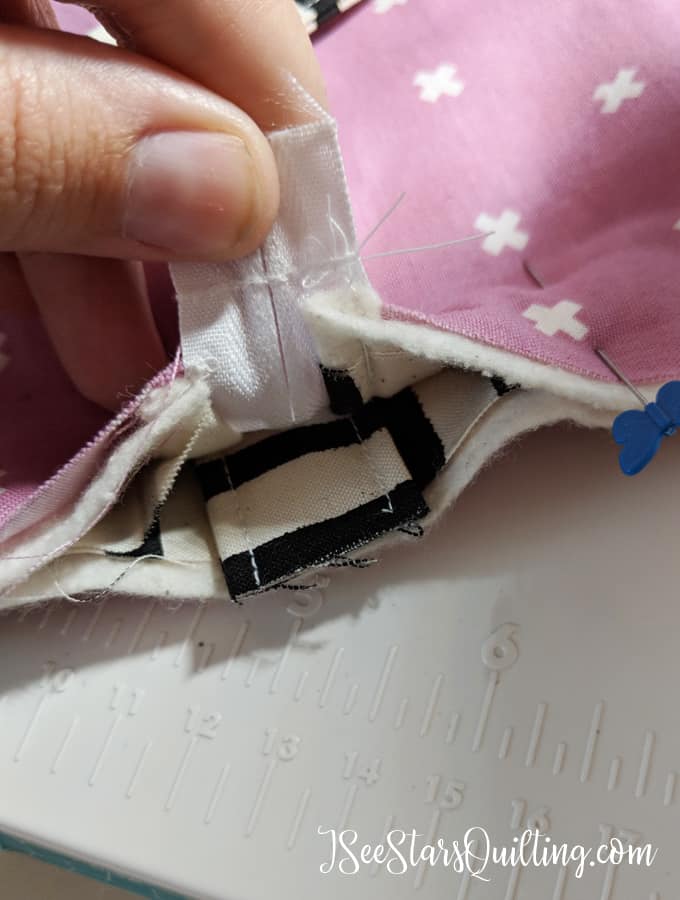
- Set aside your pinned zipper pouch. Take your 4″x7″ pull tab pieces and press in half length-wise. Then fold the 2 raw edges toward the center seam. Press again. (see pic below) Lastly, Fold again along that original center seam. Press it real good.
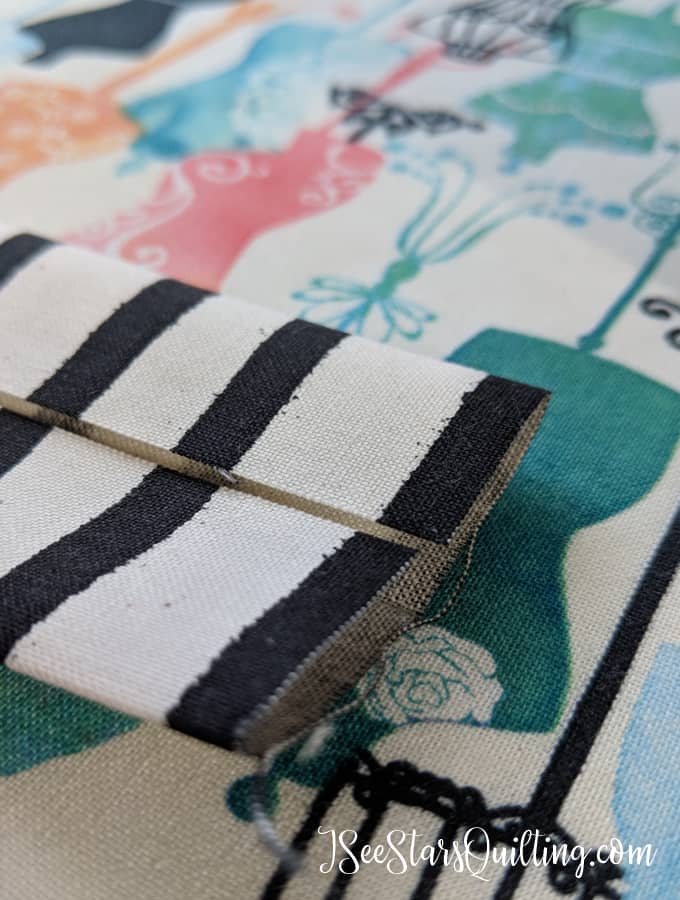
- Your strip should be about a 1″x7″ strip now. top stitch about 1/8″ down both sides of the 7″ length.
- Cut in half to get two 1″x3.5″ pieces. These will be your tab grabs/pulls. These are very helpful for this type of pouch when you try to open and close it.
- Fold your tab in half, lining up the raw edges.
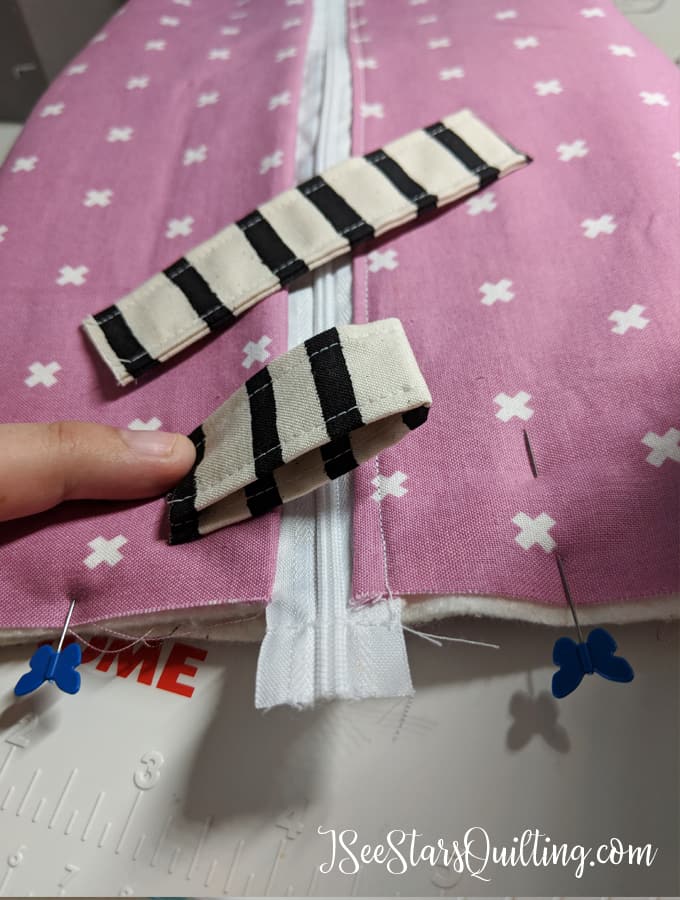
- Insert the tab between the exterior sides of the fabric. it should be CENTERED at each side of the zipper. If it is not centered, you will notice it on the finished bag like a sore thumb. Make sure it is centered. The raw edges of the tab should be lined up with the raw edges of the flattened pouch.
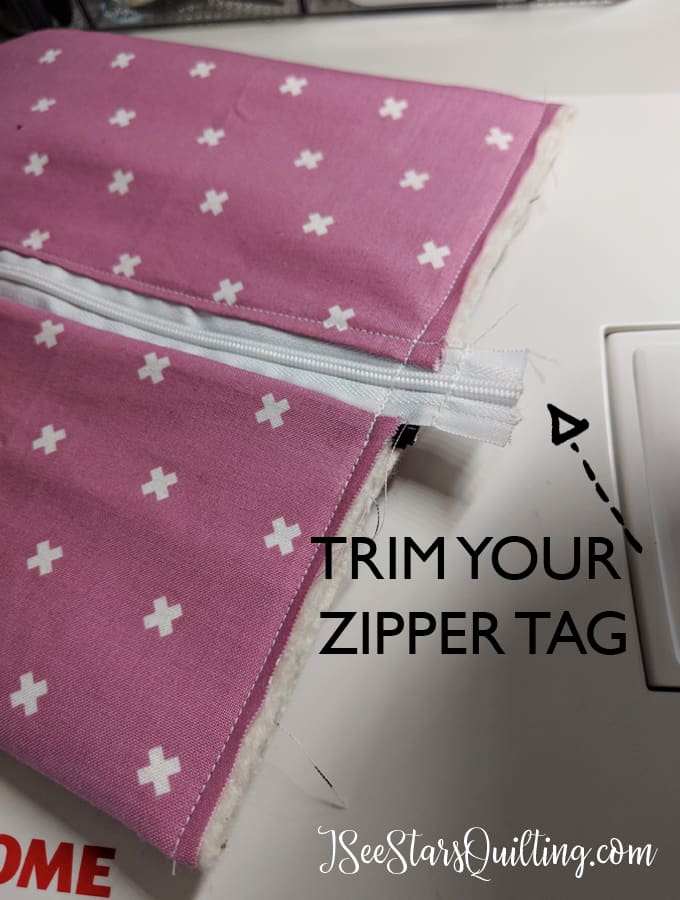
- Pin the sides of your pouch and the pull into place. Repeat for the other side of your pouch/pull. On the unzipped side, slightly overlap the tails of your zipper to ensure that when they get pulled through the machine they will line up perfectly without a gap.
- Using a 3/8″ seam allowance, sew along the sides of your zipper pouch. It’s a flat rectangle right now. We will fix it to be cute and boxy soon! Never sew over a metal zipper!
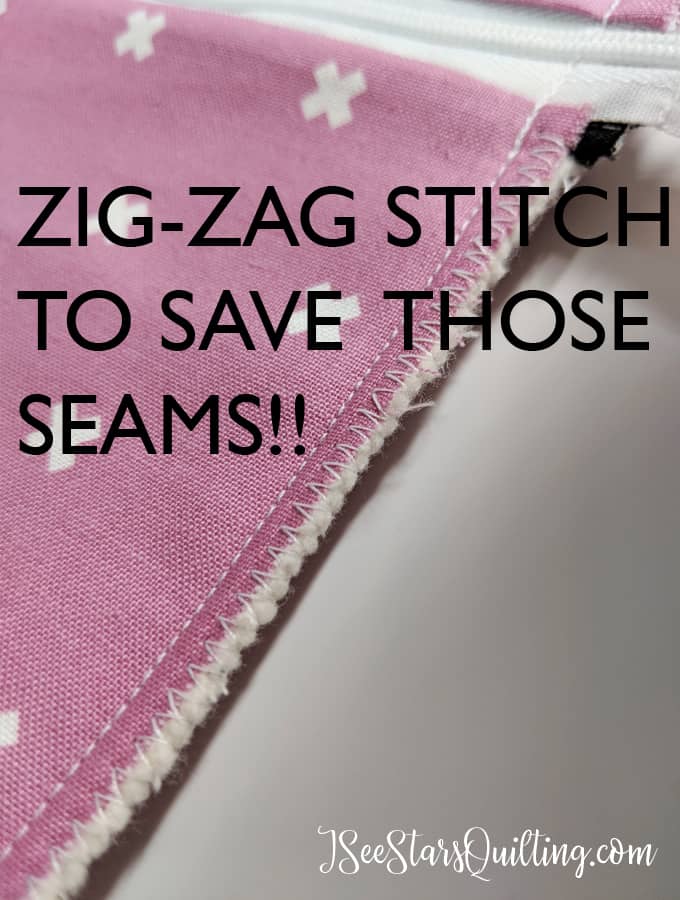
- (This step is OPTIONAL, but its quick and makes for a really nice seam for the lining of your bag!) Does your machine have a zig-zag stitch? I always get excited when I get to use this stitch. DO NOT zig-zag over any exposed zippers. Just sew as close as you can, skip over it and start again on the other side.
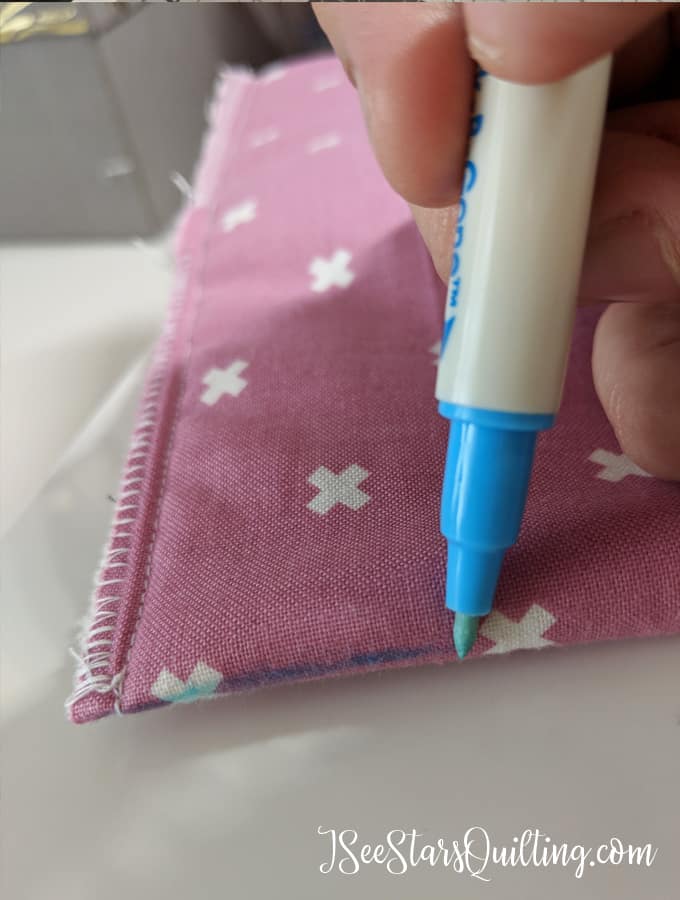
- This next step is tricky the first time you do it but it will make sense in just moment. With your pouch laying flat, mark the side seams about 2″ up. Do this for all 4 sides. I use a water-soluble fabric marker. FYI, a pencil doesn’t always come off of the fabric.
- Next, you are going to poof up your pouch and align your zig-zagged seam to the mark you just made. Double check to make sure they line up. Stick a pin in it to keep it in place. You should have a 90-degree angle with your seam coming right up the 45-degree line. Lay it flat on your table. Seam side up. Use your ruler and measure 2″ up the seam of your bag and draw a line across.
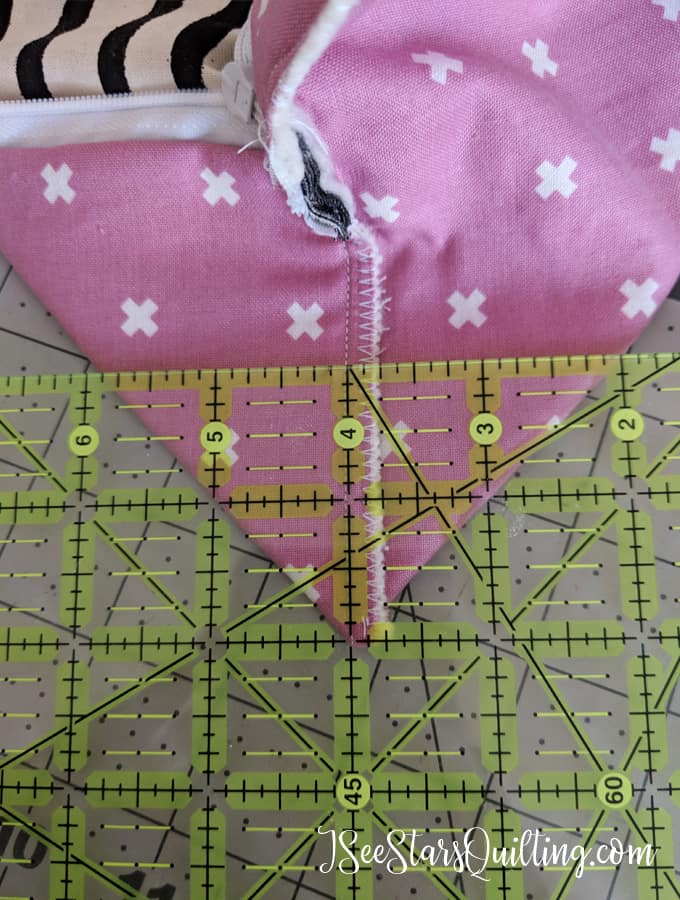
This is what your box should look like with all 4 lines drawn.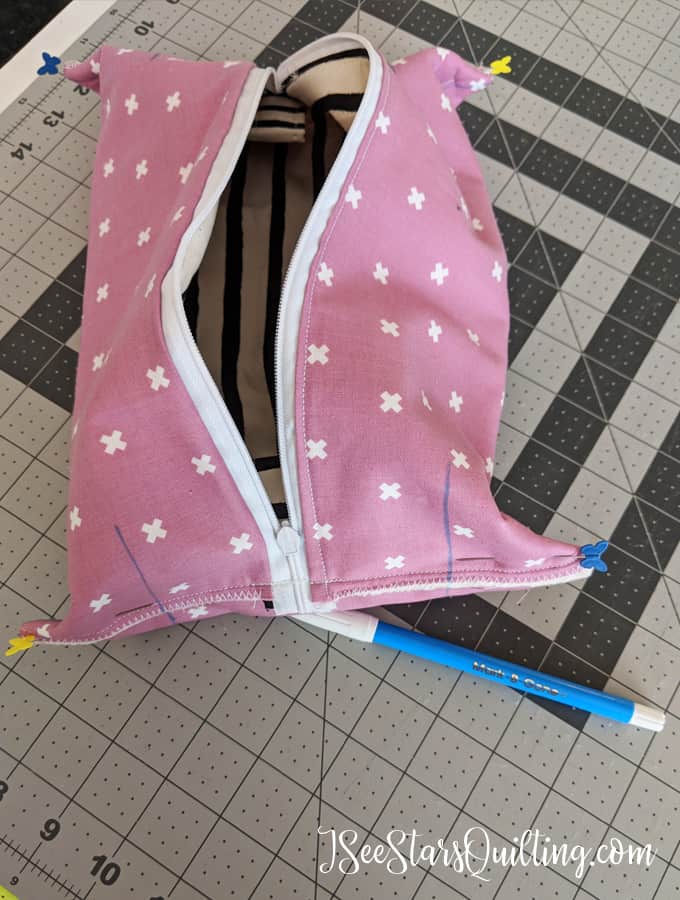
- Take it to the machine and sew along each newly drawn line. When you do each corner, make sure that your zig-zagged side seam to your pouch lays the same way. If you happen to get it twisted, it is not going to hurt anything but it will lay better if it folds the same direction.
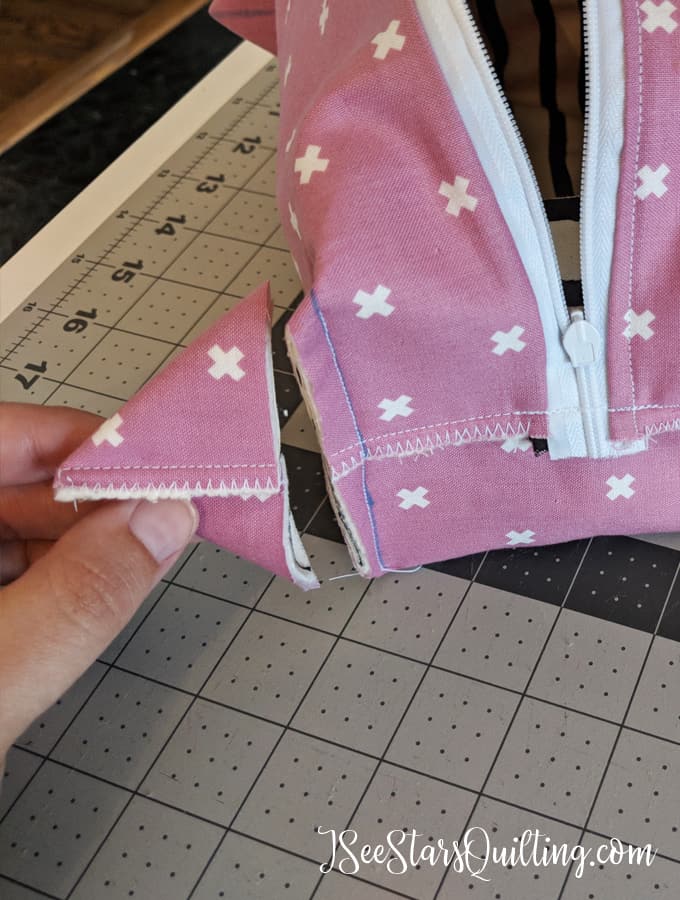
- You’re so close to being done! Using your ruler and a rotary cutter, measure 1/4″ from your seam and trim off the extra triangle of fabric. Zig-zag stitch those seams too!
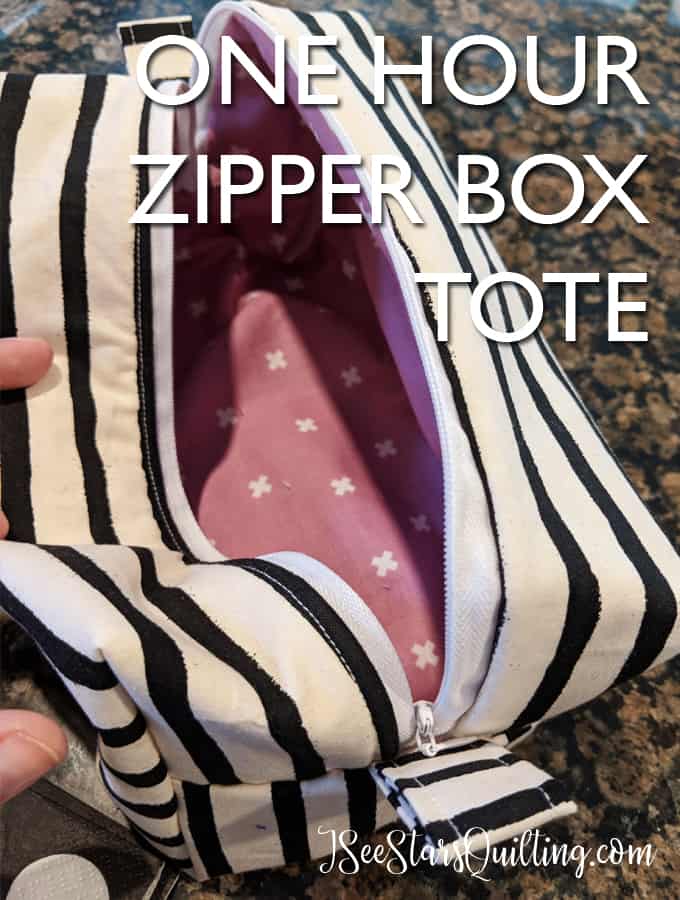
- AND that’s a wrap! Turn your Zipper Box tote right side out. Zip it up and marvel in just how quick and easy that was to create!
Wouldn’t you love to have one of these special box totes filled with all your favorite things? I can’t wait to make more 🙂 I found these rainbow fish fat quarters several months back at a little quilt shop. My inner child squealed with delight because I’ve always loved books. I just HAD to buy them… these teacher pouches are absolutely the perfect project for them!
I’m also planning to embroider the box totes before I give them to the teachers to add just a little something extra!
A little Rainbow Fish lesson anyone?

If you have made it this far, thank you! I try not to be so long winded but yet provide plenty of instruction. Did you make your own one-hour zipper box tote? Don’t forget to tag me so I can see your beautiful work!
Let me know if you have any questions. I’m happy to help!
Cheers & Happy Sewing!