So you’ve completed the quilt top! Yay!… now, what do you do on the back of your quilt?
We’ve all been there… It feels harsh just to slap some random fabric on it and call it “good”, right?
Especially if you really challenged yourself and poured out a lot of time and effort into the front of your quilt!
I believe you have the opportunity to create a full 360-degree piece of artwork with your quilt that is beautiful from every angle. And you don’t have to work yourself to death either!
I made a video with some ideas and examples of quilt backs that I have created in the past along with some tips for how to make the back of your quilt interesting!
Check it out below and then read on to see more tips!
5 tips to make the back of your quilt interesting!
1. Don’t follow a specific pattern
I love rules, I do… but I also love to break them… what can I say?
It is so creatively refreshing to be able to do whatever I want and make things fit however I feel like after I have completed a very specific and strategic pattern.
This is a great opportunity to play with your fabric and see what you come up with! It could be that you stick to something very simple and straight forward… or you could do something complex.
2. Try something new that you’ve been admiring
Maybe you’ve seen a technique on YouTube (you can check out my channel and subscribe to me here!) and it looks like an interesting block, but you’re not sure if you’re ready to commit to a whoooole quilt yet?
This is the perfect opportunity to try out a new idea. If you just end up doing one block, you can add borders around it to make a beautiful design focal point on the back of your quilt!
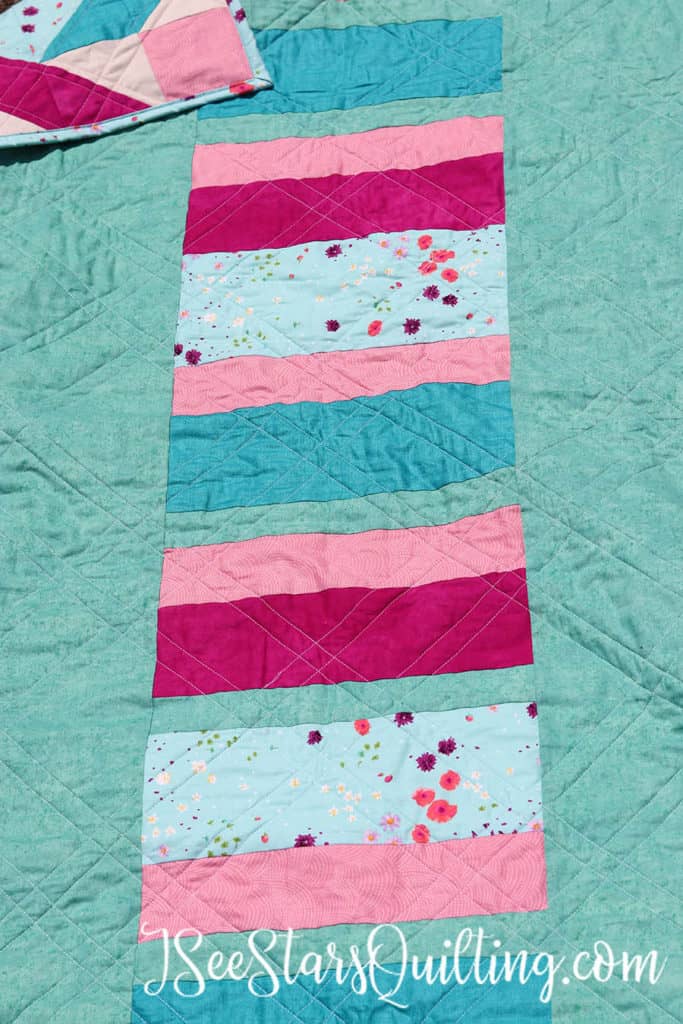
3. Well-placed contrasting strips add interest and hide seams
Nothing breaks up the weird and awkward seams of joining fabric pieces together like some well-placed strips of fabric!
In the quilt back below, the quilt was wider than my fabric. I COULD have just bought more fabric, and did a nearly invisible seam down the center of the quilt… it would have been fine. Hardly anyone would have seen it with the quilting, I’m sure…
But… there was an opportunity to do something fun!
I decided to add some scrap fabric stripes to the center and voila… instant “design choice” status vs. “boring piecing together of fabric”.
4. Don’t underestimate the power of a Jelly Roll
Jelly roll quilts are fun to sew. (Mostly because of the amount of progress that happens really fast at the end of the process… I still love to see it come together!)
Us quilters know what it takes to make a jelly roll quilt, but no one else does!
They make fantastic quilt backs! A little more detail and thought into the quilt that you make. Plus, you don’t have to buy huge pieces of expensive fabric. Use what you have on hand!

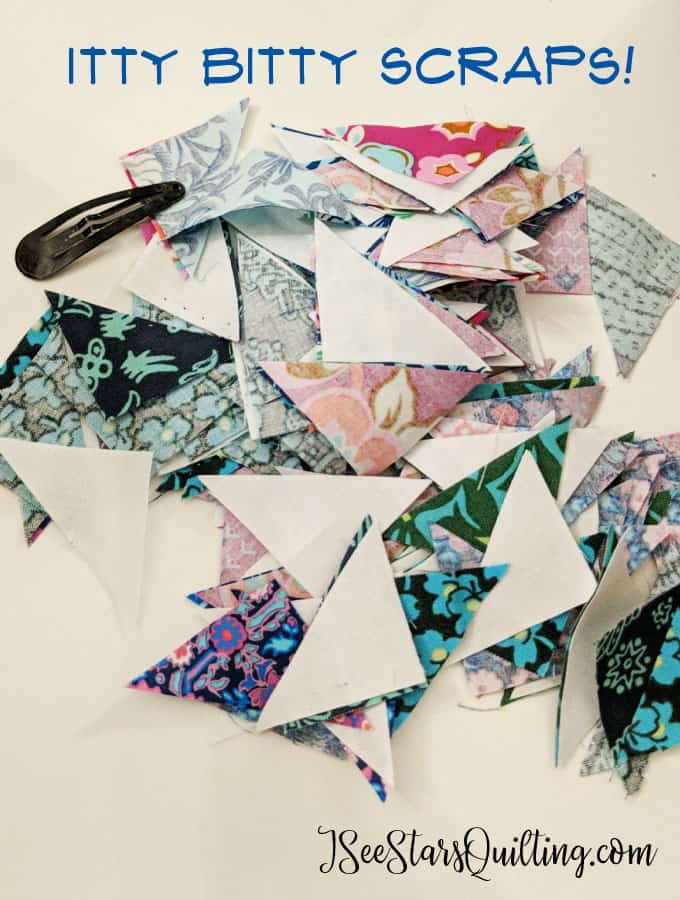
5. My favorite tip: Use Scraps!
I can’t stress this enough! Use the leftover scraps from the front of your quilt and incorporate them into the design on the back of your quilt!
It helps create a cohesive design between the two sides AND it helps you use your fabric wisely.
I’ve actually created the habit of using the “fabric requirements” of a pattern as more of a general guideline… and not a hard rule.
If you’re able to buy an extra 1/8-1/4 yard of a few pieces of fabric, not only will you have a little margin for any errors that happen along the way (don’t lie, I know it happens to you too, right?) you will have fabric left over to use on the back of your quilt!
For more information on how to organize your scraps: Scrap Fabric Storage and what to do with them.
I hope that gives you some new ideas and some thoughts on ways you can spice up the back of your quilts! Please feel free to email me if you have any questions or comment down below! I love to hear from you 🙂
What is your favorite way to treat the back of your quilt? Do you prefer simple or complex?