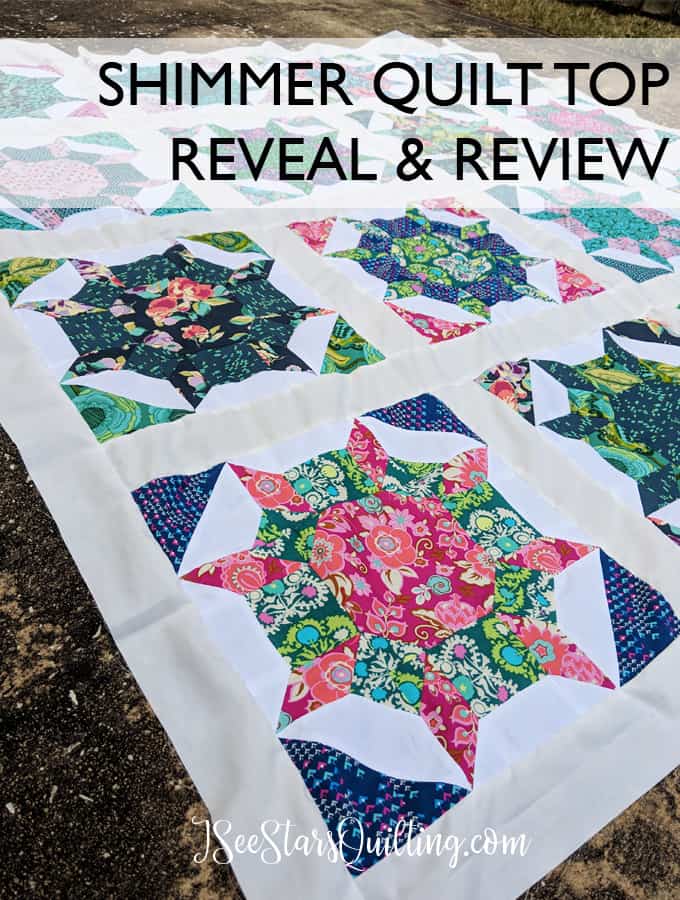
Hey Hey Quilters! I have a quilt reveal to show off today! This Shimmer quilt pattern is so lovely and it is from Cluck Cluck Sew. You can find the pattern here. I (of course) changed it up just a bit by adding some sashing in between the blocks to make the quilt just a touch larger. 🙂
Quick story, I actually finished this quilt top a really really long time ago… ok not THAT long ago, but it took me way longer than it should have to actually finish the rest of the quilt.
Here is the original Shimmer Quilt reveal post: Read it here.
I finished this quilt top December 2018. It is now June 2021!
Yikes…
Its a shame for such a lovely quilt top, isn’t it?
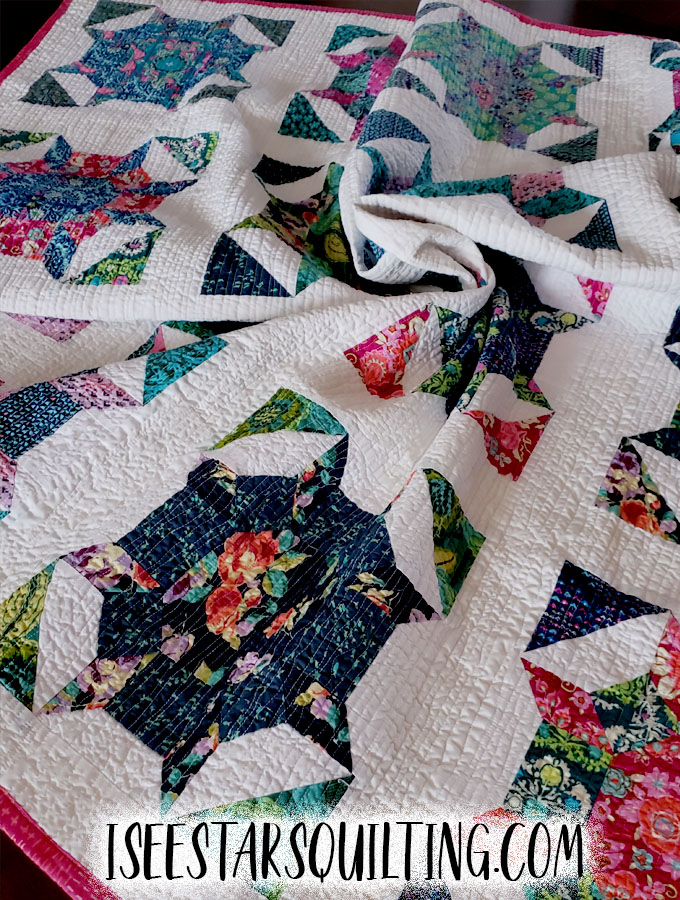
My Shimmer Quilt Pattern is finally done now!
The quilt top sat on a shelf where I could see it and my other lovely quilt tops that are waiting to be finished. for almost 2 years…. I have a few Jelly Roll quilt tops and quick and easy baby quilts and throws. What can I say? I LOVE starting new projects!
In this Shimmer Quilt Pattern I used an Amy Butler Fabric bundle that is out of print currently. It was readily available at the time but I fell in love with this combination of colors and fabrics. I accented the pops of color with a clean solid white.
It came out better than I could have hoped for!
OK Now on to some more pictures of the quilt!
Doesn’t that quilting just make you want to squeal?!
I went with a very simple but elegant quilting style. There was no fancy ruler work inovolved. I just freehand quilted some simple “straight-ish” lines horizontally across the quilt that were about 1/4″ apart. This is very tight quilting, but the result was a very even density throughout the whole quilt.
Note: “straight-ish” isn’t an official quilting term whatsoever… its just what I called it. And I did this style because I knew that if I went with straight precise lines, any errors would be glaringly obvious, right? 🤷♀️
So, if I wiggle and squiggle here, there, and everywhere… it looks 100% intentional and uniform!… 😉 See what I did there? My choice was a conscious choice to make it easier on myself!
*You should try it sometime! I make me so happy when I do this!*
Looking at the finished piece now, I can’t believe I let it sit on on the shelf for so long.
I honestly thought that I had sewn this quilt top for myself and I knew I would get to it eventually with some absolutely stunning quilting, of course. a few weeks passed and then it was a few years…. oops. I don’t know where the time goes on beautiful projects like this…
Check out these cute labels!
The corner label that I got is a more recent purchase and are part of a panel of fabric from Moda. I need these in bulk, please
And one last look of the whole finished Shimmer Quilt Pattern
I really am pleased with the way it all came out having finally got around to quilt it!
Here are the pictures of a quilting project I made using the pattern called “Shimmer”. Including photos of fabrics and final products.
The funny thing is it didn’t end up being a quilt for me after all… I ended up gifting this quilt to a very good friend of mine. She has been so kind and supportive of me and I do believe that God knew this was going to be her quilt allllll the way back when I actually finished the top but couldn’t bring myself to quilt it!
I know that this quilt will be well taken care of and in a happy place for many many years to come.
I hope that you enjoyed taking a look at the quilt pictures! Drop me a comment if you have any questions! I would love to hear from you!
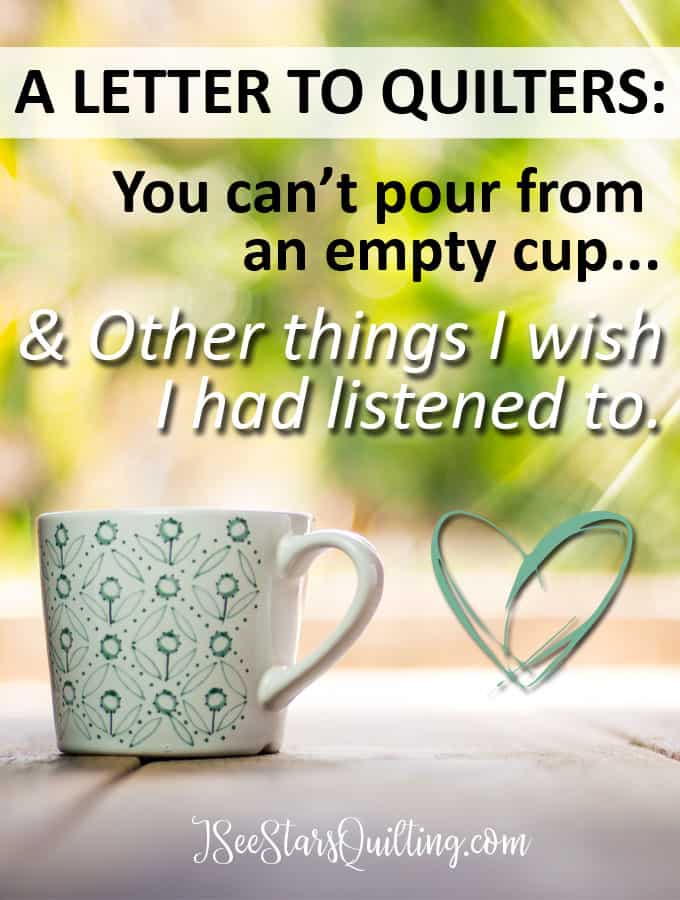
Hello, sweet quilter friend! As a quilt blogger and instructor, I love that I get to meet people from all over the world. I get to converse with people of all different skills, backgrounds, and inspirations. BUT I have one thing that drives me absolutely crazy when I meet another quilter…
Do you want to know what drives me crazy?
I meet all these people whose skills and beautiful works of art will make your jaw hit the floor so fast.
I’ve seen crazy combinations of fabric that would blow your mind and people who use fabric in ways that make me fall in love with quilting all over again!
I’m am blown away by the depth of creativity that quilters have! I love seeing the works of people from all different skill levels!
However, it never fails… and it breaks my heart when someone will say something along the lines of… “oh, I love to quilt!… but I could never do what you do!” or “I love to quilt, but I’m not an expert or anything.“
Um… First of all… neither am I.
I love to share my projects and the things that I learn along the way. I created my blog and my Youtube Channel so that I could start sharing my projects and it blossomed into a community of quilters that I gain knowledge from and share the things I learn along the way.
This one little bit of conversation can drain all your confidence away and keep it from coming back!
For most people, you might not even give it a second thought… but audibly admitting that you don’t measure up to someone else will make your confidence take a nosedive.
Maybe you’re a beginner quilter and in conversation with someone who has years of experience… yes, the statements are true… for now. But not forever.
I’m not an “expert quilter”.
I’m not! I’m just a little crazy enough to post all my learning moments and mistakes all over the internet for other people to see. haha)
Truthfully, I never ever want to get to the point where I’ve learned all I can learn and done everything I can do, when it comes to quilting. (or anything in life really)
Isn’t that the beautiful part of the creative industry?… There is no end to this journey. No experts exist in this industry. We are all always learning, even if we’re on different parts of the same journey!
Sure, there are plenty of really amazingly talented people that have years of experience and study on a particular craft or skill. But have they learned EVERYTHING? Have they seen the craft from every single angle and worked with every type of material? – likely not.
My Vision for Creatives
One of my missions is to instill an unshakable confidence in quilters who pass off their passions as “just a little side hobby” – which is totally fine to have, by the way!
There is a difference between a little side hobby and a passion that really brings you joy.
One of them is something that you do when you’ve got nothing else to do… or you are trying to do something to get your mind off of another project. The other is something that you find yourself dreaming or thinking about at random moments throughout the day… you probably even have a few Pinterest boards or a magazine file with inspirations. You have a closet full of supplies and you’re just waiting for that giddy moment when you can sneak away and be yourself!
I can usually pinpoint the moment in beginner quilter’s journey when they fully embrace what they love. By owning up to being a quilter and accepting it as something that you love… I can see their confidence level shoot upwards!
Seriously, just by owning it as a part of yourself! I see their quilts become a little bit bolder and their willingness to try new things increases too. Suddenly the big scary world of quilting is a very comforting and happy place where you’re free from true failure and welcome trying new things!- simply because you want to!
Do you want to know another benefit that I see when a quilter shifts from meekly dismissing their crafty passions to really loving and going all in on being a quilter?
There is a what I like to call the time shift.
And I swear it happens every single time!
Quilters who make the shift from “just a little side hobby” to “creating is what I really love to spend time doing”…. find out that there is more time to quilt on the calendar! It is like magic. When your passion becomes your priority you let the lesser to-dos take away your time..
*BONUS* By embracing what you love, you give others permission to be themselves
I know I talk and share a lot about quilting… but this is true for any passion in your life. Maybe you love to cook, or you’re amazing at making your own furniture, you want to perfect the perfect lollipop formula or you really love to lay out in the sunshine and read.
Embracing your passion lets other people see who you truly are and what you love to do.
This subconsciously gives them permission to love and embrace what brings them joy!
*Without going into a huge campfire snuggle session here… This beautiful circle of inspiration just goes around and around… giving people permission to be happy being their true selves.
With that amount of freedom and beauty… how could you allow yourself to shrink back or compare your journey to someone elses?
I would love to hear you thoughts on this subject 🙂 Feel free to drop it down in the comments down below!
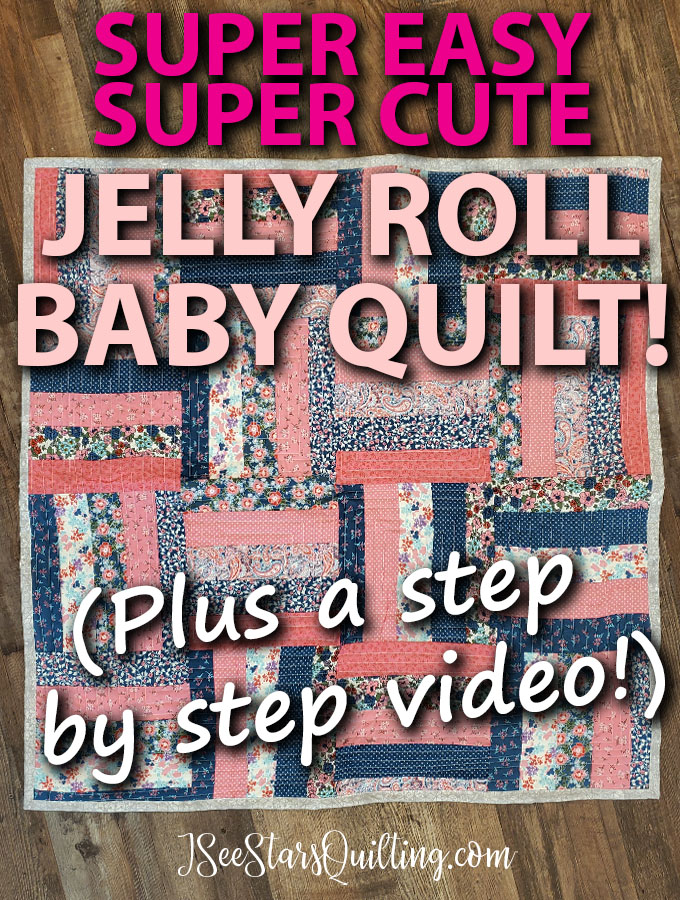
If you’re looking for a super cute and easy Quick Jelly Roll Quilt Pattern. This is it. You’re going to love this!
There isn’t a “pattern” exactly… mostly just guidelines for some structure to your quilt with room to make it all your own.
I even created a video so you can see the process of this quilt come together. Check down below for the video step by step instructions!
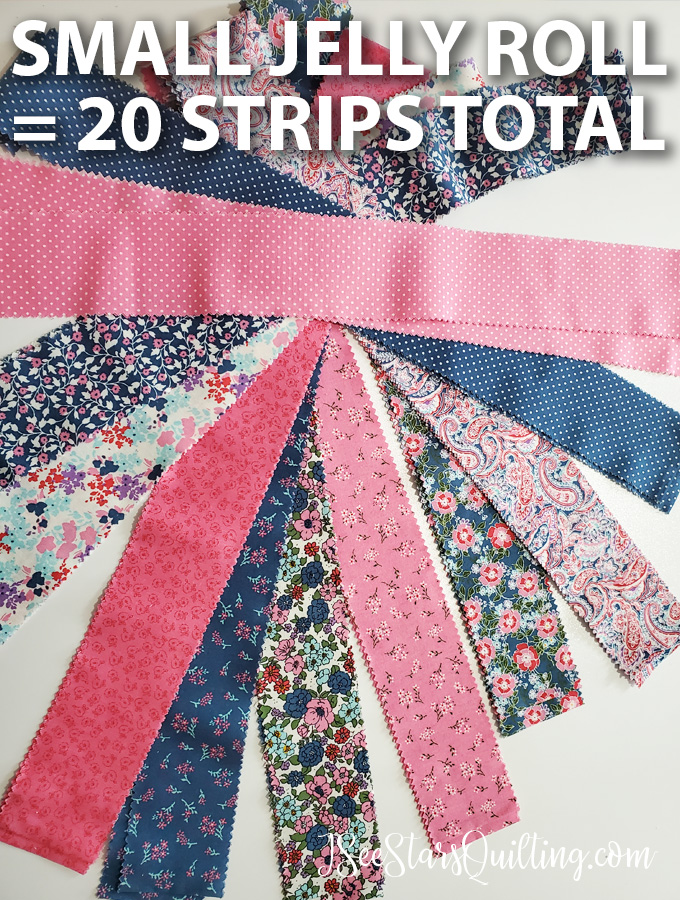
Here is what I started with: A small Jelly Roll with 10 Fabrics/20 strips (2.5″xWOF)
I’ve had this cute little mini Jelly Roll for a while. I found it at Joanns Fabric. In case you’re wondering… I have seen it recently in stock again. It must be a fairly popular one.
I fell in love with the colors and the sweet print. I knew it would make an adorable denim baby quilt someday… but then it sat on my shelf!
Jelly Roll Month
Real quick, I have to tell you…
I’ve been sharing my tips, tricks, and tutorials for using up your Jelly Roll precut stash this month (April 2021)
I love to collect them and “save them” for the right occasion but I have never actually sat down and decided what any of those occasions would be haha… so it is definitely time to use those quilt precuts up! Make sure you follow me you Youtube and check out my other videos!
Back to the cute quilt… 🤩
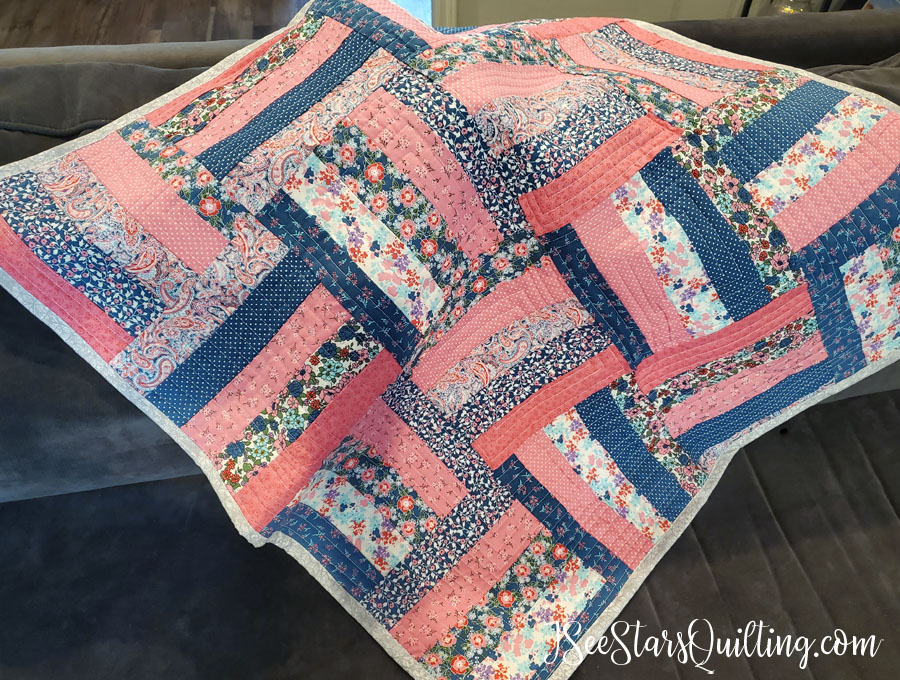
Here is the finished quilt. It is a super fast pattern with lots of tips and tricks to share to make this quilt a no-fuss pattern.
I love the way these colors just ooze sweet little baby cuddles! Maybe it is because I am a born and raised southern/country girl, but the mix of of denim blues, sweet pinks and touches of floral and paisley make me want to squeal! haha.
And I love it even more because I know that the recipient of this beautiful little quilt is going to do the same thing!
I added this gorgeous (and over the top girly) flannel unicorn backing on the quilt to add a touch of softness. The colors matched perfectly!
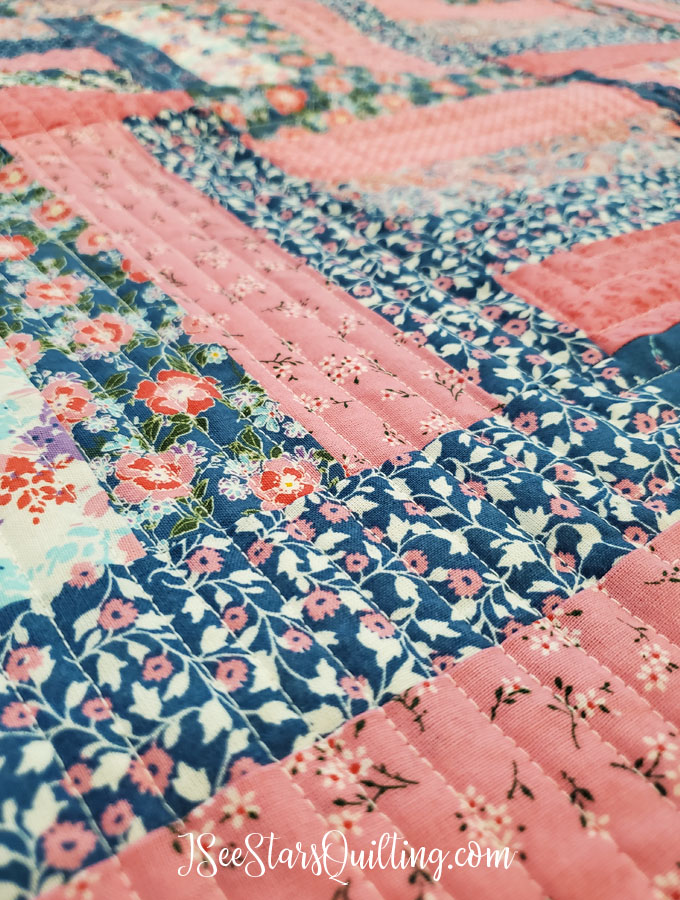
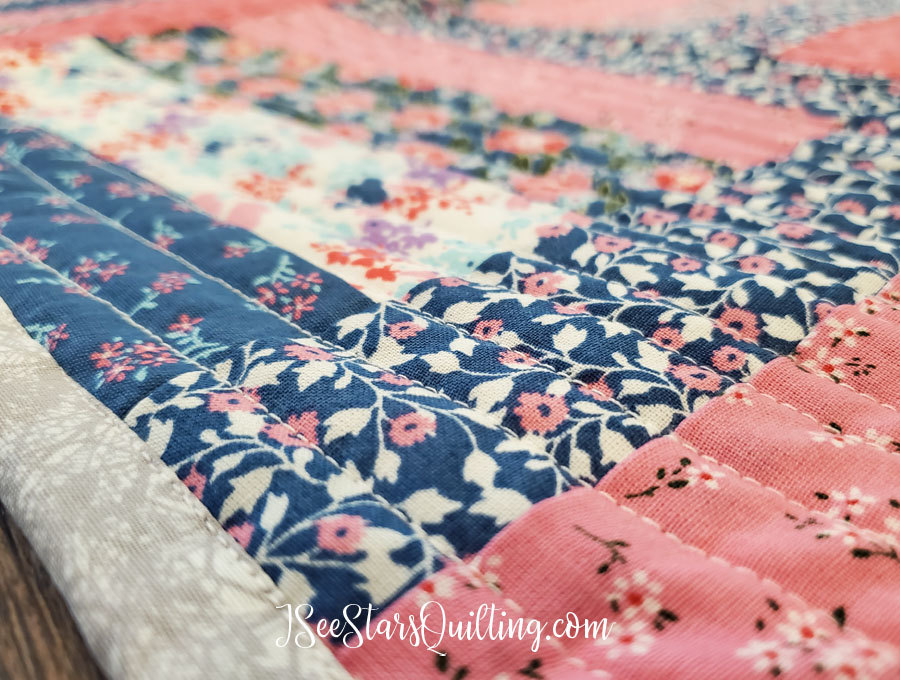
Here is a few closer looks at the quilting. I chose to do a really simple quilting. Just straight lines.
I chose a nice light grey fabric for the binding… if I had some extra denim laying around I would have LOVED to add a chunky wide binding to it… perhaps next time!
You might not be able to see it, but my quilting lines are not perfectly straight.
I didn’t use a ruler or let the slight curve/wonkiness of the lines bother me as I was quilting. I think the little uneveness of quilting lines add a lot of character to the piece.
Quilting Tips & Reasons
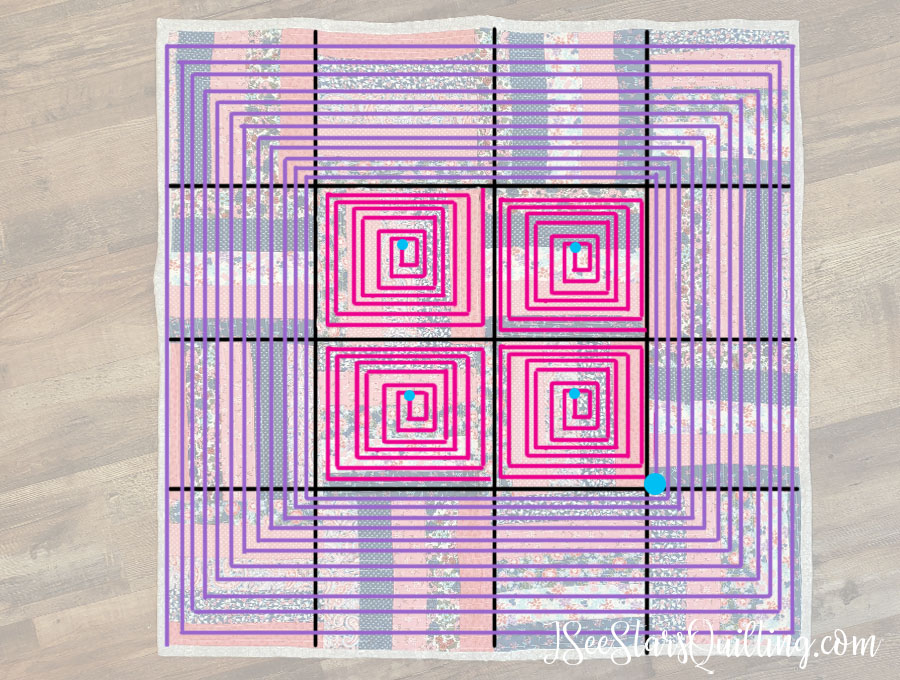
If you’re looking for some quilting ideas for a piece this size, I made a rough diagram of how I decided to quilt this one… it is rough lol But there is a method to it!
I like when people share their “easy” quilting patterns, because I almost always learn something new.. so here you go!
(The blue dots are where I started my needle when quilting the straight lines.)
I also was able to use the straight edges of my jelly roll seams for guidelines while sewing.
First, I worked on the center squares (pink lines) because it is always best to start in the center of your quilts and work your way out. It helps for a more even distribution of the quilt top to your batting and helps ensure you don’t have any shifting from the backing while you’re working.
Second I worked my way around the quilt to give it a faux border quilting look. (the purple lines) Again, I started close the the center design and worked my way out so knew the fabric didn’t bunch up or move around on me.
How long did this quilt take?
I honestly finished this entire quilt in one afternoon-ish.
I add the “ish” because I was filming, photographing and being a mom all while working on the quilt. I had to stop and take breaks and make lunches and take puppy breaks to play.
If left completely undisturbed, I could have finished this quilt in a few hours easy.
But such is life and I was still really happy to have this quilt done so quickly!
The Finished Quilt
The finished size is 40″x40″. I only used the fabric from the jelly roll, then added backing and binding! Check out the step by step video below!
Want to see one last picture?
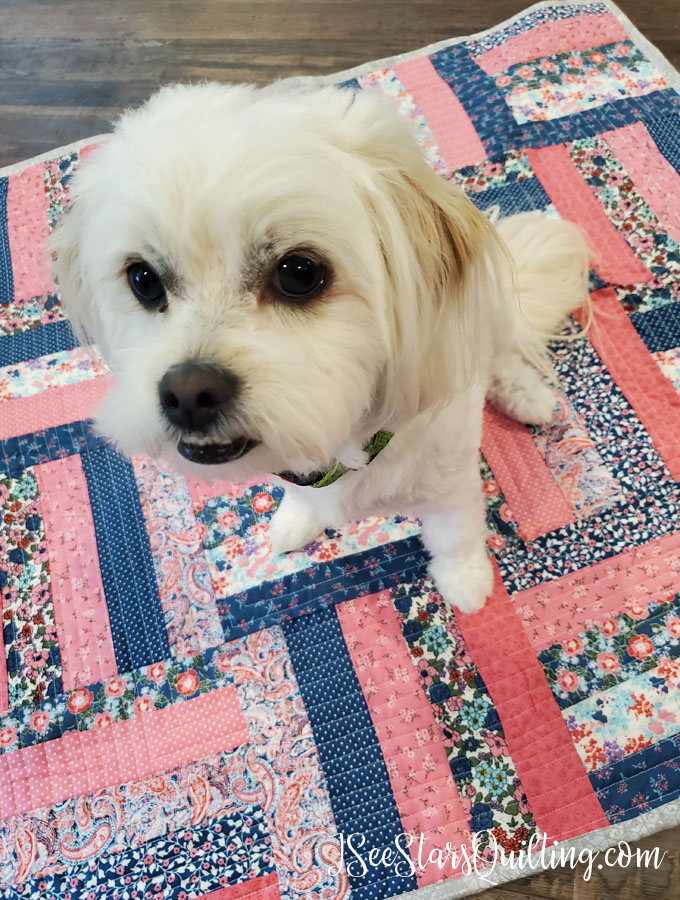
OK sure 🙂 Because any time we get down on the floor the dogs automatically assume we’re ready to give undivided attention… here is one of our puppies aka current quilt model stand in. 🤣
FYI: His name is Butters 🙂
A few FAQs
Could you make it bigger?
Yes, absolutely! I used a smaller Jelly Roll to make this quilt. Remember a standard Jelly Roll has 40 strips. This one only had 20. So this size is big enough for a small child/baby wrap up quilt or maybe a nap quilt.
If you wanted to make it bigger, you could go with the larger jelly roll size to start out with (same exact process but more strips).
You could also add a wide thick border all the way around your quilt or even add sashing in between each block to increase the size.
What if I didn’t use a jelly roll?
You can always create your own strips from yardage of fabric! I’ve done that with scrap quilts!
You can also choose to make the size of your strips a little wider if you want to add a bit more width to each strip.
Where can I buy Jelly Rolls?
You can grab them from most of your local fabric shops.
I like Fat Quarter Shop or Fabric.com for their selection when I shop online.
I know that in the eyes of the quilting industry, I’ve only been around a hot second or two even though it feels like I’ve been around the block several times!
I can’t even imagine a day without some sort of quilting or quilt planning, prepping, sewing etc. It is so interwoven into so many of my thoughts now
(This post goes into the backstory of my quilt history and how I got to be where I am at today. 🥰)
When I was 8 years old, my mom taught me how to use her sewing machine. I needed an enormous amount of assistance. I designed Barbie clothes that were absolute disasters in the fashion world. Seriously, not a single one was the least bit functional from what I remember, but still I managed to piece little bits of scraps together that made my little girl heart happy!
I barely skated through my home-economics class in middle school. I mean, just barely. I was pretty confident I knew what I was doing but I didn’t do anything the “right way” (a side effect of being self taught?) so my grades were not perfect.
I wasn’t particularly gifted in any areas of sewing or cooking. I just managed not to mess it up too horribly. The things I created weren’t perfect but they made me happy and the process brought me joy.
This trial/error and self education were the foundations of my sewing knowledge and perseverance.
Fast forward a few years: I went to college for Communication Design (aka ‘Marketing Design’ in the shortest possible explanation) thinking that I wanted to channel my creative passions into a money-making career. (The ultimate artist’s dream, right?) I studied the arts in-depth and focused on designing little pieces that brought beauty into the world.
Fast forward another few years: I married my best friend, moved with him across the country several times via the US Navy. I found myself away from my family and the comforts of home.
If you get a chance to say thank you to any of our servicemen and women for the time they have served, please do… but also thank their families for their sacrifices as well. Those few words mean a lot.
One of the good things with moving to so many different homes in such a short amount of time = I got to reinvent myself in each new place. New home, new town, new friends, and new adventures… I threw myself into redecorating our little safe haven of a “home” on a shoestring budget.
DIY was my BFF, ya know?
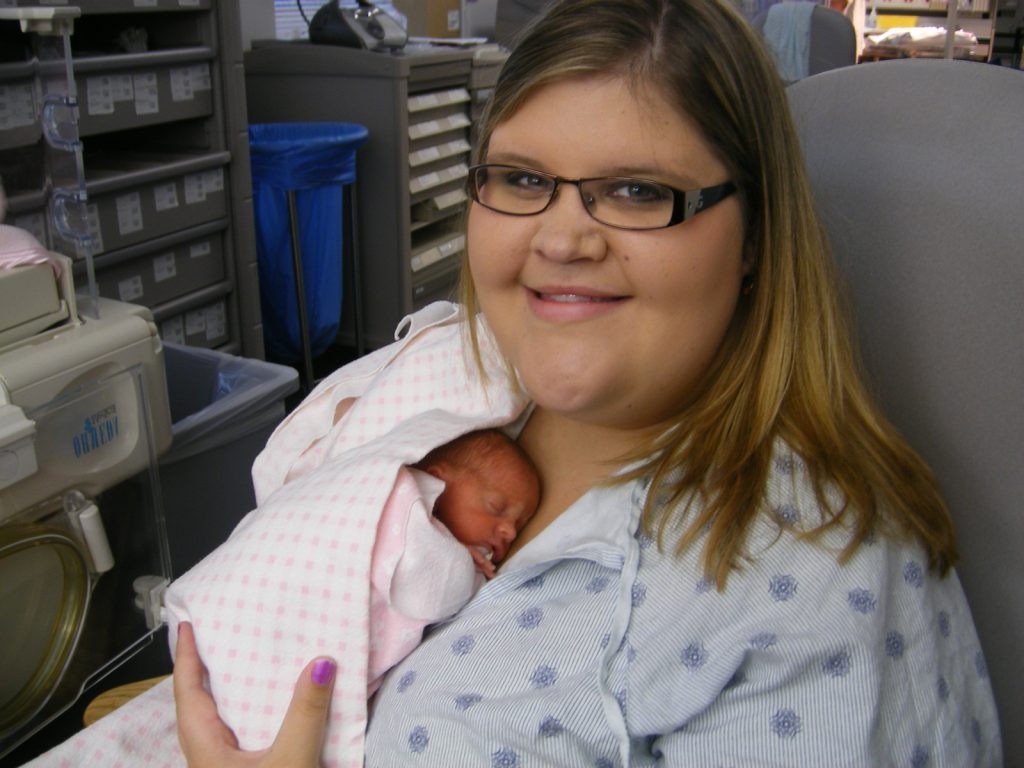
My daughter was born a premie baby at 29 weeks.
The next few years revolved around this little sweet new bundle of joyful blessings.
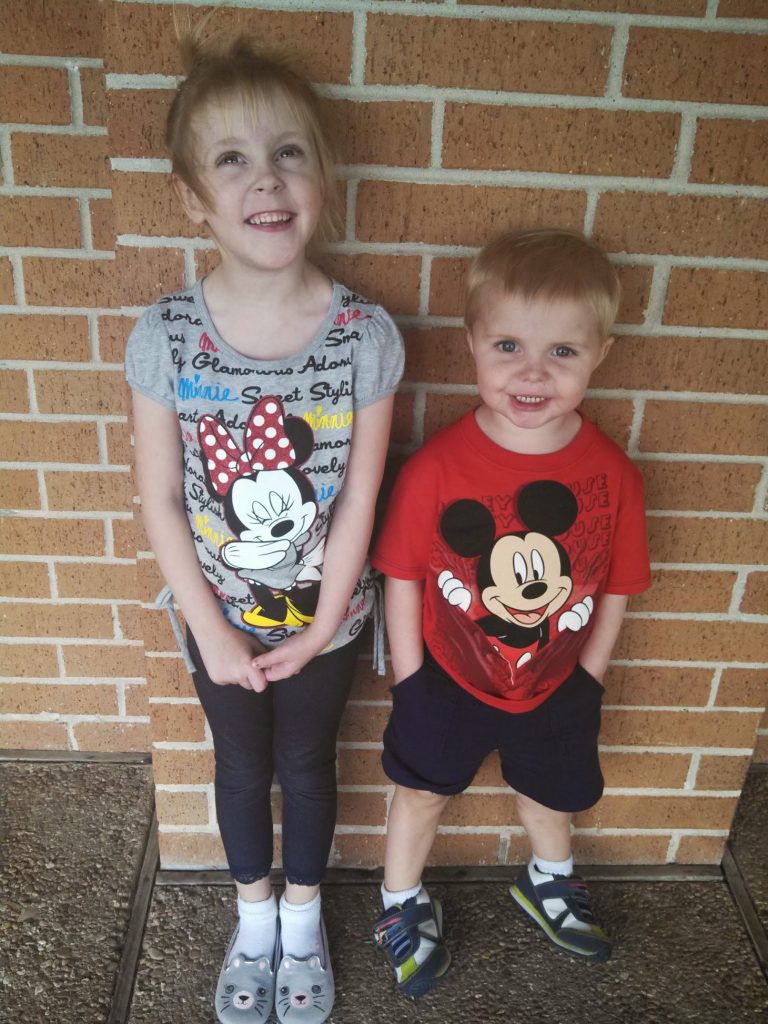
We moved back “home” to Texas just before my son was born. Then we moved again to a picturesque house in the perfect little suburb when he was 6 months old.
All in all… in the span of 4 years we lived in 5 different houses. Made countless driving trips across the United States before finally settling in for a good 8 years.
Whew…
I started teaching myself how to quilt when my kids were itty bitty.
(They’re not so little anymore!)
It wasn’t until my youngest child was about a year old, and my daughter was about 3 that I began to feel the sadness creeping in. I know a lot of young moms go through tough times and I was told it was all very “normal” (whatever that means).
I didn’t realize it at the time, but all I did each day was repeat what I did the day before. Life was the same thing over and over again. It was all very “Normal”.
The adventurous artist inside me was fading away and what replaced her was cold resentment. (I should clarify that I never resented my children. They bring me so much joy and are what kept me sane. If you are ever trapped in line with us at the check out lane… They love to talk to absolutely anyone and can make you laugh until you cry.)
The sadness that I felt was the exhaustion of having to push away my desire to be my whole true self. I missed being spontaneous and suddenly going on a ransom search for the perfect beach to read a book at or grabbing a cup of tea with a friend.
I also couldn’t just let the spark of an idea carry me through an afternoon of creating anymore.
I couldn’t paint, create or sew because I didn’t have a safe space that my kids couldn’t get into. Ample amounts of time weren’t what I had on hand either. You can’t pull out all your supplies if you only have 1/2 a minute to work before the 10 precious minutes of naptime are over…
Crafting isn’t exactly a kid friendly activity when unsupervised. And my daughter was lightning fast. I mean, in and out of a room with a path of destruction behind her before you could even finish blinking. (come to think of it, she is 12 now and still possesses this talent…)
I did a lot of soul searching and problem-solving.
The only way I could fathom getting to work on a project was if I involved my kids too. If my daughter thought this was all her idea and she played a big part in it, we would all get what we wanted = Mom’s undivided attention for her and time for me to create something.
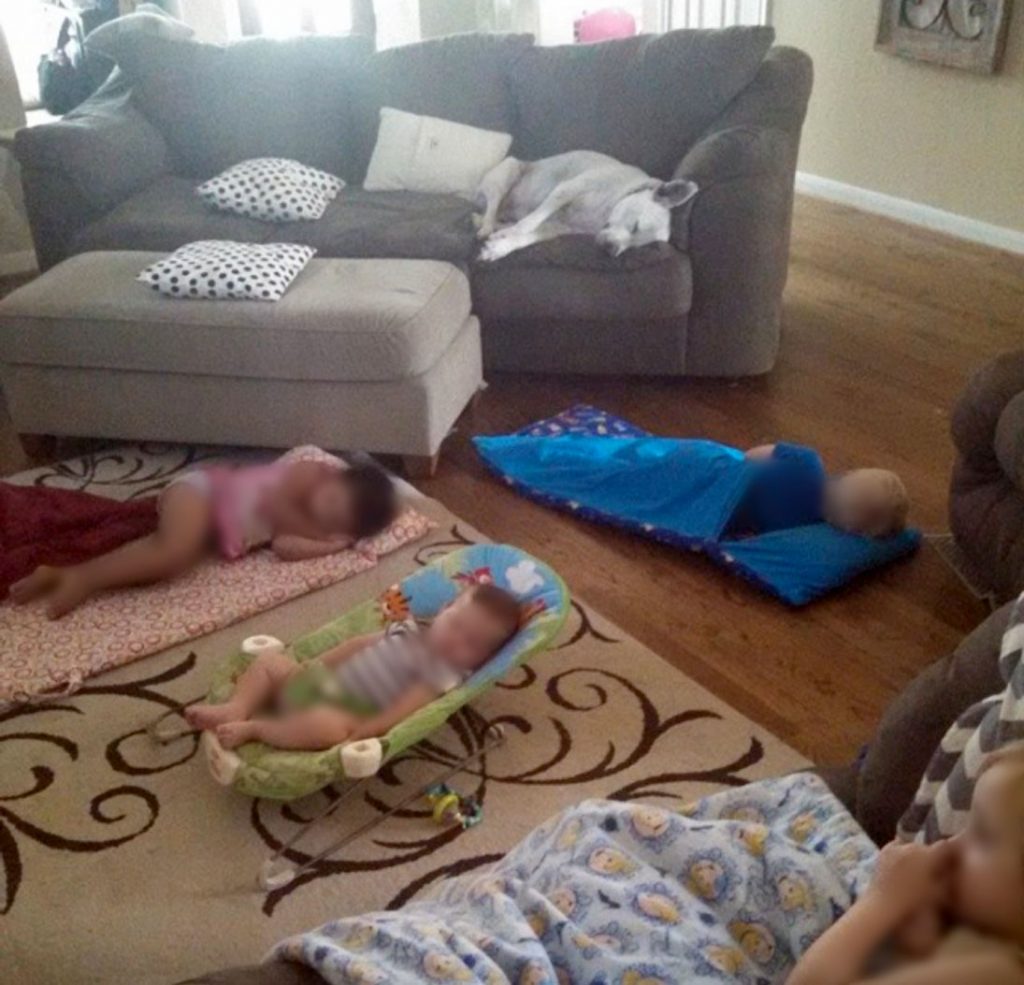
I settled on making a toddler sized snuggle quilts so everyone could have their own couch coverup. I took the kids to the fabric store and let them pick out the fabric- whatever they wanted. They got to pick their favorites. (we left with a yard of Cinderella and Batman flannel plus coordinating backing and batting.)
[Not realizing I was making a life altering decision at the time… I of course did not get pictures of the actual quilts… so this will have to do.]
Notice how even the dog is asleep? lol It was a good day.
The quilts I made were so simple, but so loved. It brought my kids joy to have something their very own that they “helped” make… it bought me joy to create something for my children.
I was pretty proud of myself…
While I was sewing, I could feel a tiny ember light. – That creative little artist inside… I just knew she was meant for more… this was just the beginning.
I made quilts for my niece and nephew and then I made another one for a friend… people who could look beyond my glaring errors and flaws haha and then another one. I don’t ever remember saying “I will be a quilter now” – It just kind of happened.
Fast forward to today
I have made countless quilts.
Each one generally more complicated than the last because that’s how my brain works. I really don’t even know where to begin counting. I’ve entered several into shows and my entire passion revolves around quilting. Every single day.
While my kids are a little older (Years 9.5 & 12 now), my daily to-do list is roughly the same.
I’m still super busy as a wife and mom. Add business owner to the mix because I love to blog and share my tips, tricks & tutorials with you.
As a self taught quilter, I know how frustrating it can be when you feel like you’re standing all by yourself out there without much help or knowledge of where to look for advice when something doesn’t turn out as intended.
You’re not on your own anymore! 😁 You have me! And you’re always welcome to contact me if you have any questions.
I don’t have any resentment anymore…
I’ve fully embraced that I love to empower other women who struggle with the thoughts of being “too busy” or “not good enough” to try something new.
The “little artist” inside me that I referred to… she knows what she is doing and one of these days I’ll learn to listen to her much more quickly.
I know this is what I am meant to be doing in this world. This is my place.
You are never too old, too inexperienced or too busy to create something beautiful every.single.day.
Job: Quilt Blogger
In 2018, I was very much in love with quilting and I wanted to share more and more the more that I learned. I took a leap of faith and created a blog to share my tips… never having any idea that it would lead me to where I am today.
My job prior to full-time blogger was as a freelance designer. It allowed me to be at home with my kids and set my own hours (sometimes really really weird hours!)
My goal was to really give blogging a shot and give it everything I had for a year… if it wasn’t worth my effort at the end of the year, I could quit.
Lucky for you… I fell even more in love with it and I love to see it grow as I am able to find new ways to help quilters out all over the world.
If there is anything I can ever do for you, please feel free to reach out to me. I am happy to help you!
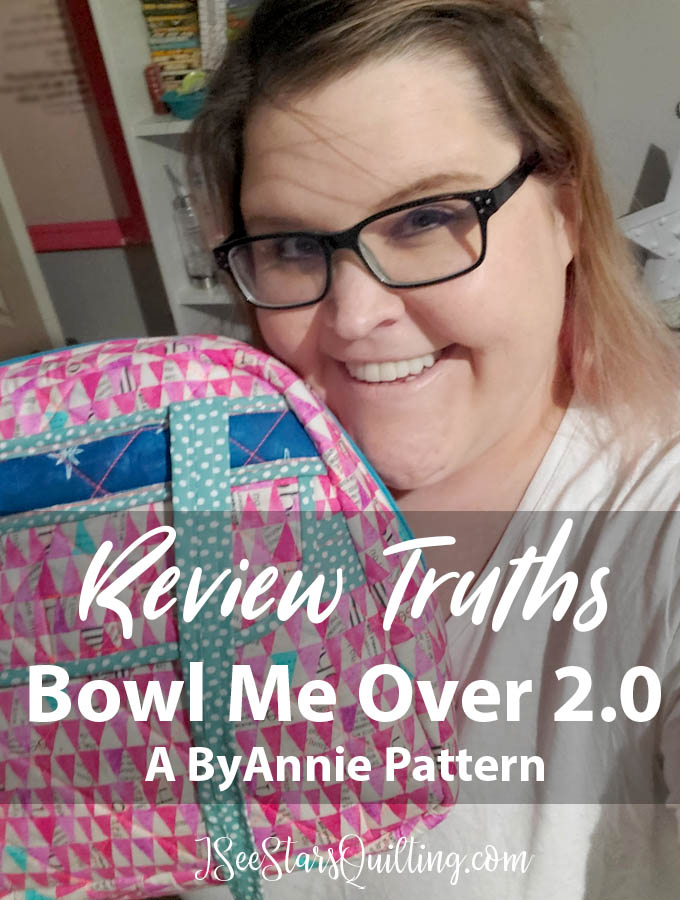
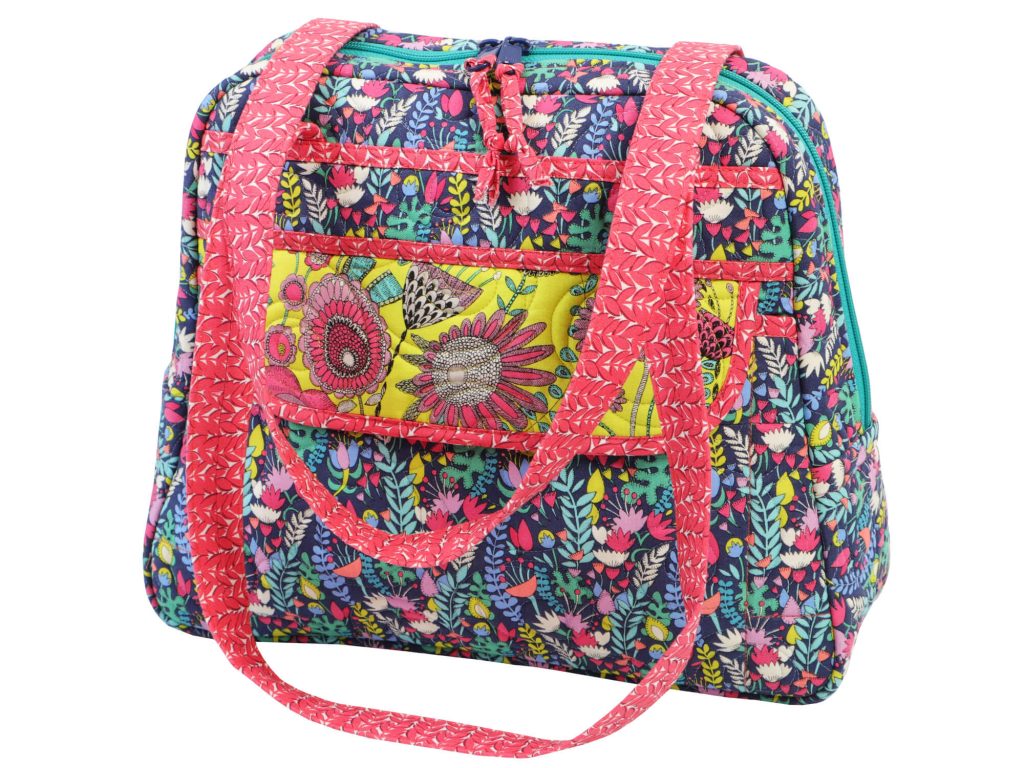
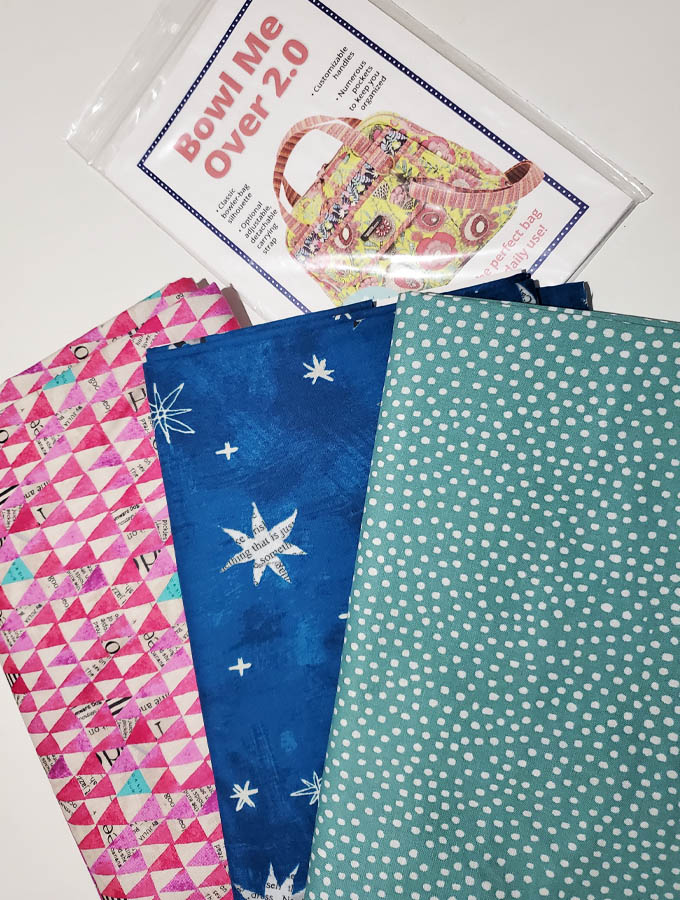
I just finished this adorable bag pattern and I had to show it off to you! If you’re relatively new to bag sewing, or lurking around the interwebs to scout some tips from sewists before you…. keep reading. I chose to start with the Bowl Me Over Bag pattern from ByAnnie Patterns.
(*This post is not sponsored by ByAnnie Patterns. Opinions are my own and I share them in hopes that you will learn from my experiences and be inspired!)
First off, I know I typically dabble my skills in the quilting corner of the sewing world. Today we’re going to go off track just a bit. 🥰 It is worth the ride.
I have to say that I would not consider myself a sewist of bags or a bag maker. Now that I have this bag behind me, I have slightly upgraded to bag maker in training. I still have some more to learn!
I’ve always been a little intimidated by bag patterns (which goes against my fearless/try-anything nature in the quilt-making corner). Don’t ask me why. I don’t have a good reason… it just seemed hard and I never let my brain really go beyond that thought to contradict myself or fully analyze WHY I was feeling that way.
Surely you have something in your life/craft world that you’re too scared to try too?
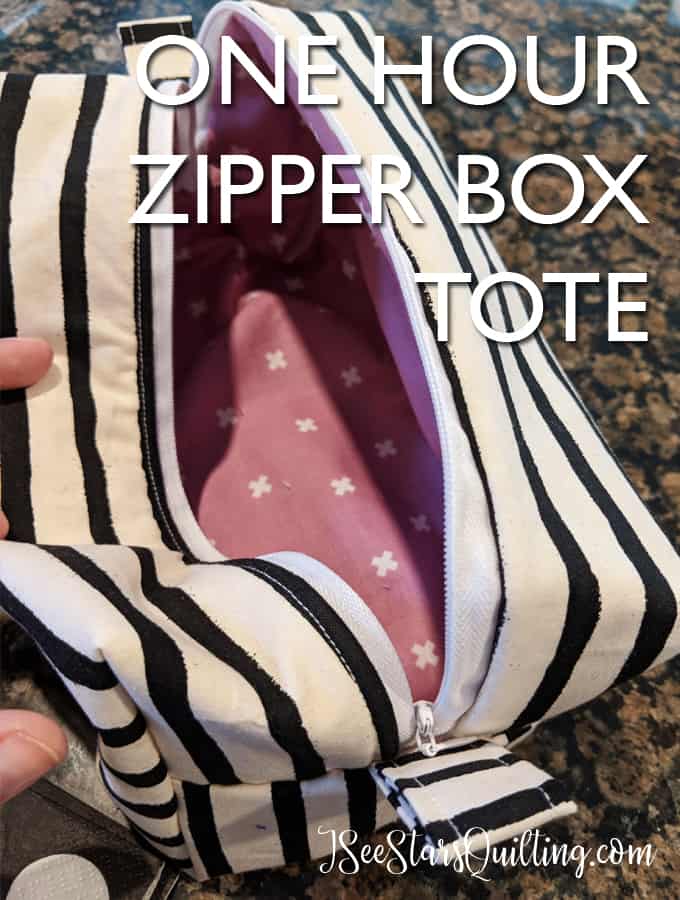
When I say “bags” I mean the purse style or overnight bags, not the cute little zipper bags or tote style bag! I’ve sewn those before and they don’t require a lot of special skills.
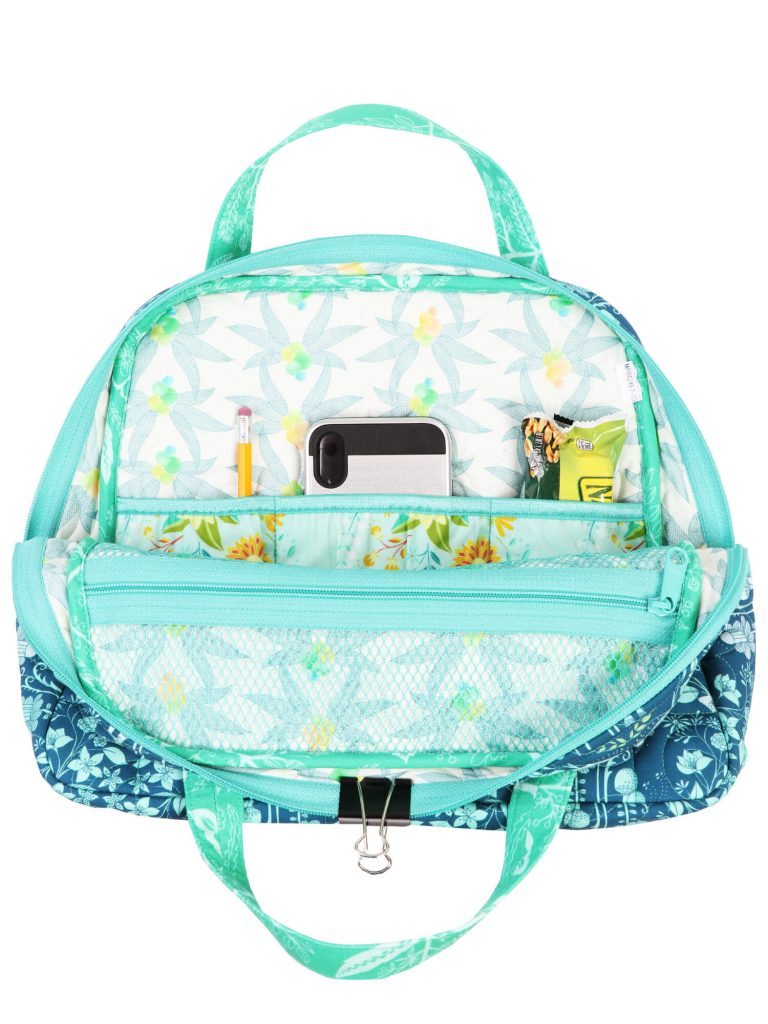
The box zipper pouches are so fun and cute. They come together quickly and there is no reason you can’t keep a few of these on hand for a quick gift!
Even though these are technically “bags” I finally decided that enough was enough. It was time for the real deal bag patterns! I mean, you never know until you try, right?
If you are a seasoned bag maker…
Please forgive any misguided instructions, silly thoughts on my part or calling processes/steps by the wrong name. I am a self-taught girl. It will always be my first instinct to jump into a project feet first and ask questions later. 🤣 I doubt I will ever learn.
The Prep Work
I looked very closely over the required supplies list. I like that the ByAnnie company does have everything in their own brand to make shopping a little easier.
You can buy everything from their website and have everything shipped at once rather than sourcing out each item on Amazon. Here is a link to the ByAnnie website.
A little more about the supply list
I have read that some people prefer other materials to the ByAnnie branded items.
I’ve also been told that you can get cheaper versions of the same type of product or hardware from other stores.
If you’re fairly knowledgeable about the materials, I would suggest looking into them to save a little money when you can. (more money to spend on other craft supplies!)
I felt the prices on the ByAnnie website were fairly priced and convenience does have a price in my opinion too, but I’m not an expert!
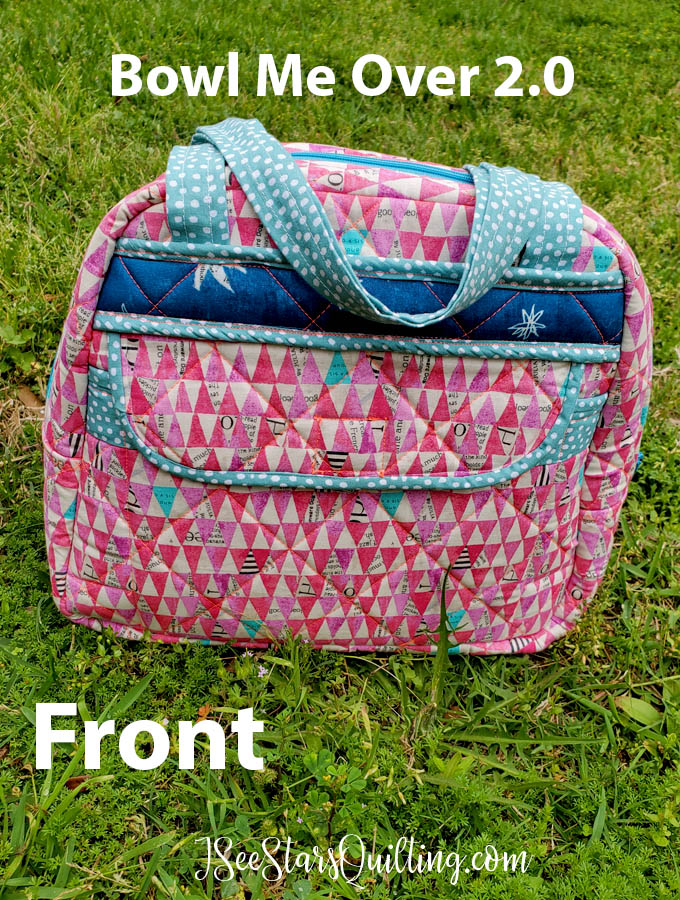
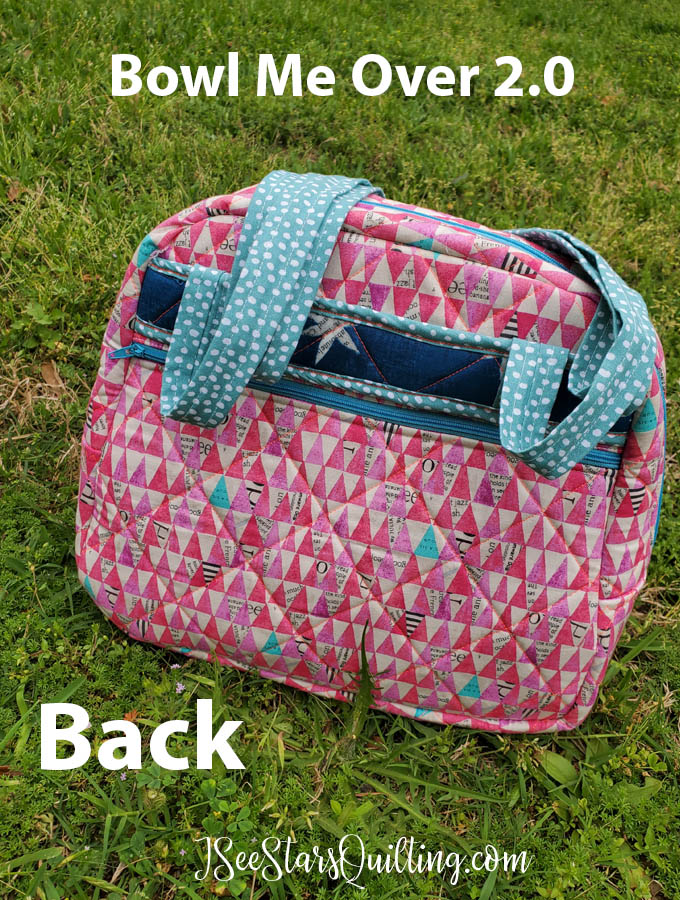
The Bowl Me Over Pattern
I decided on the Bowl Me Over PatternbyAnnie Bag. – My reason? It would easily accommodate my ipad when I traveled around running errands without feeling like I was going on an overnight trip somewhere.
Just look at how darling these bags are! I love the look of traveling homemade!
I felt like I was stepping out in faith even creating this bag in the first place. But putting off making a decision on my fabrics felt like I was dragging my feet to jump on this project.
I didn’t know if I wanted to make a “test” bag to work out any kinks or learning moments then followed up by a “final version” with my favorite fabrics… so I just went with some of my favorite fabrics to start with.
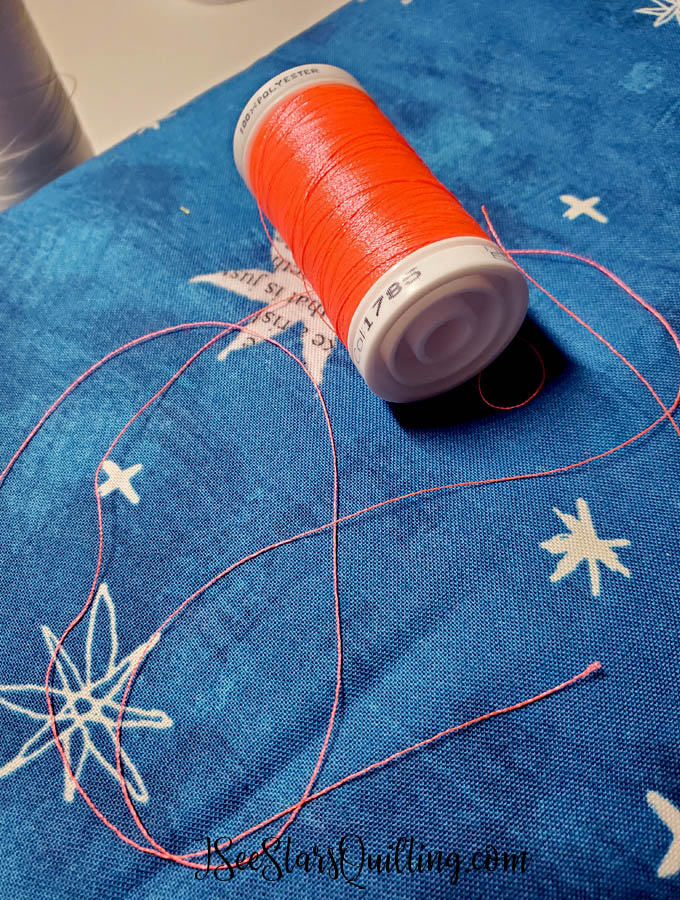
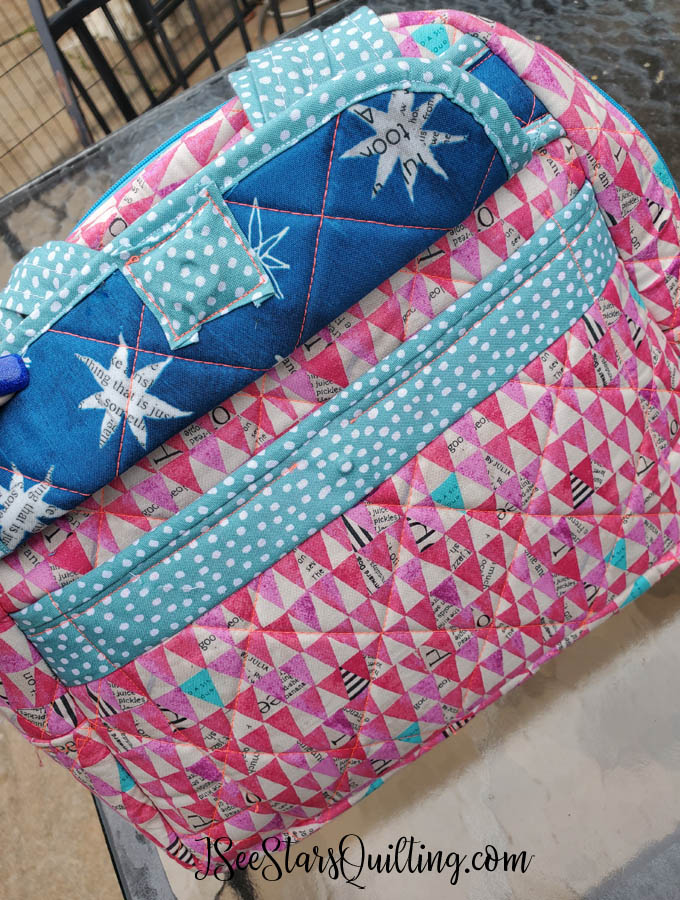
Carrie Bloomstom is one of my favorite fabric designers. I love her fabric. Everything she creates feels like my heart and soul. I am a graphic designer at heart. The blue with the newspaper star print is my favorite fabric in my collection! Just look how pretty it is!
I pulled the light aqua fabric as an accent fabric from my main fabric. There is just a small hint of it in there, but I feel like it was enough to make it all pop!
Isn’t this neon pinkish thread combo with the fabric just to die for? 🤩
My thoughts on the Pattern
The ByAnnie Patterns are very detailed. oh.my.goodness. very detailed. There are a lot of pages and diagrams within the pattern as well as complimentary access to pattern-specific videos on the ByAnnie website. (you have to buy the pattern and use the provided access code to see the videos)
I found the abundance of information really helpful at times and other times I was very overwhelmed. The process is different from the quilt patterns I am used to.
I also was not as familiar with the terminology as I thought I would be… It could just be because I am a newbie to the bag-making world from the quilting industry?
Overall, I feel like the pattern was very helpful and informative… you just have to take it slow and I learned it was better to assume that I knew nothing and proceed with caution when making cuts and seams.🤣
The Bowl Me Over Bag Making Process
Deciphering the pattern and cutting my pieces was the first hurdle… making the bag and sewing it all together was the second hurdle.
I am a perfectionist – to a point. I really really want to have a beautiful flawless project, but there were some mistakes that I had to learn to live with because if I didn’t… this bag would not be finished yet!
Done with a few flaws is better than never finishing because expectations are set too high. – Feel free to quote me on that but please don’t throw it in my face when I am angry with my seam ripper in hand lol
I have so many “learning flaws” in this bag! 😂 so many! To a random stranger, they won’t know or see the mistakes I see, but I know they are there.
Thoughts on your machine being up to the task of bag sewing
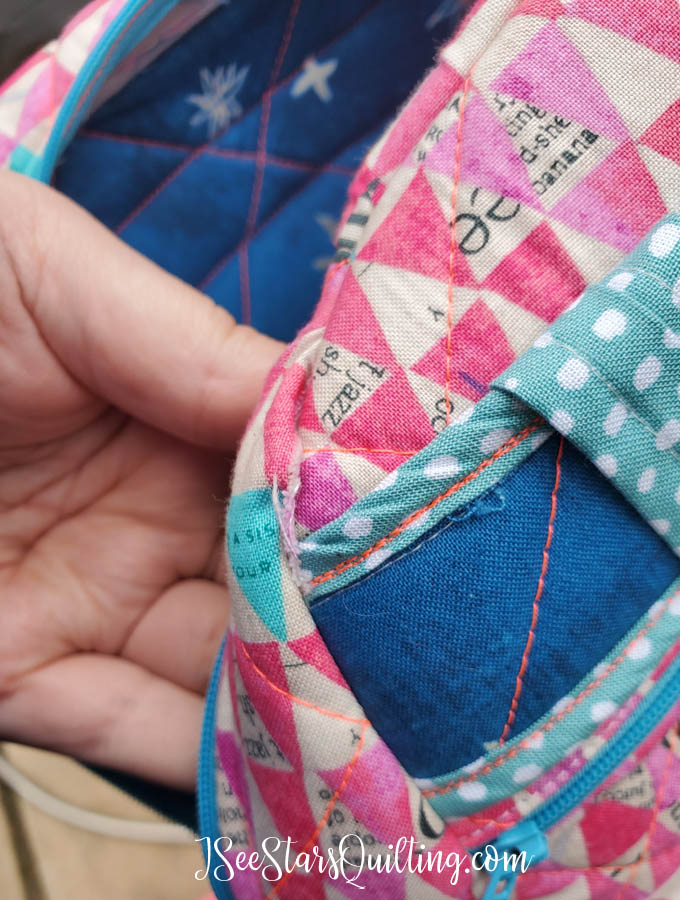
While my very reliable Janome sewing machine is up to just about every quilting task I’ve put in front of it… we struggled to sew all the layers of this bag together properly.
I completed proably about 90% of the Bowl Me Over Bag pattern on my machine without any trouble at all. The quilting, the zippers, the mesh lining and pockets were all slightly different than quilting, but worked fine for me.
That last 10%, however… was a bit rough. I struggled when it came to assembling the final steps of the bag.
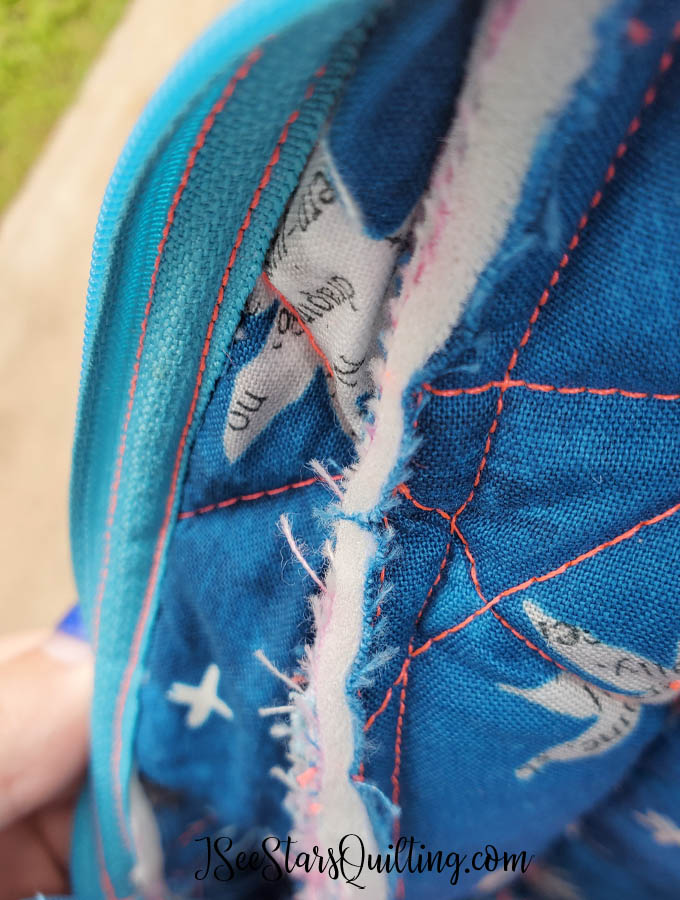
With the multiple layers of fabric and layers of stability foam… It was A LOT of layers to sew through and keep in place!
I hated that I had to skip the final finishing step of the bag… which made me sad… It was to essentially bind around all of the raw edges in the interior of your bag so it would be nice and pretty… and not look like…. well… this mess!
You can’t see this detail from the outside of the bag… and usually, no one is going to go digging through my bag but me… however, I would have loved to have seen that pop of aqua binding in the interior of the bag! Wouldn’t you agree?
I felt that the thickness of the raw edges and the binding were going to be too much for my machine and my perfectionist tendencies to attempt. Especially after I ran into this issue… oops.
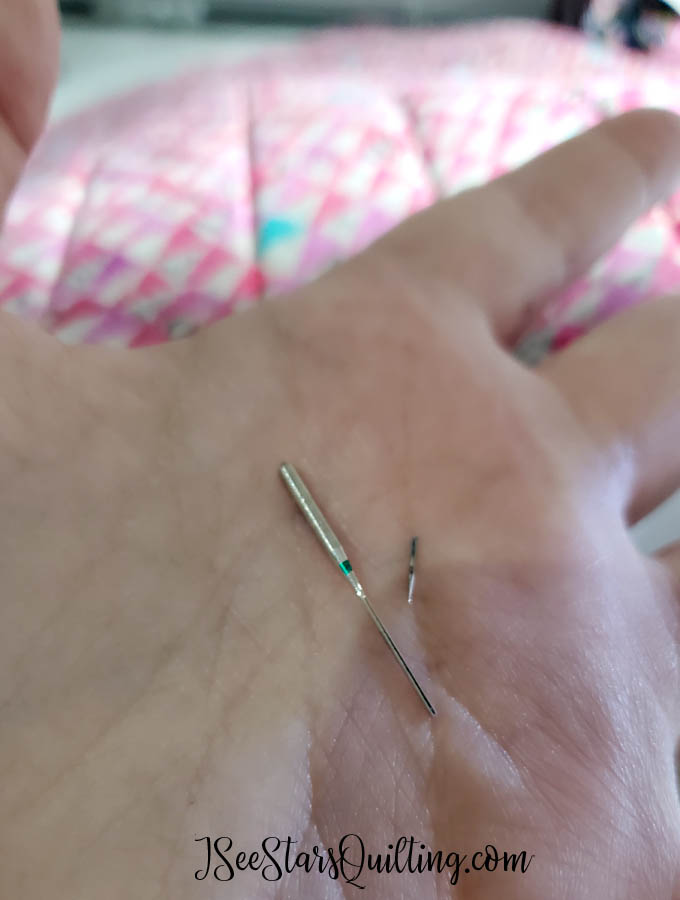
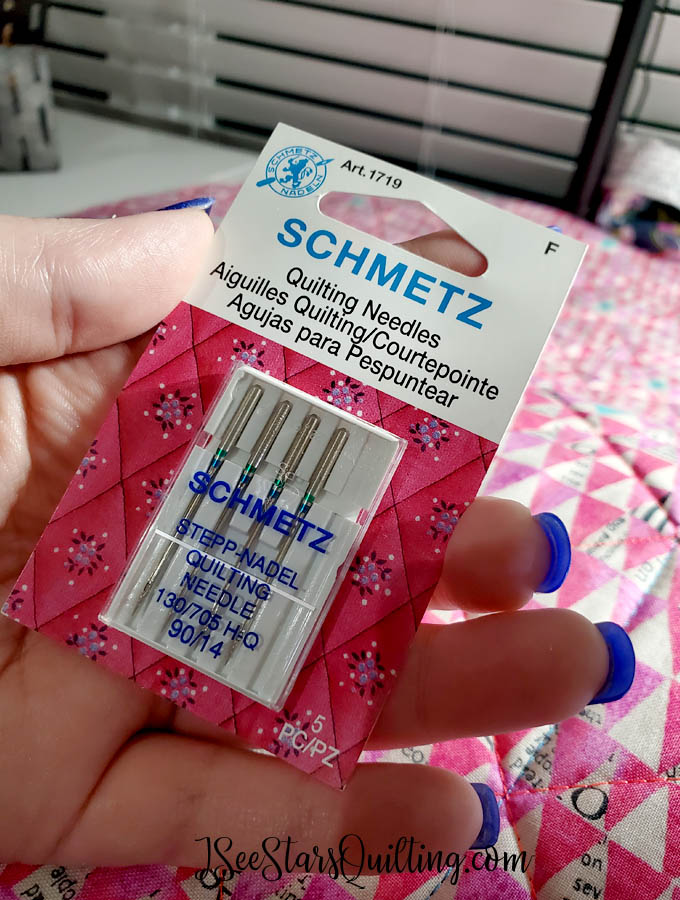
I might suggest going up on your needle strength too if you are sewing through all the bulk. I used quilting needles because they have worked well thus far, but I wonder if a Jean needle would have served me better?
Perhaps I could possibly go in and hand-stitch the binding in one day… It would be a fairly quick project… but it is on the back burner as far as urgency on the to-do list! Perhaps someday!
Also… I would like to openly admit that I have no idea what I am doing when it comes to snaps. And I am sorry because by this point, I was ready to be done with the bag.
I wasn’t in a bad mood or having a particularly hard time with it, but my alotted sewing time for the weekend was coming to a close and I had to cut a few corners to actually finish this bag! – Something else to ad to the list to learn another day!
Would I consider making the Bowl Me Over Bag pattern again?
If I decide to make this pattern again, I may look into nixing the foam that is recommended in the pattern and opting for a thinner, but still firm interfacing material instead to help the bag keep its upright shape with less bulk.
See My finished bag!
Here are a few pictures of the finished bag and all of it’s beauty… flaws and all.
I love it. I am truly happy that I decided to just go for it and make this pattern with my favorite fabrics! The jury is still out on whether or not I will make this pattern again… It could happen!
I hope you enjoyed reading about one of my latest sewing projects!
I love to share the things that I learn with you! If you have any questions (or any snap sewing tips! lol) leave them in the comments below!
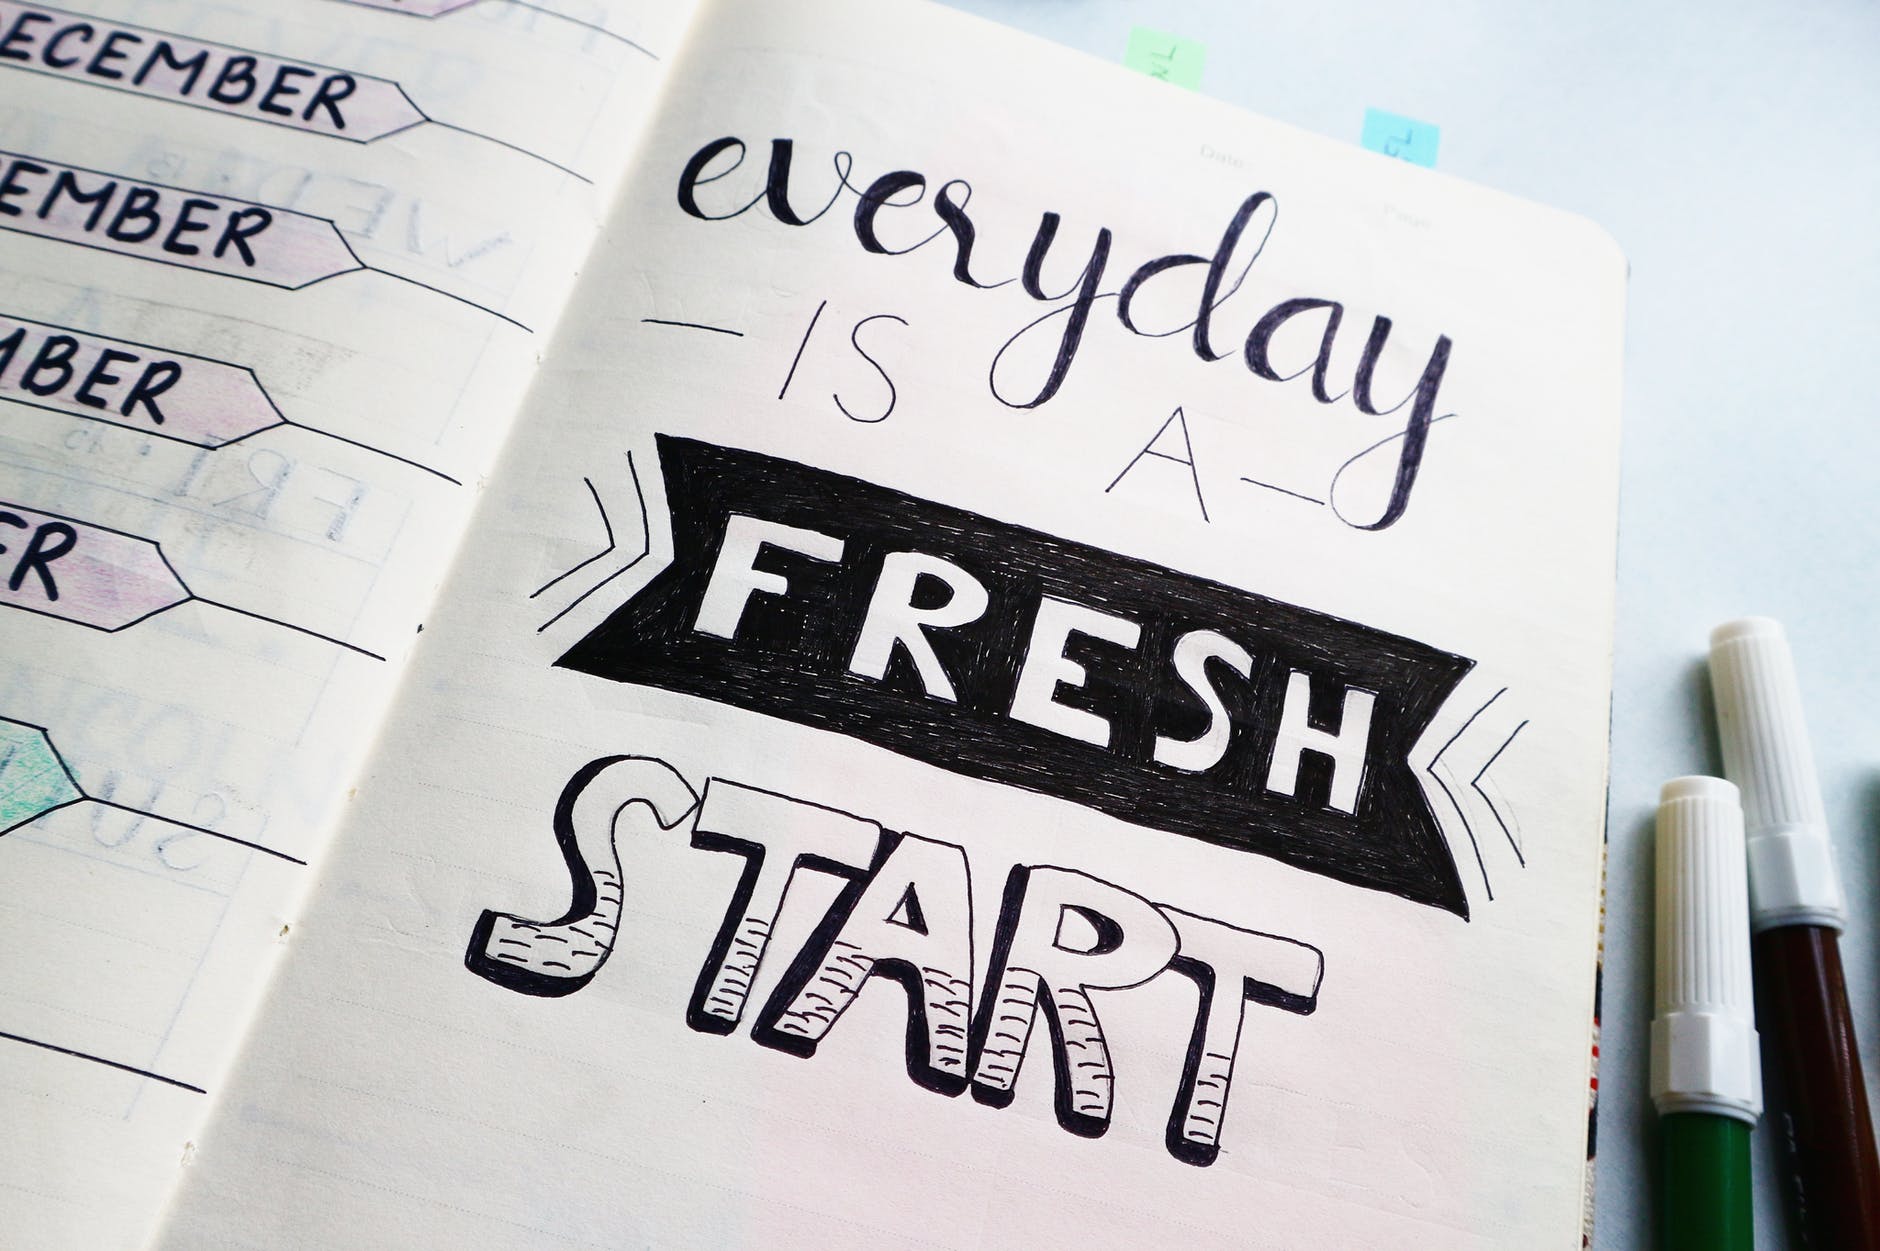
Amazing life changes aren’t only allowed to start during the month of January. Your best creative life can start today.
I hope you know that. Logically it makes sense, but also we’re kind of conditioned to believe that January is the best “Monday” of the year to start thinking about how to get our stuff together for the rest of the year, right?
Kind of funny, if you ask me.
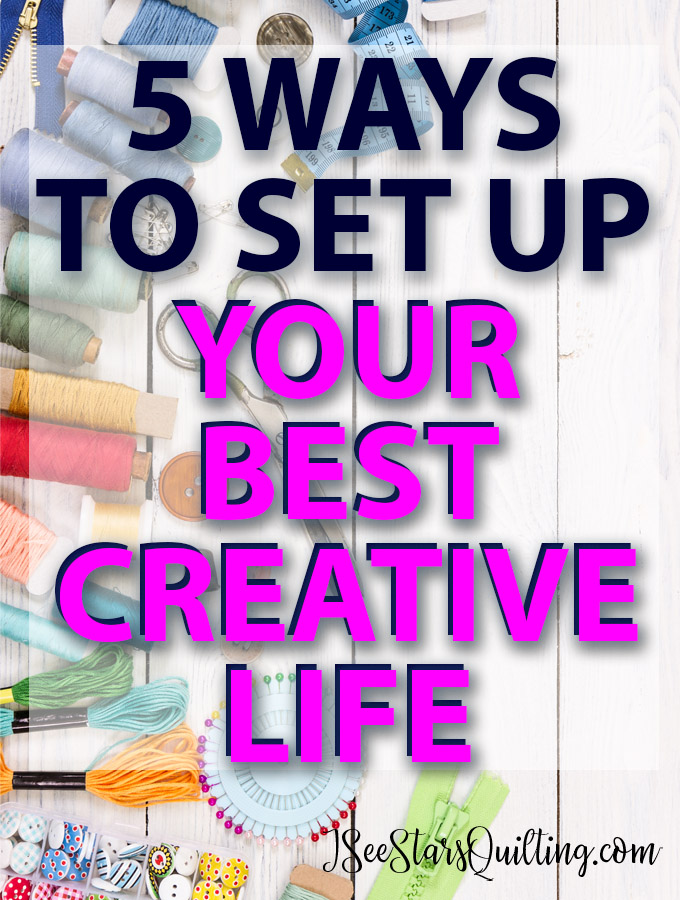
In today’s post… I’m going to tell you 5 ways you can get your footing and set up the best creative life starting at any point during the year!
5 Ways To Set Up Your Best Creative Life
1. Look at what all you have going on right now in your life.
There are great times in your life to shake things up and do something different or go all in an activity that you’ve never done before!
…And then there are times where you have to take an honest look at your life and get a few things in order BEFORE embarking on a life-changing creative adventure.
It might be a hard thing to hear but I’d rather you take this moment of reflection before you cause more stress than necessary by trying to be everywhere at once.
Taking care of your sanity is always number one!
2. Decide what you want to pursue!
If you didn’t already know, I am very much a planner and a goal achiever!
I love my check-lists and knowing what I’m getting myself into.
I also know my personality doesn’t jive well with starting 100 projects and never completing any of them. (we’re all wired differently)
You may be happy just playing with different ideas and enjoy the creativity in each moment more than the actual finished project.
You are the only one who can decide what you’re comfortable pursuing and what is going to bring your heart the most joy!
So when you’re trying to plan what you want to do… start to narrow it down by what sparks your interest but also what you have room for in your life, like we talked about above.
If you’re stretched thin by work and kids and just general busy life… You may find that a creative outlet is a good way to buy back some of your sanity points at the end of the day. That’s awesome!
Maybe start with a journal and some brand new markers or watercolors to doodle out some inspiring ideas instead of taking on your first hand stitched king size quilt project, you know?
Or if you have a little bit more time to give, look at taking a few creativity classes!
A few quick and super satisfying project tutorial ideas for you to check out:
3. Purposely book an appointment time with yourself
Schedule out time daily, weekly or at the very least a few times a month to pursue what it is you want more of in your life.
I can 99% guarantee that if you wait for those lazy afternoons or just pockets of free time in your life to show up… you’ll be waiting a very long time and see very little progress with your creative endeavors.
You have plan for it! Even if it takes marking off every Tuesday/Thursday evening on your calendar! Give yourself the time to focus without a lot of distraction around and the pressure of only having 5 minutes to yourself before something else pulls you away.
OK Ok… I know… things come up and schedules aren’t set in concrete and things DO shift around.
I’ve heard people use the phrase “You wouldn’t be a no-show to a doctor appointment you made or just bail on dinner plans with a client!”
It is easier to put the needs of others before our own when it comes to self-care or creative endeavors!
To live in the world we are in today, you have to be somewhat flexible to survive. (um hello, year 2020)
You just have to realize one thing:
If you aren’t willing to make yourself a priority and GIVE yourself the time to focus on your creativity… it will not happen on its own.
You don’t have to let go of flexibility to keep your creativity a priority!
If you have to shift things around, make sure that your time for yourself doesn’t get tossed out simply because it is the easiest thing to throw out.
Other things will always get in the way. There will always be someone else or something else that you can focus on.
Our attention is pulled in so many different directions via advertisements, social media, work, family matters, worldly news etc etc.
Work around it!
5. The perfect time to start focusing on your creativity is TODAY
(Or perhaps this weekend if you need to do a little shopping prep beforehand!)
If you’ve been waiting for things to be right to start focusing on your creative talents… You could be waiting for a long time. 🙄
I started quilting when my kids were very young. Being a really busy mom, I had this grand idea that things would get easier when they got older and I would have more time when they went off to school. I just had to make it through those hard years, right?
Well, guess what? My days still seemed to fill up quickly even with them gone most of the day when that time came… I just had a different set of responsibilities and expectations on myself than I did years before.
The best day to start your creative journey is today.
Like, we talked about earlier… now may not be the best time to start on that king-sized quilt project, but you can do SOMETHING creative that will still bring your heart joy TODAY!
YOU are the one who is in charge of your best creative life!
Here is a bonus tip!
Grace.
Grace is always something that you need to give yourself in every area of your life. 🥰
It isn’t always easy, and it isn’t something that is ever actually “done”. You have to always continue to pursue your best creative life and keep it as a priority in your life.
For further reading, I highly suggest the post below because I share a few more nuggets of my learning moments and what I have learned in pursuing my best creative life.