Christen Phillips

  • 2021 Word Of The Year Project – And Also My Foundation Paper Piecing Project

    Every single year I choose a word to focus on for the upcoming year. It’s been a tradition since I was in college.

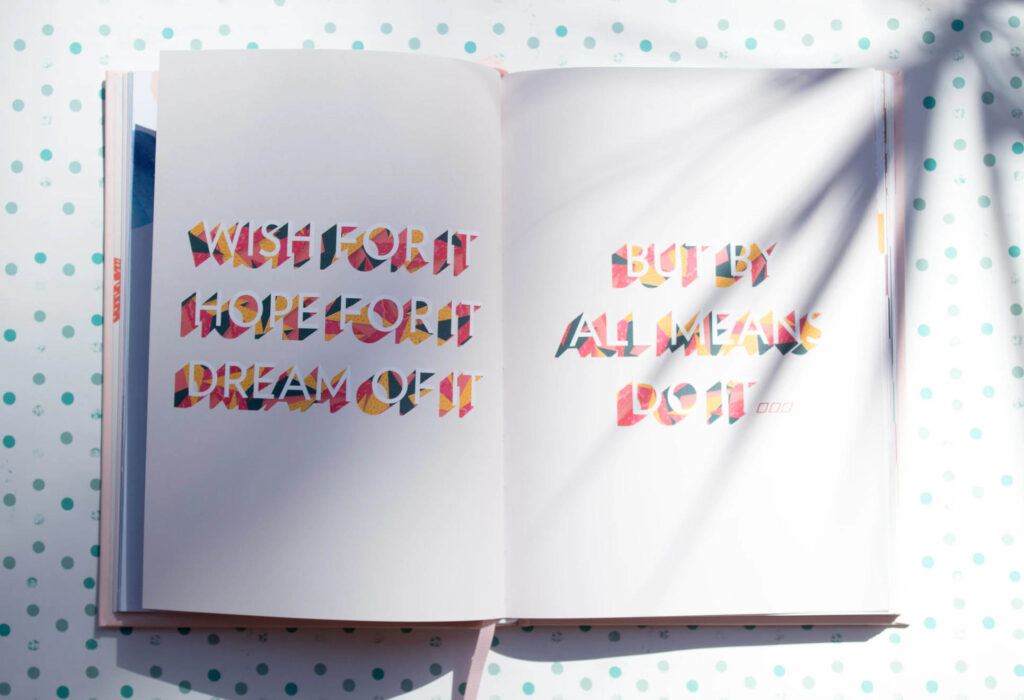
    Your word of the year is supposed to help you to move towards what you want… your intentions for your own life and your goals… by giving you something to focus on.

    For the last several years, I’ve ordered a small simple gold band with my word on it to add to my collection.

    My word for 2020 was Intentional – I’ll spare you the long story because this post is about the project I made for 2021… but I learned how to be a lot more intentional with my time in 2020, as did the rest of the world. Truthfully, I think I’m still leaning heavily into learning how to declare my intentions with my life… It is always a work in progress, right?

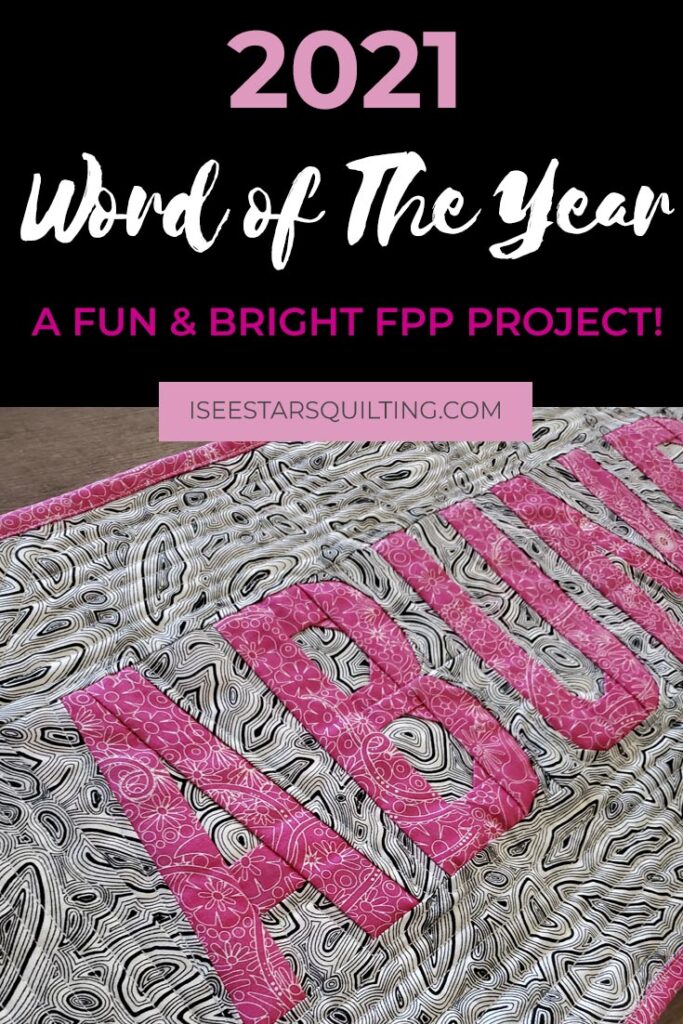
    I decided on my word for 2021: ABUNDANCE.

    My wish for 2021 is that we enjoy…

    An abundance of blessings.

    An abundance of love and joy.

    An abundance of giggles and memories made.

    An abundance of happiness and an abundance of forgiving grace…

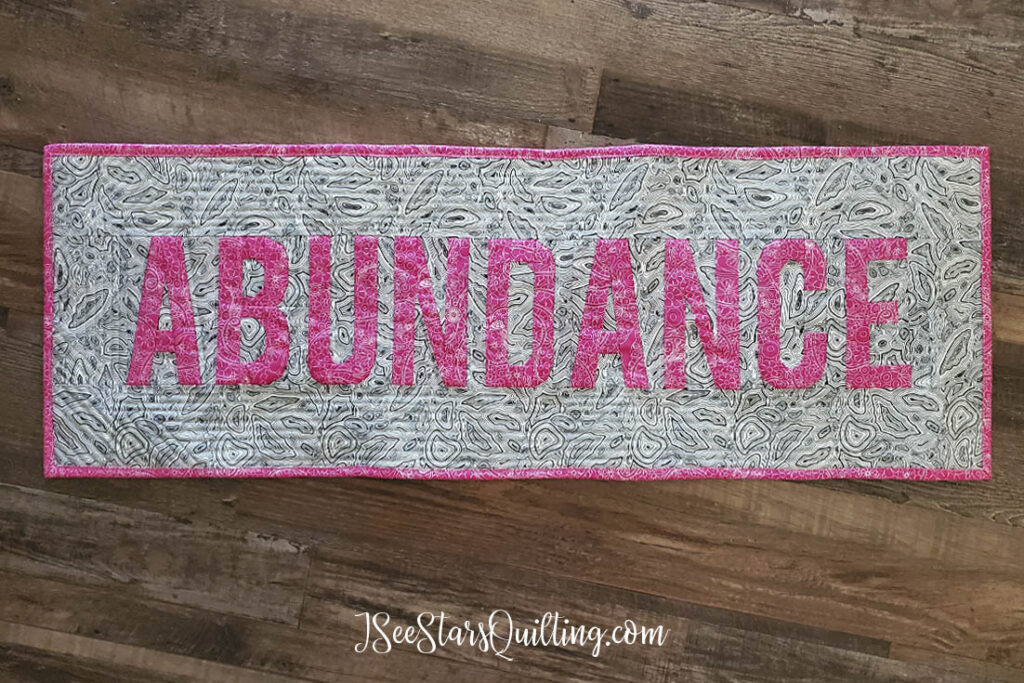
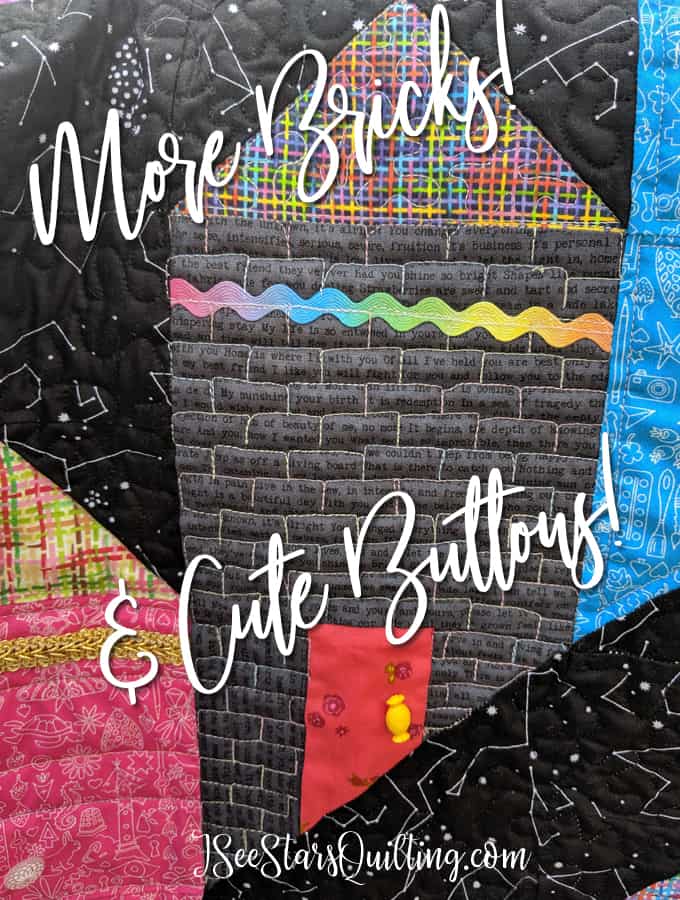
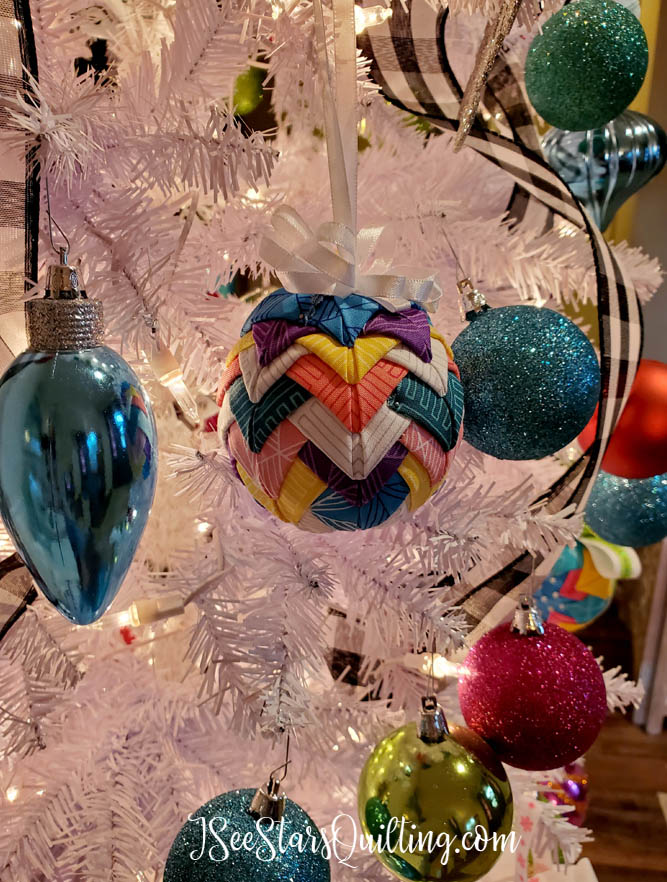
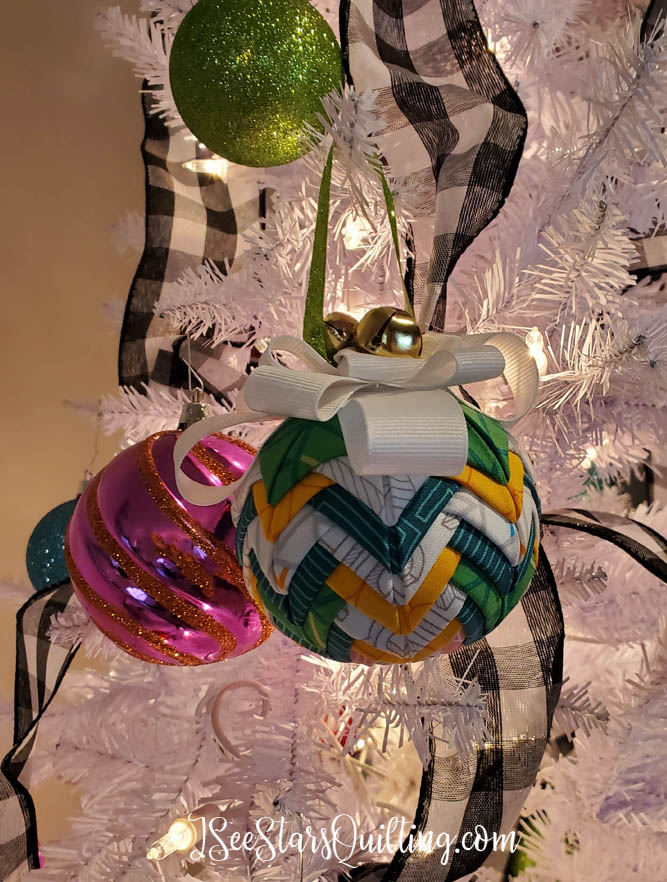
    So I took some time out of our schedule and I created this wall hanging quilt.

    It hangs right above the door in my office where I can see it every time I pass through.

    I used a mix of Tula Pink Fabric and Alison Glass (two of my favorite fabric designers! 🥰) I am so pleased with the way that it turned out and I wanted to show it to you!

    Do you ever take those personality quizzes just for fun? I used to take them all the time so I practically know what my answers will be every time.

    I’m a perfectionist and an organizer with a touch of hot mess. Did you know that a lot of perfectionists tend to be big procrastinators as well?

    It is absolutely 100% true. I swear. Essentially, you’re so afraid of it not being right or ready for it that you put off even starting your project until the very last second.

    Ummm, hi. I’m Christen and this is me.

    via GIPHY

    (If you just understood the meme above… we are now best friends!)

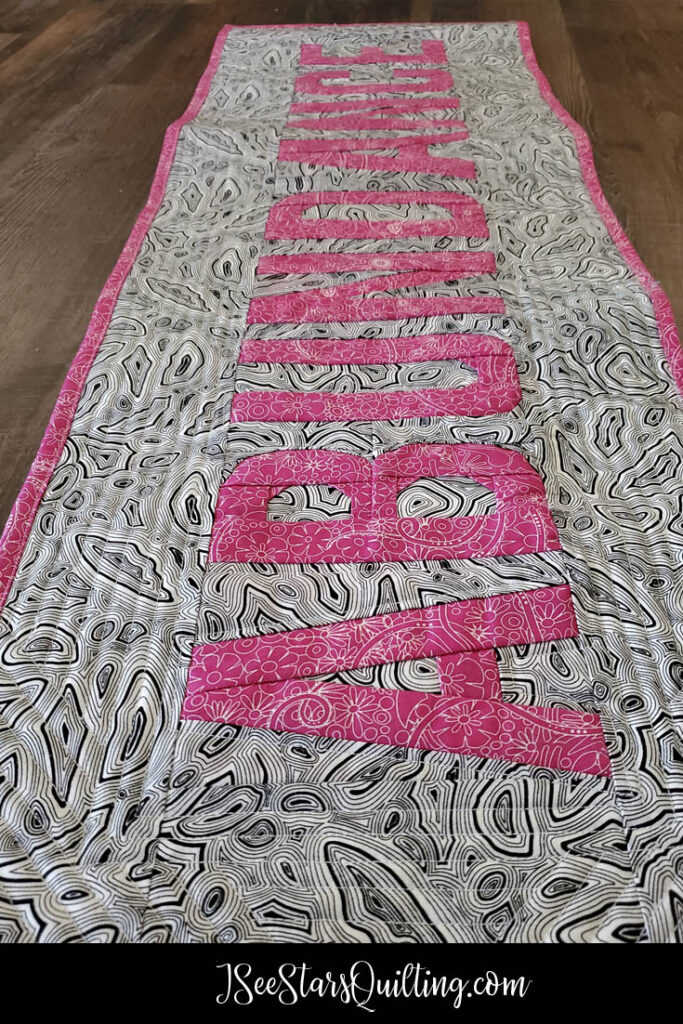
    I love how perfect my fabrics come together through Foundation paper piecing!

    Once you learn the basics and get the steps down for FPP… the world of creating beautiful perfect corners and angles is yours!

    I mean perfection without the fuss and tears? I’m so totally in…

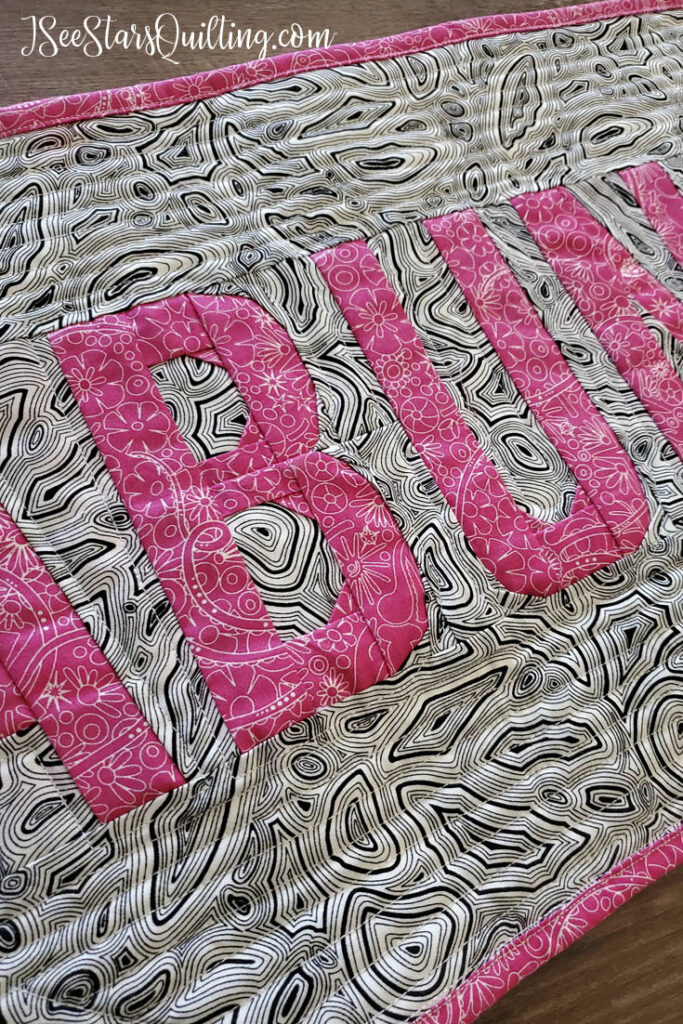
    Check out the detailing of these FPP letters!

    So… What is Foundation Paper Piecing (FPP)?

    FPP stands for Foundation Paper Piecing.

    I think that it is a skill every single quilter should have in their back pocket… even if you don’t use it very often.

    My Quilt top making skills changed dramatically – as did my confidence in my piecing skills when I learned how to get the accurate piecing with the FPP technique.

    In a nutshell, Foundation Paper Piecing is a fabric sewing technique where you stitch your fabric (using your sewing machine) to paper. After you have everything in place. You remove the paper with the guidelines and what is left is this gorgeous and sometimes detailed fabric creation that you then turn into a quilt… or any other fabric creation you can dream of!

    I don’t know if you caught the big announcement I made this week… so I’ll go ahead and spill the beans here too….

    I’m releasing a BRAND new course called Say Something FPP Academy where I’m teaching you everything I know about Foundation Paper Piecing and giving your quilts a voice!

    Here is the announcement video for it 😘

    If you want more information on the course and the enrollment dates, you can check out this page with the details to Say Something FPP Academy.

    This is the foundation paper piecing project that I created with my word of the year for 2021 - Abundance. Look how detailed those letters are! I love FPP because of the level of perfection you can achieve!

    Do you choose a word for each year? What is your word? I would love to hear it in the comments down below!

  • What Stitch Length Should I Use?

    *This post was updated on 1/19/2020*

    Hey! If you’re looking for answers to what in the world stitch length is and why you need to pay attention to it…. we’re going to get to the bottom of it today!

    For those of you who want a quick and easy answer, I created a video that summarizes the high points and gives you the quick answers. Be sure to scroll down a bit to check it out.

    For all you sewing, quilting & math nerds… I added a section at the bottom of this post with some educational content for you.

    Stitch Length – What is the easy answer?

    Your machine has all these bells and whistles and it can be hard to know what you’re changing when you start playing with them all.

    What is Stitch Length?

    Sewing machines indicate stitch length in millimeters. A 2.8 stitch length means each stitch will be 2.8 mm long.

    My Janome 3160QDC display is as follows:
    Janome 3160QDC-B Quilters Decor Computer Sewing Machine

    Janome3160 Screen Explanation

    When you adjust the stitch length, it’s not the needle that is changing; it’s the feed dogs (the little fabric grippers in the center of the needle plate below the presser foot). The machine alters how much fabric the feed dogs will move before making the next stitch. Your needle will always do its thing and work steadily in a vertical motion.

    Sewing machine with hands

    Your sewing machine’s manual may likely have a handy stitch chart of suggested settings and uses for your model.

    The key thing you need to understand is this:

    The smaller the stitch length number, the smaller the stitch. The larger the number, the bigger the stitch.

    A longer stitch length is typically used for basting (temporary stitches), sewing with heavyweight fabric, or for defining a topstitch.

    The smaller stitches are used for piecing fabric together and in situations where delicate fabric is less likely to come apart.

    What Stitch Length Do I use?

    Decorative stitches vs. foundational stitches

    Foundational stitches are the ones I like to refer to as the ones that hold everything together. Like, your piece wouldn’t hold together without this line of stitches. It is essential in the makeup and necessary in holding everything together.

    Decorative Stitches are the stitches that may very well help hold everything together but they also are there to add a little sparkle too. Just a little extra. Worst case scenario, you wouldn’t HAVE to have the stitch to hold your piece together, but it helps. You can use decorative stitching to add in your own flair or your own personal style. You can even use some of the fancy stitches that may have come pre-programmed on your machine.

    What stitch length you should use varies by project and purpose…

    Here are the most common stitch lengths so you can choose the right one.

    Most Common Stitch Situations!

    To reinforce a seam or make it stronger

    Use a tight (smaller number) stitch. This is also the case if you are sewing with silk or sheer fabrics. The exact length is not as important as making sure it looks well and gives your seams the strength it needs. Start with somewhere between a 2-2.5 on a test piece or scrap piece of fabric and decide from there. If your stitches still pull apart too much or seem to put pressure on the seams, go a little tighter

    Quilt Piecing

    Piecing is one of my favorite parts of the quilting process!

    I used to think that the bigger the stitches were the more comfortable to rip out if (when) I made a mistake.

    That is true, however… when you think about all the times your quilt is going to go through the wash and all the hours you spent making the quilt… you want those seams to hold up!

    What Stitch Length should I use?

    Use a stitch length of 1.8-2.0 when piecing fabrics for quilting.

    Tinier stitches are a pain to rip out when you have to correct a mistake, but working with the overall quilt piece is much easier with the smaller stitches.

    What Stitch Length Should I use?

    Basting

    This one is easy… whatever the longest stitch is on your machine… use that one! I like a 5 stitch length.

    The whole purpose of basting is that it is a temporary stitch. Therefore you want to make it easy to pull out.

    These are stitches you will either remove later or are just used to reinforce your quilt sandwich until you can go back with better stitching.

    Stretchy Fabric

    Oh, how I love jersey knit fabrics! I have been trying to learn more to sew with it, but there has been a learning curve for sure.

    If you’re using a stretchy fabric, you’ll want to use a longer stitch. Shorter stitch lengths can pull and pucker your fabric. You’ll know it when you see it. The fabric almost ruffles up when you aren’t even touching it. If you find that your stitches are puckering on a particular fabric, try adjusting the stitch length to allow for longer stitches.

    Your stitches should be nice and smooth without altering the fabric underneath.

    Quilting or Decorative Stitches

    Decorative stitches such as topstitching or quilting will be visible on the finished project, a long stitch length is usually more desired. Long stitches tend to be more attractive than short stitches.

    My personal preference… When I quilt, I usually will go with a 2.8-3.5 depending on the look that I am wanting.

    When quilting, the finished result is that your quilt sandwich (backing, batting, top quilt) stays together when you use it and wash it. Keep your stitches small enough that you don’t have to worry about them coming out, but large enough that it isn’t going to take you 90 million hours to quilt it.

    Those tiny stitches take a lot more time!


    To summarize…. the stitch length is really going to be determined by how your fabric responds. It’s always a good idea to run a test piece and pull on the fabric a little bit to see how it reacts.

    As a general guideline…

    For durability, use short stitch lengths; for artistic looks use the stitch length that you like.

    I hope you found this information useful. If you have any questions, feel free to let me know! I’m happy to answer your questions.

    Happy Sewing!

    PS for more Quilting tips and helpful charts, check out this post on Quilting Cheat Sheets that will save you hours!

    These helpful Cheat Sheet Charts will be your secret weapon in the sewing room! - And they're so cute too!

    The Math Explanation of it

    For those beautiful math nerds out there who love to know the reasons WHY things are what they are… here is how to unlock the secrets behind what those numbers on your machine are.

    There are 25.4 millimeters in one inch. The formula is this:
    25.4 divided by the metric length of the stitch such as 2.5 equals the number of stitches per inch.

    To go the opposite direction, if a pattern requests 10 stitches per inch, divide 25.4 by 10 to get the millimeter setting of 2.5.

    The average machine quilting stitch length chosen is between 10 and 11 stitches per inch. That is equivalent to a stitch length of 2.5mm

  • The best way to hand-tie a quilt! What you need to know.

    One of the easiest ways to finish up a quilt – and has a classic “handmade with love” look is to hand-tie your quilt. It’s an old art that sometimes loses its spotlight to the fancy free-motion quilting designs, but hand-tying shouldn’t be overlooked or underestimated! Let’s take a look at the best way to hand-tie a quilt and answer all of your questions!

    What is hand-tying?

    Hand-tying is the process of hand-tying one stitch through all three layers of your quilt sandwich (the backing, batting and quilt top) and knotting the thread on the quilt top surface or even on the back of the quilt. This is done by hand without the use of a sewing machine.

    The purpose of the knot is to keep your quilt layers together without having to machine quilt your piece.

    Why would you choose to hand-tie a quilt?

    There are many reasons people choose to hand-tie a quilt.

    This finishing technique is really great for beginner quilters – or seasoned quilters who have way too many quilt tops to quilt!

    It might be because machine quilting isn’t one of your favorite parts of the quilting process and you want to avoid it if possible? It might be because hand-tying gives your quilt more of a handmade/artisan look?

    Historically, hand-tying was an easier task than hand quilting in some cases and still accomplished the same goal. If you didn’t have access to a fancy sewing machine, you could hand-tie your quilt to finish it.

    In modern quilting, hand-tying is more of an aesthetic choice. Tying a quilt by hand gives it a different finish to machine quilting.

    You can give it a modern and artistic twist by choosing to focus on fun, colorful, or interesting textures in addition to the fabrics you choose.

    How do you hand-tie a quilt?

    I have a whole tutorial and video on this!

    I love the look of a beautiful hand-tied quilt! Check out the post that I wrote that goes into a little more detail about how to tie a quilt.

    Does it matter which batting I use?

    Not really, no. The batting does not affect the hand-tying process.

    However, your batting choice can change the overall look of your quilt. A thicker batting will lead to a thicker quilt and create more of a “hill and valley look” in the areas where you hand-tie your quilt. A thinner or more compact batting will have less of a difference in texture between the tied areas and open sections.

    More thoughts on quilt batting

    What should you use to hand-tie a quilt?

    Simple supplies to tie a quilt
    1. Embroidery needle
    2. Cute embroidery scissors (or just regular ones, but it is more fun to be cute!)
    3. Needle threader (optional but extremely helpful)
    4. Cotton Thread

    A note about cotton thread: I prefer to use Pearl Cotton Thread No. 8. It is what I like to hand quilt with. You can use something thicker… as thick as you want. You can even use yarn to tie your quilt!

    Why use cotton? – A good question! I’m assuming your quilt is made mostly with cotton fabric. Because different materials wash differently within your washing machine (some stretch and shrink differently) it is a good practice to try to keep the number of different materials to a minimum. It will help with the lifeline of your quilt over time.

    I have also used embroidery thread/floss to tie quilts because of the availability of the color I was looking for!

    Can I add buttons?

    Absolutely! Buttons are a really fun way to add texture and a funky personality to your modern quilt. Bonus: It can also hide the knot of your hand-tying if you are strategic about it!

    Note: It is never safe to add anything that could potentially be a choking hazard to a quilt for a child. No matter how well you sew on buttons, the best practice is to steer clear if the intended use is for a young child.

    A full review of the Painted Ladies Quilt Pattern - what I liked and didn't like - as well as LOTS of photos of the finished quilt. Fabric Line is from Alison Glass
    This is a quilt pattern called Painted Ladies. See more images here

    Should you tie your quilt before adding the binding?

    Binding a quilt is always the final step to finishing a quilt. Before you bind your quilt you need to ensure that your layers are secure and will note be moving, shifting or getting some weird bubble that is forever going to be an annoying flaw to you

    Secure your layers first either with quilting, hand-tying or a combination of both if you prefer. Then, you can add the binding.

    How far apart do my ties need to be?

    Where you choose to tie your knots really is a personal preference.

    The distance you should leave between your knots depends on the type of batting that you’ve chosen. This distance is usually indicated on your batting’s label.

    Check the packaging and pay close attention to that during purchase.

    I like to use Warm and Natural batting. It has a guide of 8-10 inches being the minimum distance… It is a nice and generous amount, but I usually stitch closer.

    If you’ve lost the packaging and don’t know the brand or can’t find the information, I would stick to working within 4 to 5 inches between your stitches as your minimum. You can always work closer!

    Should I use a quilt frame?

    Embroidery hoops or larger quilt frames are a helpful tool for layering your fabrics while hand-tying.

    You don’t HAVE to use them, but it doesn’t hurt.

    I like to secure my quilt layers with safety pins before I tie my quilt. That way I know the layers will not be shifting and I can still work in small sections at a time.

    little details like this make all the difference in a sewing room with personality. which pins are the ones you simply MUST have on hand? Read here www.iseestarsquilting.com
    These are my favorite pins for Quilters

    Does this add or take away from the value of my quilt?

    There is a lot that goes into deciding the final value of your quilt. The cost of fabric and your time involved is just the beginning!

    As far as the finishing quilting touches – I would be more concerned with the overall look of the quilt and what the design is calling for. You are the artist, you tend to have a gut feeling about what your quilt needs.

    If you’re looking for a quick fix for a really fun quilt, hand-tying is a great choice!

    If your quilt pattern is very detailed and you’ve put TONS of hours of sewing into it and worked on your piecing skills and you’re thinking it is quite possibly the greatest thing you have ever made… Maybe you’re feeling like it deserves a more sophisticated quilting treatment?

    I urge you to go with your gut when it comes to your quilt design choices!

    The overall value of your quilt is going to be determined by these choices altogether. No one choice, in particular, is going to be the deciding factor.


    Whew, I hope that helped you in your quest for knowledge on the best way to hand-tie a quilt!

    If you have any more questions, feel free to reach out to me or comment below. I’m happy to help!

  • Get Your Sewing Machine Ready for 2021!

    Whew! I hope you have been doing a TON of sewing these past few months! I tend to sew heavier in the later months of the year getting things ready for the holidays and finish up the projects I said I would finish by the end of the year (and find myself WAY far behind on). Anyways, your sewing machine could probably use a little extra pampering right about now, right?… Here is how to quickly get your sewing machine ready for more sewing!

    4 ways to tune up your sewing machine!

    4 things to do to get your sewing machine in tip/top shape!

    New year, new season, new projects and LOTS of creativity on the horizon? Then it is time for you to get your sewing machine ready! Let’s take just a few minutes to set yourself up for success!

    image of my sewing work area with clean workspace.
    Tour My Sewing RoomSewing Room Renovation! – Before & After Pics

    1. Give your machine and work area a good dusting!

    I know… we work and work and work and *sometimes* it is easy to just ignore the mess that we’ve created. You can even go blind to it! – As in, you may not even see it as a mess or clutter anymore. It’s just the way it always is.

    1. Take a second to step back and look at your space. Really look at it and what you have in it.
    2. Look at the table/work surface your sewing machine is on. Is it big and open with room for you to work on your projects? or is it 90% occupied with tools, baskets, piles and work to be completed?

      Consider cleaning off your workspace and re-arranging things to give you a little more room. A change in perspective and surroundings can make way for all sorts of new inspiration to come your way!

      Take a light dusting cloth and go over your machine. I don’t use any cleaning products other than water when needed or if there are any smudges to remove.
    3. Dust and wipe your work surface clean. Pick up any little bits of thread or fabric clippings and maybe even give your room a once over with a little air freshener. It doesn’t have to be a complicated huge overhaul or spring cleaning! Just do a light cleaning to bring in some good creative energy!

    2. Open up your machine and clean the insides!

    When was the last time you cleaned out your machine?

    This can either be a really fun, or horrifying task. If you want more tips on how to clean your machine, you can check out this post: How often should you clean your sewing machine? + A How To

    I recently discovered a SUPER handy tool – that totally blew my mind. I would have never thought it would be my favorite for this task and also… it is super inexpensive! Absolute win/win!

    Check it out in the video below!


    MORE HELPFUL READS:


    *Check your manual on other cleaning tips. Each model sewing machine varies on the recommended practices. Only add oil if your manual suggests it. Do not unscrew or take off pieces that you are not familiar with.

    3. Change your needle!

    Part of getting your sewing machine ready means making sure it is in the best possible shape, right? An easy part to change out regularly is your needle!

    Changing your needle is easily overlooked, especially if you’re excited to jump right into a new project and you’re used to having your trusty machine do whatever you ask of it! However, if you are sewing with a dull needle, you are adding extra wear and tear on your machine that you may pay for down the line.

    A good general rule (which can widely vary based on who you ask and the age of your machine) is a new needle every 10-12 hours of sewing.

    Personally, I think measuring sewing time is really weird, right? Like, who does that?

    If most quilting projects average around 9-15 hours (some more, some less)… you should look to change your needle at the start of every project-ish. I’m adding that ish in there because this is just a guideline, not a hard rule. You are the only one who knows what projects you work on…

    If it has been a while since you changed your needle, just start with a new one now and try to keep up with it from now on.

    Leaving your machine to push a dull needle through multiple layers of fabric and batting over and over again is a hard job. A sharp pointy needle sews so much better!

    comparison side by side of a brand new sewing machine needle and a used sewing machine needle

    Also, another note… next time you’re shopping for needles, take into consideration what kinds of projects you’re working on. Thicker and more durable fabric such as denim sews better with a more durable needle than thin cotton fabric!

    4. Consider if it is time to take your machine in to be serviced by a professional

    I know quilters who are like clockwork about taking their machines in to be serviced and cleaned up. I know quilters who’s machines haven’t seen the inside of a professional store since the day it was purchased.

    There is no judgement either way!

    I tend to fall into the category of every 2-3 years… depending on how much sewing I am doing and if I notice anything weird going on.

    I like to take mine in because I plan on using it for a very long time. Even with all the manual cleanings I do myself and trying to keep my machine in tip-top working mode… there are places that you just can’t reach within your machine without taking it all apart.

    the inside view of a sewing machine with wires and motherboard exposed.
    (😲Note: This is NOT my sewing machine!)

    I definitely DO NOT recommend taking it all apart on your own unless you know what you’re doing! Leave that to the professionals, please. The last thing you want to do is show up at the repair shop with a bag full of parts that used to be a working machine and have to pay the extra hours of service while he tries to put it back together again!

    If you’re doing regular cleanings on your own, there is no reason why your machine shouldn’t last you a really good long time… that being said, if while you’re sewing you notice the tension keeps getting off or things just aren’t working properly… there is a weird knocking noise or a squeak every now and then that won’t go away… I would recommend taking it into a repair shop, just to make sure whatever is going on doesn’t get worse.

    If you aren’t aware of a sewing machine repair shop, check around for vacuum repair shops (don’t ask me why… they’re often linked together). Or you can check with your local fabric or quilt shop to point you in the right direction.

    What you’ll need to do: Call and ask what their turnaround time is right now (i.e. how long you’ll be without your machine) and how soon you would be able to bring your machine in for a tune-up. They may ask when the last time it had a tune-up was and if anything specific is wrong with it at the moment.

    Should they find anything else wrong with your machine while it is in the shop, you can specify for the repairman to call you with estimates before the added work is completed.

    a link to a blog post on how much does it cost to get my sewing machine serviced?

    WRAP IT UP: Getting your sewing machine ready!

    1. Dust and clean off your machine and sewing area.
    2. Open it up and clean the insides.
    3. Change your needle.
    4. Consider if your machine needs to be serviced by a professional.

    I don’t know about you, but I am SUPER PUMPED up about all the fun projects I have in mind for the next year… so many wonderful things lie ahead to create!

    So get to it! Go get your sewing machine ready to create more beautiful things!

    If you need more help to plan out your next year, check out this popular resource: Framework for a Creativity Audit – How to plan for more creativity

    Creativity Audit Featured Image - to set new creative goals

    Lastly, I hope you have a wonderful start to the new year or new season… or new week (depending on when you get around to reading this!) Talk to you again soon!

  • Framework for a Creativity Audit – How to plan for more creativity

    As we close out and get ready to say goodbye to another year, I want to share with you today my end of year ritual that helps me walk into the new year with a plan and a clearer sense of purpose. My Creativity audit time is something that I use to plan for more creativity in the coming months.

    This is something that I haven’t shared with you before. There are plenty of things that I shout from the rooftops about tools and gadgets etc.

    This is a formula that I’ve developed and fine tuned over the years to get clarity on what really matters in my life so that I can set my goals accordingly.

    It isn’t exactly rocket science and there are probably variations of this same line of thought out there on the web somewhere.

    If you are wanting to shake off the dust from the past year (month, week, etc… this really doesn’t have hard rules!) I want you to give this a shot and let me know what you think! 🙂

    So pull on your comfy pants (oh, you’re already wearing them?! *high five* – me too, to be honest.) Grab the free download sheet below – Just tell me where to send it and I’ll shoot it your way…

    Check out the following tips below and watch the video that I created that gives a little more explanation to implement this audit.

    DOWNLOAD YOUR

    FREE PDF GUIDE!

    A step by step worksheet to decide your goals!

      Creativity Audit Featured Image - to set new creative goals

      WHY SHOULD YOU DO AN END OF YEAR CREATIVITY AUDIT?

      2020 has been something else, huh? Maybe the time you spent at home allowed you to be more productive than ever? Maybe you were one of the beautiful people who sewed HUNDREDS of masks for friends and loved ones?

      We got closer to our families and our comunities and yes, it was hard and emotional… but you know what? You’re still here. You’re reading this.

      I am very thankful for you.

      And I am very proud of you.

      We’re going to take the knowledge that we learned last year and keep moving forward with a perspective that we did not have before.

      I developed this ritual of a quiet reflection at the close of every year. I call it my “Creativity Audit”. It isn’t something that I usually share because it isn’t something that anyone else has any say in. It is just for my knowledge and creative growth.

      I also keep it separate from my other life goals that usually deal with finances, business growth, family goals or personal growth.

      This year, my creativity audit looked a little different than it has in the past. In some ways, I feel like I’ve lived a thousand lives… and in others, I don’t even understand how the calendar is passed March already? So many of the days and weeks blurred together.


      For more project ideas, check out these blog posts:


      Coffee mug with the words Just... begin

      Here is how I like to set the mood to plan for more creativity during my audit:

      Of course, the act of sitting down with a chunk of time where I can be without distractions is a good place to be in… but I start to set things up even before I reach that point! Schedule out a time where you can plan for more creativity and really nail down your goals.

      I’ll usually set aside a few hours the day before to really clean up my space. I put everything away and leave a beautiful blank slate that is a reflection of my openness for progress forward and being open to learning new ideas.

      If you want to learn my biggest cleaning hack, click here.

      I love to light candles and cozy up in my favorite sweater and a quilt too! I love to make a warm mug of tea and put on some soft music in the background.

      Choose whatever puts your in a good mood and sets the tone for amazing quality goal setting time with yourself! If you are the type to grab a giant iced coffee and put on really loud dance music… then by all means, go for it!

      Pro tip: If you have young kids around… give your husband a heads up several days in advance that you’d like a few moments to yourself. Leave him in charge of the house and the kids. You can order pizza or something easy to keep everyone fed… then, I suggest you say a quick prayer and lock the door behind you. 😉

      Watch the video that goes with the free printable!

      Once you have yourself set up, go ahead and watch this video. I go into a little more detail about my audit process and why I do it.

      Then… let it all marinate in your brain for a bit. Sometimes, you need a little time to let things settle or think about your goals.

      Image of brown craft paper with text "what is next?" written on it

      Think about it in terms of:

      • What do you want to experience in the next year of your life and what you want to do?
      • What would you love to create and bring to life in the next year?
      • WHY do you want to plan for more creativity? What would it mean for you?
      • How are you going to feel when you see these dreams come to life?

      And then I want to you to start to get excited about the upcoming year!

      Get yourself hyped up and jazzed about all the wonderfulness of it all! Your planning for more creativity is going to explode your world!

      To all my naysayers that will ask “But I don’t have a guarantee that it is going to be the best year ever!”… To you I say, You don’t have any proof that says it isn’t going to be the best year ever either!! 🥳

      This little ritual is a beautiful way to set yourself up for success in the new year!

      As I mentioned before, this is what works for me… please feel free to change things up or alter your own way of doing things. Do what works for you so long as it leads to positive vibes and uber feelings of success coming your way! 😘

    • My Crafty Fabric Christmas Ornaments!

      This has been such a fun project that I’ve played with the last few weeks, I just had to share it with you! Check out these beautiful fabric Christmas ornament balls that I made!

      Let me say first of all that this was an EASY project. It looks complicated, but really… it was very simple. It takes a little patience in the beginning (doesn’t everything crafty?) but after I grasped the basics, I was experimenting with different fabric and layouts and really really enjoying myself while making fun Christmas decorations!

      Make sure you check out some other Holiday Craft Projects & Tutorials down below!

      Video Tutorial – Step by Step

      Just so you know there are tons of pictures to show you all the pretty fabric Christmas ornaments that I made, but I also made a video tutorial to show you the exact steps to make your own, check it out below.

      Also, please feel free to PIN any of the images in this post to your Pinterest profile so you can easily find the tutorial again and share it with your crafty friends.

      This would also make a really fun crafty holiday party activity (pending it not being a season in the middle of a pandemic, of course…)

      What you’ll need for your Fabric Christmas Ornaments

      The beautiful thing about this project is that you likely have MOST of what you’ll need around your house/crafting supplies right now. You may have to take a quick trip to the store… or do what I did and just add a few things to your Amazon cart and enjoy FREE 2-Day Delivery.

      Note: Styrofoam balls come in a variety of sizes… I used the 3″ size in my video and on my tree. You are welcome to experiment with other shapes and sizes, just know that it may change your fabric needs and how your finished product turns out.

      The Fabric I Used:

      You’ll see in the picture below that our Christmas Tree is not decorated with the classic Christmas colors… I like incorporating bright modern colors in the decor because the rest of my house is fairly neutral. So Christmas time is rather happy and festive over here! (it is also my favorite time of the year!)

      So when I decided to make some fabric Christmas ornaments for our tree… (because… I *LOVE* Fabric… and I LOVE Christmas, so… OF COURSE, I have to, right?) My mission was to find the perfect fabric to match this bright and happy theme of course.

      I decided to use a jelly roll of fabric in order to get a good mix of fabrics that will all effortlessly coordinate together but still give me a variety of choices to pull from.

      The winning fabric was a fabric line from Wyndham Fabrics called “Good Vibes Only”. – Fitting, right? 😉

      Use Scrap Fabric!

      You can also design your own Fabric Christmas Ornaments using scrap fabrics you already have on hand!

      Just make sure your cut pieces are 2.5″ x 2.5″

      If you’re on the edge about starting this project, I encourage you to try it out. Trust me, you’re going to love it.

      Watch the video above or check it out on my YouTube Channel for the step by step instructions.

      And if you needed any more reasons to get crafty, here are a few more photos of the cute ornaments on my tree!

      I chose to embellish the ornament with some decorative pearl head straight pins for a little extra fun… isn’t it cute?!?

      My favorite part about this Fabric Christmas Ornament?

      I made a little project box that I used to store all of my pieces of fabric, pins, balls… everything that I used while in the midst of this project and took it with me all over the house to work on. I even brought it over to my mom’s house when we spent the day with them. (this is not unusual for me to tote my projects with me big and small)

      This project was light, easy to transport. It was also easy to pick up and work on whenever I had a few spare minutes. No searching for where I left off or thinking long and hard about what my next steps were…

      It was simple to work on in front of the TV while my kids were watching a movie or in the evenings while I was waiting on dinner to cook.

      Just FYI, I’m not encouraging you to take this with you and ignore your family while you’re in the same room as them…. I’m just saying if you’re going to be crafty, you can be in the same room as them instead of being tied to your sewing machine or crafting equipment in another room. 😂

      If you’re wondering how durable these Fabric Christmas Ornaments are and if they’ll stay together long term… I have zero worries about them lasting as part of our holiday décor for years and years to come. They are pretty solid. The weight of the fabric adds a real solid mass to it as well.

      Please note that if you have little children around the house, you might want to hang them a little higher up on the tree… just to avoid any little hands disassembling your pinned fabric.

      I didn’t think ahead about the ornaments being the same shape as our puppies favorite toys in the world – tennis balls… or anything that even resembles a sphere.

      So, if you were wondering… that is why you can only see a portion of my Christmas tree in the photo above… because it does not have any ornaments on the lower section. 😂🎄😲 It did when we first decorated, but they have slowly migrated higher and higher as the dogs test their limits and just how far they are willing to go to get the shiny temptation balls. lol

      What do you think? Is this something that you would like to try making in the future? Let me know in the comments and if you have any other questions!

      I hope you have a festive and wonderful holiday season! Happy Sewing!

      One of the quilted fabric Christmas Ornament. super cute and super easy to make

      More Holiday Craft Projects!

      You may enjoy some of these other tutorials from ISeeStarsQuilting.com