Sewing Tools

Let’s take an in-depth look at sewing tools and notions for the Modern Quilter! These are some of my favorites in my own sewing room.

  • CrateJoy Review Q&A – A gift for EVERYONE on your list!

    If you have ever been at an absolute loss as to what to get someone for a gift, join the club… CrateJoy is about to solve all your problems in the most fun and fascinating way!

    Thanks to the internet and having just about anything you could possibly want to be delivered to your house in as little as 2 days… and 2020 has made traipsing out for a day of shopping nearly impossible… It is time to get crafty with new ideas and ways to still celebrate the people that mean the most to you in your life!

    Today, we’re talking about subscription boxes and I want to answer the most common questions so you can decide if it is a right fit for yourself or someone you love…

    What are subscription boxes?

    If you haven’t heard of subscription boxes before, it is like a mystery box that gets delivered to your door every month.

    You can use it as a way to treat yourself, or buy them as a perfectly curated gift for someone else.

    The pricing for each month is the same but what is inside each box changes month-to-month. You’ll get a new surprise delivered each month!

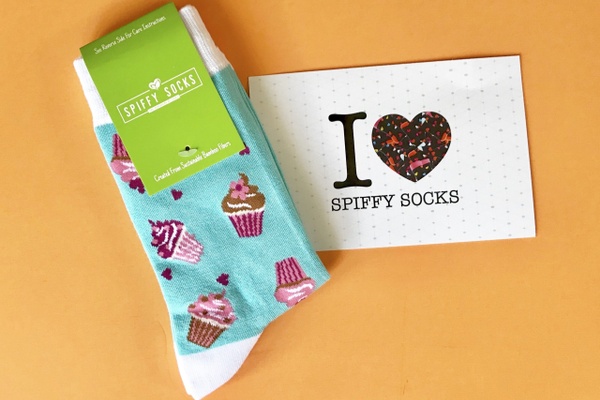
    While the contents change, you usually pick a larger “theme” for your subscription service… For example, a ‘Awesome socks’ subscription box that comes with obviously the coolest pair of socks every month! (It started out as gag gifts, but now my husband and my dad both have so many pairs of cool socks… and you know what? they LOVE them!)
    If you're thinking of subscription boxes, check out my review of one of the most popular subscription box websites right now - CrateJoy

    What is CrateJoy?

    CrateJoy is a website that is like an internet hub of ALLLLLLLLL kinds of subscription boxes. It is a can’t-go-wrong platform of information that you can use to source out the best subscription box for your needs.

    Here is how it works:

    1. Click here to the Cratejoy website
    2. Choose a category for the subscription box that you might be interested in to narrow down your search. (You can choose anything from beauty to crafts, art, novelty, etc… even search just for men, women & kids boxes!)
    3. Look through the listings that come up until you find one that you think is a good fit.
    4. Check out the pricing information, look at further details, and check the reviews from past/current customers
    5. Make your decision and sign up for the subscription by paying your first month’s payment.
    6. That’s it! When it is time for the delivery date, you’ll receive your first box of goodies!
    7. Note that depending on when you sign up, you may have to wait a few weeks for your box as these boxes ship out in bulk at the same time each month.
    8. You’ll continue to get a new box of themed goodies every month until you end your subscription!

    It’s really easy, cool, and a lot of fun!

    kids subscription boxes

    What kinds of themes are there to pick from?

    Um, only absolutely everything under the sun!

    Men, women, children, teen, crafty, food related, hobby related, books, beauty, fitness, wellness, even pets!

    We have personally tried the monthly salsa club (my husband’s favorite gift from my mom ever) and I’ve given several boxes as gifts too.
    If you're thinking of subscription boxes, check out my review of one of the most popular subscription box websites right now - CrateJoy

    Let’s look at quilting/fabric themed boxes…

    Oh yes, there are so many on CrateJoy!… but let’s take a look at my top 3 favorites just to give you an idea of the fun that awaits you!

    Stash Builder Box
    If you're thinking of subscription boxes, check out my review of one of the most popular subscription box websites right now - CrateJoy

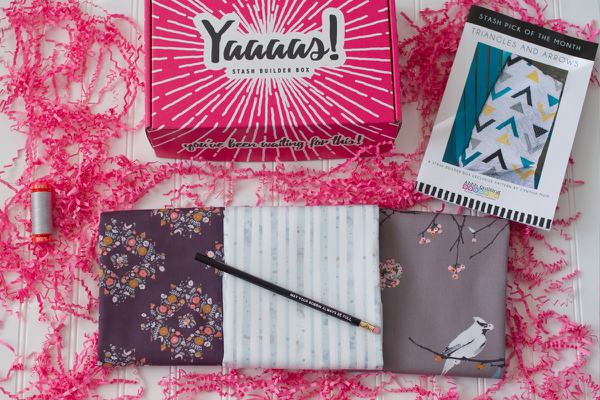
    A Monthly Quilting Subscription Box With a Cause -Cotton Cuts is a monthly quilting box that takes 20% of proceeds to make quilts for kids in need. Your purchase helps make a difference for kids in need. Every month, get THREE 1-yard cuts from a new modern fabric collection, a spool of Aurifil thread, our signature pencil and a bonus box-exclusive quilt pattern that is unique each month!”

    Where fun begins!
    If you're thinking of subscription boxes, check out my review of one of the most popular subscription box websites right now - CrateJoy

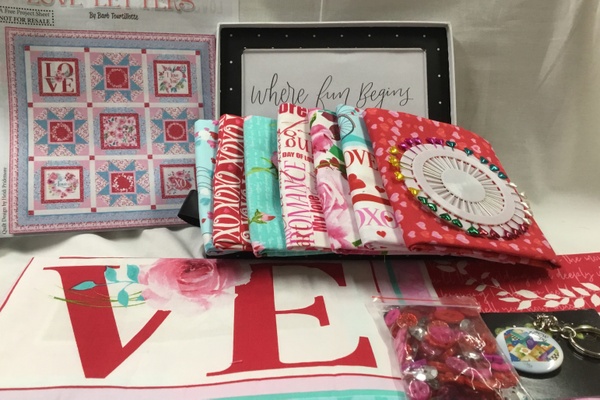
    “This subscription box is for fabric lovers. Fabrics are a work of art. Some are stunning and some are just useful. Fabrics come from professional designers who use colors, designs with fabric to make the most interesting and beautiful projects. You won’t be unhappy with our choice. 100 % Guaranteed. On occasion there are extra gift.

    • We are committed to bring you the best and keep customers loving their boxes.
    • Careful choosing, thinking and planning about what we send.
    • Our boxes will be of more value than what you pay. We love to add extras.
    • This will be a quilters haven. Are you ready?”

    Patchwork Parcel
    If you're thinking of subscription boxes, check out my review of one of the most popular subscription box websites right now - CrateJoy

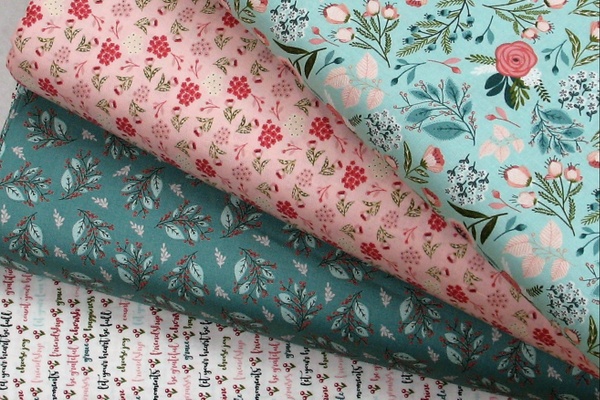
    “Whether you’re a confident beginner or a seasoned quilter, Patchwork Parcel will satisfy your craving for gorgeous traditionally-inspired quilt fabrics. The Fabric Bundles contain 4 coordinating fabrics + free goodies. Subscriptions start at $24.95/month with a discount for 3-month plans and can be canceled at any time.

    • Top-quality quilt shop fabric
    • Fabric Bundles contain 4 fabrics in either a half-yard or full-yard cuts package plus a free notion or two.
    • Traditionally-inspired cotton fabrics from recent collections”
    OK just kidding… I have one more favorite that I really want to share with you because it is amazing. The quilts that I have seen come in this kit are absolutely… LEGIT!

    Legit-Kits
    If you're thinking of subscription boxes, check out my review of one of the most popular subscription box websites right now - CrateJoy

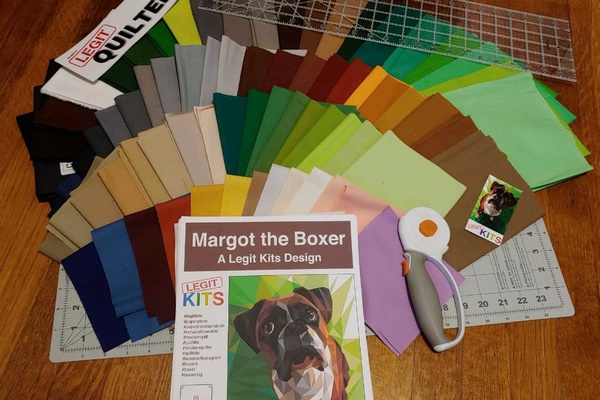
    “Your sewing machine + Legit Kits = ArtEach month you will receive printed materials, detailed foundation pattern sheets for 5-6 quilt blocks, and all the Robert Kaufmann Kona solid fabric to complete this quilt top over the course of a year (64 blocks total). Each large quilt top finishes at 60 inches wide by 80 inches long and is made of 70-100 different shades of solid fabric.

    • Fully printed paper piece pattern on foundation paper.
    • Every fabric you will need, clearly labeled.
    • Detailed assembly guide, cutting guide, and instruction sheets.”

    You can check out CrateJoy’s Top Selling Boxes here.

    What do I like about subscription boxes?

    I don’t do it very often, but… If I am getting one for myself, I love that the theme is something I am interested in but the contents are a specially curated mix of items that I know I’ll just love.

    If I am buying one for someone else, then I still love it because I pick something that is within their realm of interests and CrateJoy does the rest! It is easy and stress free! It so turns into a surprise for both of you!

    What if I don’t like surprises?

    If you can’t tell… I DO like surprises! – But if you would rather know what is in your box each month there are supscription companies that give you hints and will even show the contents of each box monthly so you can decide if you’re in or not.

    You can also shop for past subscription boxes that there may have been extra product created. – this is a little harder to find and may take some internet sleuthing to find, but it is possible!

    Do you have to sign up for a full year?

    This is a really popular question. Especially if you’re looking at getting someone a gift!

    Within CrateJoy, there is the option to “Give as a Gift” and THEN you can select exactly how much you want to commit to. You can do 1 month, 3 months even 6 months… each box may have different suggested time frames, but the idea behind it is you sign up for ONLY what you want.

    If you do choose to sign up for multiple months, you don’t have to pay for it all at once either. Usually, you will be charged the agreed amount each month before your product ships.

    What can I expect in my box?

    This definitely depends on the box theme that you choose! In every single box that I have received, there is the value that I paid for it… and then there is the actual retail value of the box (which is often much higher than the first number).

    Subscription box companies have the ability to buy in bulk and get a much deeper discount on items than buying just one at a time or in smaller quantities. A cool bonus for you and me, right?

    So you’ll get a box of items related to your theme that add up to a greater value than what you paid for the box!

    Below are a few videos of some quilting boxes that I have reviewed on my YouTube channel and you can watch the unboxing! Note: I’m such a nerd for surprises… and would never rehearse an unboxing video so what you see is what you get haha

    Creative Notions Subscription Box
    Quilty Box Subscription Box – Tula Pink Edition

    My honest opinion (and you know I will always be honest with you!) is that I really do love subscription boxes.

    CrateJoy has the motherload of subscription boxes to choose from! It just makes it easier to find the right one and know that you’ve made the right choice too.

    If you have any particularly favorite subscription box recommendations, let me know down in the comments down below. I would LOVE to hear about them!

  • The BEST Fabric Marking Pens

    I have been quilting for a lot of years… I have always been on the lookout for something that makes my life easier. I’m not afraid of hard work buuuuut if life doesn’t have to be hard, why make it that way?

    I have recently discovered the coolest tool for my sewing room and *cue angels singing* it is too amazing not to share with you!

    You know if I find something fun and handy for the sewing room or just a way to make life easier in general… I have to share it with you!

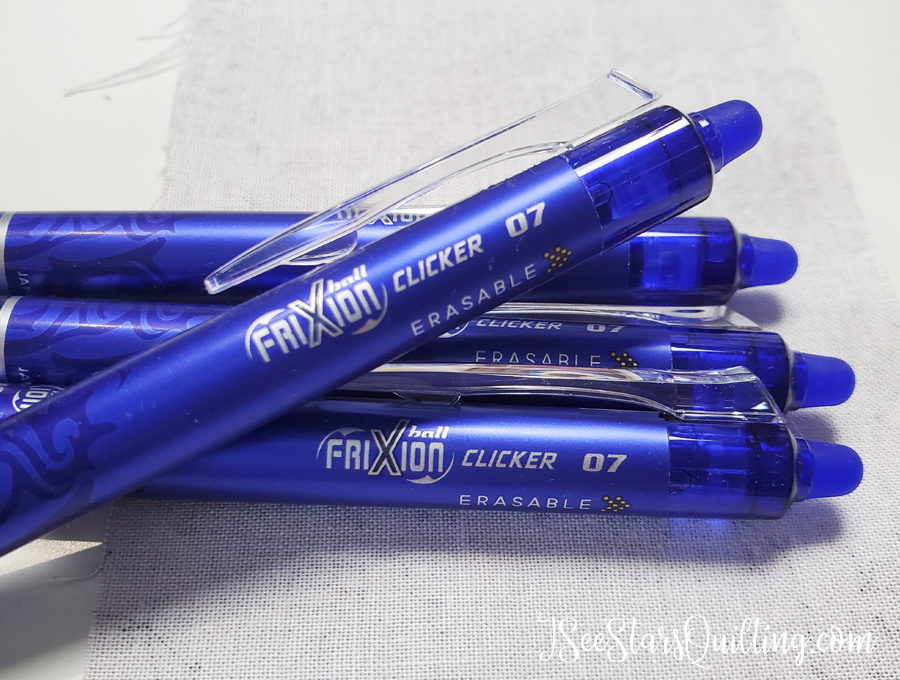
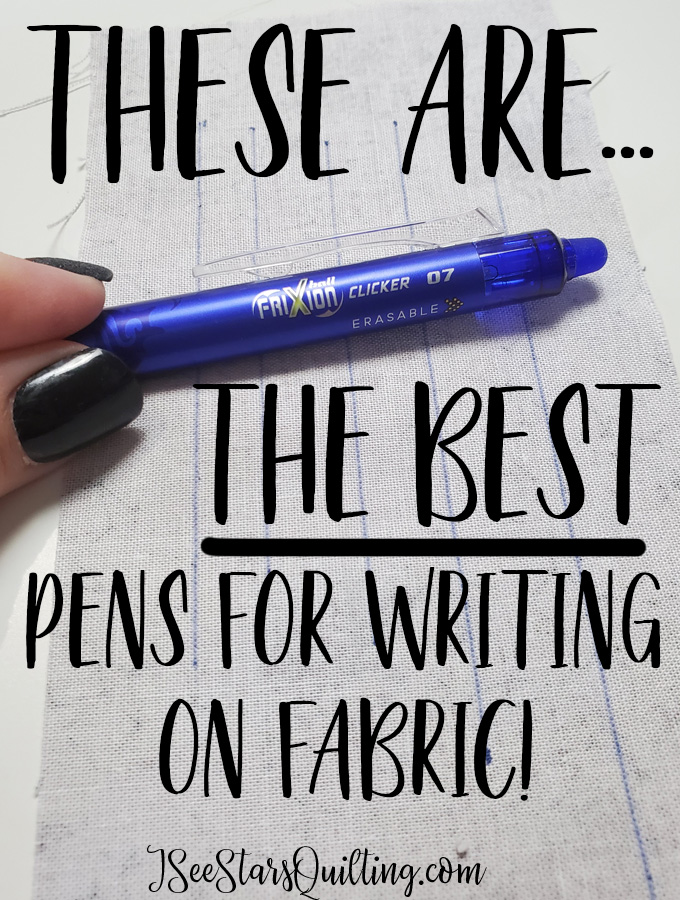
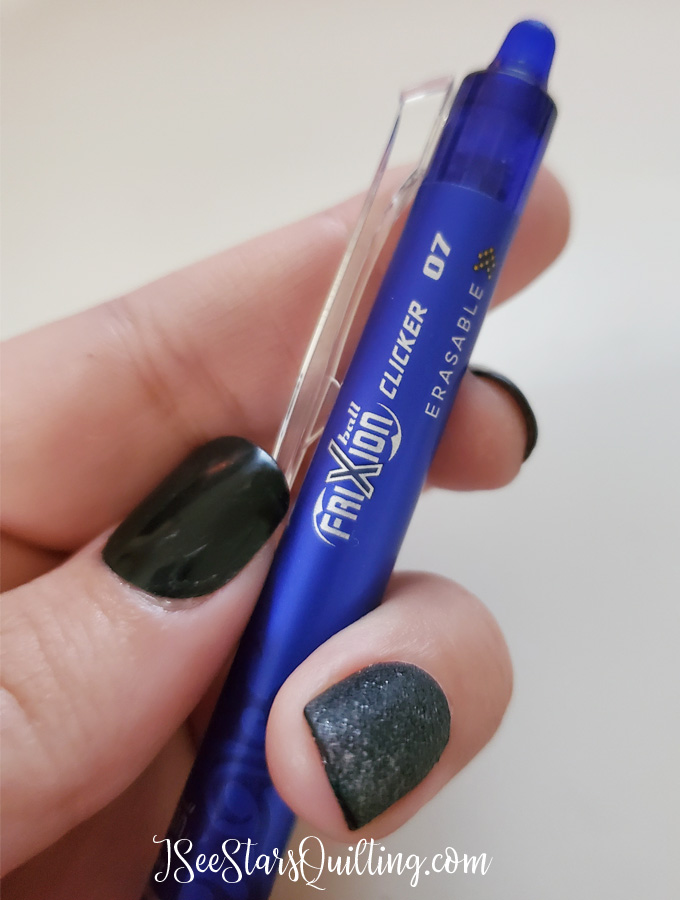
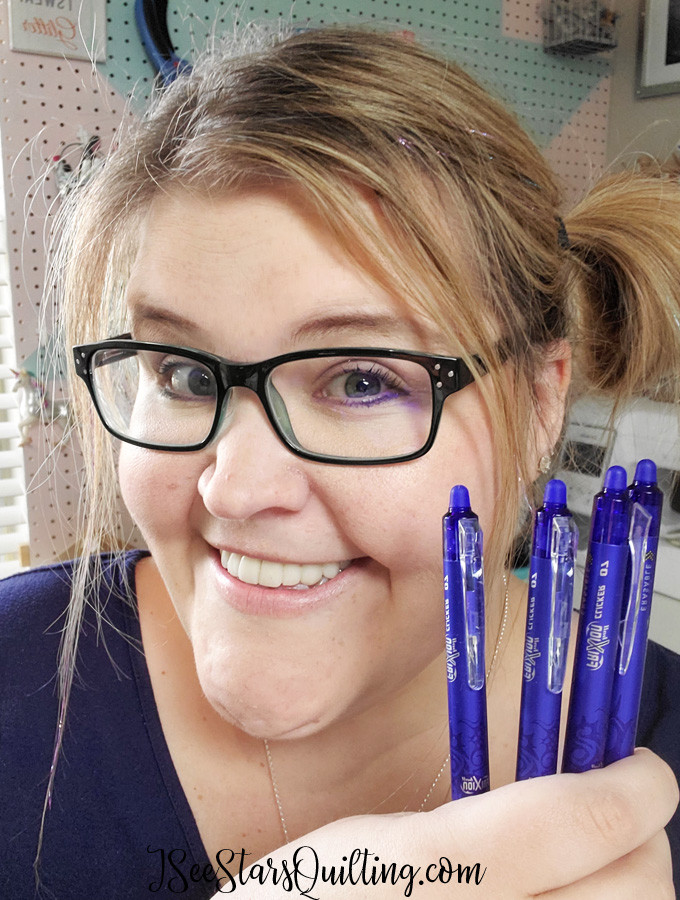
    This little seemingly simple pen is my new fabric marking pen best friend and… I’m just going to say it… I haven’t used any of my other markers for MONTHS!

    That’s right. I don’t even use my other fabric markers and pens anymore!

    This little friend is the only fabric marking pen I use!

    I’m kind of a writing utensil/marker snob. You don’t really need to know this about me but it helps explain why I get so excited/disappointed with writing utensils.

    I have my favorite pens and prefer to have my own marker set for coloring. (the kids have their own sets as well) The tip of my yellow is never tainted with brown and black smudges… It’s a weird OCD issue dating back to when my little sister would use the markers carelessly as a child and absolutely ruin them.

    Thankfully, I don’t have to share with her anymore… I don’t have to share with anyone anymore actually. ??

    The Frixion Pen for Fabric

    Let me tell you more about this pen for marking your fabric.

    I first discovered the Frixion pen when I went to the International Quilt Festival in 2019. You can read more about my trip here.

    First of all, the pen says “erasable” on the side… now, we have all had experience with pens that said erasable, but what they really meant was… “slightly less there than it was before but still completely visible”, right? (my middle school days are coming back to me when I think about the rage of erasable pens)

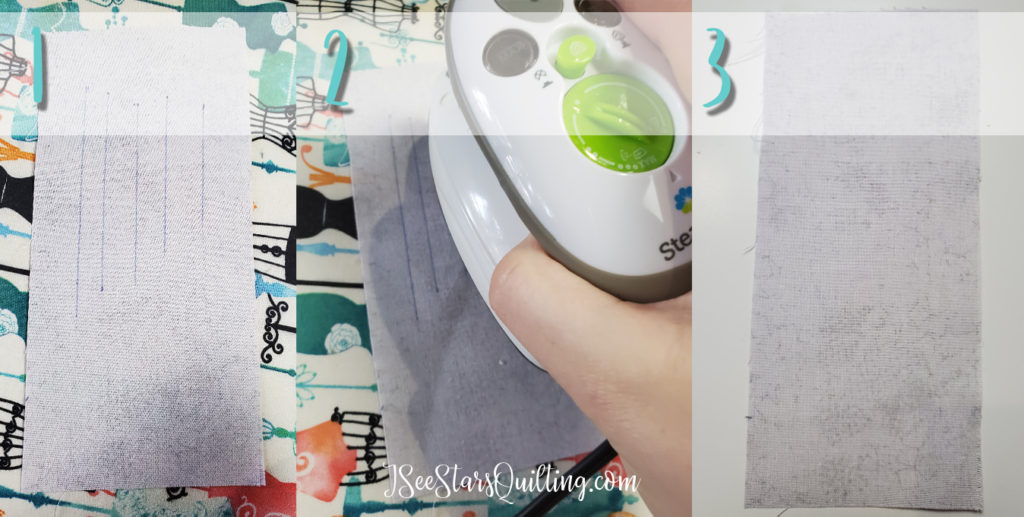
    These Frixion pens, however actually do erase… and really well!

    The way they erase is with heat! … yes! heat! And when I say erase I mean, like… no one even knows it was ever there. It’s truly amazing.

    I had to make a short video to show you why I get so excited over a pen… You just have to see it to believe it, honestly.

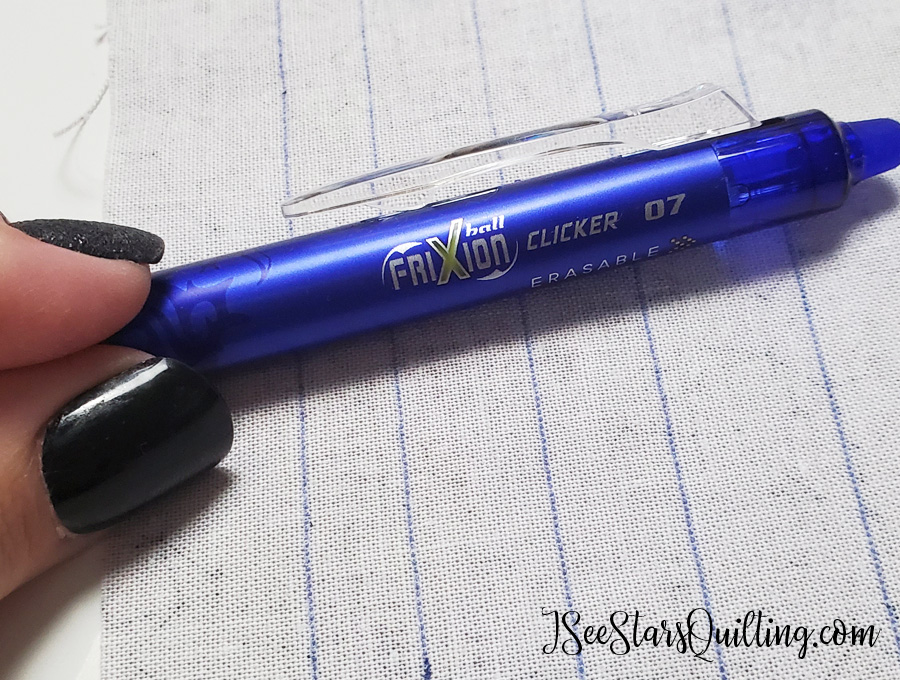
    I have found that the dark blue shows up on most every fabric I own, but just in case you want to have options… they have every color you could ever want available too!

    Other Fabric Marking Tools

    Which ones are worth buying?

    I’ve owned and used many different fabric marking pens, markers, and tools in the past.

    I’ve had quilter friends swear by tools that I didn’t particularly care for and vise versa.

    What it comes down to is that you really have to find what works for you…

    • These purple ones used to be my favorite go-to before I started using the Frixion pens. The purple marker ink just disappears over time (usually within a few hours and gone completely by 24 hours), which is really handy… one less step to worry about as a sewist. It could just be an unlucky coincidence, but lately, I’ve purchased a few markers that seemed to dry up really quickly. Once they dry up, they’re useless. It is rather frustrating when working on a project and your marker is dead.
    • This Blue pen erases with just a little spritz of water… or if you live somewhere mostly humid like I do… it’ll just disappear within a few hours because the air already has enough water in it. (Sometimes the mark can be gone before you’re ready for it to disappear.) ?
    • Chalk Writer – I will never not have my chalk on hand in my sewing room. I still love the ability to sketch out quilting lines that are easy to just shake/brush away and chalk is the perfect tool for the job!
    • I’ve used a hera marker for my quilts. This is a zero ink option. It’s really helpful when dealing with delicate or antique fabric that you just don’t want to take any chances on accidentally staining. You simply run the edge over your fabric and it leaves a slight dent/crease within the fabric as your marking guide.
    • I’ve used mechanical pencils – always be careful to make sure you write in places where it won’t show on the final quilt, because though it seems like it would wash out, on occasion I have noticed that it did not. oops.
    • I’ve also used thin Crayola washable markers because as a mom it seems logical that if they promise it will come out of my child’s favorite t-shirt, it should wash out of my cotton quilt fabric quilt just fine, right? NOTE: Use this tip at your own risk… a 4-year-old’s stained shirt is much less of a loss than a custom handmade quilt with stained markings.

    I hope this gives you a good overview of the options that you have when it comes to marking your fabrics.

    Have I made you curious about trying the Frixion pens on your own projects? Obviously, I highly recommend them because I love them, but I’m curious to know what your opinion is and if you like them as much as I do.

    Please let me know your thoughts down in the comments below!

    Do you have any other favorite tried and true methods for marking your fabrics for projects?

    Happy Sewing! ?

  • Fabric Storage: What Works For Me + A Video!

    Fabric storage has always been a big challenge for me. I know that other quilters and crafters struggle with it as well.

    I thought I would give you a few suggestions from things I’ve learned over the years through trial and error (and WAY too much money spent on the hopes of simply having MORE organizational products to force myself into being organized – spoiler alert, it didn’t make me more organized at all. It just made my mess a little cuter lol)

    Keep reading for my tips, but if you’d like the quick tour of what I am working with right now, check out the video below.

    I’ve been working on getting settled and slowly crafting my sewing room into the space that I’ve had in my dreams for years and years.

    It will always be a work in progress in some form or another. At this moment, we’ve been here for about 4 months, 2 of which I didn’t do anything to my sewing room because I was working on making the rest of the house livable.

    To claim that “I have it perfected” would be a lie lol… but I’ve learned a lot over the years of what works and what just won’t no matter how hard you try or how much money you spend!

    Scrap Fabric Storage Ideas

    Why oh why is scrap fabric the downfall of so may creatives?!

    I want to hold on to every single scrap in the spirit of not being wasteful, but in doing so… I become a hoarder of the tiny-est beautiful fabric pieces.

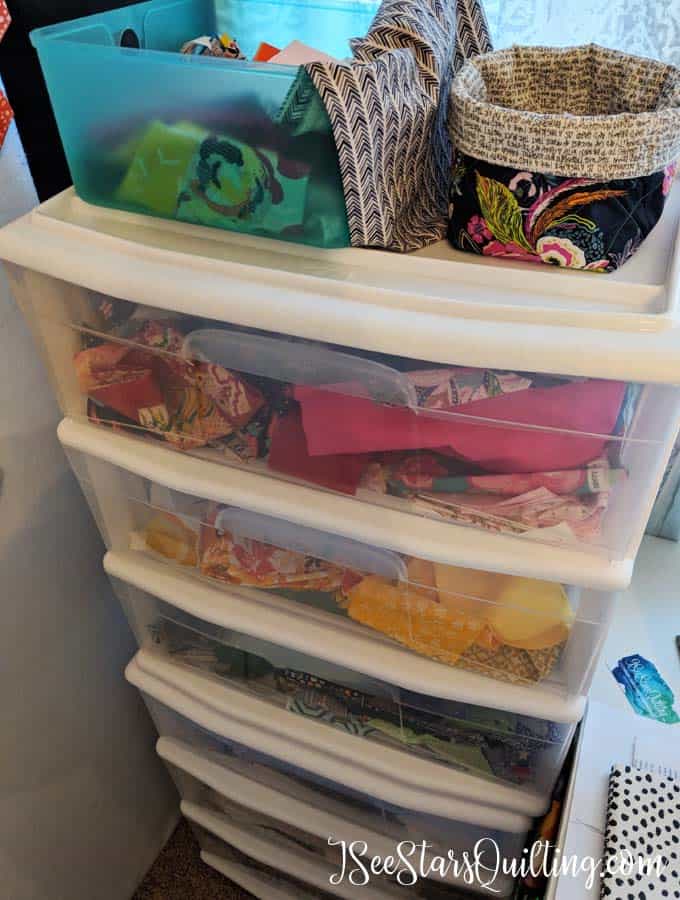
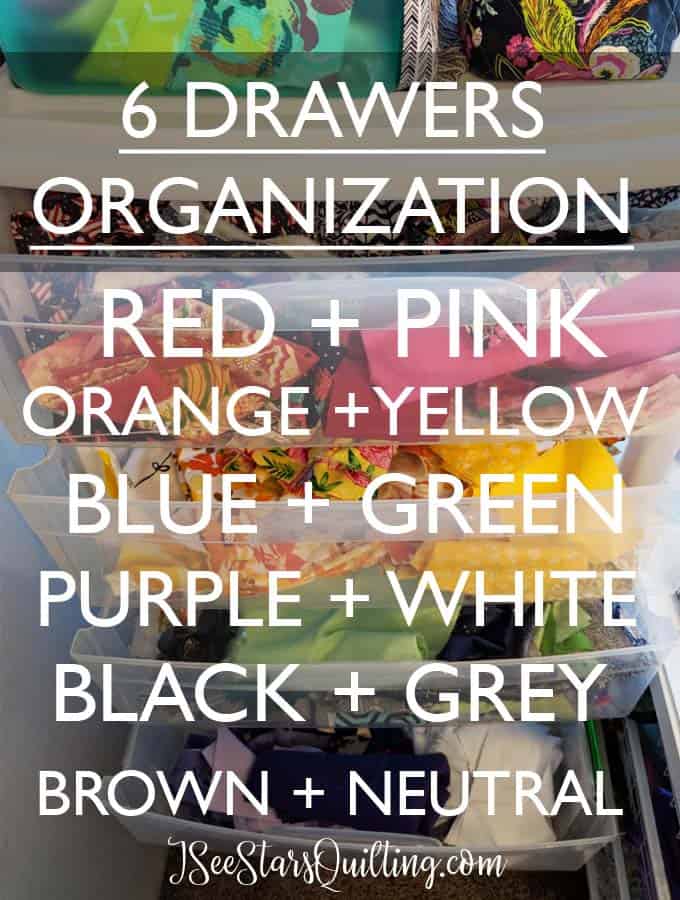
    Currently for my scrap fabric storage needs, I have been really happy with these plastic drawers. They’re really deep and they hold a lot of scrap fabrics!

    I have each of the six drawers divided up by color groupings.

    These easy solutions will have your organized and happy in no time! (and you don't have to spend a lot of time or money!)
    These easy solutions will have your organized and happy in no time! (and you don't have to spend a lot of time or money!)

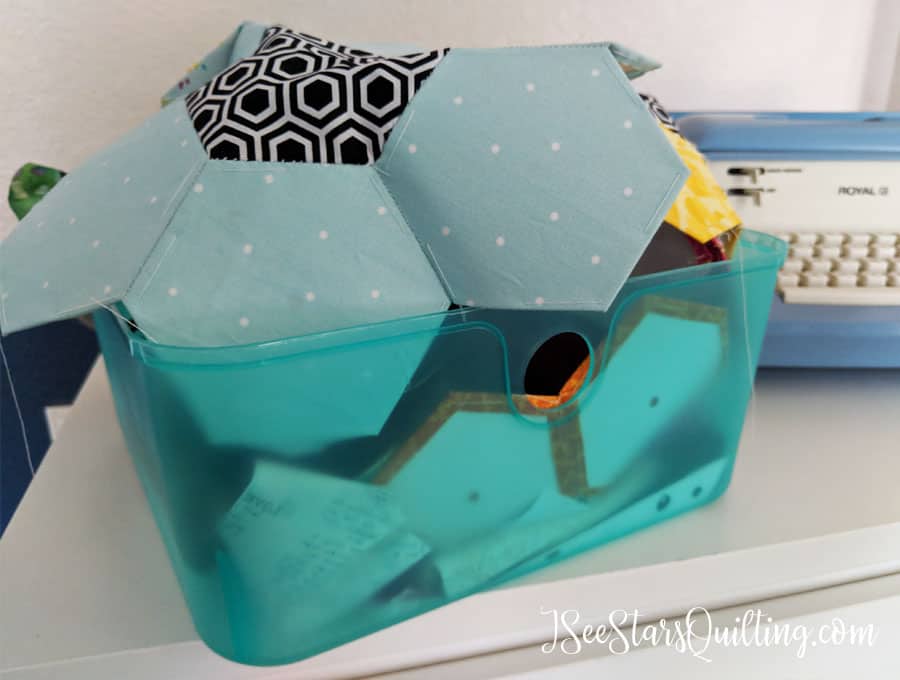
    Project Bins Are Essential

    I can’t stress enough how much these have saved my tail as far as organization goes…

    When I’m working on big projects that I know are going to take a while, I like to utilize big storage bins.

    I keep everything for the project in the bin until the project is complete.

    It helps me stay organized by keeping all the pieces together.

    It makes clean up a breeze, because all I have to do is shove it into the box. No running all over the place to put things away only to have to drag them out again tomorrow. Fast, easy clean up in a hurry.

    If you're looking for Cheap Sewing Room Storage Ideas, you'll find all my favorite picks here so you know what is worth the money and what isn't worth your time

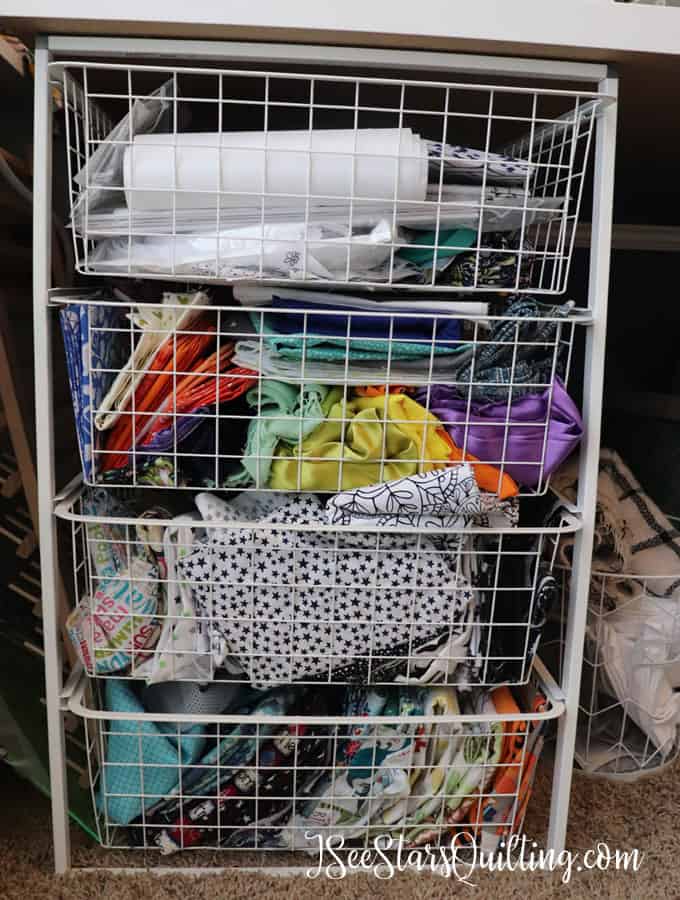
    Use Your Space Wisely

    Ok so this next picture isn’t the prettiest… I get that.

    But its more about using your space wisely so you can easily SEE and get to your tools than it is about making it look pretty for Martha Stewart to drop by unannounced at any given moment, right? … at least, that is how I feel.

    I love using the space under my work tables for more storage. These drawer sets are from IKEA, but I’ve seen similar copy-cat setups at target and walmart that you can buy and use your own desktop.

    Creativity is best in a room filled with the things that bring you joy! I'm going to give you a tour of my sewing room today and share all my organization tips along the way!

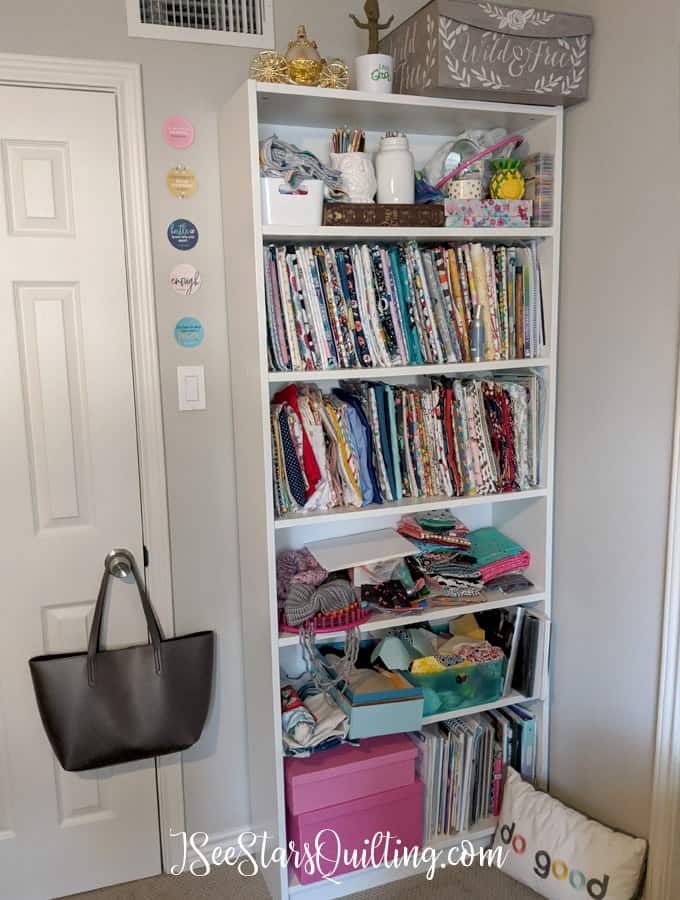
    Use Your Tall Wall Space Where You Can For Shelving

    If you have vertical space for shelving, make use of it!

    We moved! Come tour my New Creative space and see how I arranged all my tools to create the most amazing crafting space!

    I like to use these comic book boards to wrap my fabric around and make mini “bolts”. It makes a big difference in how nicely my fabric stands up on the shelves.

    [In the picture above, you can see on the second from the top shelf how nice and neat everything looks vs. on the shelf under it the fabric to the left is much more slouchy and tired looking… I ran out of boards! oops.]

    You can also just use whatever stiff boards you have on hand. Cardstock is a little too flimsy, in my opinion, but it can work. You can use cardboard, or foam-core board to customize your boards to fit your shelving!

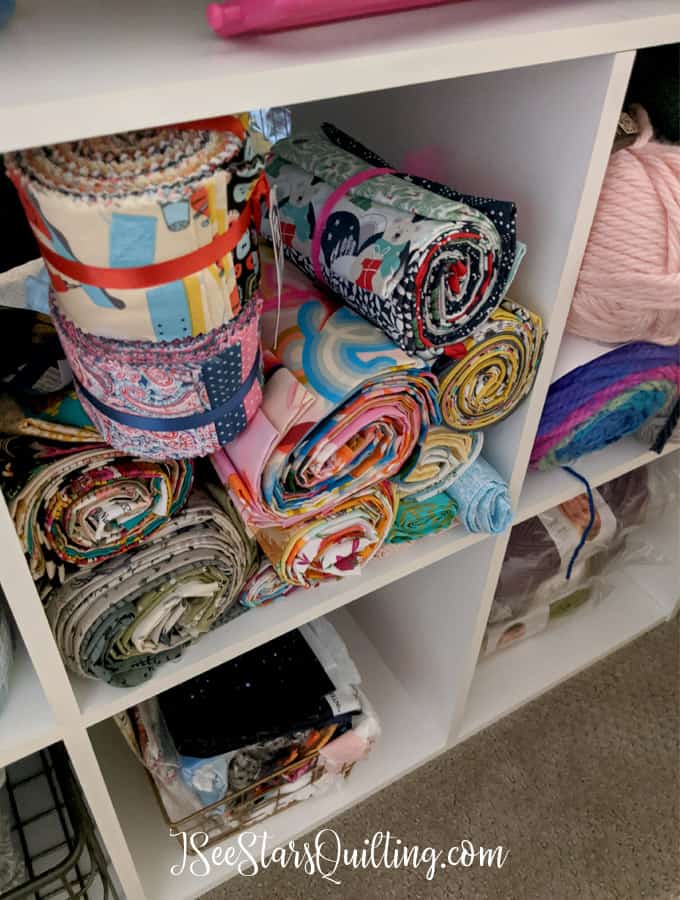
    Group Your Fabric By Quilts/Projects, Not By Color or Designer

    This is just a suggestion, but one that I’ve found has helped me A TON over the years…

    When I go to the fabric store and I pick up extra fabric (because… if you like it and are afraid they won’t have it next time, you do buy it too, right?) or I pick out a few coordinating pieces that would make a cute quilt together, I group them together in my sewing room. It makes it easy for the next time I’m looking for inspiration or I need some quick project ideas, I’m already halfway there!

    Let me know in the comments down below where your fabric storage struggles are and what are your biggest pain points in your sewing space!

    We moved! Come tour my New Creative space and see how I arranged all my tools to create the most amazing crafting space!

    There you have it! I know it sounds rather simple and I feel like a lot of my ideas may be intuative and simple, but you know what?

    Fabric storage doesn’t have to complicated!

    It doesn’t have to cost a ton of money and it doesn’t have to run your life!

    If your organizational issues run a little deeper than your fabric, I have a ebook + workbook that I have created to help you create the sewing and crafting space of your dreams.

    It doesn’t have to be complicated. I’ll show you how and walk you through step by step over the course of 25 days 🙂

    AND You can use code “CREATEMYSPACE” at check out for 20% off 🙂

  • DIY Project Dry Erase Board

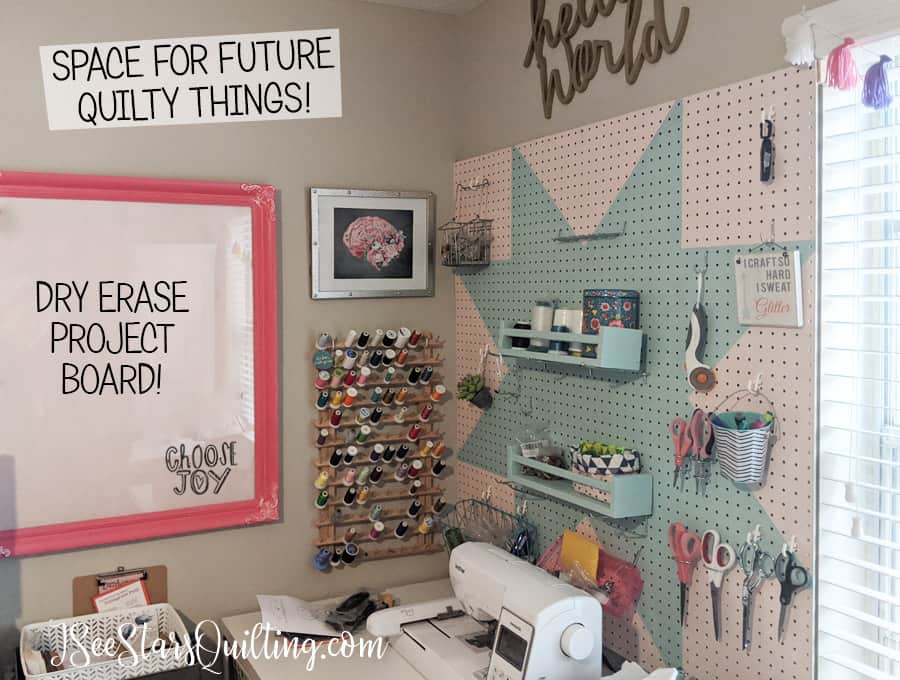
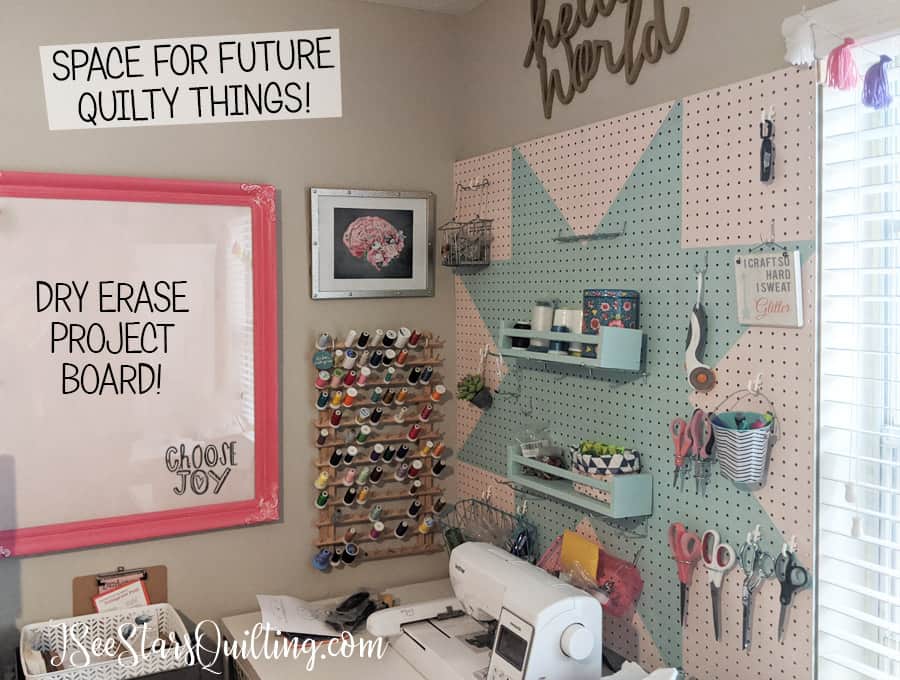
    When I finished my new sewing space in our new house, I tried out a fun DIY project that I want to share with you today! It is a DIY Project Dry Erase Board. I’ve been using it to keep my current projects front and center and using it to record my ideas on the spot.

    I wanted to test it out and make sure I felt that it was worth sharing but… my quilting friends…

    I absolutely LOVE it.

    Like, I don’t know how I survived without. It’s been THAT beneficial in my sewing room for the last few months.

    The DIY Project Dry Erase Board

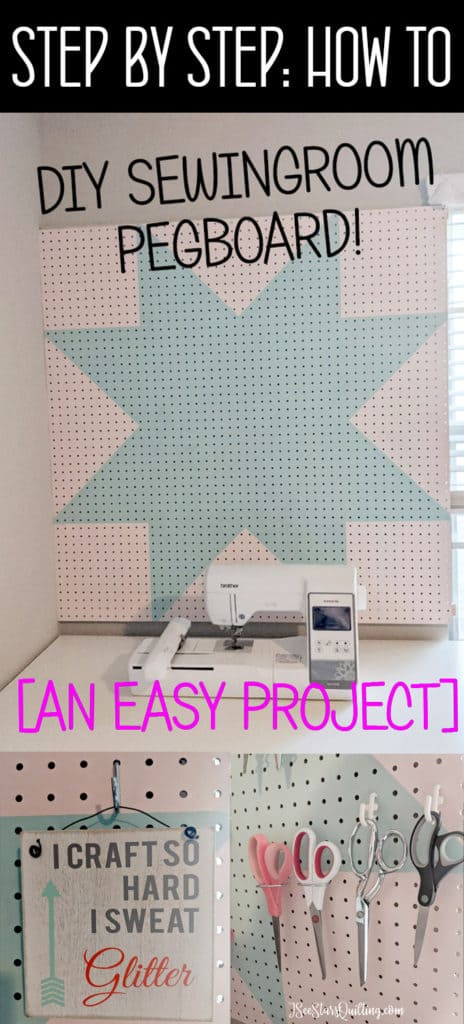
    This DIY Pegboard Tutorial has step by step instructions and tips to make your own pegboard for your sewing and crafting tools! This is a super easy project! Anyone can make one!

    I have it hung up on the wall right next to my machines.

    I see it every single day. It keeps me aware of what I have to work on, what deadlines are coming up and maybe that’s not what works for you… but my oh my have I felt more productive now!

    The best part… it only cost me $7!

    How to make your own DIY Project Dry Erase Board

    DIY Project Dry Erase Board - How I did it and why I absolutely LOVE it. I don't know how I ever got along without it!

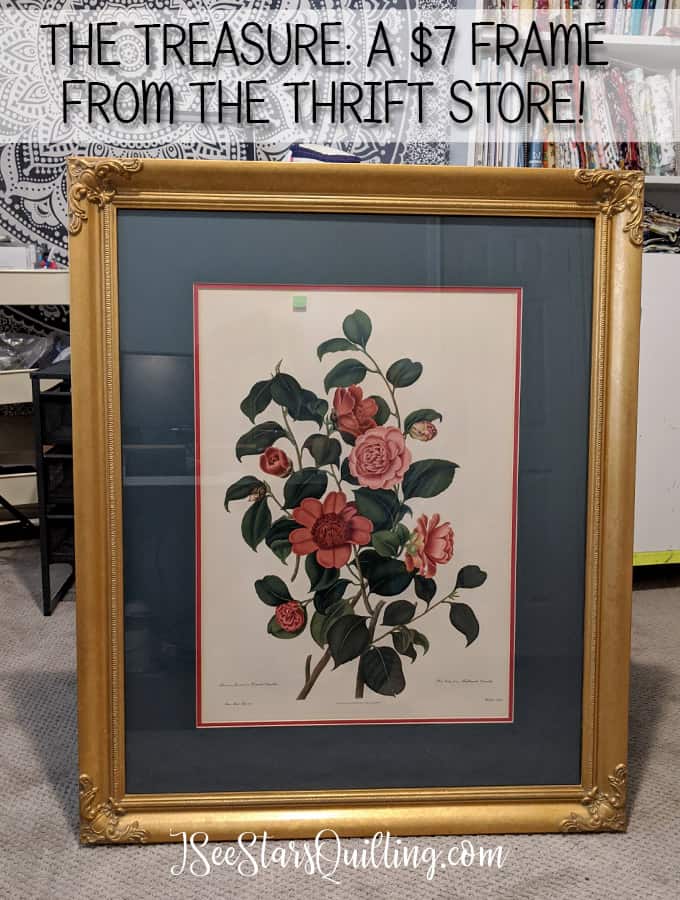
    This is what I started with… keep it budget-friendly, An idea to repurpose an old frame and make it so so pretty, because, why not?

    I went by the thrift store and found a frame that was from… I’m guessing the 1990s? I don’t know, but it was not anything that would fit my current home decor.

    I took out the picture, painted the backing that was already in the frame. (or you could frame some really cute wallpaper?), painted the frame and BOOM 🙂 Instant loveliness.

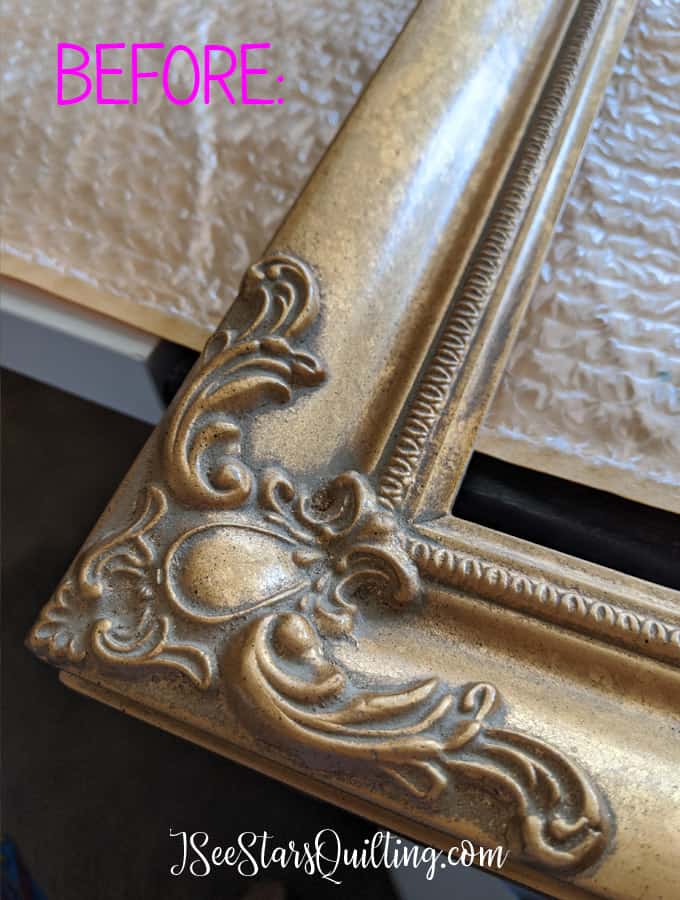
    The frame needed a little cleaning up, but overall it was in good shape and I loved the little carved details on it.

    DIY Project Dry Erase Board - How I did it and why I absolutely LOVE it. I don't know how I ever got along without it!

    I started with a primer paint that I had on hand just to minimize the number of coats of colored paint I would need to use.

    DIY Project Dry Erase Board - How I did it and why I absolutely LOVE it. I don't know how I ever got along without it!

    I had these little small containers of paint leftover from another project. It isn’t really a secret that I love pink, right?

    I love these little Valspar paints for small projects around the house. (and if you ask my husband, I collect way too many of them)

    DIY Project Dry Erase Board - How I did it and why I absolutely LOVE it. I don't know how I ever got along without it!

    I highlighted the little corner carvings with the lighter shade of pink and to add a little extra feminine touch to it.

    DIY Project Dry Erase Board - How I did it and why I absolutely LOVE it. I don't know how I ever got along without it!

    What I use it for…

    I use my DIY Project Dry Erase board as a brain essentially.

    I keep track of long term and short term goals on it as well as deadlines and progress.

    Download this FREE quilt planner and get organized so that you can create more! 6 pages of everything you need. nothing you don't!

    How to keep yourself organized!

    A while back I created this FREE 6-page quilt planner that I use to help me keep track of my current projects and what is in the works etc. You can download your copy below.

    More Ideas To Get Organized

    Comment down below and let me know if this is a project that would work for you… what do you think of my easy DIY project dry erase board organizer!

    I would love to hear your thoughts 🙂

  • HOW TO: DIY Pegboard for sewing tool storage

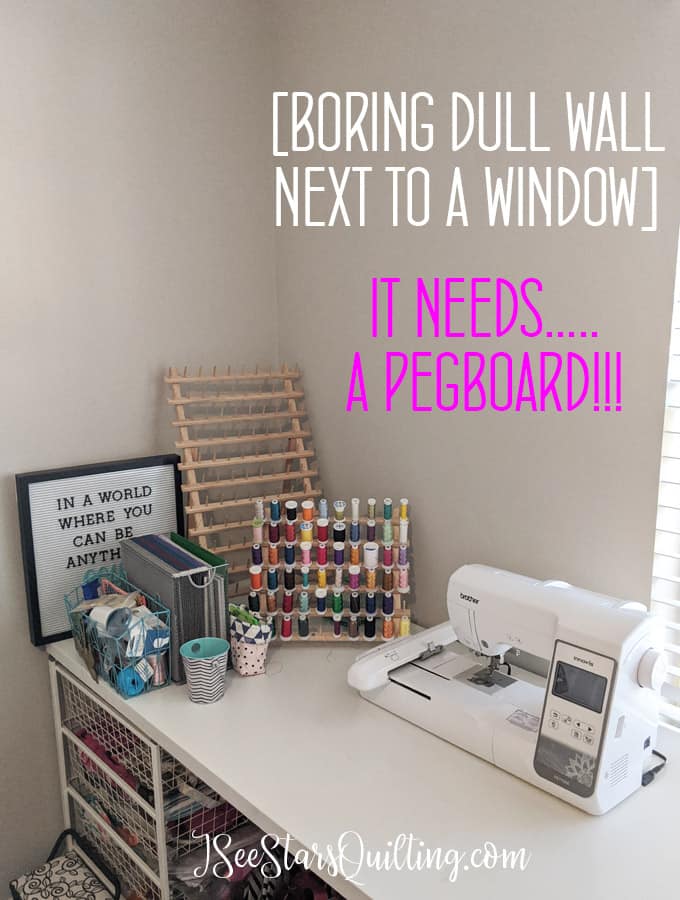
    I have wanted to make a DIY Pegboard for sewing tool storage for a really long time. My sewing room in my old house just didn’t really allow for it.

    But we moved aaaand… I have this empty wall and… It’s so totally going to happen this time!

    I’m going to share with you the steps and pics that I took along the way so that you can make this super easy (AND OH SO AMAZING!) DIY pegboard project at home!

    This DIY Pegboard Tutorial has step by step instructions and tips to make your own pegboard for your sewing and crafting tools! This is a super easy project! Anyone can make one!

    If you want to tour my old sewing room (lots of ideas on modifications and using what you have) you can check it out here.

    To tour my new sewing room, you can check it out here.

    I am so pleased with how the pegboard works in my new sewing room space! It is exactly what I was wanting and holds SO many of my sewing tools in a neat and organized manner!

    Here is the finished Pegboard for sewing tool storage!

    This DIY Pegboard Tutorial has step by step instructions and tips to make your own pegboard for your sewing and crafting tools! This is a super easy project! Anyone can make one!

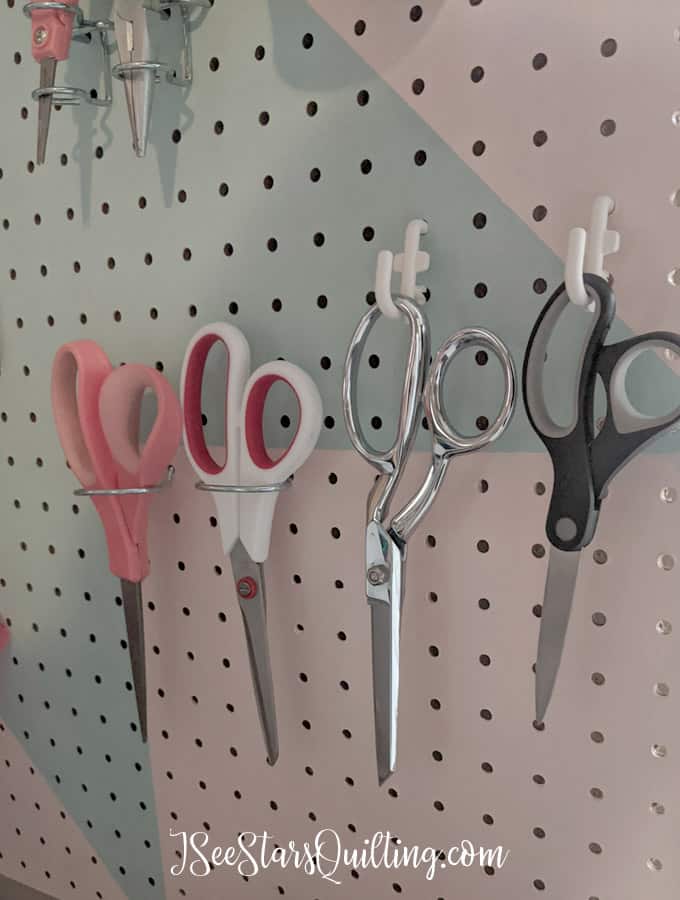
    And here it is all loaded up with my sewing tools!

    We moved! Come tour my New Creative space and see how I arranged all my tools to create the most amazing crafting space!
    Thrift store dry erase board project coming soon…

    There is so much storage with my new pegboard! I could have big happy heart eyes for daaaaayyyyys!

    Everything is neat and organized. All my most used tools are where I can easily see them… and I still feel like there is plenty of room to grow and add more tools or rearrange!

    First of all, you don’t need to be incredibly handy to make this. It is actually a really easy project!

    What you’ll need:

    • Pegboard sheet
    • (2) 1×2 boards that are the same width as your pegboard (maybe more if you choose to make a really BIG pegboard)
    • Screws
    • Paint (optional)
    • Pegboard hooks like these

    How I did it:

    1) SHOP

    I picked up a sheet of pegboard from Home Depot.

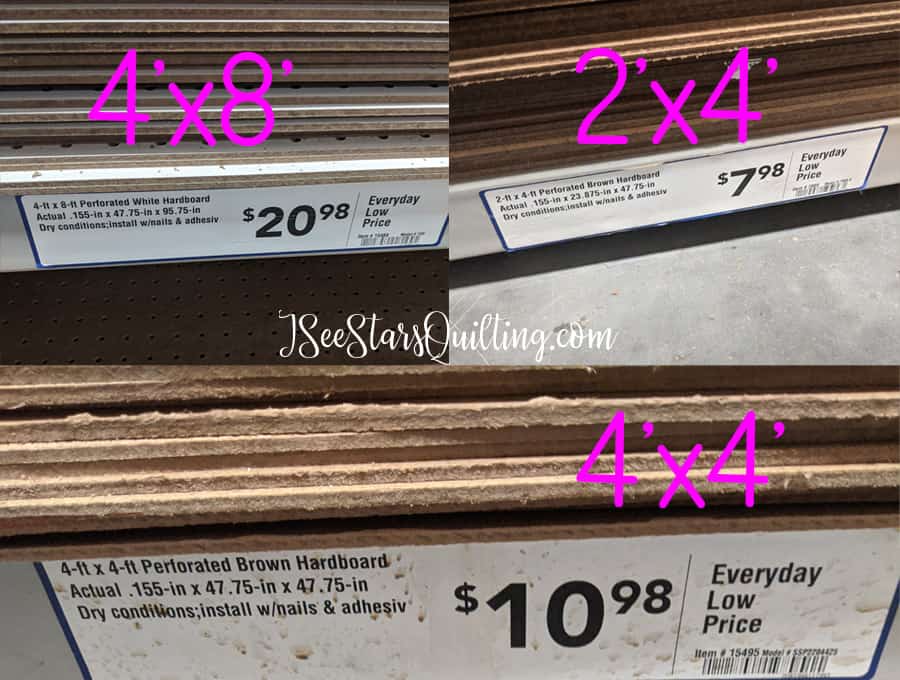
    The first thing to know is that they offer several different sizes. (When I went shopping in Dec 2019, these were the prices/sizes available.) I chose a 4’x4′ size for about $10!

    This DIY Pegboard Tutorial has step by step instructions and tips to make your own pegboard for your sewing and crafting tools! This is a super easy project! Anyone can make one!

    You can also ask them to cut your pegboard sheet to the size you want it if you have a specific area you’re looking to cover/fit. (Or you have a smaller car lol plan ahead!)

    2) PAINT!

    A fresh coat of paint will freshen up anything! It also adds a little personality and a pop of color if you’re looking for a fun piece of decor.

    I had this pale blue-ish minty color on hand. (Pink. I absolutely love it and I was so tempted to paint it neon pink, let me tell you… but I didn’t want to get tired of the brightness or have it take away from the quilts I still want to hang on the walls.)

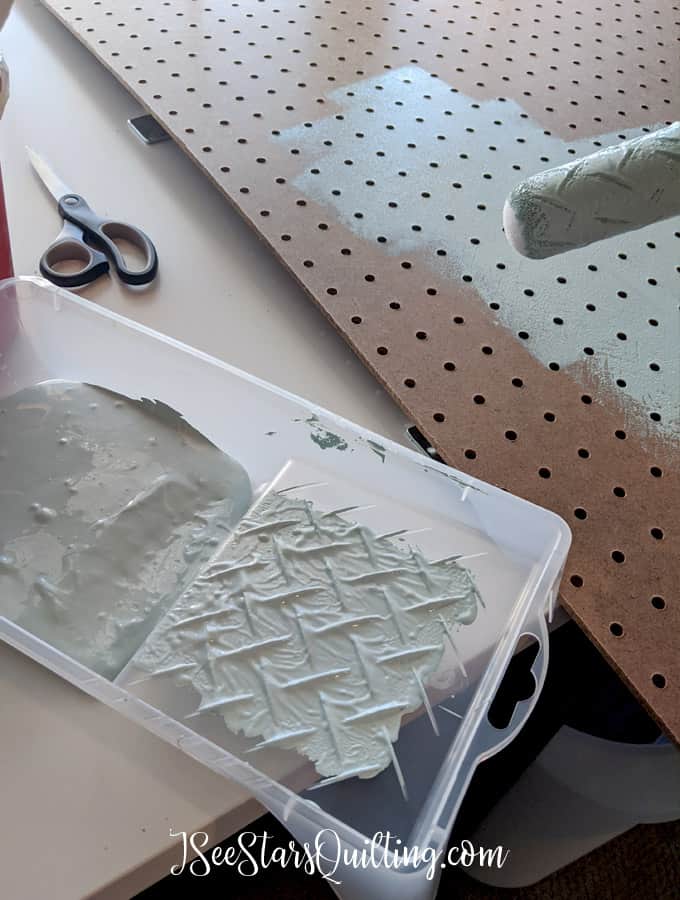
    I do recommend that you roll your paint instead of using a brush.

    There is much less of a chance of pushing the paint through the pegboard holes and making a dotted mess on the back.

    I also focused on 2-3 thin coats of paint instead of trying to cover it in one coat.

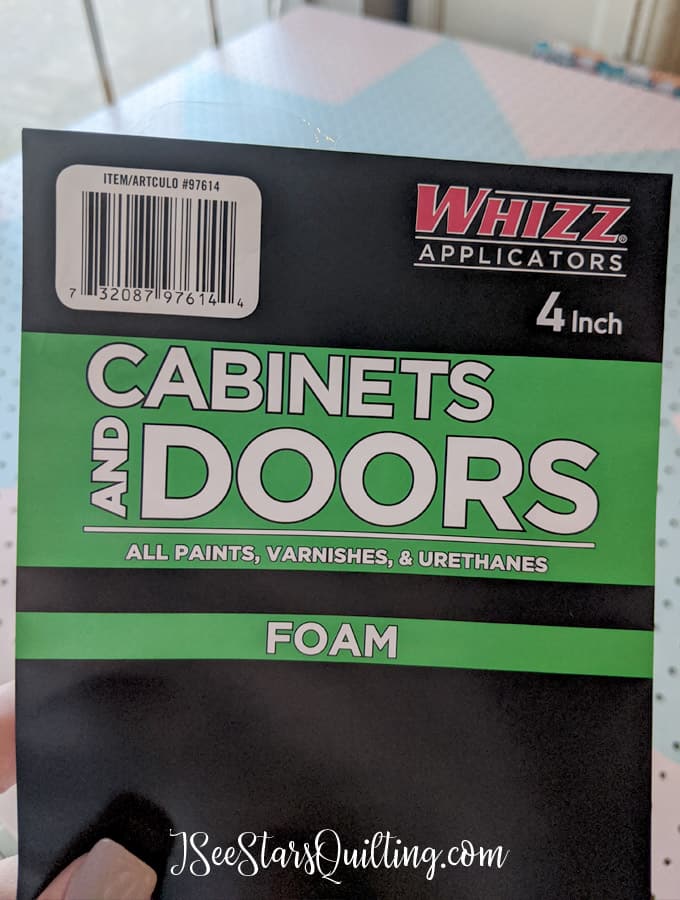
    This is the roller I used. It was perfect for the job.

    3) Decide if you want to be bold…

    I ALMOST just left the DIY pegboard the minty blue color… it would have been beautiful. I still would have loved it and it still could have held all my tools perfectly… BUT… I couldn’t leave well enough alone, could I? 🙂

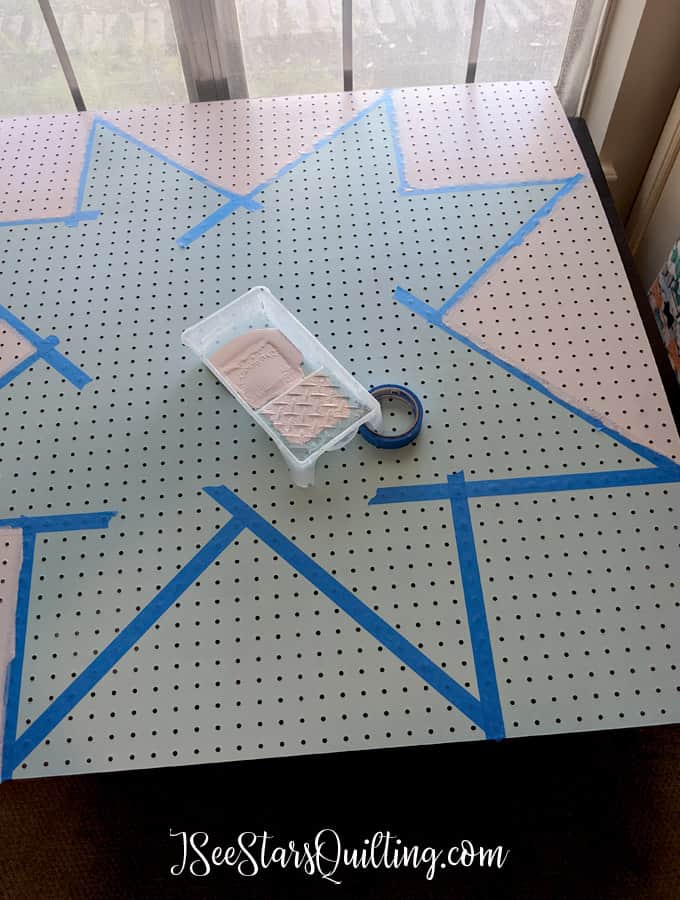
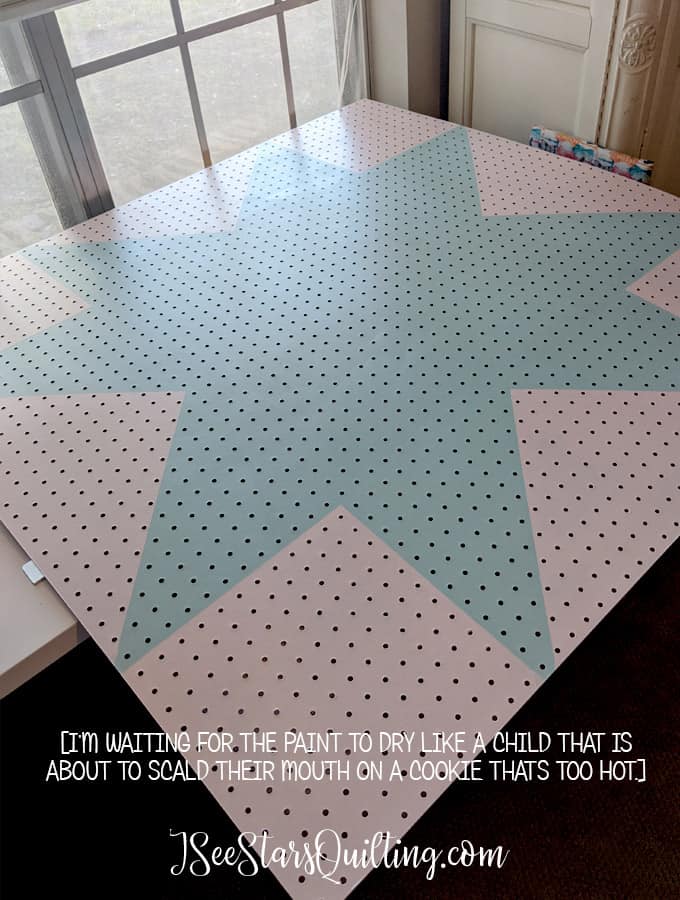
    So I let it dry a little bit and then I used painters tape to mask off a big quilty looking star pattern!

    I painted in the background using a pale pink color I had on hand from another project…

    And Voila! Here is the finished painted piece!

    I am really happy I decided to add a little more pizzaz. Polka dots were another consideration… and so was dividing the larger piece into several smaller quilty blocks.

    3) HANG

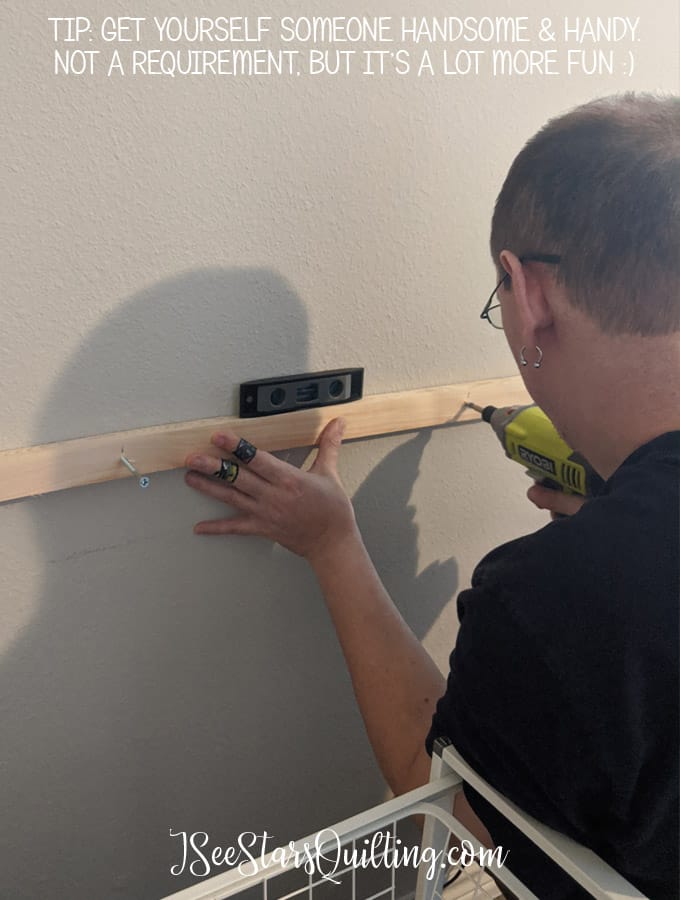
    This next part I recommend having a friend or a helper assist you in putting up your DIY Pegboard.

    Could you do it on your own? Absolutely… but the company and extra hands are nice 🙂

    Use a level to hang your 1×2 pieces and screw them into the wall studs.

    TIP: If you pre-drill your holes, it will help keep the board from splitting.

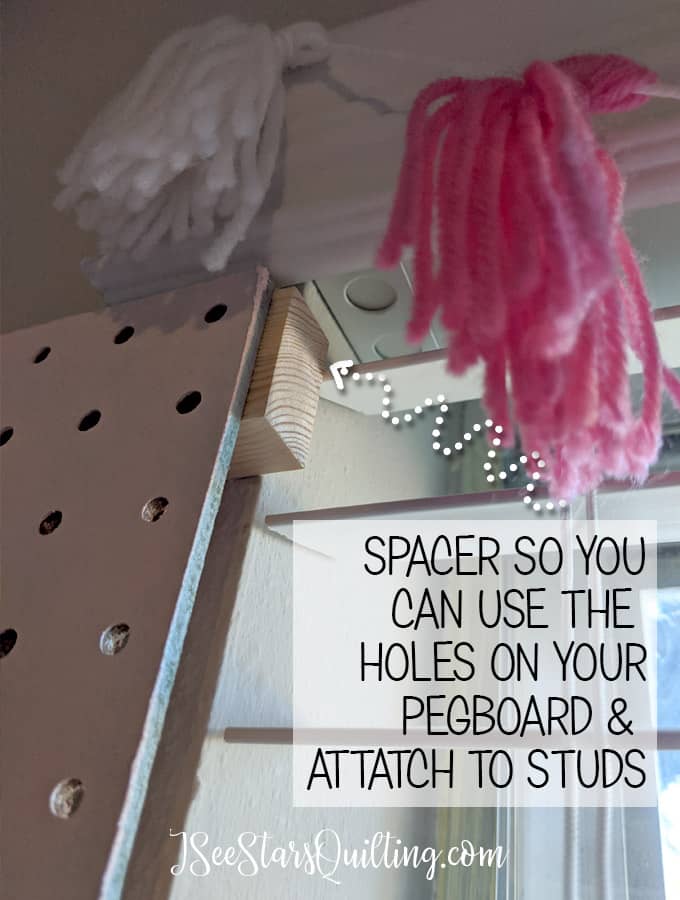
    I put a piece of the 1×2 at the bottom of where my pegboard sat and at the top of where my pegboard came to.

    This pulls it off of the wall so that you have room to add hooks to your pegboard.

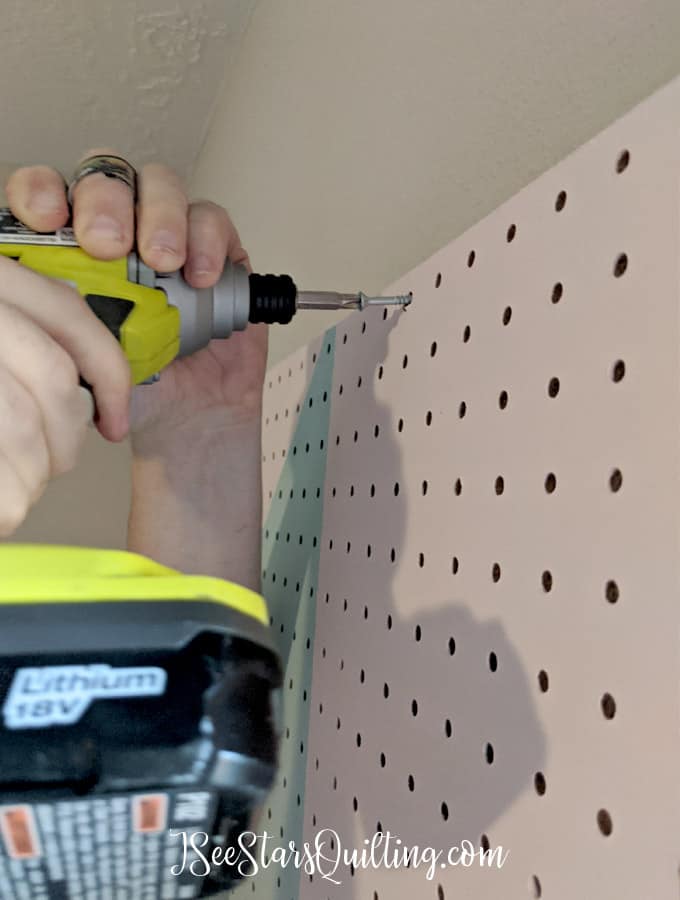
    After you put up your 1×2 pieces and they are secured to the wall studs, use screws to attach your pegboard to the 1×2 pieces in the corners. (and also in the middle if you’re my husband and want to make sure nothing is ever ever ever going to bring this thing down 🙂

    4) ACCESSORIZE

    This was the fun part 🙂

    I found a pack of pegboard accessories and used some baskets that I already had on hand to divide up the pegboard space and make room for all my tools.

    I added a few little fun displays too.

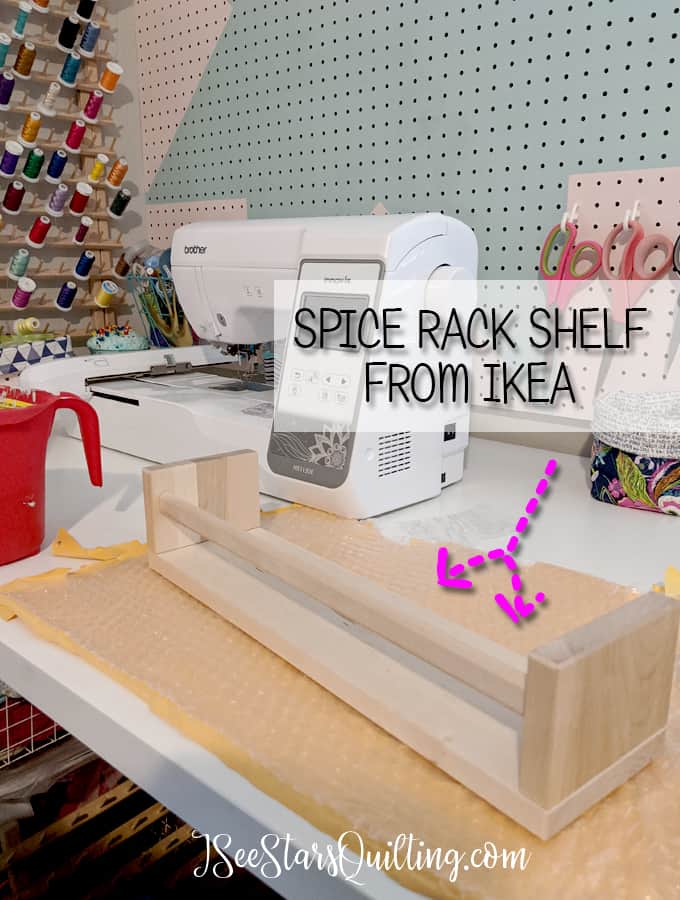
    And lastly, I repurposed some shelves that I had found cheaply at IKEA. I believe they’re called spice rack shelves… whatever, now they hold fun ribbons and canisters with sewing supplies!!

    I painted them the same minty blue as the background.

    We moved! Come tour my New Creative space and see how I arranged all my tools to create the most amazing crafting space!

    And here is a picture of the finished pegboard!

    Thrift store dry erase board project coming soon…

    What do you think?

    Do You Want to make your own DIY Pegboard for your sewing & craft room storage?

    Let me know in the comments below 🙂 I would love to hear what you think about this new little corner of my sewing room!
  • 8 Reasons Why You Should Shop At Local Quilt Shops

    It’s so easy to get caught up in the big sales online, isn’t it? Big Box stores can offer big deep discounts when they want to… And you never even have to leave your living room chair. With all the ease, it might be easy to never leave your house!

    Check out the bottom of this post for finding quilt shops in your area. Don’t be afraid to go on a little adventure to the other side of town every now and then… you may just find the fabric shop of your dreams!

    Here are 8 Reasons Why You Should Consider Shopping Local Quilt Shops vs. Big Box Stores. This list goes deeper than just FREE shipping!

    Here is why you should shop at local quilt shops!

    1. When you shop local, you’re making a personal investment in your neighborhood and your community.  

    It is said that for every $100 spent locally, roughly $68-$73 of it return to local activity! Wow!

    When you shop at local quilt shops you are individually stimulating the local economy with your support and in turn, helping shape your community’s unique character and personality.

    2. The ladies in local quilt shops are the best of the best!

    Every single quilt shop I’ve been inside (and I usually try to hit up at least 1 or 2 when we travel) has the best people inside it! Friendly faces and smiles that are all too happy to have quilty conversations with you!

    Also, other customers… who isn’t happy when you’re shopping for fabrics? Everyone is happy happy happy!

    3. Quilt Shops will go the extra mile for you

    Because the employees are likely personally invested in the fabric curating and selection as well as displays and collections they are selling, they are more likely to go the extra mile for their customers.

    These ladies are extremely knowledgeable about their fabrics, their selection and will even help you pull together a quilt color palette if you’re having a hard time. They live and breathe fabric every single day and they are the masters of it.

    For more info on curating your own fabric selection, check out this post.

    4. Non-profits receive more support from Local Businesses

    Local business owners provide significant support for non-profits. i.e. Quilt shop owners are just really really nice people! Non-Profits receive as much as 350% more money from local shops that non-locally owned businesses.

    So, your money actually reaches even further to help the community!

    5. A more defined selection

    I’m not going to lie, the selection that you will find at a local quilt shop is so carefully crafted and refined to the requests of your community, it is unreal. Want local baseball team fabric? boom.

    What is it that your quilting group is into right now? – Chances are that you’ll find something to meet those needs in your local quilt shop. If not, all you have to do is request a certain product and I’m sure they will be happy to carry it for you!

    6. CLASSES! Learn something new!

    My local quilt shop hosts numerous group activities and classes each month… you’ll never be bored. You can learn a new skill taught by another local, or check the schedule for a meetup of another traveling quilter!

    Meet new friends, ask specific questions and get one on one help. Make sure to ask your local quilt shop if they have a calendar of events so you can start scheduling your quilting education!

    If you’re looking for something very specific that your local Quilt shop doesn’t offer… I am always happy to point people towards BluePrint. They’re online classes are very informative and really good at breaking down the steps.

    Watch writing classes at myBluprint.com

    7. Create Local Jobs – Maybe even for you?

    Another benefit for your community is more jobs… perhaps even a position open for you if you’re in the market for some part-time work! Maybe you’re retired and need a little extra spending money (or more money for fabric)

    Do you have a skill that you think other people could benefit from? Perhaps you could hold a class?

    8. You don’t have to pay to ship or wait for your mail person to bring your fabric!

    This one is self-explanatory but it is worth mentioning… especially if you are impatient like I am. When I am inspired by a great idea or a beautiful vision for a quilt project… I want to start now, like right now… not 3-5 business days from now.

    Here are 8 Reasons Why You Should Consider Shopping Local Quilt Shops vs. Big Box Stores. This list goes deeper than just FREE shipping!

    How Do I Find Local Quilt Shops?

    The first thing you can do to find your local quilt shops is to ask around! Ask where your quilting friends shop. See if your guild has any recommendations!

    Another way you can find local quilt shops is to give google a search for “quilt shop in your town” or “fabric shop in your town“. You might just be surprised to find a few little shops you didn’t even know existed!

    Read the reviews online and make sure it is in a safe area before you venture out but don’t be afraid to go to an area of town you haven’t frequented before.

    Make an adventure out of it!

    If you live in a big city, chances are that you have at least a few quilt shops around you. But don’t forget to search the small towns around your area!

    Small towns are full of wonderful small businesses that can use some good local business as well!

    You can even get a few girlfriends together and make a day of it by carpooling and getting out of town for a change of scenery (oh, and getting some fabric too, of course!)

    I live in Houston, Texas (no lack of anything here!) and my favorite quilt shop is a place called Quilter’s Crossing 🙂 You can check out their website here.

    Tell me about your favorite local quilt shops! Write your town and your quilt shop in the comments below.