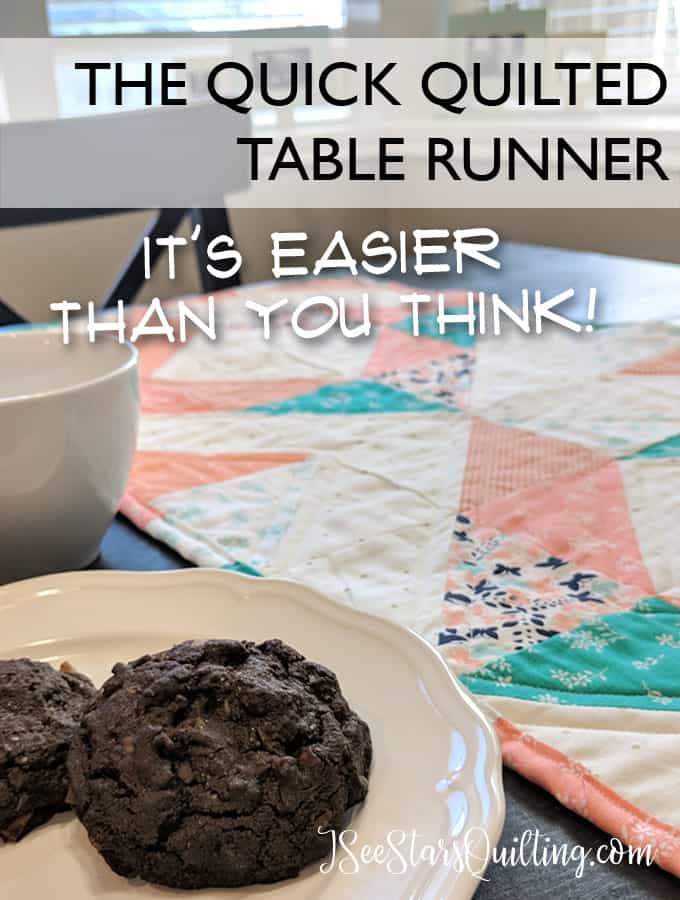
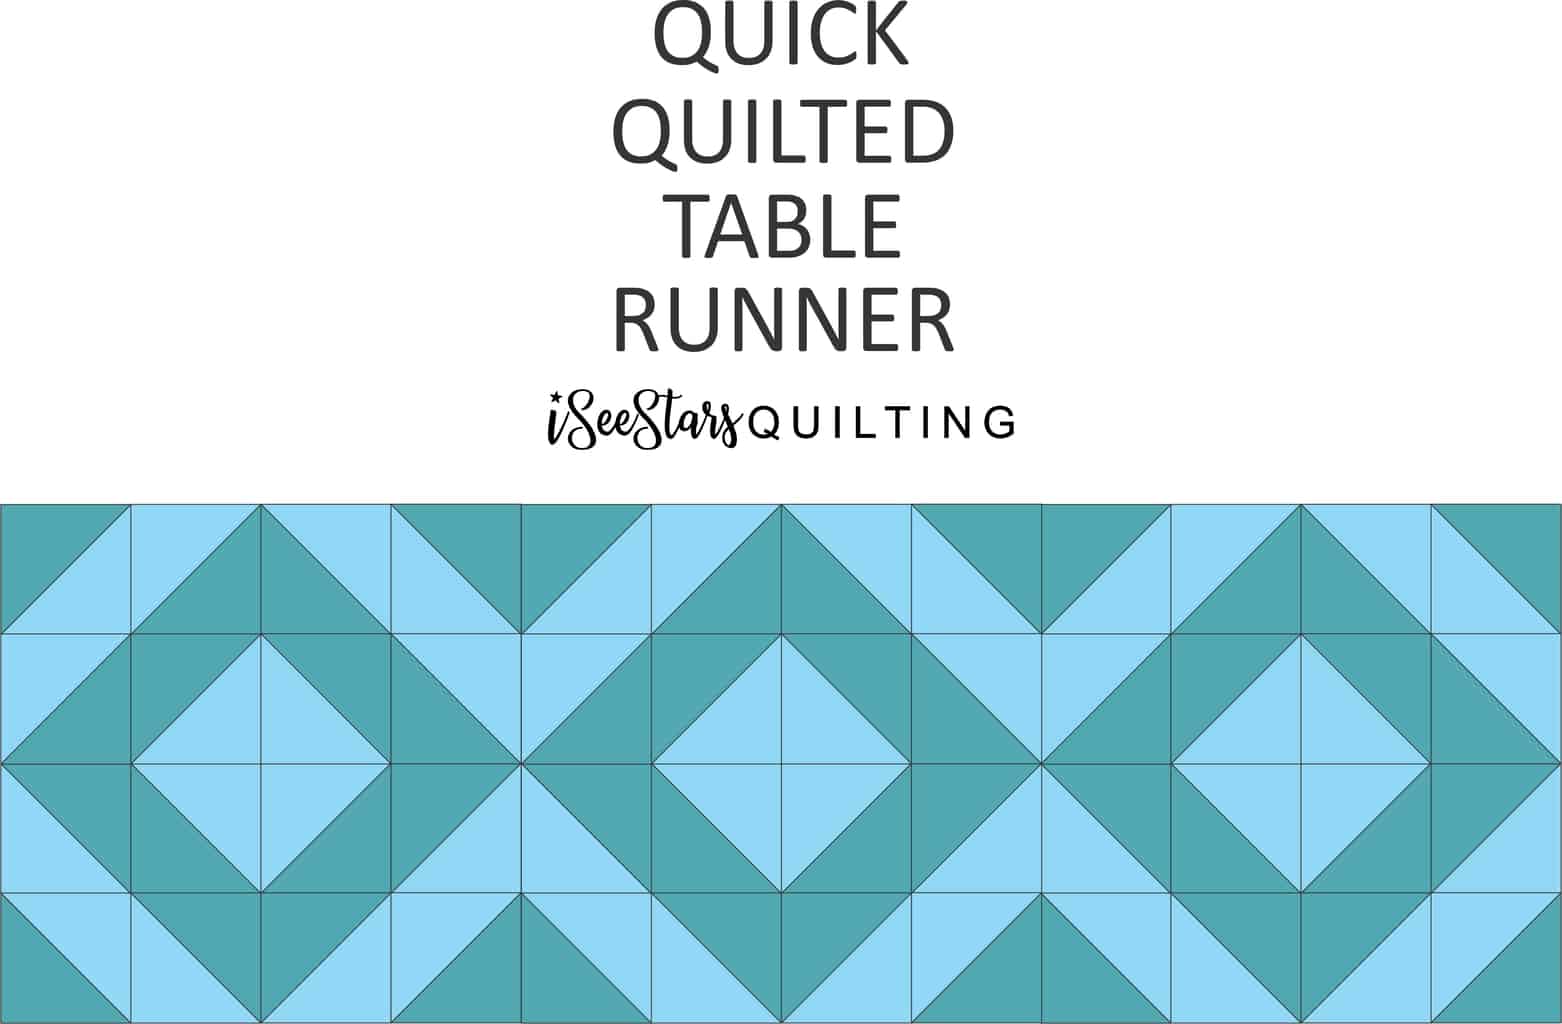
This week, I found myself in need of a quick hostess gift. I came up with this Quick Quilted Table Runner, and I’m sharing it with you today because it was so fun and so easy to make.
I’m also going to share a quick tutorial on the simple way to make HST for blocks. (Spoiler alert: You’re going to love it)
I wanted to make something using scrap fabric only. Let’s just say that I’ve hit the fabric store a little too much lately and the hubs (who I totally adore) maaaaaay have mentioned that it is time to take a step back and chill…
…Yikes, yeah. I know…
So, It’s totally cool though. I can handle it… uh huh. I’m good.
Someone, please pet the Minky fabric for me?…
If you want some of my best tips, you can read the whole post I wrote on how to quilt on a budget. It is full of super helpful tips to make the most of whatever you’re working with budget wise.
Quick Quilted Table Runner Requirements:
Again, this was all scrap fabric. Use what you have and make it work!
Finished size: 16″ x 48″
Fabric: You will need (48) 5″ squares.
I made 24 of the squares the same color to get a uniform “background” color. The other 24 were just a mix of scraps. You could easily just layout your pieces as half light colors and half dark colors so that you get the same diamond pattern.
Backing Fabric: I created mine with more scrap pieces. (See pictures below)
Batting: You will need a piece 16″ x 48″ – This is a great project for scrap batting! You can piece together batting scraps by doing a zig-zag stitch on its widest setting and overlapping your batting edges just a little.
Binding: 140″ of binding. You can do one continuous piece, or you can piece it together using scraps.
Easy HST Tutorial
This will give you two HST (half square triangles) in just a few easy steps using two squares!
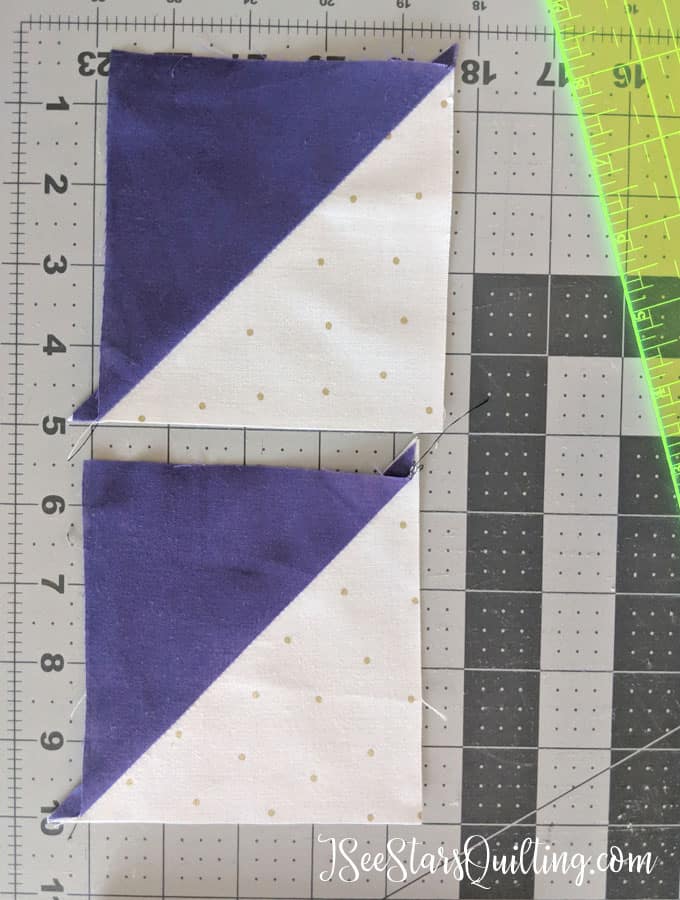
Step 1: Match up your squares! (1) Light color/background and (1) dark color. Put RST (right sides of fabric together)
Step 2: Use a ruler and draw a line down the diagonal, from point to point.
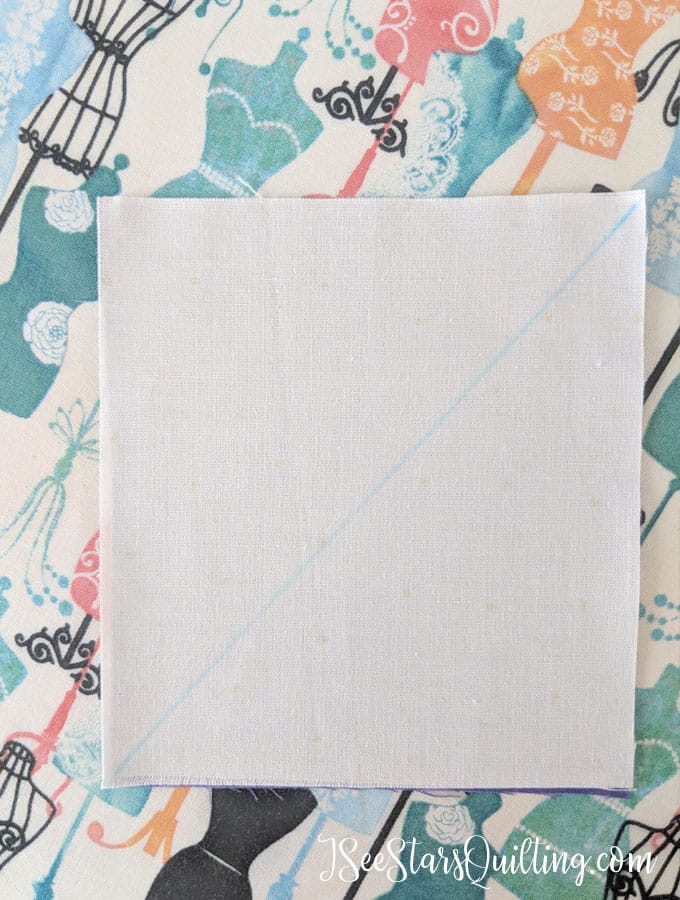
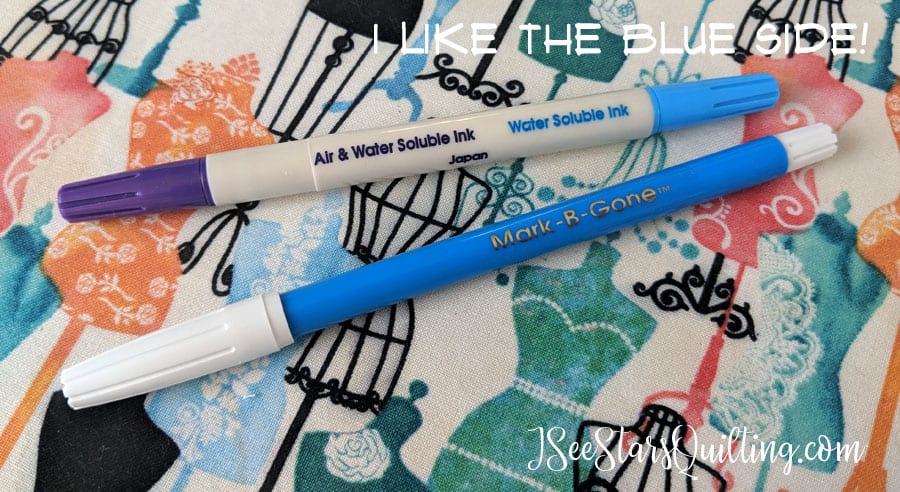
I really like and use this marker. It stays put until you wash your fabric. The purple end is good too but disappears with air, so sometimes I find I have to work quickly to make sure I sew while I still have my marks.
The blue disappears with water. You can also use a wet washcloth to take off the blue line.
However, on this project, you don’t have to worry about making sure you erase your marks on this project… you’ll never even see the blue on the finished table runner. 🙂
Step 3: I like to use my quarter inch foot here. You will sew a quarter inch on either side of the line we made.
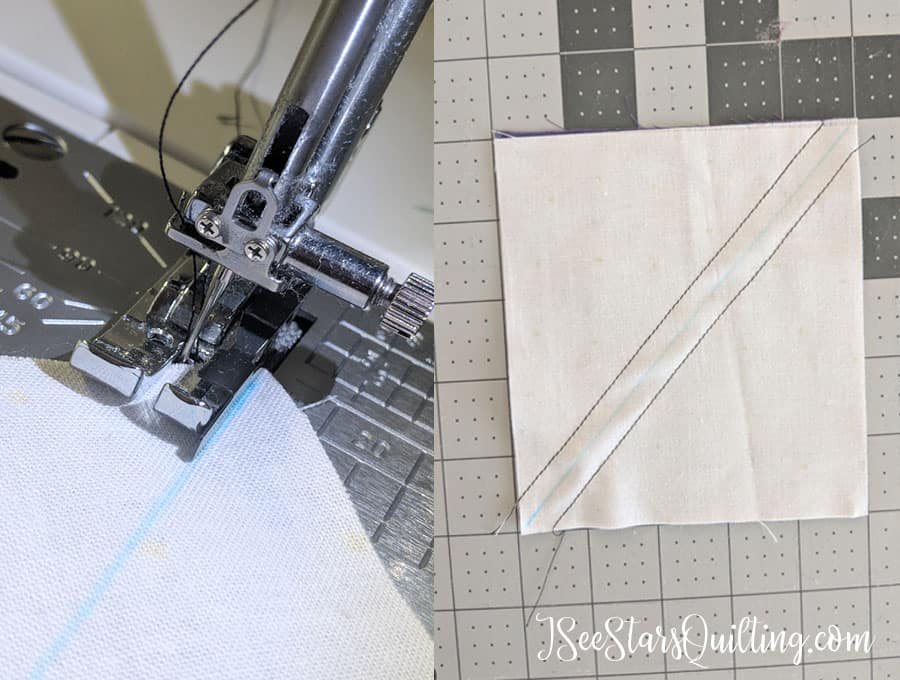
Step 4: Use your rotary cutter and a ruler to cut right down the center on the line we drew in the first step.
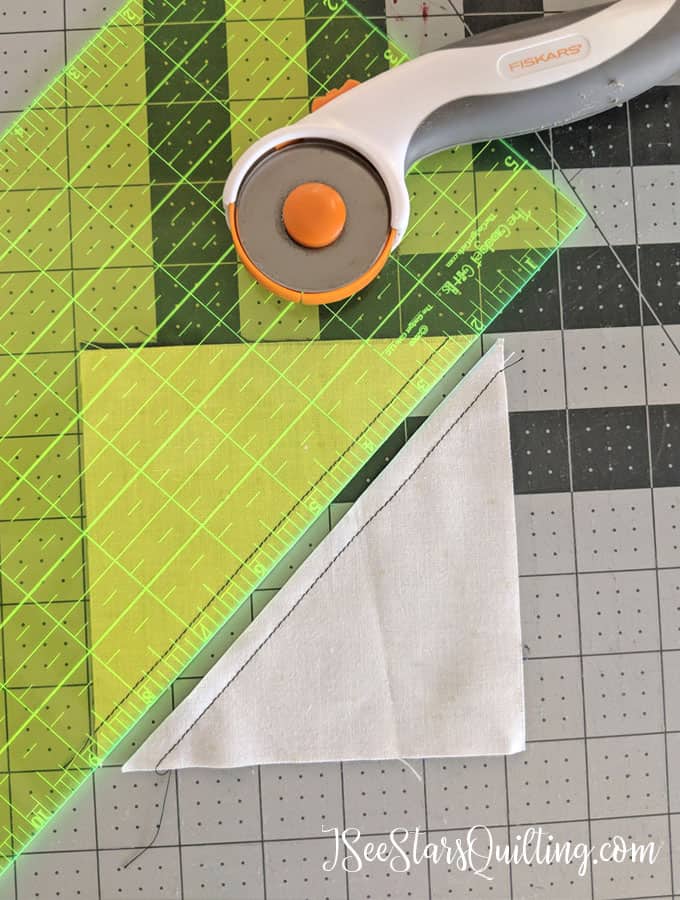
Step 5: Press your seams open or to one side and…Ta-da! You’re all done! 2 Perfect HST (half square triangles)
Now that you have your HST’s made and cut… You should have 48 total… It is time to layout your table runner.
Quick Quilted Table Runner Layout + Tips
See below for how to lay your “dark” colored triangle pieces vs. your “light” colored pieces.
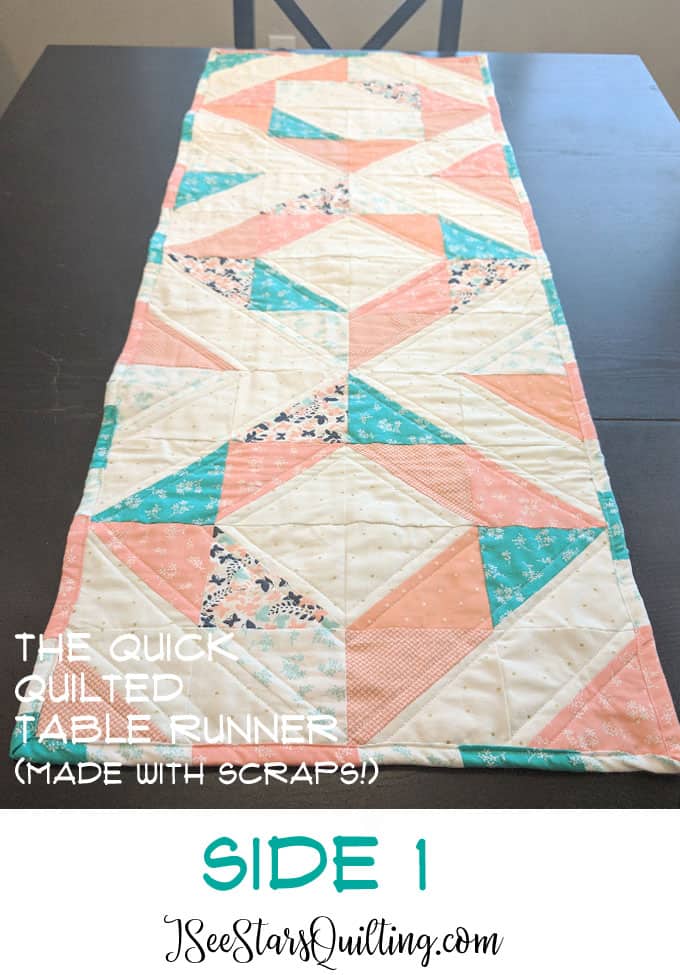
More Pictures of the Quick Quilted Table Runner that I made…
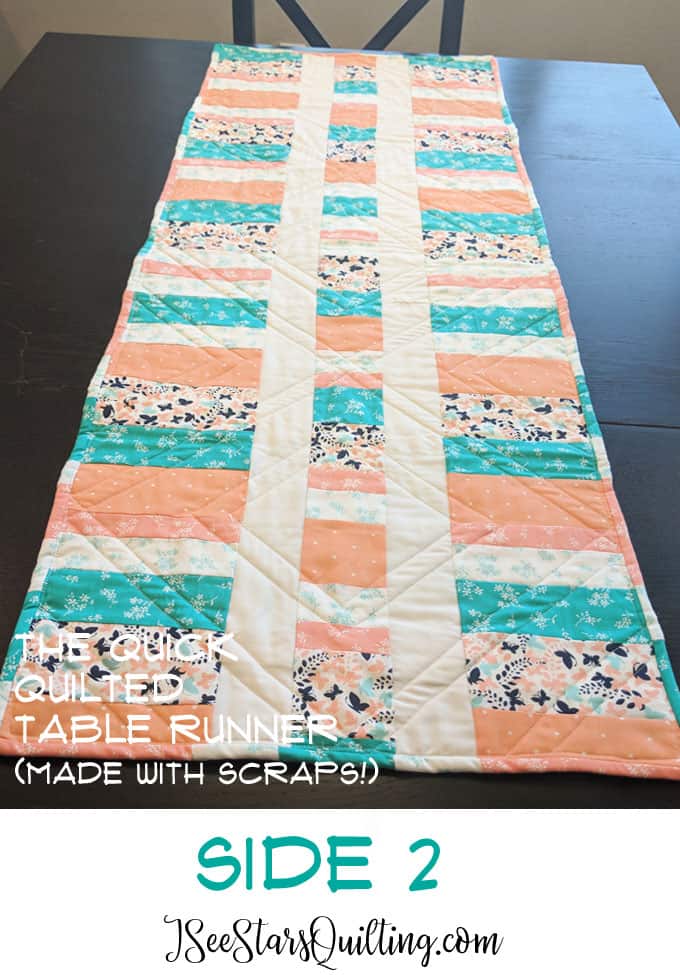
Notes on the backing:
As you can see for the backing, I made the Quick Quilted Table Runner reversible!! This is essential because sometimes spills happen. (I would guess 90% of the world’s spills happen in my house. It’s not scientific. It is just a guess, but I’m pretty sure of it) If it is just a little blemish, you can flip it over and go right on with your life without having to ruin your table display.
I created the backing using strips of fabric in varying widths. This was great because I used the scraps from those same strips that I cut to make the binding!
Notes on the Quilting:
You can see in the “side 2” picture a little more detail on how I chose to quilt this piece. All straight stitches. Easy Peasy. You can choose to quilt it however your heart desires. There is no wrong or right, but please to take into account that as a table runner, this will probroly get washed quite a lot. You want to make sure you read on your batting how far apart your stitches can be before the batting turns to mush in the washing machine.
Whew! Talk about a scrappy project… I really loved making this. It is a great reminder that you don’t HAVE to go out and buy new things when you want to sew a project. Sometimes you just have to put your thinking cap on and brew up a bit of your own magic to make it happen!
Leave me a comment and let me know if you worked on this project and quilted your own table runner. You can tag me on Instagram too so I can see it @ISeeStarsQuilting