My Quilts

Want to see what I sew? Take a closer look at some of my projects and quilts that I have worked on in the past.

  • Favorite FREE Quilt Pattern

    You know how much I love a great quilt pattern… and bonus points if it is a freebie! This particular quilt that I am sharing with you today is a pattern of my very own and totally my Favorite FREE Quilt Pattern!

    I love my quilting friends and I’m happy to share all my internet hunting finds and any other great quilt bloggers you should be following. **Plus, if you look at the bottom of this post there is a bonus blooper shot of this photo shoot ;)**

    This one was one of the first patterns that I created. I’ve created many more designs since then, but this one is still one of my favorites. It comes together really quickly as well.

    I actually took the time to carefully plan and write down everything instead of just sewing my seams by the seat of my pants and praying it all works out in the end. That was how I used to live my sewing days. Out on the edge. As hardcore as I’m trying to make that sound…. (and I’m a bit ashamed I even attempted to do that in the first place), I was the furthest thing from hardcore. I was silly and I learned a lot of lessons the hard way. I’m so glad I’ve grown up in my quilting skills since then… for both our sakes, honestly.

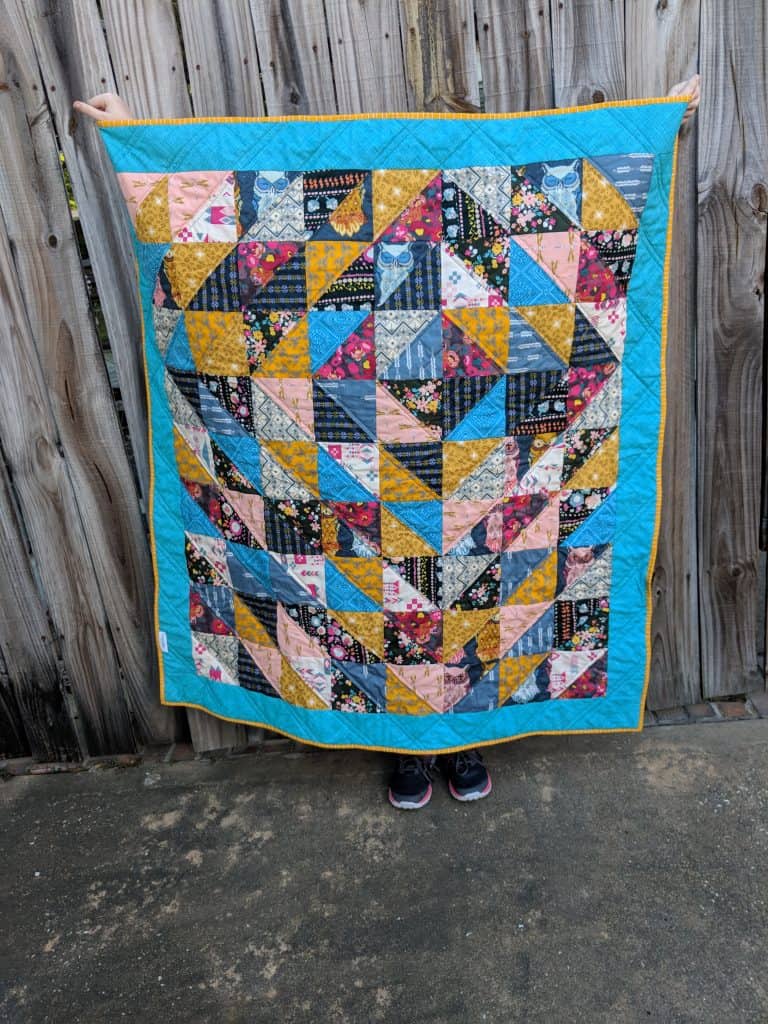
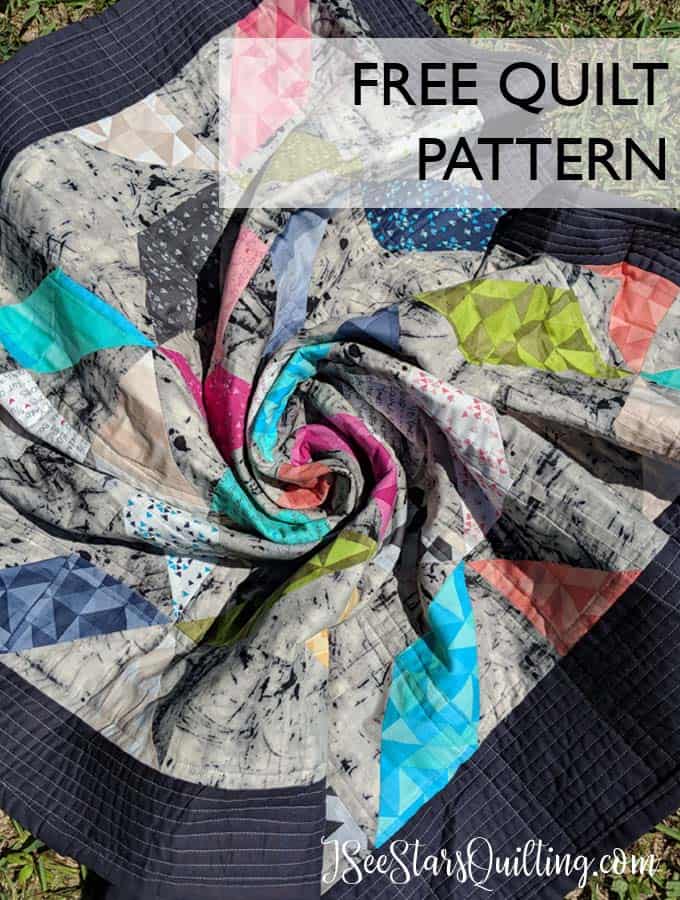
    This Windy Days quilt pattern is full of possibilities for happy spring colors!… suitable for any color palette, but I created it with spring colors in mind, so let’s go with that today, mmmk?

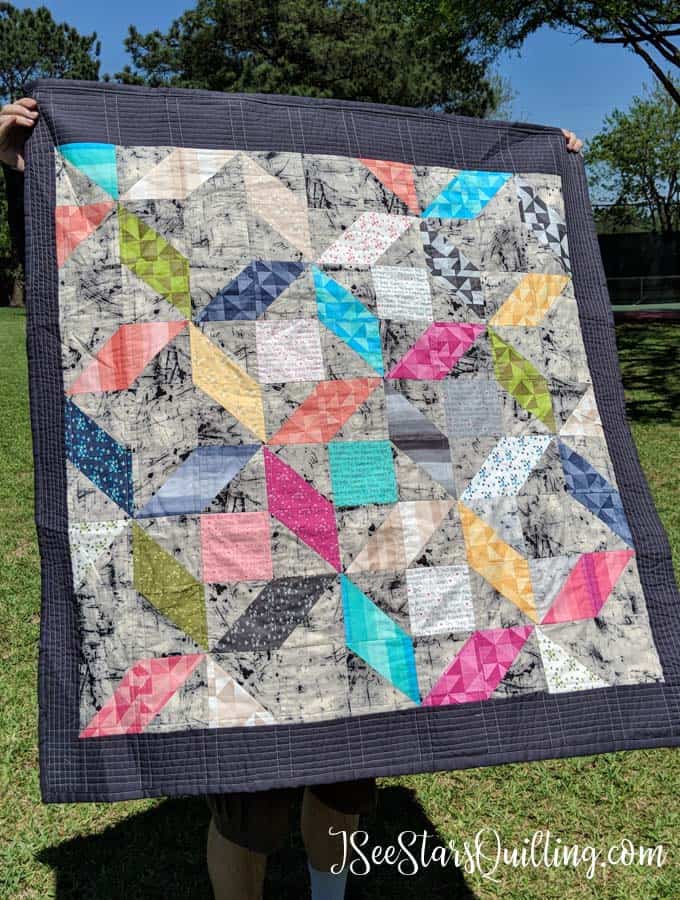
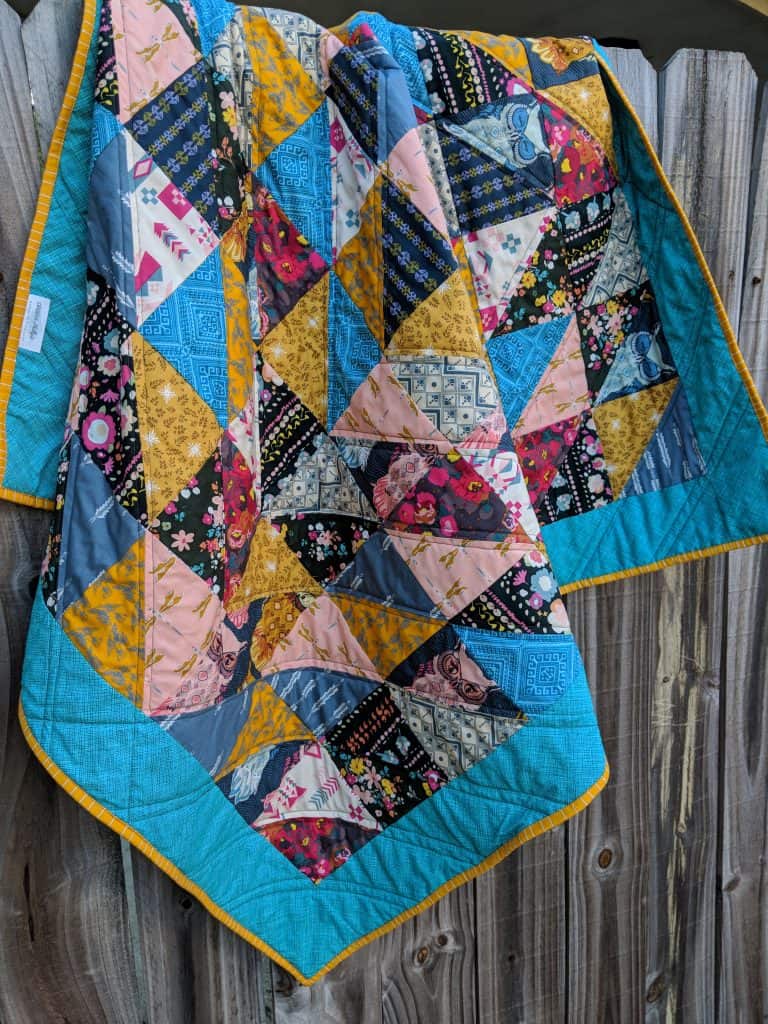
    That’s the front of the Windy Days Quilt… This quilt is an easy quilt! Do not let all the angles and corners fool you.

    It is totally beginner friendly!

    I wouldn’t lie to you or set you up for something I didn’t think you were totally capable of.

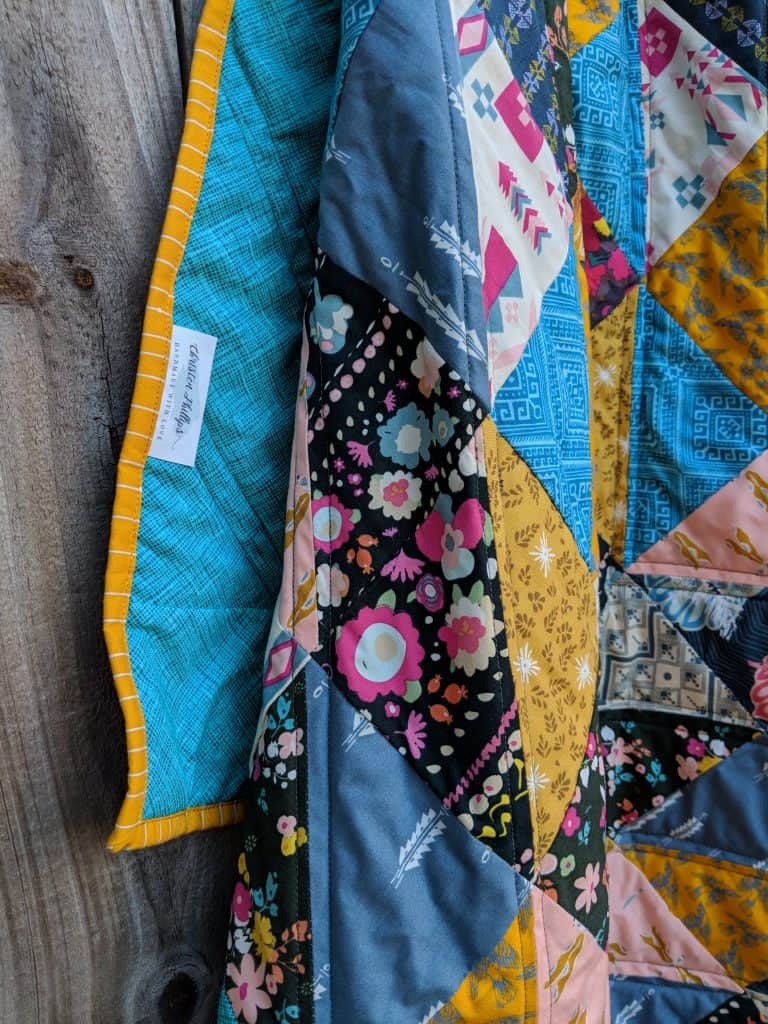
    And then here is the backing! (it’s just a really amazing solid printed piece that I used, I promise… don’t be scared, ok?)

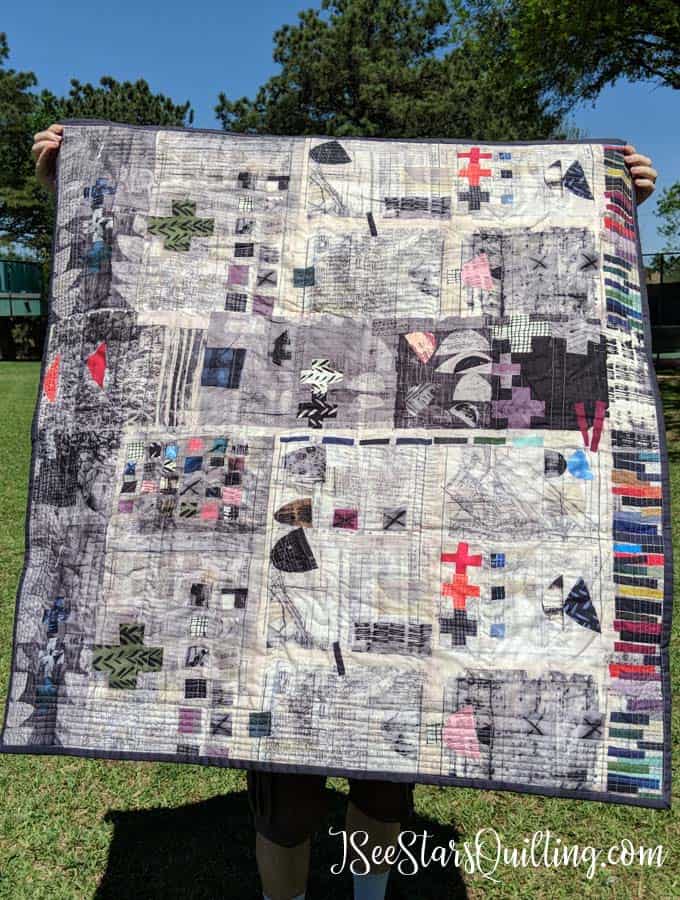
    Beautiful backing choice, don’t you think? – This quilt lives with me in my office. It’s the perfect lap quilt size for when it gets chilly in here.

    So, on to the FREE part!

    I’ll e-mail you the pattern that lays out the foundation and goes over every step how to piece this impressive beauty if you join my e-mail list. *please don’t groan* I swear I hate junk mail just as much as everyone else. I promise I’ll only e-mail you once a week (at max!) and it’ll always be full of fun goodies… no garbage and no gross sales-y tactics. I’m a marketer in my day job. Quilting is fun and in my opinion, has no room for that sneaky product pushing!

    Let’s build a group of wonderful quilters together!

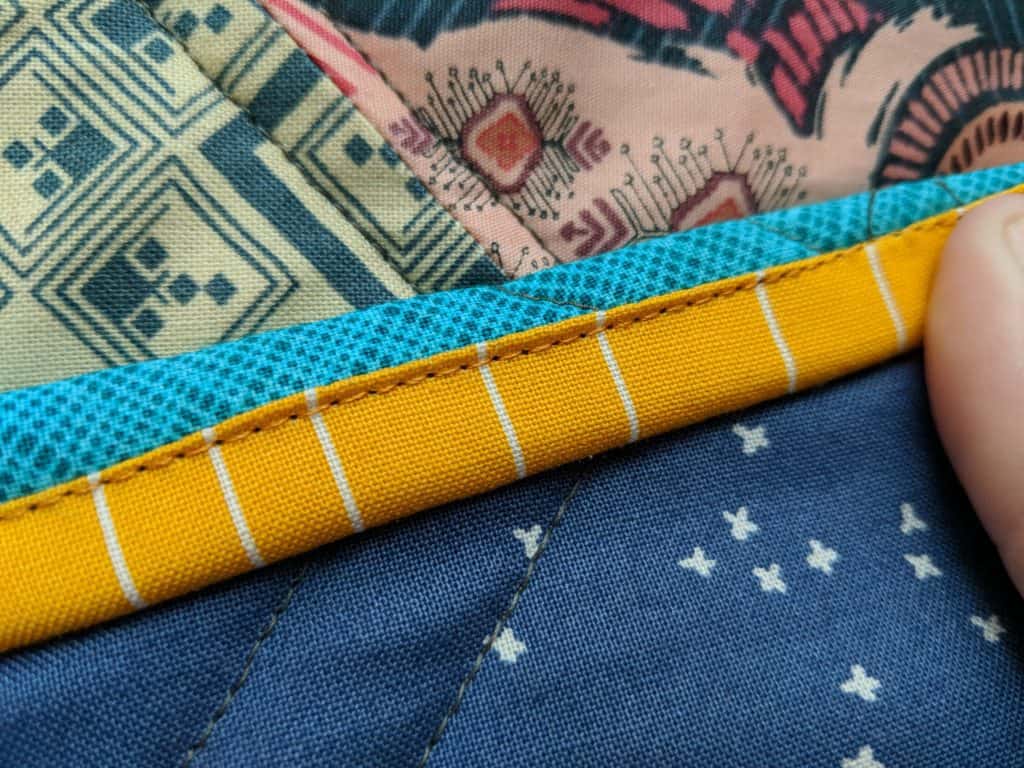
    Side note: I’ve been asked about the fabric choices I used for my quilt. I used a 6″ layer cake by Moda for the bright colored pieces. The backing and the ‘ink splatter’ grey and black fabric on the front are by Art Gallery.

    And a special thank you to my husband who didn’t ask ‘why’ when I told him to ‘go over there and hold my pretty quilt up so I can take a picture’ for the thousandth time. He gets it now and he loves me 🙂 

    The Bonus Blooper Shot

    If you want to see what a blooper shot of a quilt photo shoot looks like…. well here you go. That’s my 6 year old who wanted so desperately for me to take his picture too. I still don’t know why it didn’t make the final cut 😉

  • A Charity Quilt – The Reveal

    Quilters are some of the most generous people with their art.

    They want it to be used, to be loved and cherished. Charity quilts are huge in the quilting circle for many different organizations!

    I’m going to share some images from one of my latest quilts because I’m happy with it, ok? That’s totally ok to be pleased with yourself, by the way. Proud Momma quilter over here!

    This quilt is going to be donated to my kid’s school for a silent auction fundraiser. I’m curious to see how it does at the auction and if whoever gets it will love it as much as I do. I love to see my quilts being used, but its hard to part with them at the same time. Do you ever feel that way too? Update: It sold for almost $200! A bargain, but pure profit for the school, so I’m happy 🙂

    I just adore all the golds and blues that this quilt has to offer. The pops of turquoise really make the mustard color sing, doesn’t it?

    Heres a full shot so you can see all the colors and the quilting.

    (That’s my little girl behind the quilt. Momma’s helper for today!)

    And for good measure… just one more so you can see how lovely that matching thread is on the striped binding,

    What is your favorite use for the quilts that you make? Do you just like hoarding your lovely creations (guilty!) or are you happier knowing they are out in the world getting used?

  • 5 things To Sew For Vacation!

    Do you have a get-away planned in the future? Looking to take a long a few handmade items on your trip? Here are my favorite top 5 Things To Sew For Vacation!

    Vacations are the best….

    ISeeStarsQuilting

    One of my favorite things to do before vacation is to procrastinate packing… anyone else with me, mommas?

    Oh, I’ve got it all figured out in my head. I’ve done the laundry and have a semi-system of piles ready to go in the suitcase. But I will find other things to do to prep for our vacation besides actually packing… for example, creating fun sewing projects that will be useful while on vacation!

    What a great idea, right?

    5 Sewing Projects For Vacation

    1.Catch-all Fabric Bins – I love making these little bins because they’re fun. They’re easy and they are useful in so many ways. Use up those pretty scraps, Be creative, go crazy with that fun fabric you couldn’t live without! These were a sanity saver in the hotel bathroom as well as in the hotel room. Everyone in my family has a bin and they know to keep the things that are important to them in the bin so it doesn’t get left behind. This comes together really easily and does not require a lot of skill or sewing magic! You can get the full tutorial here – The Perfect Easy Catch the Mess Fabric Bin

    They also fold down to almost nothing in your suitcase. Bonus!

    2. Dirty Laundry bag – This was the easiest and absolutely most helpful thing to have on vacation when you’re traveling with a family!

    This darling vacation Laundry bag will take no more than 15 minutes of your time and will be a Sanity saver on your trips!

    3. Does everything have to come with its own separate charging cord?! The girls at Live It, Love IT, Make It found a great solution to manage the mishap of crazy cords when traveling!

    I could even use thing around the house come to think of it. Perhaps I should make up a few more after I write this post 😉

    4. Jewelry organizer that is really pretty? Yes, Please. And Thank You. I love this little pouch. I’ve made several over the years as gifts for friends too. They work really good to hold your essential oils too!

    If you are vacationing with kids, do not leave home without your lavender! 🙂

    5. Zipper Box Pouch – This sews up in about an hour. I promise you can make these! Its the perfect cosmetic pouch, organizer for little small toys, snacks, game pieces on a long car ride… we’ve used it for everything you can imagine!

    DIY TLC Teacher Kit - This Zipper Box tote comes together in less than an hour! Fill it with goodies and take care of your teachers #teachergift #ZipperBoxtote #easygift

    There you have it! These are my go-to vacation accessories!

    If you’re a DIY-er, don’t leave town without something handmade close to you!

    Also, if you are procrastinating your packing… don’t try and do all of these in one day and then stay up all night packing because you were sewing and then blame it on me, ok? – I mean, thats exactly what I would do, but I am warning you so you can know better!

    Happy sewing and safe travels!

  • The (less than) 5 Minute Giant Pin Cushion

    Hey there! We’re going to talk pincushions today: An essential tool in the sewing space. More importantly, a DIY Giant Pin Cushion!

    I have a pin problem. I love them all and it doesn’t matter how many I have, I always seem to run low on the big projects. So then I just NEED to buy more, you know? Tell me you have that problem too so I know I’m not alone. Anyone?

    I’ve tried everything under the sun from little magnets and bowls and bulky little tomatoes. They all work wonderfully… but can I be honest here? They aren’t all that pretty. There I said it. I feel a bit vain, but it’s out there now.

    It was so easy to make my own… and it is oh-so-pretty! Now you can totally make your own custom pincushion too! Get this… I made it in less than 5 minutes – With things I already had. NO sewing required. And it is HUGE. Like, hold all (or most) of my pins, huge.

    5 Minutes? Yeah, and most of that is gathering your pins and putting them on your new cushion. – Bonus, it even has a handle!! This is almost like finding out your favorite dress has pockets!

    The (less than) 5 Minute Pincushion

    Things you’ll need (and you probably already have)
    1 Large scrap of your favorite fabric. A 10-inch square piece of fabric will work
    1 Large Mug – I got mine from the dollar store because it was cute, but any mug will do.
    A ball of spare stuffing that will fill your mug. You could also use quilt batting or even other scrap fabric you have around.

    1. Place your ball of stuffing in the middle of your square of fabric.
    2. Wrap the fabric around it gathering the edges to one side – think like a  party balloon shape.
    3. Put the material in your mug with the smoothest part of the cotton stuffing ball on the top. All the corners and edges go inside the mug. My mug is clear and you can totally see the stuffed fabric on the sides. There is no science to it or wrong way to go about it. Just cram it in there.
    4. Make sure all raw edges of the fabric are inside of your mug.
    5. Boom. Grab all your favorite pins and go for it!

    Enjoy your new pincushion and change the fabric out whenever your heart desires!

    Until next time… xoxo
    Christen

    P.S. – What are some of your favorite simple DIY hacks you have made in the sewing room?

    Note: If you make your very own giant mug pin-cushion, I would love to see it! Tag me so I can see your beautiful new creation! #iseestarsquilting