Tutorials

Step by step tutorials for quilting and sewing projects from ISeeStarsQuilting.

  • Get Your Sewing Machine Ready for 2021!

    Whew! I hope you have been doing a TON of sewing these past few months! I tend to sew heavier in the later months of the year getting things ready for the holidays and finish up the projects I said I would finish by the end of the year (and find myself WAY far behind on). Anyways, your sewing machine could probably use a little extra pampering right about now, right?… Here is how to quickly get your sewing machine ready for more sewing!
    4 ways to tune up your sewing machine!

    4 things to do to get your sewing machine in tip/top shape!

    New year, new season, new projects and LOTS of creativity on the horizon? Then it is time for you to get your sewing machine ready! Let’s take just a few minutes to set yourself up for success!
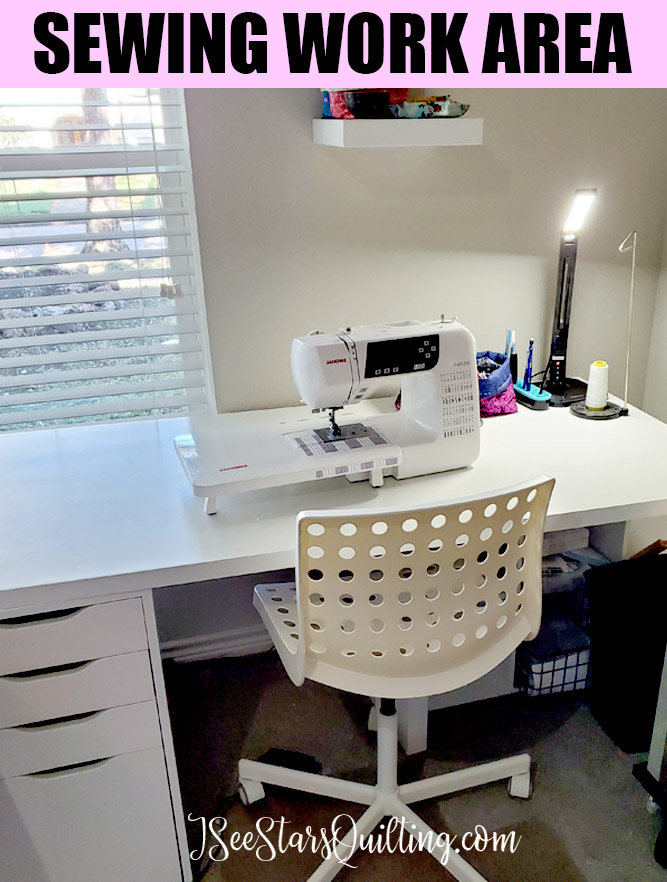
    image of my sewing work area with clean workspace.
    Tour My Sewing RoomSewing Room Renovation! – Before & After Pics

    1. Give your machine and work area a good dusting!

    I know… we work and work and work and *sometimes* it is easy to just ignore the mess that we’ve created. You can even go blind to it! – As in, you may not even see it as a mess or clutter anymore. It’s just the way it always is.

    1. Take a second to step back and look at your space. Really look at it and what you have in it.
    2. Look at the table/work surface your sewing machine is on. Is it big and open with room for you to work on your projects? or is it 90% occupied with tools, baskets, piles and work to be completed?

      Consider cleaning off your workspace and re-arranging things to give you a little more room. A change in perspective and surroundings can make way for all sorts of new inspiration to come your way!

      Take a light dusting cloth and go over your machine. I don’t use any cleaning products other than water when needed or if there are any smudges to remove.
    3. Dust and wipe your work surface clean. Pick up any little bits of thread or fabric clippings and maybe even give your room a once over with a little air freshener. It doesn’t have to be a complicated huge overhaul or spring cleaning! Just do a light cleaning to bring in some good creative energy!

    2. Open up your machine and clean the insides!

    When was the last time you cleaned out your machine?

    This can either be a really fun, or horrifying task. If you want more tips on how to clean your machine, you can check out this post: How often should you clean your sewing machine? + A How To

    I recently discovered a SUPER handy tool – that totally blew my mind. I would have never thought it would be my favorite for this task and also… it is super inexpensive! Absolute win/win!

    Check it out in the video below!


    MORE HELPFUL READS:


    *Check your manual on other cleaning tips. Each model sewing machine varies on the recommended practices. Only add oil if your manual suggests it. Do not unscrew or take off pieces that you are not familiar with.

    3. Change your needle!

    Part of getting your sewing machine ready means making sure it is in the best possible shape, right? An easy part to change out regularly is your needle!

    Changing your needle is easily overlooked, especially if you’re excited to jump right into a new project and you’re used to having your trusty machine do whatever you ask of it! However, if you are sewing with a dull needle, you are adding extra wear and tear on your machine that you may pay for down the line.

    A good general rule (which can widely vary based on who you ask and the age of your machine) is a new needle every 10-12 hours of sewing.

    Personally, I think measuring sewing time is really weird, right? Like, who does that?

    If most quilting projects average around 9-15 hours (some more, some less)… you should look to change your needle at the start of every project-ish. I’m adding that ish in there because this is just a guideline, not a hard rule. You are the only one who knows what projects you work on…

    If it has been a while since you changed your needle, just start with a new one now and try to keep up with it from now on.

    Leaving your machine to push a dull needle through multiple layers of fabric and batting over and over again is a hard job. A sharp pointy needle sews so much better!
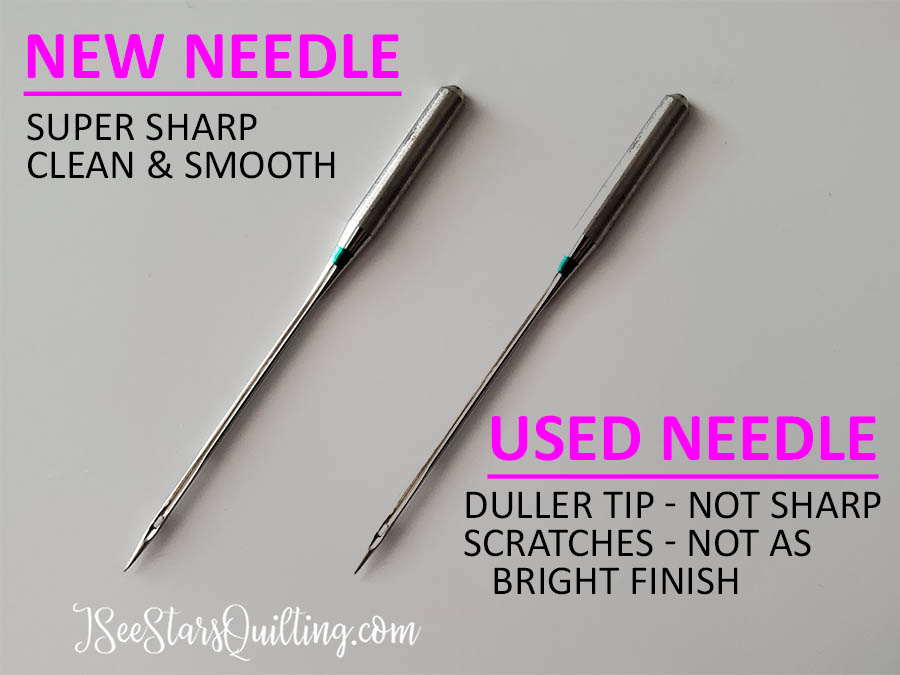
    comparison side by side of a brand new sewing machine needle and a used sewing machine needle

    Also, another note… next time you’re shopping for needles, take into consideration what kinds of projects you’re working on. Thicker and more durable fabric such as denim sews better with a more durable needle than thin cotton fabric!

    4. Consider if it is time to take your machine in to be serviced by a professional

    I know quilters who are like clockwork about taking their machines in to be serviced and cleaned up. I know quilters who’s machines haven’t seen the inside of a professional store since the day it was purchased.

    There is no judgement either way!

    I tend to fall into the category of every 2-3 years… depending on how much sewing I am doing and if I notice anything weird going on.

    I like to take mine in because I plan on using it for a very long time. Even with all the manual cleanings I do myself and trying to keep my machine in tip-top working mode… there are places that you just can’t reach within your machine without taking it all apart.
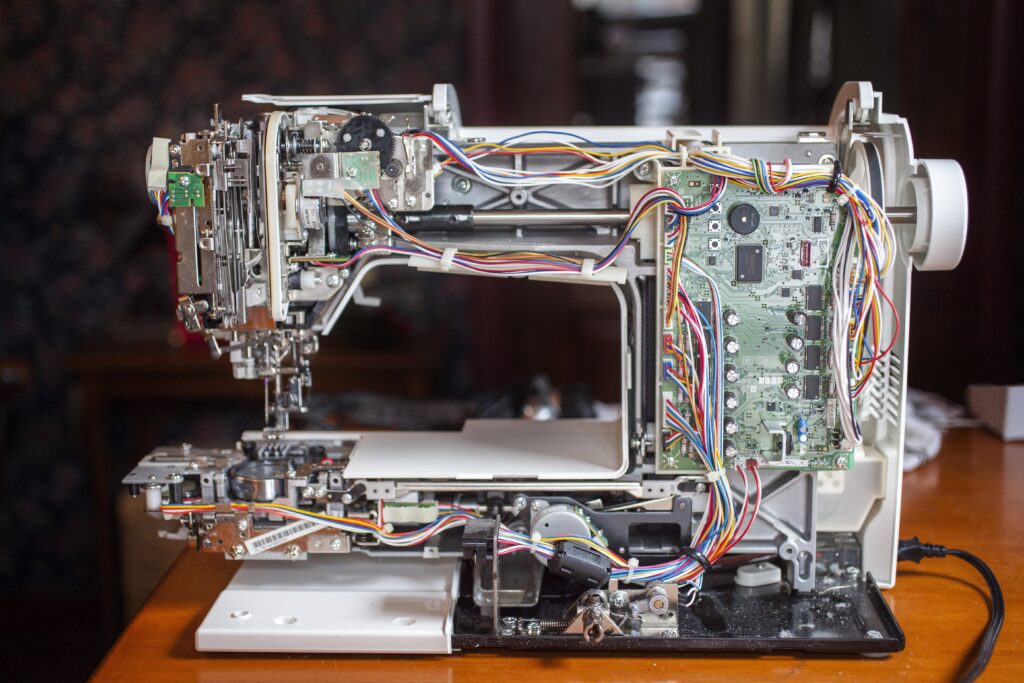
    the inside view of a sewing machine with wires and motherboard exposed.
    (😲Note: This is NOT my sewing machine!)

    I definitely DO NOT recommend taking it all apart on your own unless you know what you’re doing! Leave that to the professionals, please. The last thing you want to do is show up at the repair shop with a bag full of parts that used to be a working machine and have to pay the extra hours of service while he tries to put it back together again!

    If you’re doing regular cleanings on your own, there is no reason why your machine shouldn’t last you a really good long time… that being said, if while you’re sewing you notice the tension keeps getting off or things just aren’t working properly… there is a weird knocking noise or a squeak every now and then that won’t go away… I would recommend taking it into a repair shop, just to make sure whatever is going on doesn’t get worse.

    If you aren’t aware of a sewing machine repair shop, check around for vacuum repair shops (don’t ask me why… they’re often linked together). Or you can check with your local fabric or quilt shop to point you in the right direction.

    What you’ll need to do: Call and ask what their turnaround time is right now (i.e. how long you’ll be without your machine) and how soon you would be able to bring your machine in for a tune-up. They may ask when the last time it had a tune-up was and if anything specific is wrong with it at the moment.

    Should they find anything else wrong with your machine while it is in the shop, you can specify for the repairman to call you with estimates before the added work is completed.

    a link to a blog post on how much does it cost to get my sewing machine serviced?

    WRAP IT UP: Getting your sewing machine ready!

    1. Dust and clean off your machine and sewing area.
    2. Open it up and clean the insides.
    3. Change your needle.
    4. Consider if your machine needs to be serviced by a professional.

    I don’t know about you, but I am SUPER PUMPED up about all the fun projects I have in mind for the next year… so many wonderful things lie ahead to create!

    So get to it! Go get your sewing machine ready to create more beautiful things!

    If you need more help to plan out your next year, check out this popular resource: Framework for a Creativity Audit – How to plan for more creativity

    Creativity Audit Featured Image - to set new creative goals

    Lastly, I hope you have a wonderful start to the new year or new season… or new week (depending on when you get around to reading this!) Talk to you again soon!

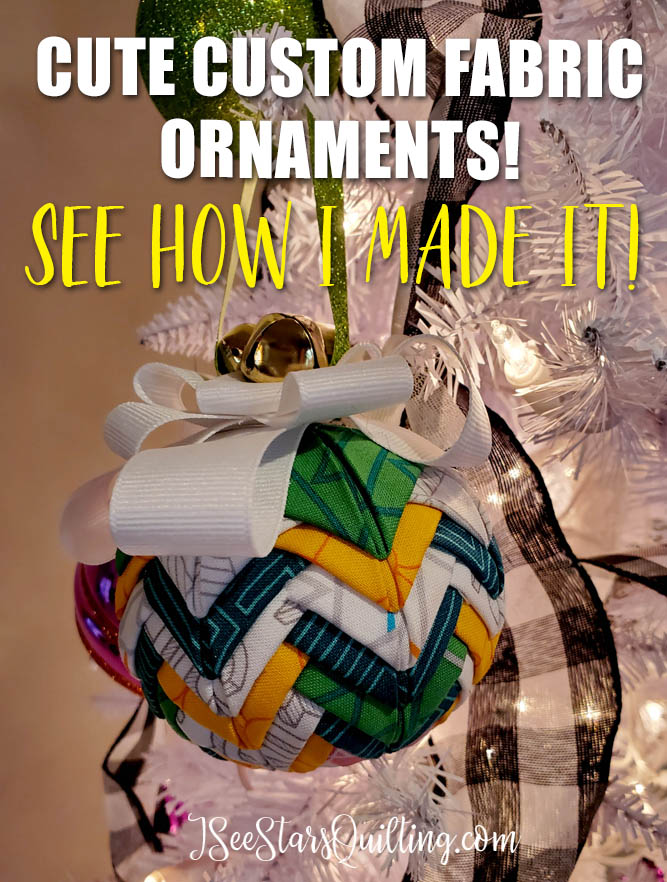
  • My Crafty Fabric Christmas Ornaments!

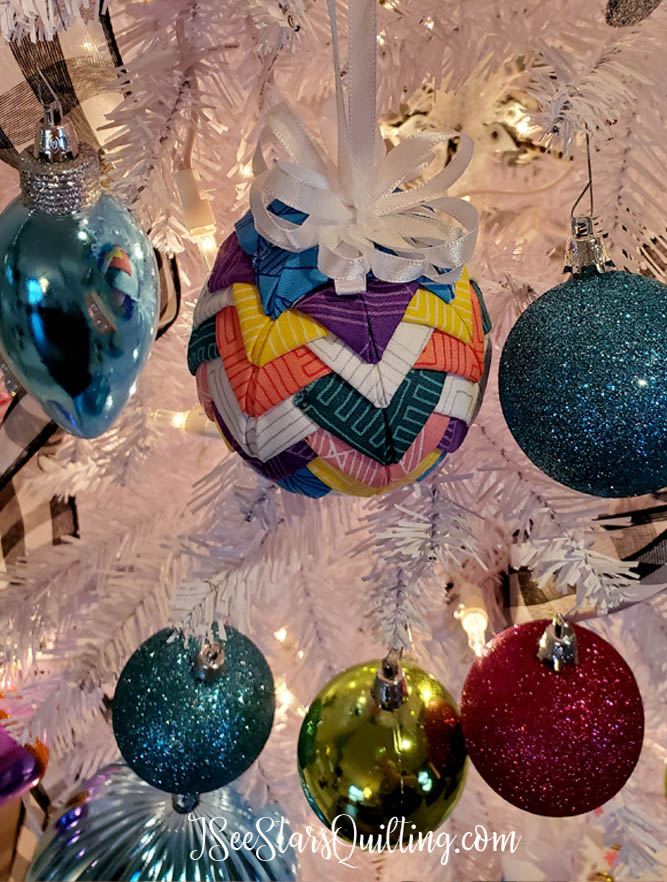
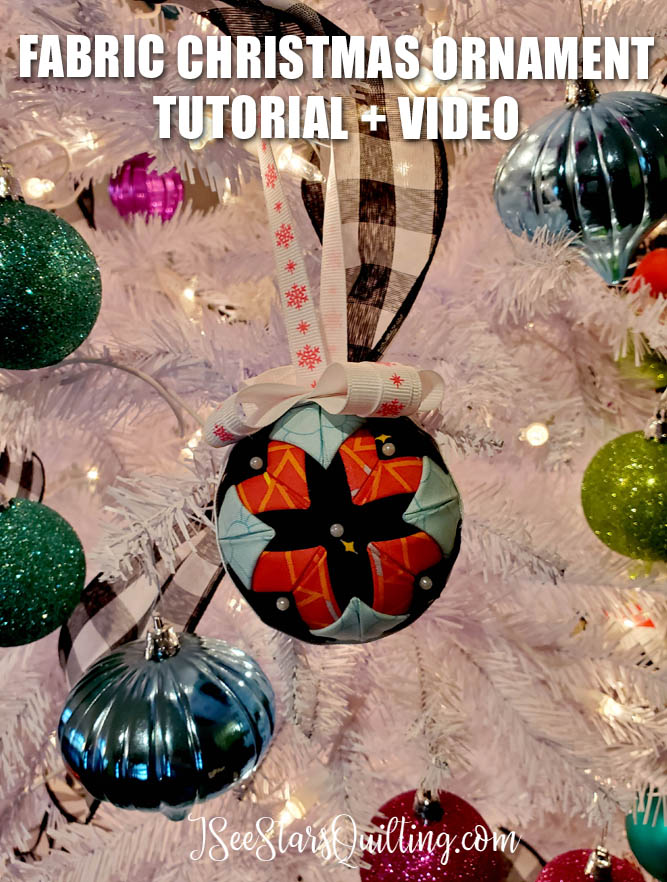
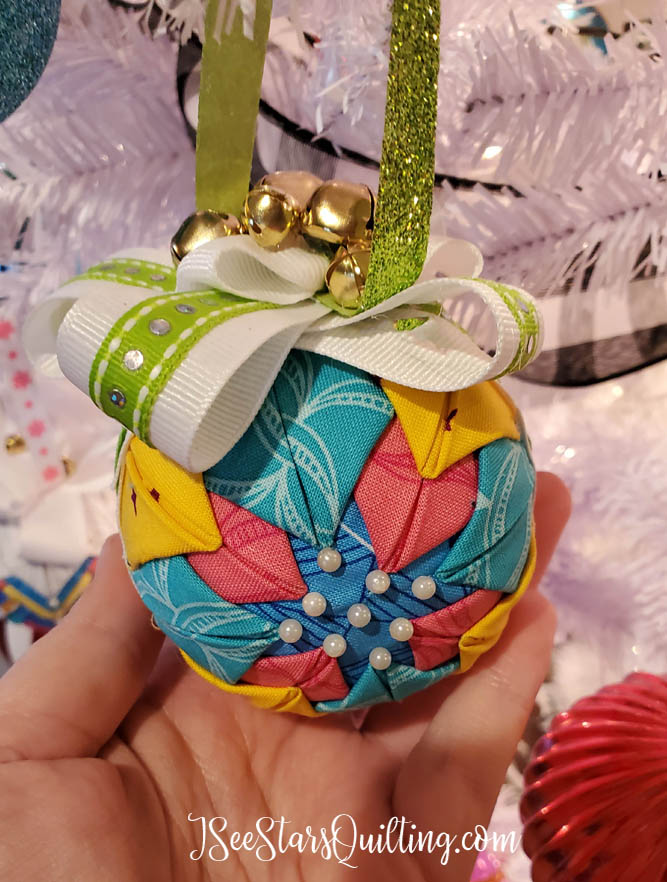
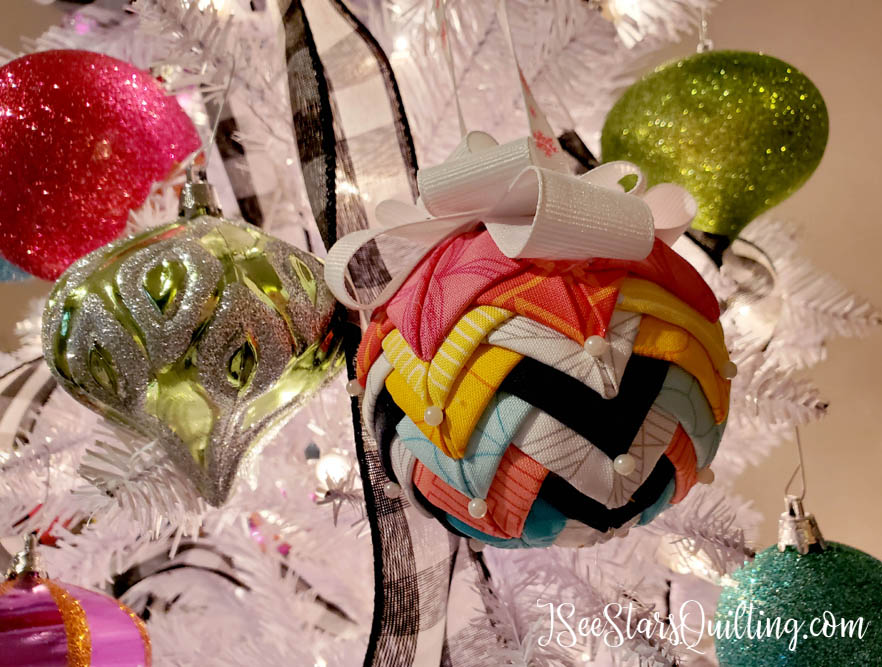
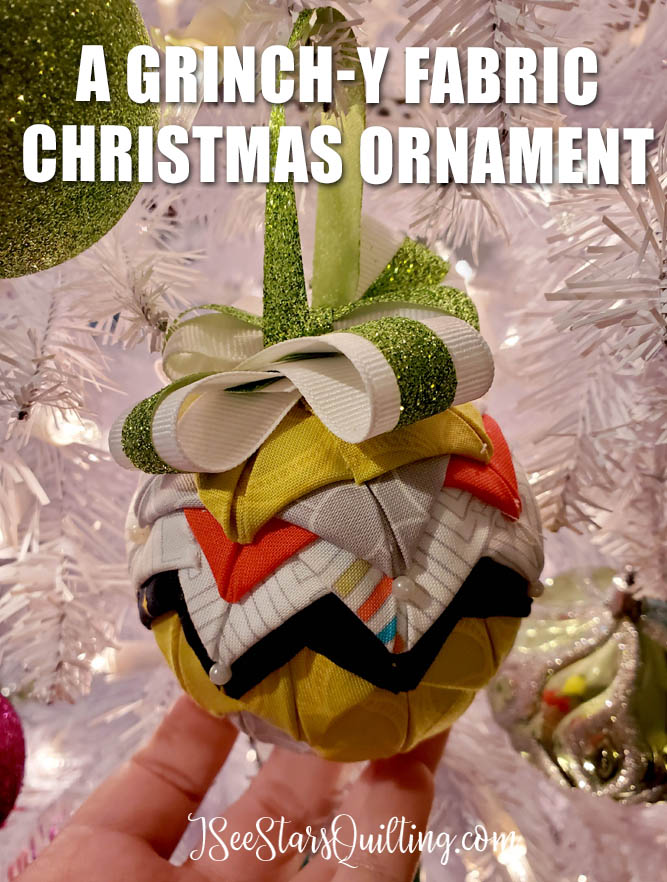
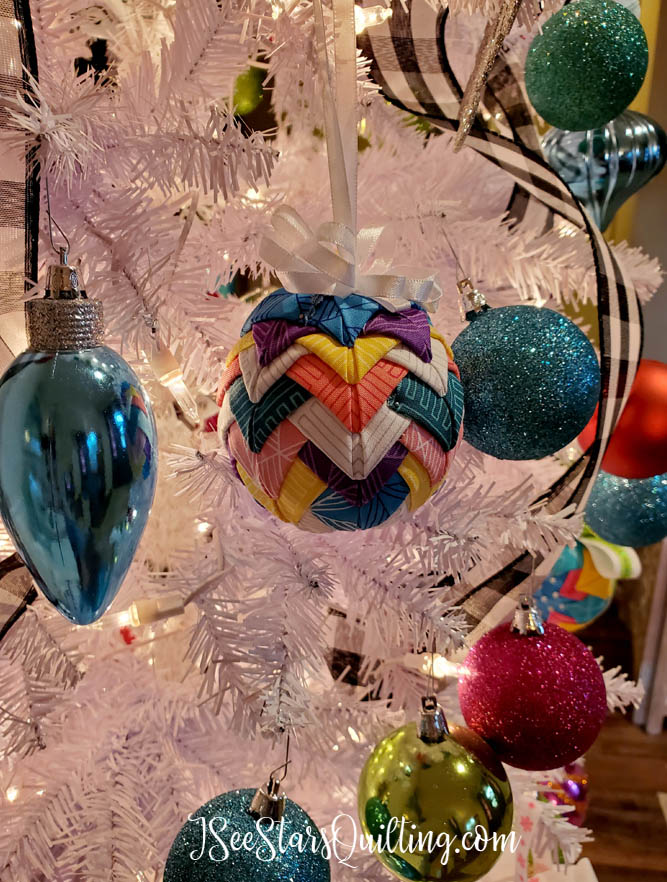
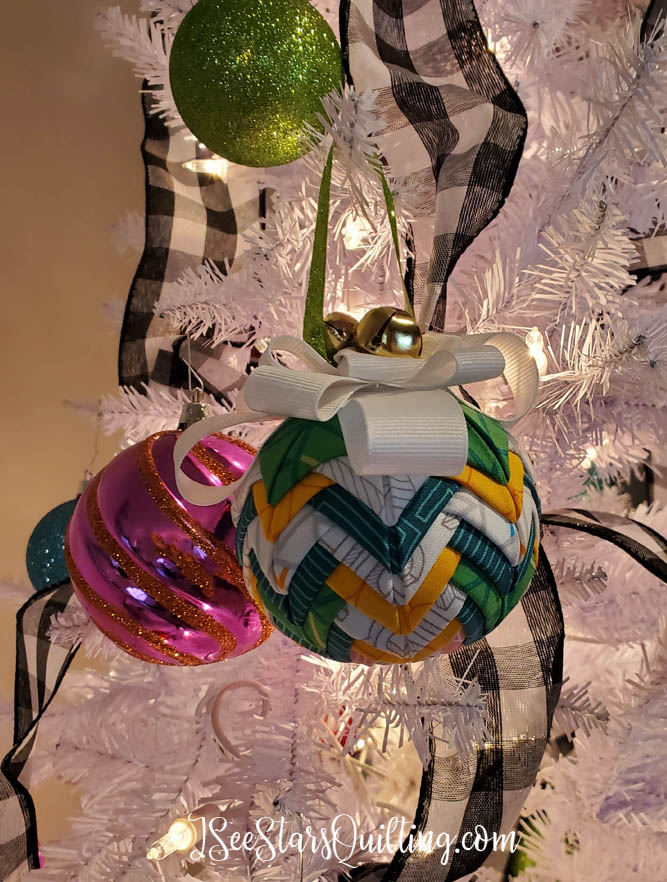
    This has been such a fun project that I’ve played with the last few weeks, I just had to share it with you! Check out these beautiful fabric Christmas ornament balls that I made!

    Let me say first of all that this was an EASY project. It looks complicated, but really… it was very simple. It takes a little patience in the beginning (doesn’t everything crafty?) but after I grasped the basics, I was experimenting with different fabric and layouts and really really enjoying myself while making fun Christmas decorations!

    Make sure you check out some other Holiday Craft Projects & Tutorials down below!

    Video Tutorial – Step by Step

    Just so you know there are tons of pictures to show you all the pretty fabric Christmas ornaments that I made, but I also made a video tutorial to show you the exact steps to make your own, check it out below.

    Also, please feel free to PIN any of the images in this post to your Pinterest profile so you can easily find the tutorial again and share it with your crafty friends.

    This would also make a really fun crafty holiday party activity (pending it not being a season in the middle of a pandemic, of course…)

    What you’ll need for your Fabric Christmas Ornaments

    The beautiful thing about this project is that you likely have MOST of what you’ll need around your house/crafting supplies right now. You may have to take a quick trip to the store… or do what I did and just add a few things to your Amazon cart and enjoy FREE 2-Day Delivery.

    Note: Styrofoam balls come in a variety of sizes… I used the 3″ size in my video and on my tree. You are welcome to experiment with other shapes and sizes, just know that it may change your fabric needs and how your finished product turns out.

    The Fabric I Used:

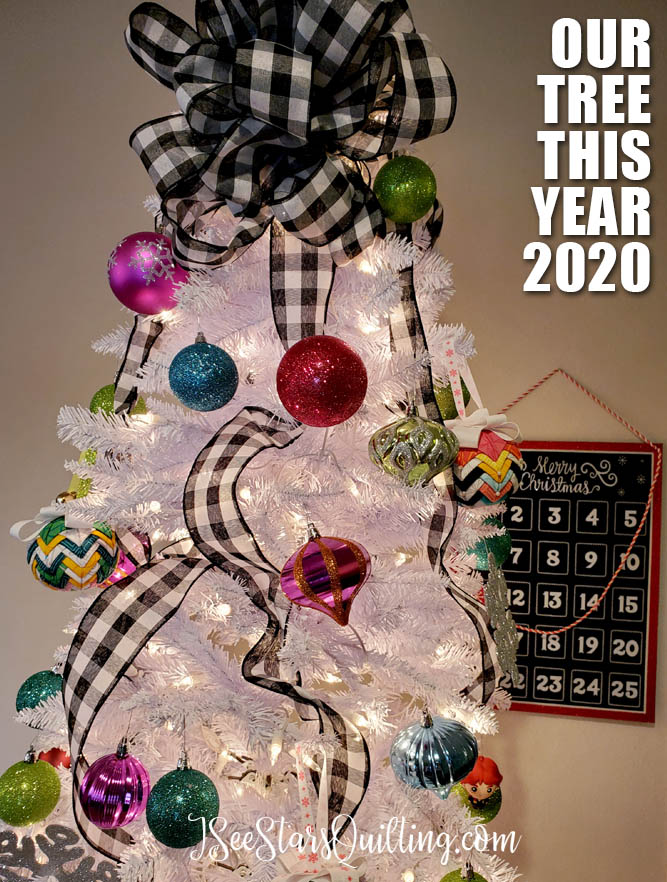
    You’ll see in the picture below that our Christmas Tree is not decorated with the classic Christmas colors… I like incorporating bright modern colors in the decor because the rest of my house is fairly neutral. So Christmas time is rather happy and festive over here! (it is also my favorite time of the year!)

    So when I decided to make some fabric Christmas ornaments for our tree… (because… I *LOVE* Fabric… and I LOVE Christmas, so… OF COURSE, I have to, right?) My mission was to find the perfect fabric to match this bright and happy theme of course.

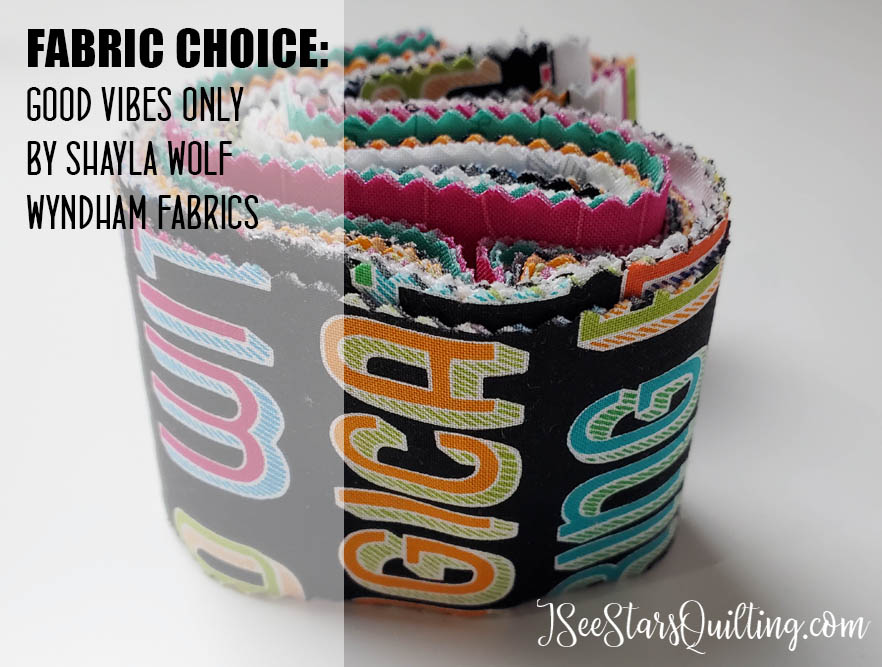
    I decided to use a jelly roll of fabric in order to get a good mix of fabrics that will all effortlessly coordinate together but still give me a variety of choices to pull from.

    The winning fabric was a fabric line from Wyndham Fabrics called “Good Vibes Only”. – Fitting, right? πŸ˜‰

    Use Scrap Fabric!

    You can also design your own Fabric Christmas Ornaments using scrap fabrics you already have on hand!

    Just make sure your cut pieces are 2.5″ x 2.5″

    If you’re on the edge about starting this project, I encourage you to try it out. Trust me, you’re going to love it.

    Watch the video above or check it out on my YouTube Channel for the step by step instructions.

    And if you needed any more reasons to get crafty, here are a few more photos of the cute ornaments on my tree!

    I chose to embellish the ornament with some decorative pearl head straight pins for a little extra fun… isn’t it cute?!?

    My favorite part about this Fabric Christmas Ornament?

    I made a little project box that I used to store all of my pieces of fabric, pins, balls… everything that I used while in the midst of this project and took it with me all over the house to work on. I even brought it over to my mom’s house when we spent the day with them. (this is not unusual for me to tote my projects with me big and small)

    This project was light, easy to transport. It was also easy to pick up and work on whenever I had a few spare minutes. No searching for where I left off or thinking long and hard about what my next steps were…

    It was simple to work on in front of the TV while my kids were watching a movie or in the evenings while I was waiting on dinner to cook.

    Just FYI, I’m not encouraging you to take this with you and ignore your family while you’re in the same room as them…. I’m just saying if you’re going to be crafty, you can be in the same room as them instead of being tied to your sewing machine or crafting equipment in another room. πŸ˜‚

    If you’re wondering how durable these Fabric Christmas Ornaments are and if they’ll stay together long term… I have zero worries about them lasting as part of our holiday dΓ©cor for years and years to come. They are pretty solid. The weight of the fabric adds a real solid mass to it as well.

    Please note that if you have little children around the house, you might want to hang them a little higher up on the tree… just to avoid any little hands disassembling your pinned fabric.

    I didn’t think ahead about the ornaments being the same shape as our puppies favorite toys in the world – tennis balls… or anything that even resembles a sphere.

    So, if you were wondering… that is why you can only see a portion of my Christmas tree in the photo above… because it does not have any ornaments on the lower section. πŸ˜‚πŸŽ„πŸ˜² It did when we first decorated, but they have slowly migrated higher and higher as the dogs test their limits and just how far they are willing to go to get the shiny temptation balls. lol

    What do you think? Is this something that you would like to try making in the future? Let me know in the comments and if you have any other questions!

    I hope you have a festive and wonderful holiday season! Happy Sewing!

    One of the quilted fabric Christmas Ornament. super cute and super easy to make

    More Holiday Craft Projects!

    You may enjoy some of these other tutorials from ISeeStarsQuilting.com

  • The Best Way to Fold and Store Your Fabrics!

    Hey howdy hey quilting friends! 😘

    I’ve got tips to share with you today (plus a video!) on the best way to fold and store your fabrics!

    Fabrics are precious little treasures… and it seems to be quite the hot opinionated topic to discuss how to store them. Everyone has an opinion or a way that they have that works for them…. or so it would seem. And then there are the rest of us who are just trying to figure out a sufficient way that makes sense (and you don’t lose anything while you’re at it).

    When I make a quilt, I always try to shop my own stash first.

    I love my fabrics so much.

    Sometimes shopping is unavoidable if you’re looking for specific amounts or you just can’t find that spark of inspiration you’re looking for… because then you get to go to the fabric store and gaze at all the new beautiful fabric lines! 🀩 … and possibly come home with a little more than was on your shopping list.

    So how do you store your fabric stash?

    First, Let’s look at yardage fabric. (see below for fat quarters and scrap fabric.)

    My yardage has always been on a bookshelf of some sort… I really love to arrange my fabric on “mini-bolts” so it looks like I’m at the fabric store. 🀩 FYI, I use these boards here, from amazon.

    I also like that when they’re stored neatly on the shelf, you can easily inventory your stash and get a good look at what you have on hand.

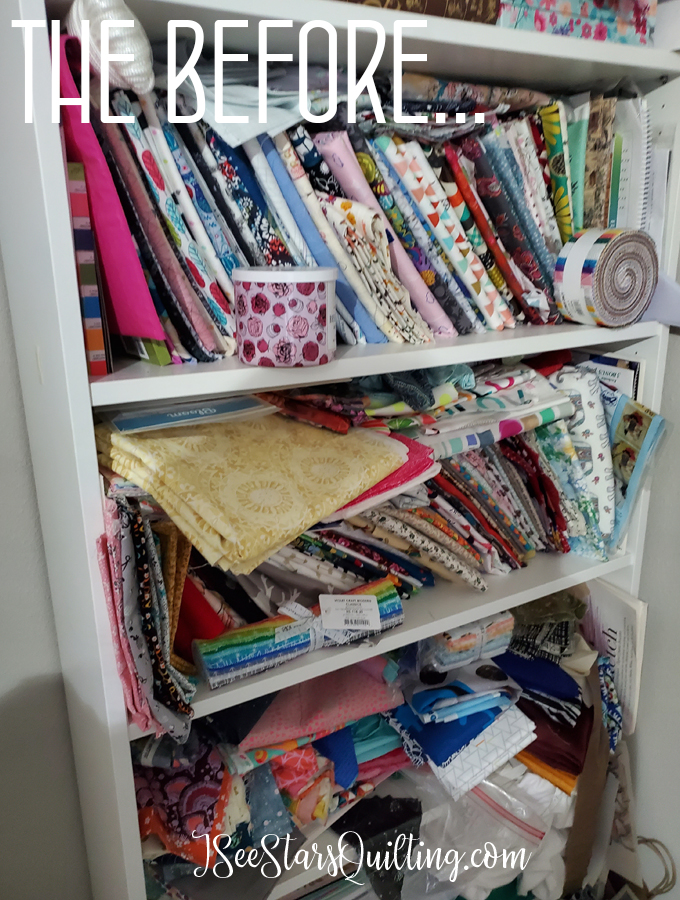
    Note: Right now, I’m in the middle of completely redoing my sewing room and storage is my main focus… because *um yikes, I can’t believe I’m going to share this with you, but here goes* this is what my fabric shelf used to look like…

    It is kind of a hot mess…

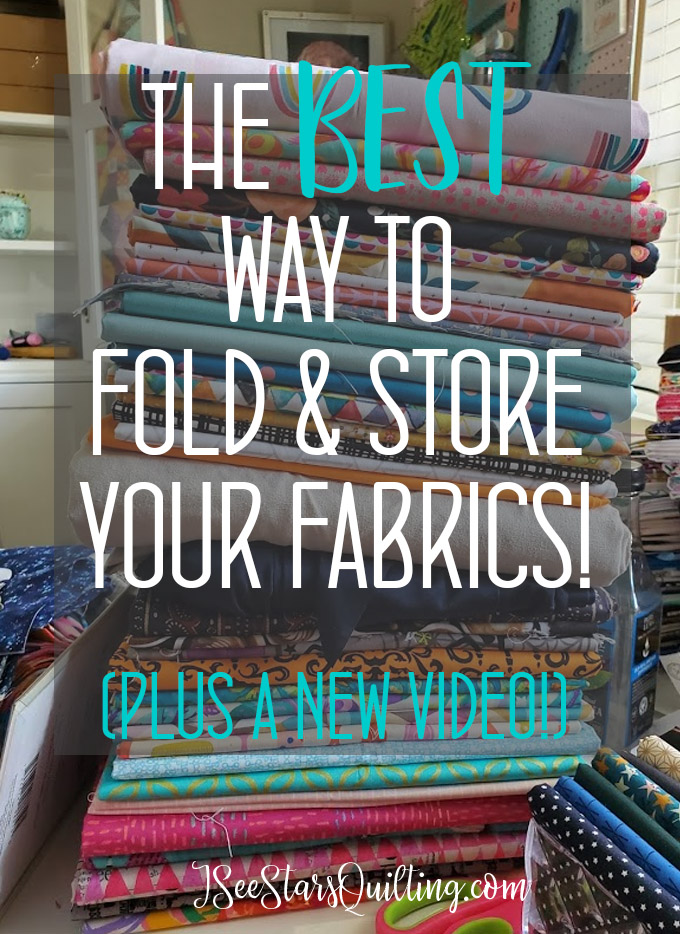
    Check out these tips and tricks that I have to share with you on the best way to fold and store your fabrics! Plus I have a new video to share!

    Please don’t judge me lol…. all I can tell you is at some point I gave up, I think? I don’t really know… it was a million tiny decisions that were nonchalantly made to “deal with it later” and then all of a sudden I had this massive tidal wave of fabric to deal with. (Truth be told, I never wanted to deal with it. It was extremely uninspiring and I avoided the stack at all costs so as not to make it come tumbling down.)

    How is that #reallifemoment for you?

    Moving on to better storage arrangement…

    I used the same method of storing my fabrics on mini “bolts” when I began to reorganize, but I really tried to focus on the “pretty” factor this time around.

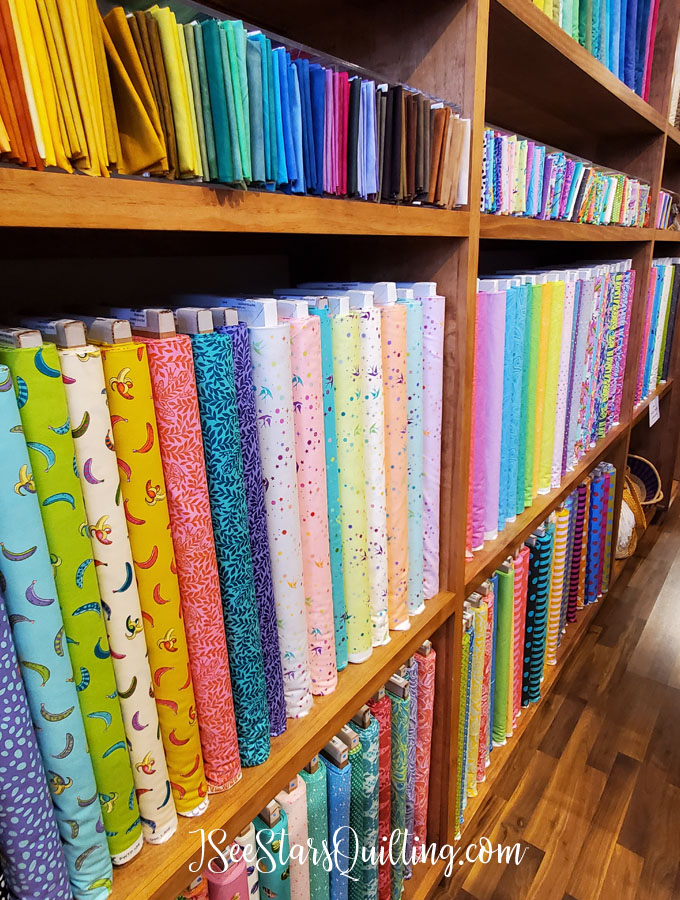
    This is how things look when you’re shopping in a quilt shop. Things are nicely and evenly arranged. all the fabrics have their place to shine… (no tumbling tower of disaster)

    Check out more pictures from my fabric shopping adventure day through small Texas towns

    I really want my sewing space to feel luxurious when I look at my fabrics… like choosing to put your cherished diamond jewelry in a fancy display box or satin lined case instead of in a ziplock baggie. The intention behind it means so much more when you take the time and effort to show more care towards it.

    Maybe I’m being a bit extra here, but this is my space, ok?

    I wanted my fabric to be an art exhibit in my sewing space. πŸ₯³

    The boards that I use to wrap my fabric on are actually these comic book boards.

    They have held up really well for me over the years. You can buy them in different quantities and use them over and over again as you move through your fabric or acquire more fabrics.

    They’re also non-acidic so you don’t have to worry about anything happening to your fabric if it is going to be a while before you get back to it.

    So yeah, I had A LOT of fabric to fold and reorganize… this is bretty much what the inbetween looked like for about 2 afternoons of getting caught up on TV episode binges and folding fabric…

    Check out these tips and tricks that I have to share with you on the best way to fold and store your fabrics! Plus I have a new video to share!
    Check out these tips and tricks that I have to share with you on the best way to fold and store your fabrics! Plus I have a new video to share!

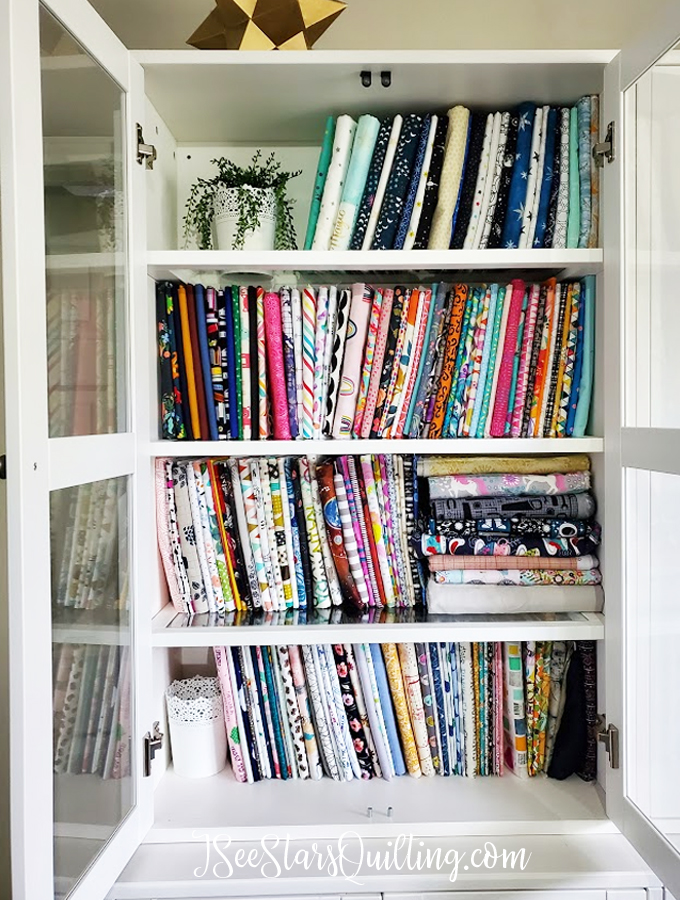
    But it was so worth it, because this is what the fabric shelf looks like now that I have it arranged much nicer.

    Check out these tips and tricks that I have to share with you on the best way to fold and store your fabrics! Plus I have a new video to share!

    Also, I haven’t decided how I want to categorize my fabrics just yet… so they’re not in any particular order at the moment. (just in case you’re looking for some sort of order or decoding system)

    THAT will be a project for another day…

    FYI, I know that I have a huge stash of fabric. I’ve been blessed to have acquired a lot of it at good deals and through sweet friends… There is no possible way that I could ever use it all so I chose to de-stash a lot of my fabric and pass it on to other people that will put it to good use. So in reorganizing my fabric, I downsized my stash and also increased my amount of storage overall so things are nicely spaced out now.

    The video: How to fold your fabrics

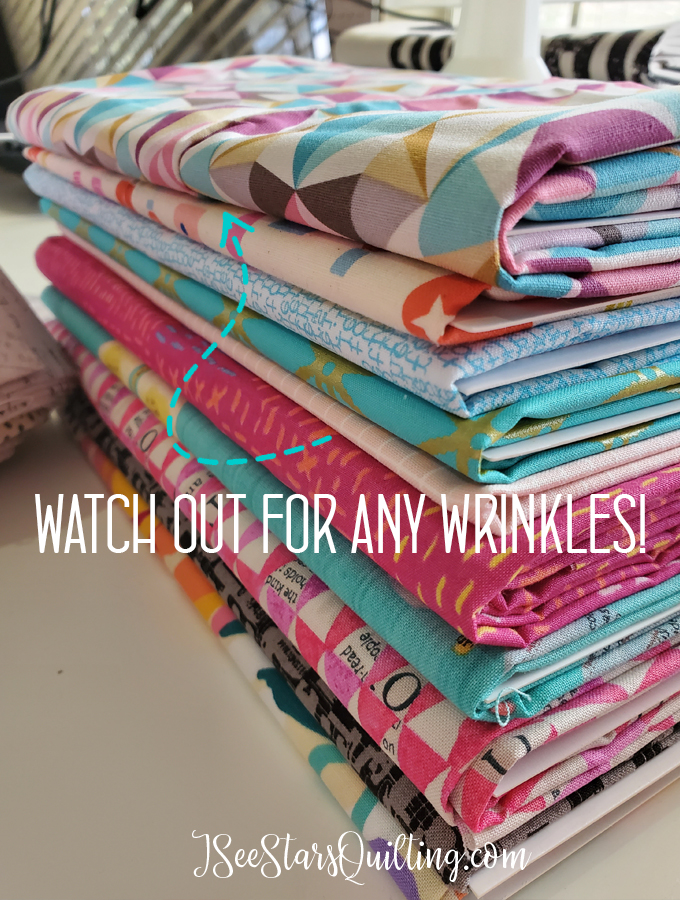
    I put together a short video that explains the best way to fold your fabrics so you can display them nicely! I’ve given step by step instructions on how I wrap my yardage fabric as well as my fat quarters.

    Um but what about scrap fabric?

    I don’t actually fold my scrap fabrics, but I do have suggestions for how you can store it and organize it! (That is a whole different level of OCD sorting, my friend!)

    I have several posts about scrap fabric storage ideas that you can check out here:

    This video has some more tips and ideas for fabric storage for you!

    I hope that was a big help and maybe a little inspiration if you’re looking for fabric storage ideas!

    I’m always on the search for more tips and tricks to share with you. I share anything I can share to make your time spent in your creative zone even better!

    Comment down below if you have any thoughts or if you have any tips to share with me πŸ™‚ Talk to you soon!
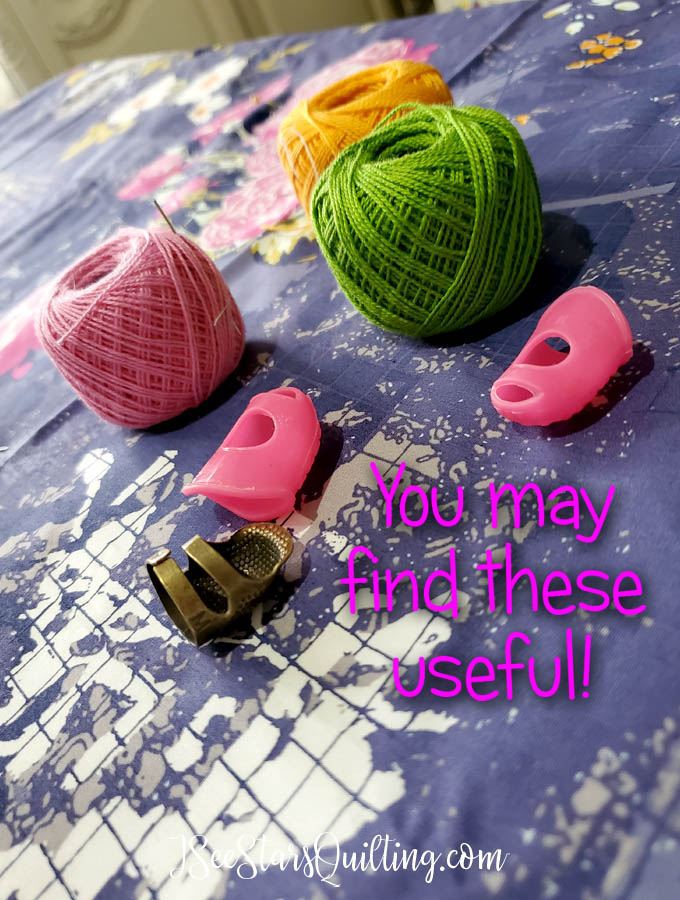
    Do me a favor and pin this image or share it with your other quilting friends? I would greatly appreciate sharing to help reach more quilters!

    Check out these tips and tricks that I have to share with you on the best way to fold and store your fabrics! Plus I have a new video to share!
  • Sewing Room Face Lift: Planning Stages

    We’ve been in our “new house” for just under a year now. So it is safe to say we’re mostly settled in and everything has found it’s place… (for now at least). We’ve completed a few projects here and there… but my sewing room has been in need of a facelift.

    When we moved in, I made things work because this is my sanity safe haven. I needed to set up shop fast and make it work.

    I love this room and everything in it.

    Here is something to know about me… I move around furniture… a lot. I think there is a perfect arrangement that makes the sunbeams shine down and everything aligns for perfect productivity… It can be a challenge sometimes, but when you find that perfect melding of function and beauty *cue angels singing* you’ll forever be chasing it in the other rooms of your home as well.

    I thrive on order and a clean workspace to think.

    I’ve been relatively happy with making things work for a while… but in the back of my mind has always been the adjustments I wanted to make…

    Current Sewing Room Tours:

    You can see my other sewing room tours in the links below.

    The next post has pictures from the sewing room in my old house, but I go a lot more into how I organized my tools and my methods for organizing. Though slightly outdated for what I sew with now, it is still a good read and full of information!
    Creativity is best in a room filled with the things that bring you joy! I'm going to give you a tour of my sewing room today and share all my organization tips along the way!
    Back to current planning stages… Recently, I’ve decided to give my sewing space/home office a bigger facelift.

    In the past, I do all this work behind the scenes in the late-night hours and then I choose to write a reveal post about it when it is all complete and lovely. 😍

    I do still like to show you all the ugly behind the scenes photos because… I’m not HGTV and this can get ugly, right?

    But this time... I decided to go a little bigger… Ok, so a lot bigger and more complicated than just a simple room rearranging.

    I decided to take you along for the ride with me and document the process in a series of posts. You’ll get to see the whole process… the conception, ideas, nitty gritty ugly bits and hopefully sooner rather than later, the finished product!

    You can also check out some current pictures on my Instagram page!

    The Starting Place

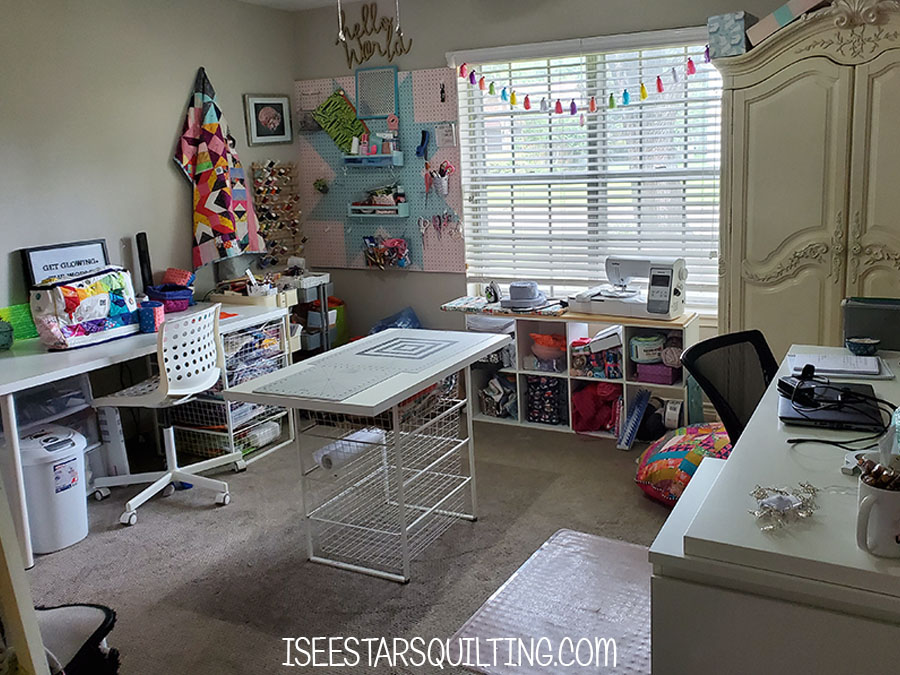
    Here is what I’m working with right now. A little messy? Yes!… Functional and a joy to sew in? Absolutely. I’m very blessed to have this space in our home to create. (You’ll notice that it is different from my “official” tour post because well… things change a lot around here lol)

    The Purpose Of The Room

    First off, when you want to make a change, you can’t just jump on the internet and start ordering new things. You really need to hone in on what the purpose of the space is.

    For me, this space is…

    • A sewing/quilting and craft space
    • also embroidery things
    • A home office where I run my business
    • A safe haven and should feel peaceful for me to be in
    • It also has the only access door to the half bath that guests use
    • A pretty space that I can be me in

    Let’s dissect the problem areas that I have with my current room.

    Some of these are nit picky remarks, but thats the beauty of creating a new space… you get to be picky!

    I like to make a list of everything. I call it my “If I had a million dollars” list. If money was no object and I could have everything I wanted, here are the things I wish I could fix…

    • I have a lot of hobbies that happen in this room… I want to maximize my space.
    • I lack hidden storage areas – most everything I have is easily seen when you walk in the room. It feels cluttered and even when the room is clean, it looks like a creative explosion went off in here.
    • The closet in the room is nearly unusable. I have no idea what they were thinking when they built it. The measurements are 22″x76″ with only one normal-sized door on one end. access is really awkward
    • When a guest comes over, they have to walk through my mess to use the bathroom. I need to be able to maintain a clear pathway from door to door.
    • I could use more desk/workspace.
    • I don’t have an ironing station/area.
    • I need a place to store my photography equipment/lighting.
    • My fabric storage is maxed out and I need to clean out the fabric I have that I will not be using – Maybe I should plan a future de-stash sale?

    You can see that there is an overall pattern of my storage solutions that could use some work.

    An important note about the “if I had a million dollars” list:

    Just because it is on the list, doesn’t mean that I am going to get everything I want. So, while it is something that I would fix “if I had a million dollars” it doesn’t mean that I get to go broke making it happen.

    With a little planning, thought and ingenuity… you usually can make things work with a much much MUCH smaller budget!

    Planning Some Solutions/Ideas

    My favorite planning tool to get inspiration from is Pinterest. Obviously… they’ve revolutionized internet searches and being a visual person… it is my first go-to for ideas.

    PS – You can follow my Pinterest boards here!

    I created a vision board with some of my ideas to give myself a little further inspiration. It helps pull together a lot of ideas and really help to clarify the vision for the final product.

    The planning stage for me is always the longest because I resist just jumping in and spending the money on something that I don’t feel like I’ve completely thought through just yet.

    It can be a good thing, but also… I really have a hard time pulling the final trigger… which brings me to my next little bit of advice…

    Involve a friend – It’s more fun with two!

    If you have the opportunity, involve a friend who understands what you do in your crafting space!

    They can not only help you come up with a plan and inspire you… but can help you make sure you don’t chicken out before the dream becomes a reality!

    A friend created a group board on Pinterest for her and I to contribute ideas to and she came up with so many solutions that I wouldn’t have even considered… she is a sewist as well… so she understands we need storage, and lots of it!

    She also gave me great advice when I was thinking that I was in over my head.

    Don’t limit yourself based on what you think you can’t do. Design your dream space and then make it work within your budget.

    My parents gave me some great ideas, because they are really good long term thinkers. My mom is amazing at making things look like a model home. (Seriously, Better Homes & Gardens has nothing on her) And my dad is amazing at home remodeling projects.

    Making a Plan

    Excuse the length of this post… This is like a months worth of thinking, formulating and planning all rolled into one post…

    I have a really good idea of what I want everything to look like, how I want things arranged.

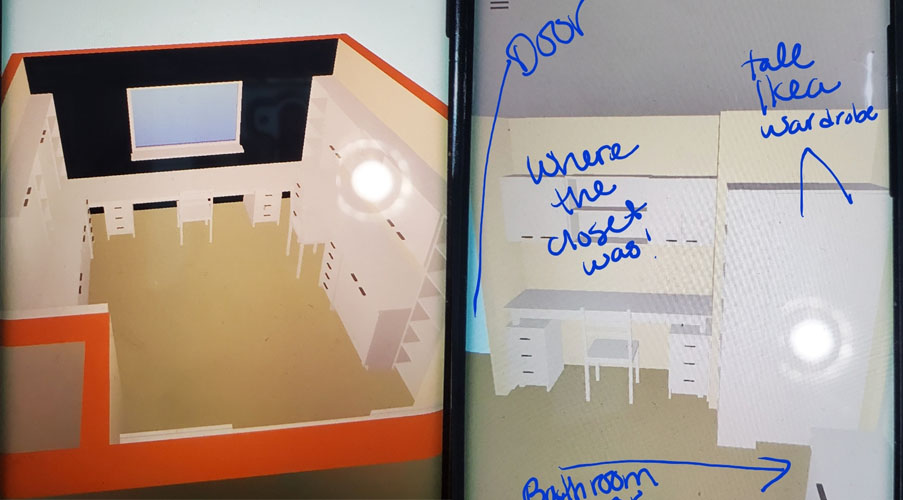
    I found an app on my phone called “Floor Plan Creator”. It is a free app, but you have to buy it if you want to export or send any of your creations. The free version worked really well for what I wanted to do.

    You can add in all your measurements/dimensions and it makes a 3D model of your room. You can add all the doors, windows and architectural features you need, plus it has a lot of stock furniture that you can change the dimensions on as well.

    Here is a very rough layout of what I want to work towards…

    Again, please excuse my messiness… this was texting pictures back and forth to my mom and I hadn’t decided at that point to share them with you just yet!

    Also, almost everything I currently own is from IKEA… so… obviously, we will be taking several trips there to add more of the same style to the room! woohoo!

    Shopping Trips

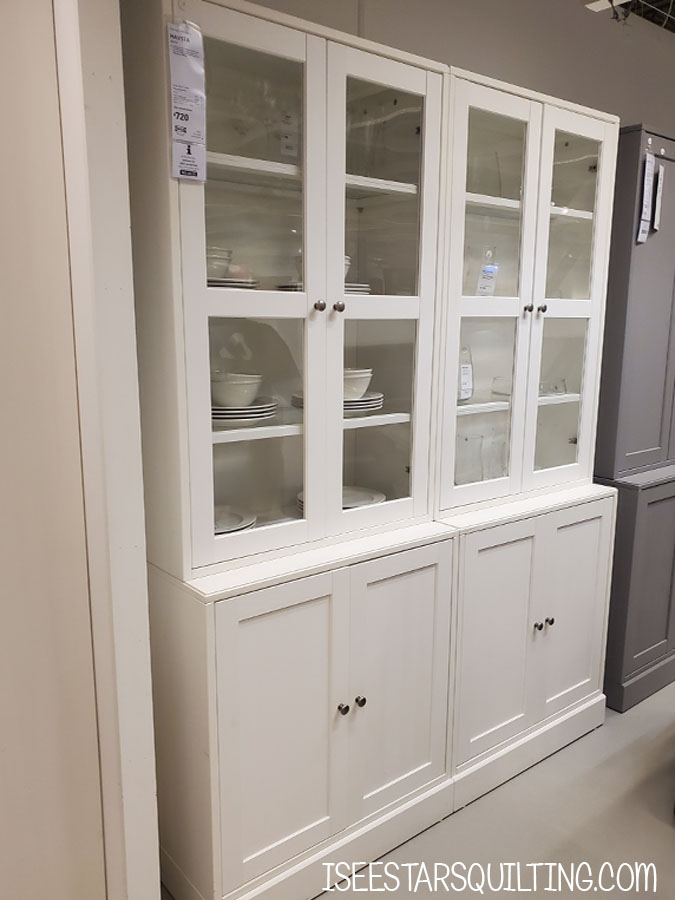
    I saw the Havsta line while shopping at Ikea and fell in love with the glass doors. It is also a solid wood line so the quality of the overall piece is higher than the standard budget pieces.

    Can’t you just see it full of beautiful fabrics? 😍πŸ₯°πŸ€©

    Unfortunately, IKEA stock is really varied right now with the pandemic (like everyone decided to re-do their home office, but didn’t want to spend the big bucks?) so I will be closely stalking monitoring their stock to see when I can pick up my other items as they become available.

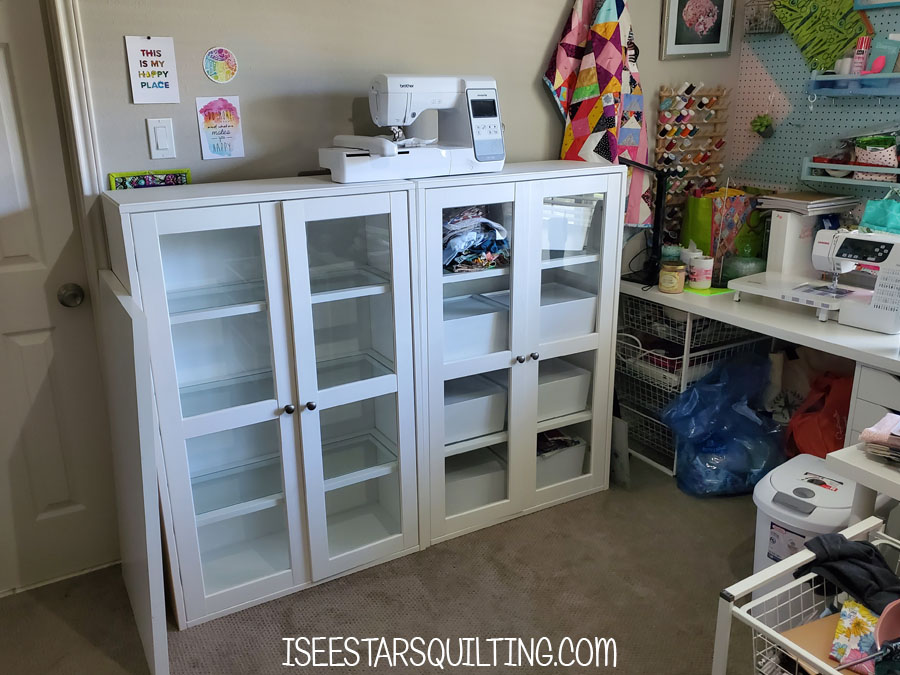
    I was able to get the glass cabinets, and have already built them, but I will have to wait on the lower cabinets a little longer… This is what I have so far…

    Can you see my vision? lol no? well… it is a work in progress…

    That is where I will leave you today because I really don’t have much else to show but a very messy space… I’ll keep you updated as it unfolds though!

    I think I am most looking forward to going all #demoday on my closet wall. I’ve always wanted to knock down a wall like some powerful goddess of destruction.

    I have no idea if that is how it will be in real life, but I’ll be able to check that off my bucket list at least! 🀣

    …more to come!

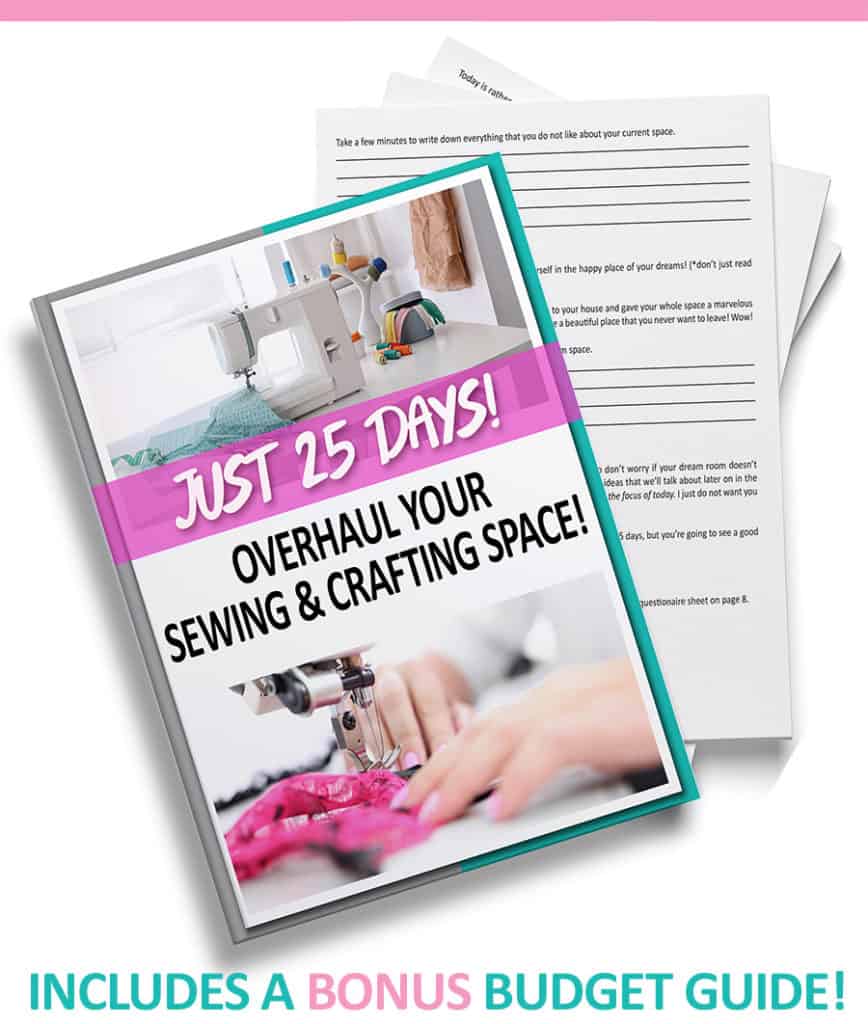
    If you’re interested in the step by step methods I use to determine what my needs are, you can check out my very popular ebook that tells everything!

    I walk you through the planning stages and show you how you can transform ANY space into the space of your dreams, PLUS I share a bonus budget guide with you!

    Check out out here!

  • How To Maintain Your Creative Focus

    Raise your hand if you are a victim of Shiny Object Syndrome?…. ? I have some tips that just might make your life a little easier if you are looking to maintain your creative focus!

    Let’s talk about it a little bit more… Do you find it easy to pick one project and see it through all the way to completion or do you have at least seven projects going on in varying stages of completion right now?

    via GIPHY

    If you have Shiny Object Syndrome – you have trouble maintaining your creative focus… you may feel easily bored with large projects (even though they started out with good intentions!).

    You might bounce around between multiple creative outlets or projects or claim to have multiple hobbies or an indecisive soul where you dabble in a little bit of everything.

    As an avid quilter, you might find a new pattern that makes you get excited and dream a little bit with heart eyes! So, naturally, you buy it and immediately dive into it when you get home… even though you have multiple projects at home that aren’t quite finished yet still sitting on your work table – OR – You add it to your file drawer of other patterns that are on your “someday” list.

    Do you have Shiny Object Syndrome?

    If it does sound like you, it is totally ok!

    As crafters, we all have a little Shiny Object Syndrome in us… we can’t help it!

    via GIPHY

    In my case, I blame glitter as my main weakness. Literally “Shiny objects”.

    …Oh, also anything with bright happy colors.

    And pretty flowers, I like those too…

    Wait… what were we talking about? Oh yeah, getting easily distracted and having too many projects going on to be able to maintain creative focus. Riiiiiight.

    I have some advice for you today on how to Maintain Your Creative Focus!

    Just so you know… this isn’t a “do it once, fix it forever” solution.

    As an artist, and avid crafty girl at heart, I still struggle with this every single day.

    BUT, I think that knowing your weaknesses and accepting them as a part of who you are can really go a long way in changing your habits and making sure that you adjust your daily life to help you reach your goals.

    Hey! pin this image so you’ll be able to find this list when you need it!

    Tips that help me:

    1. Maintain a relatively clean environment around you

    It doesn’t have to pass a white glove test!

    Just think about all the times you’ve gone looking for your scissors and came across a magazine you’ve been wanting to read. Then, you pulled out a recipe from the magazine and made a note to call a friend about dinner next week. You look around some more and try to fold a few pieces of stray fabric from your last shopping trip.

    Before you know it, 10 minutes have gone by, you may or may not have located your scissors, but you certainly let 10 minutes go by without productivity on your current project.

    Assume that you had your sewing tools organized and you knew right where your scissors were located, you wouldn’t have had the opportunity to get distracted by the magazine and all the other wonderful things that you found along the way. You would just go get your scissors and get to work.

    Time is a precious thing for us busy girls, right? Don’t set yourself up to waste a single second of it!

    If you need a little help in that area, I created a workbook that will get your sewing/crafting space in tip-top shape! Through the course of Just25 Days, you determine and actually create the space of your dreams that WILL WORK FOR YOU! It is one of my most popular downloads. (PS – THIS link will get you a special 20% off deal!)

    I also have several posts where I talk about organization and how to make the time spent in your sewing room more efficient.

    2) Decide what is important to you and prioritize it

    If you have five projects that have been hanging over your head, put them in order of importance, and challenge yourself to work on them in that order.

    Whatever you deem as “importance”. It could be:

    • Needs the least amount of work to be finished
    • The due date is the soonest
    • The project I feel like working on the most?

    I have done this multiple times in my Sewing challenges! It helps you work on your focus by keeping your attention on ONLY these projects until they are finished. (and you usually can reward yourself with something fun after… because it is more fun that way!)

    It is a fantastic way to get things checked off of your to-do list and maintain your creative focus for a determined amount of time.

    Check out more about my past challenges in these posts below:

    3) PLAN for Creativity

    I actually schedule my creativity time throughout the week – Just like I would a doctor’s appointment or a visit with a friend.

    Some weeks there is less time to sew than other weeks (and that’s ok!).

    I find that if I am intentional with my time, it makes it harder for me to justify wasting any of it.

    Going through a rough day knowing that I have a scheduled date with my sewing machine the following afternoon makes things much easier and I know that I’ve made my sanity a priority.

    4) What Brings The Most Joy?

    Why did you decide to be a quilter?

    Why do you work on crafty projects and bother with complicated projects that take both our time and our money?

    For me, it is because in my very soul I believe I am an artist and I was put on this earth to create beautiful things. I enjoy it. It brings me great joy when I get to work with my hands.

    When you’ve got a project that brings you joy, you’re naturally going to want to spend your time working on it. Keep your passion projects to only a few at a time and don’t allow for any more before you’ve completed them or you’ll feel overwhelmed and more likely to stray into other shiny projects.

    Feeling like you have Shiny Object Syndrome? Check out these 5 tips to Maintain your Creative focus and be your MOST productive self!

    5) Get Real Honest

    *Note*: I saved this one for last because it is the most important one on the list, but it is also my least favorite tip. Sorry…

    The easiest way to maintain your creative focus on the projects that you are currently working on is to put your head down and quit adding more things to your to-do list!

    Hide the pen, put away your credit card, save it to a Pinterest board, and don’t give it another thought!

    Let’s use this example: If you’re going to plan a small get together and have room for 4 couples at your dinner table… Are you going to invite 400 guests?!?

    Obviously not! That would be ridiculous and a disaster.

    When it comes to choosing the projects that you work on, be extra choosy with what you work on. Only take on what you can fit on your schedule right now…

    Learn how to say no. I know, Easier said than done sometimes, but start working on it. It is an important skill to have.

    You’re allowed to have multiple projects going on at the same time (if you can handle it) but there is no need overwhelm yourself so much that what you once enjoyed is now a major stressor in your life!

    I hope you found these tips helpful! Let me know down in the comments below if you have any other suggestions on how to keep your creative focus!

  • How To Tie A Quilt

    There are several ways to finish off a quilt. Today we’re going to talk about one of the simplest ways! – I’m going to show you step by step pictures on how to tie a quilt.

    Your quilt usually consists of 3 layers: The backing, the batting or middle layer and the quilt top.

    It is important to connect those layers together so they don’t shift and come apart and receive more wear and tear when washed etc.

    When you hand tie a quilt, usually you will use a tough heavy yarn or thread that will go through all of the quilt’s layers and then tie a knot to secure the layers permanently.

    The knots that you hand tie are placed at regular intervals all over the quilt.

    Why hand tie a quilt?

    Hand tying a quilt is a really easy way to secure the layers of your quilt together that doesn’t involve fancy stitching or using your sewing machine. It is also a good solution for very thick or puffy quilts that have a harder time going through the throat of some machines.

    The process of hand-tying a quilt also has a bit of a nostalgic feel to it for me. It is very similar to hand quilting in the fact that I get to spend time snuggled up under the quilt that I am making and really have the opportunity to look at it and study it as I work on it.

    See the step by step directions below and continue reading for more answers to your questions about hand-tying a quilt.

    Step by Step Directions: How to tie a quilt

    Chances are likely that you already have everything on hand to tie a quilt right now!

    You’ll need the following common sewing items:

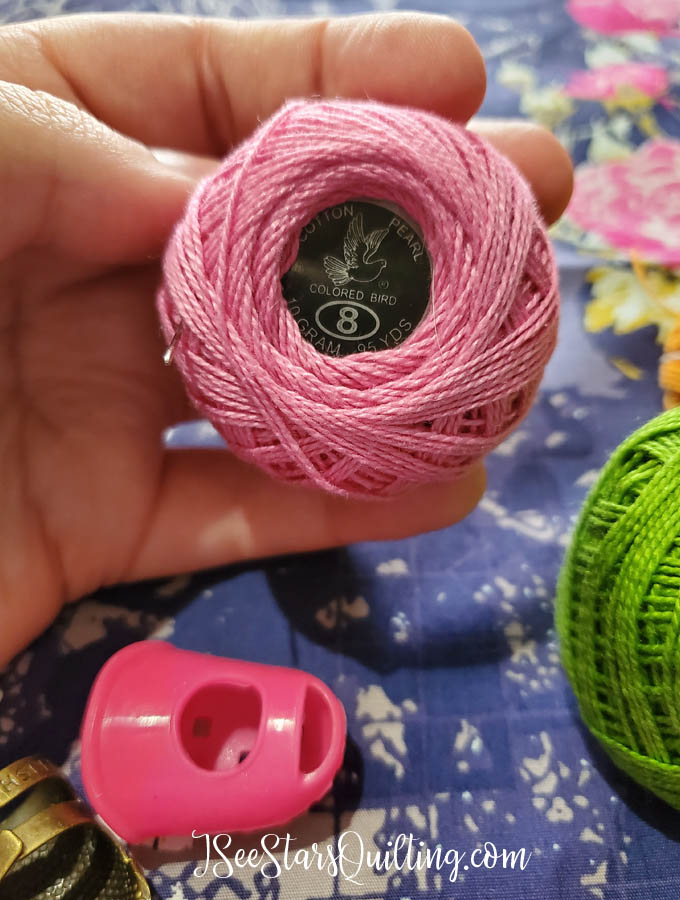
    • A heavier thread than you would normally machine quilt with – such as perle cotton, embroidery floss, or crochet cotton.
    • Sewing needle with a large eye to fit thicker threads.
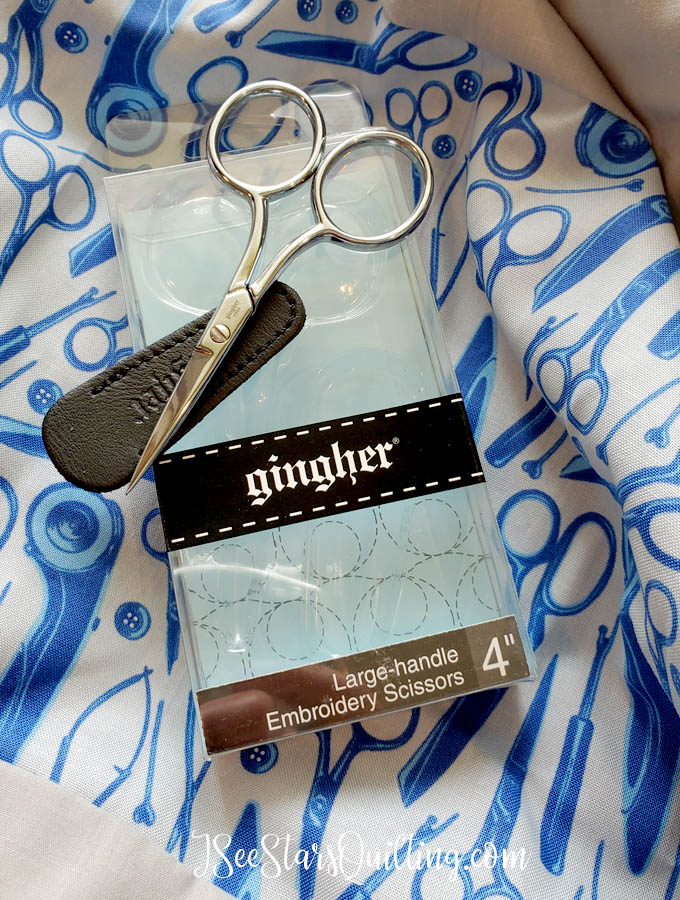
    • Scissors – I just got these and I LOVE THEM!
    • Washable marker to mark where your knots will be
    • OPTIONAL: buttons or charms to embellish if you desire.
    • OPTIONAL: Thimble or finger guards if you prefer to sew with them

    Thats it!… Really, I promise! You won’t need anything else but you and your quilt and… well… maybe a really good movie or TV show to binge watch for a few hours!

    I prefer the perle cotton threads for hand quilting and many of the little hand projects I work on in my sewing room. They’re a really great quality, come in a huge variety of colors.

    Can you see the thickness in the thread? It has a a beautiful chunky weight to it that keeps to itself and doesn’t get all hairy like a yarn would. I like that it keeps its shape nicely.

    I also recently ordered these scissors from Amazon to use with my embroidery machine because I need the super precise pointed end to get in the tiny areas… And I might need to order a second pair now because I’ve been using these them all over my sewing room. They are so sharp and I love them πŸ™‚

    … You know… just in case you need some good scissors too!

    FYI the quilt that is shown in all of the photos is a quilting project I just finished. I’ve named it my “Social Distancing Quilt” haha You can see more photos of it here in this post if you like!

    OK are you ready for the step by step instructions?

    Step 1: Prepare you quilt layers

    It is always important to make sure your layers are evenly laid out and you don’t have extra fabric bunching up.

    This process is the exact same thing that you would do for any other quilting process.

    Lay out the backing of your quilt on a smooth surface nice and flat. 
    
    Then, layer the quilt batting or middle layer on top of it making sure you aren't creating any wrinkles. Again, make it nice, smooth and flat.
    
    Add your quilt top layer and make it smooth again with no big wrinkles or folds.

    You’ll want to secure the layers temporarily before you start tying.

    You can do this with safety pins or regular sewing pins.

    Step 2: Decide where you are going to put your knots

    Decide where you would like your knots to be and if you want the ties to be on the front or on the back of your quilt.

    Use your fabric marker or washout marker to mark on your quilt where the knots will go so you will have a guide.

    This is an essential step because if you think you can eyeball it wheile you’ve got the quilt all spread out on your lap while you’re watching TV later, you are wrong! Son’t skip this step!

    Step 3: Thread your needle

    Thread your needle with the yarn or thread you have chosen.

    I find it easier to work with smaller sections of thread. There is less chance of it getting tangled while it is under the quilt and you really only need a few inches for the whole tie.

    I usually will pre-cut a lot of several pieces before I begin tying that are about 10 inches each. Yes, it is more than you will need, but I find that it is a comfortable length. Not too short, not too long either.

    Step 4: Begin tying your quilt!

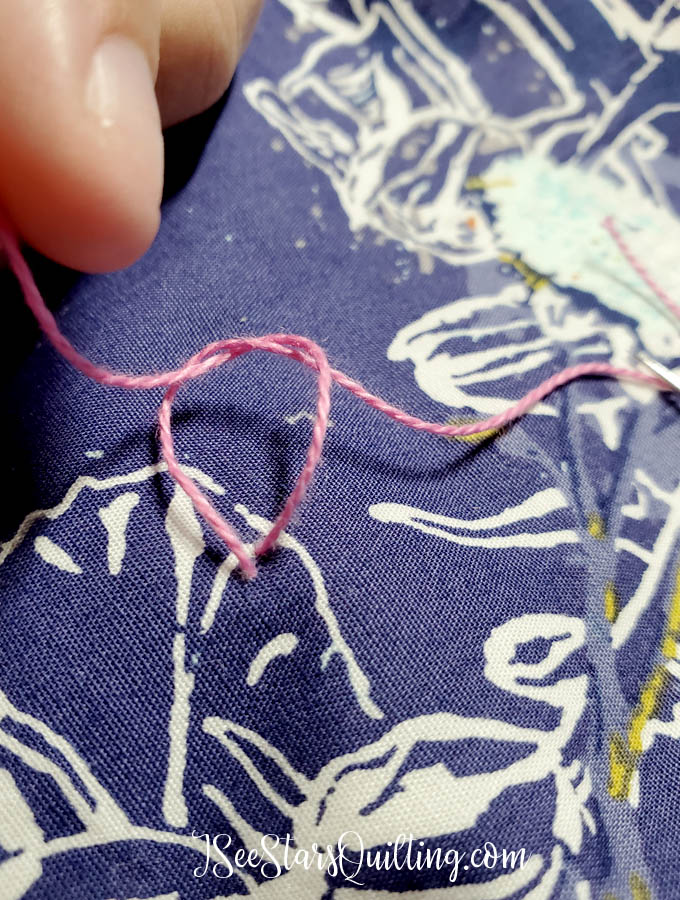
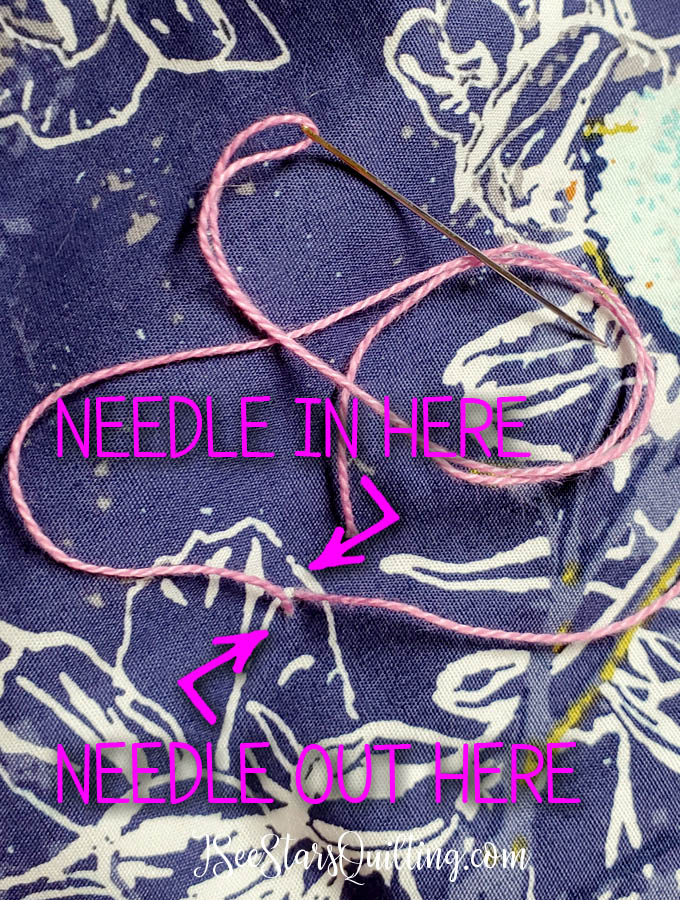
    Starting from the center of your quilt and working out, insert your needle through all 3 layers of your quilt and pull it back up as close as possible to your original hole.

    Try to make the distance between the two insertion points no more than 1/4″.

    NOTE: This is also the point where if you wanted to add a button or charm to your quilt, you would do so. add the embellishment on the side opposite where you will tie your final knot.

    Leave about 3-4″ of thread still hanging out of the first hole you made. It will be part of the tails we’ll be tying in the next step.

    Step 5: Tie the knot

    You’ll want to tie the two ends of your thread together using a surgeons knot.

    A regular knot like you would tie in a shoe lace is acceptable, but a lot of quilters prefer the surgeon’s knot because of the durability over time.

    It is a very simple knot that you can see in the video below.

    Step 6: The Finishing Touches

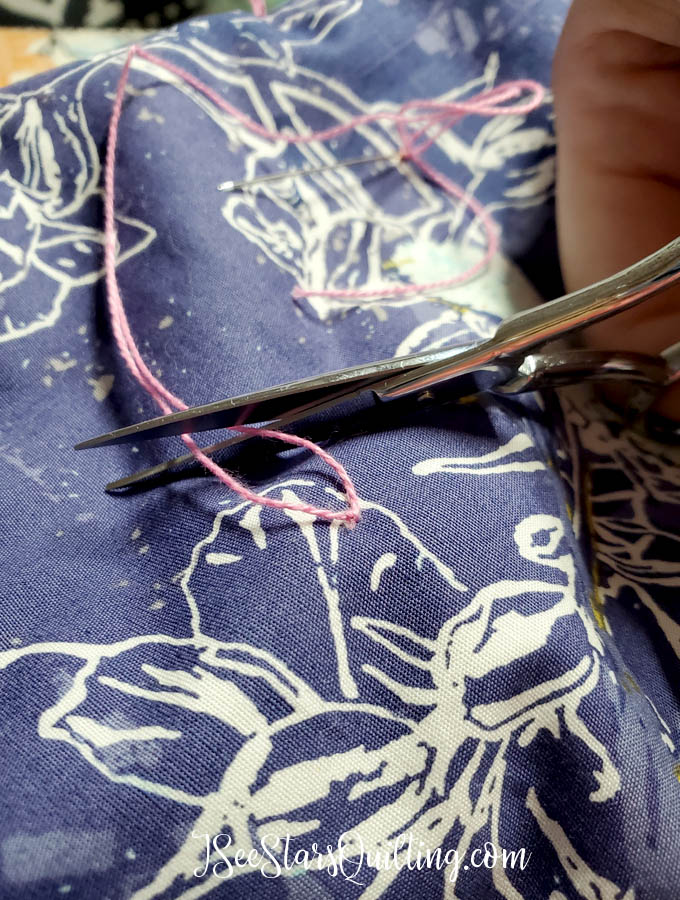
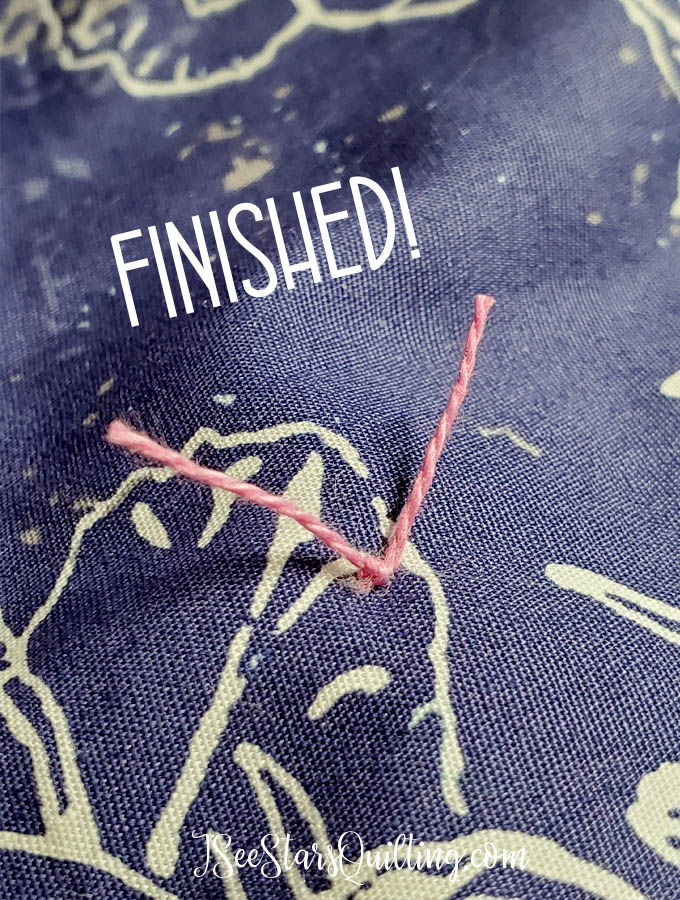
    After your threads are tight and secure, you’ll want to trim up your thread ends.

    I usually leave mine to be about 3/4″ long. I’ve seen some people prefer a 1/2″… It is up to you. You’ll want it short enough that the threads don’t get really super frayed and hairy after being in the washer a few times, but long enough that they don’t have a tendency to want to come un-knotted over time.

    Step 7: Keep going until you’ve finished your quilt!

    It really is that easy! Keep going by knotting in the places that you marked along your quilt in the beginning. You’ll find that time passes quickly once you really get the hang of the steps!

    More Tips for hand tying a quilt

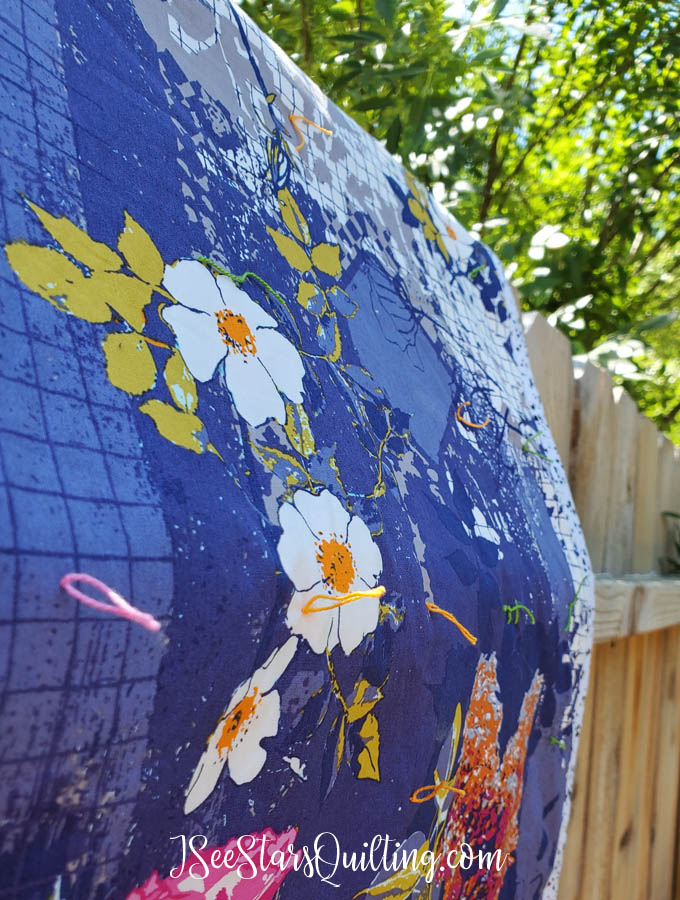
    One of my favorite ways to make hand tying a quilt even more interesting is to change up the colors of thread.

    It could be because I was a bit indecisive on this particular quilt project… but I chose three different colors of thread that coordinated with the fabric for an all over colorful fun look!

    You can also add charms or buttons to your ties that add dimension and personality to your quilts.

    Just a word of caution: buttons or charms of any sort should not be used for quilts that will be used by children ages 3 or under. There is a chance a child could swallow and choke on a button.

    How far apart should the knots be?

    Check your batting recomendations – each material is different in what it reccomends for the distance in your quilting lines. Your knots should be no further apart than the recommended distance for the batting.

    If you do not knot the recommended distance, the knots should be close enough to prevent the layers of your quilt from shifting around.

    Usually, I prefer to look at the design of the quilt and make my choices based on where my blocks fall.

    For example, my favorite batting – Warm and natural brand – has a recommendation of quilting every 8-10″.. but when I tie a quilt, I may place my knots every 5-6″… at that point, it could be considered overkill on making sure it is secure but for asthetic reasons… it is just perfect!

    So make sure you are doing at least the very minimum for what your batting requirements are… but make the right decision for your quilt’s design needs as well.

    Binding, before or after tying a quilt?

    Always tie your quilt layers first, then trim your quilt and add the binding on last.

    So What Do You Think? Will You Try It?

    Tying a quilt is a really simple yet effective way to finish a quilt. You’ll find that the more practiced you are at it, the quicker it gets finished.

    Next time you don’t feel like sitting at your machine anymore or want to spend more time in your family room, try tying your quilt!

    Let me know what you think or if you have any other questions in the comments below!