Tutorials

Step by step tutorials for quilting and sewing projects from ISeeStarsQuilting.

  • DIY Sewing Machine Cover

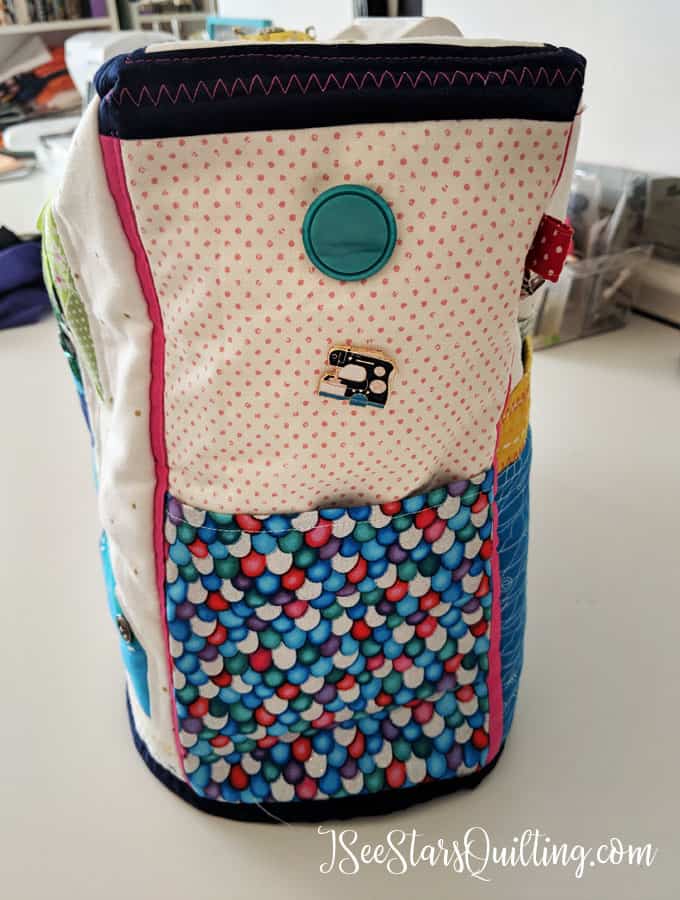
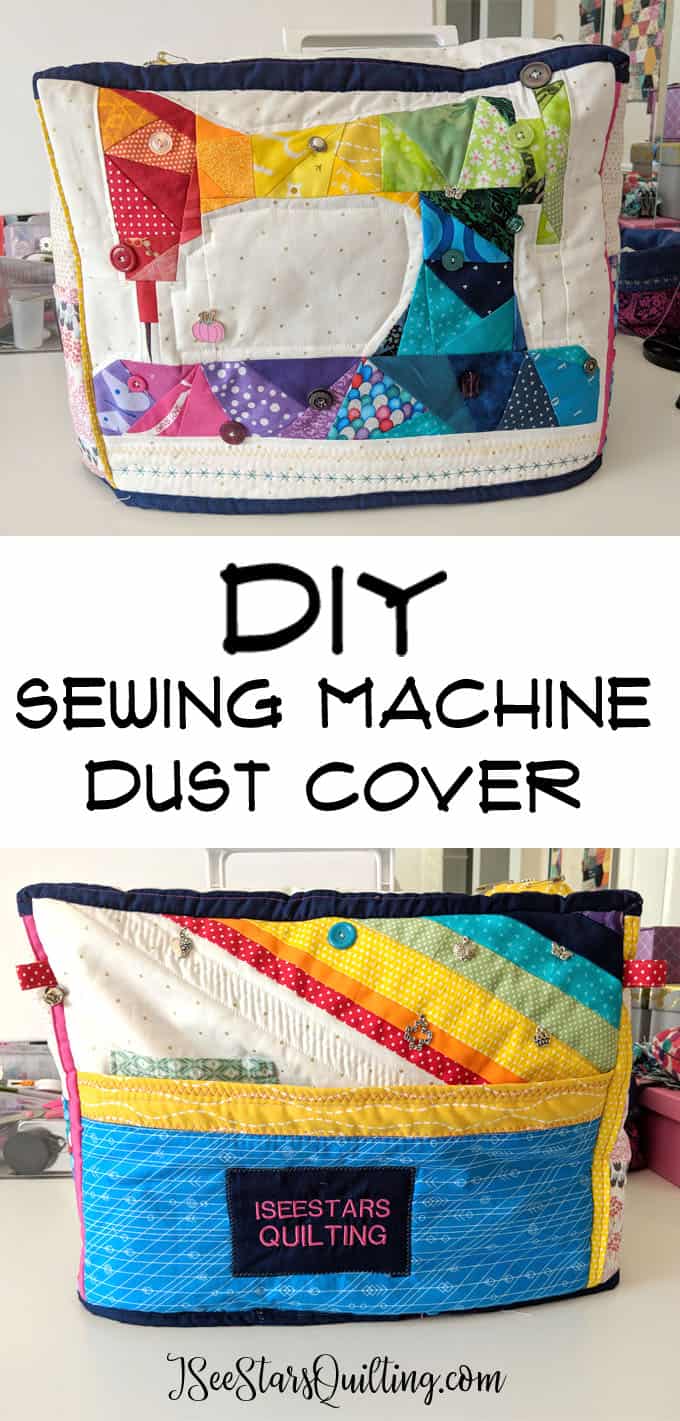
    Hey there! Guess what? I made a cover for my sewing machine! I have seen a few at sewing events that I admired. Last weekend, I decided that it was my time. I knew that I wanted a DIY sewing machine cover and that I didn’t want to make a plain jane boring boxy cover… I wanted it to be grand and amazing and so much FUN!
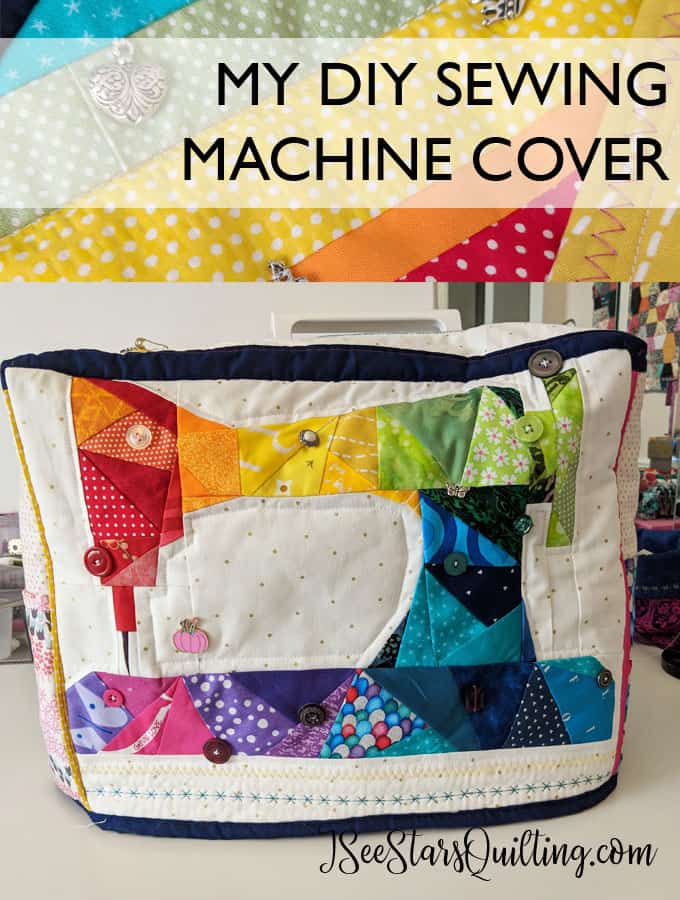
    How cute is this DIY Sewing Machine Cover?!? I want to make one! She even lists tips to make your own cover. I love to sew. I need to make this.

    I love having my machine sitting out all the time in my office where I can sit down and sew at a moments notice (because, as a mom sometimes you only have a moment or two before its time to get up and go again, right?)

    This is what I came up with, and I am absolutely in love with it!

    I shared it on my Instagram just as soon as I finished it and I had so many compliments and several people asking for more detailed pictures of all the little sections (do you follow my Instagram? You should. We have fun sharing little bits of behind the scenes on all my works in progress!)

    (Look down under the pictures if you are looking for tips to make your own sewing machine cover.)

    It started with a cute paper piecing panel from QuietPlay – You can buy the pattern here. It was fantastic and easy to work with. The instructions were simple, and it came together in just under a few hours – An easy morning sew.

    I held up my finished panel and realized it was JUST the right size for the front of my sewing machine. *angels singing* yay! This spurred on another several hours spent at the sewing machine and me not getting the laundry done as I had hoped… who am I kidding? A fresh sewing project was a happy distraction from the housework I didn’t want to do in the first place!

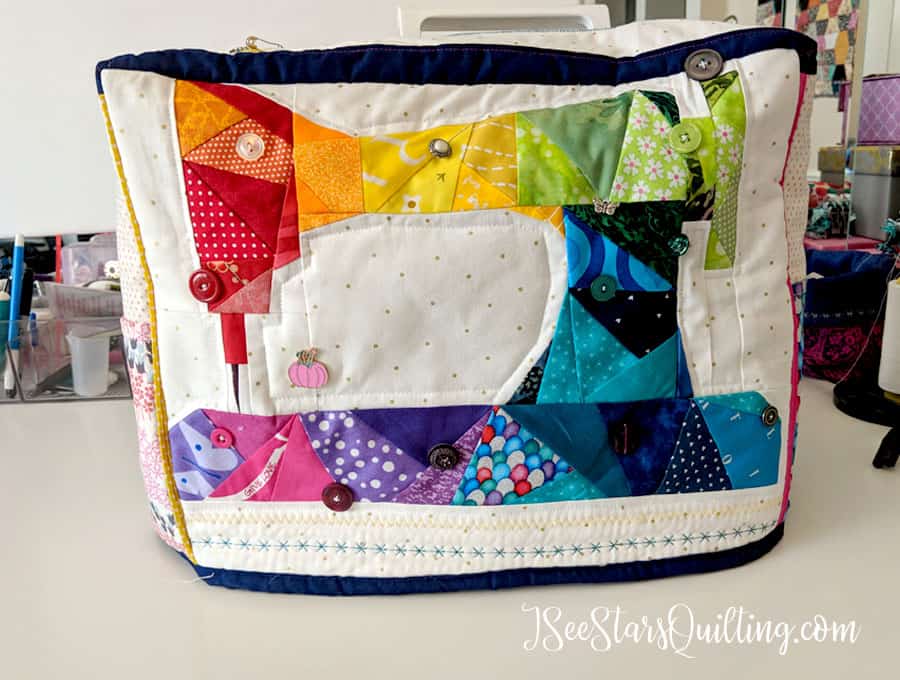
    The Front
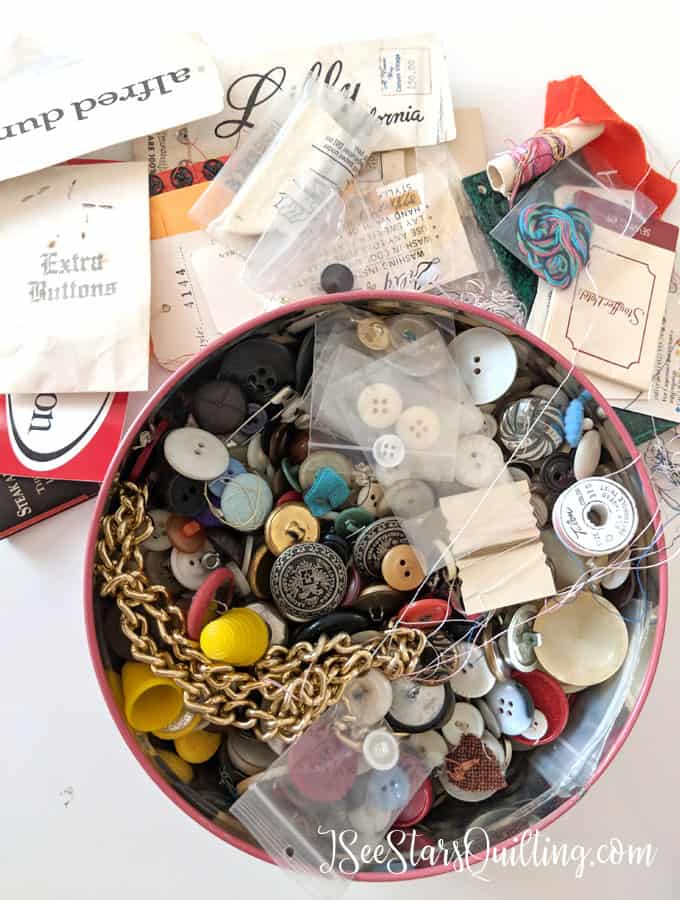
    I received a tin from my grandma a while back. It is an old round tin that is full of buttons and little bits of sewing supplies. So many buttons. Most of them just normal buttons, but there are some that are really pretty and fancy as well.

    My best guess for her button hoarding collection is just the depression-era mentality. Over the years, she clipped and saved every single button she could. She told me that if she was going to throw out a sweater or a blouse got a hole that couldn’t be fixed, she clipped the buttons off of it because… “you just never know.” You can even see the fabric still attached to some of the button backs in the photo below.

    Isn’t this collection just beautiful?
    I didn’t intend on this sewing machine cover as a piece of family history but I wanted to embellish my sewing machine cover. The two women who mean the most to me in this world happen to be my mom and my grandma. I went digging through collections of tiny things to find the perfect rainbow color button matches.

    The Back
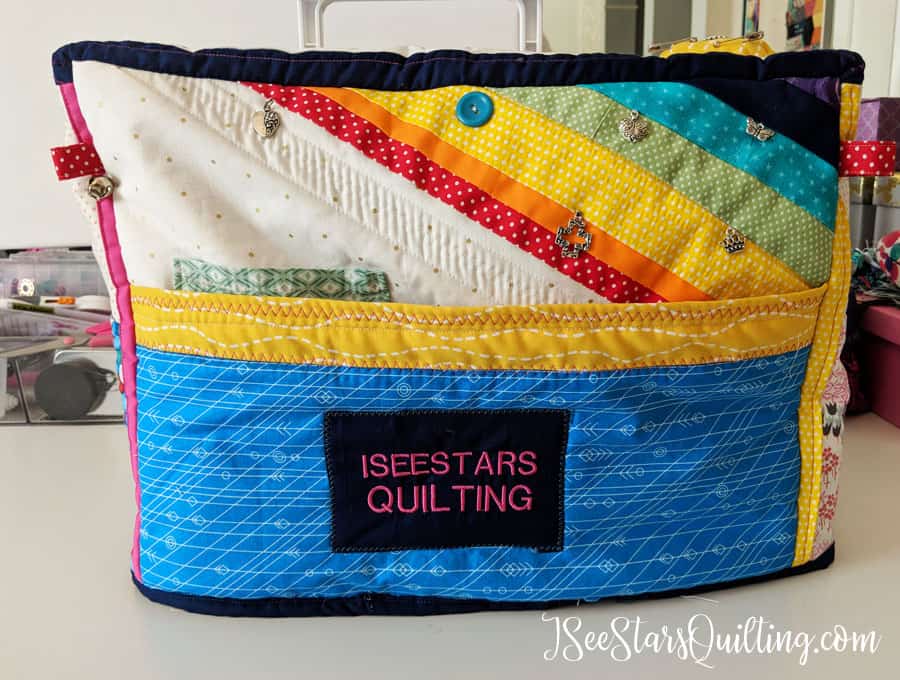
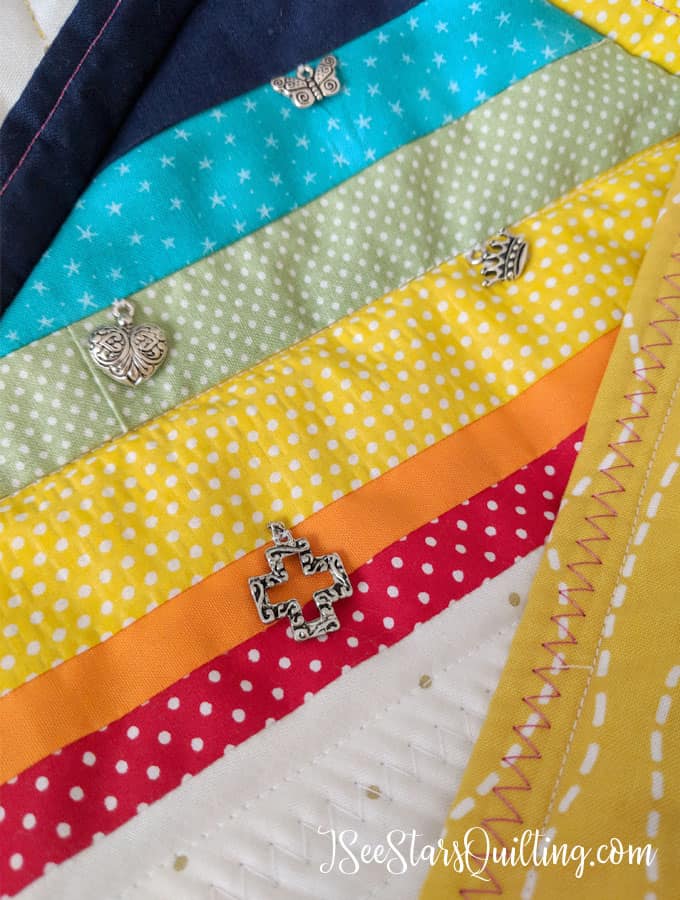
    As for the little pieces donated by my mom on my DIY sewing machine cover, I pulled out a collection of crafty charms that she had given to me.
    Pockets are, like, SO important. I may have gone a little overboard, but you know what? I’m prepared for anything. This totally takes me back to the diaper bag days where that bag held my life, and I was ready for anything unexpected at a moments notice. *hands up mommas who have it together!*

    The big back pocket can hold my pedal and my power cords. The smaller pocket can hold my rotary cutter and any markers or smaller rulers.

    The Sides of my DIY Sewing Machine Cover
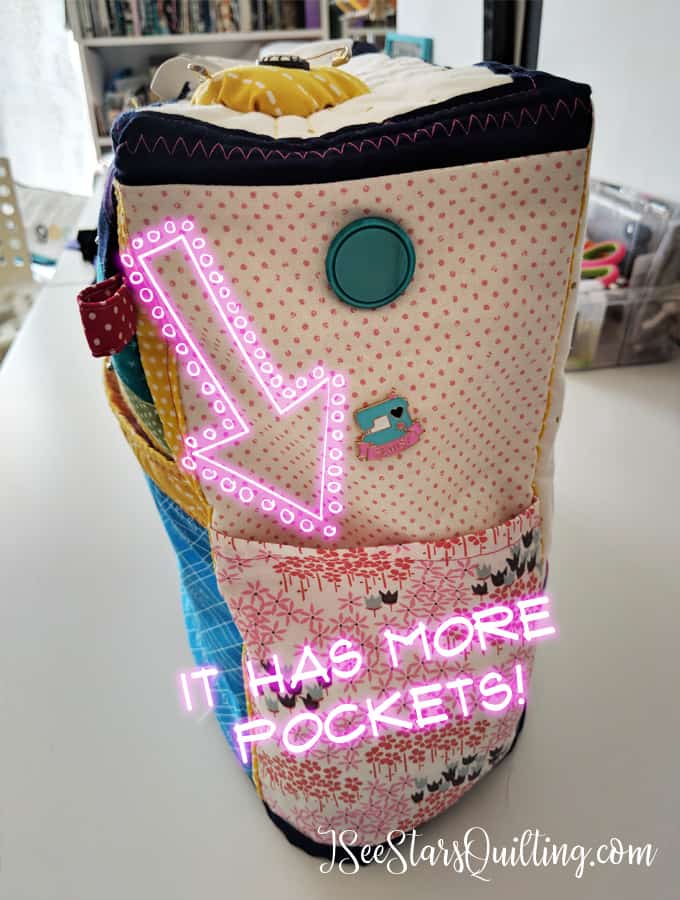
    If you like the little sewing machine lapel pins, you can purchase them from my shop! They’re so cute and make such a fun addition to a quilt swap or a gift for a sewing friend!

    The Top
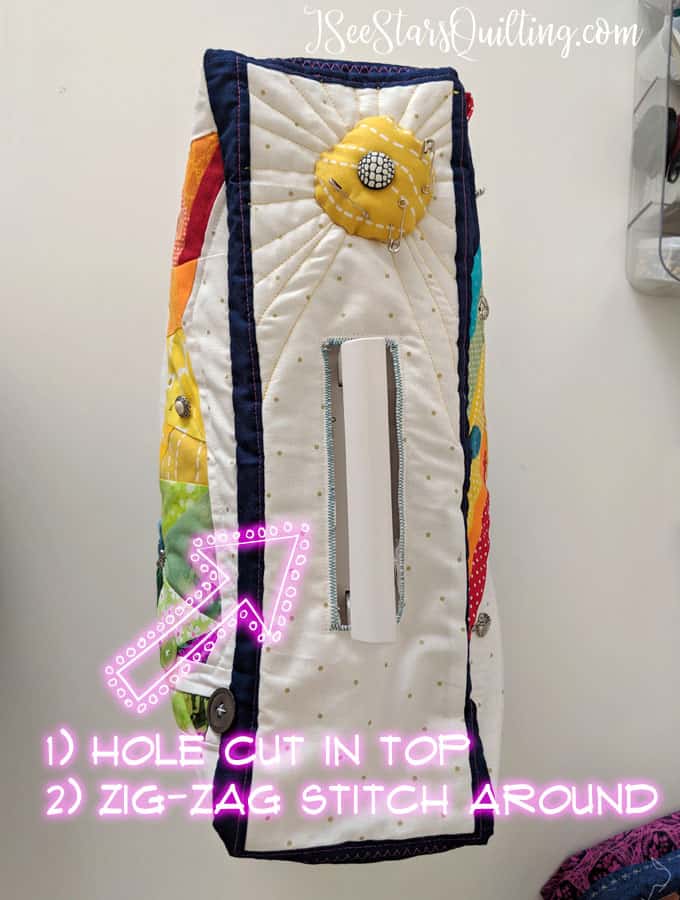
    The top was probably the most complicated part of the whole project. I eyeballed most of this part and it took several tries to get the hole just big enough. Then I zig-zag stitched around the cut fabric to keep it from fraying.

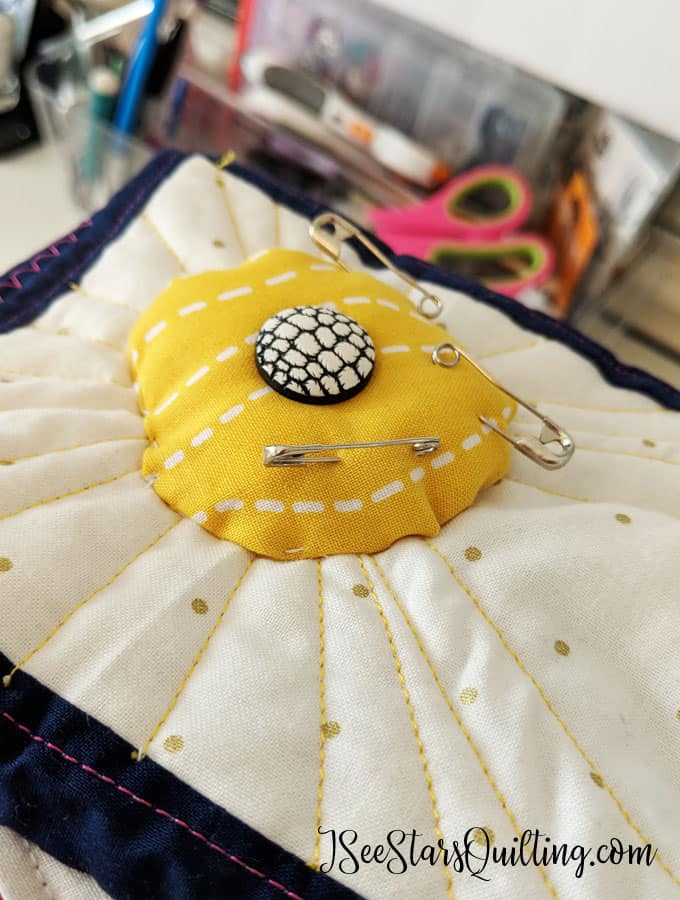
    Another detail that I added was this fun little pin-cushion on top. (A little bit more sunshine!) I don’t see it actually being useful for sewing pins, but a few extra safety pins laying around are always necessary. And it helped make this beautiful button *POP*!
    If you’ve come here looking for ideas for a DIY sewing machine cover, you’re in the right place! Most quilters and sewists really like to put their own personal fingerprint on their sewing machine covers. I’ve never seen two exactly the same… just like us quilters. We’re such a fun breed, aren’t we? 🙂

    TIPS TO DIY YOUR OWN SEWING MACHINE COVER

    I highly suggest that you:

    1. Pull out your scrap fabrics! Find the ones that call out to you. That tiny bit of pink you just couldn’t let go of? This is the perfect project for it! Find a way to bring in all the ones that you love! Who cares if they don’t all match perfectly.My cover was made with scrap fabric only. The rainbow motif created itself, honestly.
    2. Decide on what sewing technique brings you the most joy. Is it paper piecing? Or is it random modern crazy stitching? Maybe you like things to be precise and meticulous with perfect piecing? This is the best place to showcase your favorite techniques!
    3. Look for little embellishments to add on! Little loops, ruffles, charms, pins, and buttons! 3D little fabric banners? Yes, please 🙂 Even embroidery is fair game! Add it all and then some!
    4. You can start out with a calculated plan or you can just start sewing and see where you end up. There are no rules.
    5. Do not get caught up in making it absolutely perfect! If you want it to be perfect, I guarantee you it never will be. But if you roll with the mistakes and make the most of it, you’ll grow as you sew and love the results!
    6. A fun suggestion is to ask some of your sewing friends for pieces of scrap fabric to add in. If they’re making covers too, donate some of your scraps. Share the love!
    7. Have fun! Do not let this frustrate you as you’re working on it. Focus on completing the bits of inspiration as they come to you!
    8. Consider using decorative stitches to add a fun flair.
    9. Measure Measure Measure. See Below! You’ll want to make sure that you measure correctly before cutting and add in a little grace room so that your cover will not fit so snugly around your machine.It is a dust cover, not a dust girdle!
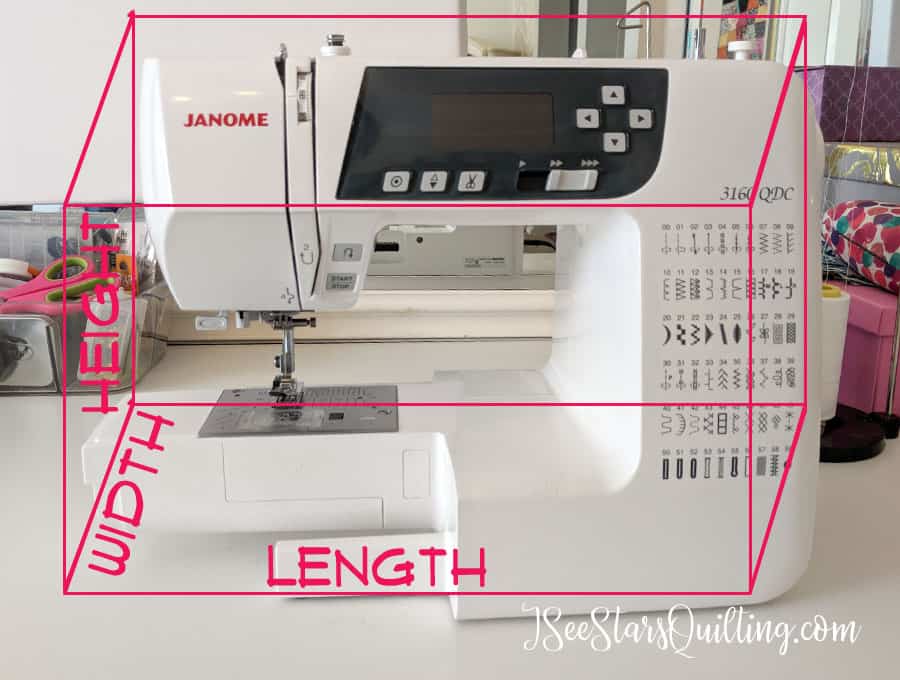
    The most important rule is to have fun with it 🙂 Measure properly and then play with the fabric from there! Let me know if you have any questions or if you’re inspired to create your own DIY Sewing Machine Cover.

    Happy Sewing!
    How cute is this DIY Sewing Machine Cover?!? I want to make one! She even lists tips to make your own cover. I love to sew. I need to make this.

  • How to DIY a Quilt Ladder

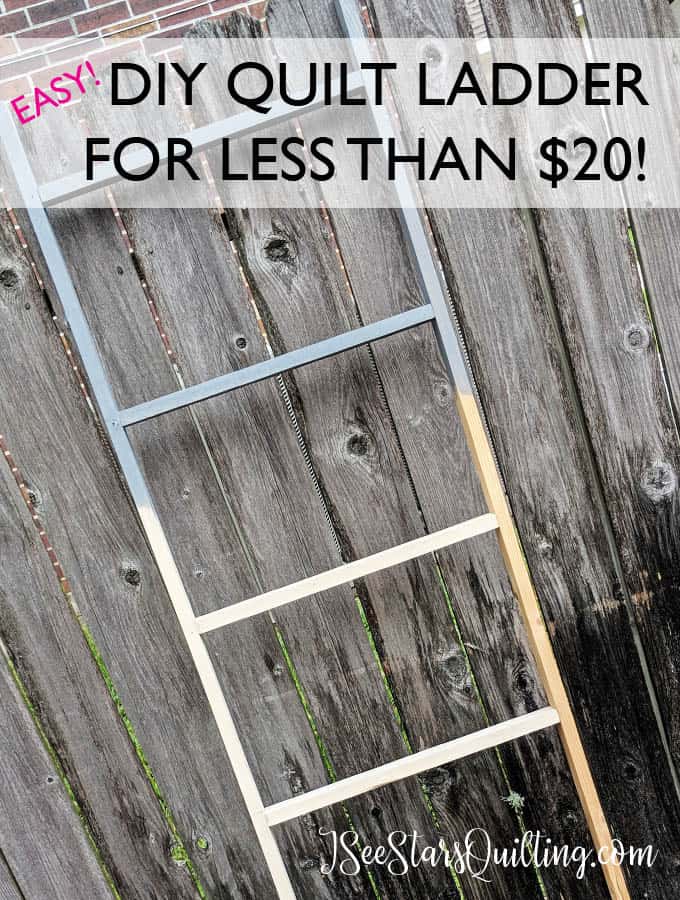
    This easy DIY Quilt Ladder is a project you can make! Don't pay high prices. Check out this step by step tutorial!This is how you DIY a quilt ladder. I’m going to tell you how I took a $150 Blanket Ladder and recreated it for less than $20!…
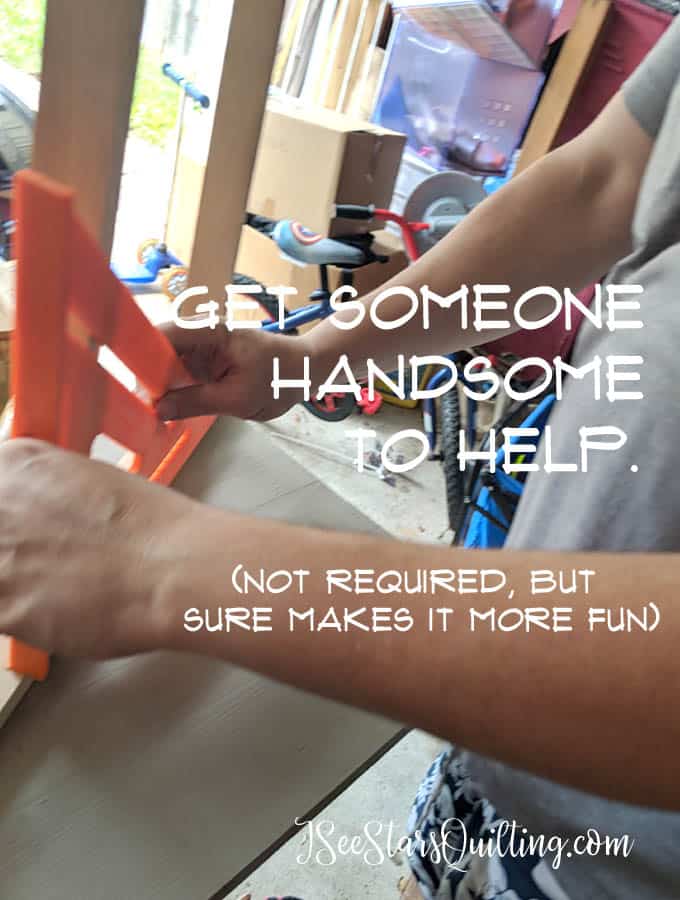
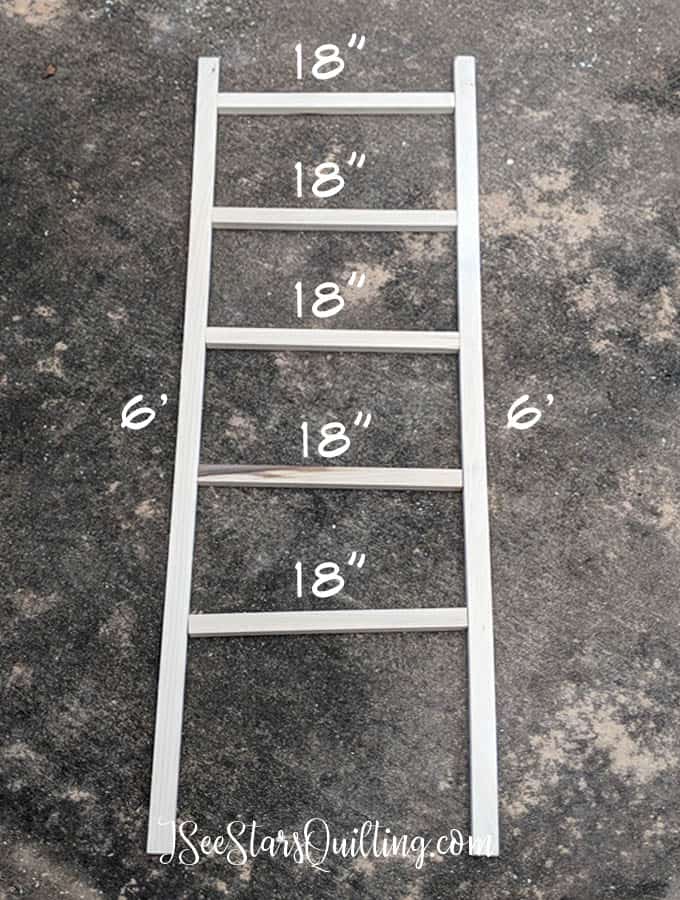
    Absolutely no rocket science involved. You can do this too!


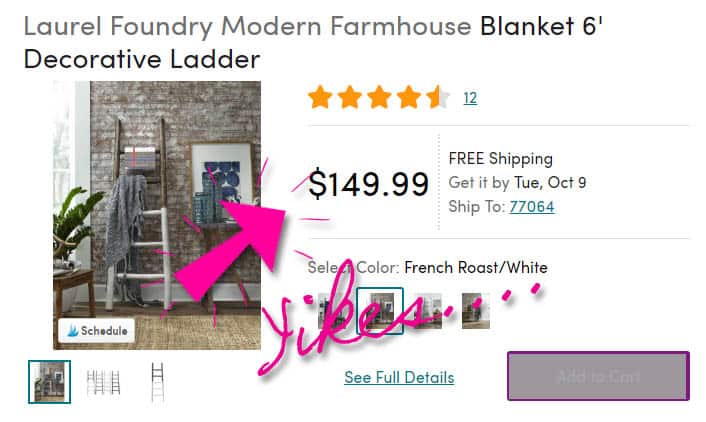
    It happened the other day… I fell hard in love with a quilt ladder that I saw on Pinterest. It was everything I ever wanted and then some! Absolutely love at first sight. Perfect to display my lovely quilts and get them out of the neatly folded pile on the floor in the corner. I loved everything, that is… except for the price.
    $150?! I’m going to let you stop for just a second and re-read that. Yes. One-Hundred-and-fifty-dollars! No way, right?

    Let me say that I really like to shop on Wayfair. I actually have several pieces in my house from Wayfair and I love a good bargain, but not on this item. I couldn’t bring myself to do it.

    My excitement was momentarily halted. $150 can buy a LOT of things. (It can buy A LOT of fabric for example.) But the heart wants what the heart wants….

    I lay awake that night in bed (that’s where I think most women plan their to-do lists and figure out their mission to save the world… all in the quiet hours of the moonlight while the kids are sleeping) and planned it all out in my head.

    I made a plan to go to the hardware store and get the supplies the next day. This was happening.

    Side note: I’m a huge Ana White fan. Here is her website so you can check her out. I look at the amazing things she is able to create and build on a normal family budget and I always feel empowered. If she can do it, I can do it. Maybe you’re not into building your own furniture. That’s totally ok. But sometimes when a girl has expensive taste and lives on a budget, desperate times call for desperate measures. The woman is a straight-up genius when it comes to breaking things down in a way that makes it easy to understand.

    Here’s what you’ll need to make a 6ft. tall and 20-inch wide blanket ladder with 5 rungs.

    What you need:

    (1) 1 in. x 2 in. x 8 ft. Poplar Board – $6.82 Each – I really like the way that the poplar board takes on the stain. It doesn’t leave a streaky wood grain texture. The coverage is pretty even and smooth.

    (2) 1 in. x 2 in. x 6 ft. Poplar Board – $5.66 Each

    Wood Screws

    Drill

    Saw – If you don’t have a chop saw, you could do this by hand with a hacksaw.

    (Optional) Stain or Finishing method of your choice – See below for what I used.

    (Optional) Felt pads to put at the top of the ladder where it leans against the wall so it doesn’t mark up your wall.

    (Optional) Clear Coat so that you don’t have to worry about the stain getting on your blankets.


    Ready for a super easy tutorial??


    How to DIY a Quilt Ladder

    You already have your 2 outer pieces for your ladder. Those are your 6′ tall pieces.

    Step 1:  Cut your 8′ long piece of wood into (5) 18″ sections. These need to be exactly the same length or your ladder will be wobbly. You’ll have just a little bit left over.

    Step 2: Lay them out on the ground to make a ladder.

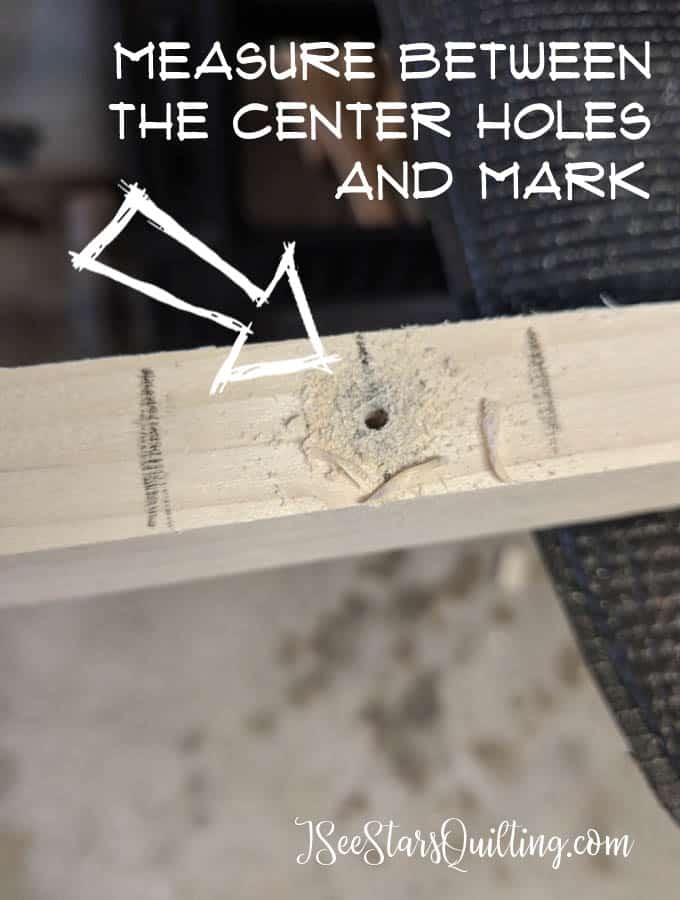
    Step 3: Space our your pieces. Use your measuring tape and your pencil to mark where your ladder rungs go.


    I put my ladder rungs 13 inches apart, but started 18 inches from the ground and left just 6 inches at the top so that I could actually hang a blanket on the bottom bar.

    Measure from center hole to center hole.


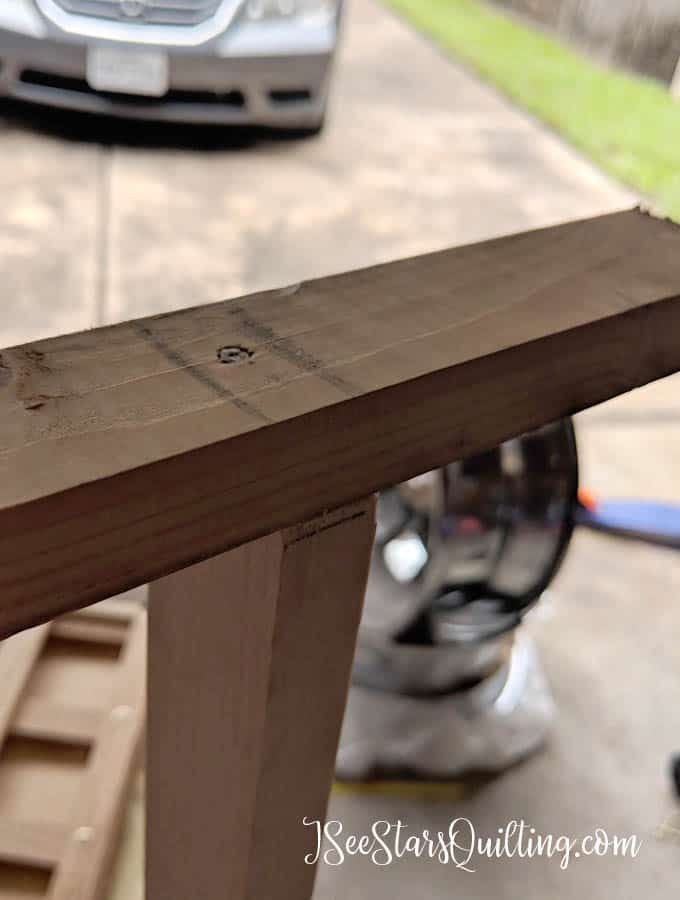
    Step 4:  Dab a little bit of wood glue on the end of each bar then attach with a screw from the outside of each side piece going straight into the center of the end of each bar.

    Step 5: Stain it the color of your choice and let it dry and air out completely (so it doesn’t stink up your house or your blankets.)

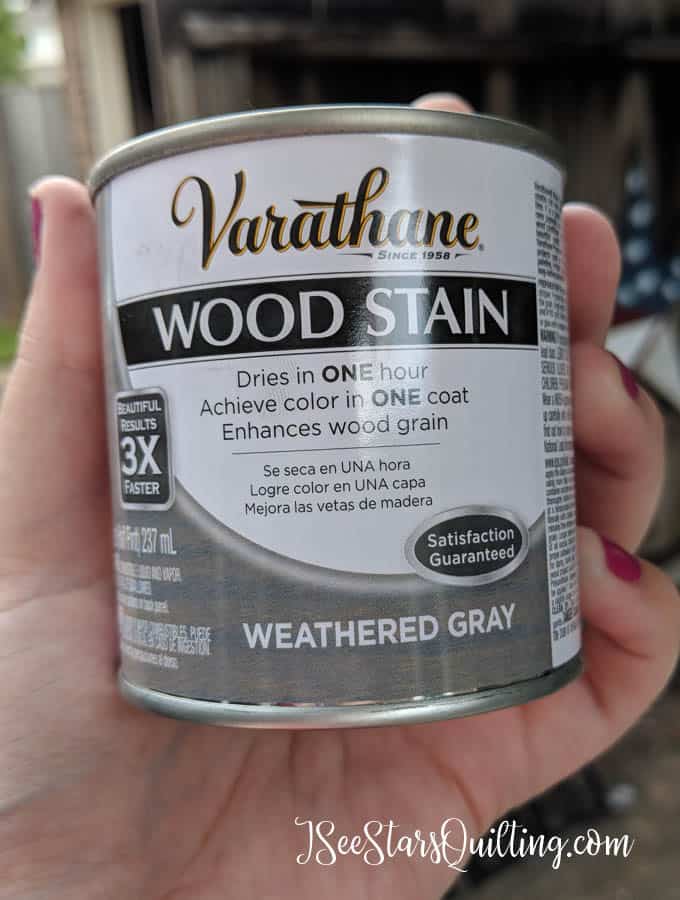
    I used this stain from home depot. It came in a tiny little can for less than $4.

    I didn’t even use a tablespoon of the stain. I have enough for many more projects. You can ask around to see if your friends have any leftover stain from a project in years past.

    *Staining Tip*

    Make sure you use gloves every single time you use any wood stain. I got excited and did not. The artist in me should have known better. But also, seeing several of my fingers stained light grey did not even phase my husband. He is used to the messy art effects by now 🙂

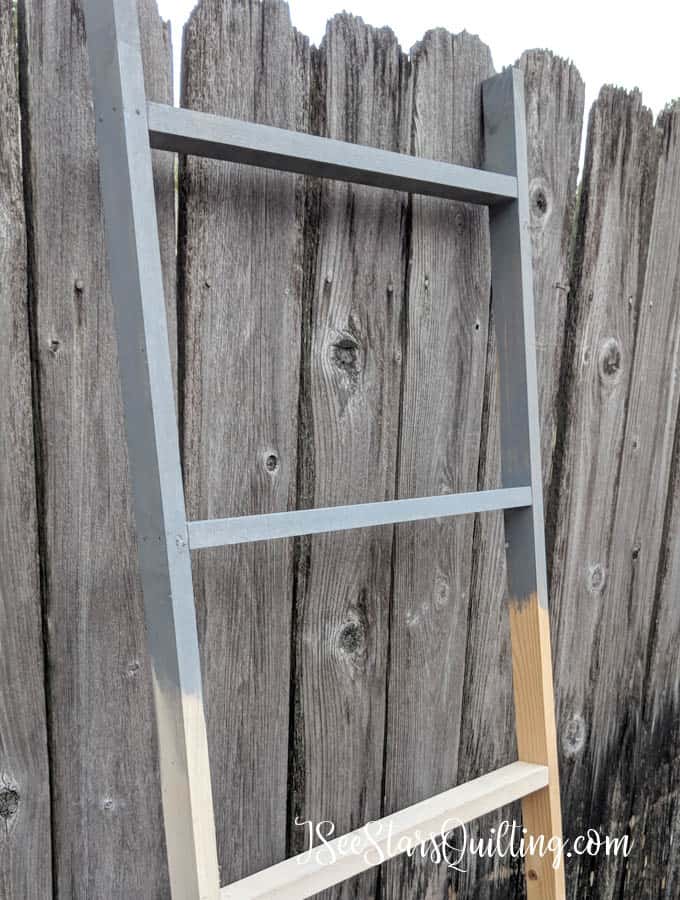
    I chose to only stain the top section of the ladder and paint the rest for a ‘dipped’ paint look. I happened to have the white paint already in my garage from another project, but you can buy the “sample paint” cans for a really affordable price. It comes in a little can about the same size as the stain pictured above. They can even tint it to the color your request. You don’t need much paint at all to finish this project.

    See how nice and even the wood stain took to the poplar wood? I love it.

    Finish with a clear coat if you think your stain may get onto your blankets.

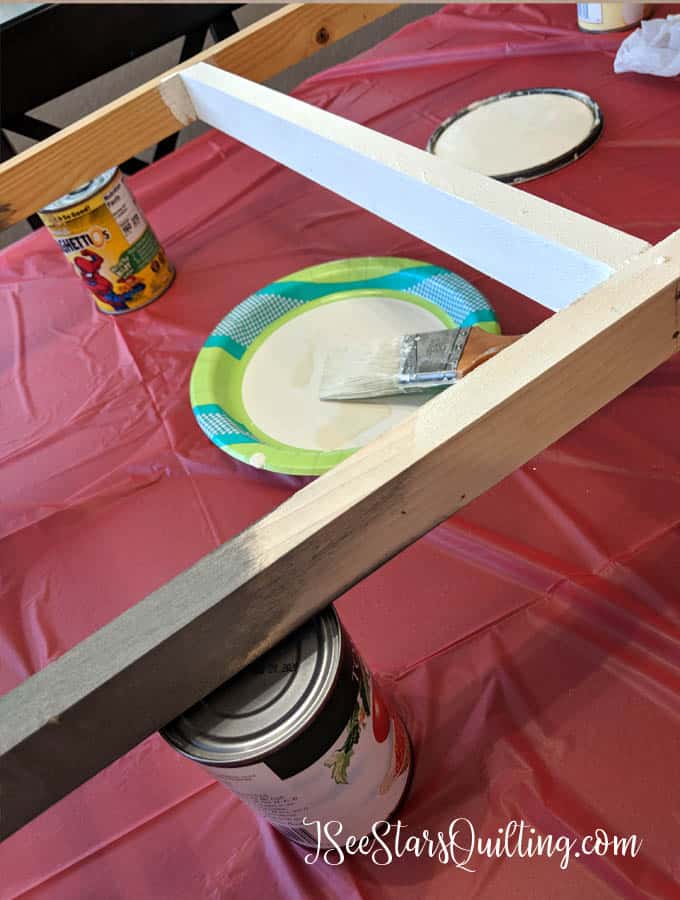
    Step 6 – Paint the lower half of your ladder. It started to rain at my house and I wasn’t finished with my project so I brought it inside, put down some dollar store trash tablecloth and brought out soup cans to prop up the ladder while I was finishing it. Be resourceful!

    Step 7 – Give your ladder ample time to dry. You can add the felt pads to the top of your ladder to keep it from marking on your wall if you choose to.

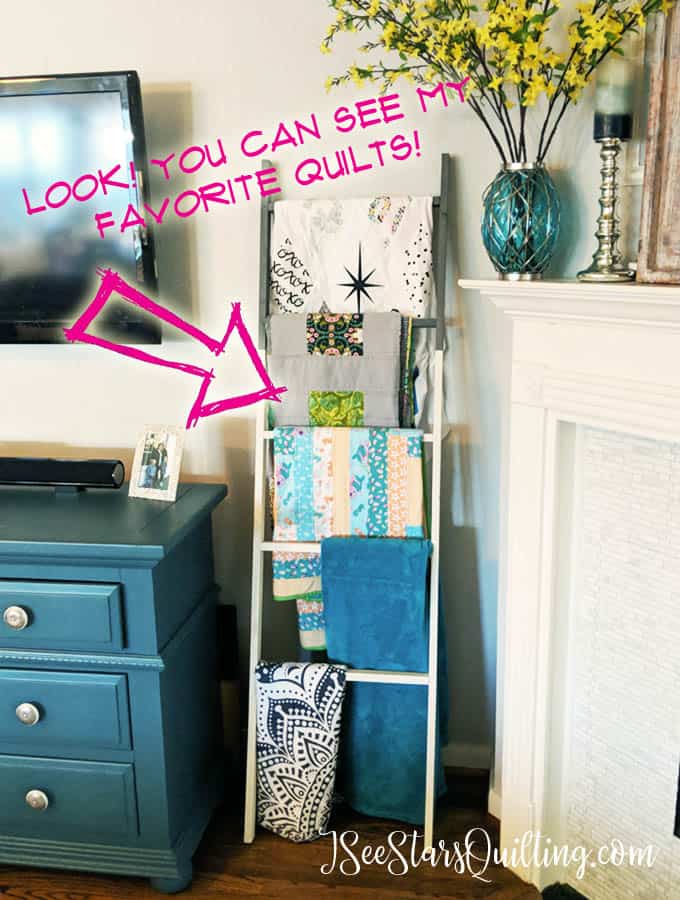
    When you are sure that your ladder is all dry, load up your beautiful quilts and be happy with all the money you saved….. yes… lots of money saved. Speaking of… I think I shall go shopping for more fabric! 😉

    If you have any questions, please contact me or leave a comment down below! I’d love to see your projects that you complete! Tag me in your pictures #ISeeStarsQuilting.com

    This easy DIY Quilt Ladder is a project you can make! Don't pay high prices. Check out this step by step tutorial!


  • DIY Binding Hack

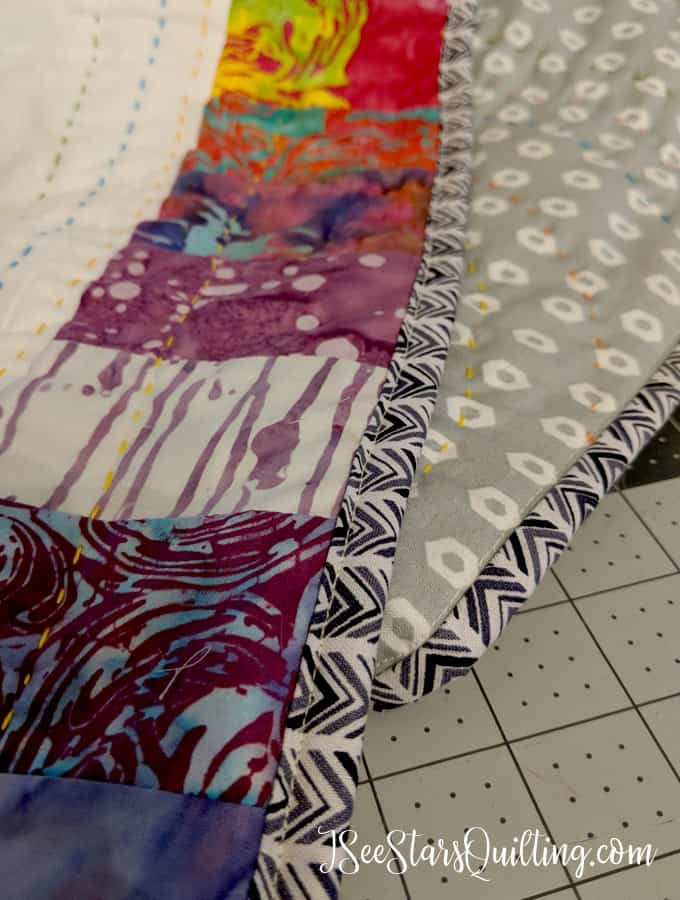
    Hello, my sewing friends! I’m going to share with you today this DIY binding hack that I touched on in my previous post, but I’m going to go into a little more detail today. I guarantee you have everything you need for this easy hack in your house, right now.

    So I recently attached the binding to one of my favorite quilts. It is rather large, but not ginormous. I call it a double throw quilt size.

    Looking for a fun quilt pattern that sews up in a day? Check out the Waterfalls Quilt Pattern! I have made this one several times and I love it every time!

    The Waterfalls Pattern is now released so you can create your very own! Click here to visit my shop.

    It is just big enough for my husband and me to share on the couch, and no one has to worry about getting the short end of the blanket. No World War III is happening over people who tend to hog the blanket. (I’m guilty. I like to be cozy)

    So generally with more extended bindings, I just put up with the long tangle of binding that usually weaves its way between my legs and around my feet on the floor while I’m attaching it. It’s only for a short period of time and only on a few occasions has it somehow tied itself into a knot. (um how does it do that?)

    It is totally doable for short periods of time, but with as much binding as I was working with… there had to be another way.

    I first turned to my two favorite shopping loves. Amazon And Pinterest. There are products out there that I will be happy to share thoughts on in just a bit… but I needed something now. (Impatient DIYer – The story of my life)

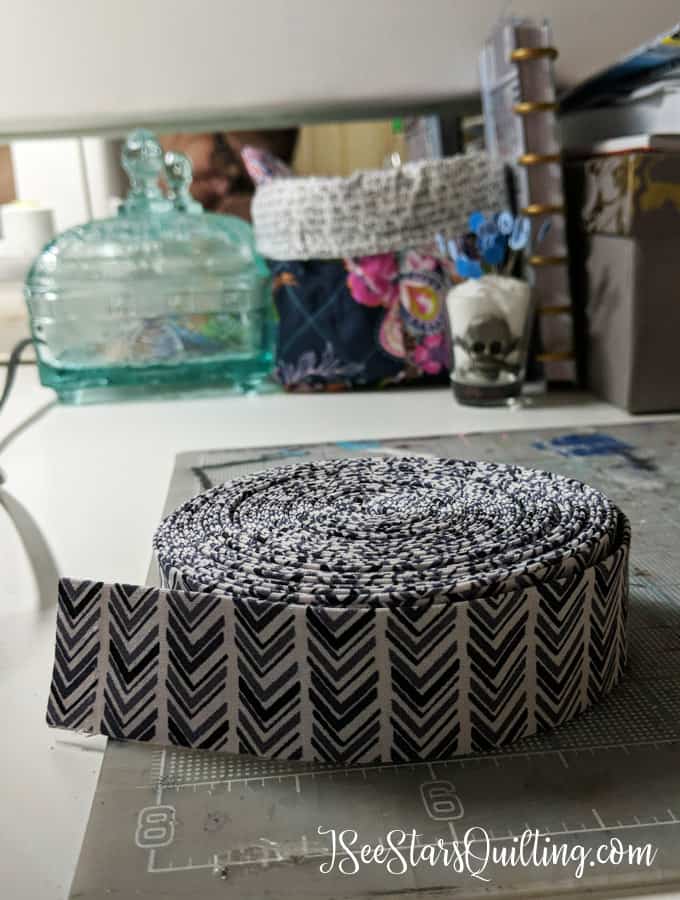
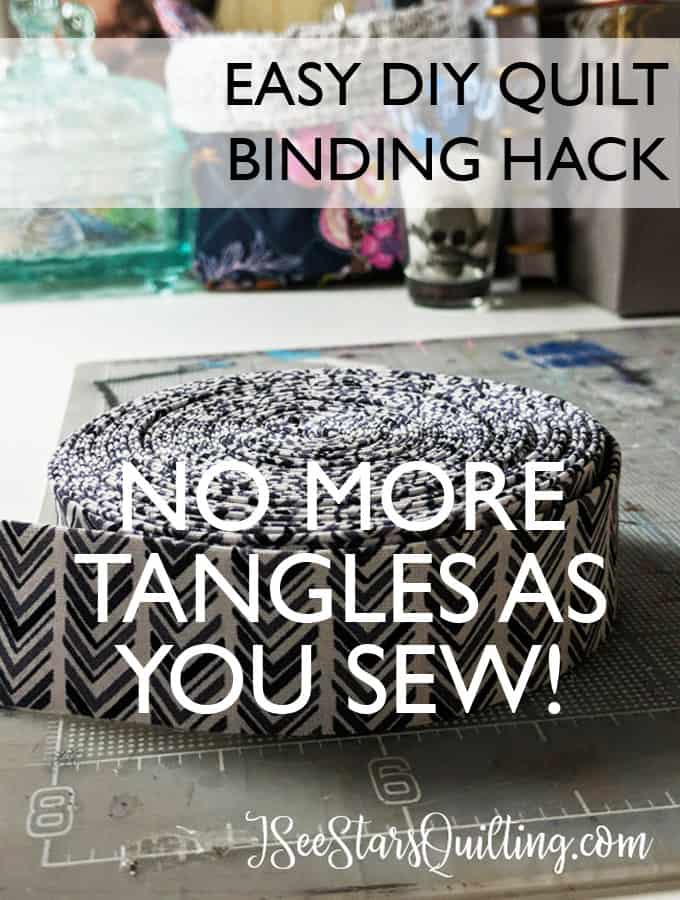
    So I wound my fabric up nice and neat, like so:

    My husband has a bit of a Macgyver gene in him. He rocks. So we invented a quick DIY to take out the mess of long bindings.

    The DIY Version

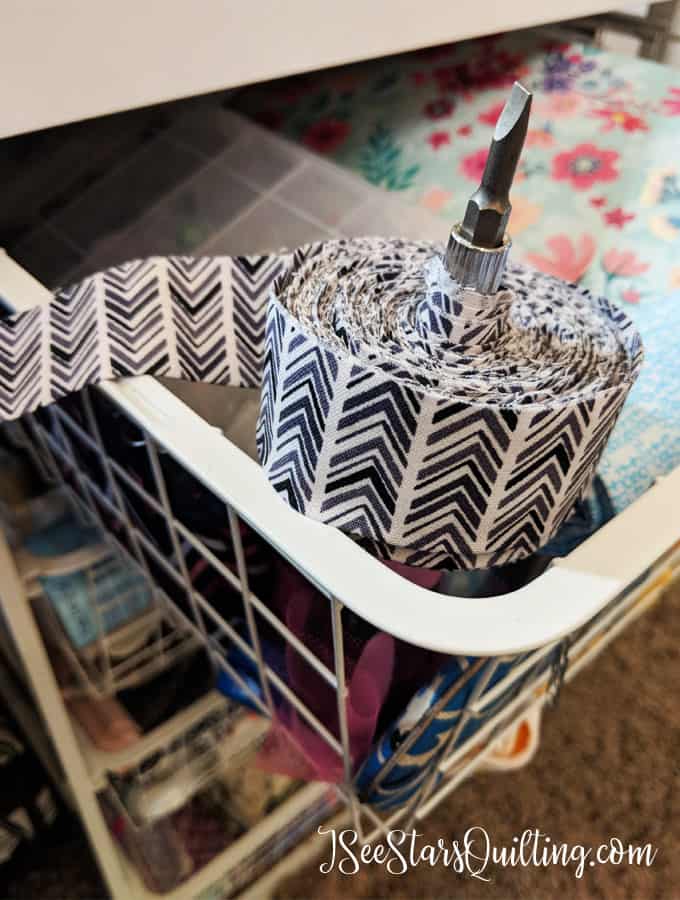
    I found my trusty Screw Driver… Can you see? It’s pink! 🙂 — You could also use a dowel or a pencil or a thread stand. Anything that will fit up the center of the binding roll.

    I tucked the screwdriver into a drawer next to where I sew and made sure the binding wasn’t going to get caught up on anything.

    These stacking basket drawers are from Ikea, in case you were wondering. The desktop is the Linmon Line. Simple, easy to clean and a great versatile storage system!

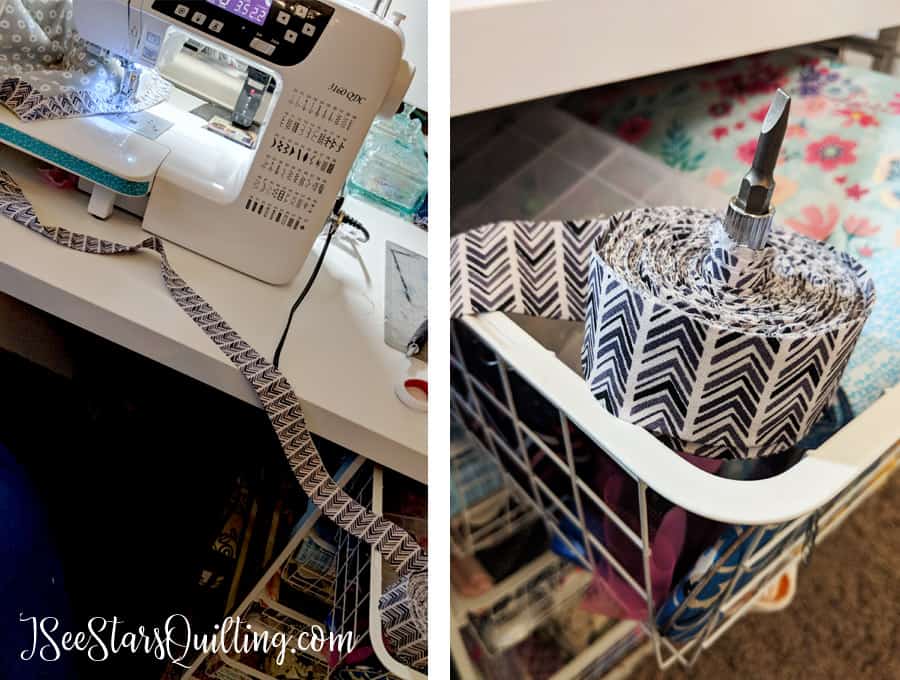
    This drawer system sits only about 2 feet from my sewing machine.

    Next, I just brought the binding tail up to my quilt and marveled in the non-tangling way that is simply unwound itself while I was sewing.

    No more spaghetti noodles of binding on the floor! Happy Sewing Mamma, right here!

    You could also find a way to attach it somewhere on your sewing table or on top of your sewing machine. The drawer just seemed convenient for me at the time. It does its job.

    Products that are not DIY

    If you prefer to have little trinkets and fun sewing notions… these little babies are a precious addition to your sewing room!

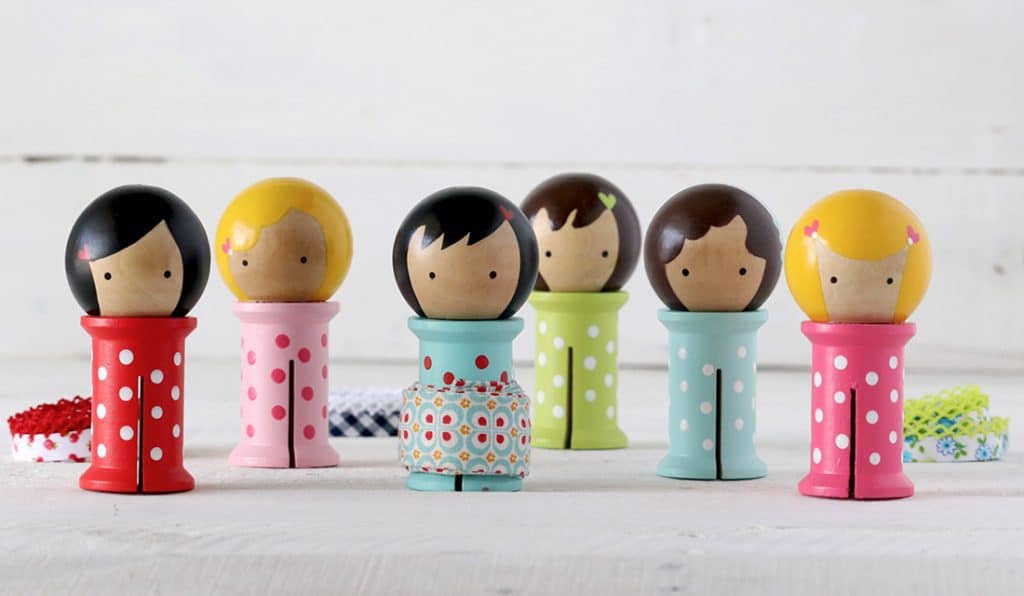
    Just look at how adorable these are! Introduced not too long ago, these little babies have taken the quilt market by storm! I mean, how can anyone resist such a cute little helper in the sewing room?

    Medium-sized Binding Babies. You can also order customized Binding Babies or Buddies (the male version), choosing different hairstyles, clothing, and skin color.
    Photos courtesy of Doohikey Designs

    Same idea, just way cuter than my screw driver! 🙂

    This super easy DIY has saved my binding tangles as I sew. It's such a simple thing to do. I can't believe I haven't thought to do it before!

    What is your favorite hack in the sewing room where you totally had a moment of genius and had a DIY moment of inspiration?

  • The Stack and Wack Quilt

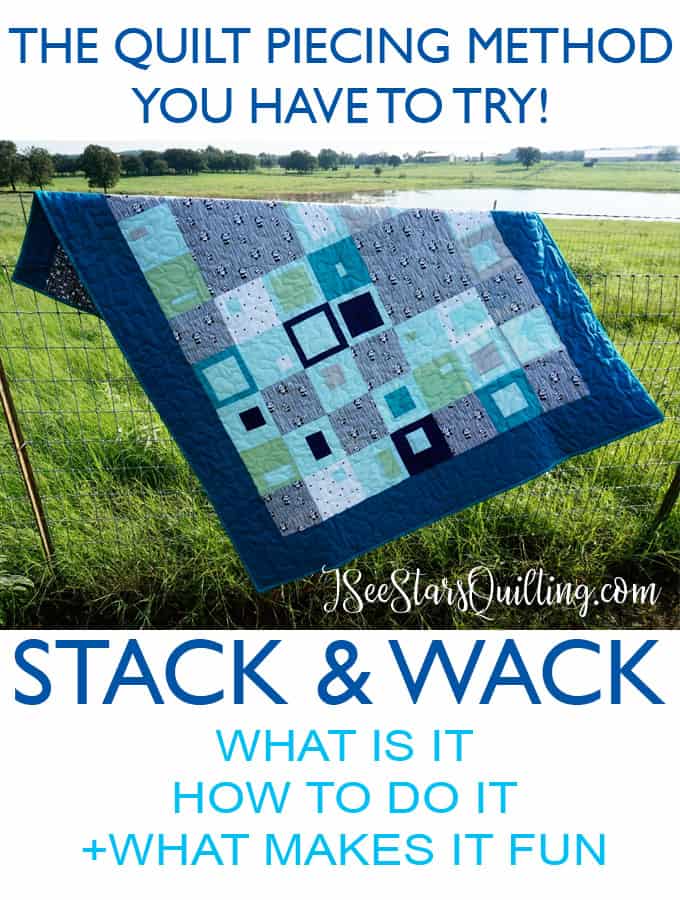
    I’m going to share with you today another quilt that I’ve been working on in secret the past few weeks. It is a Stack and Wack Quilt, and it is finally finished! And I can share it with you because this one was a gift and it has now found its home, and I will not be spoiling any surprises by doing so! (If you want to skip ahead to the tutorial, I’m sharing a few pictures of the finished quilt first)

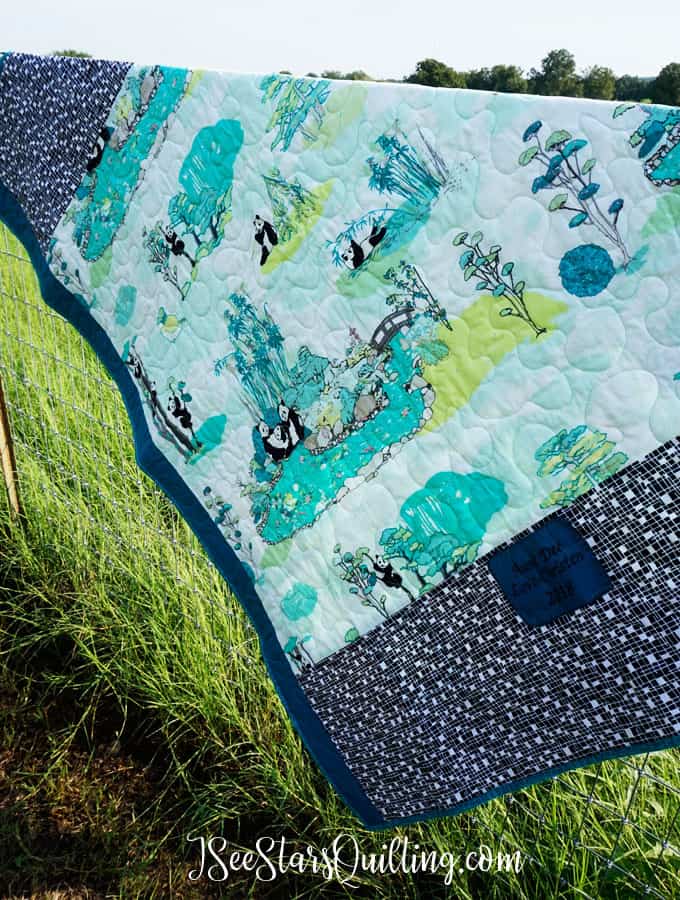
    I made this quilt for my husband’s Aunt. I absolutely adore her and her beautiful spirit. She is a missionary/teacher in China. I could sit and listen to her stories for hours, and she is kind enough to send my kids little trinkets from her travels. (A notepad made from elephant poop in Thailand? Yes, we still have it!) Anyways, when I found this Panda fabric from Katarina Roccella, I had to get it and find something to make with it for her!

    Stack and Wack Quilt

    (First of all… Say What?)

    Yeah, you heard me… Stack and Wack Quilt Method. It sounds reckless and exciting and simple, and it is absolutely a fun one to make!

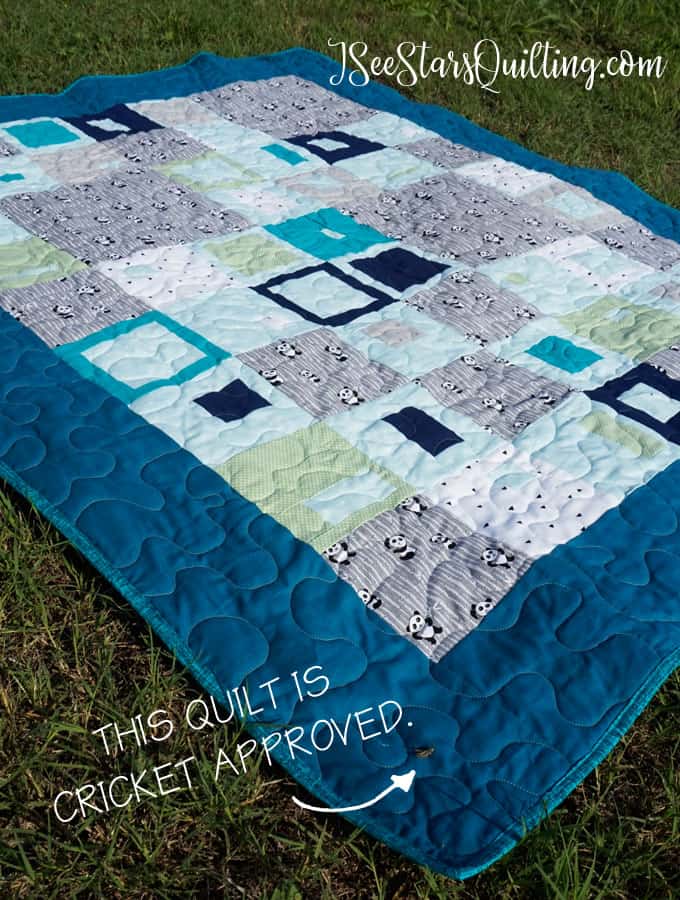
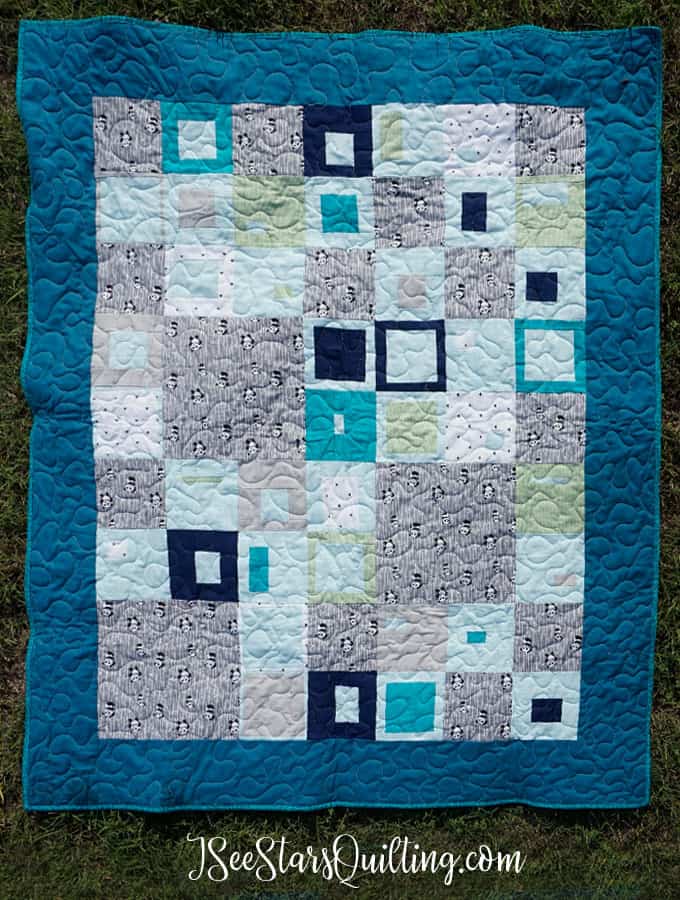
    Let’s take a quick look at the quilt I made using this method and then we will get on to the tutorial!

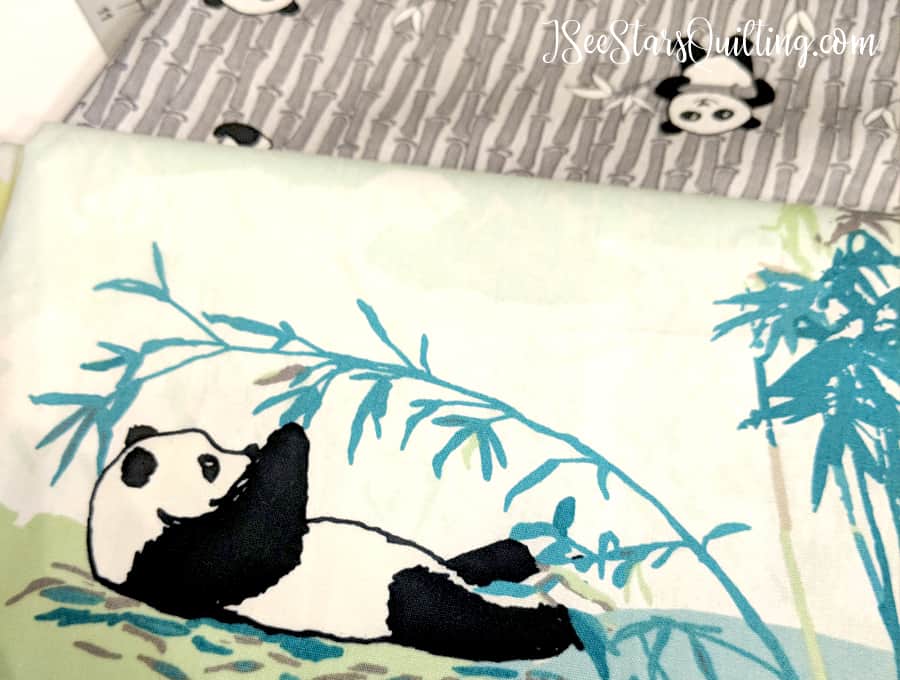
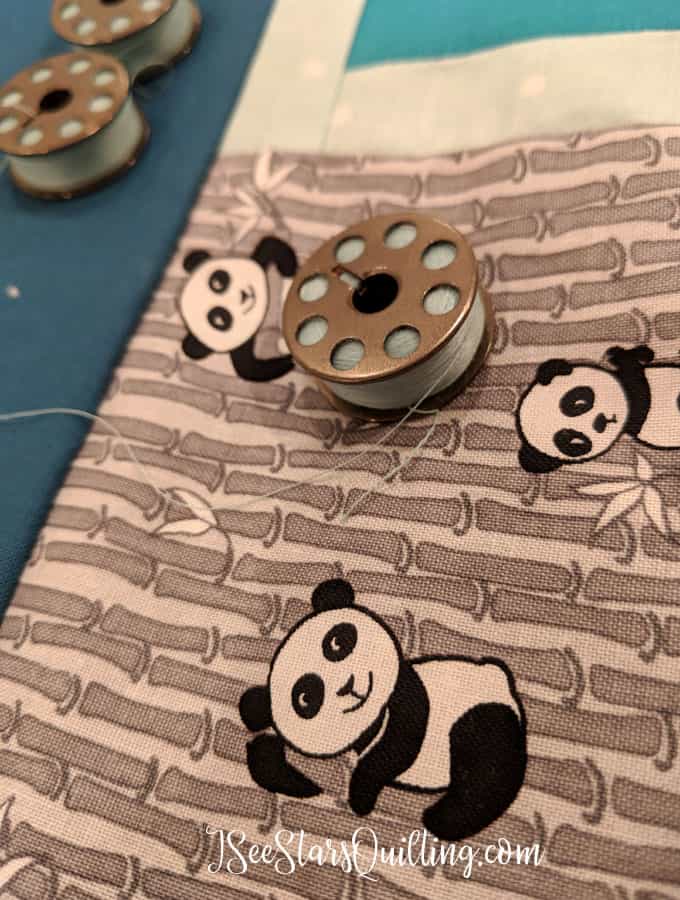
    Remember this fabric from a while back? The landscape panda is from Katarina Roccella. Read more about Katarina and her designs in this fabric spotlight post. The black and white pandas are from Riley Blake and were just too fun not to include. A little whimsy is a beautiful thing!

    Panda Fabric by Katarina Rochella and Riley Black Designs

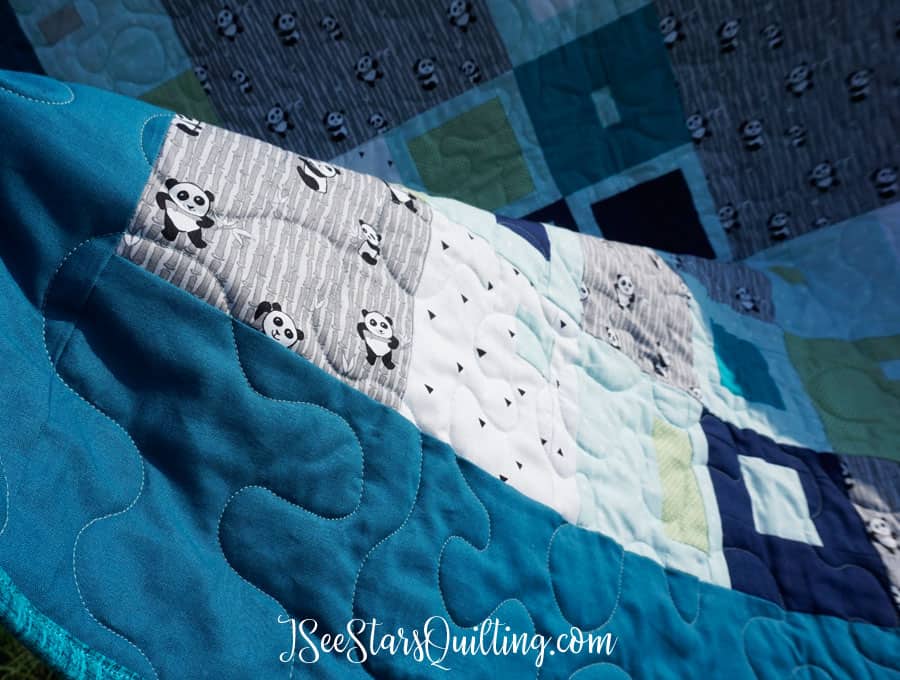
    I couldn’t bring myself to cut up the landscape panda fabric… so I made it its own little spot on the back of the quilt. These pandas are having their own little block party.

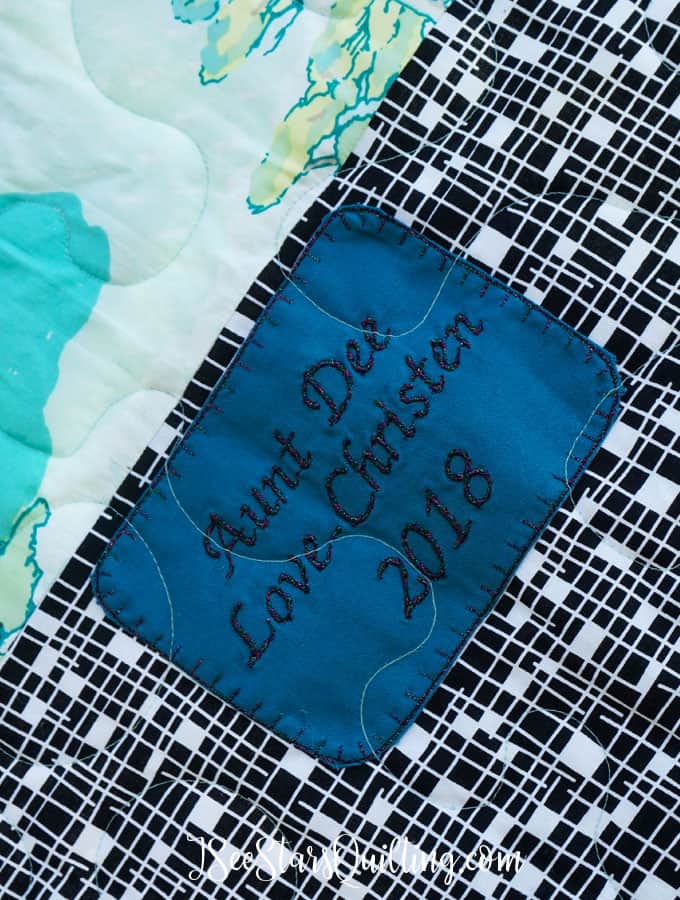
    I even added my own little-embroidered label on the back of the quilt 🙂

    A few more detail pictures because I love the fresh and serene colors of this quilt and how lovely the blocks play with each other.


    This post may contain affiliate links. If you make a purchase using one of my links, I might get a small commision of the same at no extra cost to you. You can read more here.

    The Stack and Wack Quilt Method

    Ok, onto the tutorial!

    What if I told you that you didn’t really have to measure everything perfectly?

    That your lines don’t have to be perfectly parallel?

    What if it is as easy is literally just stacking up several layers of fabric and wacking them with your rotary cutter?

    Are you hooked and sitting on the edge of your chair?

    YES, it’s that easy! — But don’t go slicing up your fabrics just yet!

    Bethany Reynolds actually coined the “stack-n-wack” term. Her quilts have a mesmerizing kaleidoscope pattern that is achieved with her signature… you guessed it… stack-n-wack method!

    If you get a chance, google her one day and get ready to be inspired. 🙂 She blows my quilt blocks completely out of the water.

    You may also hear this method called by other names such as “stack and slice” or “stack, cut and shuffle”… but they all mean the same thing. (Personally, stack and wack rhymes, so it is my favorite.) The end game is simple, cut multiple pieces of fabric at the same time, mix the pieces and then sew them back together again!

    What you will need

    To make sure that you’re stack and wack quilt turns out right, it is best to start with your fabric sections all the same size. You can either cut them all on your own, or you can use charm squares or 10″ square pre-cuts.

    I tried the 8″ precut size on the panda quilt… I think I would have preferred the 10″ starting size a little more just because you lose a lot of your fabric to seam allowances. Just a bit of friendly advice learned from the experience!

    You’ll also need a cutting mat and your rotary cutter as well as a good ruler.

    Before you start…

    Your rotary cutter should not have a dull blade on it. Besides making life miserable, it takes more effort to use a dull blade, and you risk your pieces of fabric shifting while you’re sawing through layers of fabric.

    Make sure you either have a rotating cutting mat like this one. Or you are cutting in an area where you can move around the cutting table. Whatever you do, do NOT pick up and turn your stacks of fabric when you’re changing cutting angles. You’ll end up with a hot mess of misaligned squares. Instead, move the mat you are cutting on, or reposition your body.


    Go Time – The Stack and Wack Quilt Method

    Step 1

    Choose your fabric and stack it, making sure edges are aligned, and the right sides are facing up.

    Step 2

    Use a ruler and your rotary cutter to slice through your fabric stack making sure the fabrics do not shift as you cut.

    Step 3

    Mix and match your fabrics!

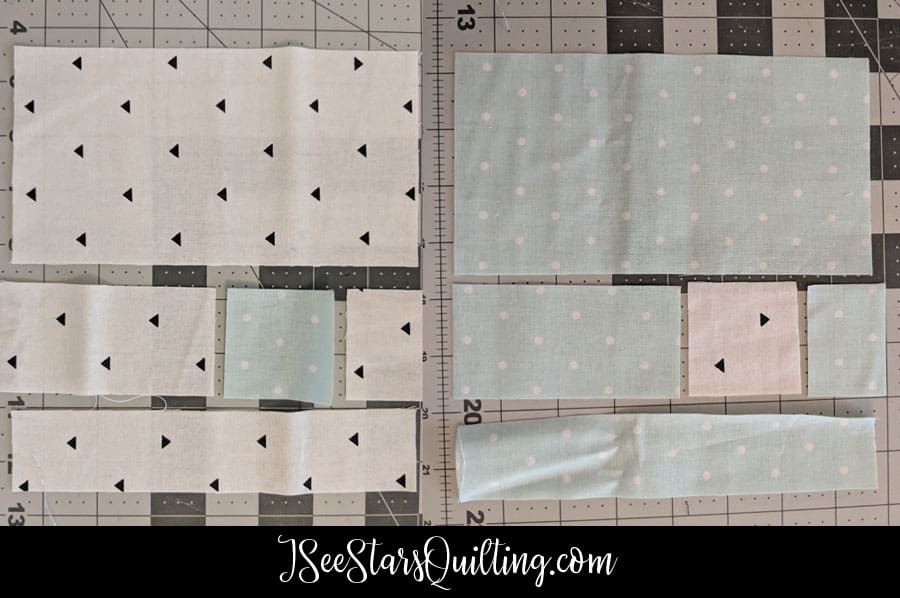
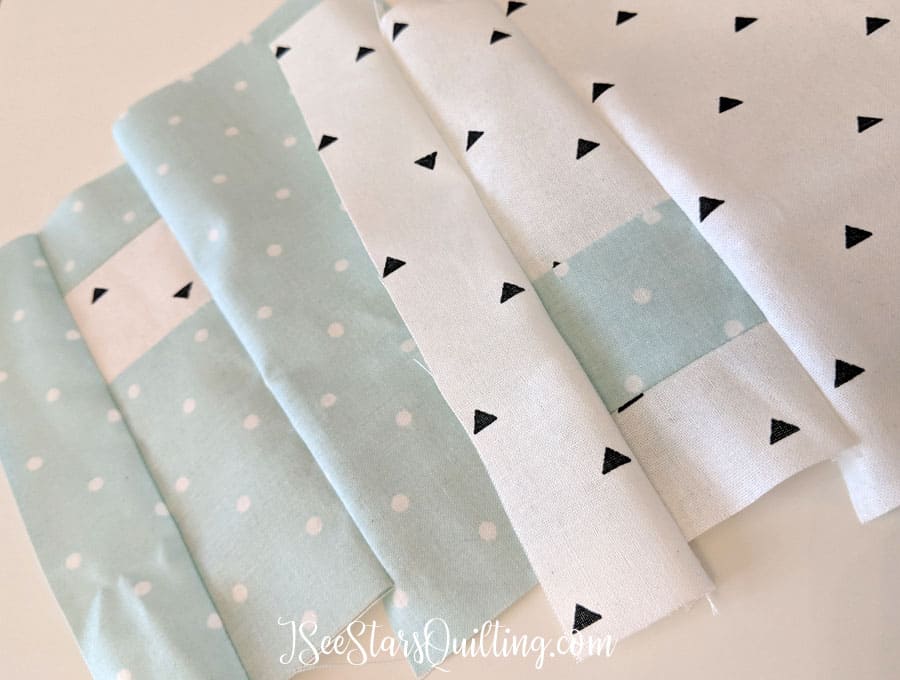
    In the Panda quilt example, I sliced the fabric in stacks of 2 at a time and then swapped the center pieces as shown below.

    There is no rhyme or reason for these cuts. You can make them be as off or weird as you want them to be. I made some with smaller borders and some with off-center middle squares. You can make the lines relatively straight and parallel or crazy and not.

    Whatever fabrics you have in your ‘stack’ are the ones that will be interchangeable. Experiment with colors and arrangement to find a pattern that works for you.

    Step 4

    Sew them back together! You’re going to end up with a little funny shaped blocks because you’ve lost some seam allowance depending on your design. Just roll with it till you get to step 5 😉

    Press your seams open.

    Step 5

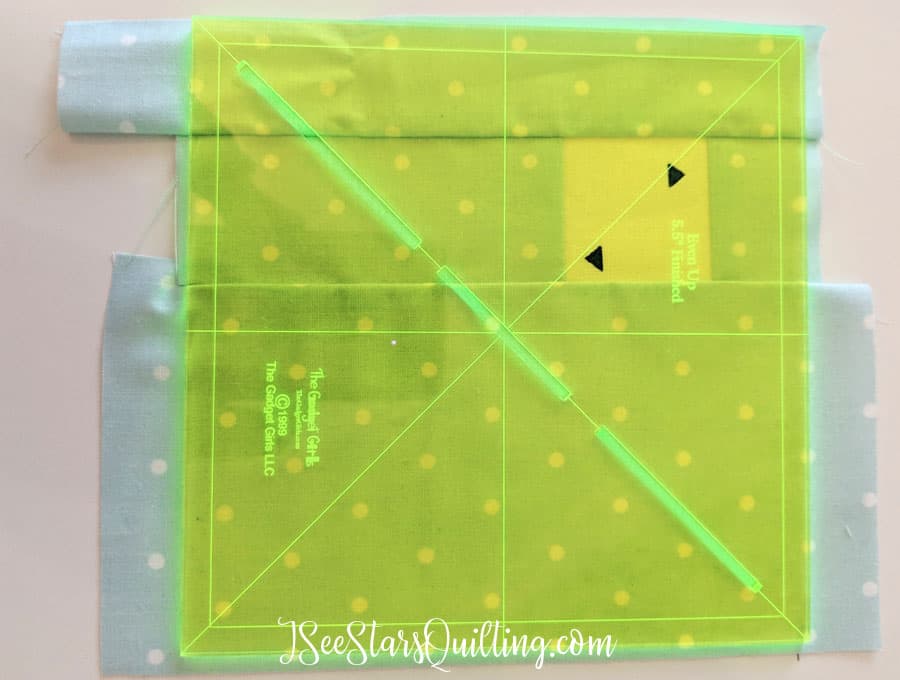
    Trim up your blocks if needed. I used this 5.5″ Even up from the gadget girls. It absolutely lives up to its name and makes ‘evening up’ everything a snap. You could also use a paper template and your ruler to trim up your edges.

    You need to make these blocks square again before you assemble your top quilt.

    Step 6

    Time to Assemble! – Piece your squares together. I mixed in some varying sizes of a larger solid print because… pandas on bamboo fabric! That’s why 🙂

    Then quilt it, and you’re good to go. You didn’t have to measure too much… and I hope you enjoyed the creative freedom that this stack and wack quilt method gave you to do what you pleased knowing it was all going to turn out just fine!

    The Stack and Wack Quilt Method is a method that doesn't require precise piecing and allows for whimsy to take place. Check out this FREE tutorial and see how easy it is to make your own Stack and Wack quilt!

    Wasn’t that fun?

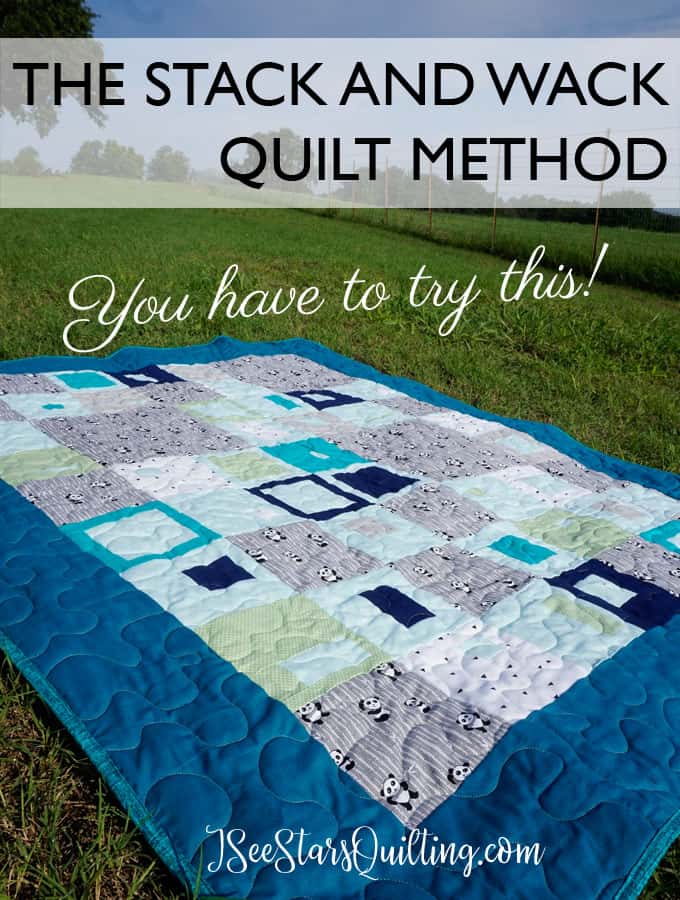
    You can pin the image below so that you can return to this tutorial when you’re ready to make your own stack and wack quilt!


  • Updates on the Zipper Box Pouch Tutorial

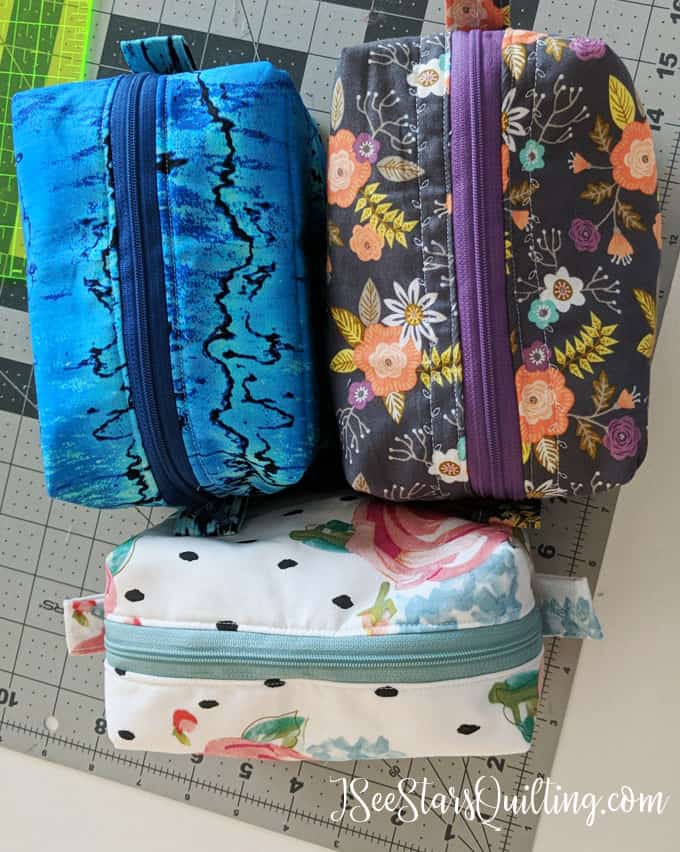
    The other day I was talking to a friend of mine about this zipper box pouch tutorial and how I’ve been making a bunch of them because they are so fast and fun and I’m going through my big scraps like water. It is just perfect, right? And the time to complete each one has gone just under an hour to only 35 minutes each. Yeah, I’ve been making a bunch of them so it goes pretty quick now.

    Easy gifts? Um, yes! (To my Mom: Still act surprised when you get one of these for Christmas ok?)

    This is an alternate finishing technique for the final step of the Zipper Box Tote. It comes together in less than an hour! #ZipperBoxtote #easygift

    You may have caught a sneak peek at some of these in the works on my Instagram account. Instagram my favorite way to share updates on the many projects that I have going on right now. Follow me!

    So as I was saying, I was all proud of the progress I had made… and just when I thought I had everything figured out, she showed me a different way to make the corners of this box pouch. Say what?! Yeah… and it was kind of mindblowing, honestly.

    So I’m adding a quick alternate ending to the tutorial for the zipper box pouch. It was really cool to go about it completely different and still get the same results. I just had to share it with you!

    Check them both out and see which way you prefer!

    (Side note: Both ways work out with exactly the same results… It is just a different technique.)

    If you haven’t read the first part of the tutorial, click here and then come back 🙂 I’ll add a link on that post as well!

    Alternate ending tutorial for the Zipper Box Pouch

    Ok so where we left off in the other tutorial, you should be looking at a pouch that is flat just like this one, and the sizes are zig-zag stitched just like this one too. Got it? Good!

    This is an alternate finishing technique for the final step of the Zipper Box Tote. It comes together in less than an hour! #ZipperBoxtote #easygift

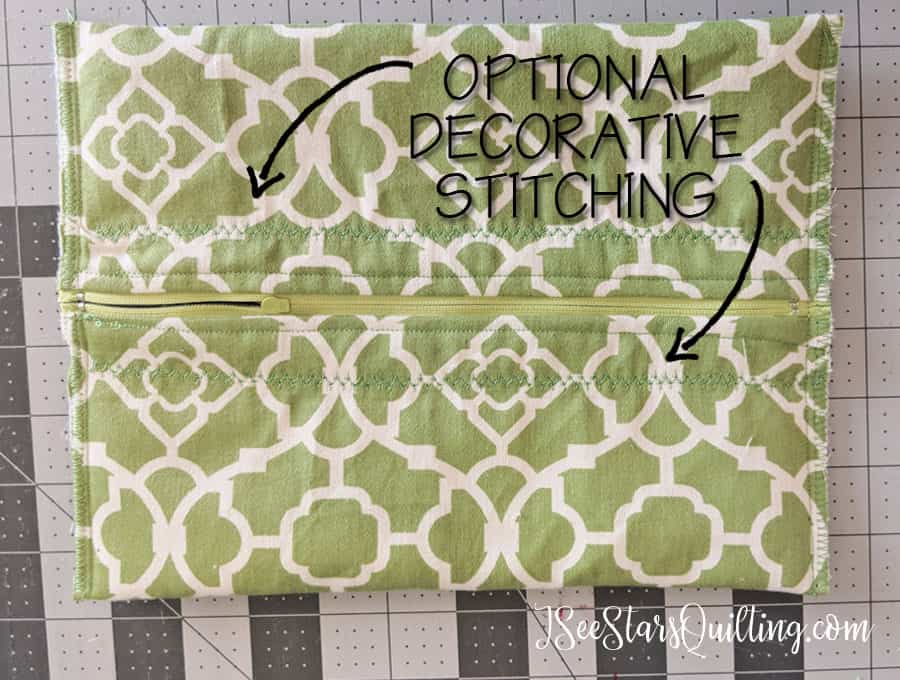
    Please see my note at the bottom of this post about decorative stitching ideas. It is something new that I started after I made the tutorial

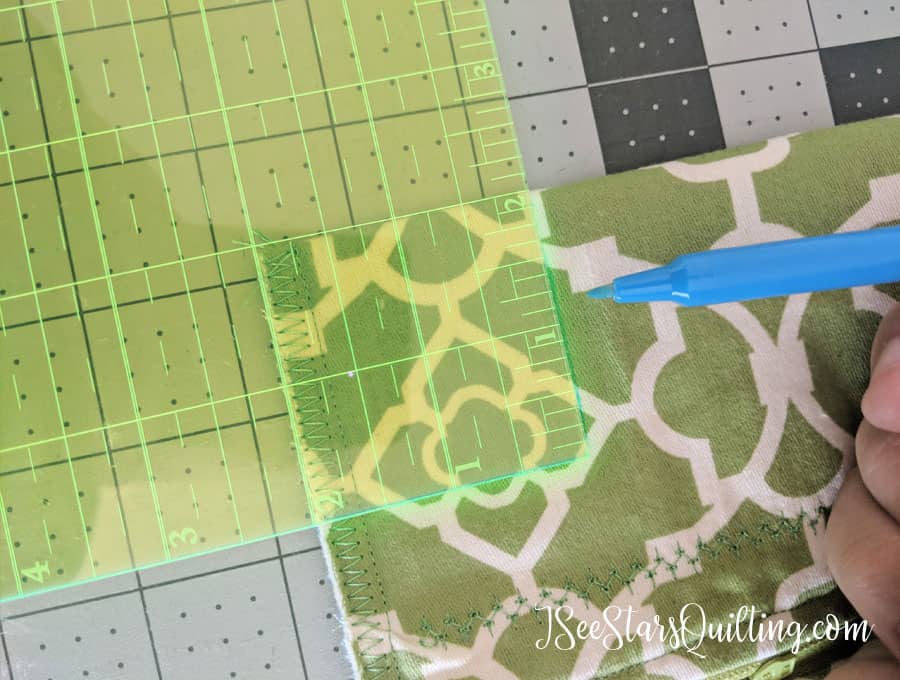
    In the previous tutorial, I had you measure up 2 inches on your folded sides. Take your ruler, fabric marker or light pencil and draw a 2″ square in each corner of your rectangle.

    This is an alternate finishing technique for the final step of the Zipper Box Tote. It comes together in less than an hour! #ZipperBoxtote #easygift

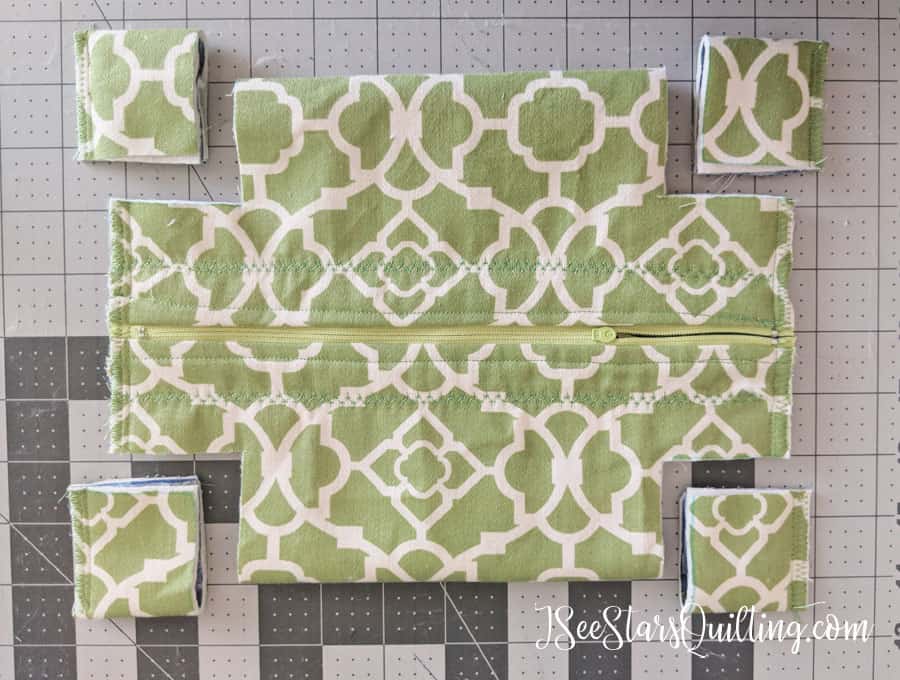
    Then carefully using your rotary cutter and a ruler as your guide for a straight line, cut those squares away from your fabric.

    This is an alternate finishing technique for the final step of the Zipper Box Tote. It comes together in less than an hour! #ZipperBoxtote #easygift

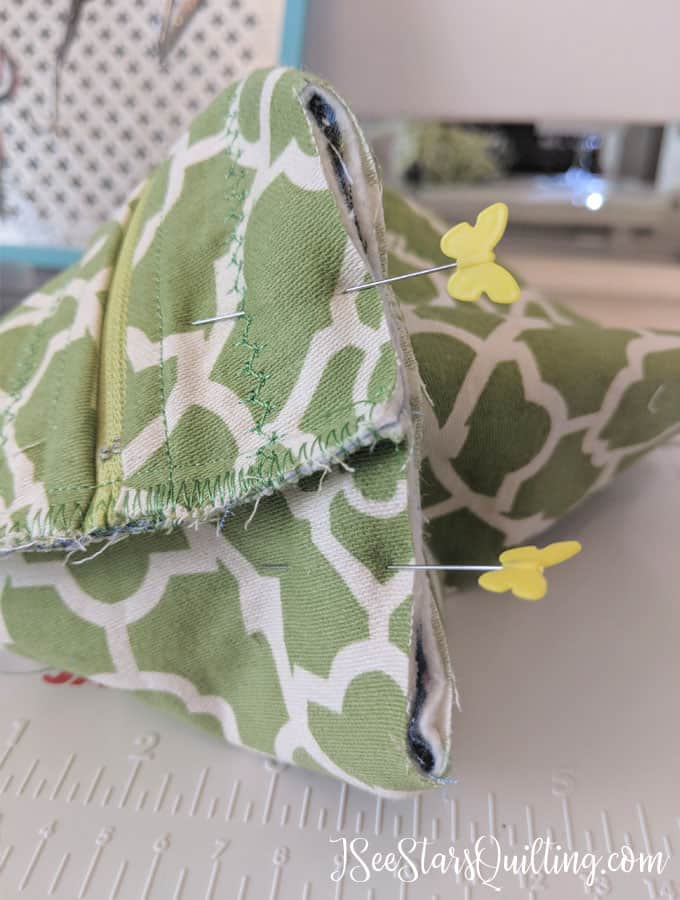
    Next, open the square cuts and pin with edges even. I think pictures speak louder than any words, but to explain a little further, the center of the 90-degree cut you just made will be the top and bottom points on the seam you’re about to sew.

    This is an alternate finishing technique for the final step of the Zipper Box Tote. It comes together in less than an hour! #ZipperBoxtote #easygift

    A little more clarification (skip along if you’ve got this) I want to make sure no one is left confused 🙂

    This is an alternate finishing technique for the final step of the Zipper Box Tote. It comes together in less than an hour! #ZipperBoxtote #easygift

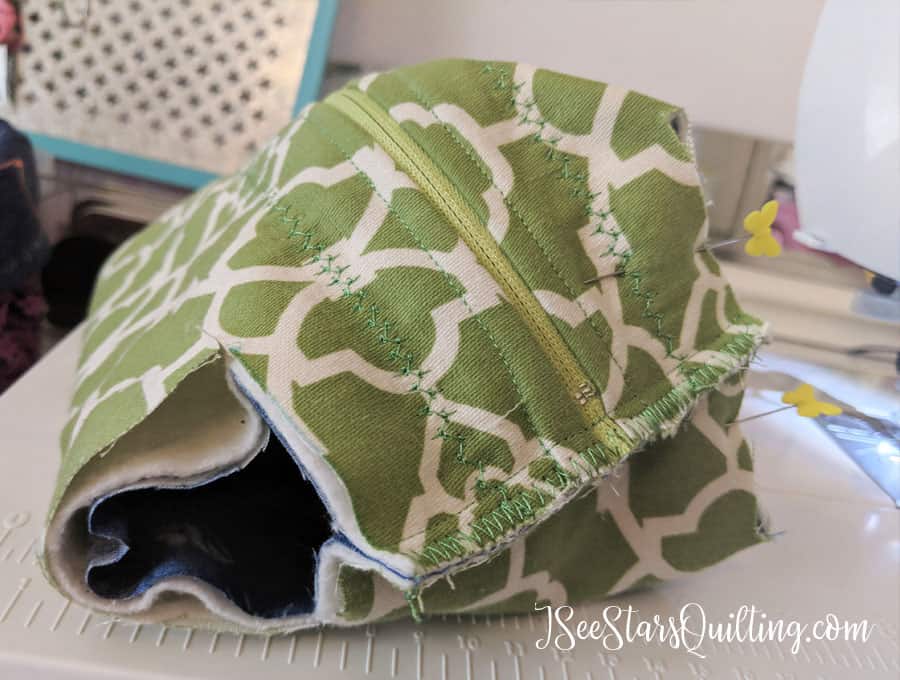
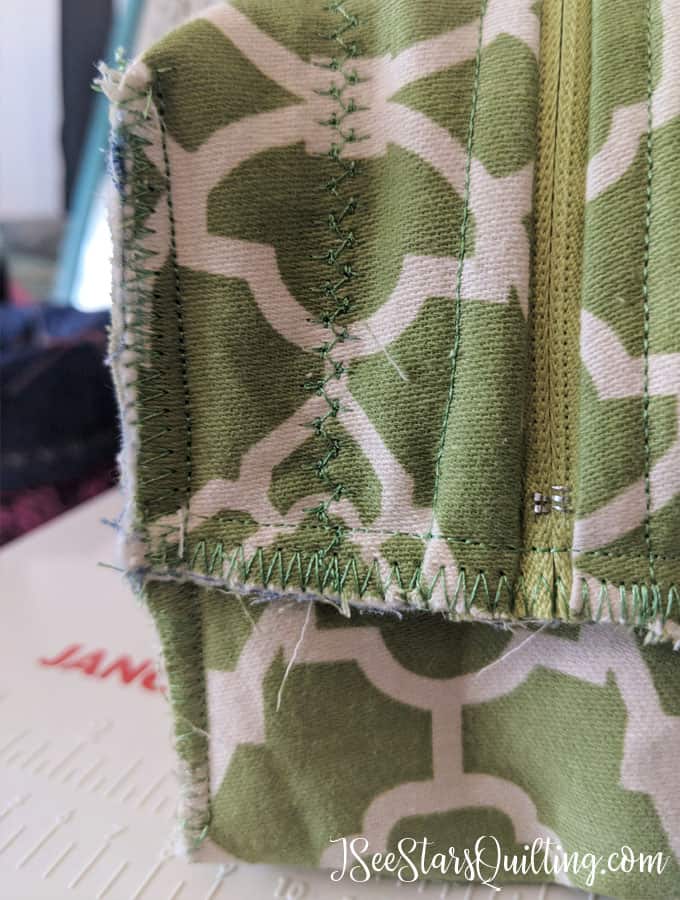
    Sew a 1/4 inch seam allowance down your newly pinned seam, then zig-zag stitch to prevent any further fraying of fabric.

    Do this step for all four corners.

    Before I call my zipper pouch “finished” I take a pair of embroidery scissors and trim any stray wild threads in the interior for a more finished look.

    Turn the bag right side out, and you are finished! Ta-da! Isn’t it cute?

    This is an alternate finishing technique for the final step of the Zipper Box Tote. It comes together in less than an hour! #ZipperBoxtote #easygift

    Adding Decorative Stitches

    This is just a little something extra you can add if your home machine has the options of decorative stitches. I love picking contrasting thread for my bags, and this is the perfect venue to show it off.

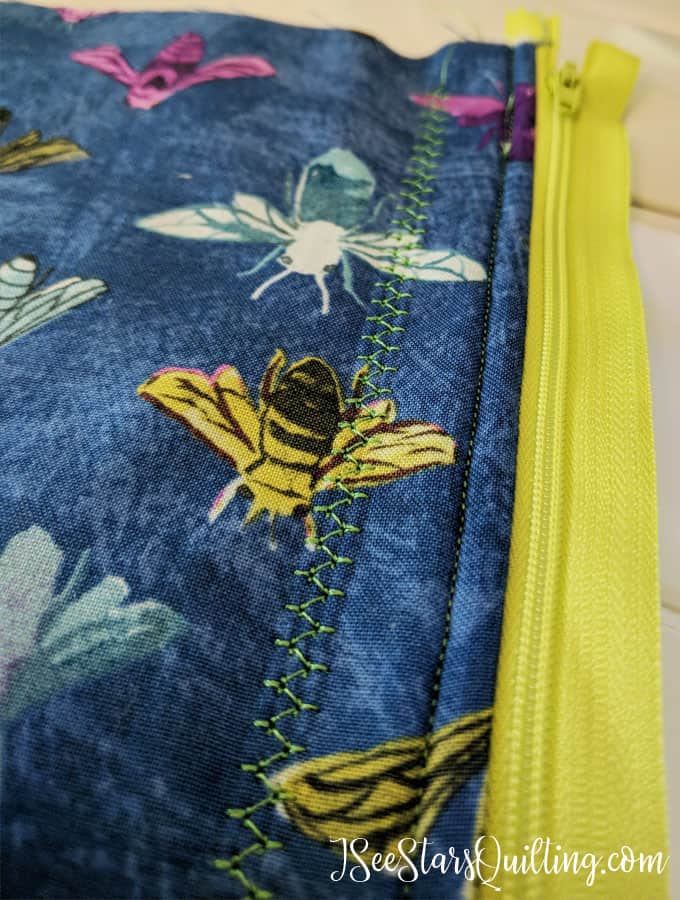
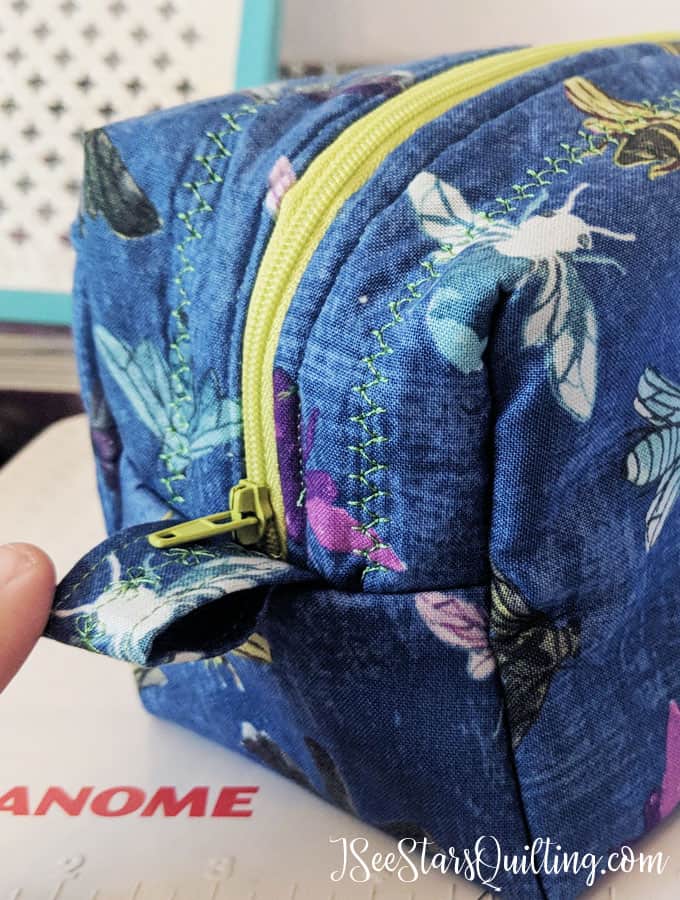
    Right after you stitch your zipper sides, sew another line of decorative stitches about 1-1.5 inches away from your zipper line. You can’t add it in later, Sorry. Experiment with a few and see what you like.

    This is an alternate finishing technique for the final step of the Zipper Box Tote. It comes together in less than an hour! #ZipperBoxtote #easygift

    Do not stitch too far away from your zipper or your stitching will fall into the sides of your bag. The 1-1.5″ area is just enough to frame out your zipper and still show up on the top of your bag.

    On this particular bag (which I called the bug bag the entire time I was working on it because… like, I don’t even like bugs, but I love this fabric and combination with the green zipper. Weird right?) I also added a little detail stitching on the zipper pull tabs. See the flowers? I did a line of decorative stitching down the center before I trimmed it in half and added it to my bag.

    This is an alternate finishing technique for the final step of the Zipper Box Tote. It comes together in less than an hour! #ZipperBoxtote #easygift

    I hope you can see how easily customizable this box zipper pouch really is… there are so many possibilities out there, and you can really make it your own.

    Do me a favor and let me know in the comments if you make this? I would love to see your projects! You can tag me @iseestarsquilting or #iseestarsquilting

    Happy sewing and have fun with this one! You’ll be making tons of them soon enough like I am… you have been warned! 🙂

  • How to Choose the Right Quilt Batting

    Have you ever walked down the batting isle at the craft store and immediately wanted to crumple into a ball on the floor or walk away? I mean, yikes… sometimes too much of a selection isn’t a good thing. I’m going to demystify quilt batting for you and help you choose the right quilt batting for your quilt! It doesn’t have to be a complicated process!

    How to Choose The Right Quilt Batting

    First of all… you’re not alone if you feel overwhelmed by this. I am mostly self-taught in quilting, so the number of times that I’ve sat there with a confused look on my face and then turned to google for answers is like, infinity by now. (Don’t even get me started on the bottles in the shampoo aisle)

    In order for me to make a decision, I need to know that I’m as informed as I possibly can be. If you think decisions like these should be some type of “quilter’s instinct” that you don’t possess.., it isn’t. Developing your own opinions is one of the most crucial steps to becoming a happy quilter. The only person who knows what you really like is YOU. But there is a little more to it than that… Let’s dive right in and get to it, shall we?

    Choosing The Right Quilt Batting

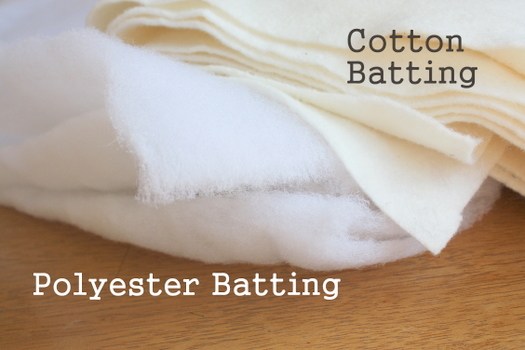
    There are four different main types of batting, cotton, polyester, wool (and more recently mainstream) bamboo. In addition to that, there are some batting blends that combine batting types.

    Let’s do a quick overview…

    Cotton Batting

    Cotton batting is made from natural fibers is one of the most favored by quilters for its soft texture and comfort. 100% cotton batting is usually 1/8″ thick.

    Cotton is my personal go-to quilt batting. I love the drape of a quilt with cotton batting. It is a little stiff just after your quilt it, but after a good run through the wash and some good snuggles, your quilt will feel more “broken in” and will loosen up.

    You can buy cotton batting in organic & non-organic fibers. If your curious little mind wants to know what “organic cotton” means, you can read this post I wrote on What Makes Fabric Organic)

    You’ll also notice that with cotton there is a ‘white’ and ‘natural’ coloring. This is just bleached fibers vs. unbleached. If you have any patches on your quilt top of white or really light colored fabric, I suggest going with the white cotton batting because the yellow tones of the natural fibers can show through and yellow your lovely crisp white fabric.


    Polyester Batting

    Polyester batting holds its shape and thickness really well compared to other fibers. It tends to be thicker but lighter and keeps you warm without the weight. Its very air-y if you look at it compared to cotton batting. It’s non-breathable but resists mold and mildew. Polyester batting thicknesses are 10 oz is 1″ thick, 6 oz is 1/2″, 8 oz is 3/4″, and 4 oz is 3/8″.


    Wool Batting

    Wool batting is very lightweight and is used for its warmth. Those warm but scratchy shirts you wear for layers in the winter time? Sandwich it between some pretty fabrics, and you’ll lose the scratchy but maintain the warmth! Win-win.  It’s also a really fluffy texture after it has been quilted. Wool batting is ½” thick and resistant to creases. Wool does not ever get fold lines or creases, even after months of being folded. Say what? Yes! This is really nice for a quilted wall hanging as you will never have to worry about wrinkles, which is pretty impressive.


    Bamboo Batting

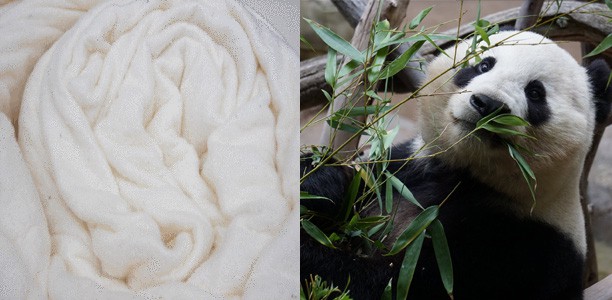
    Bamboo batting is made from 50% bamboo and 50% organic cotton blend batting. It is very breathable and ideal for machine quilting. Bamboo batting is hugely ‘green’ regarding how it is processed into luxurious fiber using pollution-free methods with little waste.

    Bamboo batting is the high-end batting option. Have you ever touched a cheap cotton fabric and then felt a 100% organic cotton fabric? –It is like night and day, right? It’s soooo soft. This is essentially bamboo batting next to every other batting out there.

    Bamboo batting drapes soooo nicely, dries quickly after washing and doesn’t allow mold or mildew to form. It’s pretty awesome, but it’s also expensive and an investment. If you’re working on a gorgeous, heirloom, generation to generation forever quilt, you might want to consider it because it will last a really long time. The quality is worth the price for such a treasure


    Poly Blend Batting

    If you find yourself torn between what your wallet says you can spend and a desire to really produce a soft and snuggle worth quilt, a poly-cotton blend may be your answer.

    Polyester blends tend to cost less if you’re looking for an economical option. It is also easy to work with and warm. Poly blend batting is also a winner if you suffer from allergy issues as it resists mold.


    WHICH ONE SHOULD I USE FOR MY QUILT?

    Often THE PRICE is also a determining factor. Let’s face it… we’re not up to our eyeballs in a cheap little hobby here. Quilting can be expensive. Pricing does tend to vary by brand, but a general expectation is that polyester is on the lower cost end, followed by cotton, then wool, and then bamboo at the higher end.

    It’s easy to cheap out on the batting because you can’t see it in the finished quilt project. However, you do need to understand that the batting is often the determining factor on how your finished piece looks and behaves.

    WARMTH is another consideration – Wool is the warmest, followed by polyester and then cotton. Cotton and wool breathe better than polyester. If you live somewhere that it snows four months out of the year and you need warmth, you’ll really get good use out of a heavy quilt vs. a climate that is much warmer may only use that heavy quilt once or twice a cold season.

    Feeling like you learned something?

    That big scary isle of white and off-white quilt batting shouldn’t be so scary anymore. Now when choosing the right batting, you’ll know the positives of each type and how they tend to behave.  Just like you can’t jump into algebra without knowing how numbers really work, you just needed a little back study. It is pretty much the same thing with quilt batting… ok so to compare algebra and quilting is a little unorthodox. I can quilt, but I’m not very good at algebra. At least with practice, my quilting improved… ha!

    Ok, we’re not entirely done yet though… stick with me.

    The most crucial factor in Choosing The Right Quilt Batting

    This next step is KEY to deciding which quilt batting you’re going to choose. It is understanding how the batting that you choose actually affects your actual QUILTING. – As in the designs that you carefully stitch to keep your quilt sandwich together after you’ve done all the piecing work!

    Each batting comes with a suggestion rating for how closely your quilting lines should be so the batting doesn’t shift or come apart within the quilt. This rating will significantly affect how much quilting you’re going to have to put onto your quilt.

    In order to hold the layers together securely, you will need to be sure not to leave any space open larger than this rating describes.

    Personally, I’ve seen ratings anywhere from 3″-10″… see how much that could affect your design? A larger rating is best if you’re just looking to quilt a few lines to hold the piece together and get it done quickly! A smaller rating is fine if you’re planning on a tighter more detailed quilting pattern.


    Standard Batting Sizes

    When you purchase batting, you can buy it prepackaged, in standard sizes for crib, twin, full, queen and king size quilts.

    Craft        36″ x 45″                 Full            81″ x 96″

    Crib          45″ x 60″                Queen      90″ x 108″

    Twin         72″ x 90″                King        120″ x 120″

    When I first started out quilting, I would get my coupons out and buy the queen or king size batting and then cut it up into several quilts at home so that I could use my own custom sizes.

    Alternatively, you can buy it off the bolt in your own custom size. This is a popular choice for longarm quilters or those who like to buy in larger quantities.

    A quilting friend and I went in together on a big bolt on Amazon (hello prime delivery!) and split the roll and the cost. Storage is kind of an issue for the larger rolls of batting, but it is easy to just hide away in a closet and I really like having the batting at home (and already paid for!) instead of having to run to the store for every quilt.

    At the end of it all, a lot of finding out what you like and don’t like comes down to experimentation. 100% cotton is statistically a favorite among quilters, but a cotton-poly blend? Don’t knock it till you try it as a way to save a few dollars! Next time you’re having a panic attack in the batting aisle and feeling inferior in your quilting skills, take a deep breath and hold your head high… you got this, momma.