Do you find it difficult to find a place for your sewing supplies? Is the clutter on your desk driving you crazy? This blog post will help you declutter and organize your sewing room so that you can have a stress-free workspace.
Over the years and as we’ve moved, my sewing space has transformed too many times to count!
It can also transform a lot when you’re a bit OCD and always searching for the perfect way to maximize your productivity. (I’m talking about me here, in case it wasn’t clear… that’s totally me)
The good news is to make yourself organized and more productive, all it takes is a few tiny steps forward today… and your tomorrow will be looking pretty great!
First things first, It is important that you do a quick tidy of your space. I promise it isn’t overwhelming. You can see how I quickly clean my sewing space in usually 25 minutes or less in this video below.
Easy, right?
Ok, let’s look at a few other tips to get you on the right track to decluttering your sewing space and finding storage solutions. They are a quick and easy way to get started with that first step into an organized life without losing sleep or causing stress! 🙂
More Decluttering tips and finding storage solutions
These are the questions that I ask myself when decluttering my sewing supplies (FYI, fabric is an entirely different process and I don’t put it in this category at all!)
– Have I used this in the last six months? Do I plan to use it in the next 3 months? – If the answer is no, get rid of it! At the very least find a long-term storage closet situation that is out of your way if you just can’t bear to part with your belongings.
– Anything that doesn’t have a specific place to go should be eliminated from your sewing room. – This gets tricky if you have a multi-purpose space. If you can, try your hardest to define clear boundary areas between your spaces and what you allow to enter. Example: I would absolutely never allow the pots and pans in my home to be stored in my bedroom nightstand when the kitchen cabinet seems like it is too full, right? If you outgrow a place, you have to scale back and figure out how to make it work, what is a priority for storage, and what can be let go of.
– Group like items together: fabric bolts, thread, scissors, pins etc. – You’re probably already doing this because it’s cute and handy right? Do you have a little overflow corner or a stack of shopping bags that you haven’t gotten to organize yet? Take care of those areas that need a little extra care.
However, do not let yourself fall into the trap of thinking that containers make you organized!… which leads me to my next tip…
– Label everything! It will help you find what you need when you’re in a hurry. More importantly, don’t ignore your labels and think that 6 months down the road you’re going to remember what is in that box. You don’t have to be fancy with vinyl cut Pinterest-worthy labels – a neon sticky note works just fine or you can use these reusable chalk labels that make it super easy to repurpose your bins again and again!
Let’s talk about those projects that you’re in the middle of right now. We call them WIPS or UFOS (works in progress or unfinished objects)
How do you currently store your projects? Are they out in the open or do you have a specific system to keep up with them?
I like to have a basket for each project to keep all the pieces together. This helps me keep my workspace clean and clear. It allows me to work on the project pack it up neatly without fear of losing anything after every session (which is usually once or twice a week) then those projects go onto the shelf for storage.
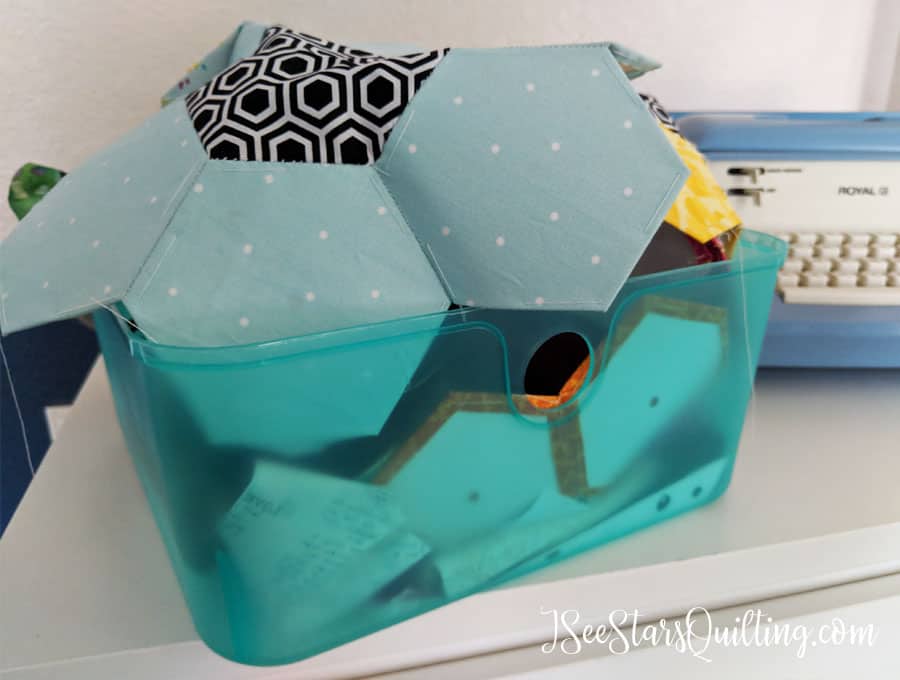
Once again: label everything and give yourself clear boundaries so there is no question about what goes where.
Another idea for storing current projects is to use a hanging file system.
They are easy to make! (it’s super cheap!) It might not be suitable for large quilt projects but for small hand sewing projects or pattern pieces, it works really well and takes up very little space.
More Storage Solutions for your Sewing Room
There are endless possibilities when it comes to finding storage solutions for your sewing room.
I try to stick to furniture that has multiple uses should I change my mind down the road and want to use it differently. I use IKEA furniture… like, a lot… so it also has cohesiveness in the room as well.
- A shelving unit provides extra storage for fabric, patterns or be used to hold your books, current projects etc.
- Try using a pegboard to hang your tools. Pegboards are great because they can be placed on the wall horizontally or vertically, depending on what you need! I used this in my own sewing room at one point. It turned out amazing. – You can check out that post here.
- If you’re short on floor space, try a storage ottoman. This is perfect for fabric because it’s out of the way but still accessible when needed and can easily be hidden away when not in use.
- Use tension rods to hang extra fabric or shelf dividers to section off your fabric bolts
- A rolling cart is perfect for storing thread, scissors, tools etc. that you want to have close at hand
So there you go – my top organizing tips for your sewing room! These tips will help you get your creative space decluttered and organized so you can create with ease and efficiency!
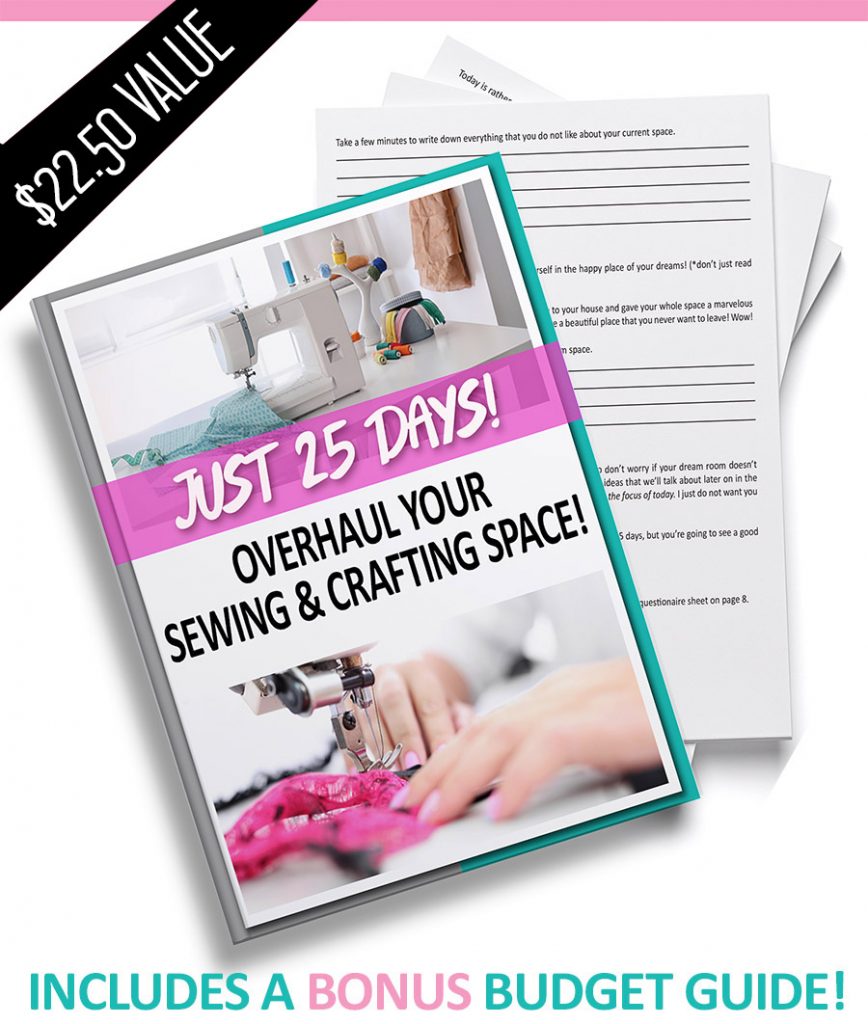
If you’re still wishing for a little more hand-holding while you’re working on your space, I’ve created an ebook that has helped hundreds of crafters create the space of their dreams! Check it out and let’s get started together 🤩🥳🥳