Christen Phillips

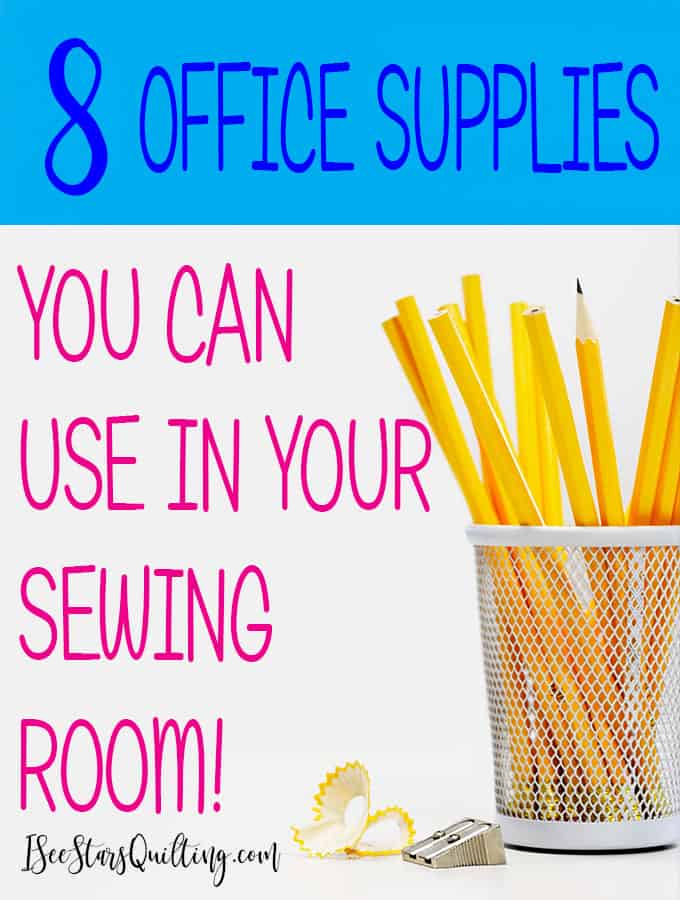
  • Office Supplies you can use in your Sewing Room

    Isn’t it great when the things you own can pull double duty? Here are 8 Office supplies you can use in your sewing room!

    I try not to own a crazy abundance of stuff in my home. I like the sleek minimal look. However, I tend to throw out all of those aspirations when it comes to my sewing room because in there more is better obviously.

    Being a quilter or a crafter can have you hoarding litteral trash because “I could make something with this!” right?

    You have to own your whatsits and your things.

    Today I want to share 8 Office supplies you can use in your sewing room. These items are going to be at your side on multiple occasions and therefore are more likely to be the best bang for your buck!

    Office supplies you can use in your sewing room!

    1. Post-it Notes

    I have already shared how much I love these things, but I’m going to do it again. The fun bright colors mean even on a crazy messy table, you’ll still be able to find your notes.

    I use Post-it notes all the time for labeling my cut pieces. If I’m working on a very involved pattern that is going to take a long time, I will leave myself notes along the way so that when I come back to it I can pick up right where I left off without having to backtrack too far.

    I use them as bookmarks in my patterns and tabs for patterns I frequent…. the list is endless!

    2. Cheapie Scissors

    Please buy a cheapie pair of inexpensive scissors for cutting your paper patterns, notes (and FREE honest crafter gift tags) wire, etc. Buy several pairs.

    It’s ok to know who you are and realize that you’re going to misplace them… or another family member might end up borrowing them. It happens.

    For all that is good in this world, save your fabric scissors for cutting fabric ONLY! 🙂 PS – I really like these scissors for fabric.

    3. Clear Sheet Protectors & Binders

    All those loose pattern pieces and freebie patterns you download? Keep them organized and all the pieces together using clear sheet protectors! And then keep your clear sheet protectors organized with a 3 ring binder. Tuck it in on a shelf and enjoy how you no longer have stacks of random papers just hoping they stay together!

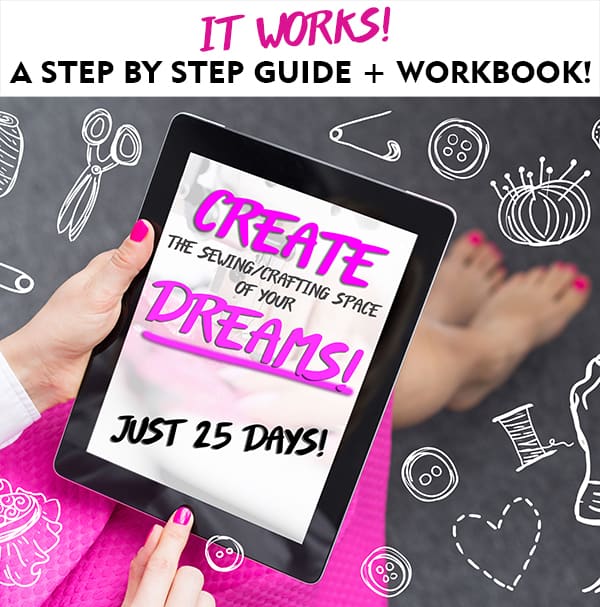
    For more ideas on how to organize absolutely everything in your sewing room, check out my ebook – 25 Days Creating the Sewing/craft space of your dreams! It’s a detailed step by step guide. I cover EVERYTHING!

    Pssst: You can get 10% off if you use the code ISAWTHISBLOGPOST when you checkout 😉

    A guide to creating the sewing/craft space of your dreams! Step by step, I've created a blueprint for your to follow that goes through everything you need!

    4. Copy Paper

    Maybe this one is a little obvious because we live in a digital world where you can instantly download your favorite pattern and print it off for use right away.

    I still feel I have to include copy paper on this list because it is always good to buy extra when you see it on sale!

    I also use it for sketching ideas and resizing patterns as well as printing on.

    5. School Glue Sticks

    When I’m working with patterns that require the puzzling job of matching up multiple pieces of paper… I don’t mess with tape. At least, I dont anymore. These Glue sticks are waaaaaay faster and easier.

    I’ve also been told that it is a great basting tool for smaller quilt projects. I haven’t tried it yet myself, but it is on the list of things that I want to try!

    You can also use a glue stick to give yourself a little help when hemming or topstitching.

    Personally, I like the purple ones that then dry clear… not to say that they work any better on the ones that are already clear and dry clear… I just like the purple color. 🙂
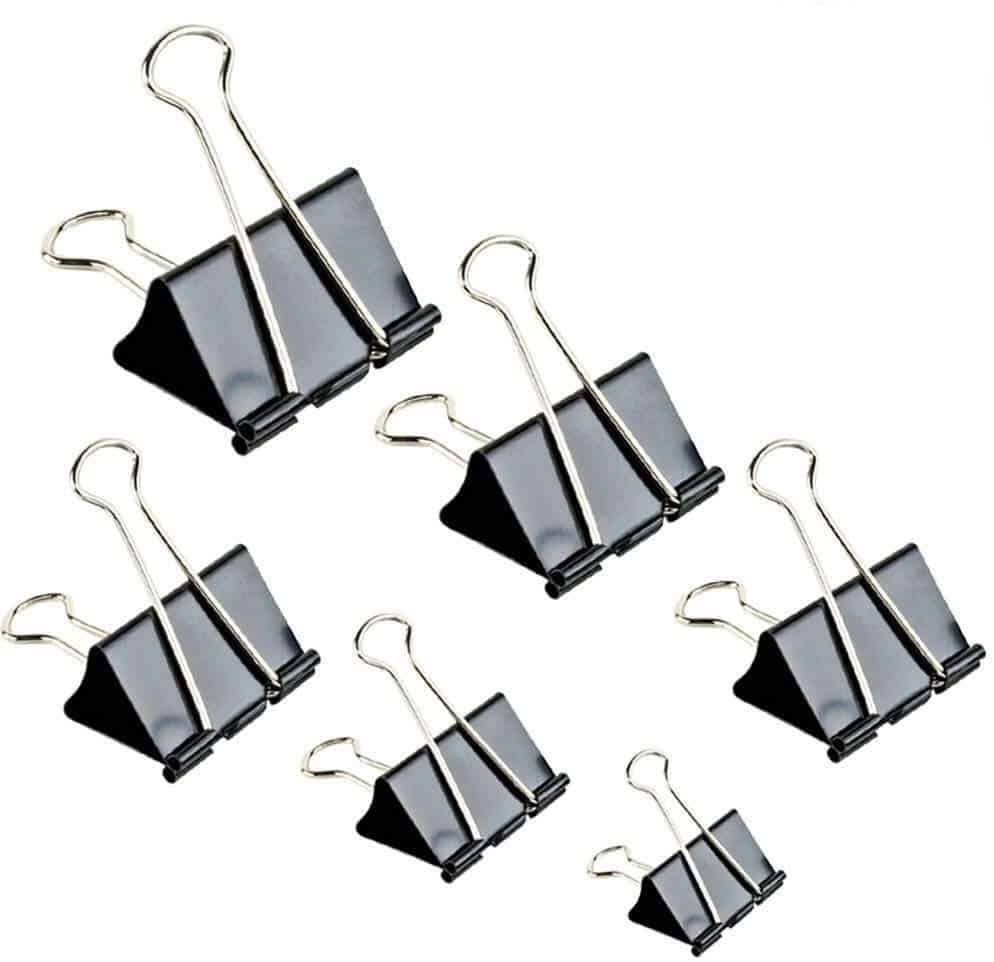
    6. Binder Clips

    If you ever see some of these at a garage sale, grab them… they work all over the sewing room.

    Magic clips are very similar and basically do the same thing but I really like the way that binder clips can hang on a hook for organizing. I have a few nails on my fence in the backyard and I use little clips to hold up quilts for photos.

    You can also use them to close up the cheerios in the pantry… so many uses!

    7. Washable Markers

    Yes, I know that the fabric store has pens specifically for marking on fabric… but in a pinch, Crayola washable markers will work just as well. They’re made for 3-year-olds to use after all.

    Both of my kids took it as a personal challenge to see just how many surfaces they could draw on before mommy noticed the quietness in the next room. So, yes… I’ve tested these markers on multiple surfaces and aside from eggshell paint finish… Crayola really stands true to the washable claim.

    Perhaps maybe I wouldn’t go for a dark green on a delicate white fabric… but for small little marks and a notch here and there I use them all the time.
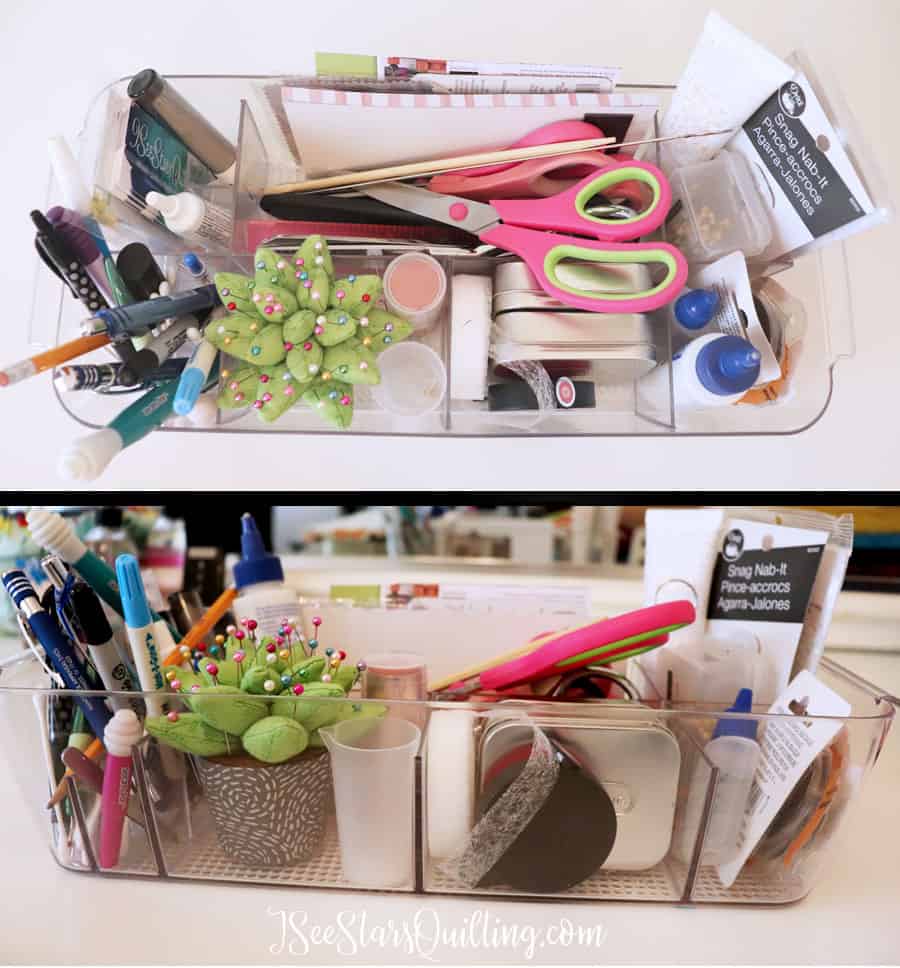
    8. Organizers

    Want to be all chic and feel fancy? Go visit the desk organizer section and imagine all your craft supplies instead of boring pencils and sharpies and … I don’t know… tax forms or something.

    For a long time, I had to be so budget conscious and pinch every single penny. Babies are expensive and so is crafting! I used empty soup cans and cereal boxes to organize my sewing supplies – and it worked great. I still have a lot of those items because functionality-wise, they work perfectly and I’m the only one who really sees them.

    I started to branch out as the diaper fund decreased and I invested in a few “pretty” items for my space to freshen it up.

    Creativity is best in a room filled with the things that bring you joy! I'm going to give you a tour of my sewing room today and share all my organization tips along the way!
    Click here to tour my sewing room

    Definitely hit up the back to school sales when they come out! You can check out my post on Dollar store Back to school sale items for your craft room.

    To keep a minimal vibe in your home and craft space (or just to make every dollar stretch a bit further) look for items that can do double duty. These office supplies you can use in your sewing room will be useful in so many ways around the house!

  • 30 Amazing Quilting Tools I Purchased On Amazon!

    Let’s get one thing straight… I’m the mom who will spend 2 hours at target because we needed toothpaste and somehow come home WITHOUT the toothpaste!

    It is kind of a curse, but also kind of a whole lot of fun, because you never know if I’ll actually remember what I needed to go shopping for.

    Amazon is a great BFF. I don’t know where I would be without it… (Probably having to make an emergency trip to the drug store because we still don’t have toothpaste!) Amazon Prime and me, we were made for each other.

    It has also opened up a whole new world of Quilting tools that I would have never even noticed before in the isles of my regular craft store.

    Here is a list of 30 tools I purchased from Amazon that I would absolutely buy again 100X over (because I love them that much!)

    Quilting Rulers

    I wrote a post on the Essential quilting rulers and which rulers you should buy. You can’t ever have enough of them! I can’t tell you how handy it is to have the one tool that is absolutely made for EXACTLY what you want to do!

    At the very minimum, you should own:
    6″ x 12″
    6″ x 24″
    And this bargain set of square rulers is really great too!

    Non-slip Ruler Grips

    Sometimes its the tiny things in life that make a huge impact. These are little circles of sticky sandpaper that keep your ruler from sliding around on your fabric and make things just that liiiiitle bit easier. For less than $6, you can own 30 Non-slip Ruler Grips!

    The Iron You really shouldn’t be without

    You know how I feel about this iron. I’ve mentioned it many times before. I’ve had mine for over 4 years now and it hasn’t shown any signs of slowing down! I use it ALL the time! It is simply the best little iron out there in my opinion!

    Wool Ironing Mat

    I recently discovered these and I really love the little plush extra-ness of having a wool ironing mat! This one is less than $25 and is a hefty 14″ x 14″!

    FMQ Sewing Foot – (Free Motion Quilting)

    If you’re even thinking about trying FMQ (free motion quilting) you need to get your sewing foot from Amazon. They have the best prices that I’ve been able to find. Try starting out with this one here for less than $6!

    More light, I say!

    I talked about this desktop light in the tour of my sewing room. I use it all the time and I love how bright the light is as well as the fact that the brightness is adjustable. It is absolutely worth the $30 bucks I paid for it for a quality long-lasting light.

    If you prefer light directly on your sewing machine… I recommend this LED light strip. It is a bargain price and has tons of good reviews that speak for it as well. It fits all sewing machines! Cut it to the size you need.

    A Porcupine Sewing Caddy

    Just look at this little guy. A total impulse buy?… maybe, but you’ll never be sorry you bought him! Check out all the fun little ways he can help you out!

    There is also a Ladybug version!

    Pins that are easier to grab on to

    I love these pins because the heads are 1) easy to see on my fabrics and 2) easy to grab onto/work with. I just love them for their sheer functionality.

    A Magic Wand

    Yep. If you have a floor, and you use pins while you’re sewing, you need this magic wand. Maybe it’s more about the magnet inside it than anything else, but just a wave over your flooring and you won’t have to worry about finding that stray pin with your foot later! … ta-da!

    Or this one actually looks like a magic wand… 🙂
    And this one has a light on the end of it if you need to be extra…extra?

    A Light Tracing Tablet

    I really love to use this light table when I am paper piecing. My kids use this tablet for tracing over their favorite dragon characters out of storybooks… whichever you choose to use it for, it has held up really well over the few years that we’ve had it for the price!

    Prewound Bobbin Thread

    I prefer the even tension of a pre-wound bobbin if I’m just doing regular piecing or sewing. It just leaves one less thing to be an error on my part if something goes wrong.

    If I am quilting on my machine or doing decorative stitching with a colored thread, I will wind my own bobbins.

    You can buy them in any number, I like to have black and white on hand.

    Sewing Organizers

    I feel like my life is a little more put together when I have a good organizer on top of my workspace… even if I know its only an illusion of having it all together 😉

    Random Button Collections

    It is wonderful if you can collect cute boons as you come across them. I love to use buttons on my quilts! I have used them to just bring a little 3D element… and I have used them to cover up some mistakes! The quilt admirer will never know.

    I really like these buttons because they bring a lot of personality to whatever you sew them on.

    A really good pair of sharp embroidery scissors

    And these ones are Raaaaaaainbow colored!

    Speaking of scissors… I really like this pair when I’m having a sewing session where I’m up and down and all over the craft room. They have a necklace and a nice little spot to keep your scissors close by you so you don’t have to keep looking for them!

    Thread Cutter

    If your machine does not have a mounted thread cutter… you NEED this, like yesterday. It increases your productivity like 1,000x (don’t quote me on that, I completely made it up, but I’m sure it is somewhere close to that.)

    There is also a ring version that is perfect for when you’re doing some hand sewing or on the go. I have been known to feel so comfortable wearing mine that I had a stranger at the grocery store ask me where I got such a “bold artsy jewelry piece”…..

    For Marking Quilting Lines

    This Hera marker is one of my new favorite tools to have on hand. Someday I’ll get around to doing a whole post about how much I love this thing for quilting but until then… I will link to Suzy’s blog about the Hera Marker because she is really the one who sold me on it, to begin with!

    Click here to read all about why you should love this tool too!

    Extras to have on hand

    Do you want to know a good way to ruin an afternoon of sewing? Try breaking your needle and realizing you don’t have any extras on hand… ugh. The tragedy!

    Here are a few other things you should always have a few extra of on hand:

    Universal Sewing Needles
    Rotary Replacement Blades (45 is the most common size)
    White Sewing Thread
    This Eat, Sleep, Quilt, Repeat T-shirt
    Lumbar Pillow for those long hours of sewing
    Spool Huggers keep your thread from becoming a big mess

    If you made it all the way down to the bottom of this list…

    Thank you! 🙂 I hope you find some treasures on Amazon too and enjoy your shopping extravaganza for notions and fun new things to add to your sewing space!

    If you are not a member of the Amazon Prime Club, you can do a 30 Day Free trial with no risk!

    Please let me know in the comments if you found anything in the list above that was just too aming not to pass up… and also if you have your own amazon listing to add to my list! I’m always up for testing out more tools!

  • Keeping A Clean Sewing Space: A How to

    Sometimes I manage that amazing superpower of keeping a clean sewing space!… where everything has a place and the tabletops are clear of clutter… ahhh, It is so nice to know that creativity could happen at any moment!

    However, more often than I like to admit, my sewing room used to look like a tornado a path of destruction. I couldn’t find a single thing. Like that rotary cutter, I swear was on the table a minute ago? oh, it’s over on my desk now… Why? I don’t know. It just is.

    I felt uninspired when my sewing room was a mess… There was so much going on, I couldn’t even think… much less find room to create!

    Maybe you know how I feel?

    Are you drowning in clutter and fabric scraps?

    Is your space to cramped and feels like it’s impossible to work in?

    Are you overwhelmed or don’t even know where to start to make it better?

    I got so tired of feeling frustrated and out of control…

    Losing your creativity vibe because your space is a mess? Completely clueless with how to keep your space clean? I can help you! Check out these ideas that will help you keep your space perfect! (Even if you're prone to being messy)

    How I fixed it: Keeping A Clean Sewing Space

    I decided that I had had it one day. No more was I going to let the place that I called my “sanctuary“, “my happy place” and “my very own little slice of sanity” be a major source of stress for me!

    When I thought about it like that, it was absolutely ridiculous that I couldn’t be happy in my own happy place, right?!

    It took a while to figure out how to make things work and I have had a lot of trial and error over the years. My space isn’t “fancy” and you probably won’t find it in the pages of HGTV magazine… but I LOVE where I sew.

    You can take a tour of my sewing room in this post.

    Creativity is best in a room filled with the things that bring you joy! I'm going to give you a tour of my sewing room today and share all my organization tips along the way!

    Steps to Keeping a Clean Sewing Space: The Space Itself

    1. Give yourself a good talking to and be honest with yourself

    I mean like a mom talking to her toddler threatening to give away all the toys unless she cleaned them up kind of tough love talk.

    If you have too much stuff that there is simply no way that it will fit nicely in the space that you’ve allotted for yourself, you have 2 options: 1) find more space or 2) get rid of some of your stuff

    You can be as tough or as lenient in this that you want to be. After all, you are the only one who is the boss of you.

    2. Assess Your Storage Needs

    I used to have a bins and boxes problem. Do you know how I had a problem? I had empty boxes FOR my empty boxes!

    It is the crafty/DIYer curse… you just NEVER know when you might need it right? So I couldn’t bring myself to throw it away or pass up a good deal on a pretty box.

    I knew I really needed to be more organized and I was sure that not enough boxes to put things in was my problem. It absolutely was not! I would forget what was in my boxes and be unable to find things so I would end up buying duplicates or forgetting what I owned.

    3. Sort and purge everything you possibly can

    Purge the things that you know you will never end up using. Just get rid of it. Also, even though it is hard, let go of the things that you once were absolutely in love with but either realize that you will never have the time or just you simply just don’t feel that spark for anymore.

    It does you no good to hold onto and let it take up physical space for years and years.

    Don’t hold on to it unless it has a purpose or it really brings you joy.

    The items you are purging, you can give to friends who are just building their collections or bring your stuff to a guild meeting to see if anyone wants it. You can donate your scraps. There are tons of charities that take fabric too!

    Click here to read more about my favorite charities for quilters.

    Or you can see if your guild is interested in doing a remnant sale! Everyone brings in unwanted scraps and remnants and sells it for a bit of cash. Win win!

    4. Downsize your collections

    Gather all of your tools and make piles of the duplicates. Make a goal to only own 5 scissors or whatever it is that you have.

    Sometimes all it takes is putting everything into one place to realize you miiiight just have a problem.

    After you’ve cleaned out your space it is time to organize it and keep it that way!

    Ok, once you have it down to the essentials in your space and you are not wasting any space… you need to realize something…

    Your space can still get messy! Ugh, I know. I’m so sorry.

    Losing your creativity vibe because your space is a mess? Completely clueless with how to keep your space clean? I can help you! Check out these ideas that will help you keep your space perfect! (Even if you're prone to being messy)

    I turn around after a particularly good sewing session and my space looks like someone left a toddler unattended for 10 minutes!

    1. Have a specific place for everything.

    Every tool, every pattern, every project.

    Give everything a home and do your absolute best to return everything to its spot as soon as you are done with it.

    Read more about how to organize your space with items from the dollar store!

    2. Create zones in your sewing/crafting room.

    If you have more than 1 hobby, create sections for each hobby and try your best to keep all the supplies in that area. Not only is it easier to reach, but it helps keep you organized and from things quickly spreading to the whole room!

    3. Always Clean up 3 times.

    • Do a quick tidy before you start any new projects.
    • Clean up while you’re working on your project. Make sure you’re working as efficiently as possible. Keep trash off your worktable.
    • Always do a thorough cleaning after you finish a project. (Like the queen is coming to visit!)

    4. If you work on multiple projects at a time…

    If you take no other advice from this list, do this one thing! It will help you immensely in the sewing room.

    Have a dedicated box for each project and all its pieces/instructions. When you have to switch projects, pack everything up and put it on the shelf. You won’t accidentally misplace anything and when you’re ready to start again, you’ll have everything you need

    I really hope this list helps you in keeping a clean sewing space.

    Remember that it is your space and you can make it however you want it to be… as long as you make sure you surround yourself with the things you love and you leave yourself room to create!

    Need more of an Action Plan?

    Check out this 25 Day Guide that I created to give you a step by step plan to creating the sewing/crafting space of your dreams!!

    I will be with you every single step of the way with detailed instructions!

    So many people have used this guide to clean up their act in their sewing space and make it a place that they just can’t wait to get into! It is now the space of thier dreams!

    Click here to learn more information about how YOU can create the space of your dreams too 🙂 You won’t regret it!

  • 10 Great Places to Donate Quilts!

    I love sharing the warmth of a beautiful handmade quilt with someone who truly needs it. You know exactly what I mean… to be able to share the LOVE of quilting is a wonderful thing. Here are 10 great places to donate quilts to!

    I have another post on a Quilt I made for Charity here

    Ten Great places to Donate Quilts! Feeling extra generous with your beautiful talents? Want to share the Quilt Love? Check out these Amazing places!

    Donating Quilts For Children

    Project Linus

    I love this charity! It’s such a sweet one. Project Linus aims to provide love and security for seriously ill, or children in need. Many children find comfort in a ‘blankie’, and Project Linus delivers them to hospitals, shelters, social service agencies, or anywhere else love is needed.

    Project Linus has chapters in all 50 states. You can find the location nearest to you on their FAQ page. Learn more about donating quilts here, and learn more about the organization here.

    Wrap Them in Love

    If you want to help on a more global scale, Wrap Them in Love distributes donated quilts to children around the world. In 1980, founder Ellen Sime, adopted two children from Korea. While waiting for her adopted children, Ellen thought “Was someone holding her when she cried? Was he fed and taken care of properly? Did someone hug him?” So she began Wrap Them in Love, to send love and hugs around the world for children who need them. Learn more about the organization here.

    Quilts for Kids

    Quilts for Kids was founded by Linda Arye, a quilter who saw the waste of discontinued fabric samples being sent to landfills. She decided to start a charity to save that perfectly good fabric from the garbage, and create it into something beautiful. Quilts for Kids has saved millions of pounds of fabric and donates roughly 30,000 quilts yearly. You can request a pre-made quilting kit from them, and only need to pay for the shipping ($6.00)! Learn more about the organization here or request a kit here.

    Quilts Beyond Borders

    Quilts Beyond Borders provides quilts to orphans around the world. Originally, Quilts Beyond Borders focused on Ethiopia but has now expanded to spreading love and hope to 25 other countries. Currently, Quilts Beyond Borders is focusing on Syrian refugees, and children living in the Navajo Nation. Learn more about their quilting criteria here and more about the organization here.

    Sew Powerful

    I’m adding this charity here because they are als slowly changing the lives of young girls and it is amazing! You can download a free purse pattern from their website, create the purse and donate it back to them to deliver all over the world. – If you’re looking for something to shake up your sewing skill (but is super easy to follow) this is for you!

    You can read more about Sew Powerful in this post.

    Sew Powerful is a "sewing for good" organization that helps break the cycle of poverty and they need your help! Download the FREE purse pattern and change a life!

    Donate Quilts For Veterans

    Quilts of Valor

    Quilts of Valor near and dear to my heart. I love this charity and supporting the military.

    Quilts of Valor is dedicated to creating and distributing quality quilts to veterans. Catherine Roberts, founder of Quilts of Valor, has one basic principle: quilts = healing. Quilts of Valor has specific requirements for their donations, as they pride themselves on quality and durability. Find their quilting requirements here, and learn more about the organization here.

    Quilting In Honor (Island Batik)

    Quilted in Honor is a fundraiser led by Island Batik, and is part of Operation Homefront. Quilted in Honor has 24 locations nationwide where you can donate quilts to veterans and families. They also run quilting challenges where the entry fee proceeds are donated to Operation Homefront, and you are able to donate your finished quilt when the challenge completes. Quilted in Honor also has a shop of specialty fabrics and thread that when purchased, provides more donations to Operation Homefront. Learn more about Quilted in Honor here.

    Quilts of Honor

    Gail Belmont, creator of Quilts of Honor, is a Vietnam era veteran who has been playing Taps at military funerals since 1969. To ensure that no warrior would be forgotten she began Quilts of Honor. Additionally, Quilts of Honor was asked to by the Navy Seals to make a “Presidential Quilt” in 2007 for President Bush. It was installed in the “9/11 Memorial Display Case” that Fall. Quilts of Honor has chapters nationwide, and like Quilts of Valor, has special requirements for their quilts. Find their quilting requirements here, and learn more about the organization here.

    Other Places to Donate Quilts..

    Victoria’s Quilts

    Victoria’s Quilts aims to provide comfort to cancer patients. Deborah Rogers hopes these quilts will help cancer patients be able to feel a little more comfortable. Victoria Morrison was an avid quilter herself and helped Deborah start her quilting journey. She honors her memory by helping others with the love and warmth of quilts. Learn more about the organization here.

    Hopes and Dreams Quilt Challenge for ALS

    Hopes and Dreams is not an open quilt donation organization, but they host quilting challenges for ALS patients and donate to ALS research. Participants vote on the best quilts of each challenge, and winners are eligible for some great prizes! If you are interested in participating in an ALS quilt challenge, you can learn more here.

    The Giving Quilt, Inc.

    The Giving Quilt is an organization that distributes to all kinds of non-profit agencies. This ranges from children’s hospitals, neonatal units, military organizations, and many more. You can donate a quilt at any time, or take part in their sponsored sew days and biennial quilt show. Learn more about the organization here.

    Even More Places to Donate Quilts

    There are so many places around the world to donate quilts to but in reality you don’t have to go very far… there are a lot of charities right in your own back yard!

    You can always research where to donate quilts locally. Depending on your area, you may be able to donate quilts to senior centers, homeless shelters, churches, animal shelters, and hospitals! Start researching, get quilting and spread your love of quilting as far as your fabric can take you!

  • Less Cooking Time = More Quilting Time!

    I’m always looking for more ways to manage my schedule more efficiently. Time spent in the kitchen is one area that continues to amaze me. One thing I know for sure is that less cooking time = more quilting time!

    I’ve learned that by working more efficiently in my tasks around the house, I can get in more sewing time at the end of the day and let me tell you… it is amazing. It is a total game-changer for the busy girl!!

    For more ideas on how you can get more sewing and quilting time, check out this blog post: HOW TO MAKE MORE TIME FOR SEWING AND QUILTING and TIME-SAVING SEWING ADVICE

    How do I get more time?

    First of all, I’m not a wizard ok? But what I do have is a ridiculous sense that if I schedule things juuuust right and I tweak my calendar enough I’ll have enough extra time built up that I can someday solve all of the world’s problems…. ok maybe not ALL… but geeze, I can at least finish this quilt top before the baby I’m giving it to is born? #truthconfessions

    Recently I shared with my readers that my newest obsession is Butternut Squash Soup because it has every single flavor of fall and it is so good! it also can be made in the crockpot or the instant pot and 80% of the dish is hands-off. let the gadgets do their thing… I love it.

    My kids even like it because they like pumpkin seeds and a sprinkle them over the top like confetti. Here is the recipe if you want to try it too!

    And I asked for your favorite go-to recipes that save you time in the kitchen. Boy oh boy did you respond! I KNEW you were my people, I just KNEW it!

    Here is a list of all the recipes you’ve sent to me!

    (I’ll try to update it from time to time with new/seasonal dishes) Note: these recipes are all from other bloggers and are recommended by other readers just like you. If you have a favorite recipe you don’t see here that saves you time in the kitchen please feel free to add it to the comment section below!

    Goodness!… meal planning for the whole month anyone? 🙂 I have so many ideas for new recipes that I want to try now.

    I hope you find some good recipes and some delicious inspiration in this list so you can get more sewing time in your schedule!

    Word of advice: If you are trying to cut down on your time in the kitchen because you want to spend more time at the sewing machine… DO NOT go do your laundry and think you’ll “get to sew later”. That is the opposite of intentionally making time to sew.

    Laundry and housework will always be there, no matter how hard you run to try and get ahead.

    That sewing project, however, doesn’t deser a permanent backseat if it is what brings you joy! Do what makes your heart happy while dinner is in the crockpot.

    Less Cooking Time = More Quilting Time!

  • How to Print your Quilt Patterns for FREE!

    I love that most Quilt patterns are available online for instant download. Isn’t it just great?! What a time to be alive right? …Well… I love it until I realize that the amount of ink that I’ll have to use for the pattern! Yikes. Today I am going to tell you how to print your quilt patterns for FREE!

    Yes! I said FREE!

    FREE: As in, give me all the high-quality full-color pages you can throw at me! I have been printing all my quilt patterns and pages for the total price off FREE! Did you see that? That was FREE, nada, zilch, nothing!

    I used to be such a scrooge with my ink cartridges. It is perfectly ok to admit that you have a problem when you’re looking hard at your PDFs and wondering just how much of the material specs you can remember in your head to avoid having to print it out and waste that liquid gold, right?

    I even used to print everything in “economy mode” and picked which of the pages I absolutely NEEDED to print.

    It seemed like every time I turned around we were out of ink. And every single time I was spending $50-$60 to replace the ink.

    It was slowly driving me crazy.

    I started shopping for laser printers (holy cow that’s an investment). Then, I dove into research mode and weighed out the costs over time… switching to just black and white all the time (boring!) and different printer brands (so so many)… I even looked at commercial office printers! …I was in deep.

    So what did I do to fix my problem!?

    (because you know I fixed it AND you KNOW I’m going to share my hack with you so you can know how to print your quilt patterns for FREE too!)

    I ran across a program from HP called HP Instant Ink.

    And it totally changed how I use my printer!

    I’m going to share with you a little about the program and then I’ll jump into spilling my secrets on how I get it all for FREE!

    If you’ve never heard about it, here’s what HP Instant Ink is:

    HP Instant Ink is a by-mail ink cartridge replacement service. You decide from several HP Instant Ink plans. The plans vary in their monthly service fee based on the number of pages you print each month.

    Your printer sends ink level information to HP, and when ink levels get low, HP automatically ships ink replacement ink cartridges. You can save up to 50% on ink that’s ordered by your printer and delivered to your door before you run out. All included in the monthly rate. How cool is that?

    To sign up for this service you need a printer that is HP Instant Ink eligible. They have eligible printers that fit all budgets.

    If you don’t have an HP printer, I’ll explain to you how in the long run when compared to your current printer and ink costs, A new printer from HP is really are quite affordable and make a lot of sense.

    Printing get expensive! I'm going to share this simple trick I use for how to print your quilt patterns for FREE! It is so easy!

    Why I LOVE using the HP Instant Ink program

    When you sign up for HP Instant ink you can get several months for FREE immediately

    I got 6 months of FREE HP Instant INK when I signed up. 6 months!

    And because you can change your plan level at any time… you better believe that I took advantage of those free months and set it at the highest level right away. 300 Pages/month! 6 Months X 300 Pages = Up to 1,800 for FREEEEE! And it is whatever quality page I want to use!

    I could keep going on and on about it because I love it, but I bet you want to know how to print your quilt patterns for FREE too, right?

    The first thing you need to do is:

    • Get 1 month FREE by signing up with a referral link/code :
      You can get 1 month free by signing up with my referral link try.hpinstantink.com/BfDsr or code BdDsr to get 1 free month. (Just so you know, I’ll get a free month too if you sign up using my link, thanks!)
    • My new printer came with a 3 months free trial – most new printers do I believe. Look for any promo code that would be included with your printer, or contact HP Instant Ink customer service if you can’t find it.
    • After that, I tried out every discount code I could find online and managed to score an extra 2 months of Free HP Instant Ink. I’m going to list the codes that I know of right now for you.

      You’ll want to stack as many of these on at the beginning as you can!

      Discount codes often change, so it is anyone’s guess what will work and what will not. You just have to try them all out one after the other (you can use multiple coupon codes on your order). You can also google for more if needed.

      I definitely recommend you try these promo codes:

      FREE INK
      3FREEINK
      SAVE50PERCENT
      HPINSTANTINK4U

    What happens after the free months are up?

    After you’ve used the program for a little while, you should have an idea of how many pages/month you actually use and can downgrade (or upgrade) your plan from there to find one that fits your budget more.

    HP Instant Ink offers several plans to fit everyone’s printing needs. And I think they’re super affordable. You can also change your plan at any time.

    Here is what I did: I signed up for the Frequent Printing Plan (up to 300 pages) during my free trial/free months to take full advantage of the free months, and then switched to a cheaper plan (moderate) that more fits our actual printing needs.

    Below are the Instant Ink plan costs:

    My best guess is that most people will be totally fine with the occasional (50 pages/month for $2.99) or moderate (100 pages/month for $4.99) printing plans.

    I spend that amount going through the drive-through coffee place ONCE (you know the one!) So, for less than the price of a fancy coffee, you can always print as much as you want, using the best printing quality every time, and never worry about running out of ink!

    How do I know how many pages I’ve used?

    HP thought of everything because you can log into your Instant Ink account and see immediately how many pages you’ve printed this month so far.

    What if I don’t use all my pages for the month?

    If you don’t use every single page allowance, it’ll roll over to your next month and you’ll have a little bit of a cushion so you can print what you want when you want it. Absolutely NO worries!

    What if I go way over and print too many?

    And if you go over your plan limits, you’ll only pay $1 for every 15/20/25 additional pages (depending on your plan). $1!

    Still so much cheaper than taking it down to the copy shop!

    Is it hard to cancel?

    You can totally cancel this service at any time (on your last free month for example) if you’re not convinced by this system… but I doubt you will want to cancel. 🙂

    My favorite part about the whole program is I don’t have to sit and think “is it worth it to print this and waste my precious ink?” It has completely erased my fear of running out of ink and having to spend more money as well.

    Printing get expensive! I'm going to share this simple trick I use for how to print your quilt patterns for FREE! It is so easy!

    Want to earn more months for FREE?

    Here is the best part, there is no limit to the number of FREE months that you can earn!

    Once signed up, you’ll have your own referral link and codes that you can share with your friends and family or anyone who will listen. They will get a FREE month thanks to you and you’ll get an extra free month too! Every single time someone signs up using your referral links.

    It’s that easy.

    So, essentially, you could keep on using HP instant ink for free for a long long while!

    I mean, you share your favorite products with people anyways, right? Why not spread a little love and get a little love in return?

    When you checkout, make sure your total due is $0 and you see (at least) the referral code for a free month from me in there! With any luck, you’ll be able to start off with 4-6 months of completely FREE printer ink! Woah…

    How does that sound? Hit me up in the comments section and let me know if this awesome hack answers your questions on how to print your quilt patterns for FREE!