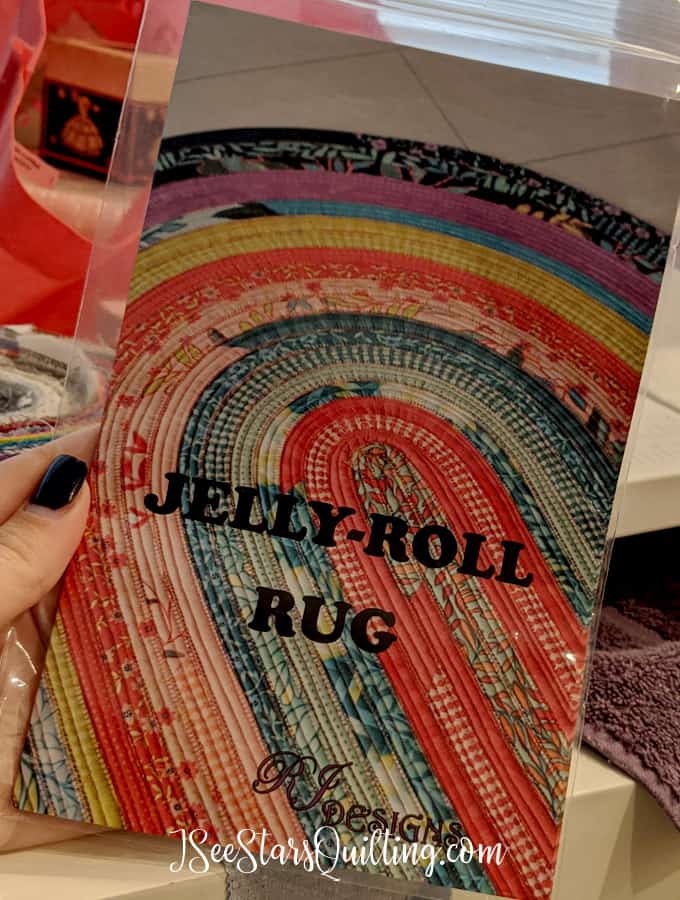
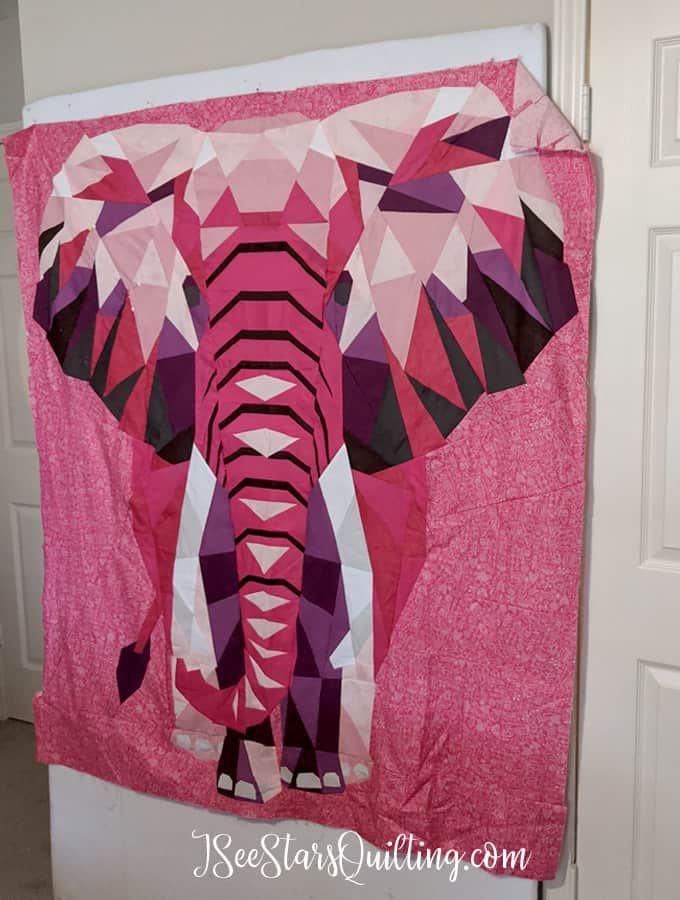
It feels like it’s been so long since I’ve been really able to commit to a big quilt project. I’ve done a few small projects here and there but it sure doesn’t scratch that quilting itch to play with some fabric and make something wonderful! – The Jelly Roll Rug Pattern!
I’ve had this small (or not so small?) Jelly Roll Rug project on the back burner for a while because I was busy with quilts and too many other things going on. About a week ago, I finally decided it was time to pull it out and let me tell you… it has been a breath of fresh air.
A little something different can do wonders for your inspiration and creativity!
First of all, I had mixed feelings about this project because it was kind of slow going in the beginning… but the longer it goes on, the more I find myself planning another one… isn’t that too funny?
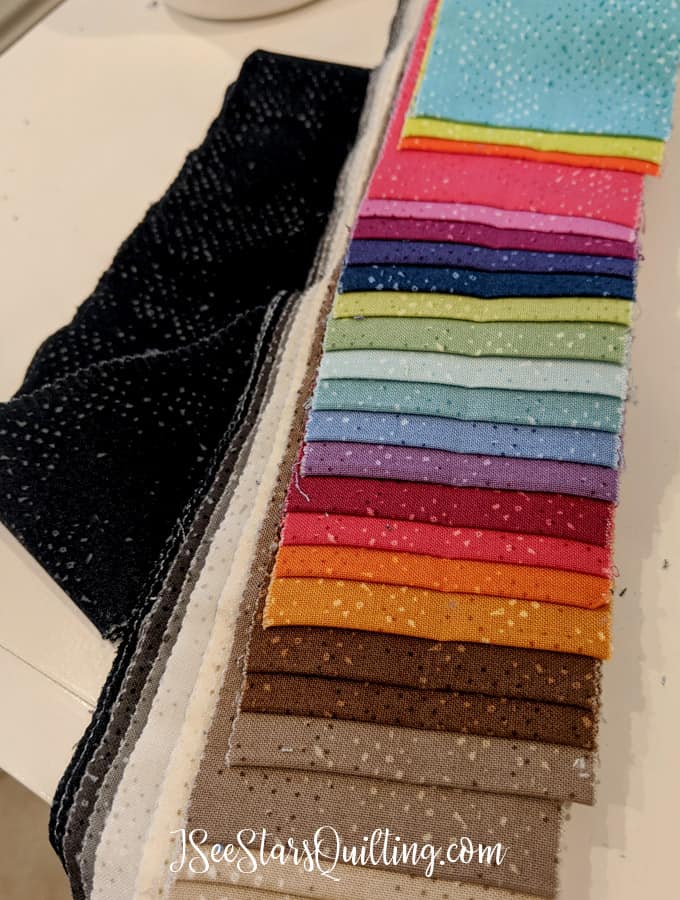
What do you think about the subtle pattern/texture? I wasn’t sure what to expect so I chickened out decided to go with simple fabric patterns to see what happens.
In hindsight… you could absolutely pick something wild and crazy or stripes and polka dots… anything with these rug patterns! Even scrap fabrics would make a really fun and useful rug.
(This is where I get myself into trouble, planning my “next” rug project before this one is even finished… what can I say?)
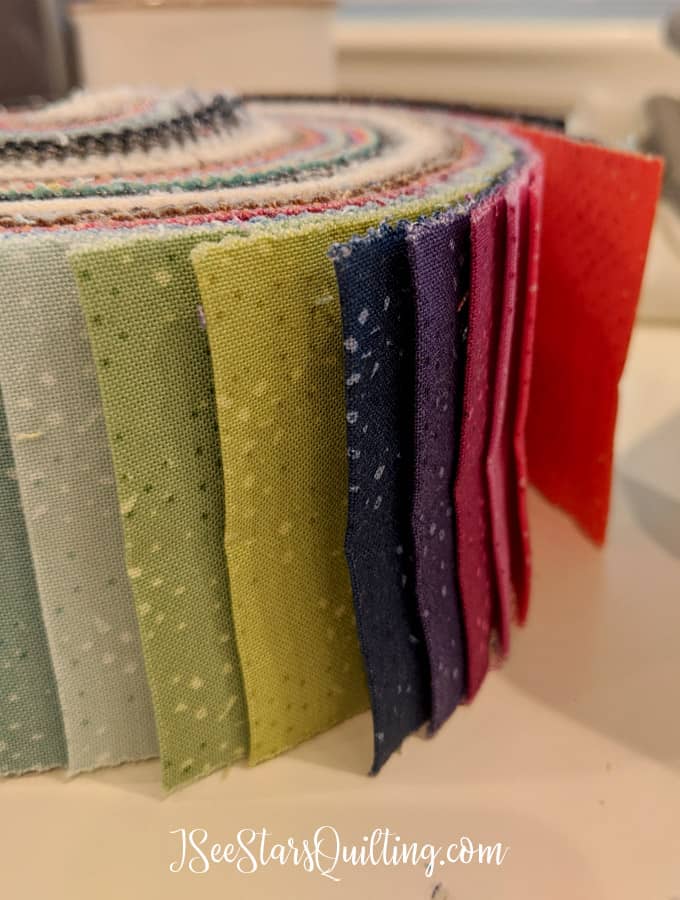
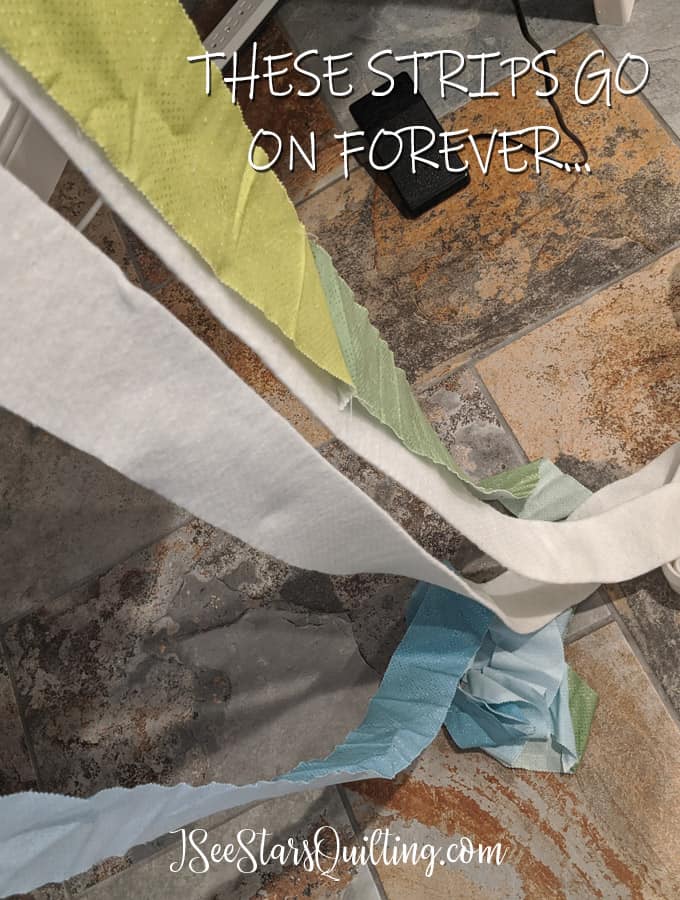
The only thing you really need is A LOT of Jelly Roll Strips. Like so so many.
You’ll feel like the line of fabric is never ever going to end…
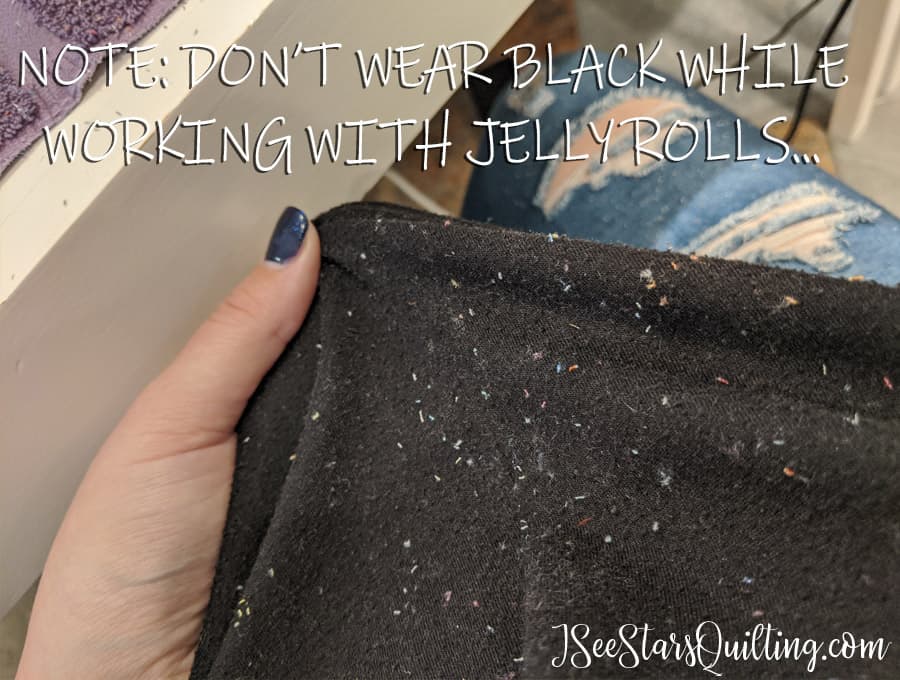
A Note about working with Jelly Roll fabric…
Jelly Roll fabrics really stick with you… quite literally.
If you have worked with Jelly Roll fabric bundles before… you know this drill… but I didn’t heed my own warning and well… Ladies and gents, do NOT wear black. Just do, not wear anything that you would mind looking like you’ve been kissed by fabric confetti, because there is no avoiding this disaster. None.
I’m calling in a new fashion trend for us quilters. – In-the-middle-of-my project-chic AKA lint-brush-way-over-where? ooh or what about #creativitykisses 😉
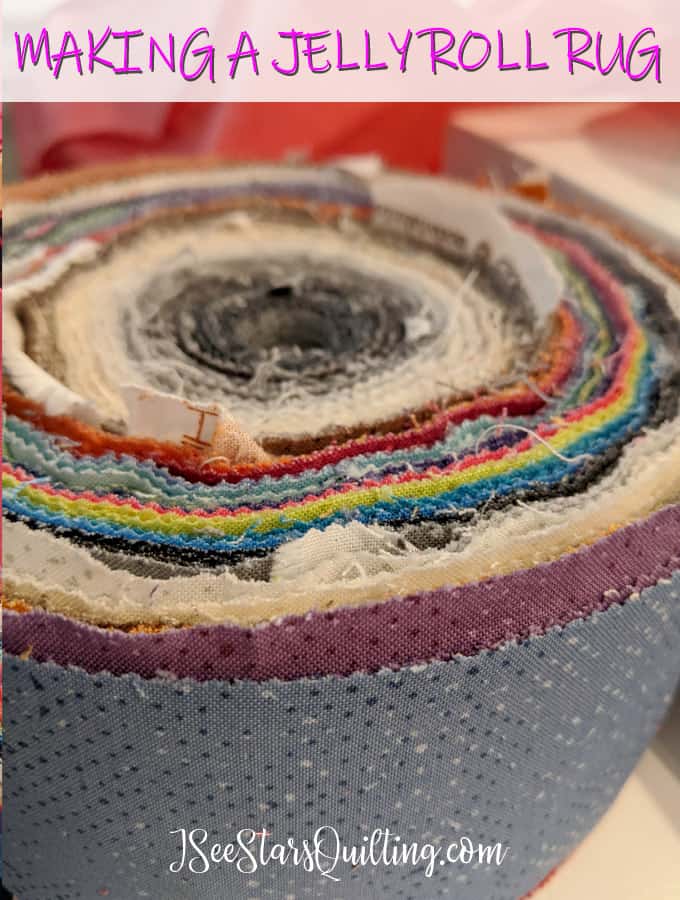
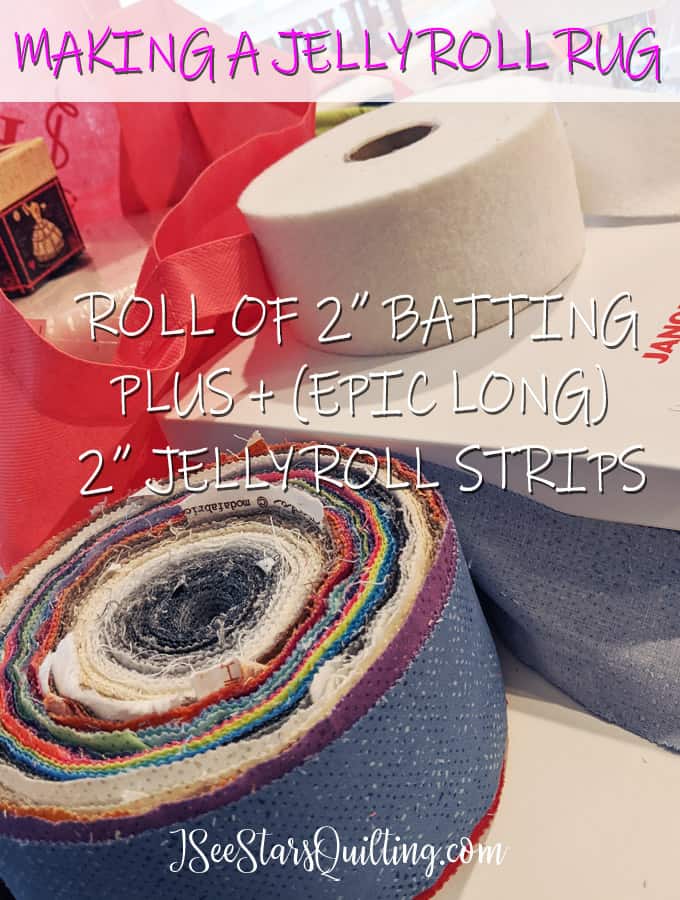
After you sew all the strips together, you line it up with the batting and follow the instructions to create the “rope”
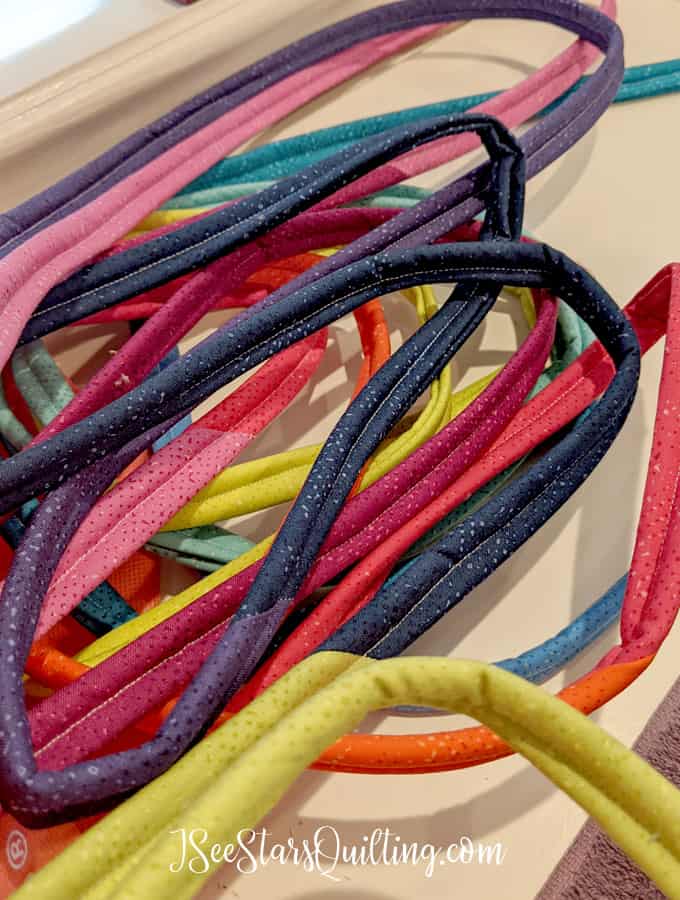
Current Progress of the Jelly Roll Rug
This is where I currently am. I’m working on my “rope” after sewing all the strips together and working it in with the batting.
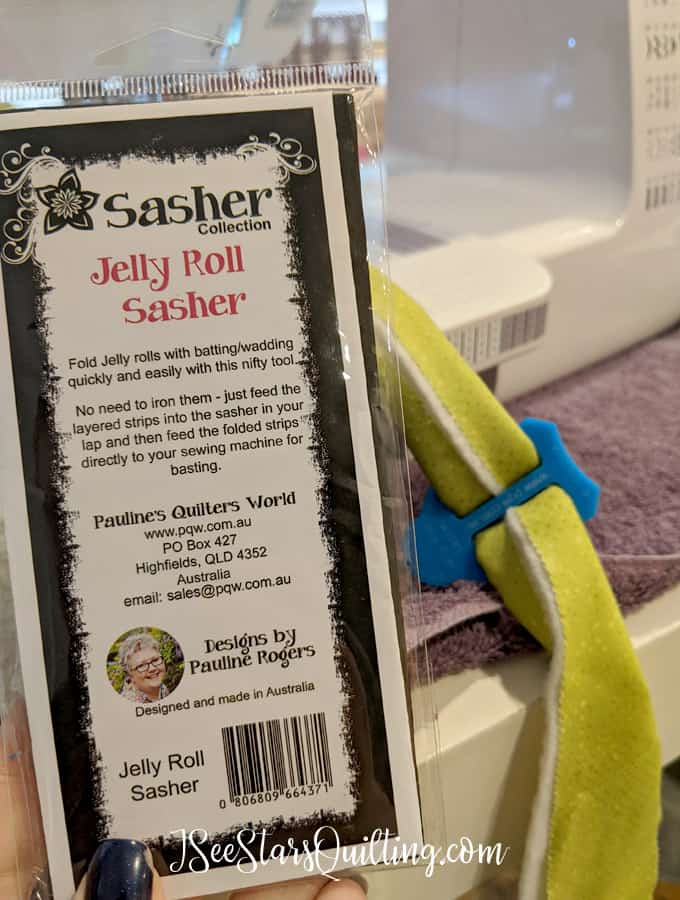
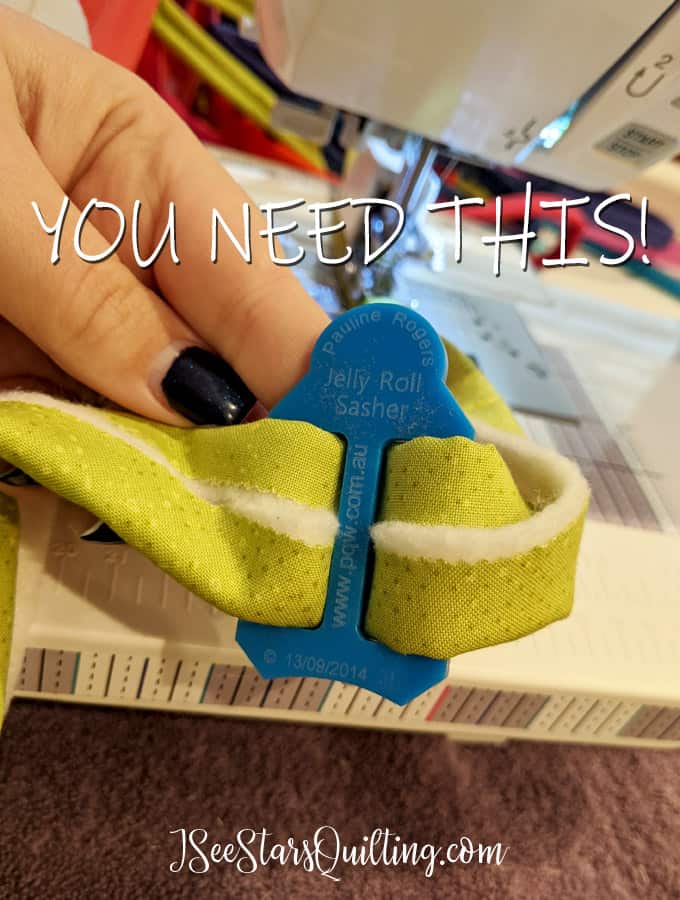
Note on a tool that I thought wasn’t necessary to buy, but a friend talked me into it because… peer pressure, right?
[Turns out she was right] If you plan on making even one of these Jelly roll rug patterns, you NEED to invest in this.
It was a little awkward working with it at first, but I’m fairly sure there is a youtube tutorial (perhaps I will film next time I’m working??) or something similar out there, but I took it out of the package and immediately started playing with it until I could make it work on my own.
It helps you fold and crease the fabric as you’re pulling together up this big chunky roll of fabric… by about 5 minutes in, I realized there was no way I could do without it. (also, the only way to get it off is… to bring it all the way through to the other side of you looooooong jelly roll strip!)
I know its a work in progress and I’m making a little progress at a time in between other events that we have going on right now but its really creatively satisfying and I’m excited to finally be starting on this project!
The Jelly Roll Rug is going to turn out amazing and I’m really looking forward to putting it in the little half bath that I have attached to my sewing room so that it is just a quilty as the rest of the space!
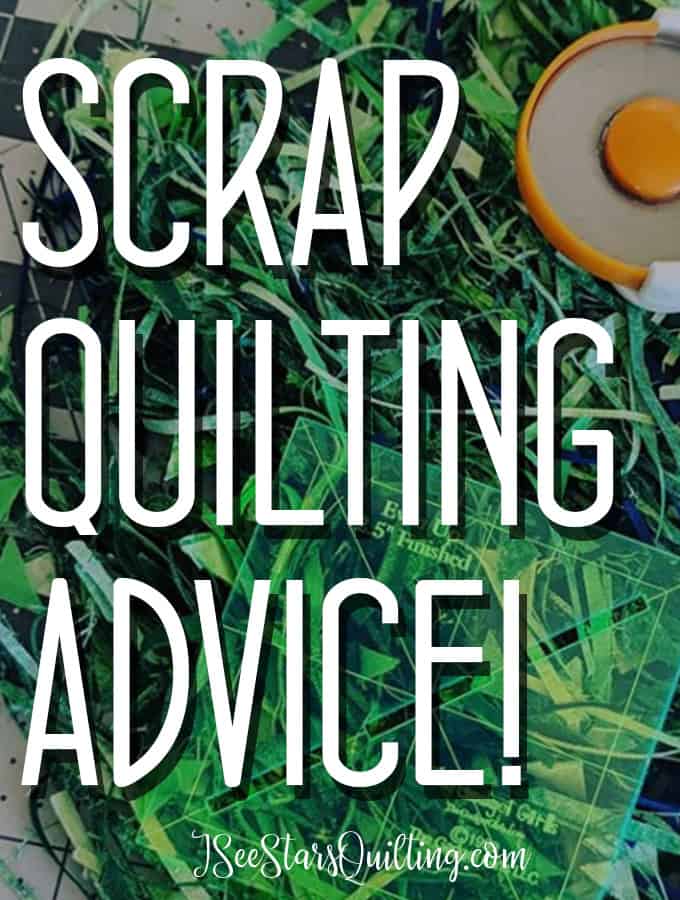
Something that has been on my mind a lot recently has been trying to use what I have on hand to create quilts instead of feeling like I HAVE to go out and buy a lot of fabric for each and every project. AKA Scrap Quilting!
It is so tempting to walk through the aisles like I have all the money, time and storage space in the world… when in fact, I’m running short on all three of those things! haha
Scrap quilts are so easy and fun. A lot of times you take away the stress of selecting the perfect fabrics and colors and choose to focus on fabrics that contrast with each other.
In other words, throw caution to the wind and make something wild! The final outcome will be a wonderfully creative expression of using what you have on hand!
Quilters have been using this method for generations, using torn dresses and saving shirts that were beyond repair, fashioning bits of fabric into beautiful works of art made into a quilt!
What is a scrap quilt?
Scrap quilts use a random assortment of fabrics. You can use the little bits of leftovers from previous projects. You can also swap with friends to get some fresh fabrics to play with!
Whatever you have on hand is fair game in a scrap quilt.
(At least for every single quilter I know) It really isn’t unusual to have tons of scrap fabric lying around … why not use it and make it into something wonderful?
How to Choose Fabrics for Scrap Quilting
Variety is the key to curating a collection of scrap quilting fabrics. Choose all sorts of fabrics, even fabrics you don’t really LOVE. – (Someone has to be a secondary fabric!)
Choose a mixture of print types: florals, geometrics, calico fabrics, novelty prints, stripes, plaids, batik fabrics—the more variety, the better.
Fabrics in a wide range of colors make a lovely mix!
Choose fabrics with prints of all sizes.
Tone on tone fabrics are a great ‘background’ fabric to add
Neutrals give your eyes a soft place to rest and break up areas of the quilt that could otherwise be too busy.
Scrap Quilting is also a really great way to try out new patterns and blocks that you’re not entirely sure of just yet!
My Favorite Scrap Quilting Books
If you’re wanting some more information on scrap quilting ideas, these are some of my favorite books out there on scrap quilting! *Just a warning… it can be completely addicting… and oh, so much fun!*
I’m adding in Amazon links, but you might also be able to find them at your local library or quilt shop too! Ask around and see if you can swap a good brook with a friend too!
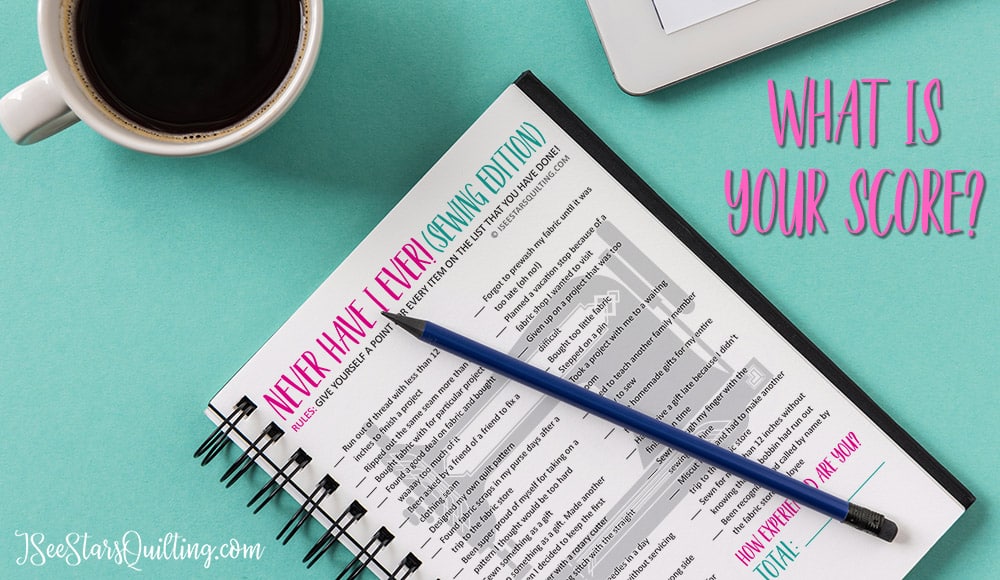
Have you ever played the “Never Have I Ever!” game? It’s pretty fun 🙂 I started thinking about creating a sewing edition and before I knew it everything had spilled out… and below is the final version!
This activity is perfect if you’re just curious where you stand… It’s even better if you print it out and take it to your sewing retreat or quilt group meeting and compare your score with your sewing besties!
Never Have I Ever! (Sewing Edition)
Rules: Give yourself a point for every item on the list that you HAVE done!
Run out of thread with less than 12 inches to finish a project
Ripped out the same seam more than once
Bought fabric with no particular project in mind
Found a good deal on fabric and bought waaaay too much of it
Been asked by a friend of a friend to fix a clothing seam
Designed my own quilt pattern
Found fabric scraps in my purse days after a trip to the fabric store
Been super proud of myself for taking on a pattern I thought would be too hard
Sewn something as a gift
Sewn something as a gift, and then made another one because I decided to keep the first
Cut my finger with a rotary cutter
(Tried to) zig-zag stitch with the straight stitch food still on
Broken more than 2 needles in a day
Gone more than 2 years without servicing my sewing machine
Sewn something inside out or wrong side of the fabric
Had to stop what I was doing and look for my scissors only to realize they were in my hand the whole time
Entered into a quilt show
Forgot to prewash my fabric until it was too late (oh no!)
Planned a vacation stop because of a fabric shop I wanted to visit
Given up on a project that was too difficult
Bought too little fabric
Stepped on a pin
Took a project with me to a Dr. appointment waiting room
Tried to teach another family member how to sew
Made homemade gifts for my entire family
Had to give a gift late because I didn’t finish it on time
Sewn-through my finger with the sewing machine
Miscut fabric and had to make another trip to the fabric store
Sewn for more than 12 inches without knowing that the bobbin had run out
Been recognized and called by name by the fabric store employee
What’s Your Score?
Total up how many points you have and put your score in the comments! Then share this post and call up your sewing girls to see how you rank 🙂
The more points you have, the more experienced sewist you are!
For more free printables, join my email list! I have a whole library of freebies!
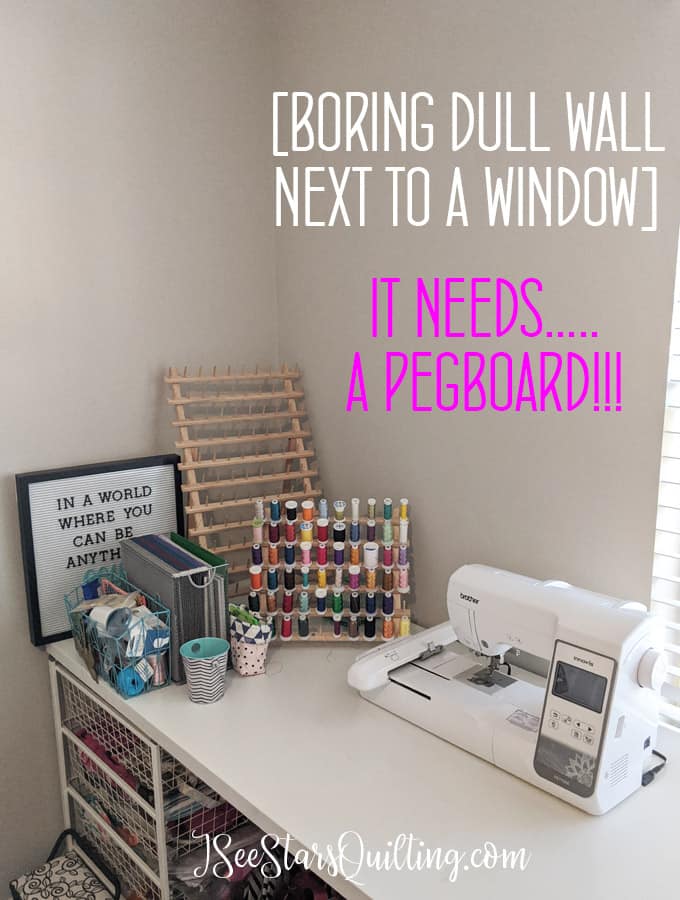
I have wanted to make a DIY Pegboard for sewing tool storage for a really long time. My sewing room in my old house just didn’t really allow for it.
But we moved aaaand… I have this empty wall and… It’s so totally going to happen this time!
I’m going to share with you the steps and pics that I took along the way so that you can make this super easy (AND OH SO AMAZING!) DIY pegboard project at home!
If you want to tour my old sewing room (lots of ideas on modifications and using what you have) you can check it out here.
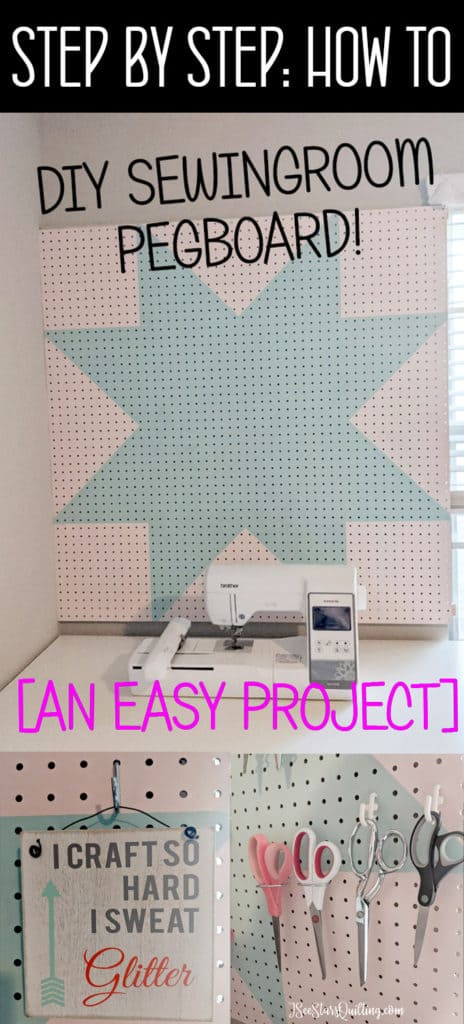
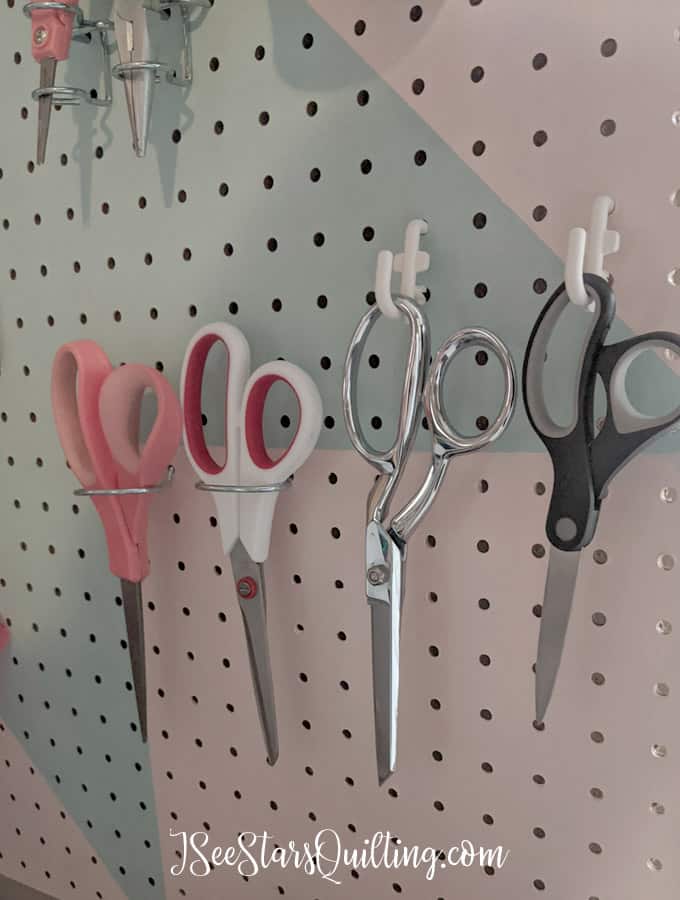
I am so pleased with how the pegboard works in my new sewing room space! It is exactly what I was wanting and holds SO many of my sewing tools in a neat and organized manner!
Here is the finished Pegboard for sewing tool storage!
And here it is all loaded up with my sewing tools!
Thrift store dry erase board project coming soon…
There is so much storage with my new pegboard! I could have big happy heart eyes for daaaaayyyyys!
Everything is neat and organized. All my most used tools are where I can easily see them… and I still feel like there is plenty of room to grow and add more tools or rearrange!
First of all, you don’t need to be incredibly handy to make this. It is actually a really easy project!
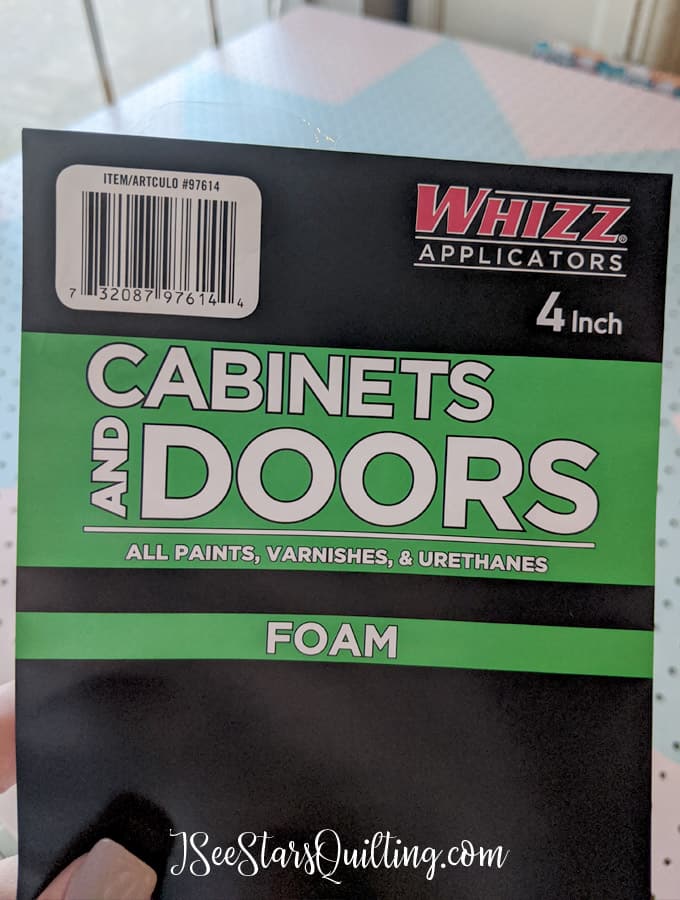
What you’ll need:
Pegboard sheet
(2) 1×2 boards that are the same width as your pegboard (maybe more if you choose to make a really BIG pegboard)
The first thing to know is that they offer several different sizes. (When I went shopping in Dec 2019, these were the prices/sizes available.) I chose a 4’x4′ size for about $10!
You can also ask them to cut your pegboard sheet to the size you want it if you have a specific area you’re looking to cover/fit. (Or you have a smaller car lol plan ahead!)
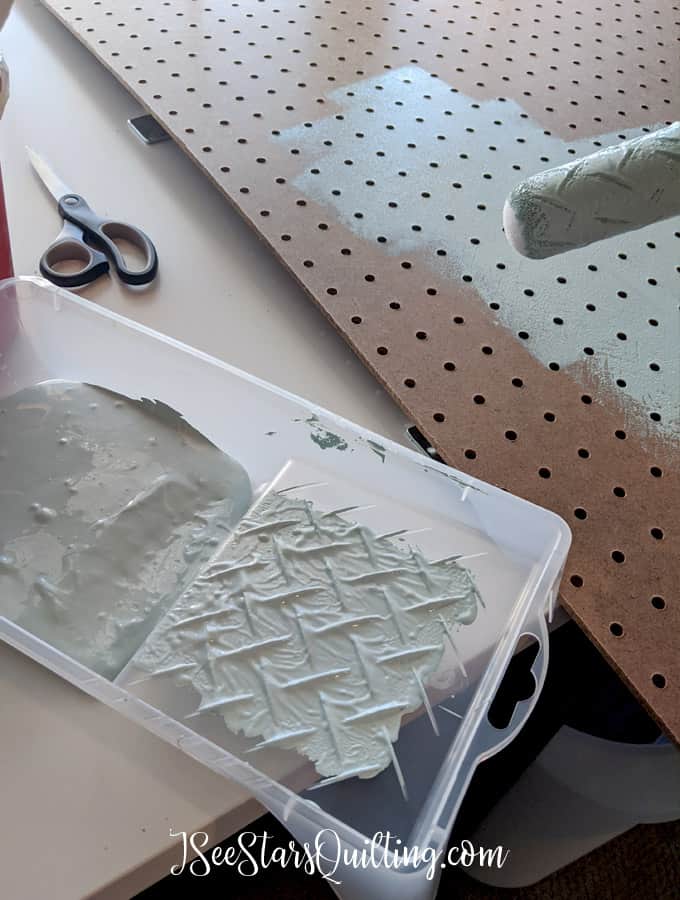
2) PAINT!
A fresh coat of paint will freshen up anything! It also adds a little personality and a pop of color if you’re looking for a fun piece of decor.
I had this pale blue-ish minty color on hand. (Pink. I absolutely love it and I was so tempted to paint it neon pink, let me tell you… but I didn’t want to get tired of the brightness or have it take away from the quilts I still want to hang on the walls.)
I do recommend that you roll your paint instead of using a brush.
There is much less of a chance of pushing the paint through the pegboard holes and making a dotted mess on the back.
I also focused on 2-3 thin coats of paint instead of trying to cover it in one coat.
This is the roller I used. It was perfect for the job.
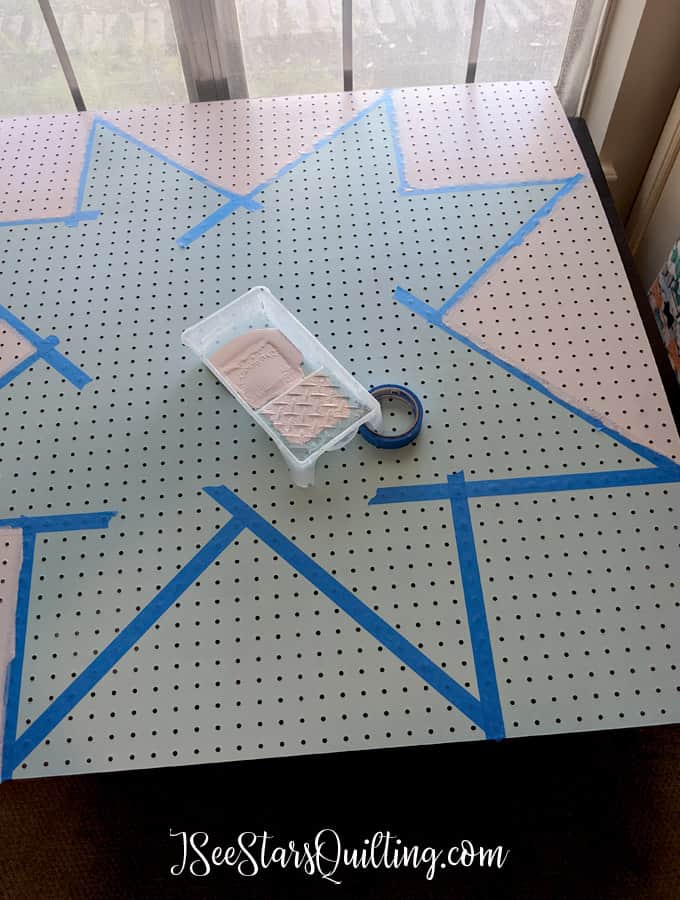
3) Decide if you want to be bold…
I ALMOST just left the DIY pegboard the minty blue color… it would have been beautiful. I still would have loved it and it still could have held all my tools perfectly… BUT… I couldn’t leave well enough alone, could I? 🙂
So I let it dry a little bit and then I used painters tape to mask off a big quilty looking star pattern!
I painted in the background using a pale pink color I had on hand from another project…
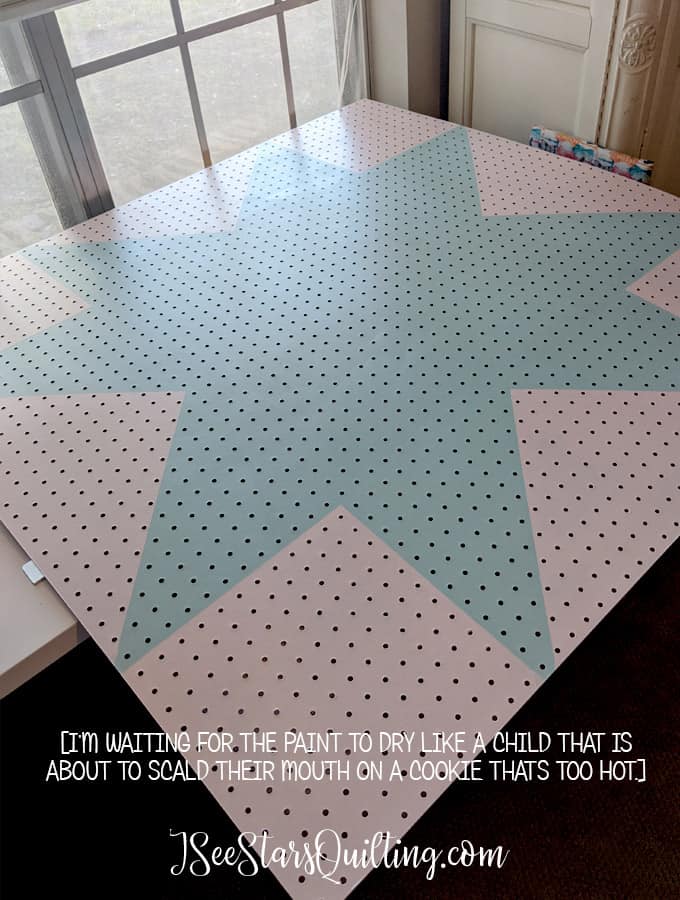
And Voila! Here is the finished painted piece!
I am really happy I decided to add a little more pizzaz. Polka dots were another consideration… and so was dividing the larger piece into several smaller quilty blocks.
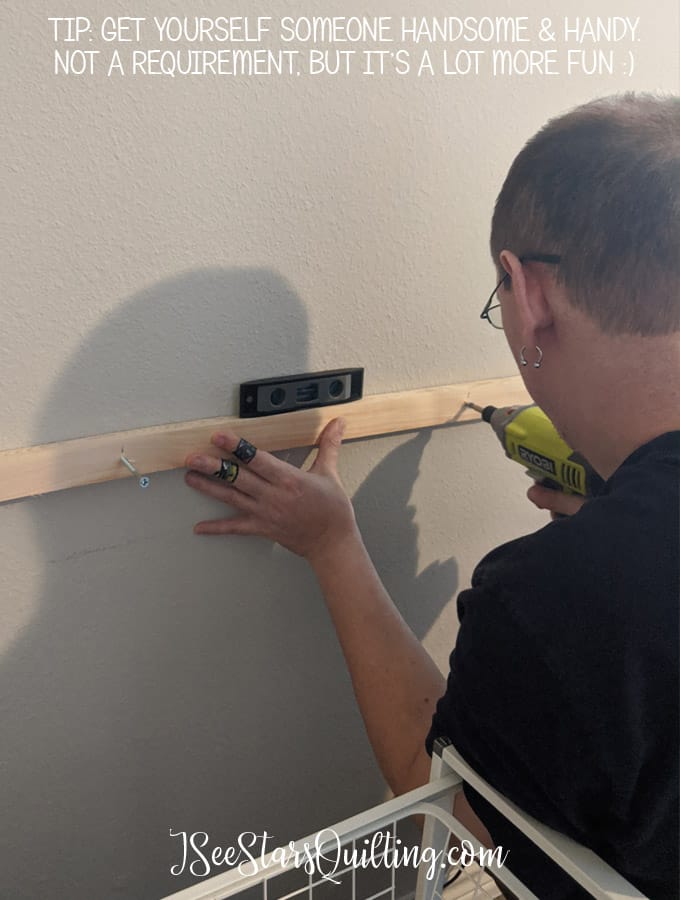
3) HANG
This next part I recommend having a friend or a helper assist you in putting up your DIY Pegboard.
Could you do it on your own? Absolutely… but the company and extra hands are nice 🙂
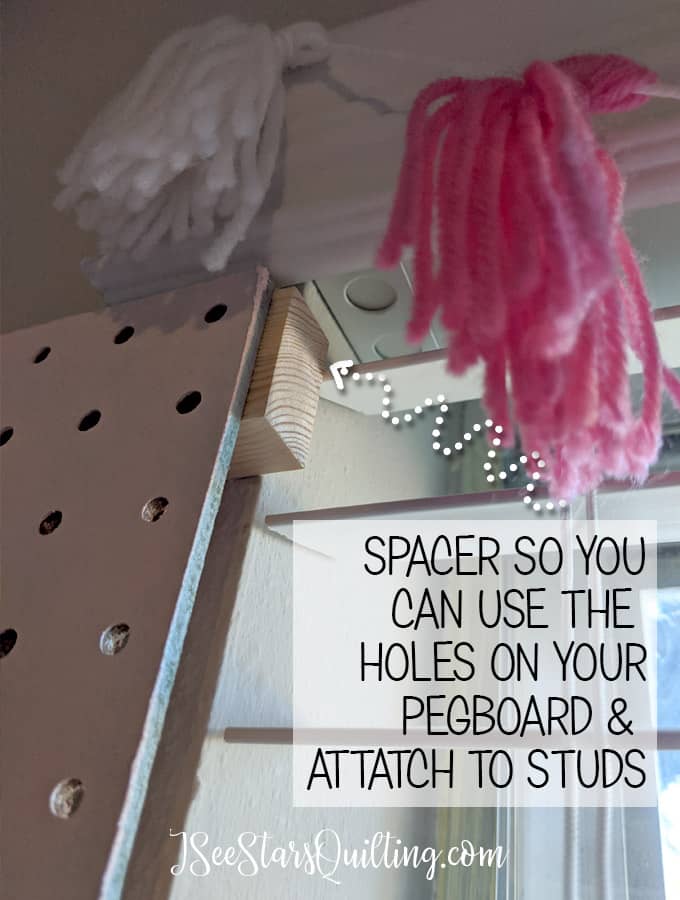
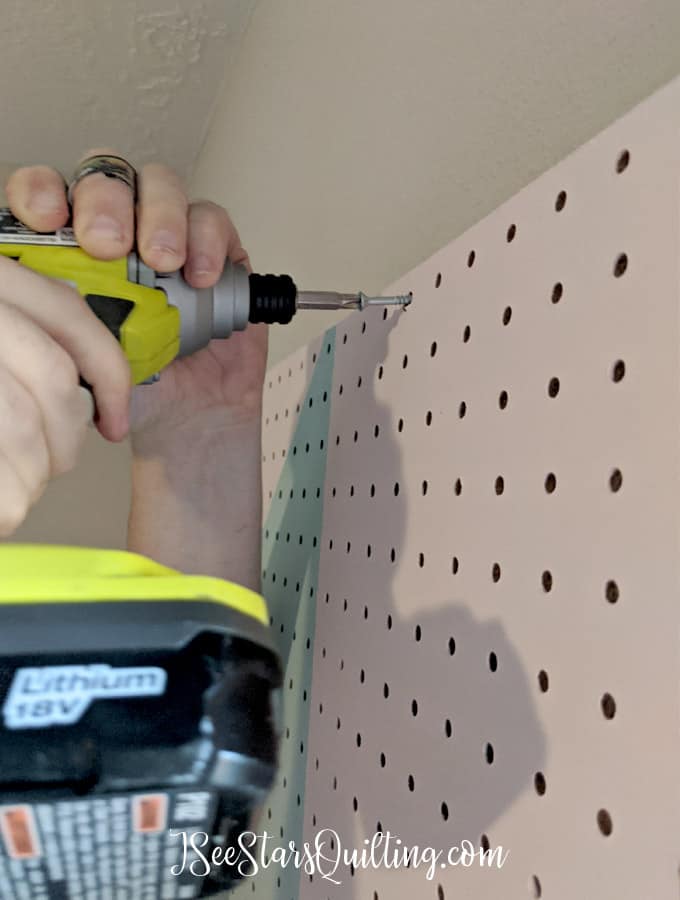
Use a level to hang your 1×2 pieces and screw them into the wall studs.
TIP: If you pre-drill your holes, it will help keep the board from splitting.
I put a piece of the 1×2 at the bottom of where my pegboard sat and at the top of where my pegboard came to.
This pulls it off of the wall so that you have room to add hooks to your pegboard.
After you put up your 1×2 pieces and they are secured to the wall studs, use screws to attach your pegboard to the 1×2 pieces in the corners. (and also in the middle if you’re my husband and want to make sure nothing is ever ever ever going to bring this thing down 🙂
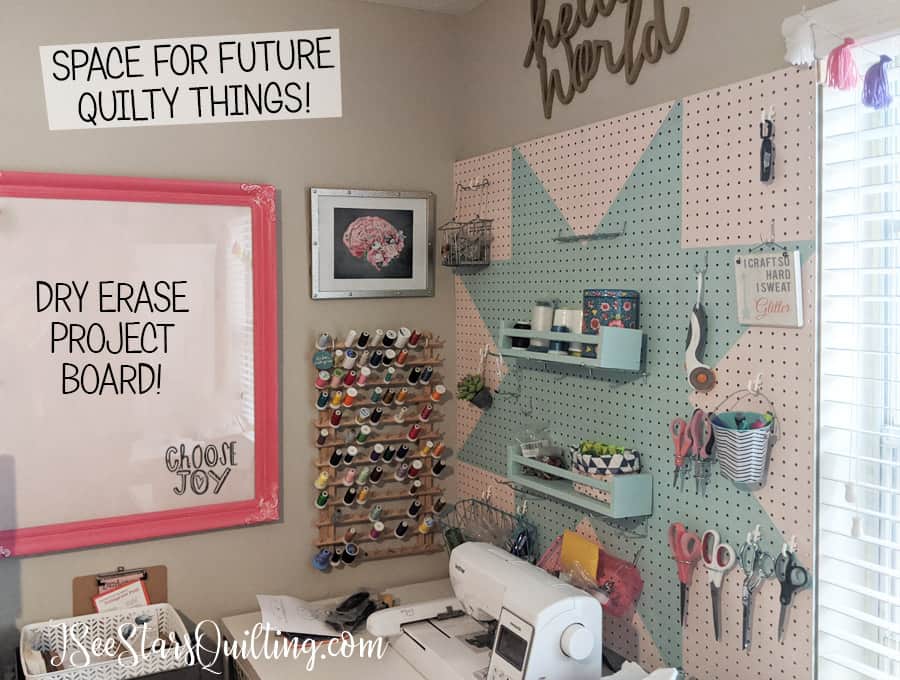
4) ACCESSORIZE
This was the fun part 🙂
I found a pack of pegboard accessories and used some baskets that I already had on hand to divide up the pegboard space and make room for all my tools.
I added a few little fun displays too.
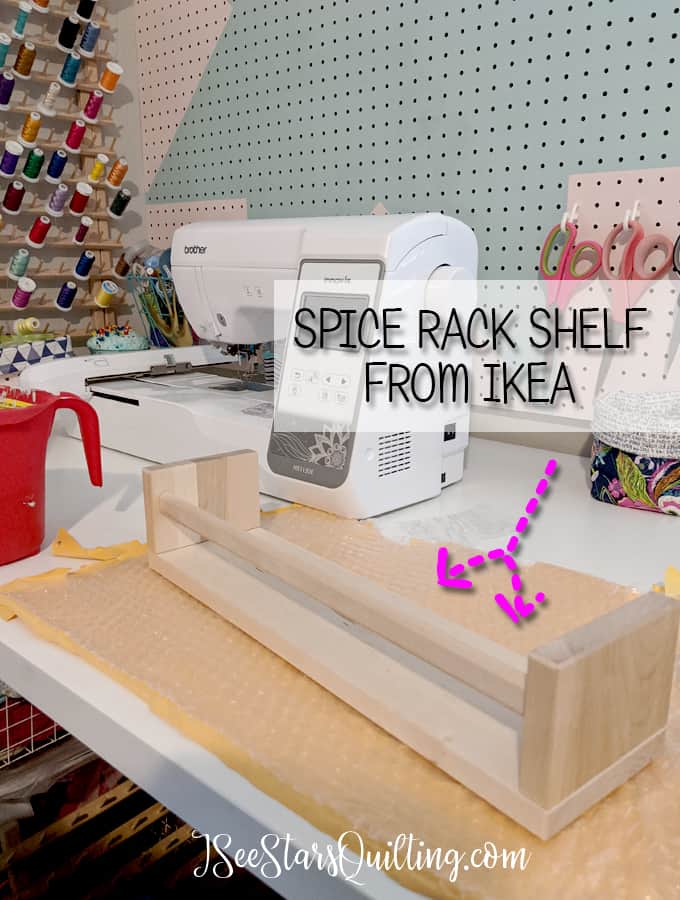
And lastly, I repurposed some shelves that I had found cheaply at IKEA. I believe they’re called spice rack shelves… whatever, now they hold fun ribbons and canisters with sewing supplies!!
I painted them the same minty blue as the background.
And here is a picture of the finished pegboard!
Thrift store dry erase board project coming soon…
What do you think?
Do You Want to make your own DIY Pegboard for your sewing & craft room storage?
Let me know in the comments below 🙂 I would love to hear what you think about this new little corner of my sewing room!
So it is finally here, photographed and ready for you to see! We moved about 2 months ago and I had to reconfigure my whole sewing room again! Just FYI, Here is my sewing space in our old house. 🙂
[Fair warning, this post has A LOT of photos 🙂 ]
First of all, I love you so much for your sweet emails and politely asking when I was going to show what I did with my space haha but seriously, y’all don’t understand when I say I didn’t know exactly what I was getting myself into with moving. whew! I don’t know if we will ever do that again!
My husband and I have moved plenty of times before. Most not by choice. In the past, the military packed and moved all of our stuff for us. Or we had sold most everything we owned and just bought new things to slowly build our new home, so we didn’t have a lot of belongings.
We lived in our last house for 8 years. If you’re under the impression that a baby comes with a lot of things… Nope… it is nowhere near the number of things that two children who think everything is worth keeping come with.
I can’t fault them entirely though… there was also me with an entire home office of crafting supplies and quilting fabrics too! 🙂
I know people move all the time and I am so proud of you for doing it. It was just… rougher than I expected. That is all.
BUT it has been a few months and things are finally running smoothly here again… we’re here and it is finally time to share my new sewing room with you!
DISCLAIMER: Please know that this is a creative space and as such… things will most definitely change and shift and probably get painted at some point or another. Freedom to change is a powerful thing!
I wouldn’t call this “finished” by any means… but it is functional and I love my space!
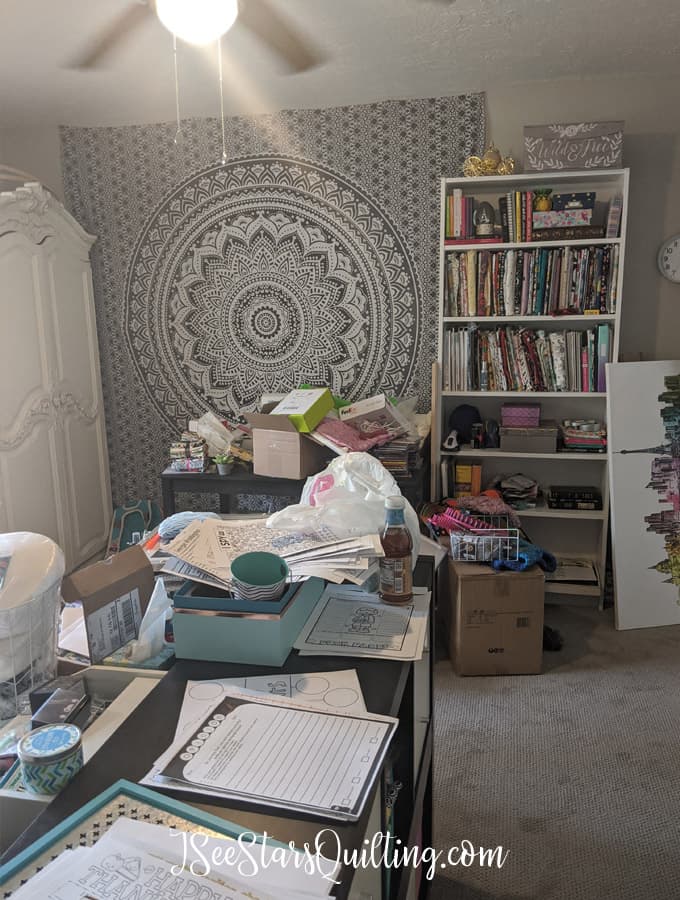
I hesitate so much to show you these next pictures, because… well, you will see! But I feel like in order to appreciate what it looks like currently, you have to know where I started!
My old house had a formal dining room that was open concept to the rest of the house and my mess was constantly on display. Our new house has a “mother-in-law” suite with a half bath and bedroom. It is now my sewing room. Upgrade? YES! And I’m so excited about it!
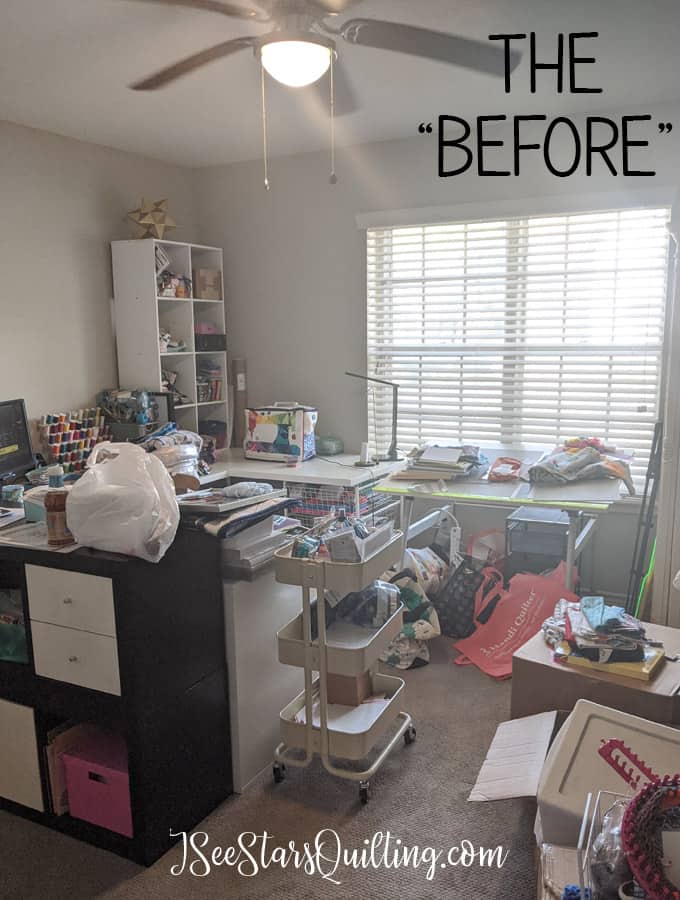
So here it is… the good, the bad and the messy…
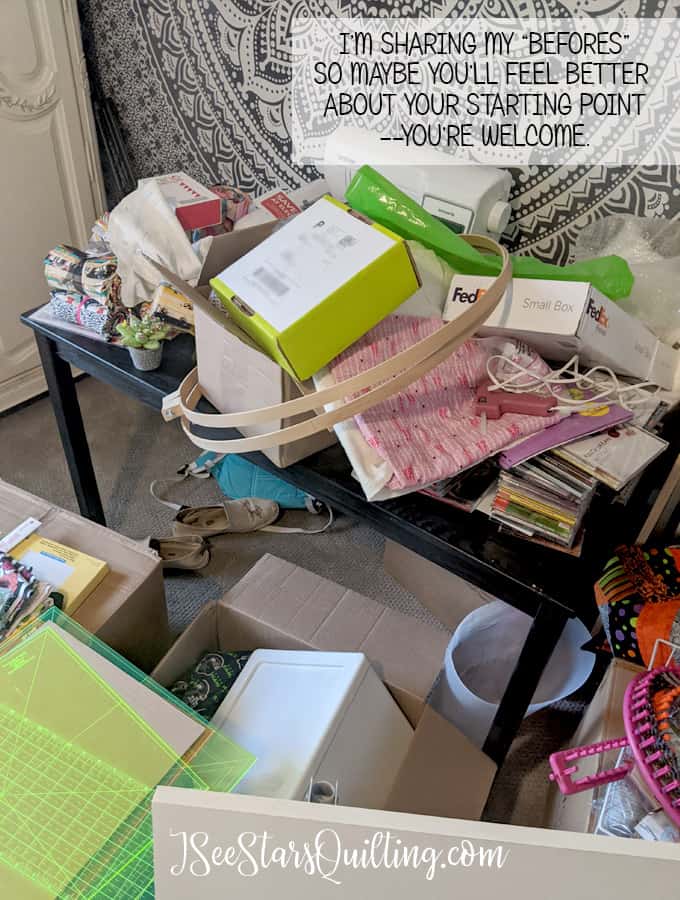
I know to see my before pictures is going to be helpful to someone, even if it is just an ego boost that at least you’re not in as bad a shape as I was, right?
[Type A personalities… you might want to look away!]
When we moved in, things just got dumped in the general area of where they were supposed to go. It took me FOREVER to really sort things out and organize it all again…
Another view – the other side of the room… getting better but still a disaster… (hey at least I can see a floor now!)
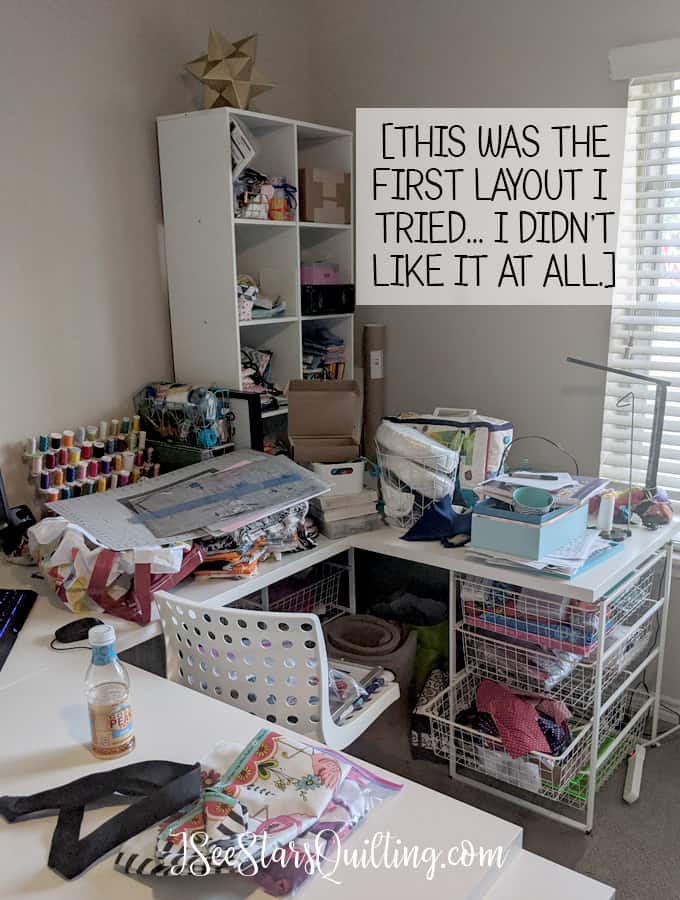
I tried several different furniture layouts until I found one that was what I was comfortable with. The one above was good in theory but ended up cramming me into a cubicle-like-workspace in only 1/4 of the room – Not a good use of the space.
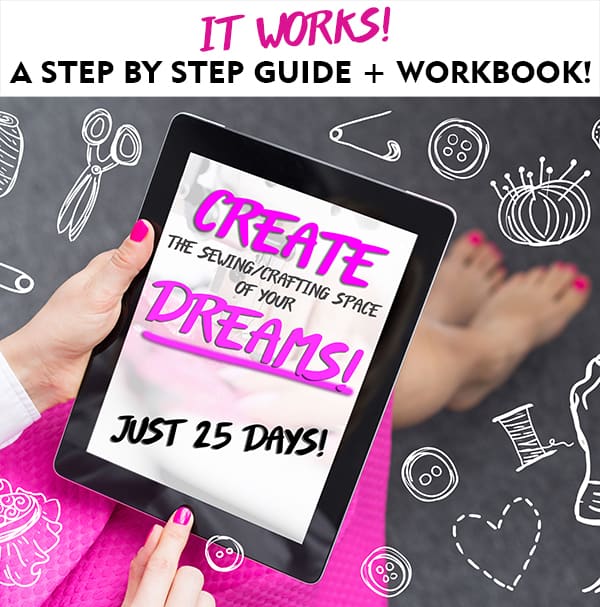
If you’re curious about what method I use to decide how to organize and furniture placement… I’ve written out everything in a step by step guide that you can download instantly here 🙂 It is one of my most popular downloads and has helped SO many people create the space of their dreams.
Just so you know… there was no HGTV crew to come in here and help me heave all my furniture around and plan out my strategy to find the floor again. It was all just me… and it all took place over the course of about 3 weeks from the “before” to the “after”!
The After Pictures
When we knew we were moving, I got rid of a bunch of my fabric and a lot of the quilts I had laying around. I tried my best to clean out and purge when I wasn’t using.
Needless to say, I still had A LOT of stuff to fit into this room again. It is still a work in progress as I fill the walls up and find a place for everything.
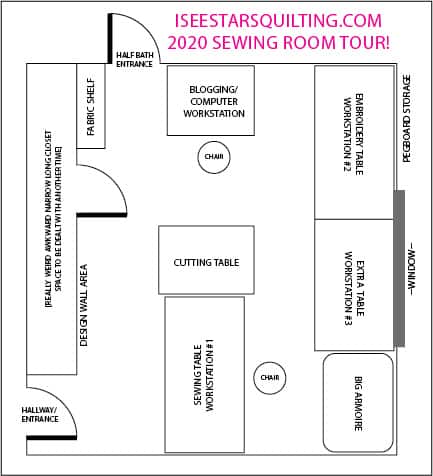
This is my sewing space!
As you can see, I made sure that there were multiple workstations for people to come over and sew with me! There are lots of tables to spread out and lots of good lighting as well!
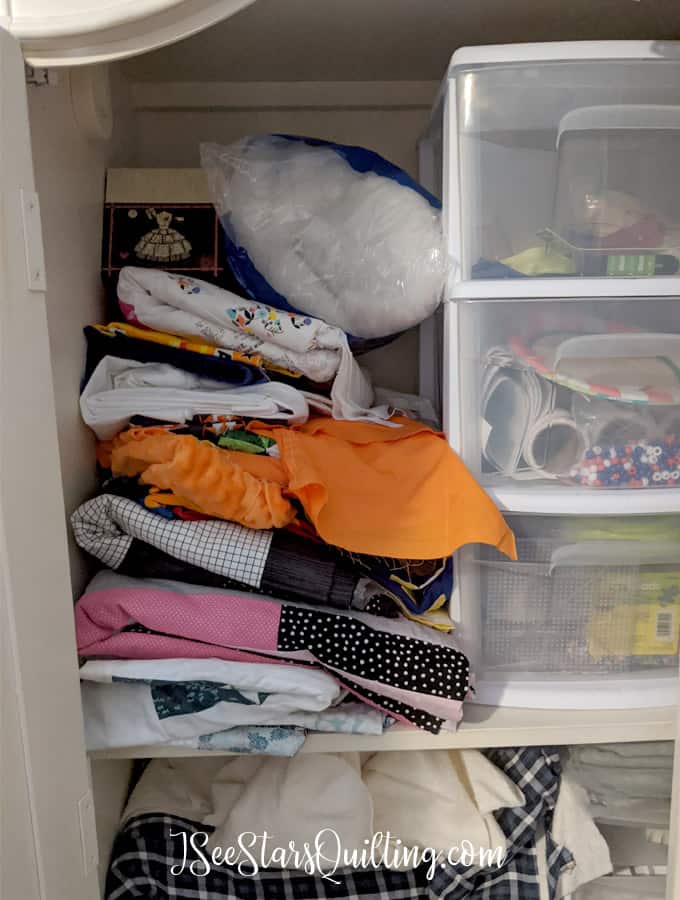
*The really awkward closet situation is something I am at a loss for at the moment, but hopefully someday I’ll figure out a solution to be able to use to space efficiently.*
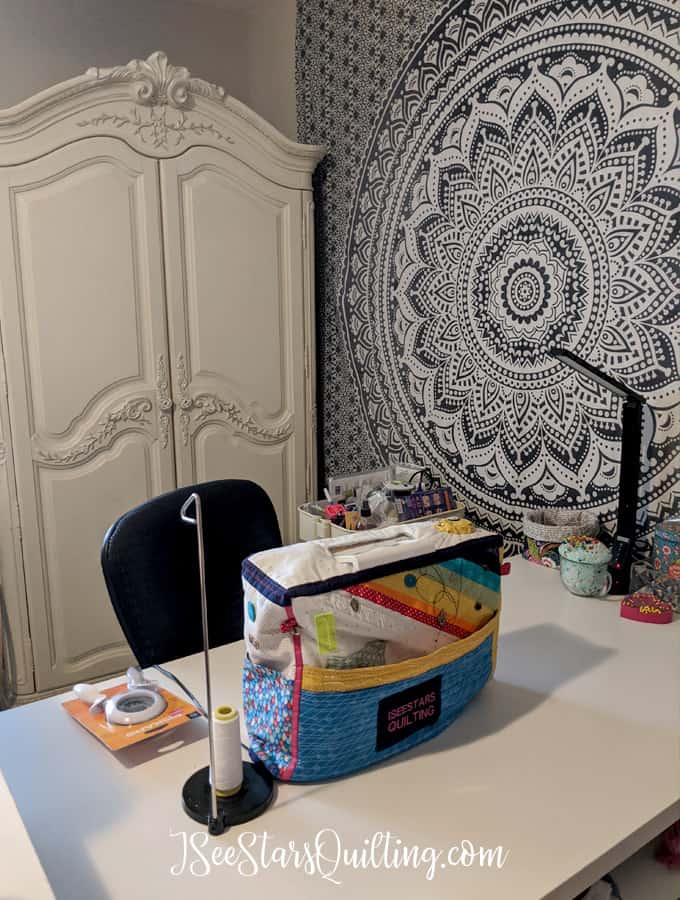
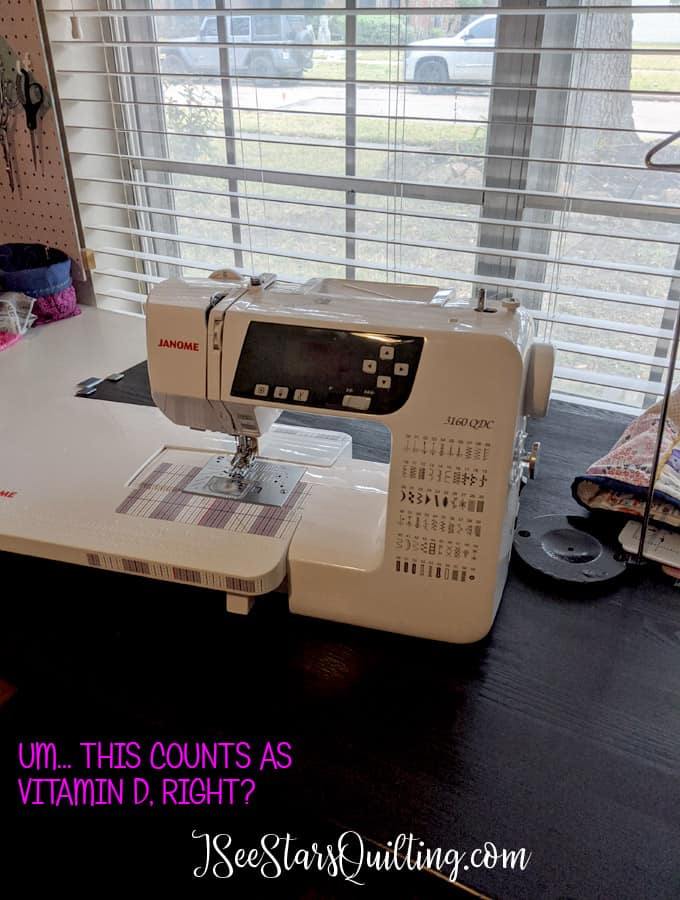
My Sewing Table
Underneath the sewing table, I have a cube shelf that holds fabric bundles, fat quarters, current project boxes and yarn.
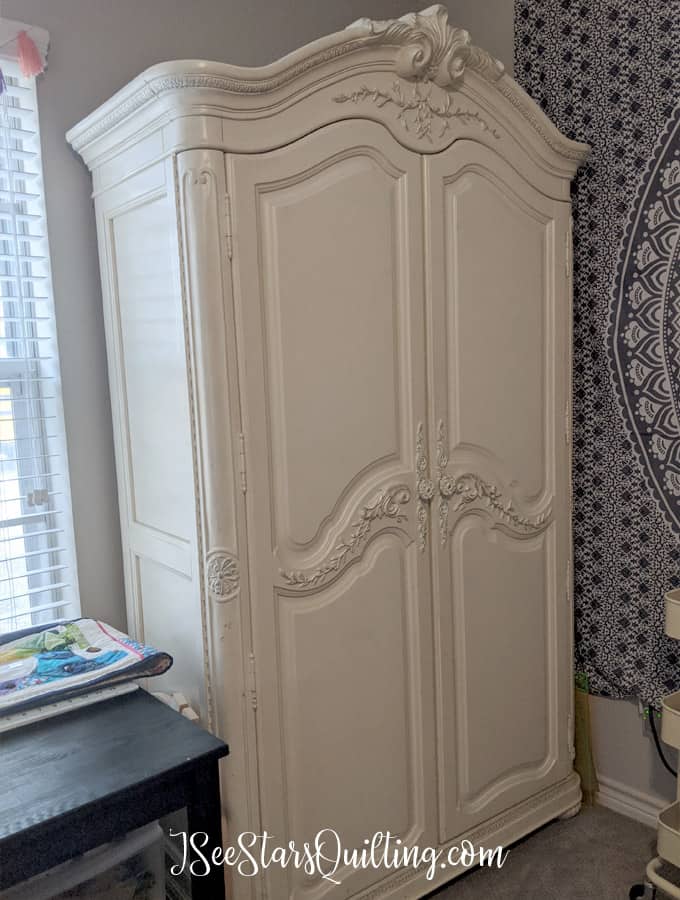
A New Armoire for Storage
Behind my Sewing Table is this big beautiful monstrous piece of furniture! It was actually used in my kid’s playroom for toy storage in our old house.
It is huge and solid and so so heavy. When we had the movers move our furniture to the new house, I mentioned that I wanted it to go upstairs in the game room area… The sweet man looked at me and shook his head!! haha. It was a nope, not happening.
Thus, we pivoted the plan and now it belongs to meeeeee!
I’m using it to hold more quilts and fabric and general crafting supplies. The nice thing about it is that while the inside could use a trip to The Container store and some organization… right now, I can just keep the doors closed so I don’t have to see the mess and work on it one step at a time!
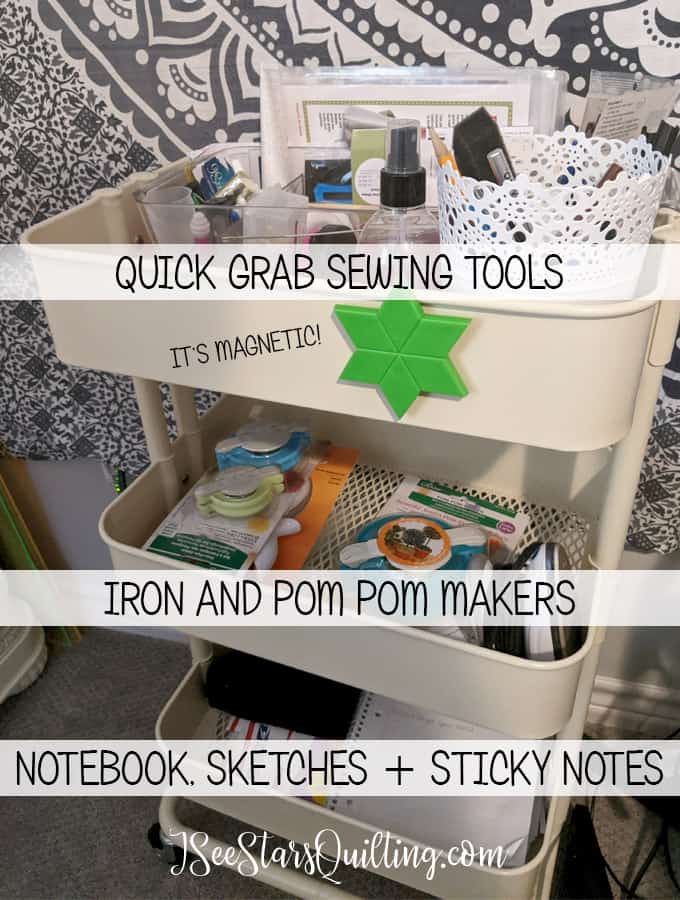
Just between the Armoire and my sewing table is the perfect spot for this rolling cart. It is one of my favorite places in the sewing room because it’s uses are endless! I currently use it to hold my quick grab sewing tools and it helps keep my sewing table in a more tidy state.
I have another work area that faces the window where I can change my point of view and soak in some sunshine.
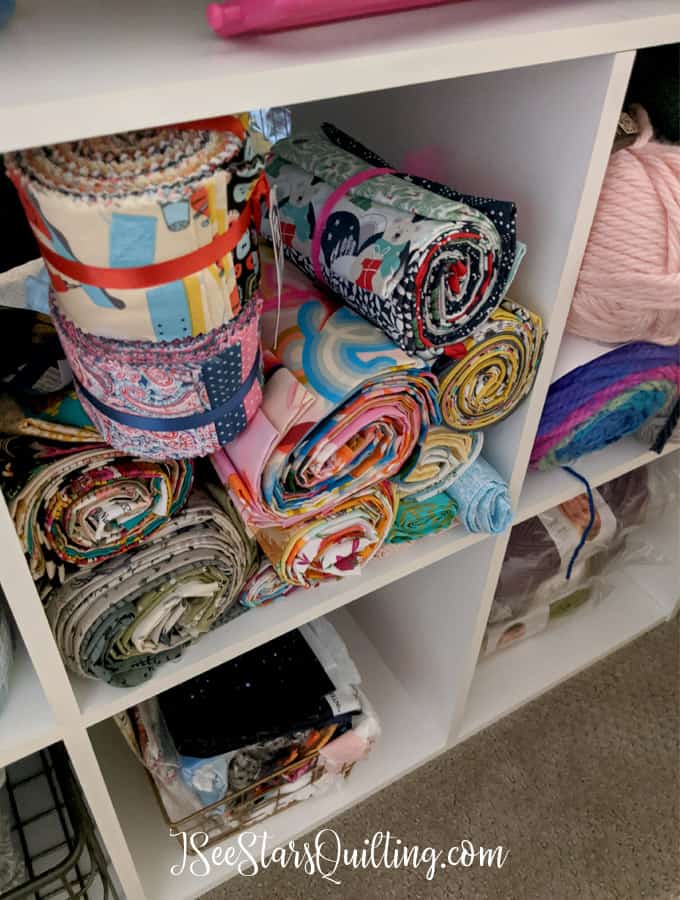
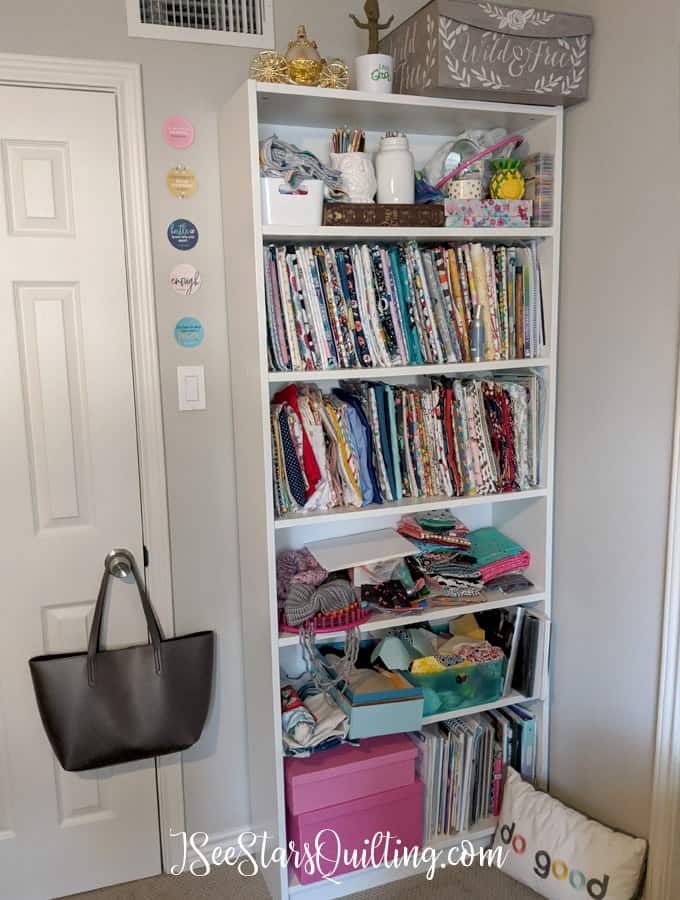
Fabric Storage! (well, some of it)
On the other side of the room, I have a big tall shelf (from IKEA if you couldn’t tell… I shop there a lot for home furnishings!) I store a good part of my favorite fabric – though not all of it.
A Design Wall Space
I also have a large blank wall area for my design board! It is great to be able to leave my projects out and keep them up off the floor.
My favorite part?
My most favorite area of my new space has got to be this corner right here!
I think it is because it is the area that is “finished” the most.
[PEG BOARD TUTORIAL COMING SOON!]
My dream was to have a space for a pegboard wall for my tools. I finally made it happen! Because I know someone would want to see, I took pictures along the way and I have a blog post coming soon so you can see just how easy this project was and why I can’t believe I waited so long to make it happen!
[DIY DRY ERASE BOARD TUTORIAL COMING SOON!]
I also LOVE my dry erase board! first of all… it cost me $7. Yep. And it is so so sooooooooo useful! (and… PINK! I love pink, I was hesitant to go with such a bold color at first but I am so glad I took the plunge and embraced my love of PINK! It makes me smile.)
I love having my reminders and thoughts and ideas up in front of my face all the time because sometimes… even if I write it down, there is a chance I won’t find that piece of paper again for a while. Do you ever do that too?
This dry erase board makes it impossible to lose track of current projects and deadlines as well as ideas I have for future projects.
I love having a space for all my tools in a neat and organized fashion!
My second favorite part…
I really love filling this space with things that bring me absolute joy. Everything in here inspires me and brings back wonderful memories!
I think this is probably one of the best things you can do for yourself is to fill your space with things that you LOVE. Even if its silly little trinkets… limit it to only the most important treasures.
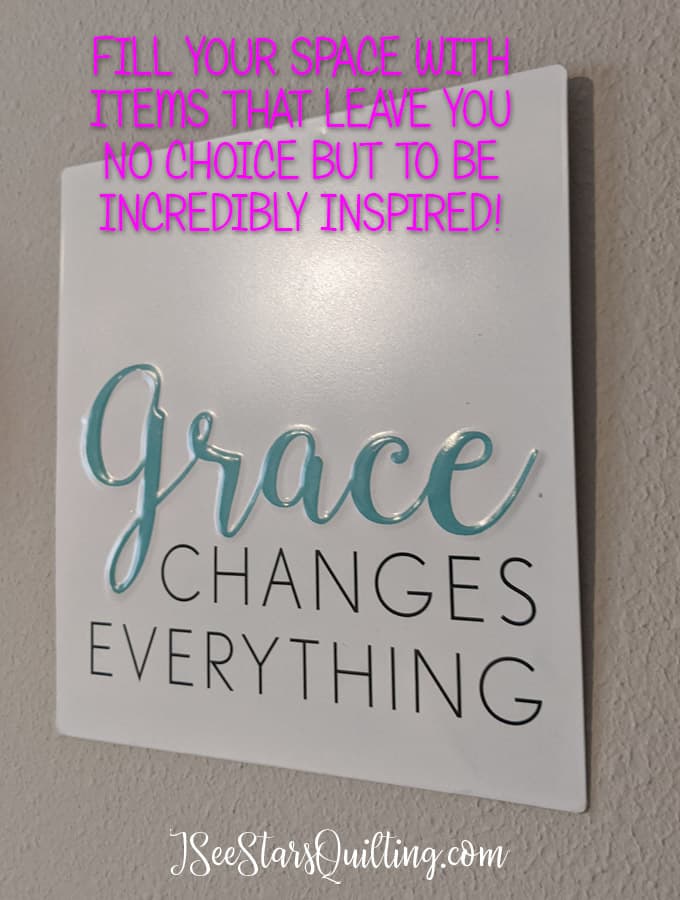
“GRACE” was my word for 2019. And I fully embraced it… I love the idea that while I strive to be everything to everyone and accomplish my dreams and sew alllllll the quilts while I’m also moving and raising a family etc etc etc *BREATHE*… I am allowed to fail and I am allowed to not be perfect and I am allowed to have GRACE.
Because when you have GRACE, you look at yourself like you would a child who is struggling and just trying to do her best and with grace, you have love and compassion.
Anyways, that was my GRACE tangent 🙂 here are a few more inspirational things that I have up in my sewing room.
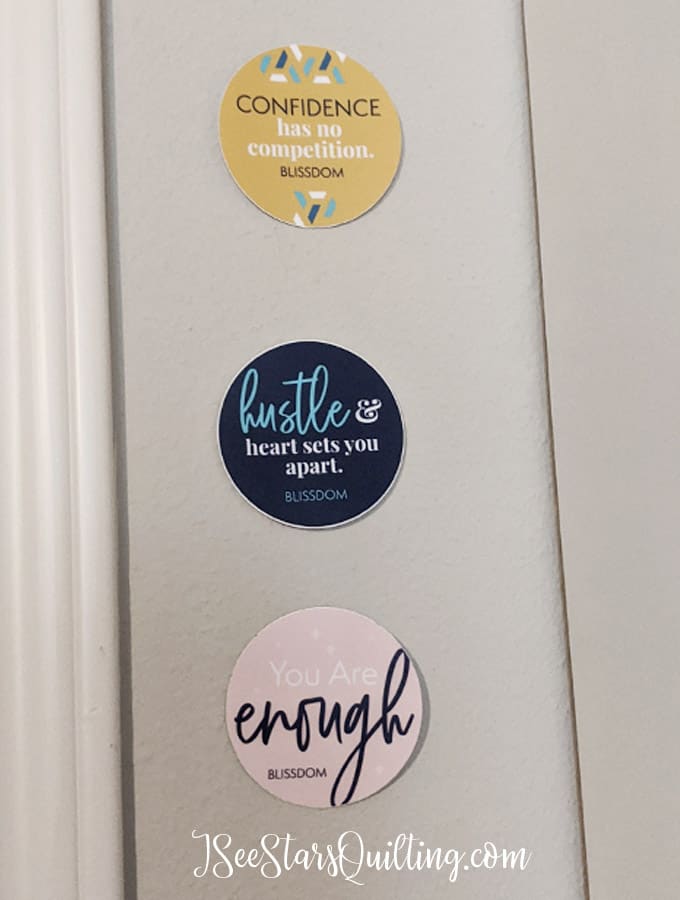
I have some stickers that I picked up from a conference that are beautiful reminders!
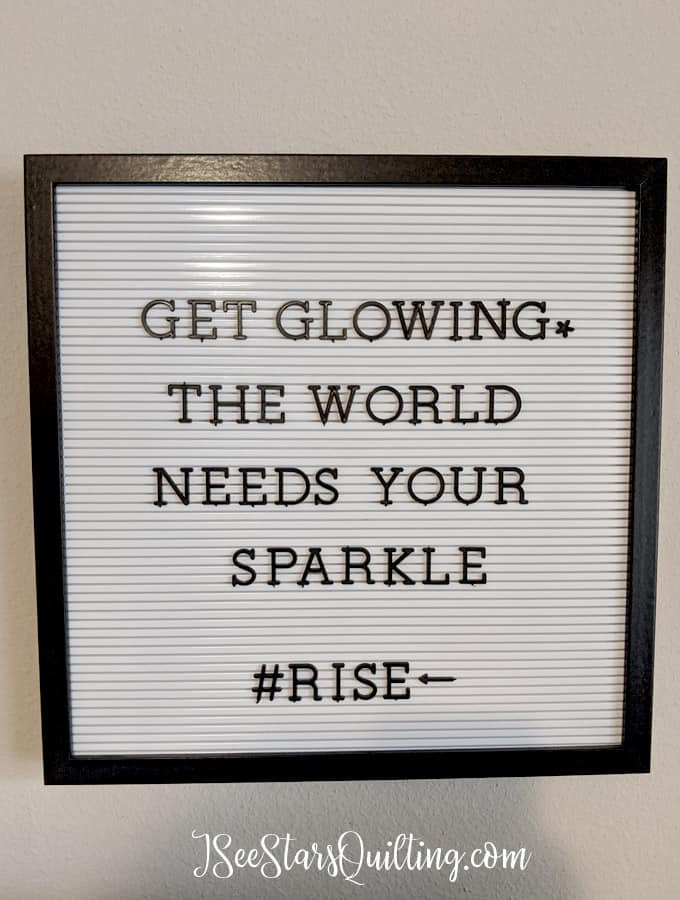
I have one of those letter boards that are SO in and trendy right now and honestly, I love it so much… but it takes FOREVER to write on the darn thing! To make sure you have all the letters and make sure that what you want to say is really impactful because you KNOW it is going to be a while before you change it again haha… so this is my current message 🙂
…and there you have it!
This is what my sewing space looks like thus far!
I’m still adjusting things as I go and moving/organizing, but it isn’t meant to be staged for a magazine photoshoot! This space is messy a lot of times there are multiple projects and kids in it!
What are some of the struggles you have in your sewing spaces? Do you need more storage ideas or are you running out of space? How do you deal with multi-purpose rooms?
Tell me down in the comments! I would love to hear your thoughts!
Hey there! We know to iron your quilt seams as you sew… It is a really big deal – like, non-negotiable for some people, right?
But what if you’re new to quilting and you’re asking yourself…
Why?
Why do I HAVE to iron my seams? – I hate ironing.
DO I HAVE to iron my quilt seams? – I really hate ironing.
What will happen if I don’t? – I really really hate ironing.
I’m here to answer those questions today as well as show you a video at the end that will hopefully further answer your most pressing questions! – (pun, totally intended. I couldn’t resist!)
Do you NEED to Iron your Quilt Seams?
The short answer is that you SHOULD. Yes.
But why do you HAVE to iron your quilt seams?
Because the pattern tells you to.
…
…
Just kidding. I wouldn’t expect an answer that simple to be the end of it!
Listen, I hate to iron!
I actually will pick up a super cute shirt in a store and then put it back if the material looks like it’s going to need ironing after every wash. No thank you. I don’t have time for any extra chores in my life.Sorry, cute shirt.
When it comes to quilting (and sewing), however…
I do iron.
I do iron my seams when I sew. (we’ll get to ironing fabric before you start sewing in just a minute.I have advice about that too.)
I like to think of the pattern like a cooking recipe. If you want to make a cake, you have to follow the directions, right?
You can’t add in a little extra flour, skip the eggs, and double the milk… and then expect to get a cake. It doesn’t’ work that way.
Sewing and quilting are a little more forgiving and lenient when it comes to creativity, but you still should take the suggestions of the pattern designer.
I’m sure they aren’t into wasting time any more than you are. So if they make a suggestion, it is best to follow it.
When you do iron your seams…
The biggest difference that you are going to notice is that your quilt top is going to lay flatter.
Why does this matter?
If you’ve ever tried to quilt on a top that has the seams all wonky, you’ll notice the extra bulk in areas of your quilt – especially if you have a quilt where many pieces come together. There is just a lot of fabric in those places and it takes some careful laying down of the seams to minimize the bulky-ness.
We all have little mistakes and places on our quilts that aren’t perfect. No one expects it to be and I think that it’s perfectly normal.
You can say that the mistakes “add character”… (Side note: I had a quilter actually tell me that) but don’t just let it be an excuse for pure laziness. 🙂
You spend so much time, creativity and effort on your quilts… why skip one of the major steps that are going to give your quilt an overall more professional look?
Check out the video below to learn more about ironing your quilt seams and see my tips as well as a few favorite products of mine!