We’ve talked a little bit recently about common quilt sizes. The hardest thing to understand is that these guidelines are just that… guidelines. But as a beginner quilter, you have to start somewhere right?
Quilts come in all shapes and sizes. There is no “right” or “wrong” quilt size. As long as the quilt size fits the needed size, it is right. Some of my quilts have ended up square, and some are more rectangular. I’ve even made hexagon-shaped quilts.
I’m here to give you your starting guidelines.
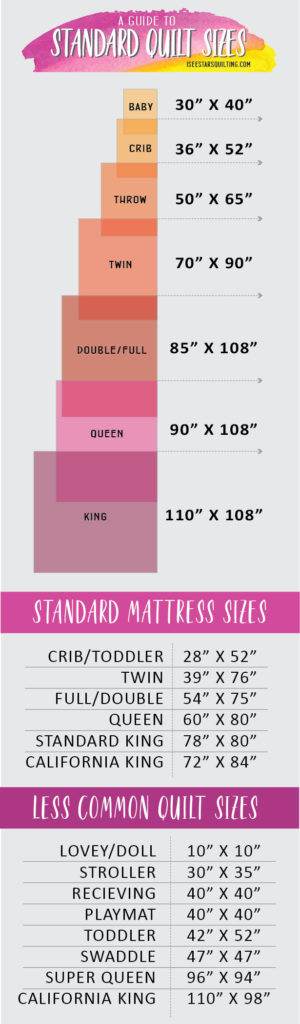
I wanted to share with you a clear quilt size chart to visually show the differences in the quilt sizes and shapes of standard quilts.
You may choose to make your quilt a little wider or a little taller depending on your need, but this will be your first stop before designing your quilt.
I created the perfect chart for you so that you’ll always be able to refer back to it for quilt sizes… and… of course, I made it pretty too!
Most Common Quilt Sizes
(Make sure you Pin it to save it for later!)
But what if I don’t want to follow a common quilt size?
(You’re a bit of a creative rebel aren’t you? It’s totally fine, I am too ?)
Yes, well the good thing about guidelines is that they’re not hard cut rules. You can – and in some cases, totally should – break them!
This sizes above are approximate and can vary 4″ – 8″.
If you want to go completely rogue and do your own thing… go for it!
You just have to adjust the fabric requirements for your pattern so that you won’t run out of fabric before you run out of quilt.
If my budget allows for it, I will usually buy a little more than the required fabric in a pattern anyways. I tell myself that it’s a little safety net in case I mis-cut or make a mistake I can’t come back from.
It also come in handy to piece coordinating fabric from the front of the quilt into the back of the quilt.
For more tips on what to do on the back of your quilt, check out these recent posts
This isn’t something that I talk a lot about but I really like to design my own quilt patterns. Ha, um you may have noticed as I give away a lot of FREE patterns in my Freebie Library and on my site. I also have several really fun patterns available in my shop as well that work for any level of quilter.
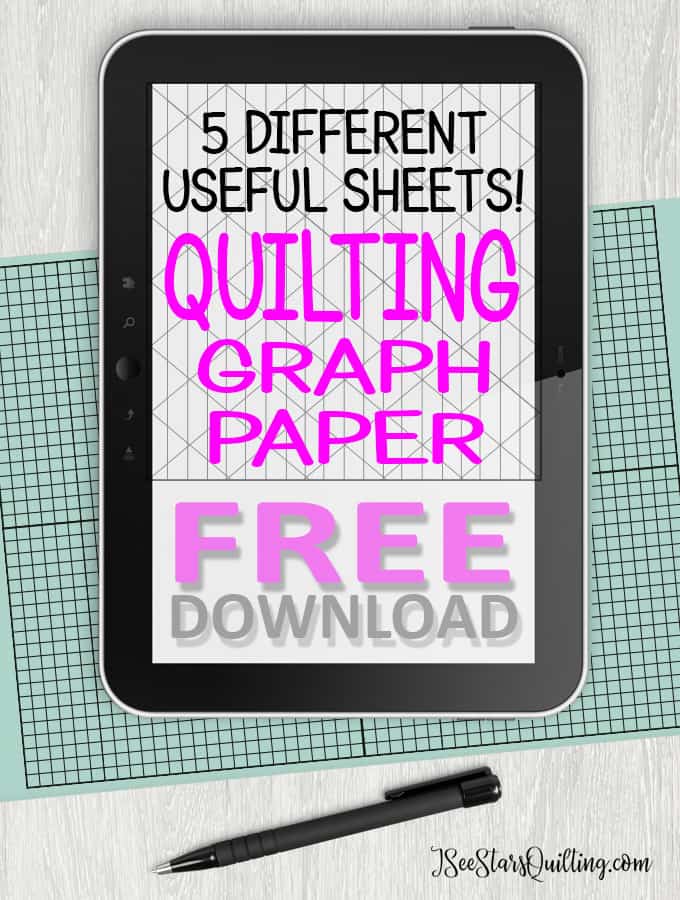
I start out sketching my ideas for a quilt pattern on graph paper and once I have a lot of the kinks worked out I draw the pattern up in my EQ8 software on my computer. It is a wonderful program with so many awesome calculations and capabilities.
If you’re even half serious about designing your own quilts, I highly recommend owning the program because it will make your quilt math so much easier!
As quilters, we often spend so much time working on the quilt top. Getting the perfect piecing, spending time on the design work and the fabric choosing… There is so much to it! – But what about the back of your quilt? Today I’m going to talk about just that. This is the Ultimate Guide to Quilt Backings!
Be sure to check out the FREE download quilt backing reference chart that I have for you!
Are you guilty of just looking at your quilts as a flat 2D piece?
It’s totally ok. You spend all your energy on the quilt top and then when it comes to the end, you just slap something on the back and call it done! I mean, for goodness sakes, this quilt project didn’t start out as being your entire life’s work… (maybe it was just a small craft project that morphed into a big obsession?)
I get that by the end your brain might be ready to move on to the next project and be done with the quilt entirely… but if you give yourself just a few more moments to make the right decision, it will be so worth it.
Taking a little extra time preparing the backing can make a huge difference in the quilt’s longevity as well as how easy it will be to quilt it
While you generally only look at one side of a quilt at a time, your quilt really is a 360-degree piece of art! …yes, ART!
Every single decision that you make, no matter how small, further differentiates your quilt from every other quilt out there.
Have you ever been a part of a sew/quilt-a-long and seen two quilts that turned up identical? I never have.
You are an artist with your quilting. That tiny mistake that you sewed over and over and decided to just let it stay because you couldn’t be bothered to pick out the threads again… it becomes part of your beautifully unique quilt!
Your quilt is one of a kind and every single angle should be celebrated!
Backing fabrics can be so expensive!
Quilters know this. Fabric can get expensive. And if you have a love of fabric and a need to keep hoards of it untouched in your home… well, it can get REALLY expensive really fast.
Sometimes it feels like so much money has been spent on the fabric for the front, you can’t bear to drop another $50+ on the backing, right?
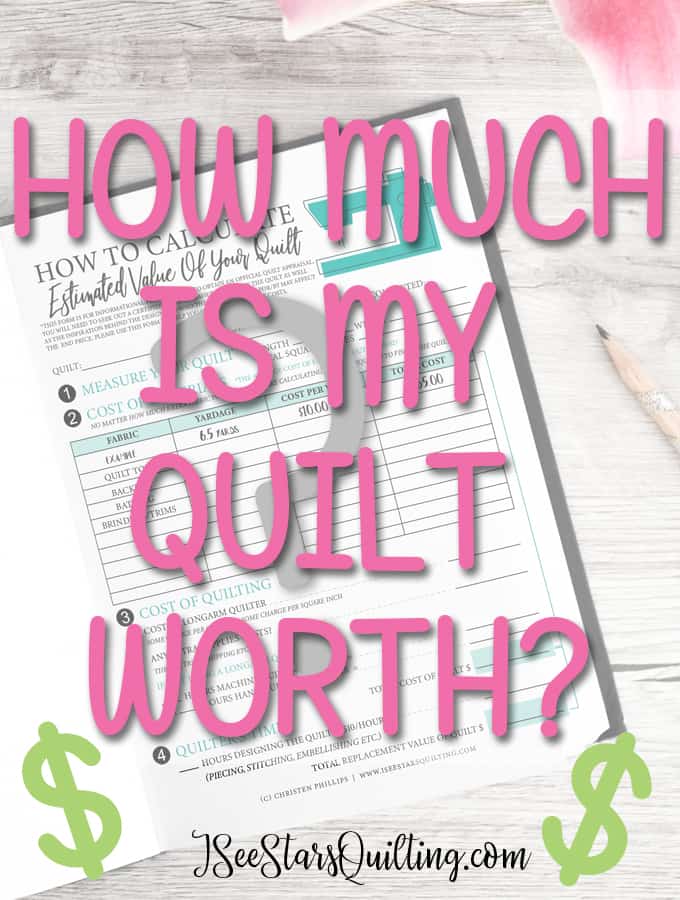
Hey if you want to know the easiest way to calculate the worth of your quilt, check out this blog post that I wrote! I have a FREE download sheet for you that walks you through and details out every step!
When you have already spent what feels like a fortune on fabric for the front of your quilt, going and buying even more fabric for the back… ugh… it can be tempting to find whatever is cheap and easy… because no one will really see the back will they? (*ahem* Read the above section, please!)
One way that I like to save a little money on quilt backings is to check the sale racks when I’m shopping for other fabrics. Always. every single trip… because you never know what you’ll find.
I even wrote a whole post on How I find cheap fabrics – (Let me clarify real quick. When I say “cheap” I mean in price. It is best not to mess with cheap/low-quality fabrics when quilting.)
You might also find this post helpful for quilting on a tight budget… or just making sure that you’re using your crafting money wisely.
I’m a bit of a treasure hunter. I really like finding bargains and I feel triumphant when I find a good one. I’ve even found good quality quilting cotton for $2 a yard! – And it was pretty! It has been used for many of my quilt backings.
Quilting can be an expensive hobby, but it doesn’t have to break the bank… even when you are shopping for quilt backing fabric.
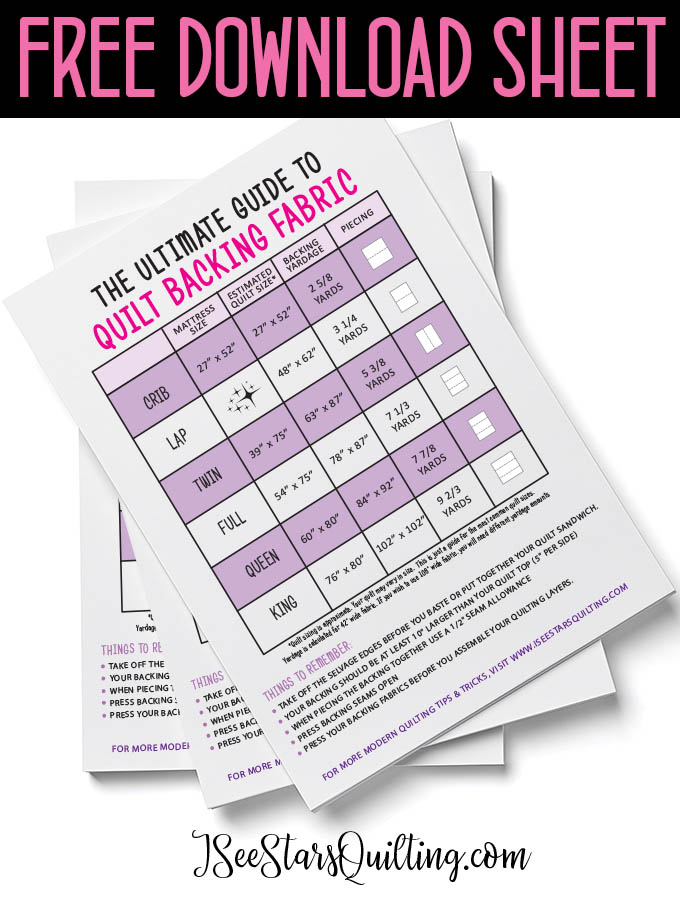
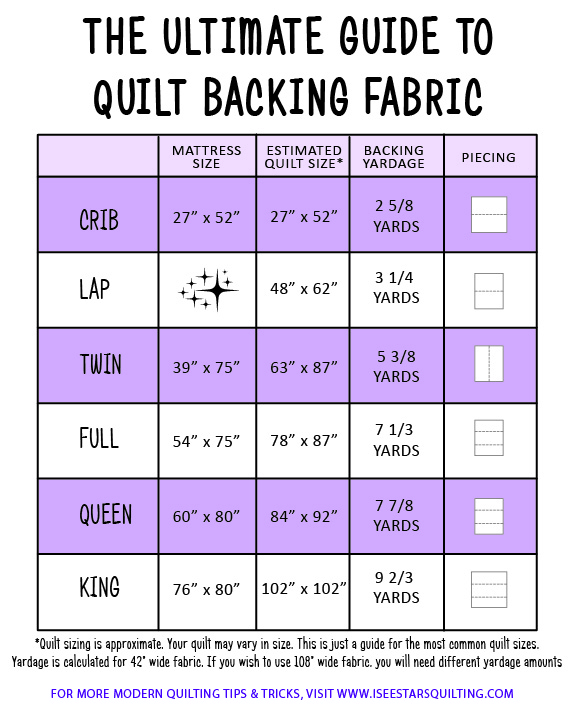
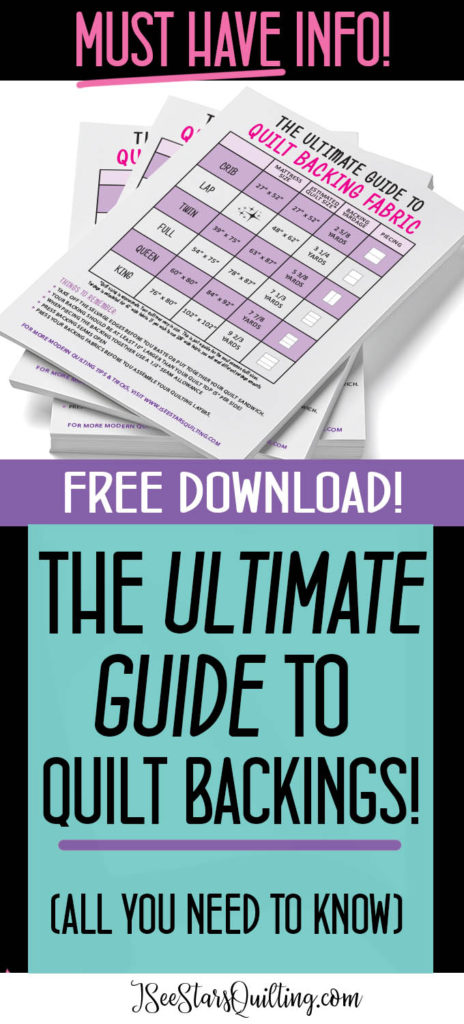
How much fabric will you need for a Quilt Backing?
Perhaps your pattern didn’t specify the fabric requirements? Or didn’t specify how you should arrange/piece your backing fabric?
Here is a general chart that is helpful to keep on hand!
Remember to PIN this image so you can refer back to it later!!
To make even more information available to you, I created a FREE download with more tips for when you’re thinking about or planning your backing.
I tried to pack as much useful content as possible into the one-page download sheet!
Should I still use a 1/4″ seam measurement?
Actually, it is recommended on the back of your quilts to use a 1/2″ seam measurement.
Using a 1/2″ seam allowance instead of a traditional ¼-inch allowance on the backing helps reduce bulk at each seam and makes it lay flatter.
Also as with piecing, it is recommended to use a shorter stitch length of 10 – 12 stitches per inch for a sturdy seam that will hold up well over time. I usually keep my stitch length on a 2.2 for piecing.
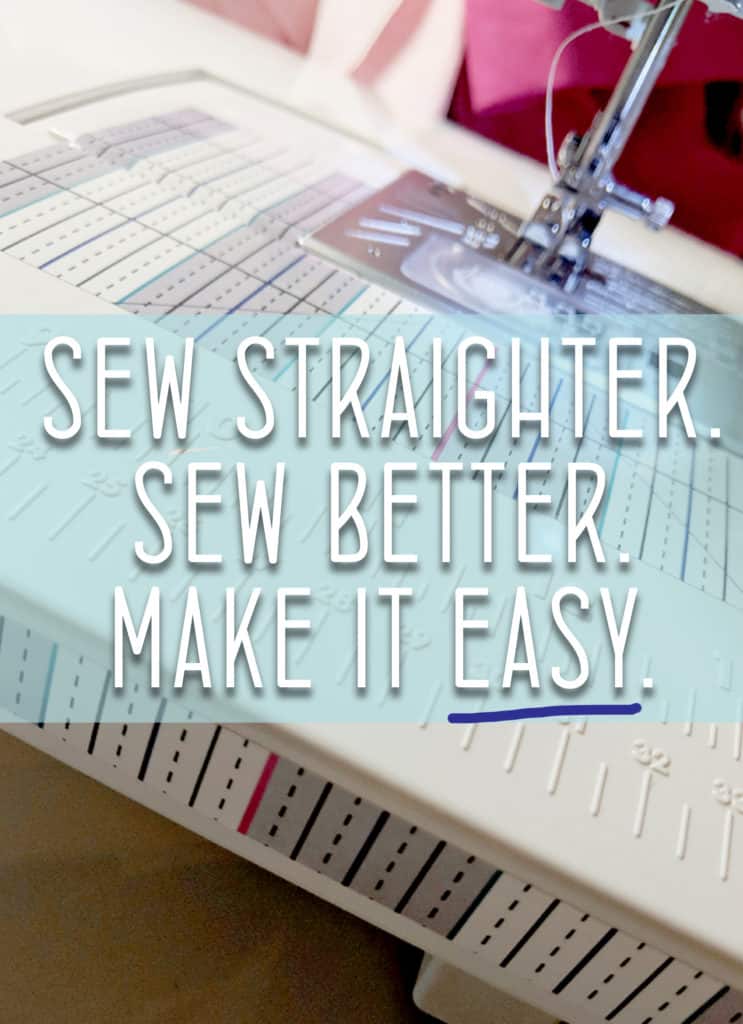
If you have a hard time keeping your seams straight when you sew, I created something just for you! This is a really popular add on to your sewing machine… and I’m offering FREE shipping!
Are there any other specific requirements for sewing backing?
Actually yes… I mean with everything in quilting there are guidelines… and you can choose to follow them or… do your own thing, but general things to keep in mind are:
Take off the selvage edges BEFORE you baste or put together your quilt sandwich. – just trust me.
Your backing should be at least 10″ larger than your quilt top (5″ per side) if you are planning on giving it to a longarm quilter to finish. They need the extra wiggle room.
If you are doing the quilting yourself, you should be safe with 4″ extra per quilt side.
When piecing the backing together use a 1/2″ seam allowance instead of your general 1/4″. It is just a little stronger.
Press my backing seams open so that the fabrics lay flatter.
Give your backing fabrics a good press before you assemble your quilting layers. You don’t want a rogue wrinkle to come up that you have to go back and fix later or accidentally quilt over.
Lastly, try not to sweat it too much 🙂 Quilting is fun, right?
For more tips on what to do on the back of your quilt, check out this post. I tried to keep the above post more on the technicalities of your quilt backing, but I went into a lot more about the design of your quilt backing and how you can use up fabric scraps in this post!
Hello quilters! Today is a great day ? I finally finished a quilt that has been in the back of my mind for ages… seriously. I wanted to make this hexagon quilt a long time ago but the timing just wasn’t right. I just had to wait for the right opportunity to come along!
Do you have quilts like that? Quilts that you want to make, but don’t yet have the right recipient? Or patterns that you’re saving for a rainy day?
I can tell you it is so refreshing and invigorating when you finally can check it off of your list as done!
And even better when the finished quilt idea comes out better than you could have hoped for!
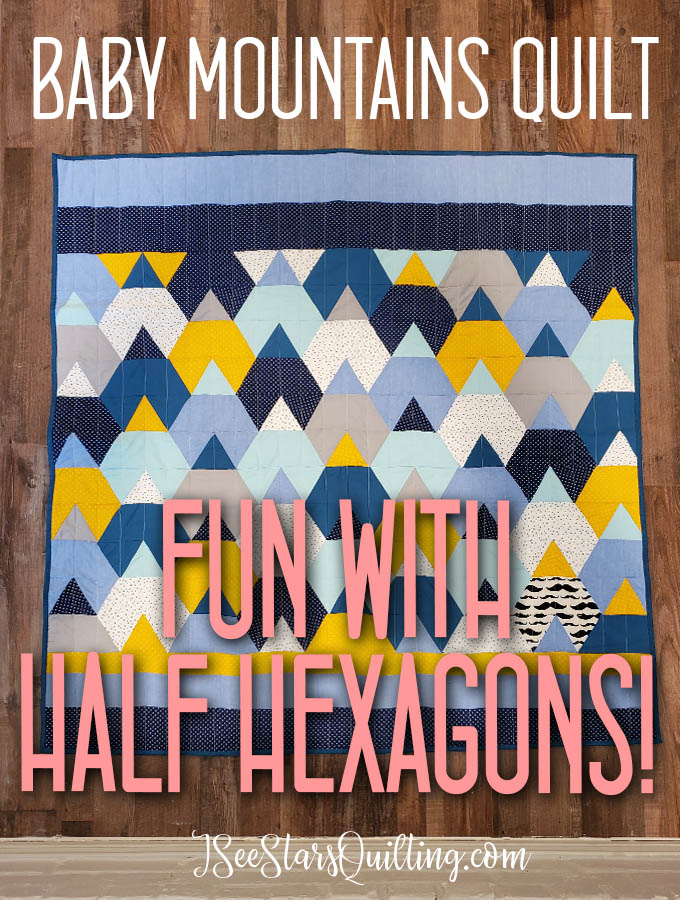
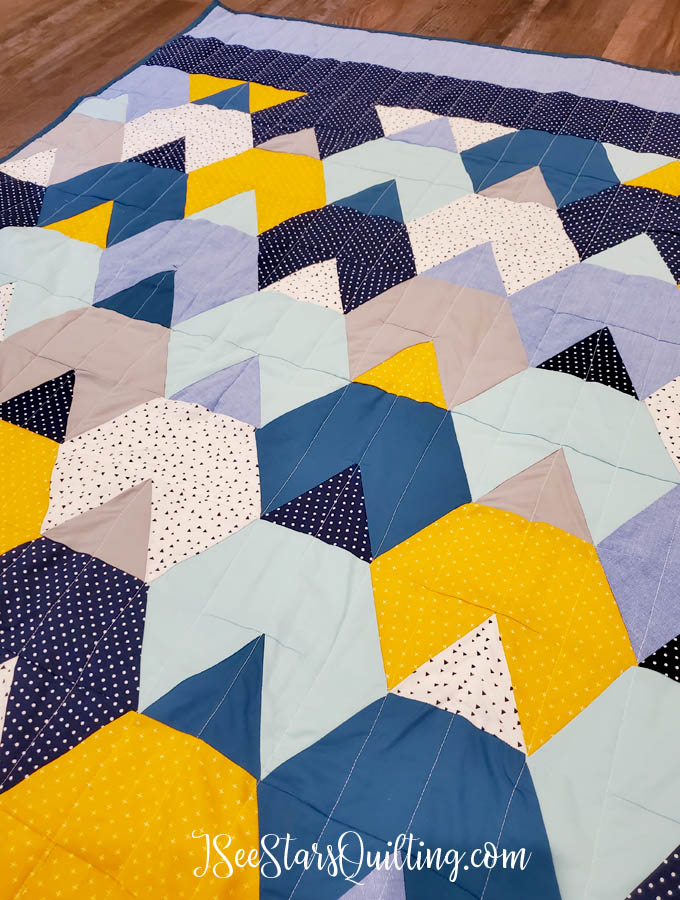
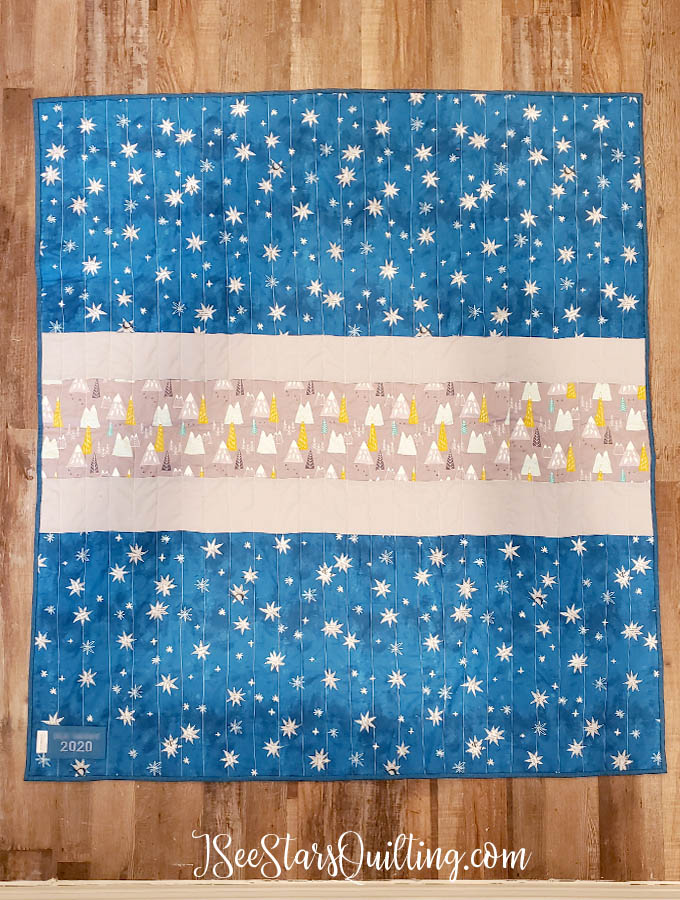
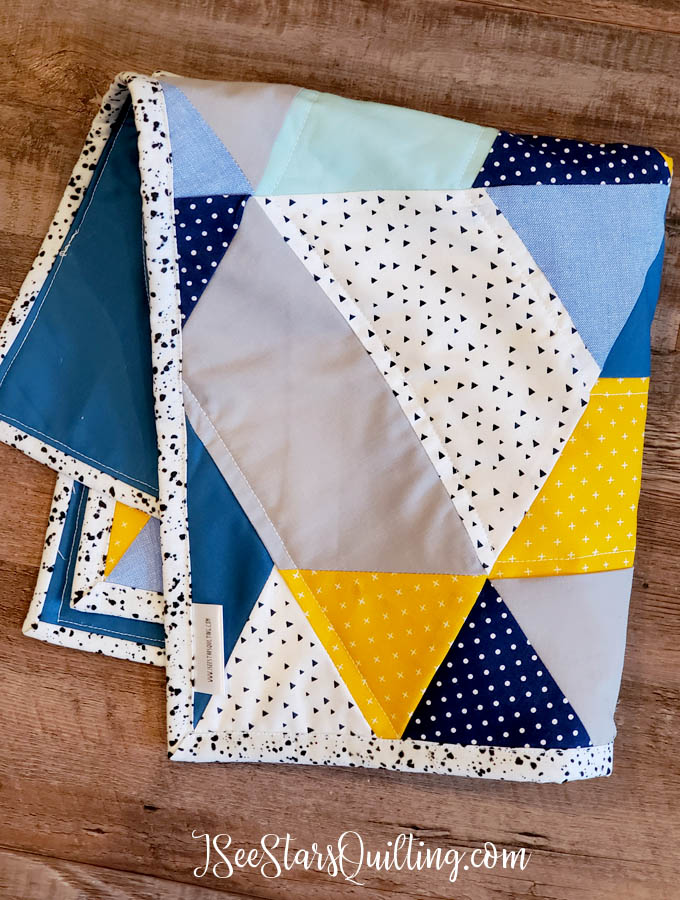
This is the finished quilt. – Baby Mountains. ❤❤❤
I made this quilt for a friend of the family that just recently had their second child.
Hexagon quilts have drawn me in lately with their versatility. I wanted to make a hexagon quilt using the templates I had on hand and I kind of made it up the pattern and layout as I went. – I didn’t use anything but a vague idea I had in my head for an earth-y/nature-y vibe with a soft baby twist.
Pretty sure I nailed it. ? What do you think?
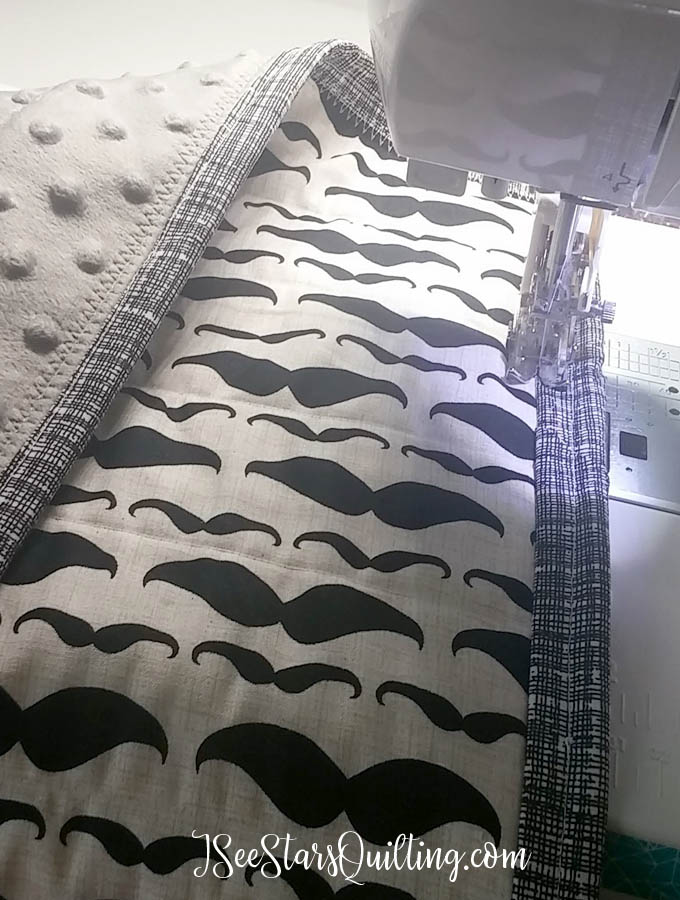
I made a quilt for their first child too. It turned out super cute as well… Something about the size of baby quilts makes me want to call every single one of them “super cute”… just saying ‘cute’ doesn’t feel like it is enough, I guess?
Unfortunately, I was a terrible quilt photographer back then and this is THE ONLY picture I have of the whole quilt?! Say what?! I don’t know. I’m sorry. That is why I will always encourage you to take pictures of each and every one of your quilts… even if you think they’re terrible and don’t deserve to be photographed. You’ll want to look back on it one day!
As you can see, the back of the first quilt had this adorable mustache fabric on it! There are certain fabrics that I’ll never get over… I swear it still makes me want to squeal with delight at how awesome it is. I LOVE this mustache fabric!
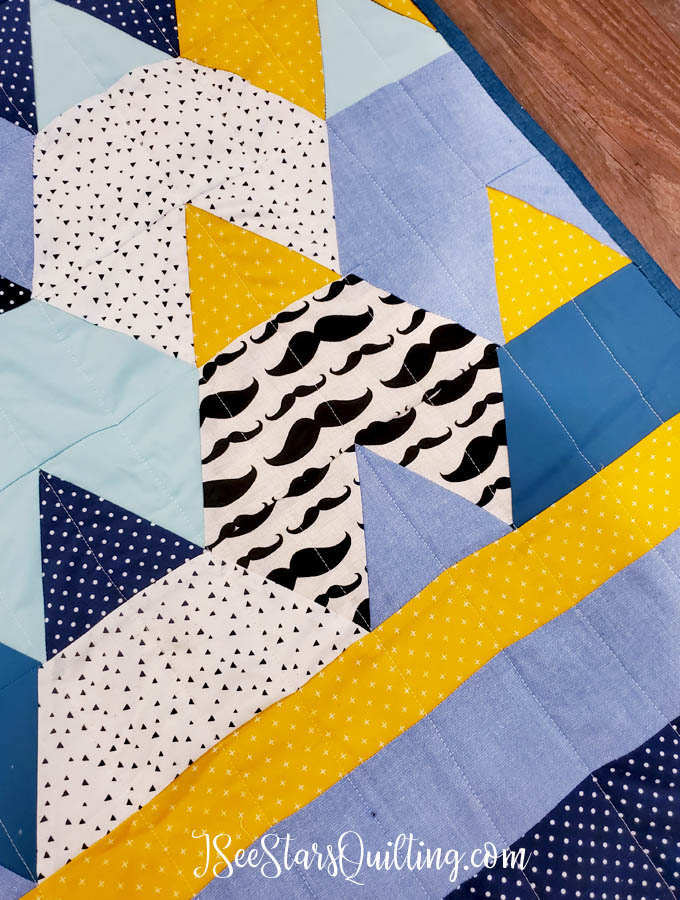
When I was searching through the fabrics that I have in my stash (because… quarantine, right?) for fabrics to pull together for the Baby Mountain quilt, I ran across a little leftover mustache fabric and just KNEW I had to use it too.
…because sibling quilts! ??
I used the mustache fabric on just one of the mountains. It works as kind of a focal point for the quilt as well.
As I was piecing the quilt together and working on the mustache mountain, I imagined the new big sister getting excited about seeing a mountain matching her quilt. It is pretty special, I think. 🙂
Of course, I might be the only one excited over that cute little matching mountain, but that is ok. 🙂 Sometimes you just have to imagine the world a better place all by yourself!
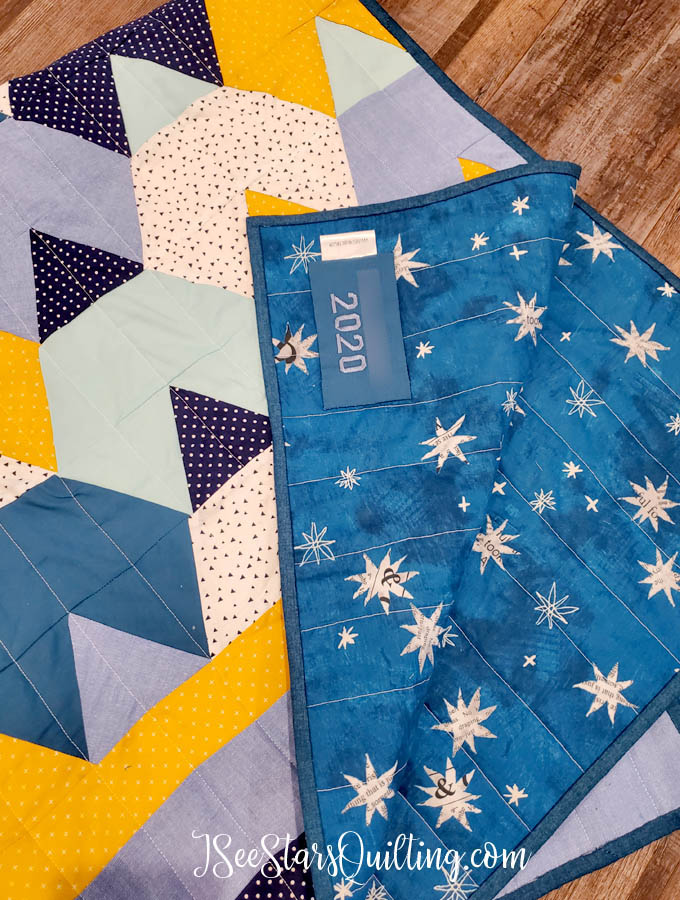
Here are a few more pictures of the Baby Mountain Quilt…
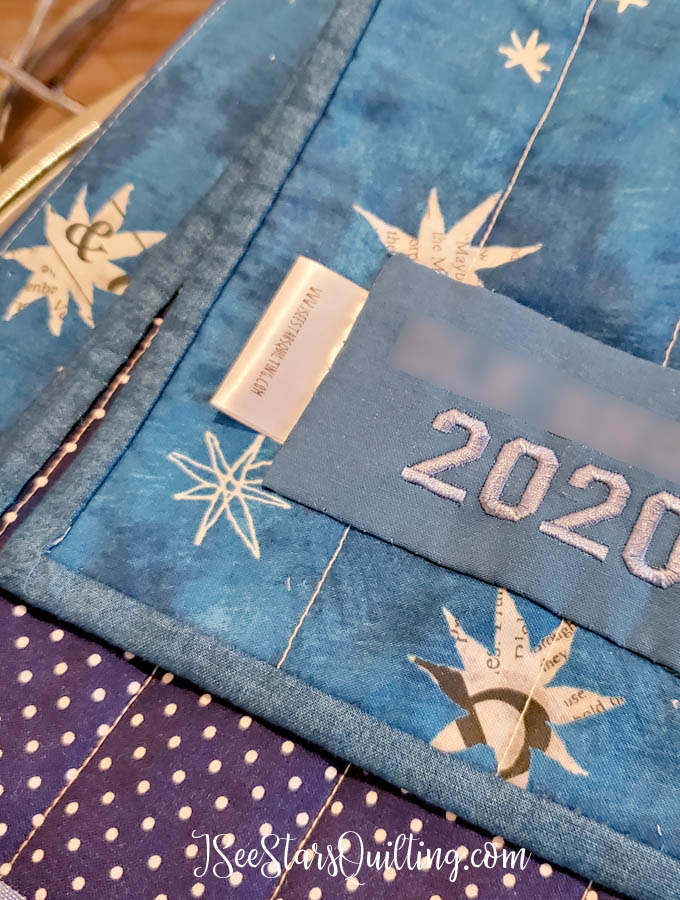
This was the first quilt that I got to use my new labels on! I love how cute they came out. (ignore the ugly yellow lighting… it has been raining for 3 days and I can’t go outside to get good sunlight photos…)
The backing fabric is one of my favorites by Carrie Bloomston’s Wonder line of fabrics. Absolutely in LOVE with this fabric and being in a quarantine state it was hard to part with even a little bit of this fabric haha…(I might have hoarding problems.)
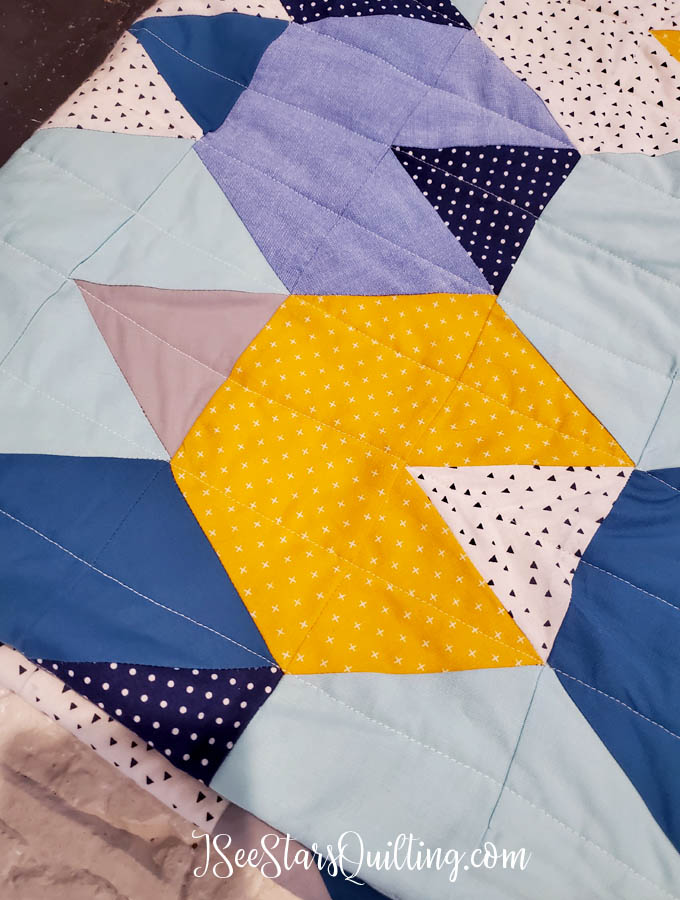
There is so much going on with the fabric and colors in this quilt… your eyes are drawn all over the quilt from mountain to mountain. I feel like the soft color palette helps to calm things down a bit, but I didn’t want to complicate things further with the quilting so I decided to keep it really simple. This quilt called for some straight line quilting.
I also decided to hand stitch the binding on this quilt to give it a special finished look. (also, *bonus* I was able to sit and watch a movie on the couch with my kids while I worked)
Here is a close up look of just how simple the construction of this hexagon quilt is. I used my half hexagon template and a triangle template. That is it! It is simple to mix and match your fabrics however you like to create the shapes that you want!
The Other Sibling Quilt
I might have gotten really happy cutting out half hexies… or possibly distracted? I’m really not sure. After I got the quilt pieces arranged on my design wall I realized I had way too many cut pieces left over. oops.
I could either make this baby quilt into a throw quilt, let go of the extra pieces or I could save them and use them on another project.
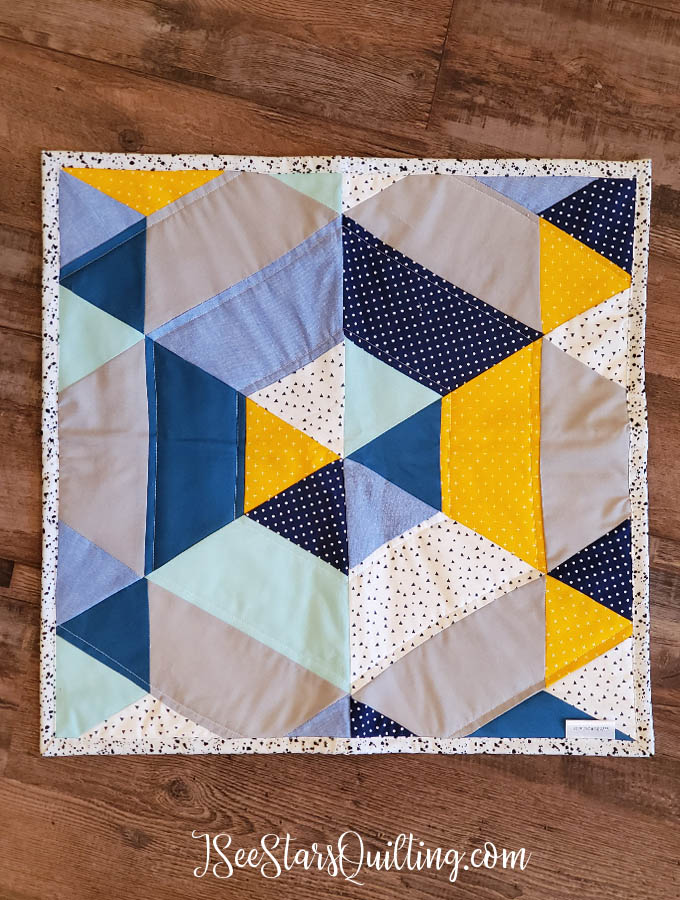
I decided that since baby brother has a matching piece to big sister’s quilt… perhaps big sister would like a matching quilt to baby brothers! Also, She might be getting to the age where she wants to copy mommy or have little baby dolls of her own, so I decided to make a mini quilt using the leftover pieces. It is a 32″ x 32″ mini quilt.
I arranged the pieces a little differently because playing with hexies is a lot of fun ? I hope she likes her little quilt gift.
I’m really excited to make this quilt off to its new home to hopefully have many many snuggles and naps in the future.
Here are a few more blog links about using templates and rulers that you might find useful:
The quilting rulers that are my absolute favorite are from Gadget Girls. Their quality is absolutely superior to what else I have found in the chain stores while shopping. Check out their website here.
Let me know what you think in the comments ? Feel free to ask any questions… I’m off to go work on another baby quilt that has been in the works for a while! More pictures to come in a few weeks!
There are several ways to finish off a quilt. Today we’re going to talk about one of the simplest ways! – I’m going to show you step by step pictures on how to tie a quilt.
Your quilt usually consists of 3 layers: The backing, the batting or middle layer and the quilt top.
It is important to connect those layers together so they don’t shift and come apart and receive more wear and tear when washed etc.
When you hand tie a quilt, usually you will use a tough heavy yarn or thread that will go through all of the quilt’s layers and then tie a knot to secure the layers permanently.
The knots that you hand tie are placed at regular intervals all over the quilt.
Why hand tie a quilt?
Hand tying a quilt is a really easy way to secure the layers of your quilt together that doesn’t involve fancy stitching or using your sewing machine. It is also a good solution for very thick or puffy quilts that have a harder time going through the throat of some machines.
The process of hand-tying a quilt also has a bit of a nostalgic feel to it for me. It is very similar to hand quilting in the fact that I get to spend time snuggled up under the quilt that I am making and really have the opportunity to look at it and study it as I work on it.
See the step by step directions below and continue reading for more answers to your questions about hand-tying a quilt.
Step by Step Directions: How to tie a quilt
Chances are likely that you already have everything on hand to tie a quilt right now!
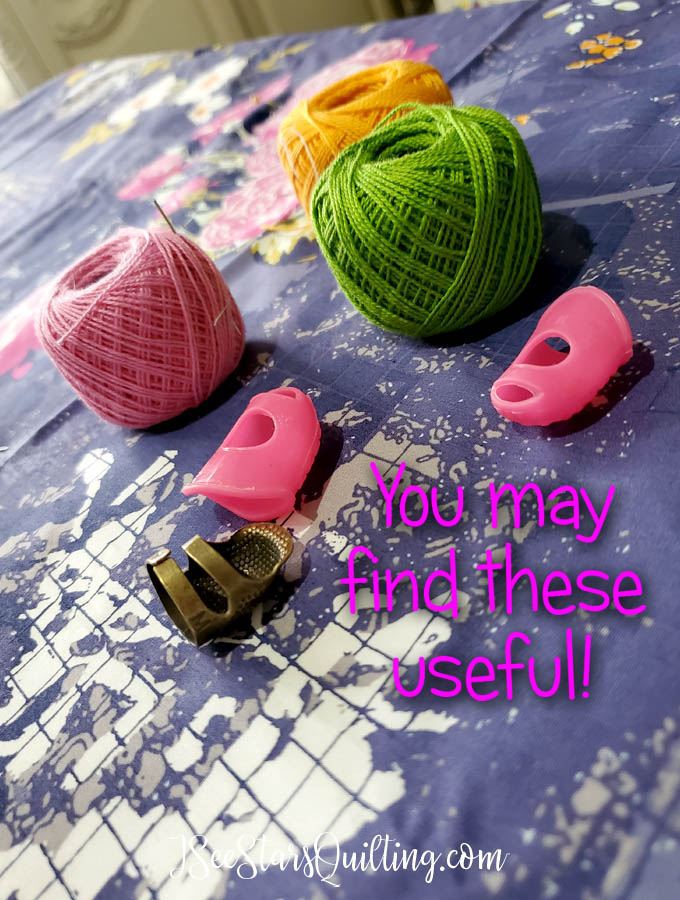
You’ll need the following common sewing items:
A heavier thread than you would normally machine quilt with – such as perle cotton, embroidery floss, or crochet cotton.
Sewing needle with a large eye to fit thicker threads.
OPTIONAL: buttons or charms to embellish if you desire.
OPTIONAL: Thimble or finger guards if you prefer to sew with them
Thats it!… Really, I promise! You won’t need anything else but you and your quilt and… well… maybe a really good movie or TV show to binge watch for a few hours!
I prefer the perle cotton threads for hand quilting and many of the little hand projects I work on in my sewing room. They’re a really great quality, come in a huge variety of colors.
Can you see the thickness in the thread? It has a a beautiful chunky weight to it that keeps to itself and doesn’t get all hairy like a yarn would. I like that it keeps its shape nicely.
I also recently ordered these scissors from Amazon to use with my embroidery machine because I need the super precise pointed end to get in the tiny areas… And I might need to order a second pair now because I’ve been using these them all over my sewing room. They are so sharp and I love them 🙂
… You know… just in case you need some good scissors too!
FYI the quilt that is shown in all of the photos is a quilting project I just finished. I’ve named it my “Social Distancing Quilt” haha You can see more photos of it here in this post if you like!
OK are you ready for the step by step instructions?
Step 1: Prepare you quilt layers
It is always important to make sure your layers are evenly laid out and you don’t have extra fabric bunching up.
This process is the exact same thing that you would do for any other quilting process.
Lay out the backing of your quilt on a smooth surface nice and flat.

Then, layer the quilt batting or middle layer on top of it making sure you aren't creating any wrinkles. Again, make it nice, smooth and flat.

Add your quilt top layer and make it smooth again with no big wrinkles or folds.
You’ll want to secure the layers temporarily before you start tying.
You can do this with safety pins or regular sewing pins.
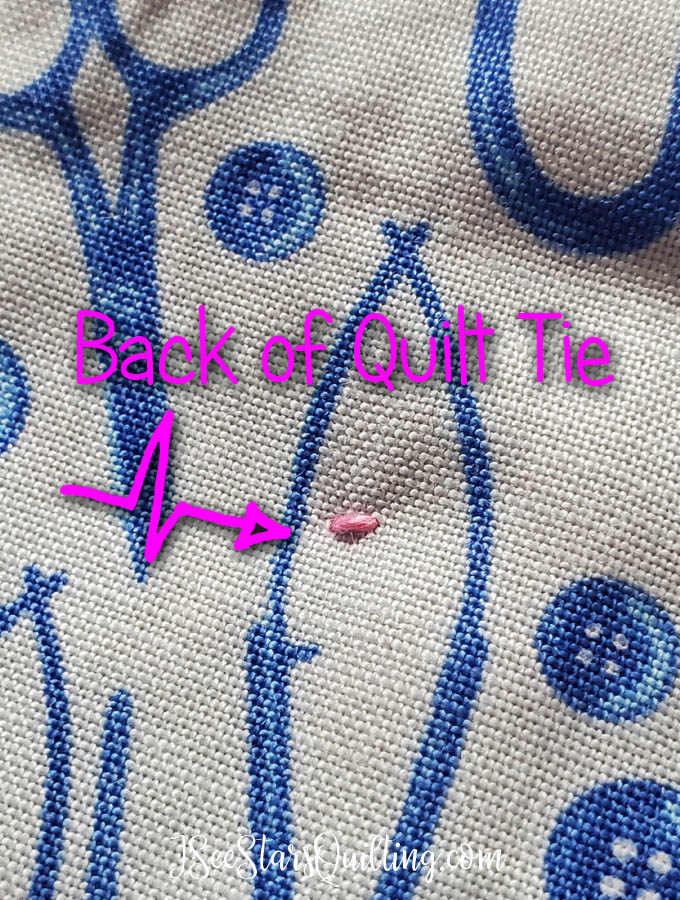
Step 2: Decide where you are going to put your knots
Decide where you would like your knots to be and if you want the ties to be on the front or on the back of your quilt.
Use your fabric marker or washout marker to mark on your quilt where the knots will go so you will have a guide.
This is an essential step because if you think you can eyeball it wheile you’ve got the quilt all spread out on your lap while you’re watching TV later, you are wrong! Son’t skip this step!
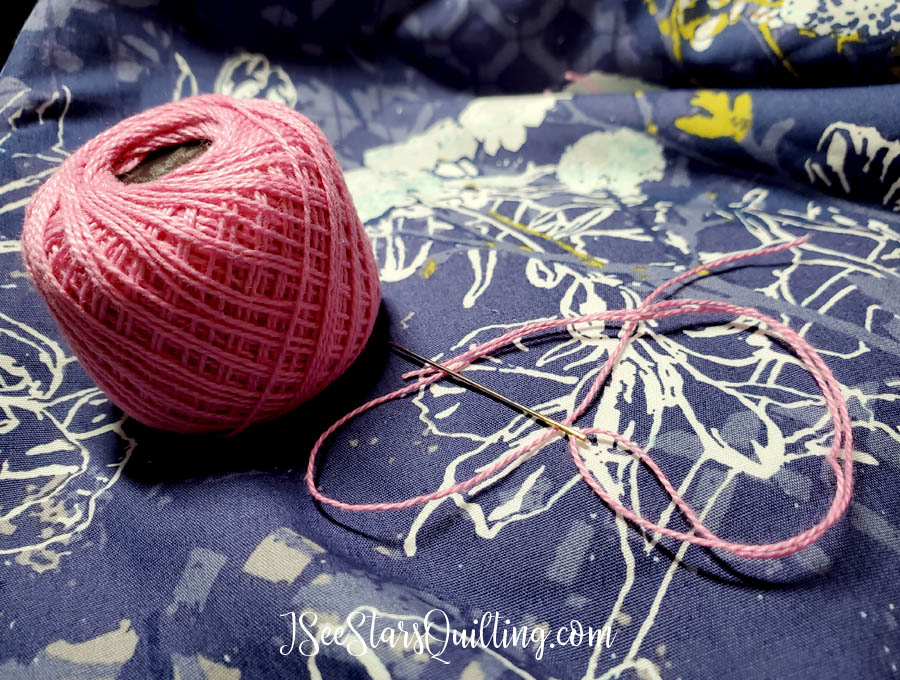
Step 3: Thread your needle
Thread your needle with the yarn or thread you have chosen.
I find it easier to work with smaller sections of thread. There is less chance of it getting tangled while it is under the quilt and you really only need a few inches for the whole tie.
I usually will pre-cut a lot of several pieces before I begin tying that are about 10 inches each. Yes, it is more than you will need, but I find that it is a comfortable length. Not too short, not too long either.
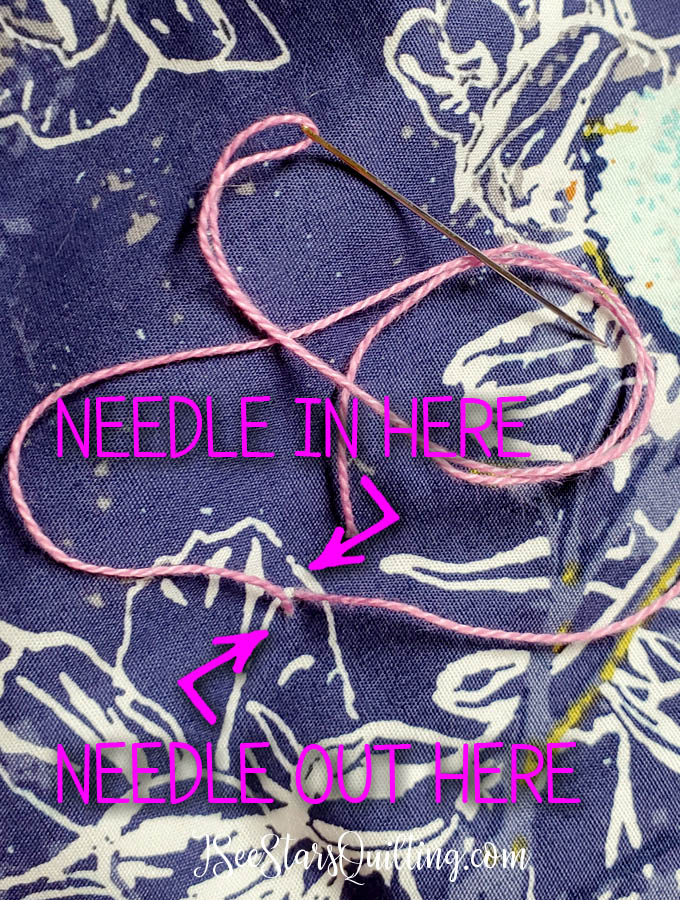
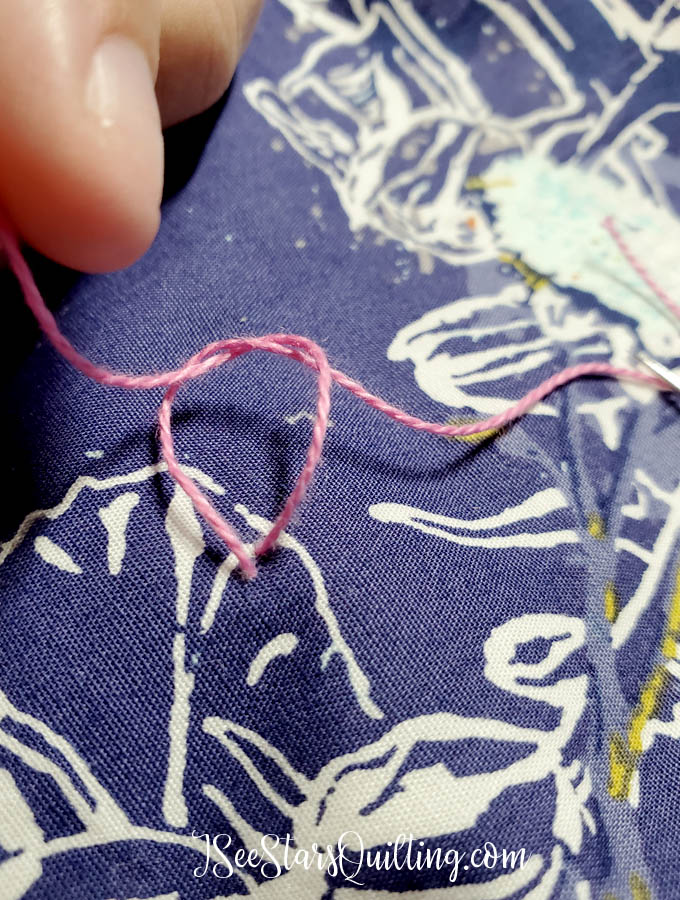
Step 4: Begin tying your quilt!
Starting from the center of your quilt and working out, insert your needle through all 3 layers of your quilt and pull it back up as close as possible to your original hole.
Try to make the distance between the two insertion points no more than 1/4″.
NOTE: This is also the point where if you wanted to add a button or charm to your quilt, you would do so. add the embellishment on the side opposite where you will tie your final knot.
Leave about 3-4″ of thread still hanging out of the first hole you made. It will be part of the tails we’ll be tying in the next step.
Step 5: Tie the knot
You’ll want to tie the two ends of your thread together using a surgeons knot.
A regular knot like you would tie in a shoe lace is acceptable, but a lot of quilters prefer the surgeon’s knot because of the durability over time.
It is a very simple knot that you can see in the video below.
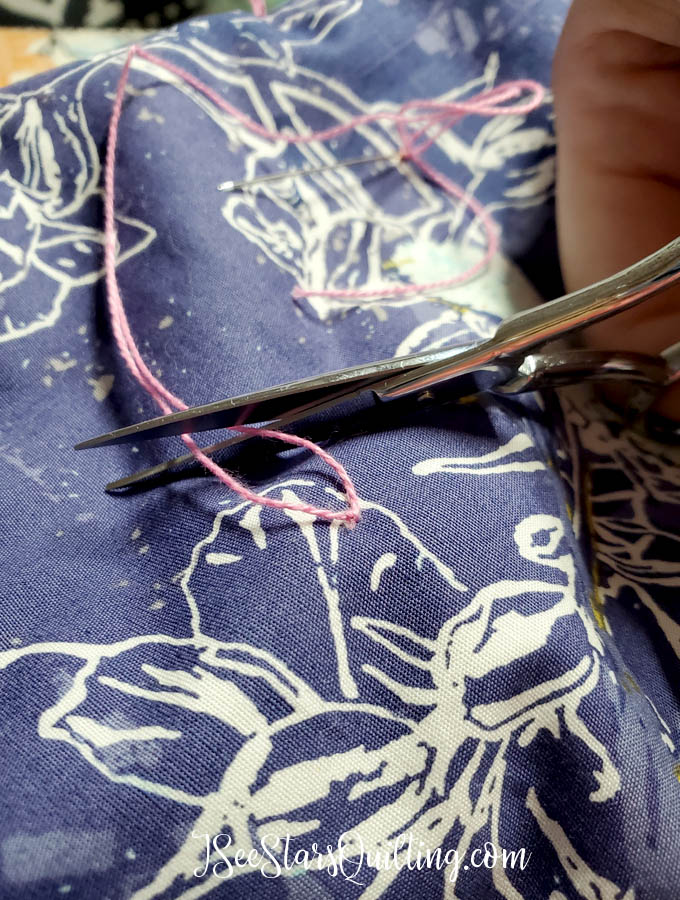
Step 6: The Finishing Touches
After your threads are tight and secure, you’ll want to trim up your thread ends.
I usually leave mine to be about 3/4″ long. I’ve seen some people prefer a 1/2″… It is up to you. You’ll want it short enough that the threads don’t get really super frayed and hairy after being in the washer a few times, but long enough that they don’t have a tendency to want to come un-knotted over time.
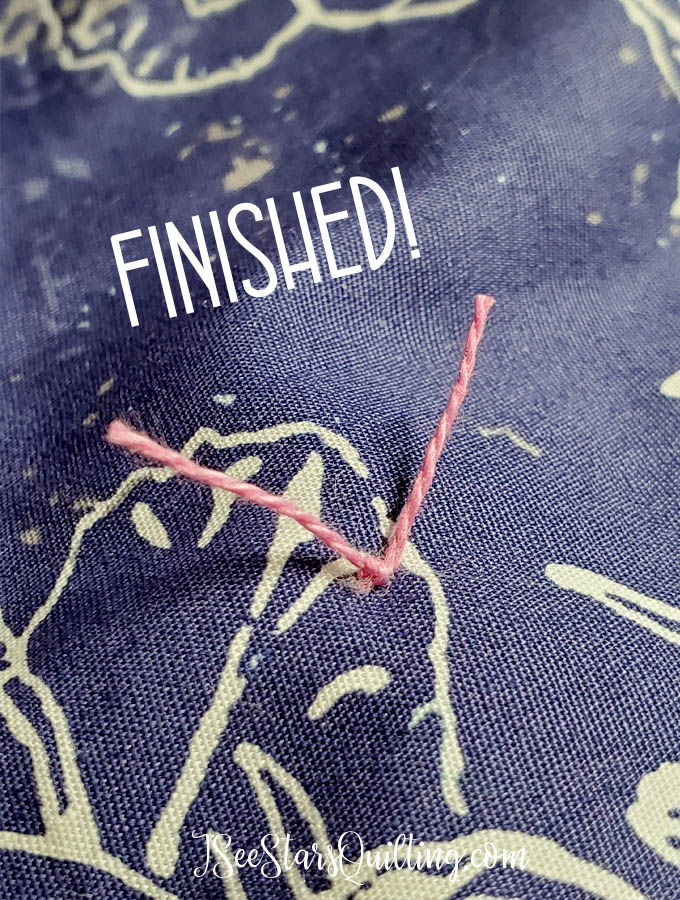
Step 7: Keep going until you’ve finished your quilt!
It really is that easy! Keep going by knotting in the places that you marked along your quilt in the beginning. You’ll find that time passes quickly once you really get the hang of the steps!
More Tips for hand tying a quilt
One of my favorite ways to make hand tying a quilt even more interesting is to change up the colors of thread.
It could be because I was a bit indecisive on this particular quilt project… but I chose three different colors of thread that coordinated with the fabric for an all over colorful fun look!
You can also add charms or buttons to your ties that add dimension and personality to your quilts.
Just a word of caution: buttons or charms of any sort should not be used for quilts that will be used by children ages 3 or under. There is a chance a child could swallow and choke on a button.
How far apart should the knots be?
Check your batting recomendations – each material is different in what it reccomends for the distance in your quilting lines. Your knots should be no further apart than the recommended distance for the batting.
If you do not knot the recommended distance, the knots should be close enough to prevent the layers of your quilt from shifting around.
Usually, I prefer to look at the design of the quilt and make my choices based on where my blocks fall.
For example, my favorite batting – Warm and natural brand – has a recommendation of quilting every 8-10″.. but when I tie a quilt, I may place my knots every 5-6″… at that point, it could be considered overkill on making sure it is secure but for asthetic reasons… it is just perfect!
So make sure you are doing at least the very minimum for what your batting requirements are… but make the right decision for your quilt’s design needs as well.
Binding, before or after tying a quilt?
Always tie your quilt layers first, then trim your quilt and add the binding on last.
So What Do You Think? Will You Try It?
Tying a quilt is a really simple yet effective way to finish a quilt. You’ll find that the more practiced you are at it, the quicker it gets finished.
Next time you don’t feel like sitting at your machine anymore or want to spend more time in your family room, try tying your quilt!
Let me know what you think or if you have any other questions in the comments below!
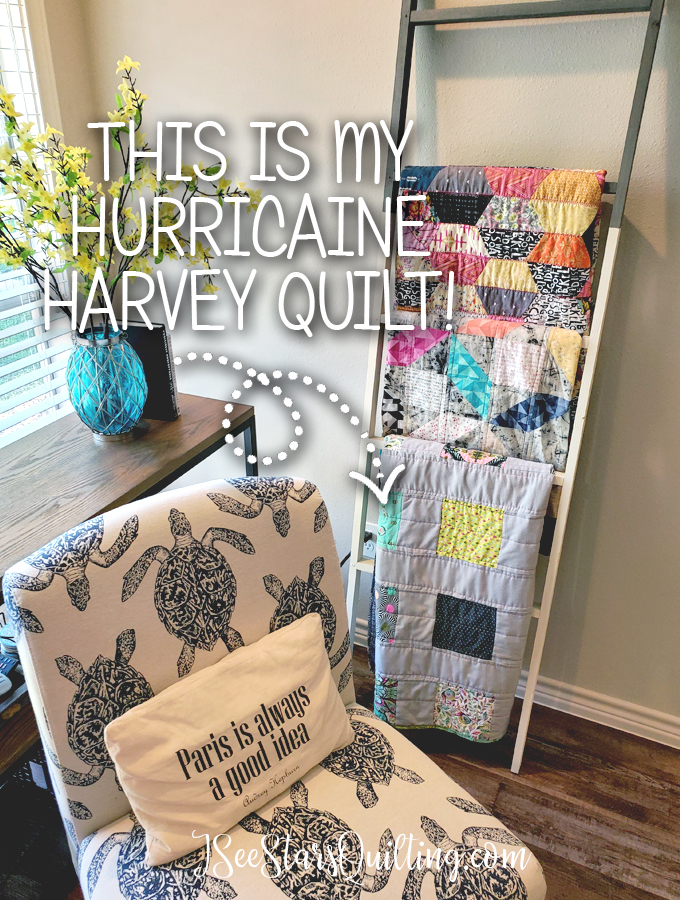
I don’t know what it is about my office/sewing room… it is always freeeeezing in here compared to the rest of the house. I’ve been meaning to make myself a pretty lap quilt for a while now… if only I had the extra time, right?
Oh… be careful what you wish for, right?
When Hurricane Harvey hit my Hometown in 2017, we were stranded for days and expecting the worst… because, what else can you do? To busy myself and wait for the storm to hit, I made a quilt. (perfect productive activity, right?!)
The pattern was super simple so that if needed I would be able to finish it by hand should we lose power or have to evacuate.
When it was all over, I had a pretty new quilt for our home and a reminder that everything will always be ok in the end. Thankfully we were among the fortunate ones and didn’t experience any loss or flooding.
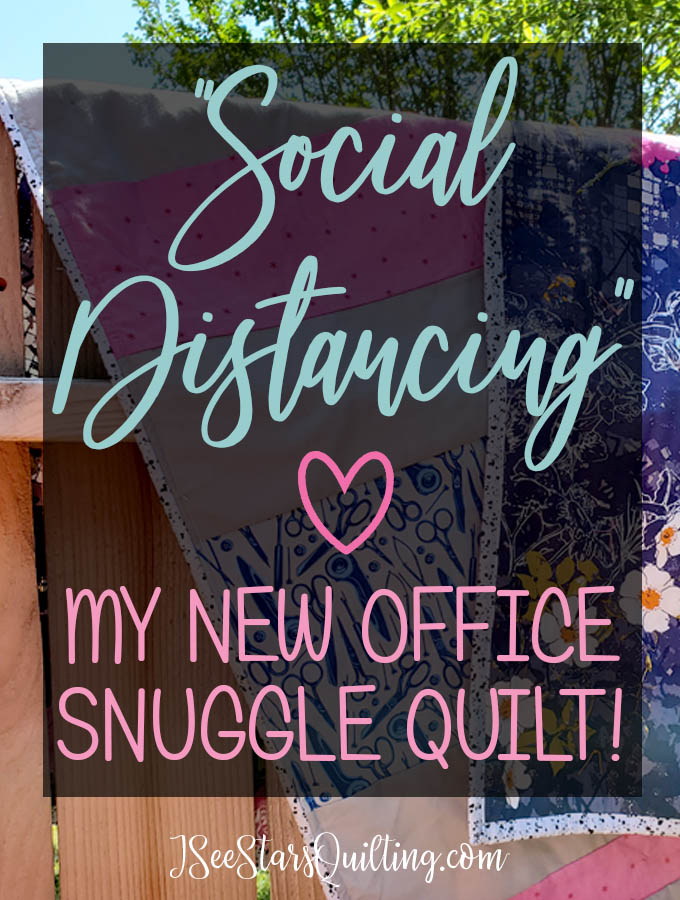
Faced with another period of time sitting at home and waiting to see what the future holds… I decided to make a “Social Distancing” quilt project!
Have you started a new project lately?
The goal was again to keep it simple.
When I make a quilt for a friend of family member… I will absolutely almost always make it way more complicated than it needs to be.
It’s in my nature… it is what I do?
I choose a pattern that make you want to pull your hair out. It’s complicated and usually involves me learning a brand new crazy skill as well… because I’m a curious creative and a glutton for doing things the hard way!
And because I love my family and friends fiercely… I’ll fight through it and learn the skills needed and fix my errors as I go.
Saying it out loud makes me sounds completely insane… I get that now. Perhaps my next few quilts will be relatively easy ones before I pick another hard one.
(FYI – this is also why I share so many of my tips and tricks that I’ve learned over the years with you… because I often do it the hard way the first time! It is much easier if someone can share the easy way first and allow you to jump over that learning curve with ease!)
This social distancing quilt was going to be mine and for my own personal use in my freezer of an office.
When I make quilts for myself and my personal use, I like to focus on the fabrics.
I absolutely fell in love with this Katarina Rochella Print from Art Gallery Fabrics… I mean… it is pure perfection and makes me so excited just staring at it! (I actually wrote an entire post on Katarina because I love her fabric designs! You can read that here.)
The name of this fabric is Framework Violet. It is part of her fabric line entitled Grid. I believe it is a 2019 release.
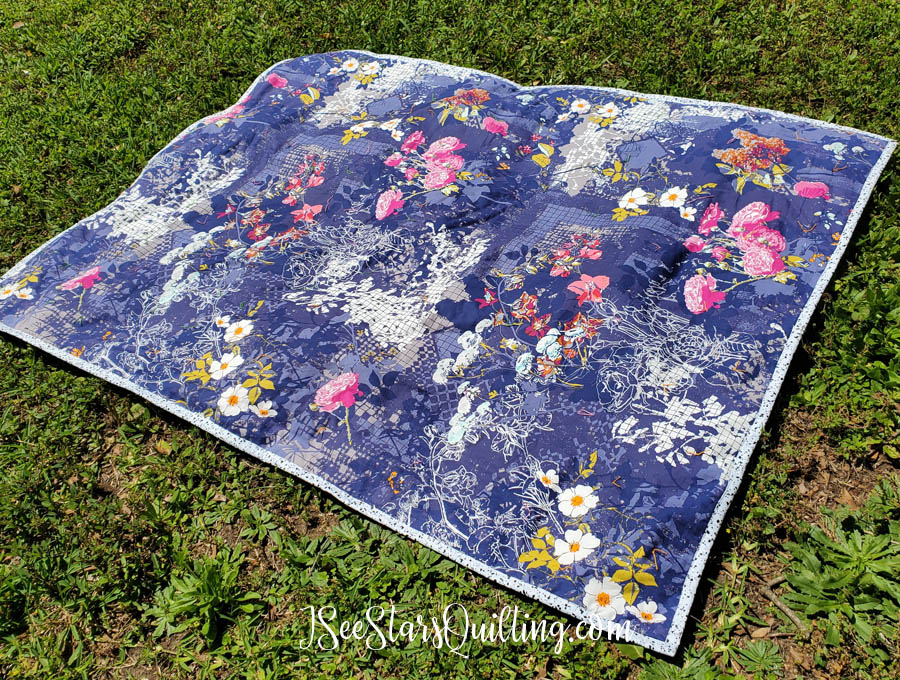
The fabric has a floral yet grunge look to it and I couldn’t bear to cut it up and piece it together again. The fabric was busy enough by itself as well.
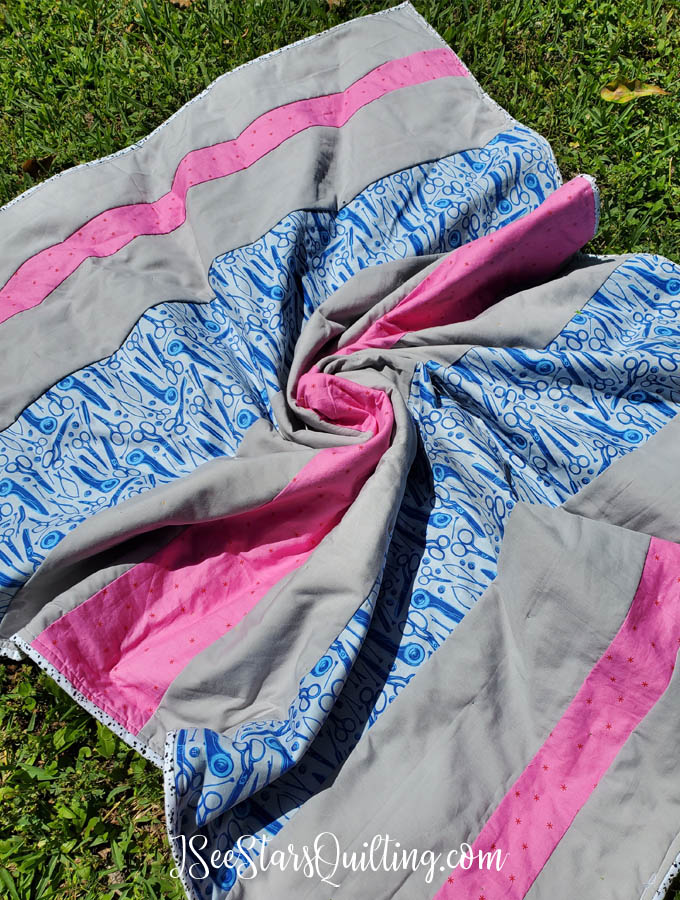
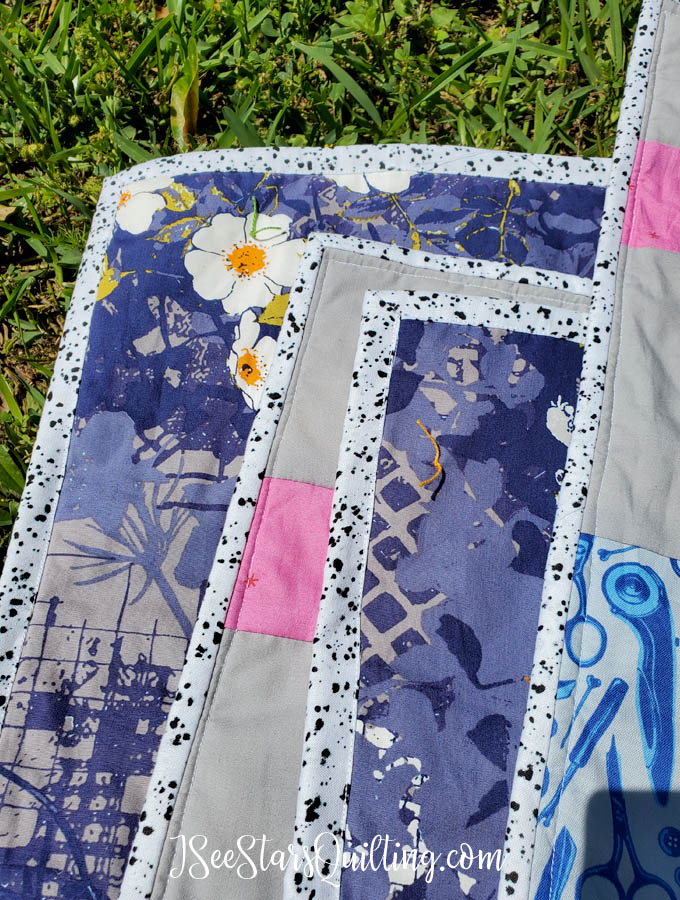
I left one side the quilt the Katarina Rochella Fabric and decided to piece the other side of the quilt with some other fun finds from the quilt shop!
Check out this mix of fun fabric that I picked up from Tula Pink (the blue fabric) and Ruby Star Society (the pink fabric) that I used on the other side!
And because of the craziness of the times we are living in right now with the isolation and feeling completely out of sorts… I went with a very unconventional choice for the binding.
I had this dalmatian spotted fabric for a while and felt like it was the right random choice for my Social Distancing quilt 🙂
Does it match the rest of the quilt? No, not really. Is it what I would have chosen had I had the ability to run back to the quilt shop real quick and pick a nice pink or green? Again, no.
While the binding wasn’t my first choice, it still turned out lovely. It’s really grown on me the more and more I spend time with the quilt.
I feel that it reflects the fact that we’ve had to make a lot of choices recently that we otherwise would not have had to make… be it weird dinner combinations before having to go to the store or figuring out how to celebrate birthdays and holidays while away from family…
You know what? The times we’re in are a little crazy right now… but it is all going to be just fine as long as we take care of each other.
This quilt is the perfect addition to my sewing room. It is perfect to wrap up in when I feel chilly because I will always prefer to be barefoot in the house!
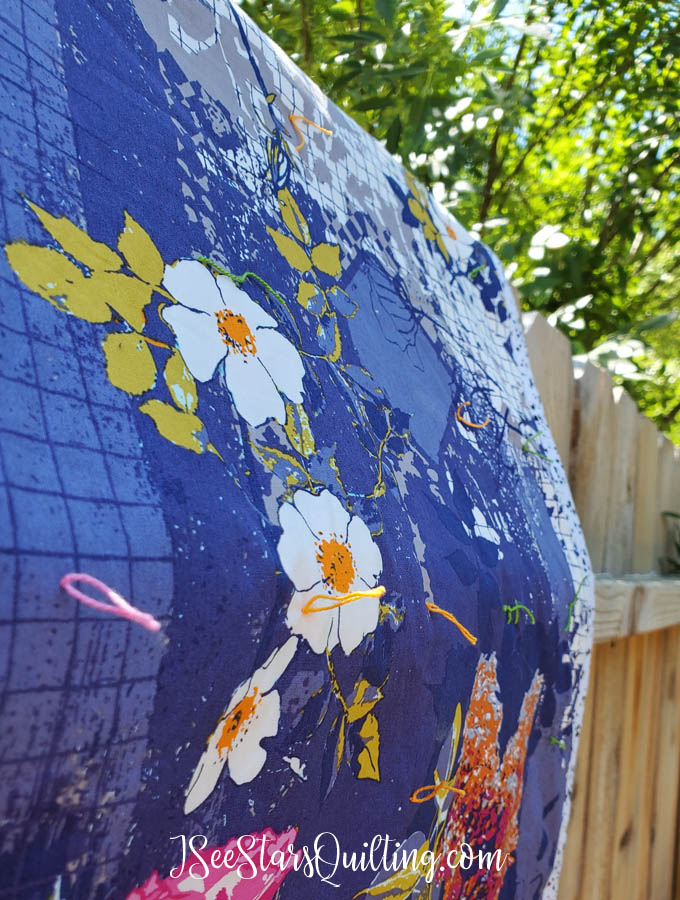
The last little bit that I wanted to show you was how I decided to quilt my Social Distancing Quilt!
Being that we’ve been spending a lot of time together as a family… I mean a lot of movies on the couch, board games, card games and snuggles watching classic old cartoons etc… I decided to hand-tie this quilt while I was sitting on the couch with my family!
It seems fitting, right? I’ll be sharing a tutorial very soon on how you can hand tie a quilt or even just add a little more of a hand-finished touch to your machine quilted quilts.
Check out the little knots on the quilt 🙂 Aren’t they cute?
I know I’ve met several other quilters that have their own version of “social distancing” and “Isolation” projects going on! Let me know what you’ve been working on and what you think in the comments below!
Ready for some really fun and easy FREE patterns that use pre-cut Jelly roll fabric? That is exactly what I have for you today! I’m rounding up my favorite free Jelly roll projects to share with you from around the internet!
In quilting terms… just what is a Jelly Roll?
A Jelly Roll is a collection of forty fabric strips that are pre-cut at 2 ½” height x 44″ long. The strips usually consist of a variety of fabrics that are already coordinated and matchy matchy to make your project look amazing!
The strips are layered, rolled up tight, and tied with a bow. – They are nearly irresistible in the stores!
Jelly Rolls are wonderful and save so much time on cutting and coordinating fabrics! You can pretty much guarantee your quilt or project will be amazing when using them!
This is a fun project that doesn’t really need a pattern even!
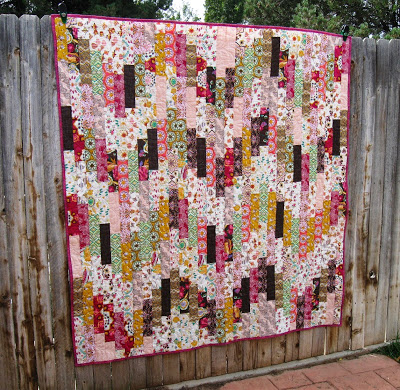
I wrote a guide to making traditional randomized Jelly Roll quilts a while back and it has been a super popular resourse for quilters in calculating the fabric requirements for their Jelly roll quilts.
The following is by no means the only patterns/tutorials out there… but I tried to round up my favorite projects that give you the most amazing results!
10 Free Jelly Roll Patterns & projects
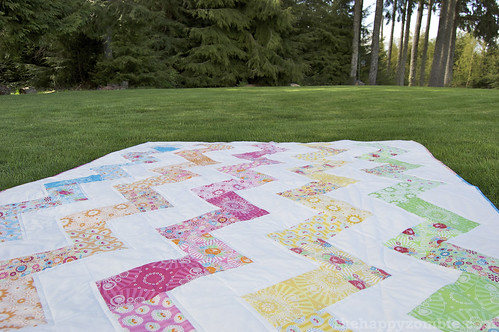
1. This Cute Zig-zag Quilt Pattern!
This “Super Zig” Quilt pattern is a free download over on The Happy Zombie. You can get it here.
I love how versatile the pattern is for every occasion and combination of fabrics!
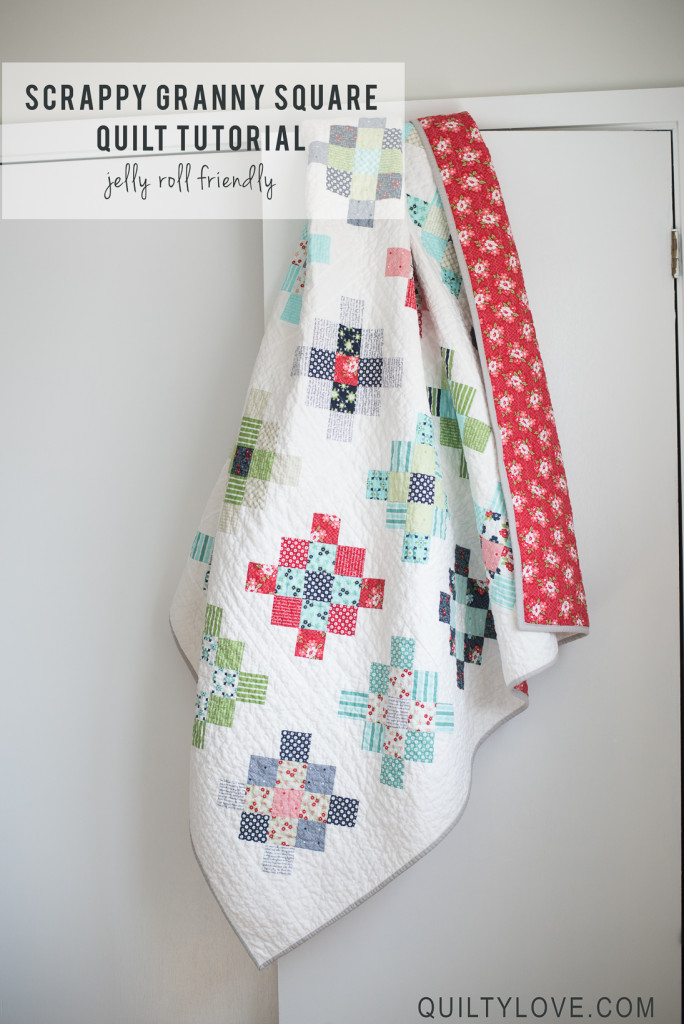
2. Scrappy Granny Square Quilt Pattern
This might look complicated and tedious, but really… it is a breeze! 🙂
The tutorial is also super easy to follow. Emily over at Quilty Love is one of my favorite quilters . I’ve yet to meet a pattern of hers that I didn’t just completely fall madly in love with. <3
This quilt pattern is so fun and so easy. OK so you might need a little more fabric than just 1 jelly roll, but it’s absolutely worth it to get this beautiful boxed block look!
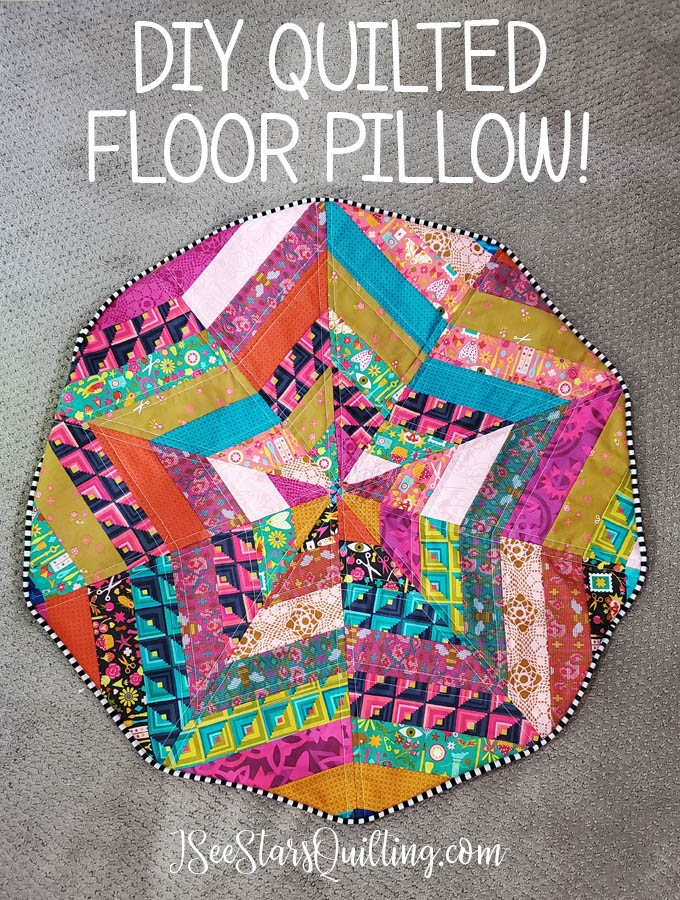
*ahem* Shameless self promotion here… but I’ve had amazing feedback on this pillow that I created… Due to the number of requests that I recieved after I posted it, I created and easy to follow FREE pattern for your to make your own pillow!
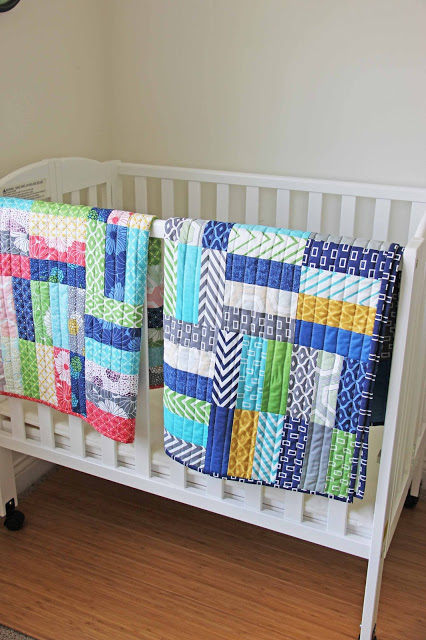
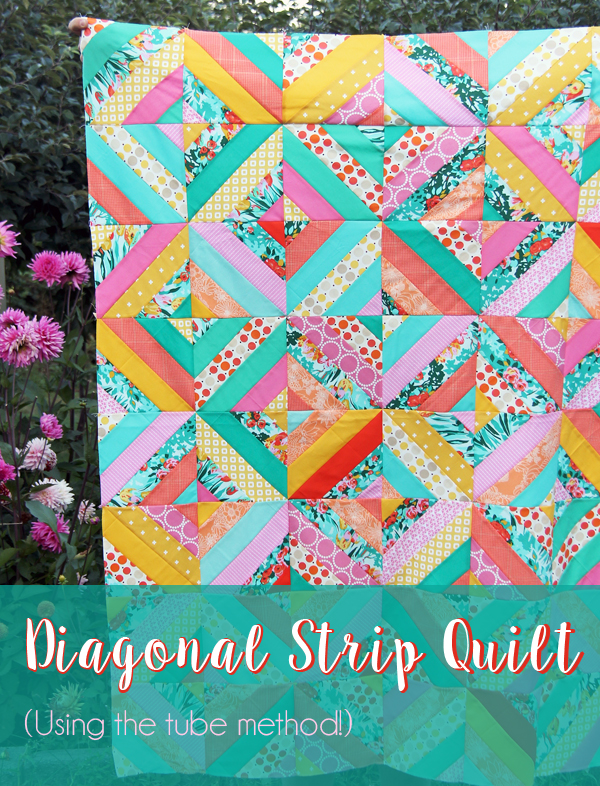
A slightly different version of the zig-zag pattern, but still stunning with such pretty fabrics! I love the play on the dark and light fabrics with this one!
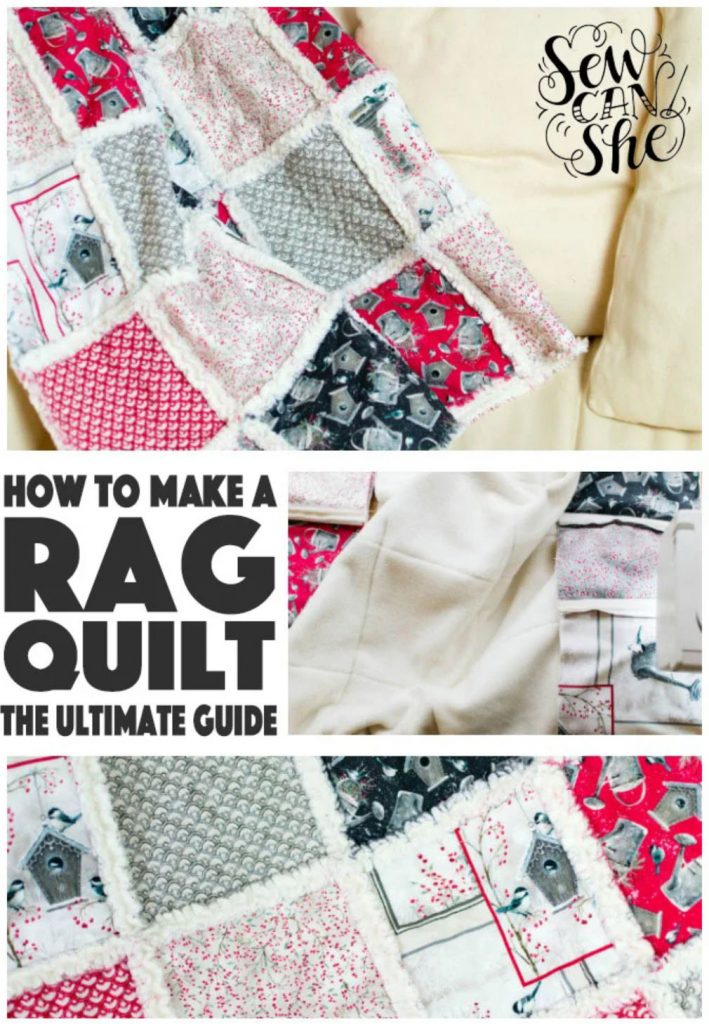
Doesn’t this quilt look so cuddly and snuggly? SoCanShe has a really wonderful technique to get the soft ruffles on the edges of the jelly roll strips!
This is one you really need to check out because I promise you… however you think this quilt is made… it isn’t correct. This borders along with one of the smartest tricks I’ve seen in a long time.
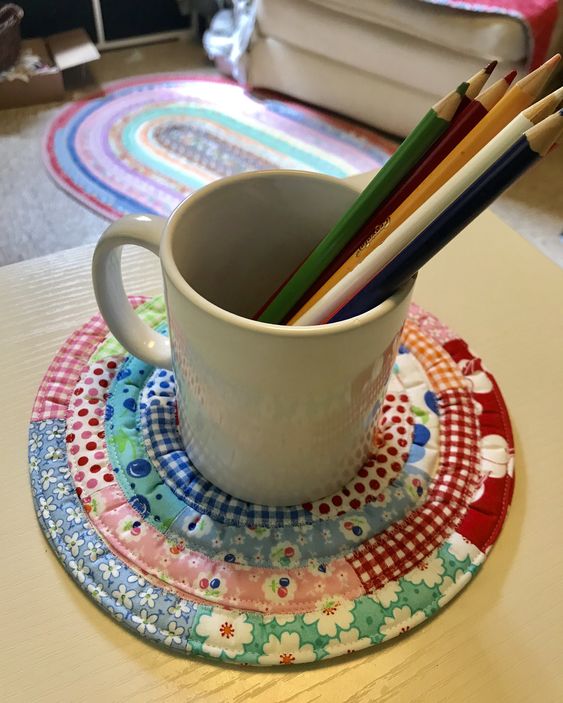
Hello handmade Holiday gifts! I could make these for all over my house right now. Aren’t they precious?… and do you see the matching jelly roll rug in the background of the photo above?
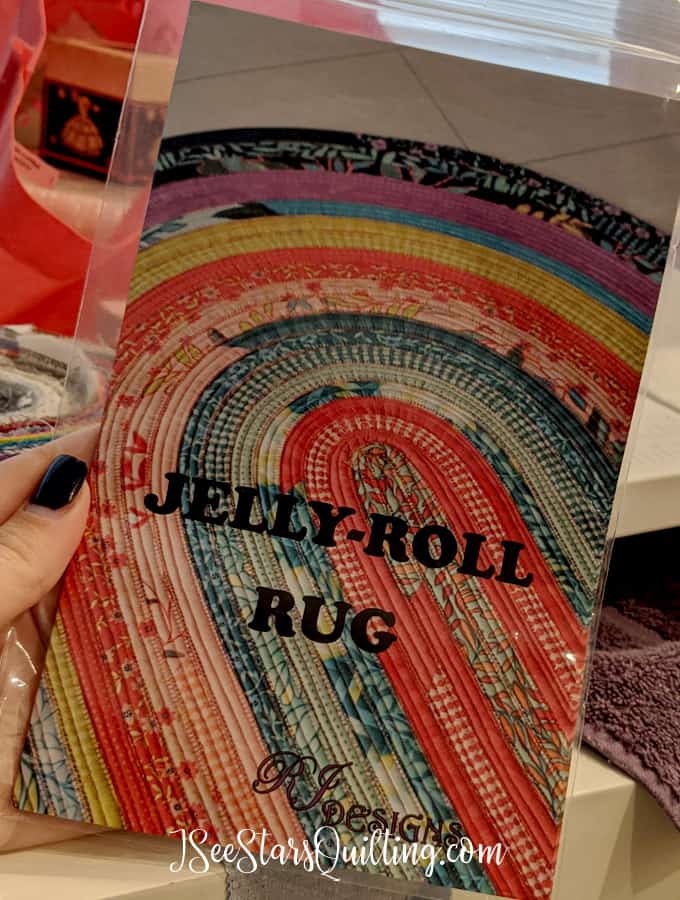
I recently made a jelly roll rug for the first time and I fell in love with the process… well… if I’m being honest, I liked some of the process, some… not so much… but what I did LOVE was the end results!
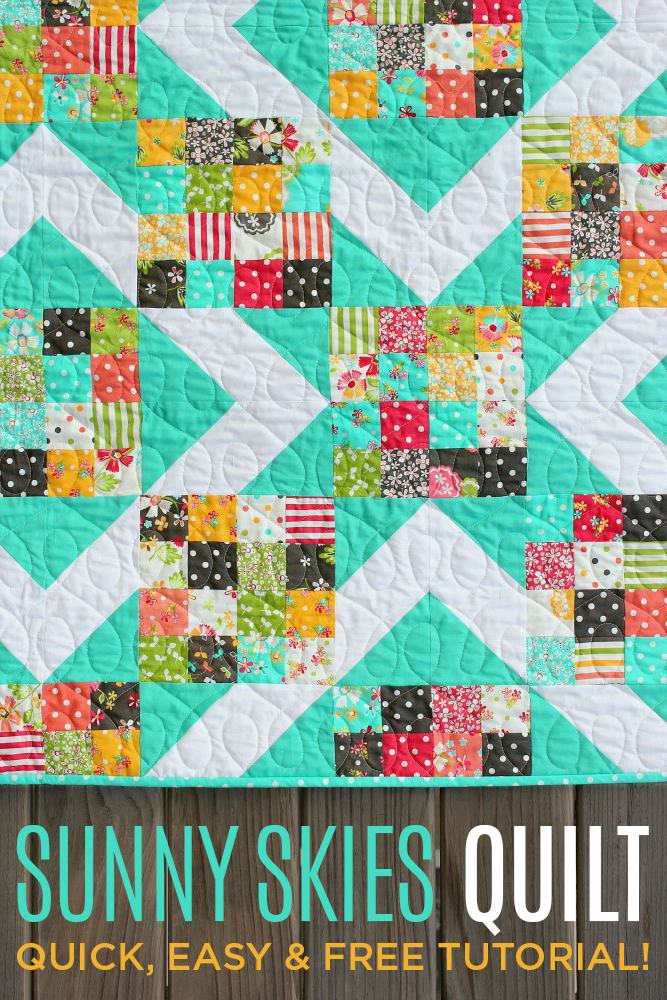
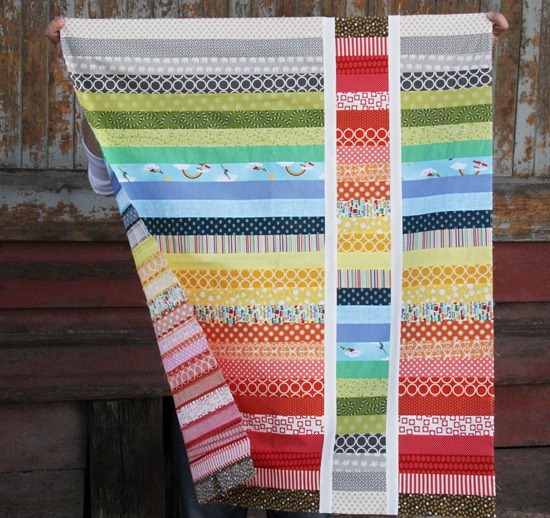
Level = Easy, but I will never tire of how beautiful this quilt top (or back!) looks! Sometimes, I feel myself drawn to the really complicated patterns that make me want to pull my hair out and sometimes I find myself swooning over the patterns that really let the fabric shine in a simple yet stunning pattern.