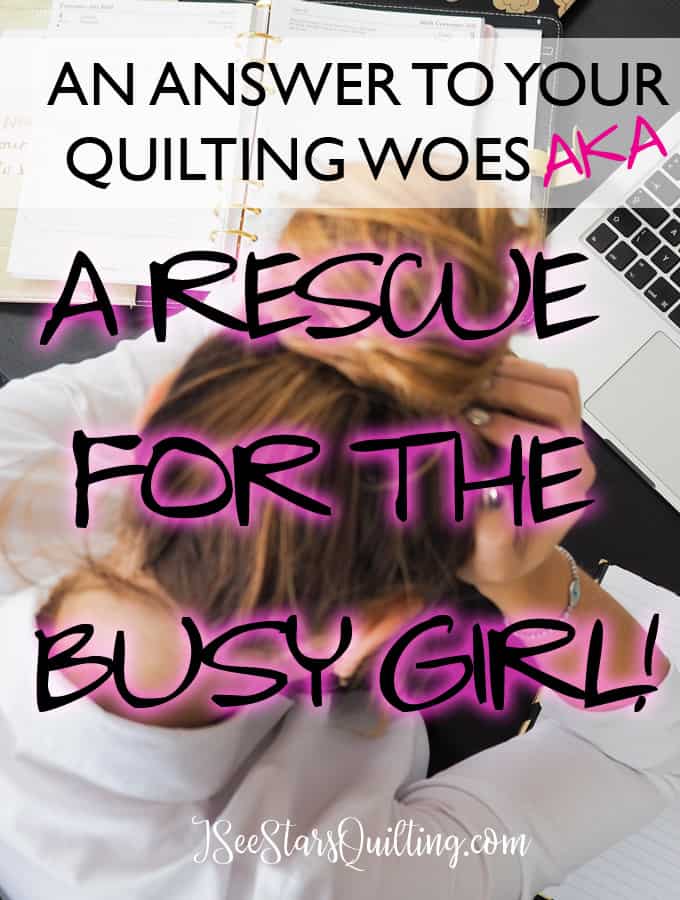
I can’t speak for how people in other parts of the world answer the question “how are you doing?” but here (and for a while now) the answer has been “busy, but good!” I hear other mamas say it to me all the time!
And honestly, life IS good. But we’re always on the go and always busy. There is that word again… It’s a mystery how we can fit in one more single thing into our schedules much less a time-consuming hobby like quilting!
But I can’t help it! I LOVE to quilt. I LOVE to sew! And I really love making things for my family. Seeing them snuggled up on the couch with one of my quilts brings me so much joy!
I’ve learned that doing things for myself makes me a better mom and a better wife, but doing those things for myself doesn’t have to come at the cost of not being able to care for my family.
It is totally possible!
And I think its really a necessary part of life to try and figure out how to squeeze it in.
“BUT HOW?” you ask…
I get it, we all want to quick fix answer. I’ve never been one to hold back secrets that can help others!
Over the past several years I have developed little tricks and figured out how to squeeze in bits of time to do the things I love. Quilting being one of them! And I’m going to share them with you today!
I’ve created a FREE download e-book that explains my whole philosophy on the idea and how to implement it into your own life. Don’t worry it is short! and you can start working through it TODAY!
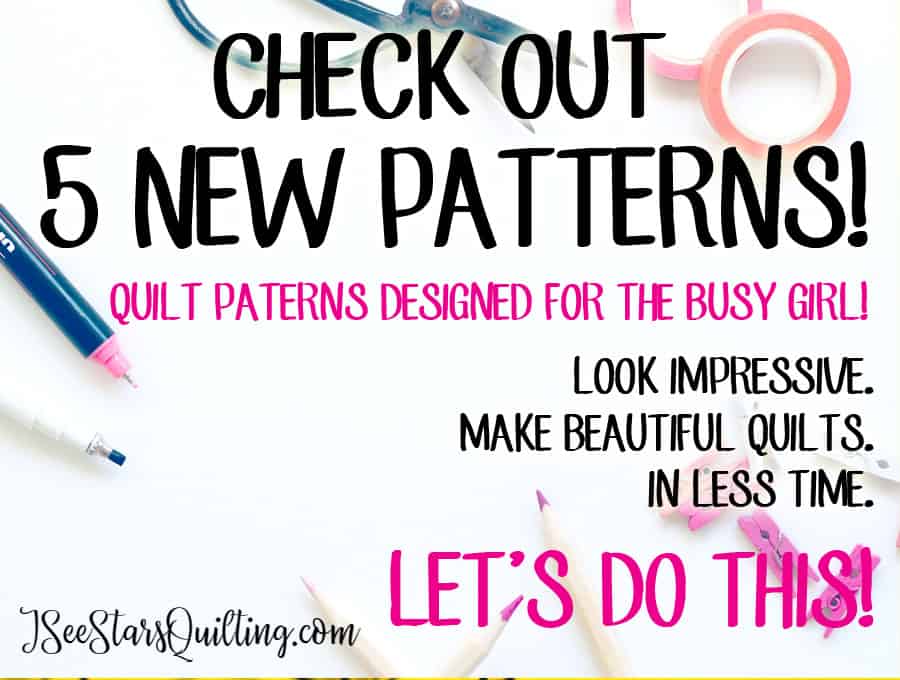
I’m also really excited to announce that I’m releasing 5 new patterns in my shop today that are made for YOU!
Yes, YOU – The busy girl who desires to create beautiful quilts that look complicated but are actually achievable in the midst of our busy lives!
Yes! You can totally do this! 🙂 Click on over and check them out! The feedback that I’ve had from my pattern testers is amazing. I can’t wait to see what you create with these patterns!
Look, I admire the quilting women of generations passed who just needed a needle (and it didn’t even have to be all that sharp) and some fabric to create a beautiful work of art…. but I just can’t do that. I LOVE all my modern quilting tools! There are so many that make my life easier and allow me to work more efficiently and save me time! SO I thought I would share them with you today. These are the Quilting tools I can’t live without!
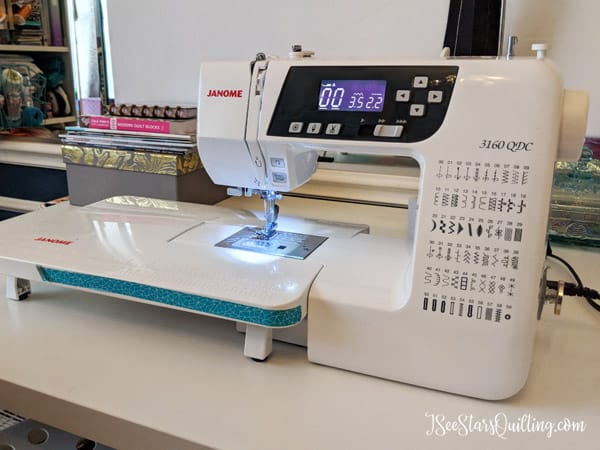
1) First off – My Sewing Machine!
This beautiful machine is my sewing BFF. We’ve been together for a few years now and it has been worth every single penny of my investment and then some!
I have the Janome 3160QDC. She is as absolute dream home quilting machine without going too deep into your pockets!
Sewing machines are kind of like cars… some people prefer Ford, some people like Toyota. It is still going to run and do the job it set out to do, but some brands have a few more bells and whistles than others.
Whatever you decide is “your” beloved brand, do yourself a favor and really consider where you want your skills to be in 3-5 years. When you buy your sewing machine, make sure it has those capabilities because, with regular care, you two will be besties for life!
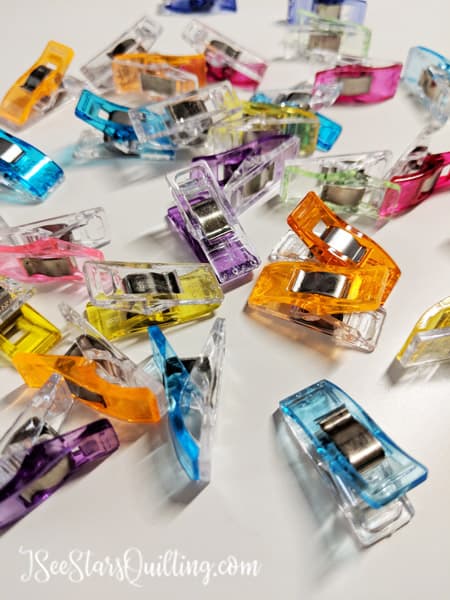
2) Wonder Clips
If you’re the boss of your sewing space, these babies are like your personal assistant – behind the scenes keep everything together and organized.
Also, bonus, they won’t stab you like their pointed job counterparts… I’m looking at you single pin that fell down in the carpet and was found later by my foot. ouch!
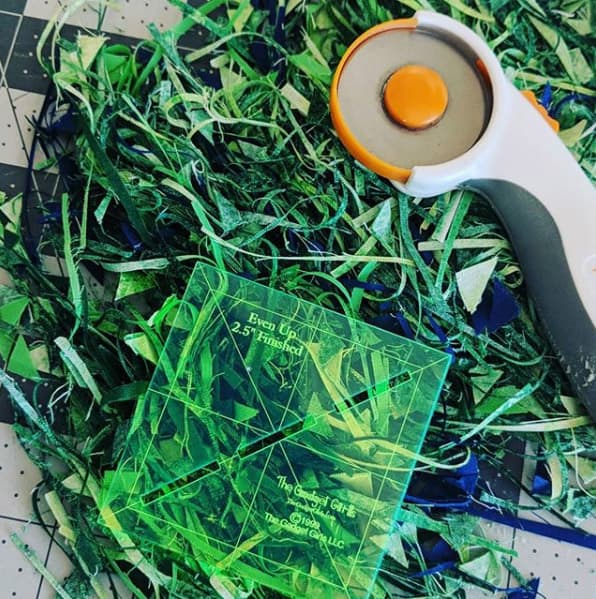
3) Rotary Tools and Accessories
My suggestion is if you invest in only one single tool, it needs to be one of these. Scissors just ain’t going to make the cut for modern quilting patterns and templates. (I mean scissors WILL cut… but not well… you know what I mean)
I can’t even imagine being able to cut accurately without my rotary cutter!
The one I use the most is this one. It is a Fiskars brand rotary cutter. I also have an Olfa brand one that I like, but the fiskars one just fits ergonomically in my hand better.
Make sure you get one with an easy closing blade and make sure you train yourself to close it after every.single.cut. Sometime I will share with you what happened when my rotary cutter slipped off of my cutting table and fell on my barefoot. It didn’t hurt at all. In fact, I barely felt it… but the cut, and the blood…. close your rotary blades, ladies!
I also highly suggest investing in a good self-healing cutting mat. Wait no, not a suggestion. You have to get one of these as well. Otherwise, you will destroy whatever other surface you have in your sewing room, as well as the rotary blade itself.
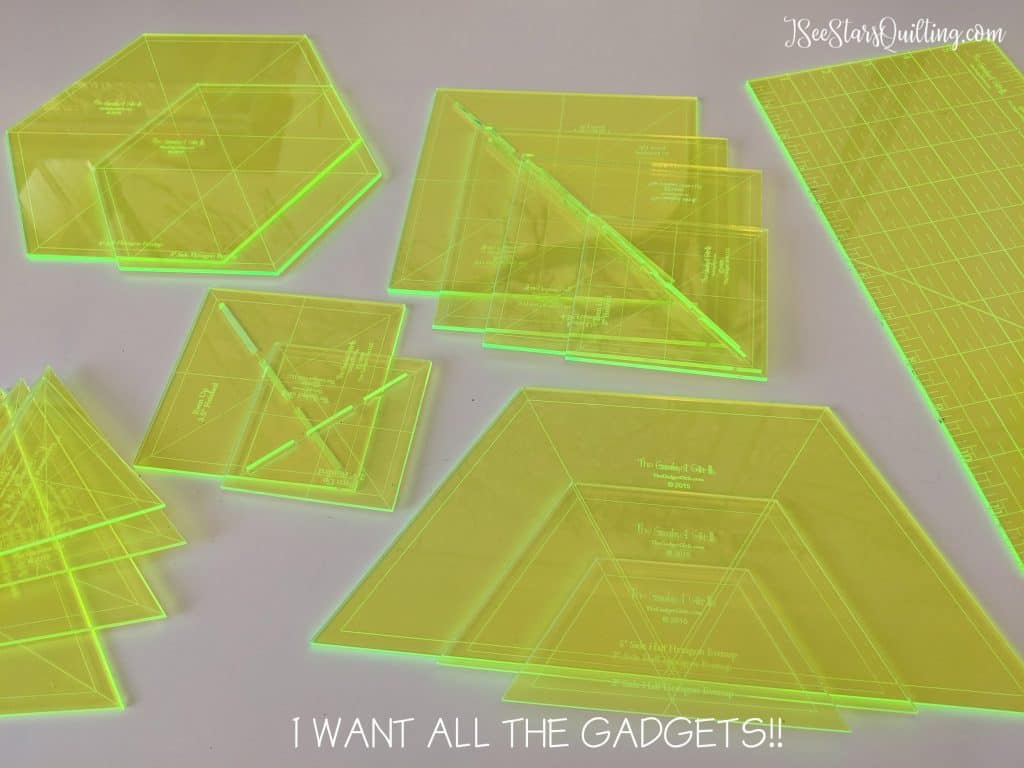
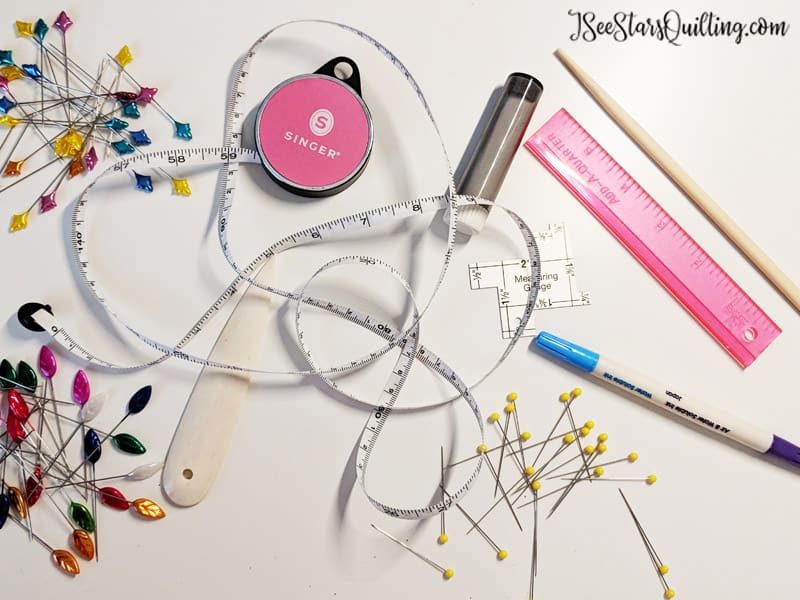
6) My Rulers!
This goes hand in hand with the rotary tools, but rulers easily are a category of their own.
Your standard crafting and dollar store rulers will be sufficient for a while but they will show wear. When I bought quilting rulers for the first time… oh man, never again will I use anything else as a straight edge to cut with. (I truly was super budget in the beginning and I used a lot of amazon boxes as my templates and rulers! … gasp… I know!)
My favorite brand is The Gadget Girls rulers. Besides being just absolutely wonderful people, their products are amazing quality and the selection is vast enough that if you’re looking for a specific function ruler… you will find it! http://www.thegadgetgirls.com
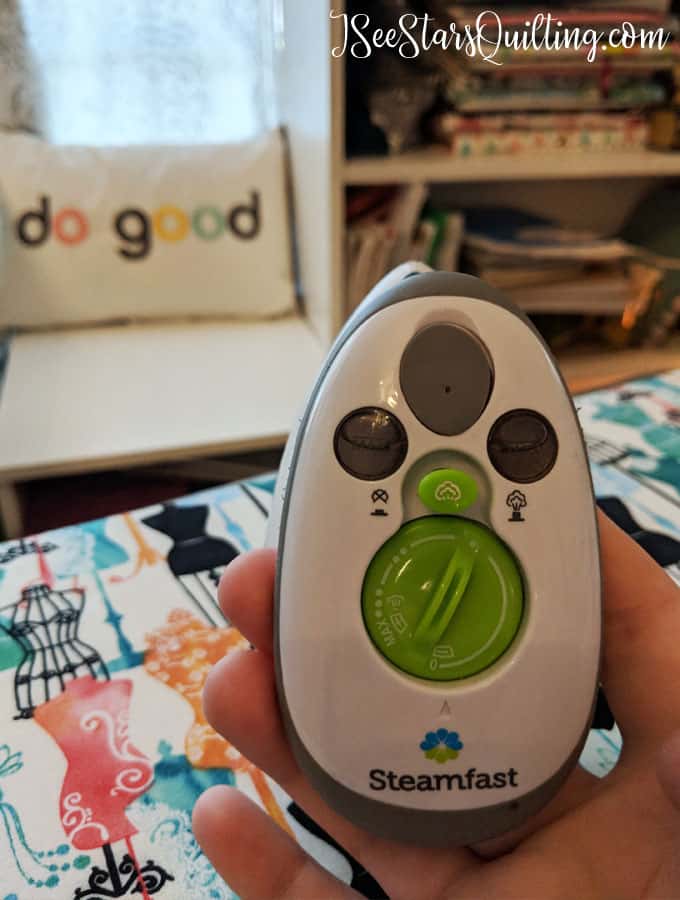
I wrote a whole different post on irons because they are essential in the sewing room (you can read the iron post here – Which Iron should you be using?)
This little one is my favorite! – No, it doesn’t replace my big guns iron. But the little girl does a fine job of ironing my seams and not blasting hot hot steam all over my little fingers while working in tight areas!
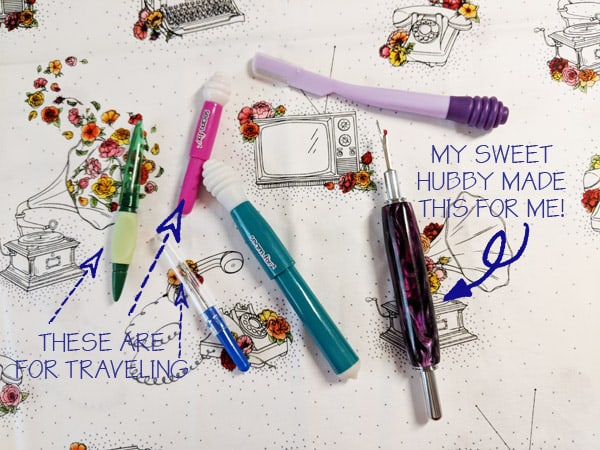
6) My SeamRipper
Yes, something I wish I didn’t hold near and dear to my heart….. yes, my seam ripper is absolutely essential in my sewing room because… I don’t know, sometimes I’m a total spaz and I make terrible sewing decisions or even just spaced out silly mistakes. *shrugs* Thats just life. What are you going to do?
My husband MADE me a good sturdy one. (Yes, ladies. The mister of the house is a crafty one too!) It makes a frustrating moment a little less terrible knowing that he loves me. 🙂
7) Misc Notions
To be honest, if I ONLY had the 6 items above… I would be able to survive just fine in my quilting room!
You don’t need a ton of extra fluff and tools. But there are a few times where if my budget has allowed, I splurged on a few extras.
These extras have included pretty pins, organizational bins and trays, Different sewing feet for my machine etc… but mostly just pretty little things that I find (and of course, have a coupon for it, so why not, right?)
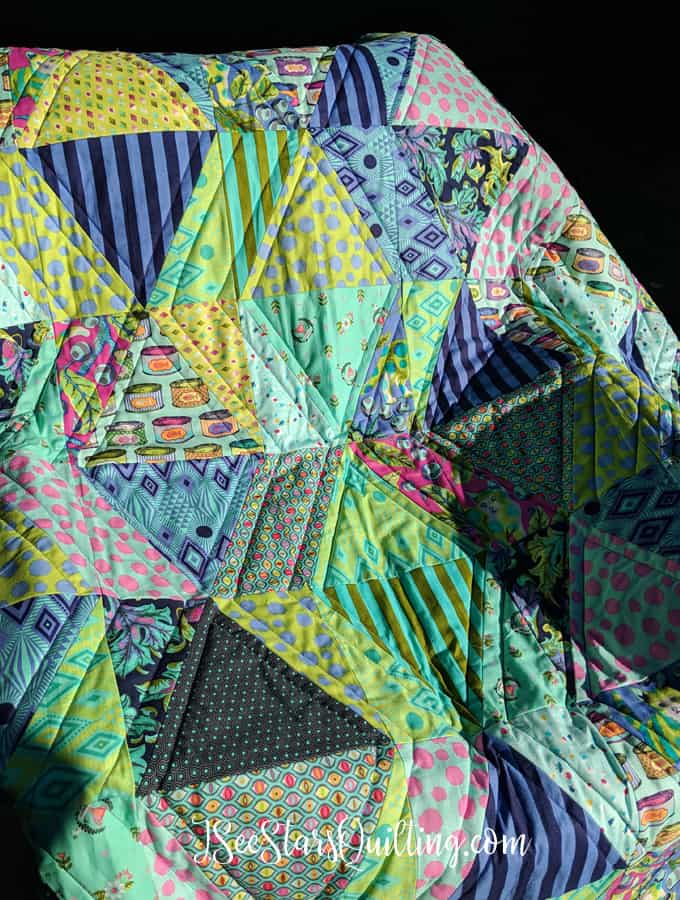
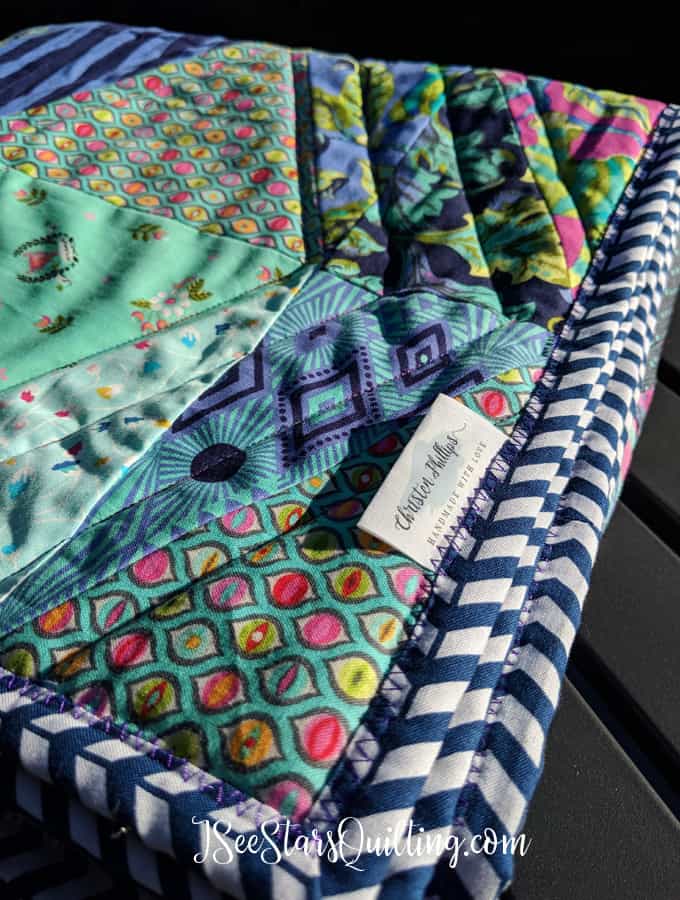
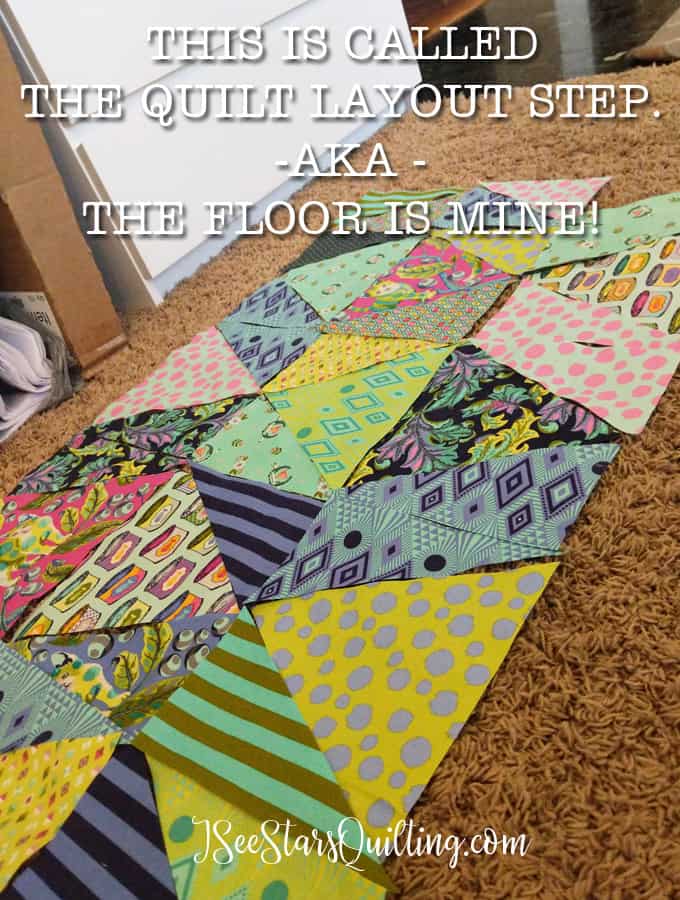
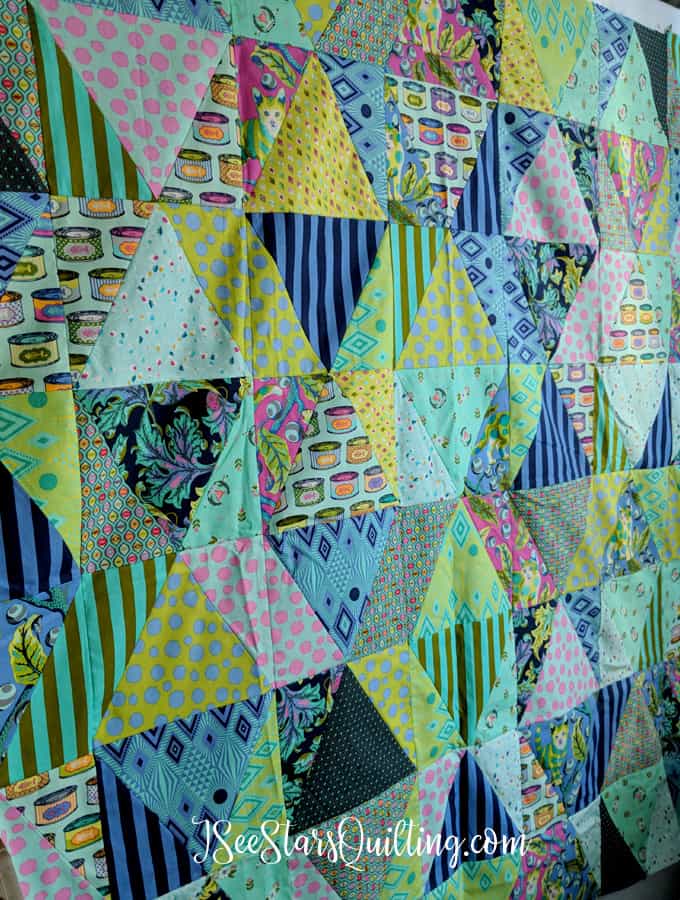
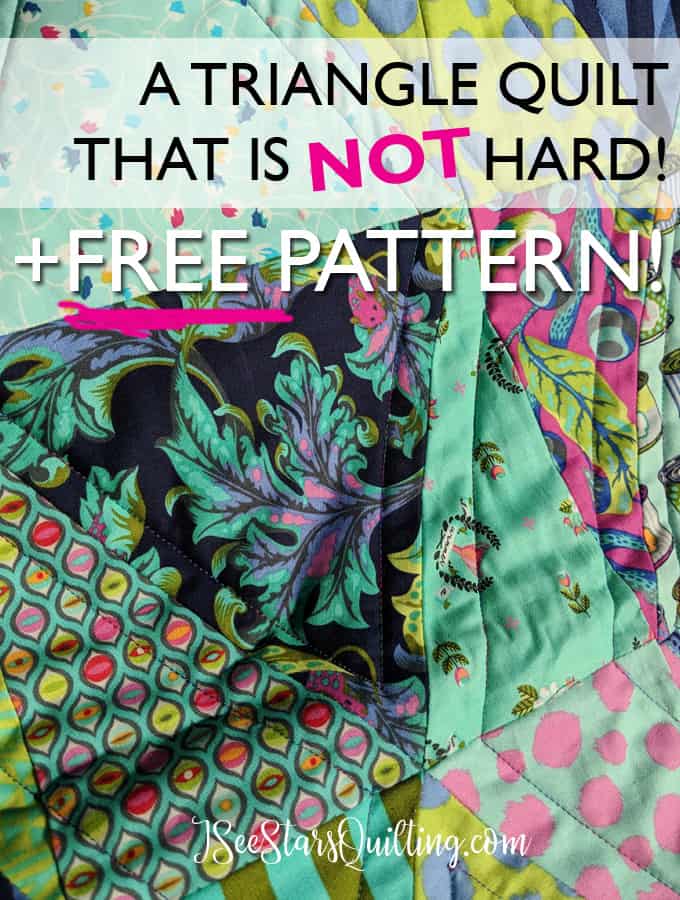
Today, I am going to share with you this Easy Triangle quilt (and a free pattern too!) Do not let the triangles scare you! This is really an easy quilt!
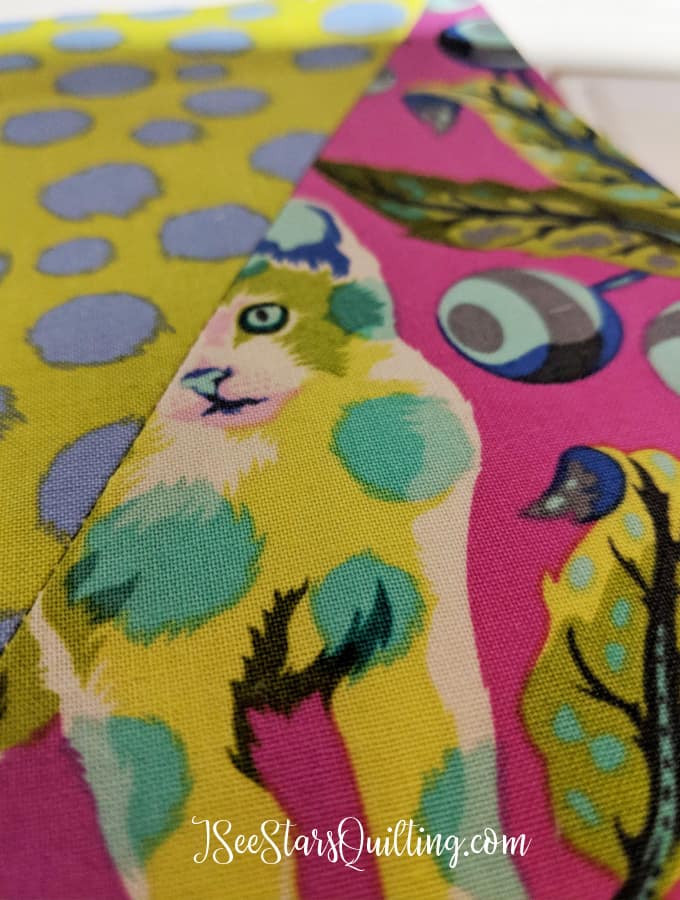
This quilt is one I made for a sweet young girl in my family. The fun colors of Tula Pink’s Fabric and a love of Cats… I knew it would be a winner!
[Quick backtrack in time story] I very vividly remember when I first started quilting, I saw this beautiful triangle quilt and I immediately wanted to make one! (I was – and still am – fearless in the pursuit of learning to make what I love) A friend told me “Triangles are really hard to sew and piece, especially for a beginner.”
*Kill joy*… I know.
But I believed her and put that in the ‘when I feel like I am an expert’ file.
[Yeah, that was a bunch of bologna] Now I know I will never feel like I am an expert because the world of quilting is so vast and people are coming with new and beautiful things every single day! So like… I will never truly know it all, right? And that is awesome because then it means that I can absolutely quilt and do what I love forever.
And I am shouting today because I want to drown out allllll the other voices that might tell you otherwise…
You CAN totally make a triangle quilt! And you don’t have to sew “Y” seams!
Also… you don’t have to be an expert at quilting!
Whew… there, I said it. And I mean it. If you have any reservations about sewing a triangle quilt, pull up your big girl panties and get ready!
Seriously, with just a tiny bit of practice and maybe a test block or two, this quilt is as easy as simple square piecing!
If you don’t believe me…. Get ready because I would never lie to you 🙂
First, download this FREE pattern that I whipped up. It explains step by step how to piece your blocks and it gives you the pattern pieces to print and cut out as well.
All the tips and how to’s are in the pattern download, but I thought I would give you a few extra tips here so I’m not just turning you over completely on your own.
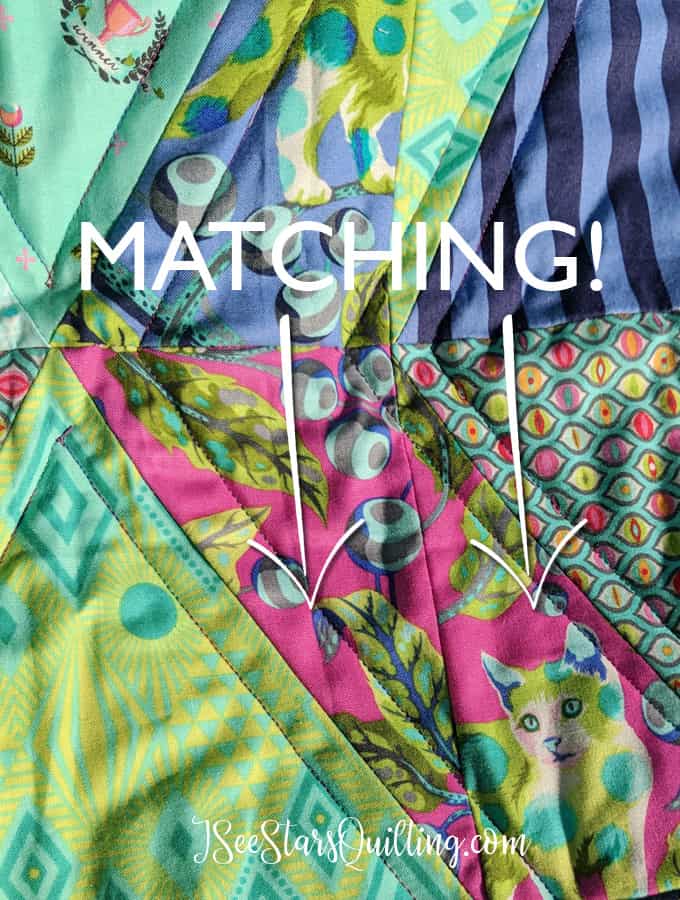
With this pattern, there is absolutely no rhyme or reason to the fabric placement unless you want it to be a certain way. I made all the pieces with the kitties in them face the same direction – personal preference.
It did take a little more work in the beginning to make sure that I planned ahead.
You’ll see in the picture above and in the one below that I matched some of my side …. parallelograms (Alright! High school geometry coming back into play!)
You don’t HAVE to do this… there are a thousand different ways you could make this quilt depending on your fabric choices.
The fact that some of my end pieces matched up were very randomly placed with no rhyme or reason. And I really like it like that because as if the idea of triangles wasn’t daunting enough… making sure all your fabric is perfectly placed can be added stress.
I encourage you to give this one a shot…. JUST DO IT. Mix and match and have fun with it! Show those triangles who is the boss. (hint… it’s YOU!)
Are you going to give this one a shot? Let me know if the comments, won’t you? I would love to hear from you!
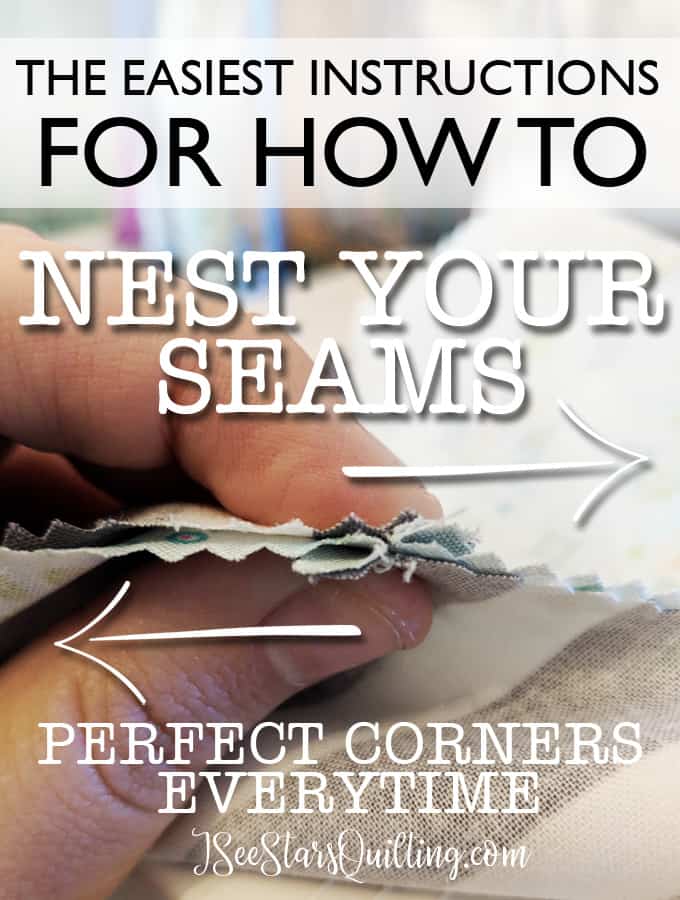
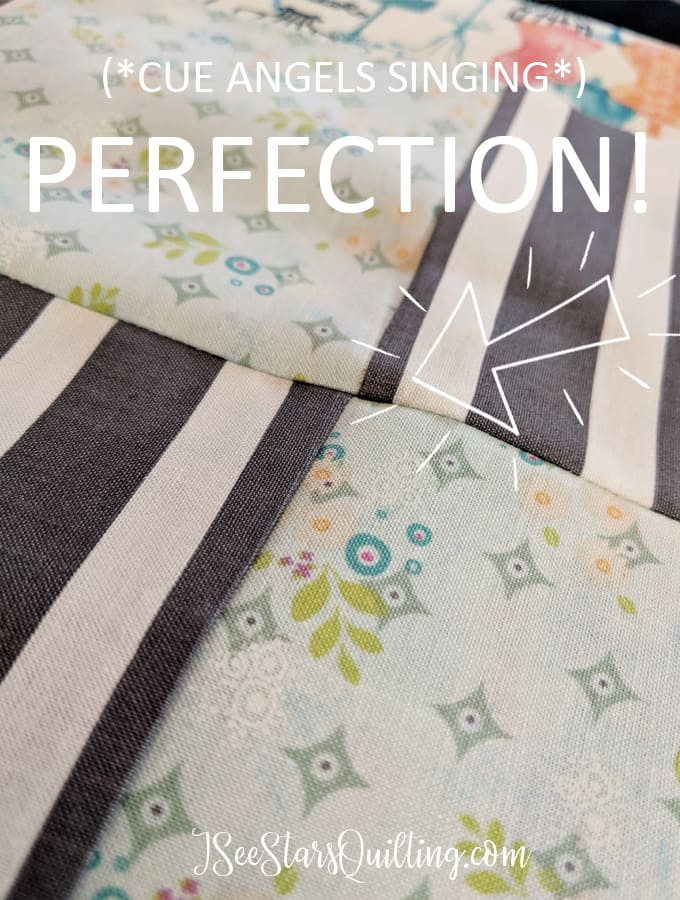
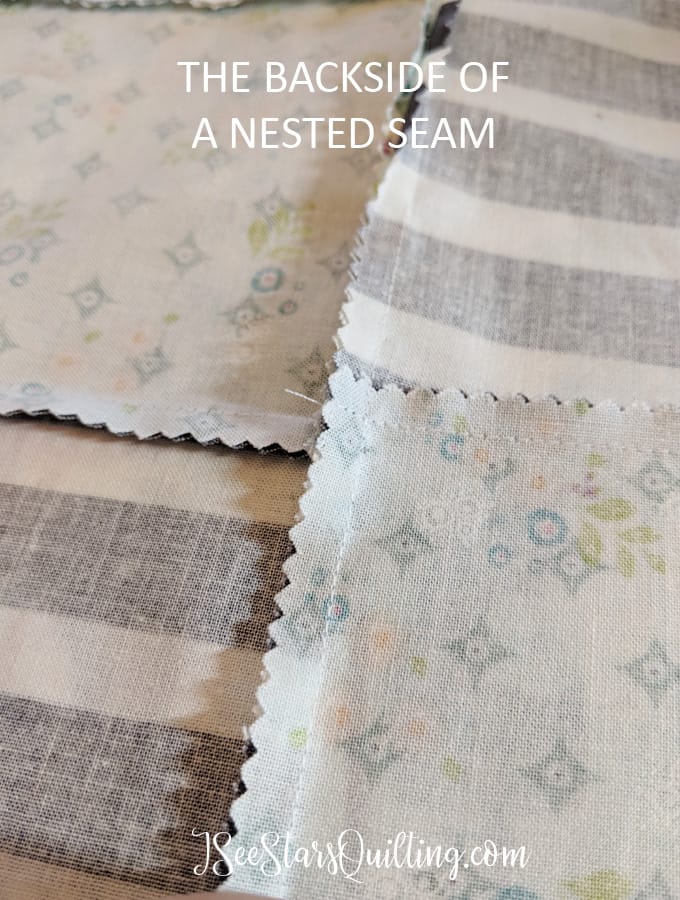
This is powerful-quilt-skill-altering-stuff here today, happy people! We’re going to learn one of my favorite tricks in quilting: How to Nest Your Seams.
(If you’re impatient, there is a quick video at the bottom of this post!)
Are you ready for this? Because It is going to be great!
We’re going to dive into the what, why and how of it all.
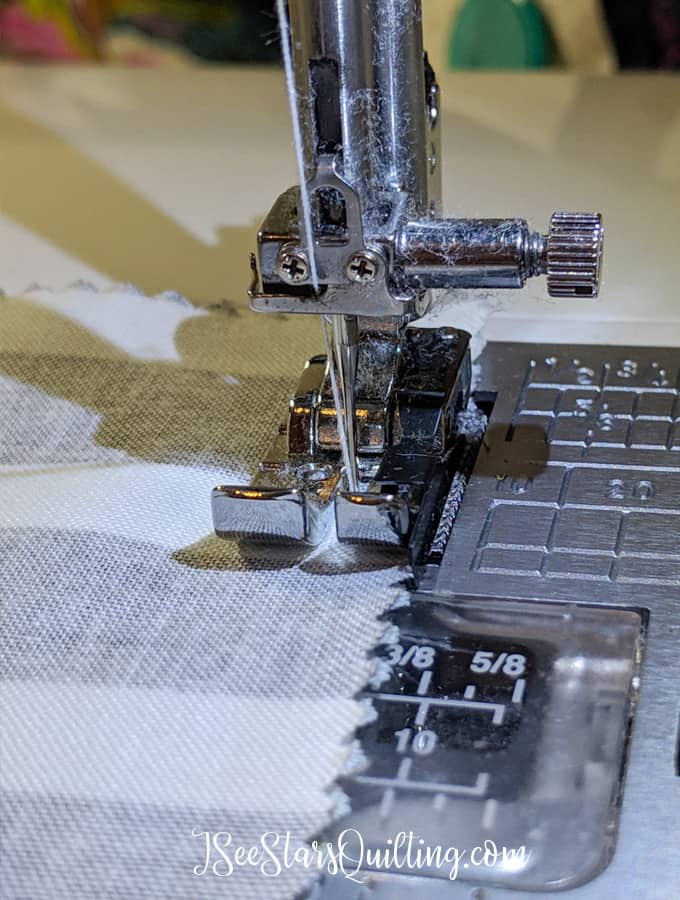
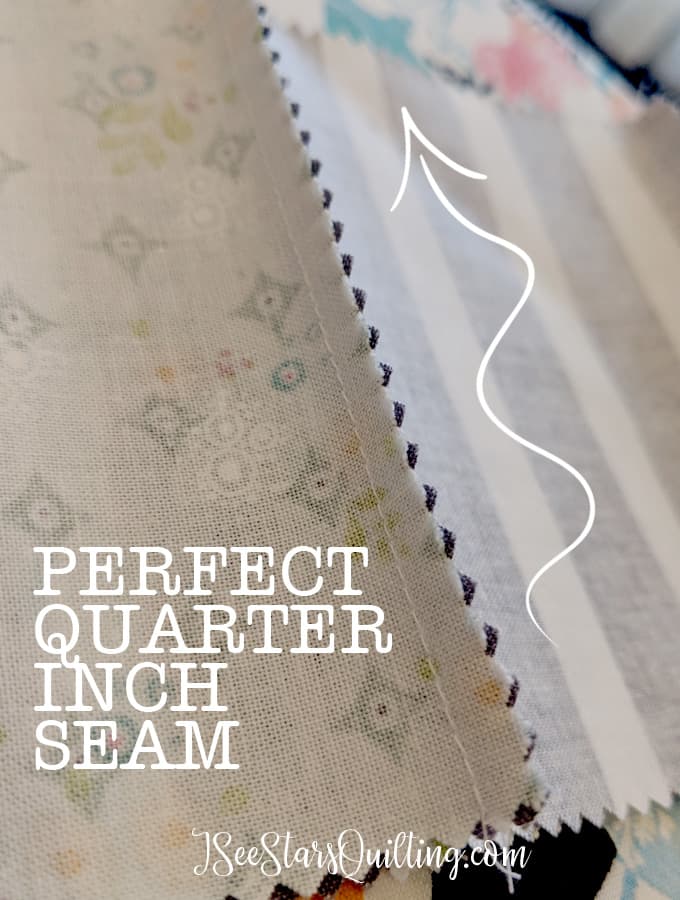
First… make sure your seam allowances are all the same measurement. Your seams will not line up if you’re off in your seam allowances! For tips on that, you can read more about mastering that skill in this post: Mastering The Quarter Inch Seam
*Yikes! Look at all that fuzz!*
What is nesting your seams?
Nesting your seams starts with how you press your seams after you sew.
Yes, I’m going to be one of those pesky quilters that tells you how important it is! A few years ago, I was on the opposite side of the fence and you couldn’t make me touch an iron on each and every seam. I learned my lesson and my quilting has improved so so much since then! So I don’t want to hear your whining. Just suck it up and do it, ok?
Some quilters prefer to press their seams open to make the quilt top lay flatter… it is a personal preference, but I usually press my seams to one side, which allows me to nest my seams and have nice tight hold between my seams without using pins.
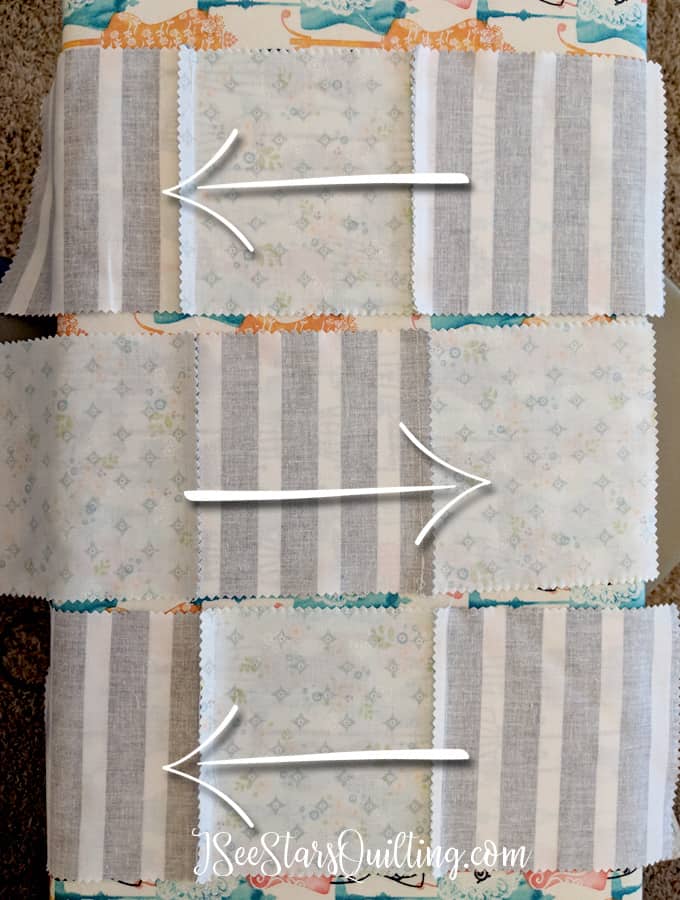
Ok now that we’ve all decided that ironing is best…. Start by ironing all your seams like the picture below. Each row will alternate seam pressing directions.
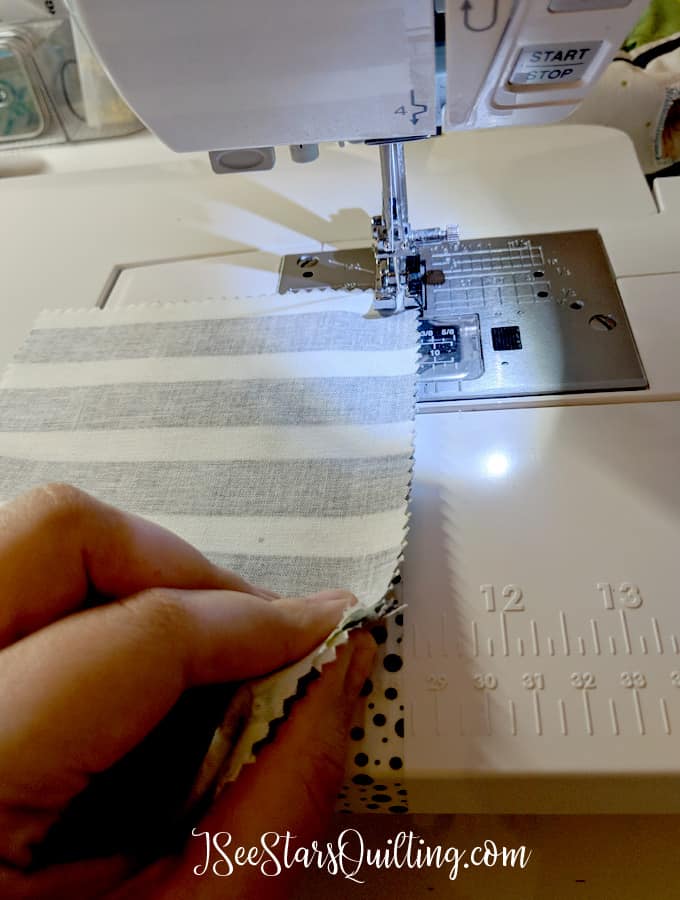
Next, you’re going to sew your rows/columns together!
Why Should you Nest Your Seams?
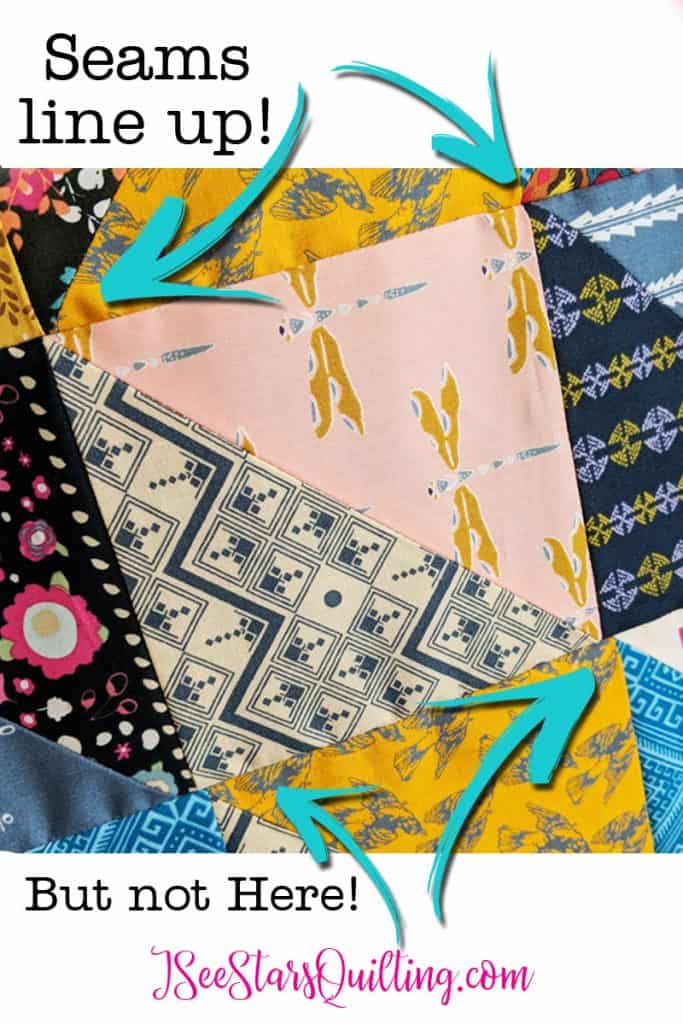
I think this one is obvious and probrobly why you came to my site in the first place, but really… we want out quilts to be as perfect as we possibly can get them to be, right?
Take a look at this quilt I did a while back, you will see the glaringly obvious error. And we don’t want our seams to be off, right? I COULD argue that its supposed to be that way… modern quilting does allow us a lot of liberties in the name of art, but you and I both know the pattern didn’t call for it to be that way.
How to Nest Your Seams?
So let’s get to fixing it so the above issue doesn’t sneak up on you!
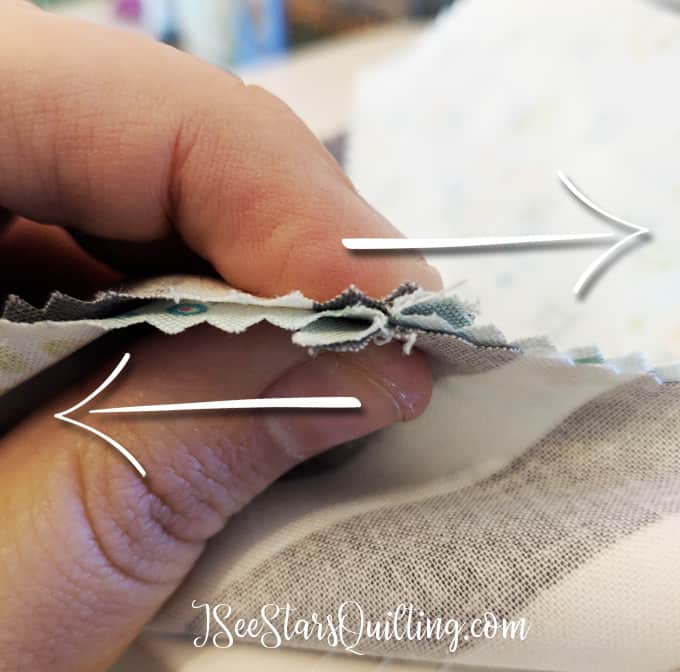
With your fingers, I want you to line up the seams. Rub it between your fingers just slightly. You’ll be able to feel it when that seam finds its sweet spot! The seams will nestle in right next to each other.
You can put a pin in it if you like but I want you to still hold onto it with your fingers when you sew because its the absolute worst to sew a whole long line of a seam only to find out a few of the little guys have shifted and then out goes the seam ripper (and my grumpy side).
Pinch the seam between your fingers while you’re sewing so that it’ll be perfect and the fabric will be evenly distributed in between each little nest.
When you come to it, make sure the fabric doesn’t shift. This may take a few times to get comfortable with but I rarely have to check this anymore because I’ve got this and it is like second nature.
Flip it over, press your new seam anyway you like and VOILA!
This little trick will save you so much time and really help to give your quilt that polished look! (one more rookie mistake will vanish from your future quilts!)
Let me know what you think in the comments after you give this a shot, won’t you? I love to hear from you!
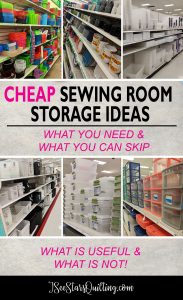
We all have dreams of a big beautiful sewing room that is stocked with walls of gorgeous fabric and beautiful shiny fancy tools. Oh *big puffy pink heart eyes* all the counter space and shelving of pretty threads! ooh! and big glass french doors to close the mess off from the rest of the house! Yesssssss! Chances are that it won’t happen today… but I do have some simple Ideas that can improve your sewing room to share with you!
When you create a space you love, it loves you back by allowing you to create more efficiently and in turn more amazing quilts!
These ideas don’t involve a house remodel or a weekend doing DIY projects pretending to be Johanna Gaines. They also don’t involve a giant budget because well… I’m a mom and honestly, I have never had a big giant budget to work with so, work with what you have, ok?
The key in improving your sewing room is…
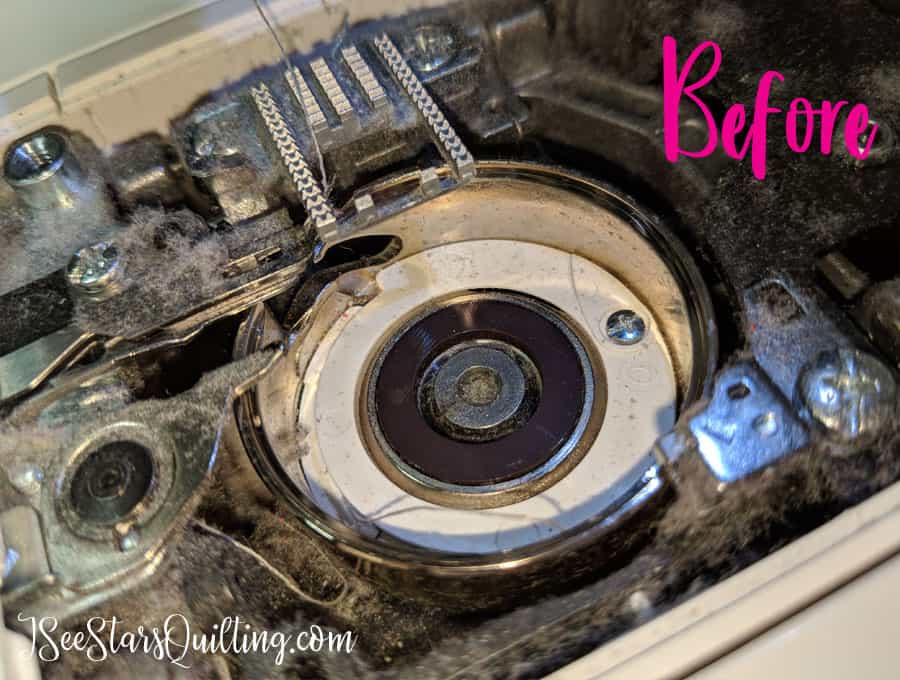
1. Clean what you have!
I know, I’m awful, right? That is such a “duh!” thing to say, but when was the last time you REALLY cleaned everything? Do you dream of a spa day? So does your machine!
Your machines could use a good cleaning but how about everything else? The nitty gritty of whiping everything down and dusting? And a little fabreeze to freshen up the place?
2. Go through your supplies and purge your ‘clutter’
As creatives, we hoard. Go on and admit it… You are not alone.
I define “clutter” here as anything that you have hanging around that doesn’t serve your goals or interests right now.
What do you have in your possession right now that you’ve been holding on to for “someday”?
It is time to get honest with yourself and really decide if “someday” is ever going to really happen! (I know, this is tough love speaking)
Go through these top areas of clutter: * Tools * Fabric * UFOs & WIPs (unfinished objects and work in progress) * Decorative clutter – Those things that are precious collectibles and things given to us over the years that are so hard to part with!
Make 3 boxes: Donate, trash and sort Then, get to it. Take no more than 5 seconds to decide on a box to place your items. Clean off an entire area of clutter quickly.
Purge the items you labeled trash and be done with them.
Move the box of donated items to another room. Do it right now. Those items no longer have a place in here. If you leave it by the door, you may be temped to find a place for them again. Take a deep breath and let them go!
3. Clean again!
I mean it. The hidden corners the dark spaces… Really give your space a good wipe down again now that your stuff is moved out of the way.
4. Decide on the storage you need.
[Notice I didn’t put this first – It is important to really see exactly the items that you’re going to be storing before you go out and buy a bunch of random containers!]
This is optional. Some of us quilters are blessed with shelves of storage and have built up our stash of storage containers.
If you’re in need of some ideas… check these posts out!
There are also several products on Amazon that I just LOVE having around my sewing room. I’ll link them here for you 🙂
5. My favorite Part – Organize!
Now it is time to add back in the things that really matter to you – the things that truly bring you joy!
Once you have your bins or shelves or totes… whatever it is you decide works best for your space you can organize your items and make it a space you truly LOVE. It makes such a difference to be surrounded by the things you love.
When you improve your sewing room, you will notice a difference in your creativity too!
8 Sewing Skills Every Quilter Should Know
What is your favorite part about your sewing room? Tell me down below in the comments! I would love to know!
I’m on a mission this year. It’s 2019 and maybe its because I’m reaching my mid-30s *gasp, yes I just totally told you how old I am… how un-lady-like of me!* But here the thing… I’m on a mission to really cut out the extra fluff and do more for my readers, but I need your help. So I’m just going to come right out and ask for it, ok?
I love each and every one of you (like, so much). I love your e-mails and I love seeing the beautiful quilts you create and answering your questions via e-mails. I love bonding over fabric and tea and patterns etc.
So my goal this year is to create more books and patterns to help the busy quilter… but I would like to know more about you and what will be of most help to you.
So what do you say? I have a short survey for you to fill out (I promise it’s painless!) I would be ever so thankful if you’d take 5 minutes to fill it out.
Thank you!
— Christen
(You’ll be redirected to a Survey form on Google Docs)