Christen Phillips

  • The Ultimate Sewing Space Checklist!

    Are you ready to have the ultimate sewing space?

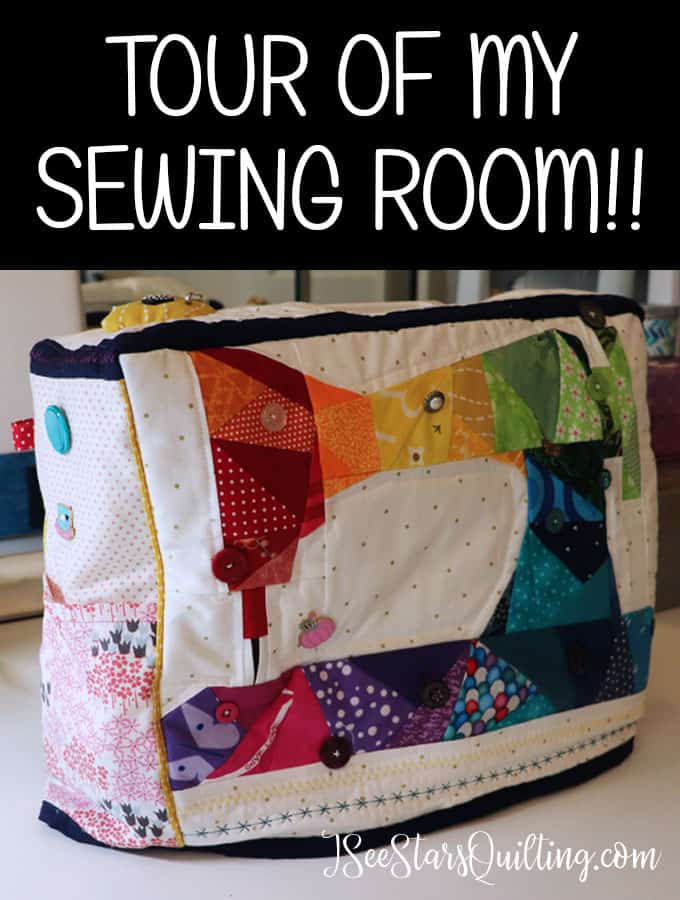
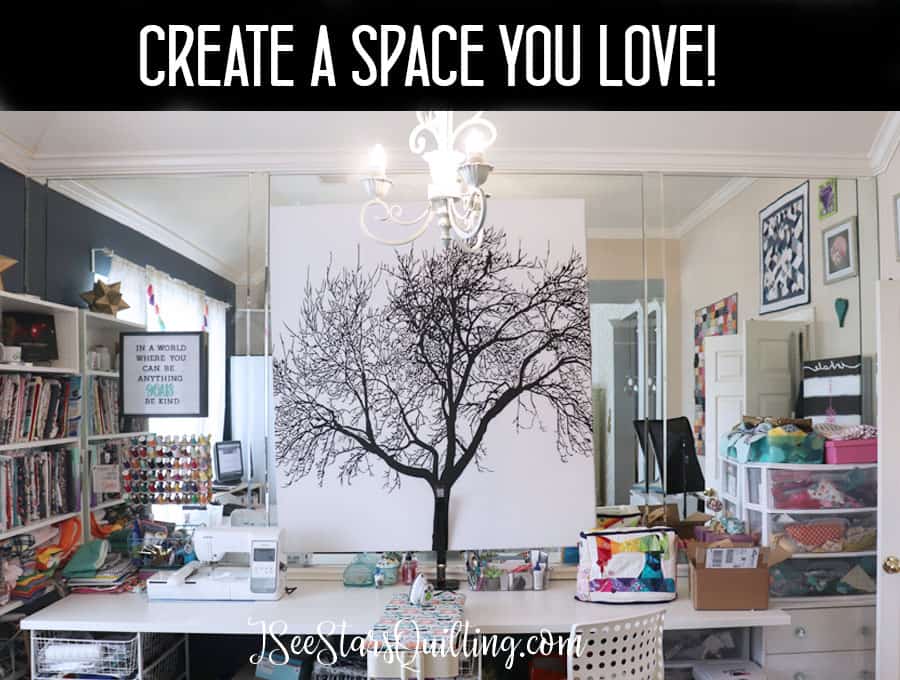
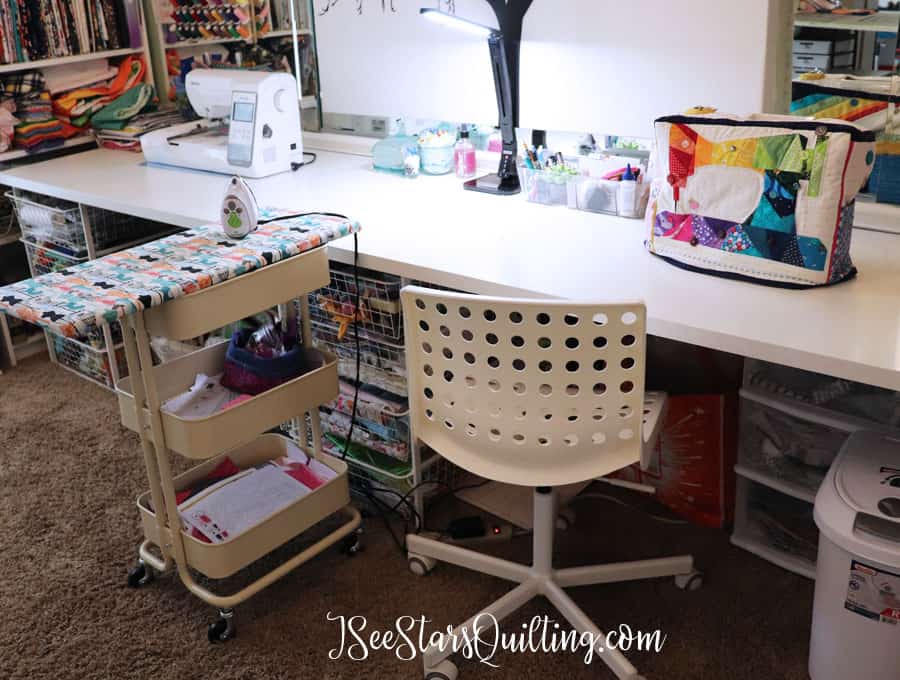
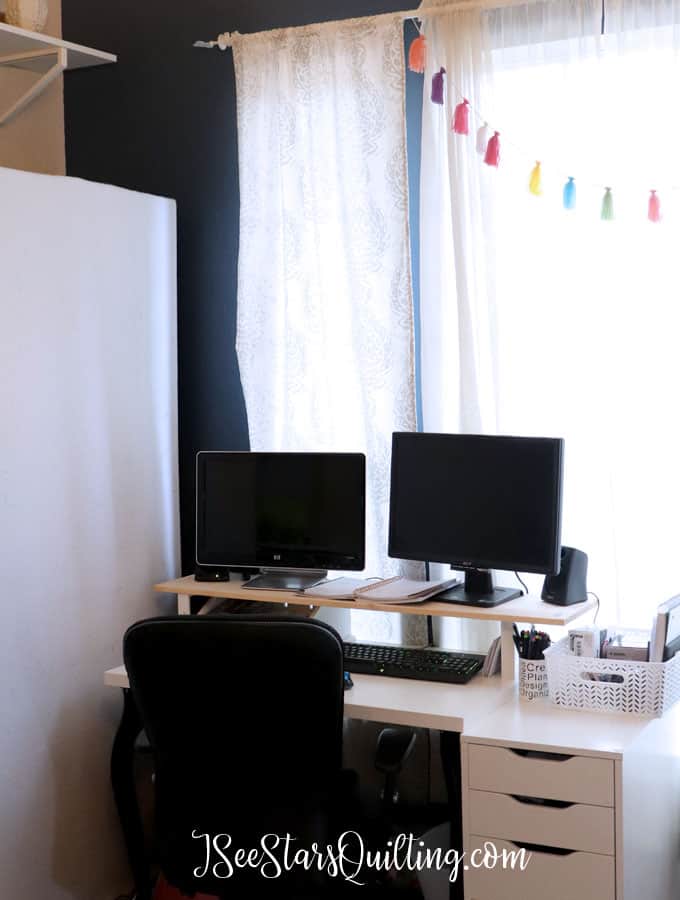
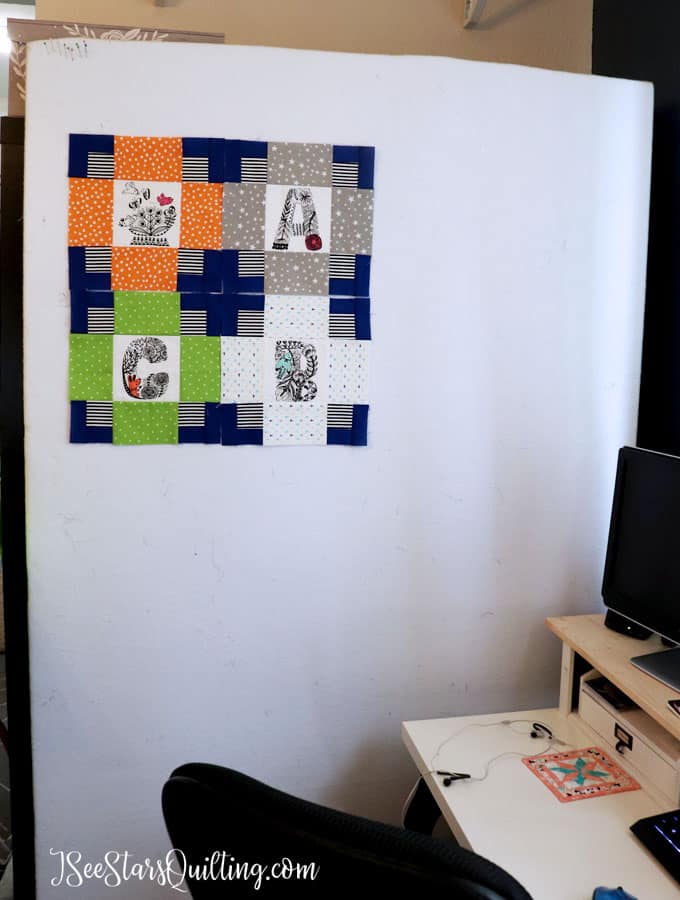
    I shared pictures and all the details on my office/sewing space and it got me thinking about what exactly was essential for it to function well.

    Like, if I were to help someone else set up their perfect sewing space, what would you HAVE to have?

    Today I’ve got a few tips for you on how to set up your own ultimate sewing space —plus a handy checklist for ensuring you don’t miss anything!

    Tips For Setting Up The Ultimate Sewing Space

    Here are tips to creating The Ultimate Sewing space (no matter what size!) PLUS a Free download checklist so you have everything you need!

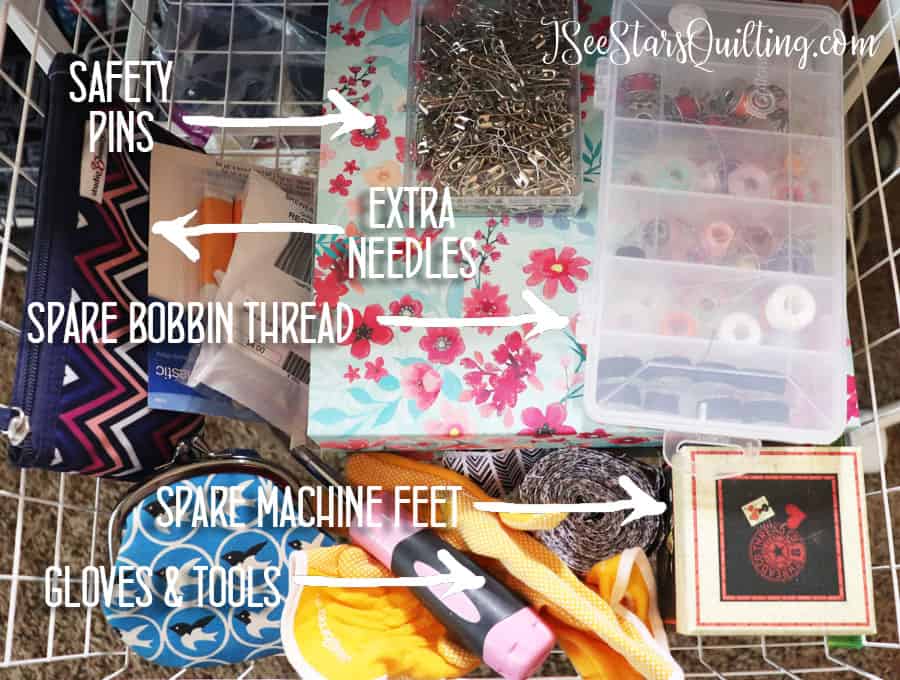
    1) Assess what supplies you already have

    Chances are that you already might have several things around your home that would be useful to use for your sewing space. There is no need to go out and buy a ton of storage or big furniture until you actually know what it is you’ll be storing!

    Take some time going through your home and bring out all of the sewing supplies and gadgets and gizmos-a-plenty. all the whos-its and whats-its galore. Pull them all into one place and categorize like things together in piles.

    Once you know what you have, you’ll be able to better categorize it and take note of anything you need, but don’t have or have but don’t need.

    2) Consider what you actually NEED (and don’t need!)

    After you’ve taken mental note of what you already have, I want you to pause and think about what you *need*. Yes… we can all flirt with the boundaries of being a full on hoarder. You don’t have to go fully minimal with your supplies, but you don’t want to have so much that you can’t find the things that you do need either.

    If you have more than one of something, consider parting with it if you’re looking to de-stash.

    You might be tempted to go out and get storage happy with all the cute bins and baskets and drawers, oh my! — Look out Target… we have a woman who wants to organize! I swear they can spot you from a mile away and your pocketbook might even start to shake with fear.

    Even if you don’t already any have organizers or baskets, you might realize that you don’t need as much as you think you do to be really effective.

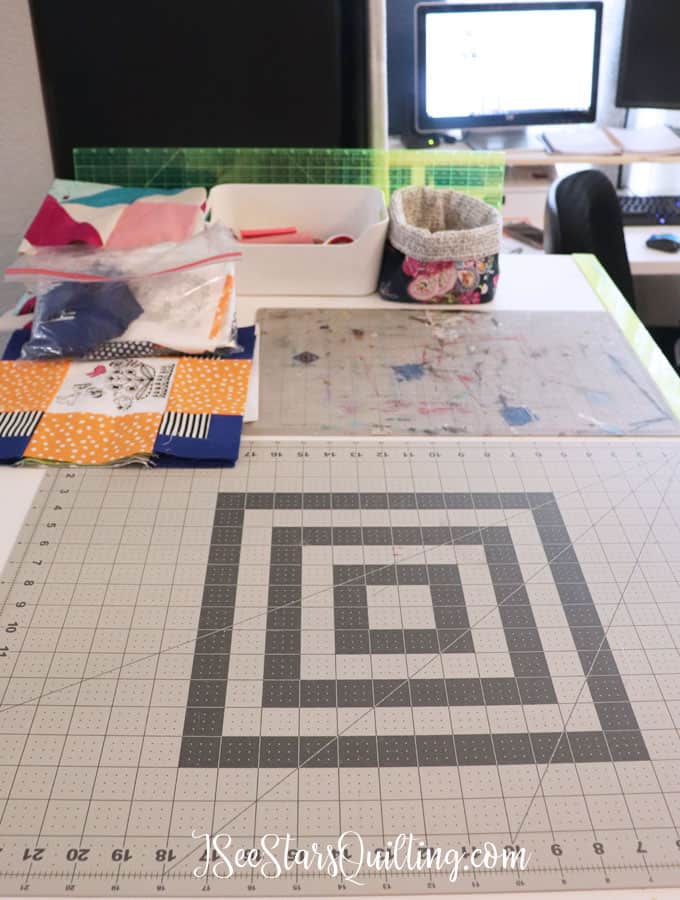
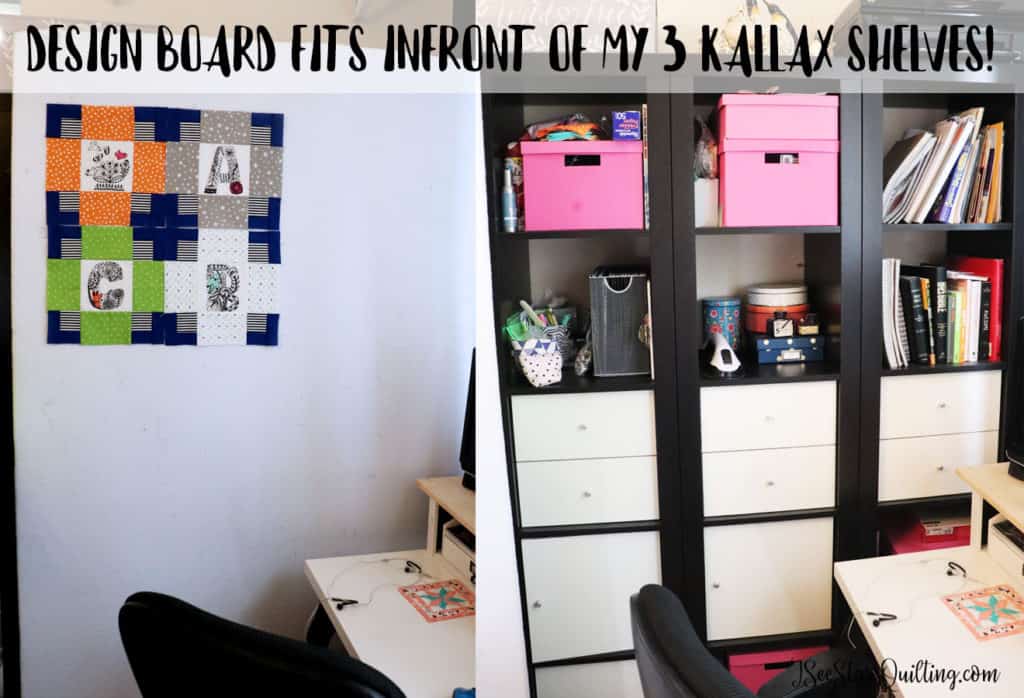
    3) Assess your space

    You might be one of the lucky girls with a whole spare bedroom for your sewing space or you might just have a small temporary table that you set up in the dining room from time to time.

    Whatever you have, keeping your supplies organized and easily accessible is going to give you the efficiency to spend far more time creating and far less time looking for things… or even having to go to the store because you know you have it, but you can’t find what you need!

    This post also has some really good ideas on improving your current sewing space.

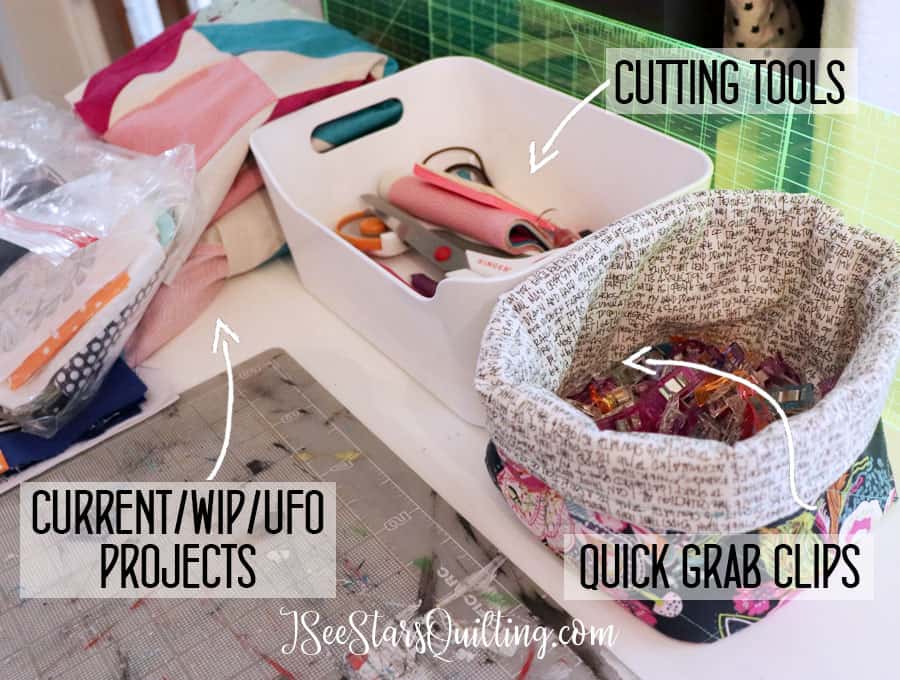
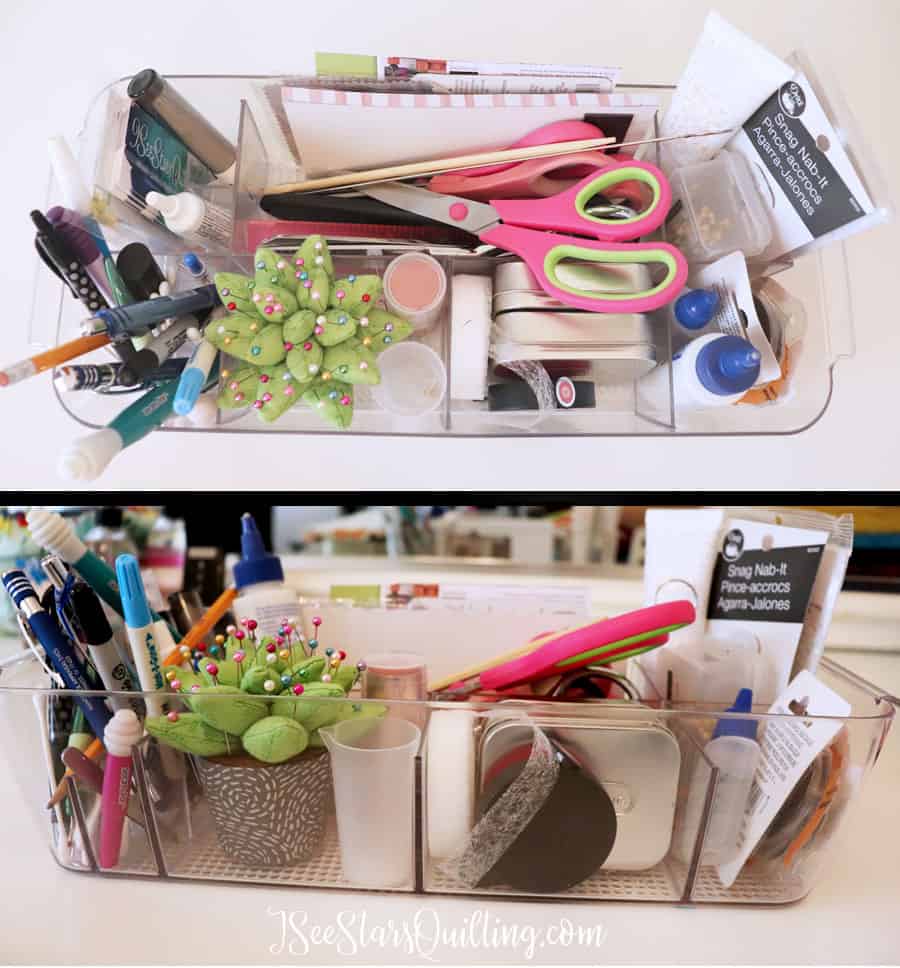
    4) Organize Starting With Priority Items

    Once you have all of your sewing supplies, you’ll want to actually organize everything to get your ultimate sewing space set up!

    Hear these words… do not just put things wherever there’s a free spot or a free shelf. No! Resist, I tell you! I want you to be strategic about setting up your space.

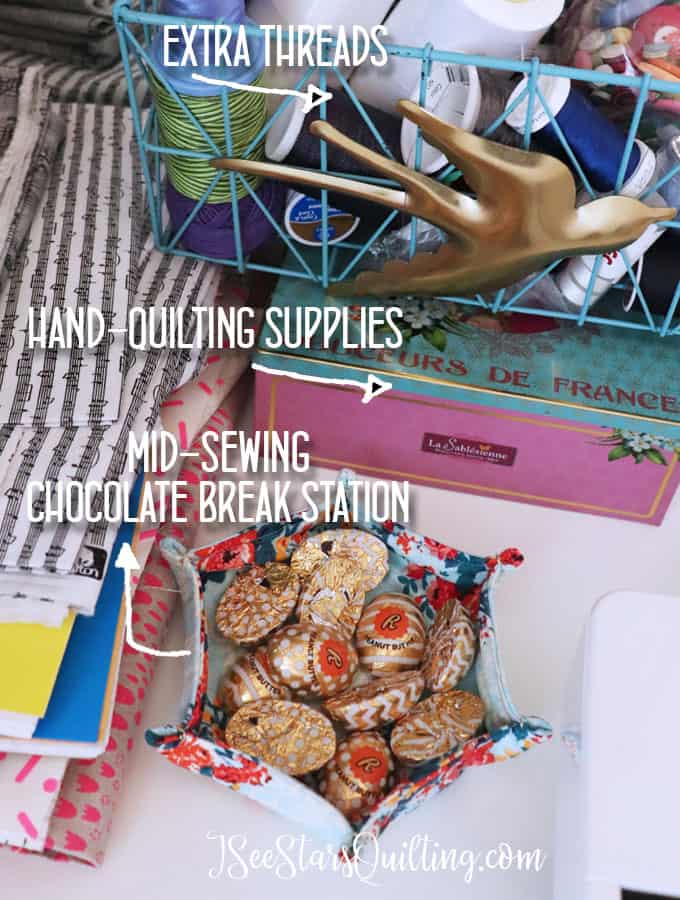
    Organize your sewing space based on your personal needs and priorities.

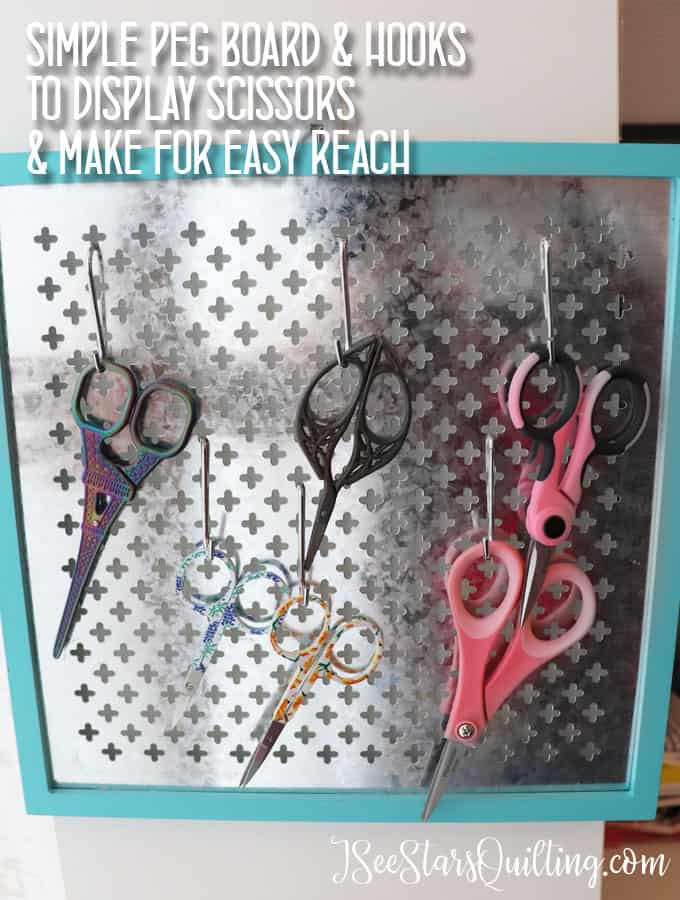
    For example, we know that the seam ripper is going to get used… a lot. Don’t hide it at the back of a drawer that’s difficult to get at. Instead, make it easy to access! You don’t want to have to quit your creative flow just because you can’t find a basic sewing tool!

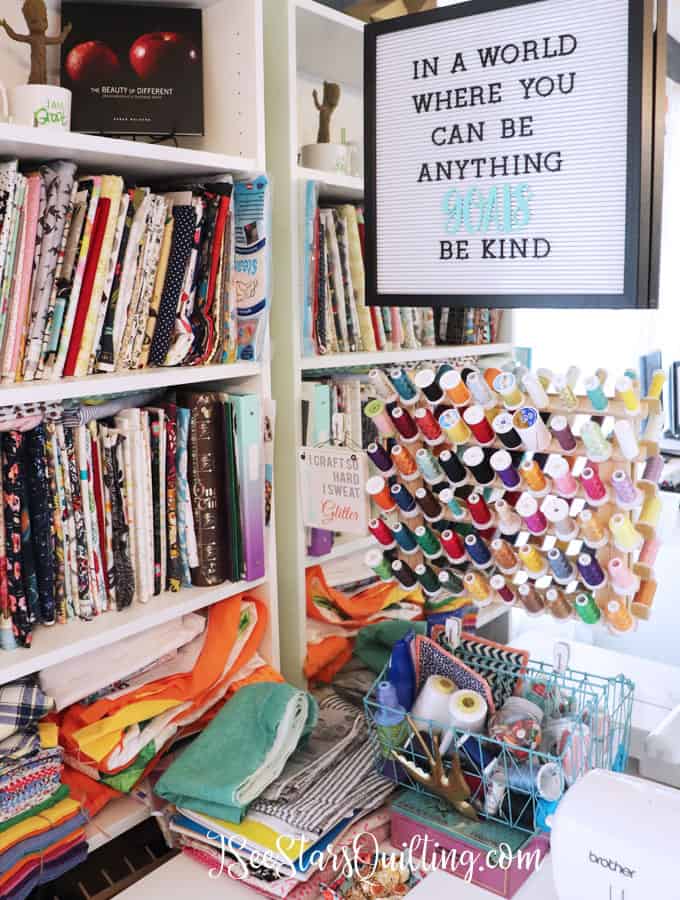
    Consider what supplies you are constantly reaching for and need to easily access. Then do your best to keep them within arm’s reach. This will keep you more on-task when you’re working.

    5) Create good habits – And Stick To Them

    How often do you clean and tidy your creative or sewing space?

    …Come on now, be truthful with yourself! You don’t have to tell me.

    When was the last time you cleaned your sewing machine? (hint, you can read this post if you want to know how) or dusted all those nooks and cranies around your workspace? What about that pile of ‘I don’t even remember what I was doing when I set that aside’?

    It’s HARD to remember to keep your sewing space neat and tidy, but it will do wonders for your productivity levels!

    Creativity is messy, yall. It really is… but There is a difference in DIRTY and just slightly cluttered!

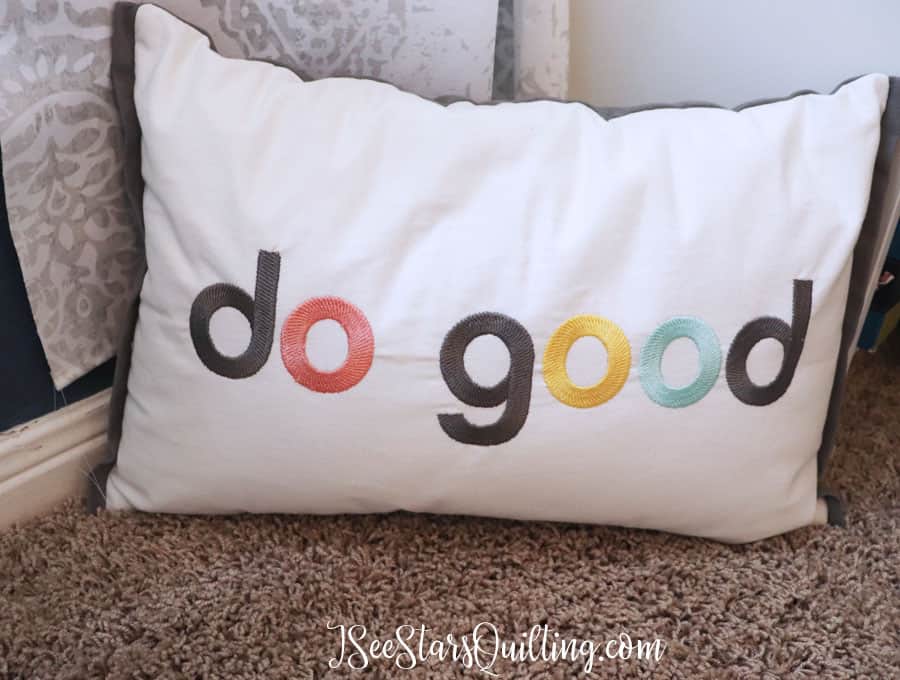
    Make sure it is a space that you actually WANT to work in every day!

    Make your sewing room a beautiful haven that you LOVE to be in! After you finish sewing, take 60 seconds to tidy up and organize. Set yourself up for success the next time you come to sew.

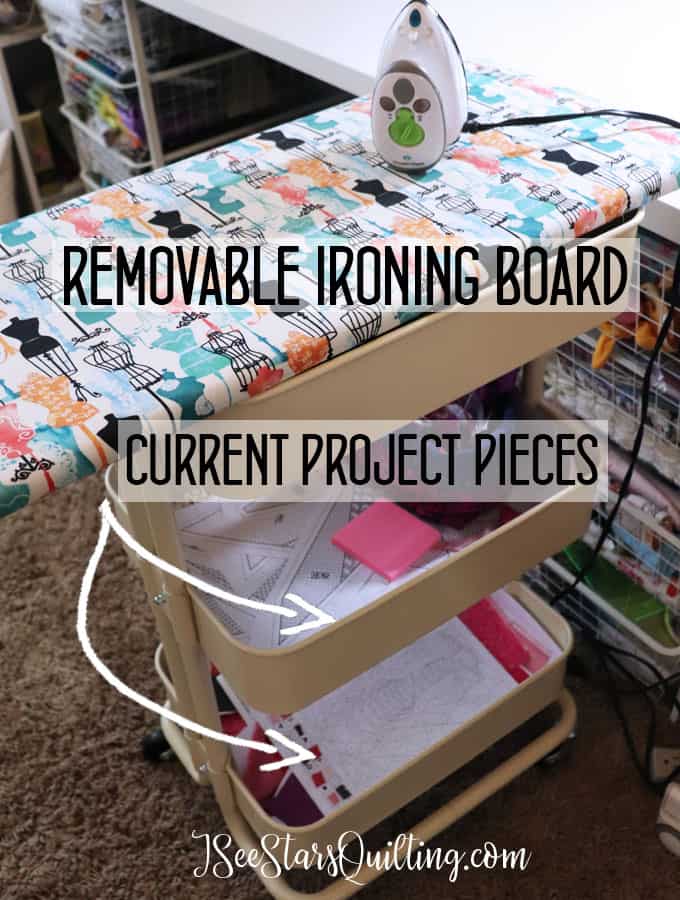
    6) Avoid having absolutely everything out in the open

    Avoid distraction like your sanity depends on it.

    Maybe you have superior laser focusing abilities… I, do not possess those skills. I am more like a squirrel in a nut factory with ADD. Basically, try your best to hide anything in your sewing space that you aren’t working on or related to the project that you are working on. Keep your workspace clear so your brain doesn’t have a choice!

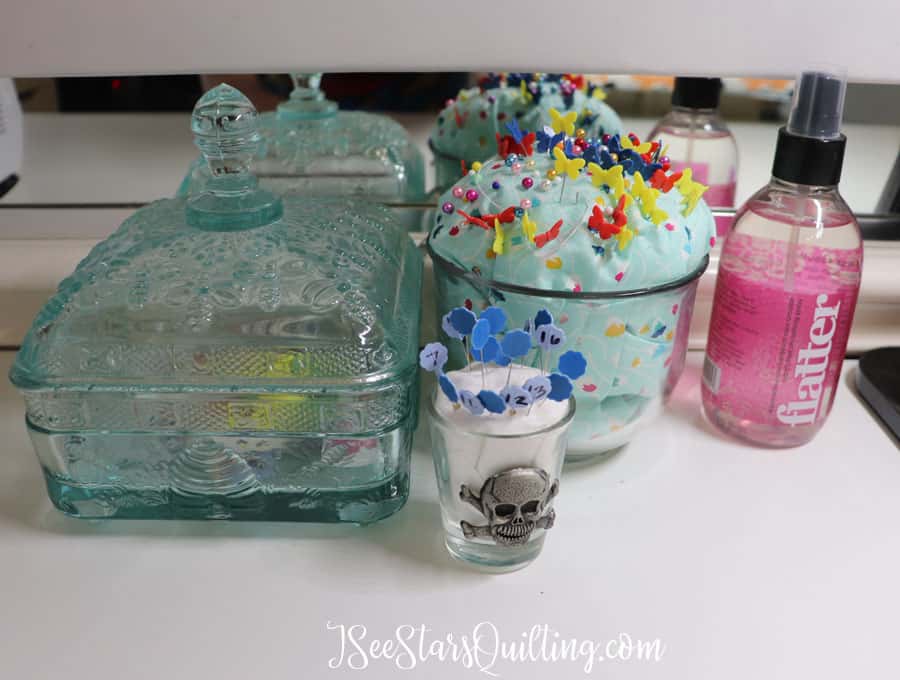
    You might be wondering, “but what about my trinkets? All my lovely fabrics? Or pictures of my grandkids, or plants? They don’t have anything to do with quilting/sewing. Do I have to hide them from view in my office?” No! Things like that can stay—just LIMIT how many you have on display if you can. Limit those little extras so that your sewing space remains primarily a space for sewing and productive creativity. You can still allow some of your personal interests/joys in life to shine through.

    When you do this, you’ll find that you are able to stay so much more focused on your projects at hand, and you’ll be less distracted—which means you’ll produce higher-quality work. Win-win!

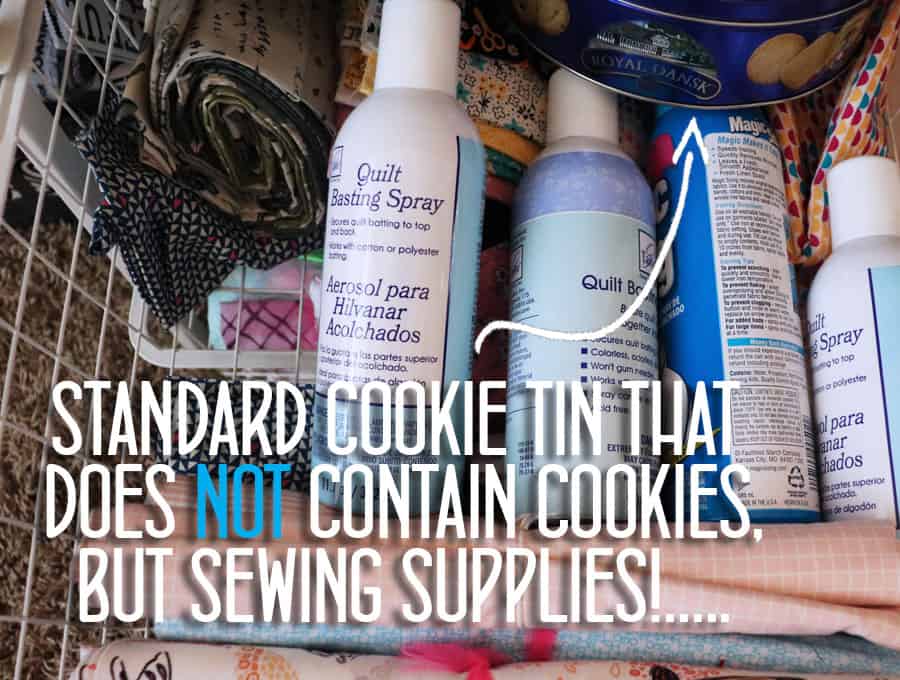
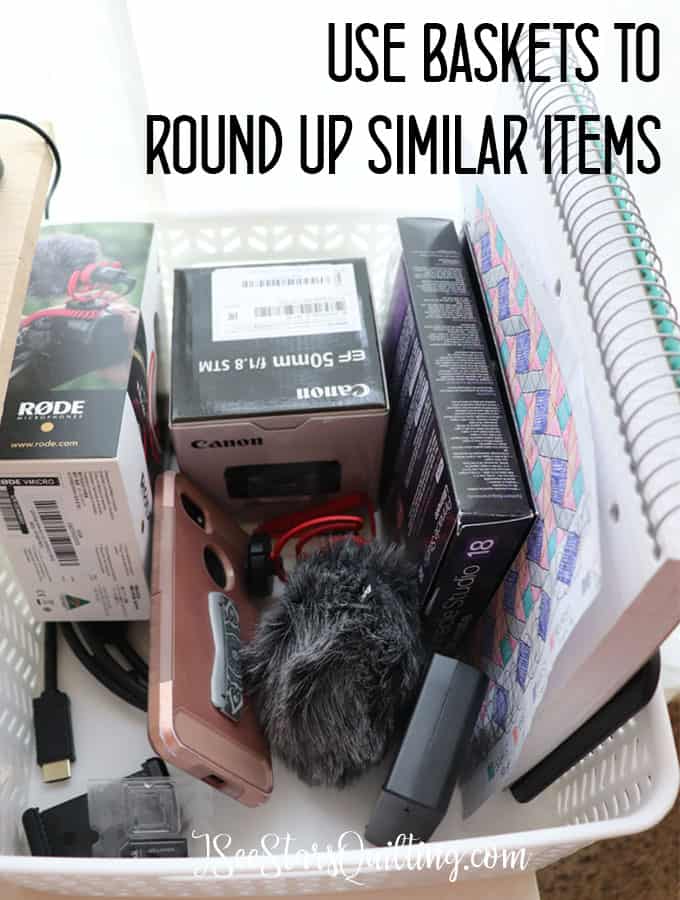
    7) Storage Solutions

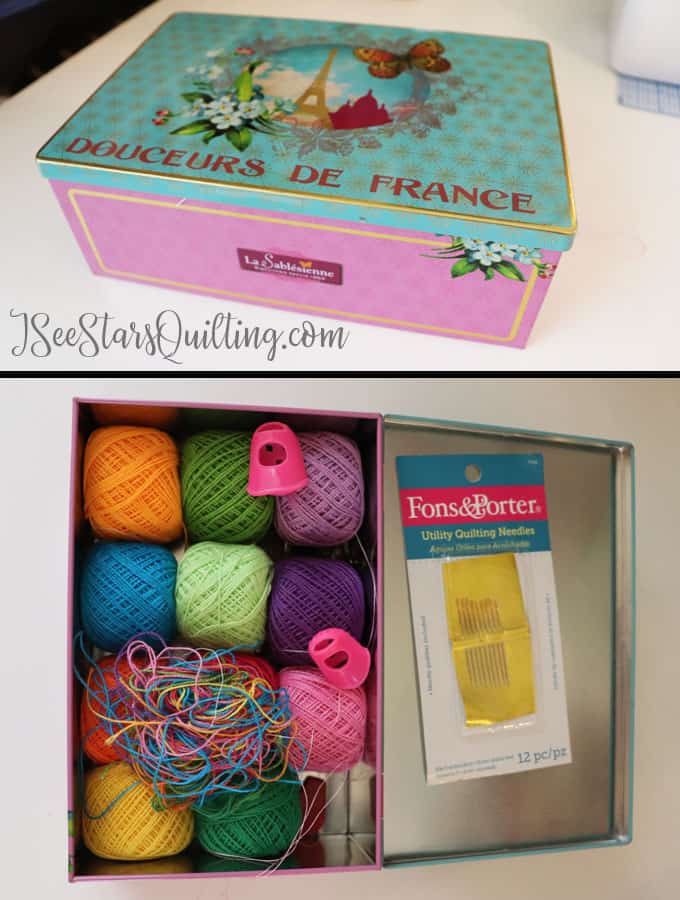
    Don’t be afraid to take a good hard look at your recycled boxes when it comes to organizing. Even if you look at it as a temporary fix.

    Perhaps the budget doesn’t allow for a full makeover right now. You can “test out” different sizes and ideas by anticipating what you might need and give it a go before making any purchases.

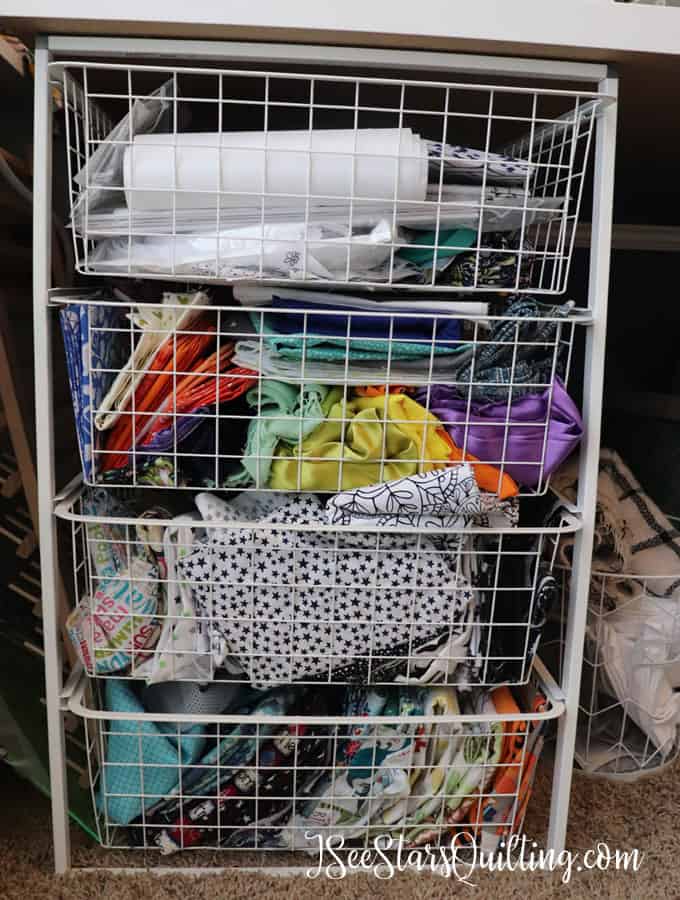
    You can read this post for more ideas on cheap storage solutions for your sewing room

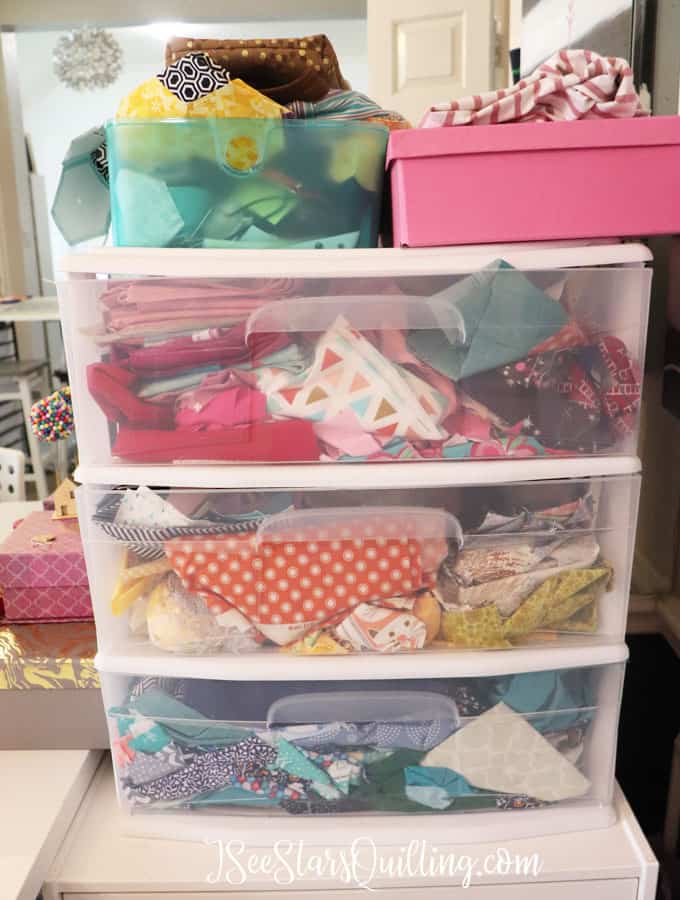
    Or you can read this post for ideas on how to store you scrap fabric.

    Every person’s habits vary and what works for one sewist might not be the most efficient for another — you need to figure out what kind of organizational systems and ultimate sewing room set-up is right for you!

    Here are tips to creating The Ultimate Sewing space (no matter what size!) PLUS a Free download checklist so you have everything you need!
  • Tour of My Sewing Room

    I thought today we would take a quick detour from the typical quilting and how-to posts. Today, I am inviting you into my space and giving you the grand tour of my sewing room!

    This is where all the fun fabric magic happens!

    I am so blessed with the space I have. We have a very open floor plan in our home (which is great when you have little kids running around, but not so great if you want to maintain any facade of a clutter-free home! The mess just grows and is visible from everywhere in the house…)

    My sewing space is actually just after you walk in the front door, where a “normal” family would have a formal dining space. From the moment we moved in, I knew we weren’t formal dining people… because when you have little kids, carpeted dining areas aren’t the wisest choice.

    The formal dining room space became my office/craft space and eventually I gave up the Pinterest worthy interior designer decor and it became my full on quilting space. i.e. I brought in all my crafty junk and just made myself comfortable in here instead of trying to make it look like a magazine spread!

    Yes, I’ve considered putting up french doors to hide a little more of the mess in the space but that would block a lot of the natural light in the other rooms which is one of my favorite aspects about our home…

    Creativity is best in a room filled with the things that bring you joy! I'm going to give you a tour of my sewing room today and share all my organization tips along the way!

    If you are asking yourself… “I wonder if she really cleaned up for these pictures or if it always looks like this?”

    Hahahahahaha, the answer is yes… I absolutely cleaned up and usually, my space has 10+ different projects strewn about in varying degrees of completion plus children reading books on the floor… oh and a dog too. She is normally right under my feet while I work.

    But I also always promised to keep it real with you, my sweet sewing friends… so while I straightened the clutter, I didn’t take the time to fold all my fabric and make it soooo perfect. I’m honest with myself too and that just not how I function when I create.

    Creativity is messy and a little messy is ok!

    So without further delay… here it is… my *starry eyed* sewing space 🙂

    Creativity is best in a room filled with the things that bring you joy! I'm going to give you a tour of my sewing room today and share all my organization tips along the way!

    Let’s start with the wider view of where I work 70% of the time. from left to right, you have my favorite fabrics (oh yes, there is more than just this shelf…), the project time out corner, my embroidery machine (Brother NS1150E), favorite tools, my Janome sewing machine (Janome 3160QDC) and scrap fabric bins. Yes, the back wall is a mirror

    The large white table tops are from IKEA (you’ll see a lot of ikea in this room)

    Creativity is best in a room filled with the things that bring you joy! I'm going to give you a tour of my sewing room today and share all my organization tips along the way!

    I love this corner. The bookshelf holds my favorite fabrics. I have access to all of my thread colors as well as hand quilting supplies.

    The timeout corner is that shelf with the orange fabric on it… They need a little time to reflect on how nice it is to work with others and stop making me pull out the seam ripper so much! I’ll pull them out when they have learned their lesson….

    Creativity is best in a room filled with the things that bring you joy! I'm going to give you a tour of my sewing room today and share all my organization tips along the way!

    I also like to keep my favorite quilting patterns and books/magazines within easy reach on my bookshelf. Though it is slowly growing tighter and tighter on this shelf. 🙂 I also keep loose patterns in a 3 ring binder with clear dividers so I don’t lose pieces or parts.

    Creativity is best in a room filled with the things that bring you joy! I'm going to give you a tour of my sewing room today and share all my organization tips along the way!

    Hanging on the side of my bookshelf is my embroidery scissors organizer. (this isn’t all of them as some are with on-the-go projects right now) but it is a fun way to be able to see these pretty scissors and use them quickly too!

    Creativity is best in a room filled with the things that bring you joy! I'm going to give you a tour of my sewing room today and share all my organization tips along the way!

    Another fun area of the bookshelf is my collection of fat quarter fabrics and jelly rolls… please tell me you have an addiction to these little fabric bundles too?

    Keeping them all together ensures that if I need only a little bit of fabric or have a small project, I check here for fabric first before cutting into a larger piece of fabric. Also, these are all REALLY cute fabrics that I just couldn’t live without! It makes sense to use them!

    Creativity is best in a room filled with the things that bring you joy! I'm going to give you a tour of my sewing room today and share all my organization tips along the way!

    Also in this zone of my sewing room is my chocolate stash. It is essential for motivation in the sewing room or when things aren’t going well and I need a little pick me up. If you don’t have a chocolate station, you need one!

    PS: There are other treats for when days are REALLY rough… the children do not even know these exist in my house. They are a secret! I absolutely implore you to go and buy these treats because I swear they will make even the worst days just a little bit better 😉 They are soooo gooooood!

    Creativity is best in a room filled with the things that bring you joy! I'm going to give you a tour of my sewing room today and share all my organization tips along the way!
    Creativity is best in a room filled with the things that bring you joy! I'm going to give you a tour of my sewing room today and share all my organization tips along the way!

    This pretty little box actually used to hold some french cookies that I purchased from Homegoods or TJMaxx (I can’t remember which). While the cookies didn’t last long, I found the perfect use for the tin in my sewing room. I love to re-purpose old containers… and as an added bonus, now my hand sewing supplies are easily portable for when I want to take it on the go!

    Creativity is best in a room filled with the things that bring you joy! I'm going to give you a tour of my sewing room today and share all my organization tips along the way!

    Ugh… I know, this is not your “Pinterest worthy” Photography shot to be bragging about but you know what? I live here… and I rummage through these drawers quite a bit.

    That being said. They are really amazing for storage. I have 2 drawer sets from IKEA and use them to prop up the table tops I purchased as my sewing workspace.

    Creativity is best in a room filled with the things that bring you joy! I'm going to give you a tour of my sewing room today and share all my organization tips along the way!

    A big part of creating your sewing space is filling with with things that bring you joy and creating a room that you never want to leave 🙂

    But don’t become over run with dust catchers! Only pick the very best of the best… the very pick of the crop items that you love and proudly display them!

    Creativity is best in a room filled with the things that bring you joy! I'm going to give you a tour of my sewing room today and share all my organization tips along the way!

    Let’s look a little more into the hidden parts of my sewing room…

    Creativity is best in a room filled with the things that bring you joy! I'm going to give you a tour of my sewing room today and share all my organization tips along the way!

    This is a peek into the drawer that is closest to me when I am at my sewing machine. As you can see, I have everything that I need close by and it has a home so I know exactly where it is.

    Down below my tool drawer is my collection of rulers and acrylic templates for patterns and cutting.

    Creativity is best in a room filled with the things that bring you joy! I'm going to give you a tour of my sewing room today and share all my organization tips along the way!

    If I buy a fabric bundle or purchase fabrics that coordinate together while I am shopping, I keep the fabrics together in a drawer.

    This makes for a quick grab when you need to make a quilt for a gift or need a quick sew. Half the battle of creating a quilt is deciding what fabric to use and what pattern you’re going to sew… this knocks out the majority of that struggle!

    Creativity is best in a room filled with the things that bring you joy! I'm going to give you a tour of my sewing room today and share all my organization tips along the way!

    I also keep my basting sprays (purchased in bulk with a coupon! woo!) and other prays handy.

    Creativity is best in a room filled with the things that bring you joy! I'm going to give you a tour of my sewing room today and share all my organization tips along the way!

    Moving over to where more prep work for quilting takes place is my cutting table.

    This is actually a drafting table that I got from my dad back in high school. It is adjustable in height and has been a staple in my craft room from day one! Yes, its kind of been around a little while… but we’re not going to discuss technical terms and numbers here!

    I have a few different cutting mats on the cutting table to protect the table top and my rotary blade as well.

    Creativity is best in a room filled with the things that bring you joy! I'm going to give you a tour of my sewing room today and share all my organization tips along the way!

    I like to use containers to coral and organize my tools on top of my cutting table. This also makes it a little safer for wandering little hands that just want to run away with anything they can reach!

    Creativity is best in a room filled with the things that bring you joy! I'm going to give you a tour of my sewing room today and share all my organization tips along the way!

    Another fun area to dig through is my scrap fabric storage! It is just simple plastic drawers from Target, but it holds oh so much fabric! (I have 2 of these because… you know… I had to organize my fabric in rainbow order. 3 drawers does not fit the whole rainbow. Slightly obsessive and compulsive? yes, I realize that but I have no plans to change :)

    Creativity is best in a room filled with the things that bring you joy! I'm going to give you a tour of my sewing room today and share all my organization tips along the way!

    If you want more ideas for scrap fabric storage check out this post: Scrap Fabric Storage

    Just to the left of my sewing machine, I have all my quick grab tools. I purchased the clear organizer tray on Amazon. It has been 110% worth it to have everything in one place. I think these are mostly used to organize makeup brushes… but they work well for crafts too!

    Creativity is best in a room filled with the things that bring you joy! I'm going to give you a tour of my sewing room today and share all my organization tips along the way!

    I also have an extra light source for when I’m working in the evenings and the daylight is fading. This is handy for when I’m working on tedious projects.

    This is the lamp that I have, if you’re interested. It has different light settings so you don’t have to work by the light of 1,000 suns and you prefer a little soft reading light 🙂 Also, really happy with this investment I made!

    Creativity is best in a room filled with the things that bring you joy! I'm going to give you a tour of my sewing room today and share all my organization tips along the way!

    The last little area on my table I have that is close to an arms reach away is my big pin cushion and my flatter ironing spray.

    Creativity is best in a room filled with the things that bring you joy! I'm going to give you a tour of my sewing room today and share all my organization tips along the way!

    This stuff… THIS STUFF!…. it is a recent find of mine, but I can’t imagine why I never heard of it before. If I could stand on the street corner and shout its praises without looking silly, I totally would. It’s that good.

    Just a little spritz when you iron and ahhhhh…. perfection beyond what you thought was possible. AND IT SMELLS LOVELY too. Win-win.

    My favorite thing about my sewing room is how accessible it is and allows me to work however I please.

    I used to have a big ironing board that was from before my husband and I was married and I hated that thing. It was always in the way and it was rather precarious if you ask me. We still have it for when I actually have to iron clothes, but in my sewing room, I use this super simple solution.

    Most of what I iron is just 1-2 seams at a time… no need for the BIG OLD ironing board.

    I have a cart that I have on wheels right next to my machine. I DIY’d myself an ironing board and now I don’t even have to get up from my chair to iron a quick seam.

    Lazy? Perhaps haha… but I prefer to call it efficiency, my friend!

    Work smarter, not harder!

    Creativity is best in a room filled with the things that bring you joy! I'm going to give you a tour of my sewing room today and share all my organization tips along the way!
    Creativity is best in a room filled with the things that bring you joy! I'm going to give you a tour of my sewing room today and share all my organization tips along the way!

    The cart is from… *Ding ding ding* You guessed it! IKEA! 🙂 But I’ve also seen a really similar version for a few dollars cheaper at Walmart. We use the Walmart one in the kid’s playroom and I see no difference in quality.

    Creativity is best in a room filled with the things that bring you joy! I'm going to give you a tour of my sewing room today and share all my organization tips along the way!

    The last section of my sewing room is where I am right now as I am writing this to you today. It is the “office” part and where all of the behind the scenes technical stuff happens…

    Creativity is best in a room filled with the things that bring you joy! I'm going to give you a tour of my sewing room today and share all my organization tips along the way!
    Creativity is best in a room filled with the things that bring you joy! I'm going to give you a tour of my sewing room today and share all my organization tips along the way!

    Did you see that basket on the desk there? I love baskets to group like things together! This one holds my photography equipment. But you can round up anything and give it a home in a nice basket!

    Creativity is best in a room filled with the things that bring you joy! I'm going to give you a tour of my sewing room today and share all my organization tips along the way!

    Everything HAS a place, everything IN it’s place!

    Does that saying drive you crazy? It does my kids haha 🙂 but our home runs so much more smoothly if everything gets put back in the place it belongs… especially our shoes which tend to get separated (I mean seriously, how?)

    And I work so much more efficiently in my sewing room if I know where things go and can grab them in a flash.

    This computer work area also has one of my favorite and most used pieces of my sewing room… MY DESIGN WALL!

    Someday I will do a full tutorial on this baby, but it is really simple to make on a budget that it almost doesn’t need a tutorial. It is so easy!

    I used insulation board that you can find at a hardware store (the stuff they put behind drywall I think) and I made a sleeve out of quilt batting to go around it by sewing down each of the long sides. Boom. Done & Voila. Nothing to it, right?

    It’s sturdy, light weight and move-able… AND by creating a large sleeve of quilt batting, it is double sided! Can I get a woohoo?!

    Your fabric clings to the batting (or you can pin it for a more secure hold) and makes for a really great area to play with placement and fabric arrangements… where the dog (or the kids) won’t come and try to “help” you… not that I don’t adore the help of little hands. I’m just less keen on accepting their advice after I’ve already got it all laid out perfectly...

    Creativity is best in a room filled with the things that bring you joy! I'm going to give you a tour of my sewing room today and share all my organization tips along the way!

    Do you want to know a secret?

    Do you?

    Do you?

    Do you? 🙂

    My design board is about the same width as three KALLAX
    single bookshelves (its another IKEA product again!)

    Remember how I told you in the beginning how open my house is and if one room is messy they all look messy…. I can “hide” some of our general family office mess and other storage areas behind my design board!

    But shhh… Let’s not share that with everyone, ok? 🙂

    Creativity is best in a room filled with the things that bring you joy! I'm going to give you a tour of my sewing room today and share all my organization tips along the way!

    Whew, I feel like we need a tall glass of sweet tea after all that!

    Thank you for stopping by and taking the full tour of my sewing room! I’m, so happy that we got to share this together today and I hope you can take away some fun ideas to implement into your own sewing rooms!

    I’m always on the lookout for new and fun ideas…What is your favorite things about your own sewing space?

  • The BEST Places To Buy Fabric Online!

    I love to go shopping for fabric!… (and like a lot of quilters I know…) maybe a little too much? ….. ha… Just kidding… you can never have enough fabric, right? 😉 I have done my fair research of the best places to buy fabric online!

    I love love love fabric. Don’t you just love collecting it and using it in beautiful quilts to show it off.

    I also love a good bargain so I’ll tell you my secrets on shopping for bargain fabric too! You can also check out my tips on How I find fabric for $2 a yard!

    The qualifications I look for in Online Fabric are:

    • It MUST be high-quality quilting fabric – No cheaply made fabric that isn’t worth my time.
    • I love a good selection of Modern prints – the more I can buy from 1 store, the better I can save on my shipping.
    • It isn’t a deal breaker but it certainly helps if I can find a good coupon or FREE shipping, am I right?

    My go-to Websites for buying fabric online:

    My first go-to website is Fabric.com They have a HUUUUUGE selection of fabric in most every possible collection you can think of. I even wrote an entire blog post on Fabric.com and the evolution of online fabric shopping!

    It is a color obsessive quilter’s dream paradise because you can shop by color, fabric type, theme etc.

    However, I have found that they don’t carry a lot of the smaller more limited collection prints… so if you’re looking for the super specialized fabric you may have to dig a little deeper into the internet.

    How to find the deals: Shop clearance and closeout fabrics first. Then fill in with what you need from the full priced fabric.

    Side Note: You can also get an extra 1% discount if you sign up for an ebates account. I swear it used to be 3% so it may change again in the future. I know its not a lot, but if you do any amount of online shopping, it is totally worth signing up for. It’s FREE and you earn cash back for buying your regular purchases online. That’s it. No catch or secrets. ummm did someone say more fabric money? Yes, yes I did! I’ve been using it for about a year now and love love love it!

    FatQuarterShop is a store with us quilter’s in mind! I’m talking all the bundles, jelly rolls, layer cakes, quilt patterns, notions and fabric in one beautiful store.

    They offer FREE shipping if you spend over $80 – yes, thats kind of a high limit, but oh so easy to get to if you plan you shopping right and buy it all in one place.

    There is also a flash sale every single day that I am so tempted by every time I shop. Its 1 product every single day that is deeply discounted for 24 hours and then a new one the next day. who doesn’t love that bargain grab?

    There is also these incredibly essential band-aids that no quilter should be without! And at $4.48/box… well we can heal any needle prick, can’t we?

    Hawthorne Supply Co has long been a favorite of mine! It is run by a husband and wife that are just adorable.

    They have a good selection of sale fabrics and their site is absolutely beautiful and easy to navigate to find exactly what you are looking for quickly.

    They also have great giveaways on their site frequently… I have never been fortunate enough to win one but… I must keep trying because you never know, right?

    Keepsake Quilting is a wonderful site for quilting fabrics! Oh, they have a fine collection, yes they do!

    They also have a great selection of notions, patterns and clearance fabrics too!

    I couldn’t help it… their name drew me in bu their fabric selection brings me back again and again. Thousands of bolts is just what their name says – so much fabric!

    … and it is organized by color too so its easy to pull together the look you have in your mind when you are planning a quilt but don’t know exactly what you need.

    They also have specials on fabrics for just over $5 a yard!

    Clair’s Fabrics is a lovely (Australian) shop. It is full of such wonderful modern and contemporary prints and fabrics. I feel like I get lost in a wonderland looking through the selections!

    You can even shop by designer which is a nice touch if you have your favorites and want to shop quick to see whats new!

    First of all… a Pink Castle logo! duh…. second of all, really great deals on pre-cuts and bundles! Pink Castle Fabrics is a hot spot for quick and easy shopping.

    Bloomerie is a super well organized online shopping experience and I have never had one single issue with my order.

    I usually find several fun finds in their sale section as well

    This darling website is just that… everything is just adorable and I want it all. The people who work to curate the bundles at Cottoneer are absolutely gifted in what they do. I envy their talents with all my fabric loving heart.

    Fabricworm has been in the business of fabric obsessing for over 10 years now. I love their selection of Japanese Imported fabrics.

    One of my last (but certainly only scratching the surface of online fabric shopping) is Connecting Threads.

    First of all – free shipping on your first order when you join their email list (yay!)

    Once you’re in, you can shop by color, fabric use, type etc. This makes it easy to go straight to what you’re looking for.

    *Whew!* Thats was a little long winded but I hope you have found a new store or two to browse through this evening 🙂 Go shopping and enjoy the best places to buy fabric online!

    There are so many fabrics out there just waiting for you to scoop them up and turn them into something wonderful!

    What about you? Where are you favorite places to shop for fabric?

  • Tricks to Sewing Straight Seams

    Sometimes I wish for the simplest things in life – like sewing a line with your sewing machine and expecting it to be straight. That shouldn’t be too much to ask, right?… wrong. – But fear not! – For today I am going to share with you my tricks to sewing straight seams!

    When it doesn’t happen the way you want it to, you have to find ways to make it happen.

    Frustrated with wavering seams? Try these 3 tricks to sewing straight seams and go live your happy carefree life!

    Sewing straight and even lines when you’re piecing a quilt or following a sewing pattern is kind of… how can I put it nicely?

    Absolutely positively non-negotiable… yeah. Exactly that.

    Even the slightest waver of your stitches and you’re suddenly the queen of fudging it to make things right and hoping no-one notices.

    Or you just have to come to terms with the fact that this beautiful piece that you dreamed of in the planning stages just isn’t going to perfect. You either have to learn to live with it, or dramatically crumple it up and put it in the corner to collect dust until you have the patience to pull it out again.

    I mean, maybe its because I am a mom and therefore I sometimes have the defiant mentality of a toddler, but I am the boss of my quilts… not the other way around. Sometimes there are tantrums too, but that’s a whole different post.

    Frustrated with wavering seams? Try these 3 tricks to sewing straight seams and go live your happy carefree life!

    Anyways, today I am going to share with you a few different tricks to sewing straight seams so you won’t have to throw a tantrum yourself!

    You’re welcome 🙂

    It is worth mentioning that if your fabric cuts are not straight and even… you might as well quit reading now.

    How can you judge the straightness of your seams if your fabric is all wonky?

    Being able to have a clear guide for your fabric is one of the biggest keys in sewing straight lines.

    Here is a fact: Your needle sews a straight line… Always.

    It only goes up and down… so the real culprit in your wonky sewing lines is your fabric.

    If your fabric is moving around, your lines are going to be off and not straight.

    You need to find a way to tame your fabric so you can feed it into your sewing machine correctly.

    I have a few helpful suggestions for you!

    HOW TO SEW STRAIGHT SEAMS

    The first one I’m going to share with you is an invention of my own creation because I got fed up with following the faded and almost nonexistent lines on my sewing machine.

    The Straight Sewing Guide

    In a quick moment of inspiration, my designer background served me well and I created this Straight Sewing Guide. I know I’m not the only one who struggles with this so I made it available to us all!

    It is a vinyl sticker that you adhere to your sewing machine. It gives you longer guidelines, allowing you to keep your fabric straight while sewing.

    [Notice the front, middle and back guidelines!] –Yes! I love them too!

    You can grab your very own Straight Sewing Guide in my shop! Also, I am offering worldwide free shipping for my sewing friends around the globe! 🙂

    WASHI-Tape Guidelines

    Another trick that I used for a long time was simple line of Washi-tape.

    It may not be fancy, but hey… it did its job. If you’re not yet a fan of washi-tape… it is an amazing low-tack decorative tape that is super popular in the craft circles… just… imagine the possibilities of pretty tape!

    I used the washi-tape to to make my 1/4″ seam guide on my sewing machine. This gives you a guideline to keep your fabric aligned to.

    Provided your cuts are accurate, your seams will also be straight.

    How to MASTER the quarter inch seam. Want to improve your beginner/intermediate sewing skills? do this and you'll be well on your way

    As you can see in the image above, I had to take the tape off every single time I wanted to change out my bobbin thread, but you could just use a craft knife and make a few slits in the tape to make it easier on yourself.

    Quarter Inch Machine Foot

    This is a little more focused than just a straight seam, but if you’ll notice on the quarter inch foot, there is a little guide that keeps your fabric in check.

    How to MASTER the quarter inch seam. Want to improve your beginner/intermediate sewing skills? do this and you'll be well on your way

    As long as your fabric stays nicely aligned with the little guide, you should have beautiful quarter inch seams!

    I wrote another post on Mastering the Quarter Inch Seam. It goes into more detail about why you should and also shares some other tips for how you can really be the master of your quarter inch seams!

    I hope these Tricks to Sewing Straight Seams help you master it.

    Remember…

    You are the boss of your quilt… not the other way around! 🙂

    Happy Sewing!

    Frustrated with wavering seams? Try these 3 tricks to sewing straight seams and go live your happy carefree life!
  • Jelly Roll Quilt Size Guide

    I just had to share this pretty queen sized jelly roll quilt with you that I recently finished. Its almost too pretty to be the on the back!

    Here is the front of the quilt. It is a quilt for my daughter’s bed. She is 10 and *loves* unicorns… I mean, who doesn’t, right?

    This is a pattern I designed myself. I’ve thought about jazzing it up with some instructions and releasing it on my site, what do you think? Are you interested?

    I’ve been collecting Unicorn fabric for about a year now… not just any unicorn fabric though, neon like the sunset sky, neon pink! Needless to say, I ended up with way more than I needed, but a healthy collection to choose from. FYI: Most of the neon fabric came from different Cotton + Steel Fabrics.

    So… I could keep going… Quilts are super fun to take pictures of! 🙂

    But the real star of today’s post is totally this queen-sized jelly roll quilt that I made for the back of my unicorn fabric quilt!

    Just look at how lovely all these colors look together!

    I made my strips 2.5″ wide x 40″. It is a TON of strips!

    I love the way it turned out! It’s a tough call to say if I would do them at 2.5″ again or not if I decide to jelly roll another quilt.

    In hindsight, I SHOULD have made them a little larger, maybe 3.5″ or even 5″… There is a LOT of fabric wasted in the seams of this quilt.

    Also, this long initial piecing strip of fabric went on for at least a few miles, I swear 😉

    I was inspired to create something fun and different with this quilt… a little off the normal ‘jelly roll’ method! And look what I did!

    Do you see the little smaller blocks? This is probably my most favorite detail to the quilt back. I cut some of my strip up into 2.5″ squares and randomly placed them in with my longer strips.

    When I say randomly, I really mean randomly! Always in groups of 4 to give it a little more visual interest and tried not to let similar fabrics “touch” (when I say this I feel like a toddler who can’t have the peas on her plate touch her pasta or the ketchup touch the chicken without having a meltdown”) I just see no point in putting the same fabrics next to each other because it will look like one continuous piece of fabric!

    The result is this beautiful mix of long strips in traditional jelly roll fashion with some confetti of smaller blocks to jazz it up and make it fun!

    Here is a formula that I used to determine the sizing for my Jelly Roll Quilt…

    I suggest you take a moment and do your math properly because what I did was just jump in and I ended up doing a little more figuring out in the middle than I probably should have. — Live and learn, right?

    The Jelly Roll Formula (AKA Do this first!)

    A  formula to just figure out how many strips you need for your Jelly Roll Race Quilt is:

    (inches wide x number of rows) / 40″ strip = number of strips needed

    *Number of rows is your quilt height divided by the height of your jelly roll – ex: a 2.5″ jelly roll strip will be a 2″ height strip with the seam allowance taken out.*

    *Also, while your fabric may be a little wider than 40″, remember that you’ll take out the selvage and you’ll also take out a bit for seam allowance.*

    Remember, the length will be determined by the number of rows and that is a set number. Only the width is completely flexible.

    To add to your length you will have to make two separate pieces and sew them together.

    If you think you could run a little short, just add in a few extra strips to be safe!

    Other Jelly Roll Size Guides

    Maybe you don’t want to make a queen sized quilt? Here are other guidelines for Jelly roll quilts!

    Baby sized Jelly Roll Quilt

    (20) 40″ strips – Your finished top will be a little bigger than 32.5″ x 50″. You can also cut those strips in half ‐ from (20) 40” strips to (40) 20” strips so your small quilt will have a more mixed stripe look. Shorter strips = more busy colors and fabric variation.

    Lap Sized Jelly Roll Quilt

    (40) 40″ strips or (80) 20″ Strips – This will yield a lap quilt that is about 50″x 64.5″.

    Twin Sized Jelly Roll Quilt

    (70) 40″ strips, or (140) 20″ strip – Your finished size will be close to 64″ x 88″.

    Note: Make this by creating two sets with  35 strips. This will make two quilt tops that are approximately 87.5″ x 32.5″, and then sew them together to make your 87.5”x 64.5″ top.

    Queen Sized Jelly Roll

    (105) 40″ strips, or (210) 20″ strips – Standard Queen size is 86 x 93.

    See the method used in the twin sized quilt – Use 3 sets of 35 strips to make 3 segments measuring 87.5″ x 32.5″ and then sew together side by side. Your finished top size will be approx. 87.5″ x 96.5″. You can trim down or you can leave it a little larger for maximum snuggle quilt size!

    King Size Jelly Roll

    (120) 40″ strips, or (240) 20″ strips ‐ Standard King size is 104″ x 93″. We can create one that is 100″ x 96.5″ using the jelly roll method and then you can add borders or sashing to make it a little larger.

    Make it in 3 segments – 40 strips in each. Stop when each segment is 100″ x 32.5″. Sew all three together and you’ll have your king sized top!

    To make a custom sized jelly roll…..

    This is the general formula you should use…

    [(Length/2) x Width]/40 = number of strips you’ll need!

    I hope that helps you create your very own custom sized jelly roll quilts!

    Let me know if you use this formula and if you have any questions!

    Happy Sewing!

    Custom sized jelly roll quilt? Here is the magic formula I use! Works every time and is so simple! + a look at the queen sized jelly roll I made with a design twist
  • What Quilting Rulers Should I buy?

    Yay for you! The decision to buy the right quilting tools is a big step towards being a really great quilter! But “which quilting rulers should I buy?” is often the very first questions most people ask.

    *If you are more advanced in quilting, I have suggestions for FMQ (free motion quilting) and longarm quilting rulers towards the bottom of this post!*

    I mean honestly, when you’re staring at a hundred different shapes and sizes… circles and squares, normal looking rulers and ones that look like they’re straight out of some sci-fi fiction glowing universe… yeah, it can totally get overwhelming. I get you…

    If you need help deciding what rulers are the best bang for your buck in quilting, you are in luck! :) These are the essentials that I use on every single quilt.

    I’m going to go through the reasons you should own at least a few (hint: you don’t need ALL of them!), exactly which ones you absolutely should own and what to expect cost wise because…

    Quilting tools can add up real fast if you’re easily swayed into buying everything that is pretty and promises to make you the greatest quilter alive. So let’s not forget that aspect! Unless you’re a billionaire chances are most likely that budgeting is something that you keep in check.
    (if you are a billionaire can we be friends? I make really great cookies and I’m totally a hilarious wing woman.)

    So let’s go through it, shall we?

    Why do I need Quilting Rulers/Guides?

    With the right tools, you’ll find that your work is easier and your skills and accuracy will soar skyward! – I am not even joking.

    If you’ve quilted for even a little bit, you’ll know that accuracy is important… no, wait. It is the golden key to quilting, because if you’re off even a little bit… The puzzle pieces don’t line up. Things can get all askew…. Then you are spending time with the darn seam ripper again and… and…. aaaannnddd…. ARGH!

    *Don’t even get me started….*

    • Quilting Rulers are clear. You can see through them to get precision that is un-matchable to whatever straight edge you can find in your house that you’ve been telling yourself will ‘work for now‘.
    • Fussy cutting is a breeze when you can see straight through your ruler… oh yes, it is magical! 😉
    • The measurements and guides are marked clearly and are easy to follow. – My personal favorites are the neon tools, from The Gadget Girls (http://www.thegadgetgirls.com). Not only are they bright and fun colors, but the markings are actually etched into the tools so the guides actually glow nice and bright no matter what fabric you have behind it!
    • I don’t have scientific reasoning for this but when you have the right tools… you just work better, smarter and more efficient. Your brain energy isn’t spent trying to figure out how you can DIY this or that or get by without… you have the focus to put into your quilting!

    I held off for the longest time on purchasing quilting rulers. Being a young mom – (baby formula will eat your budget alive!) I felt guilty spending even more money on myself because I was already conservatively buying fabric when I could. I just couldn’t justify it… until… another quilter friend said:

    How are you going to cook if you don’t have a stove? You could go build a fire in the backyard and get by, yes, but wouldn’t the investment on proper cookware be worth more than getting by and dealing with the current limits and frustration?

    Of course, you don’t need a stove to quilt, (and we’re well equipped in our kitchen thanks to the foodnetwork making my husband and I feel like we could totally kill it on Iron Chef) but I heard her loud and clear.

    I was wasting time using things around the house to cut my straight edges – and if you know me, then you know that Christen does NOT like to waste time. At all. I like to be a productive machine and live my life to the fullest volume possible! Any wasted time away from my family is unacceptable.

    I was blinded by the thought of not wanting to spend a little money on myself and my passion: quilting.

    Do you hear me on this?

    **PS – I’m going to link these to the rulers on the Gadget girls website because I really feel like of all the rulers that I have owned, they are the best quality and my personal favorite 🙂

    Ok, so… Bare Minimum – What do I need?

    Let me make this next part clear…. you don’t have to go out and buy everything in the world or spend a fortune right this very second. And I’m not just saying that to make you feel good. I mean it. Don’t think you have to spend a ton of money to be good at quilting! You can do a whole lot with just a little!

    If you want to start your collection of rulers and you are ready to make that jump, here is what I suggest. Pick and choose a la carte what fits your needs:

    6″x12″ Ruler – This ruler is probably my best friend in the sewing room (but don’t tell the others that, ok?) It is an easy size to square up your littles and make those quick cuts. All the guidelines are invaluble!

    6″x24″ Ruler – I know what you’re thinking… “Isn’t that almost like the 6″x12″?” and yes, you’re right EXCEPT that your fabric is 40″ wide and folded in half, I can use this big daddy ruler to make one single clean cut all the way across my fabric… I am like a genie. It is AMAZING. I have never once regretted purchasing this ruler. I also use it to help square up my quilt. – It gets used on every single quilt i make.

    Even-ups or Square Rulers – These beauties are pretty much the crown jewels of my quilting blocks. They come in a variety of sizes and shapes. As you can see, they already have the seam allowance accounted for and they make squaring up 458 (yep…I did that…) 2″ blocks and HST a breeze.

    I would suggest at minimum buying the even measurements – 2″, 4″, 6″, and 10″ or 12″ – You can buy every size in between and even larger for t-shirt quilts that you want to make as easy as possible.

    Pssst: they also come in triangles and hexagons AND half-hexies! (you have to scroll through the diff pages on the website to see them all) – *Swoon* OMG! I know, girl. Perfect triangles with like no effort… surely we must be dreaming, but no. It is totally real and it is totally wonderful.

    How much should I look to spend?

    This is always a question people ask and this is always where I have a hard time answering.

    Usually, rulers are anywhere from $12-$30ish each. Some are more, it just depends on the purpose and the size of the ruler.

    Honestly, buy what you can out of the list I mentioned above. If you can’t buy them all, don’t sweat it. There are so many different ones out there but you will be doing great with just the essentials!

    Start with the 6″x12″ and really work that ruler! If you use it for a little bit, you may get a better idea of what you should buy next based on what your most used size pieces are.

    Is a holiday coming up? Your Birthday? Christmas? …um… Arbor day, perhaps? Ask someone you love for what you need (nicely)! I don’t want to hurt any feelings but none of us NEED another pretty candle, do we?

    I really hope you found this guide to rulers useful. If you are hungry for more, I will be making a video on rulers really soon. I’ll be including the ways I use my rulers plus some tips to store them and keep them essential in your sewing room!

    You can check out my YouTube channel here.

    A Word to my FMQ and Longarm Quilters…

    If you're looking to up your quilting game with some new tools, you're in luck! Don't just go buy what you THINK is going to be useful... read this first so you KNOW from a seasoned quilter what is going to be the best bang for your buck!

    YOU! My lovely beautiful creative quilters, you…. You are amazing and I am truly inspired by the beauty that you create… are you looking to up your quiling ruler collection a little bit too?

    FMQ does not have to be impulsive or make it up as you go – You can make it a little more structured with quilting rulers that you trace around either with your needle or a fabric marker.

    You’ll get drool worthy perfect quilting patterns that you can then quilt on your machine! The classic baptist fan pattern? A cinch when you have this right here.

    Check out the remarkables section on the Gadget Girl’s website for every shape you could possibly imagine!

    With these tools, your quilting is going to be so lit… which means really really awesome.

    Let me know what you think!

    These are 6 Quilting tools that I can't live without in my sewing room!