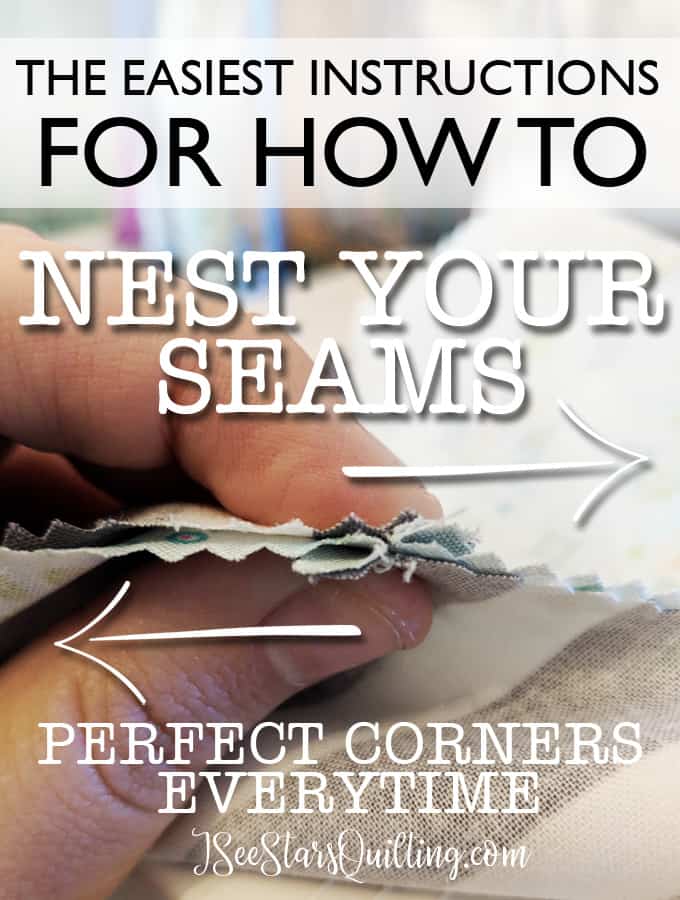
This is powerful-quilt-skill-altering-stuff here today, happy people! We’re going to learn one of my favorite tricks in quilting: How to Nest Your Seams.
(If you’re impatient, there is a quick video at the bottom of this post!)
Are you ready for this? Because It is going to be great!
We’re going to dive into the what, why and how of it all.
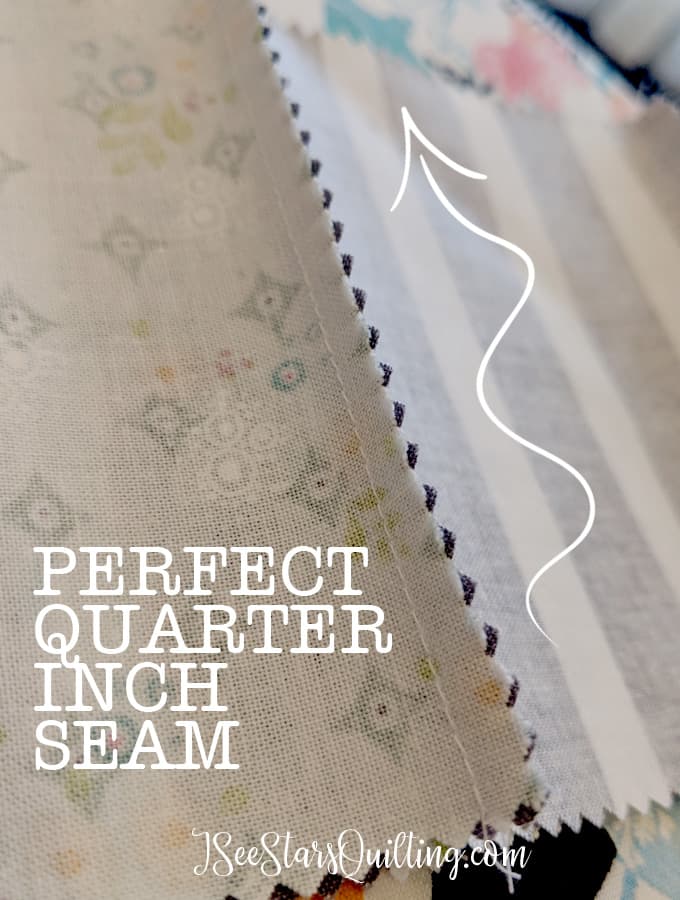
First… make sure your seam allowances are all the same measurement. Your seams will not line up if you’re off in your seam allowances! For tips on that, you can read more about mastering that skill in this post: Mastering The Quarter Inch Seam
What is nesting your seams?
Nesting your seams starts with how you press your seams after you sew.
Yes, I’m going to be one of those pesky quilters that tells you how important it is! A few years ago, I was on the opposite side of the fence and you couldn’t make me touch an iron on each and every seam. I learned my lesson and my quilting has improved so so much since then! So I don’t want to hear your whining. Just suck it up and do it, ok?
Some quilters prefer to press their seams open to make the quilt top lay flatter… it is a personal preference, but I usually press my seams to one side, which allows me to nest my seams and have nice tight hold between my seams without using pins.
Ok now that we’ve all decided that ironing is best…. Start by ironing all your seams like the picture below. Each row will alternate seam pressing directions.
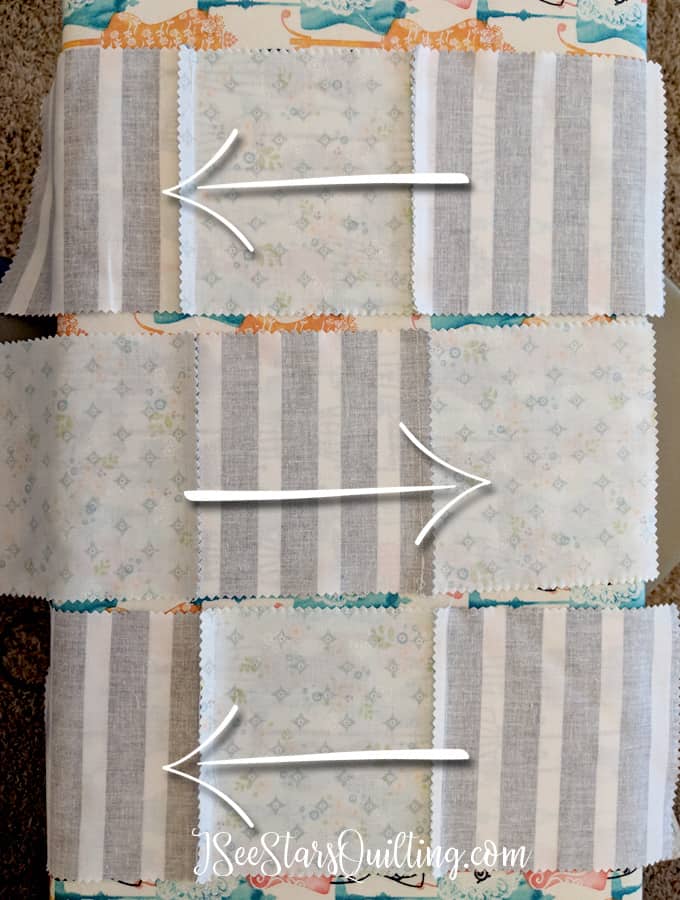
Next, you’re going to sew your rows/columns together!
Why Should you Nest Your Seams?
I think this one is obvious and probrobly why you came to my site in the first place, but really… we want out quilts to be as perfect as we possibly can get them to be, right?
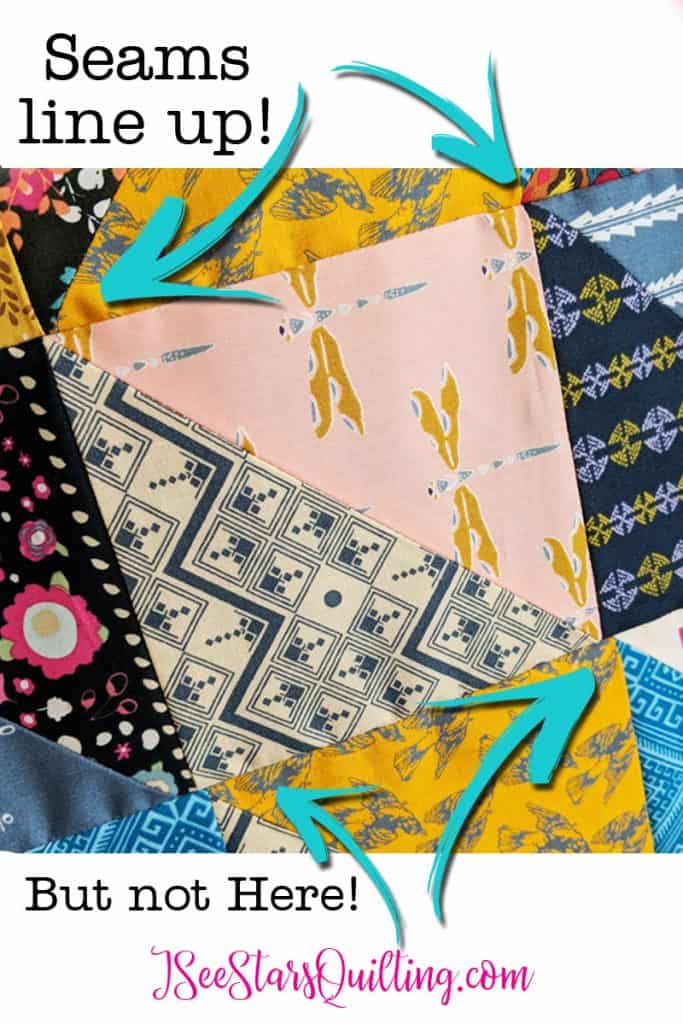
Take a look at this quilt I did a while back, you will see the glaringly obvious error. And we don’t want our seams to be off, right? I COULD argue that its supposed to be that way… modern quilting does allow us a lot of liberties in the name of art, but you and I both know the pattern didn’t call for it to be that way.
How to Nest Your Seams?
So let’s get to fixing it so the above issue doesn’t sneak up on you!
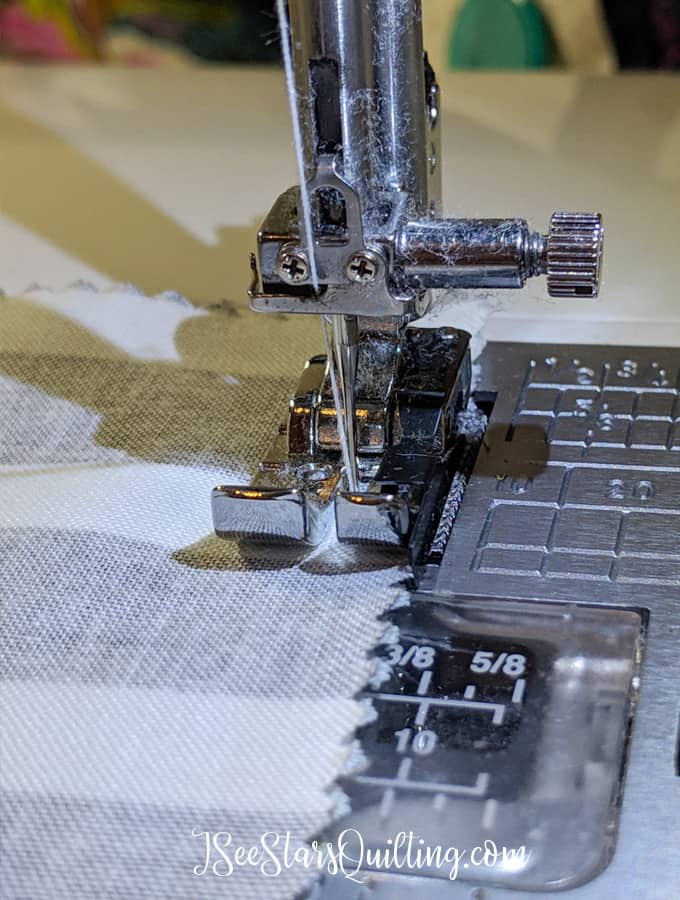
With your fingers, I want you to line up the seams. Rub it between your fingers just slightly. You’ll be able to feel it when that seam finds its sweet spot! The seams will nestle in right next to each other.
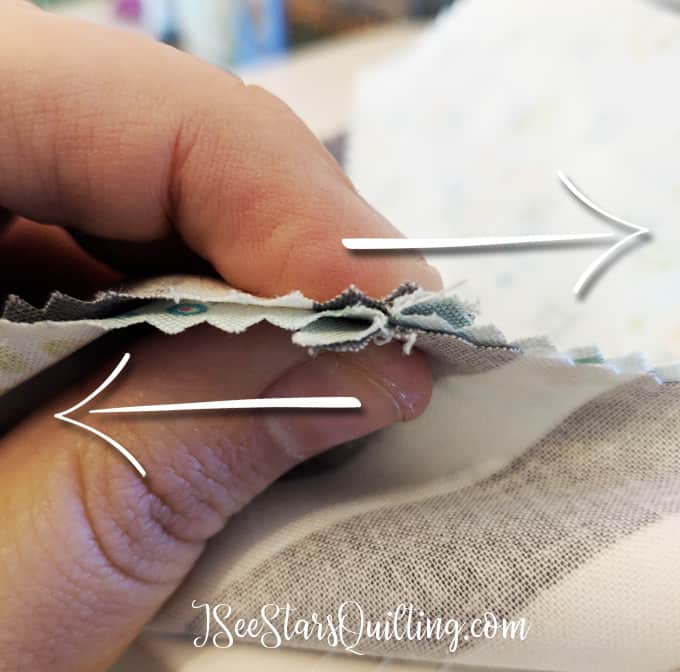
You can put a pin in it if you like but I want you to still hold onto it with your fingers when you sew because its the absolute worst to sew a whole long line of a seam only to find out a few of the little guys have shifted and then out goes the seam ripper (and my grumpy side).
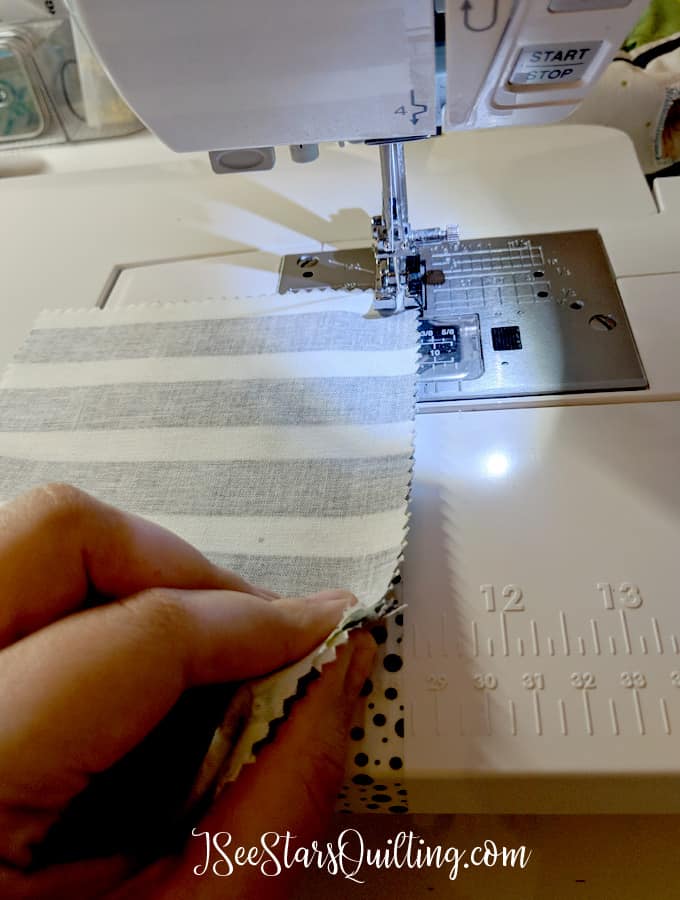
Pinch the seam between your fingers while you’re sewing so that it’ll be perfect and the fabric will be evenly distributed in between each little nest.
When you come to it, make sure the fabric doesn’t shift. This may take a few times to get comfortable with but I rarely have to check this anymore because I’ve got this and it is like second nature.
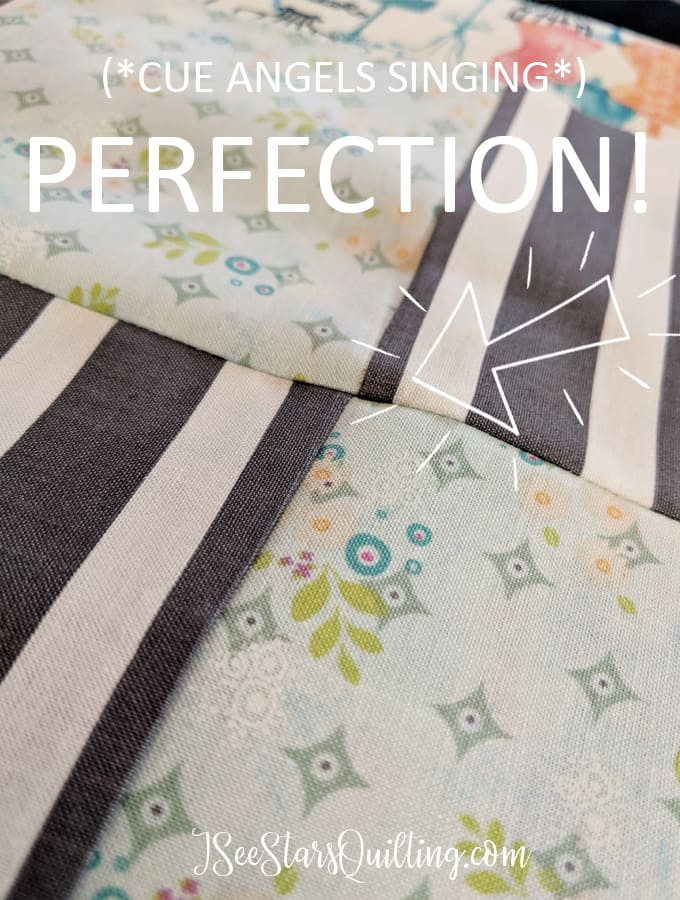
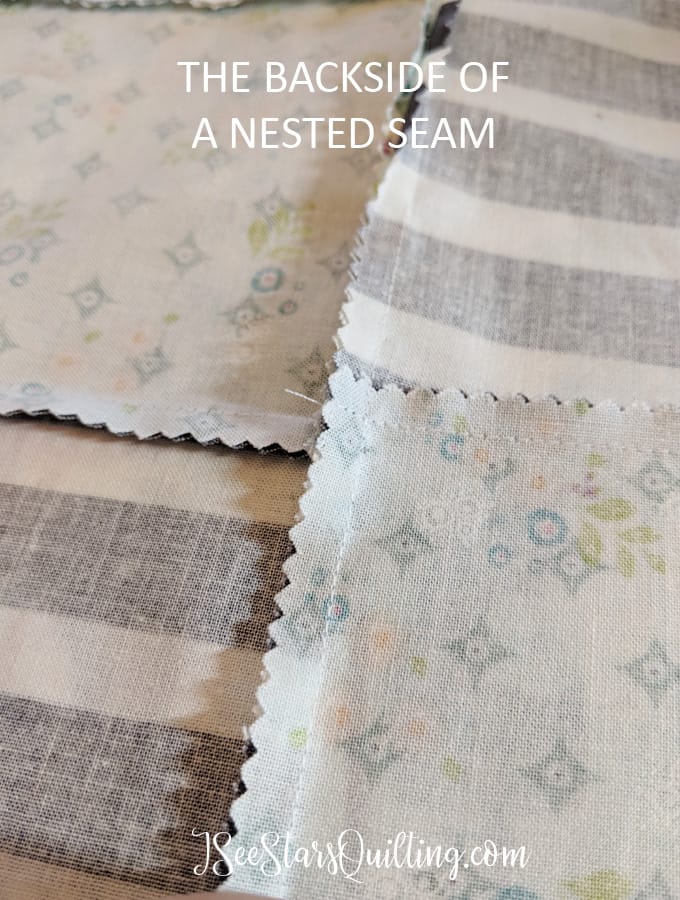
Flip it over, press your new seam anyway you like and VOILA!
This little trick will save you so much time and really help to give your quilt that polished look! (one more rookie mistake will vanish from your future quilts!)
Let me know what you think in the comments after you give this a shot, won’t you? I love to hear from you!