Christen Phillips

  • Sewing for Good: Sew Powerful

    Do you like to make a difference? Do you like knowing that you’re contributing to the greater good of this world? – I knew that I liked you. 🙂 I really love making things for all my loved ones but I also like what I like to call “sewing for good”.

    Sewing for good is: Sewing to spread the warmth of a handmade gift to someone in need.

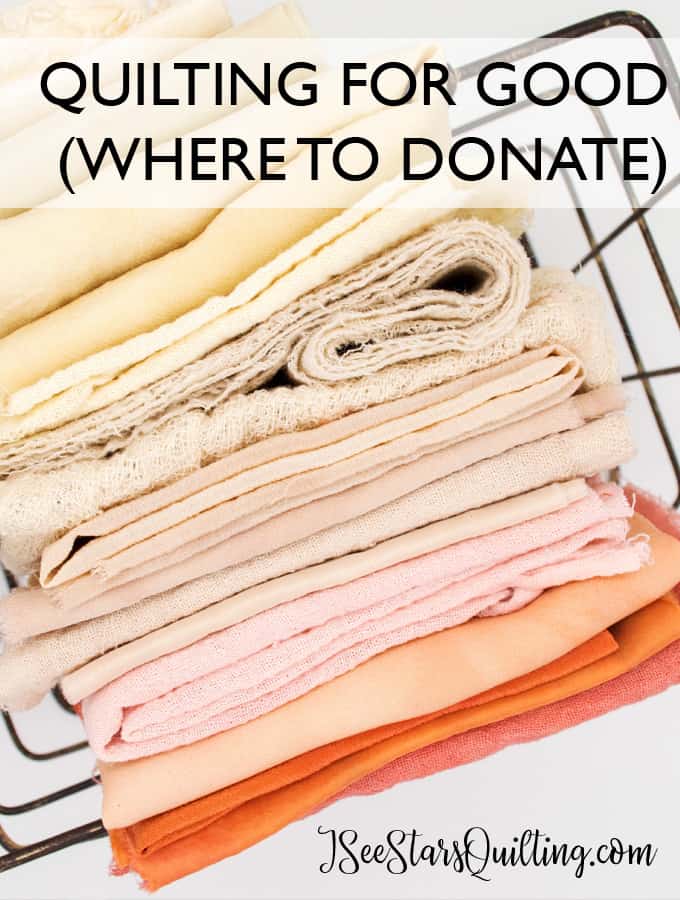
    There are so many different organizations that will gladly accept your handmade quits and sewing projects.

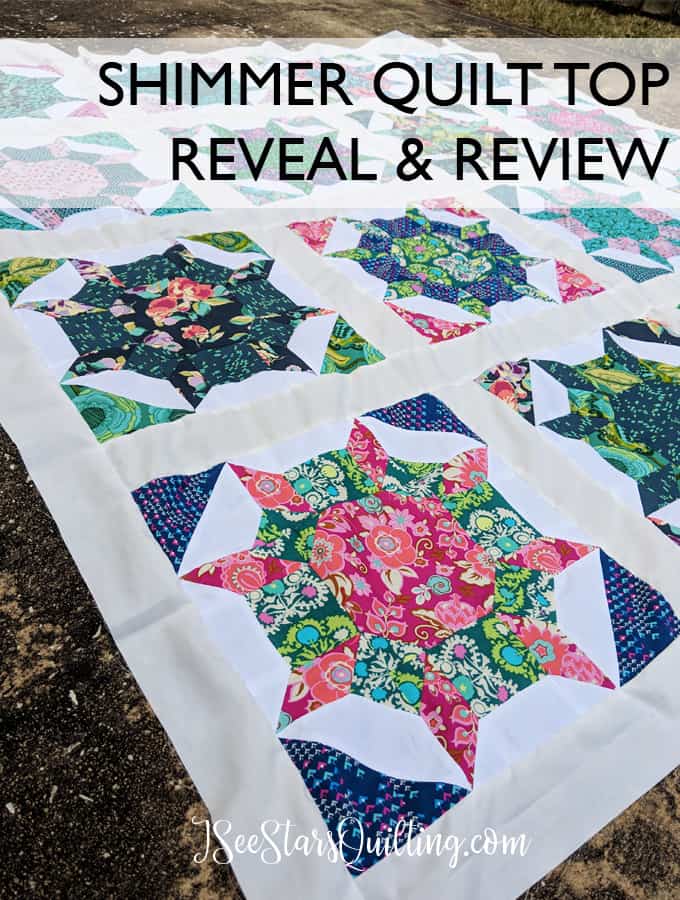
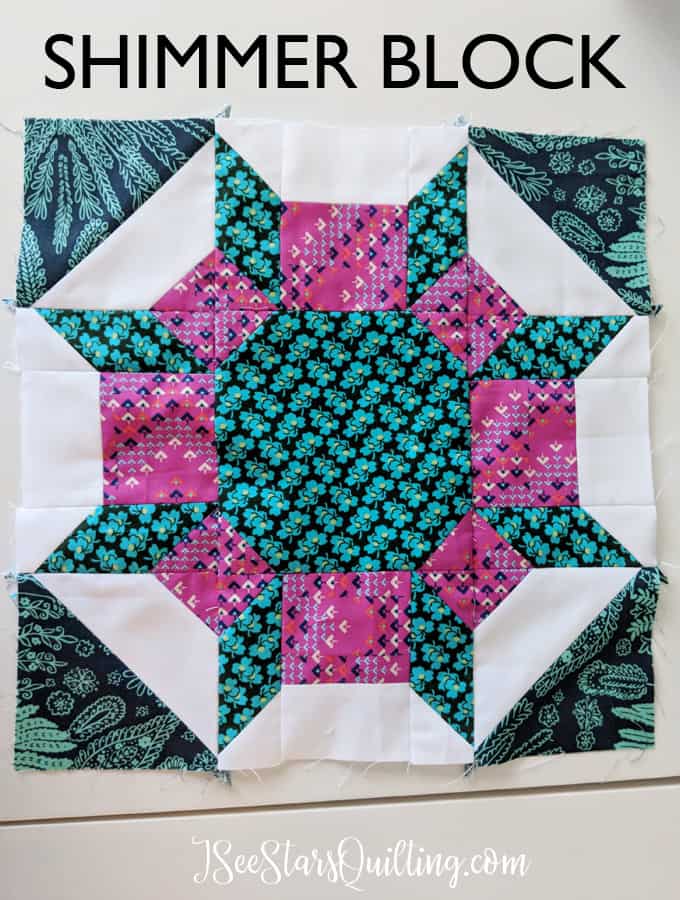
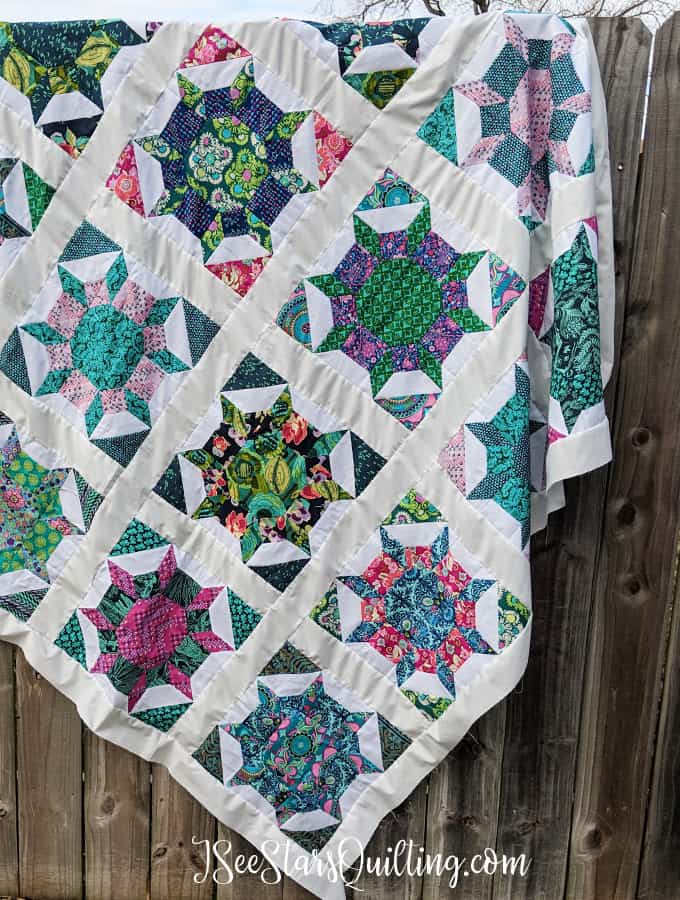
    One of my more popular posts is about where to donate quilts. It warms my heart to know that there are so many other quilters out there searching for organizations to donate their beautiful handmade quilts to.

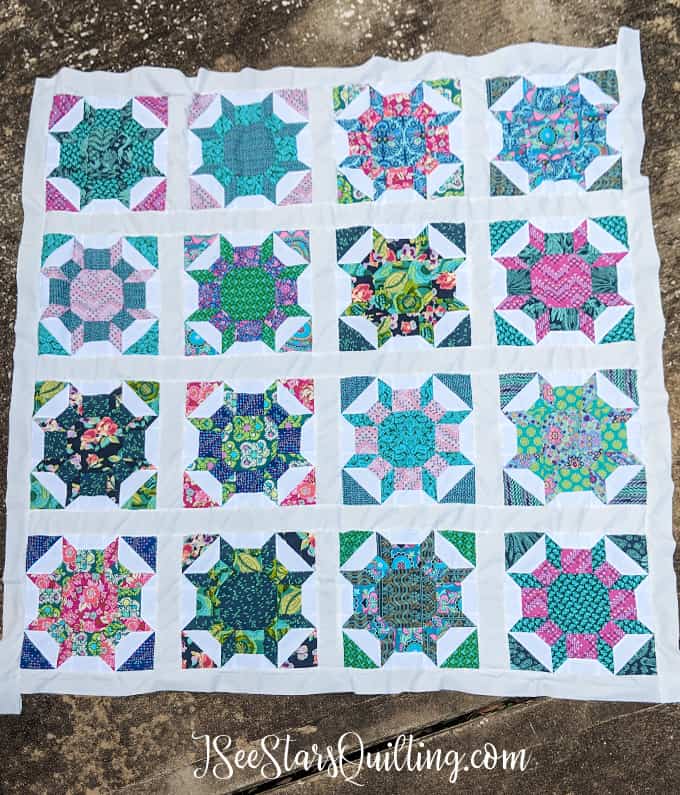
    I also shared pictures of this quilt that I donated in 2018 in another post. (I’ll be releasing the pattern for it in my shop this month!)

    As a family, we sponsor two children in Aftrica through World Vision. Soloman is a little boy in Mali and Cendrine is a little girl in Burundi. My children love our “far away family members” and we write to them and send them little trinkets often. *fun fact – Each of our sponsored family members have the same exact birthday as my children.*

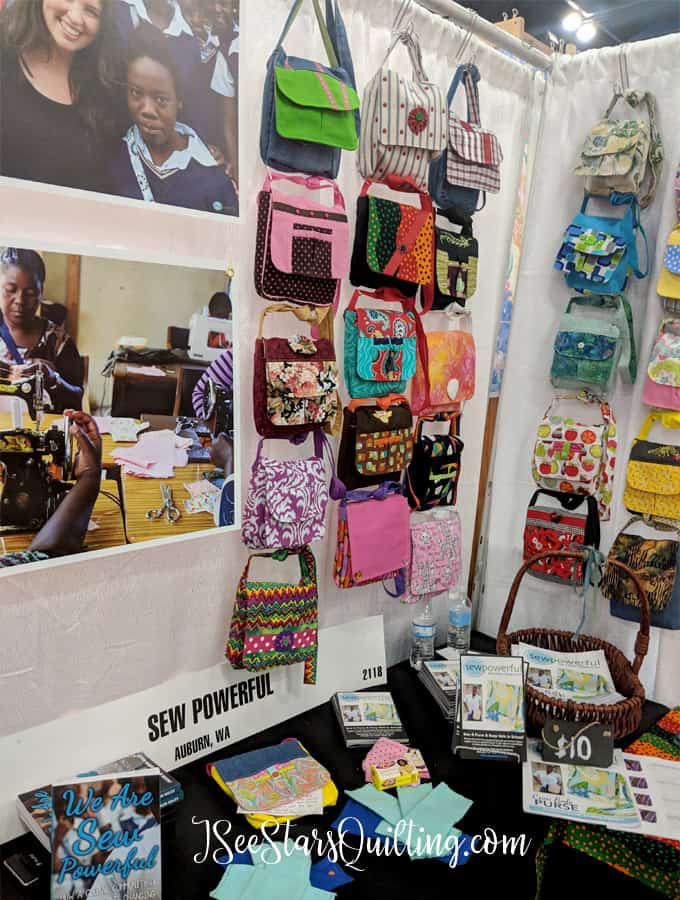
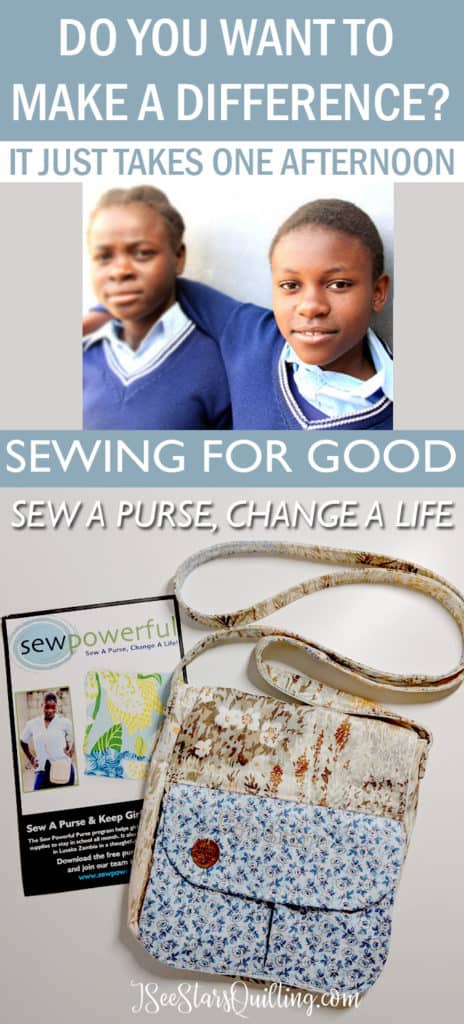
    I first met the company that I am going to share with you today at the International Quilt Festival last year and they have a great need for seamstresses!

    Sew Powerful is a "sewing for good" organization that helps break the cycle of poverty and they need your help! Download the FREE purse pattern and change a life!

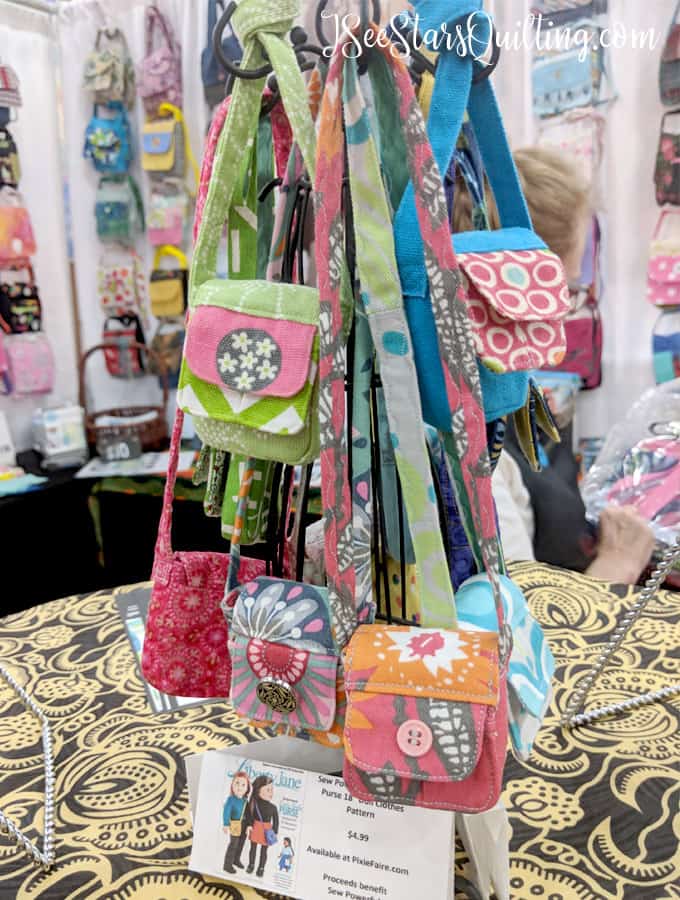
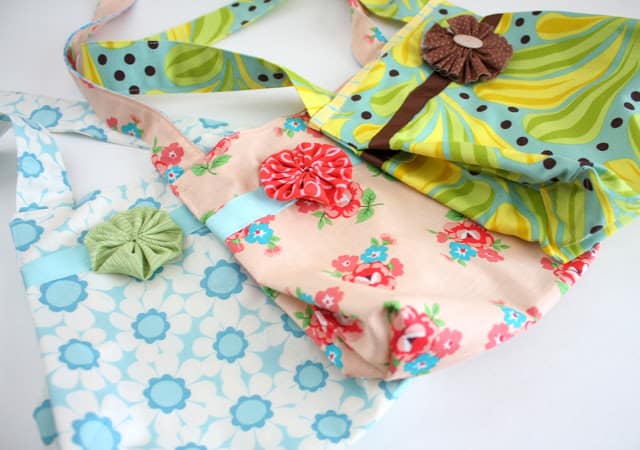
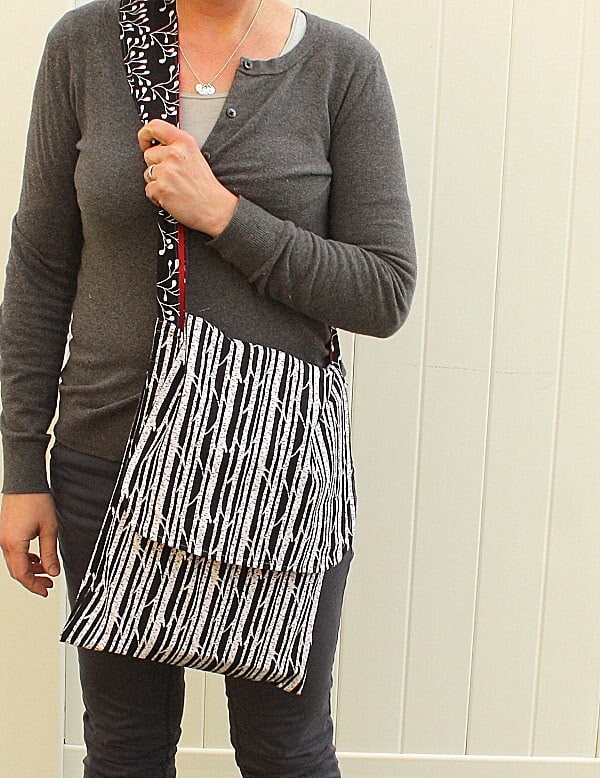
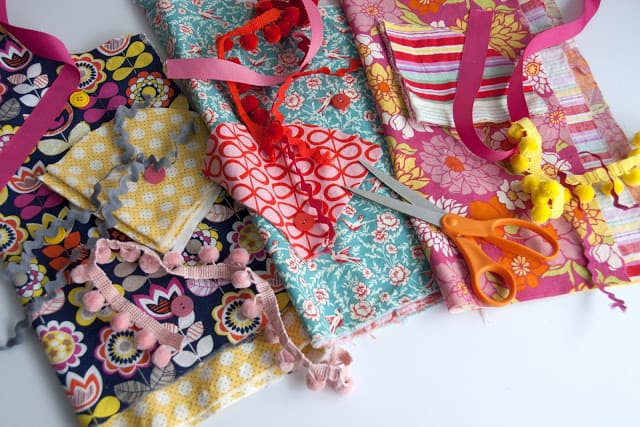
    I was drawn to this happy colorful booth full of these beautiful handmade purses! And I immediately thought of Cendrine and how perfect one of these purses would be for her! I hoped to purchase a pattern or something.

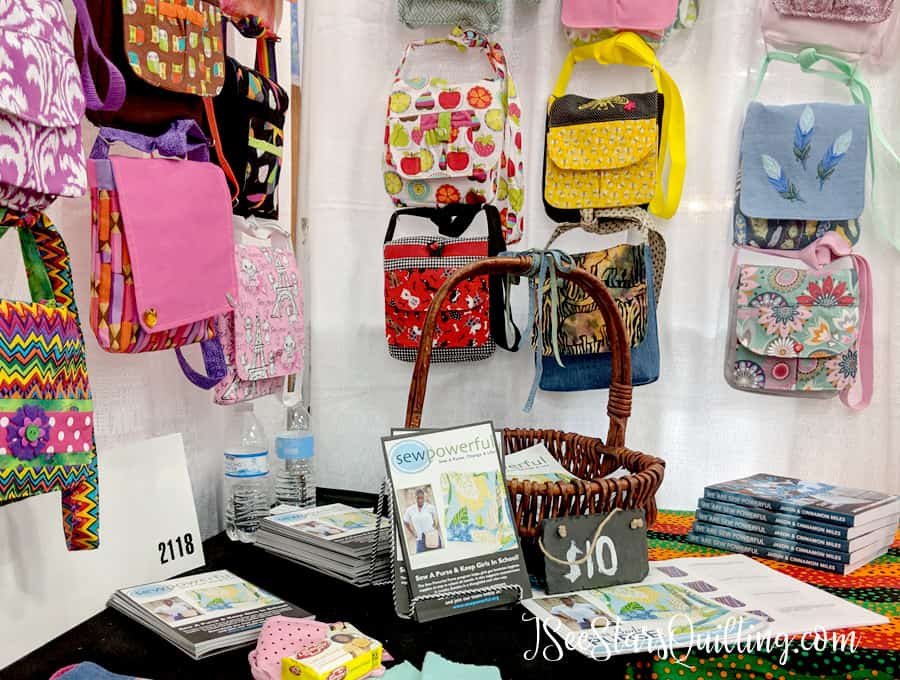
    What I found in talking to the woman who was working the booth was a company that had a heart for girls and a mission for serious compassion.

    They want to help Lusaka Zamia, one of the world’s worst striken areas of poverty, in a big way… by giving the children a chance. You can read their entire mission statement here.

    Sew Poweful has a mission to combat extreme poverty.

    Sew Powerful trains and equips adults in Lusaka Zambia with good paying jobs. They learn to create school uniforms, reusable feminine hygiene products and soap. Each of these products is designed to keep kids in school and enable academic achievement. Success and greater potential to break out of the poverty cycle is actually attainable with the right system in place.

    How amazing is that?

    …And all the purses? They are the perfect size package for the reusable feminine hygiene supplies that are distributed to the girls in health classes!

    I was immediately in love with SewPowerful. I knew I had to make these bags, for Cendrine and for other girls too.

    The pattern for these bags is FREE on their website!

    You can Download the Pattern for FREE here

    If you’re one of my beloved quilters that is a little skeptical about sewing a purse, you can worry not. They have a video tutorial that goes right along with the pattern to show you exactly how to do everything!

    I mean how happy do these purses look? Who doesn’t know a little girl who wouldn’t be over the moon to receive one of these?

    I started my purse this weekend and though I fumbled just a little bit (silly mistakes because my brain is not as used to purses as it is to quilts). I found the pattern to be really easy an super easy to follow!

    There is an address on your pattern download for you to mail your completed purse(s) to and they will distribute them to the girls in need.

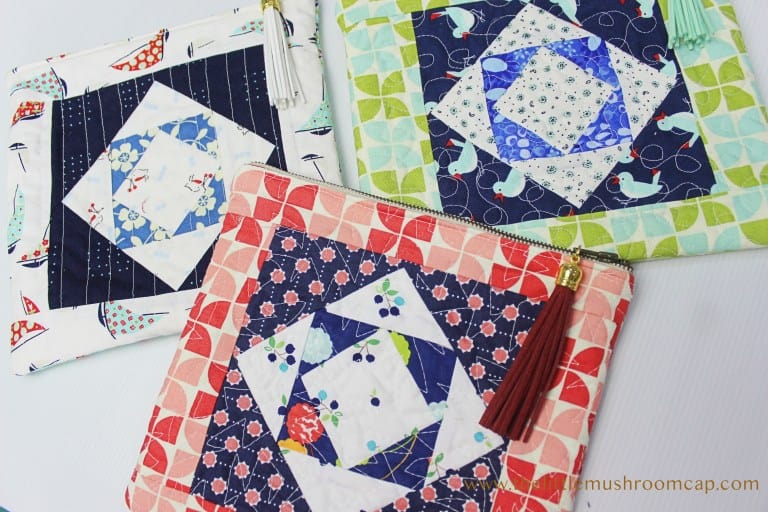
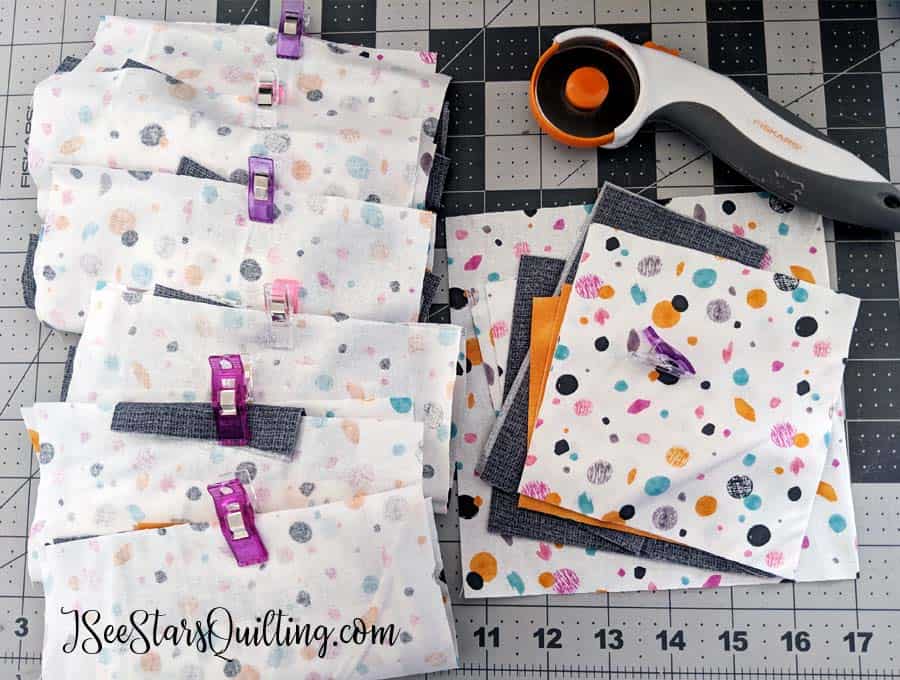
    Pictures of my Purse for Cendrine

    I thought I would share a few pictures of my purse process so you can see a little bit of the in-between steps. 🙂

    Sew Powerful is a "sewing for good" organization that helps break the cycle of poverty and they need your help! Download the FREE purse pattern and change a life!
    Sew Powerful is a "sewing for good" organization that helps break the cycle of poverty and they need your help! Download the FREE purse pattern and change a life!

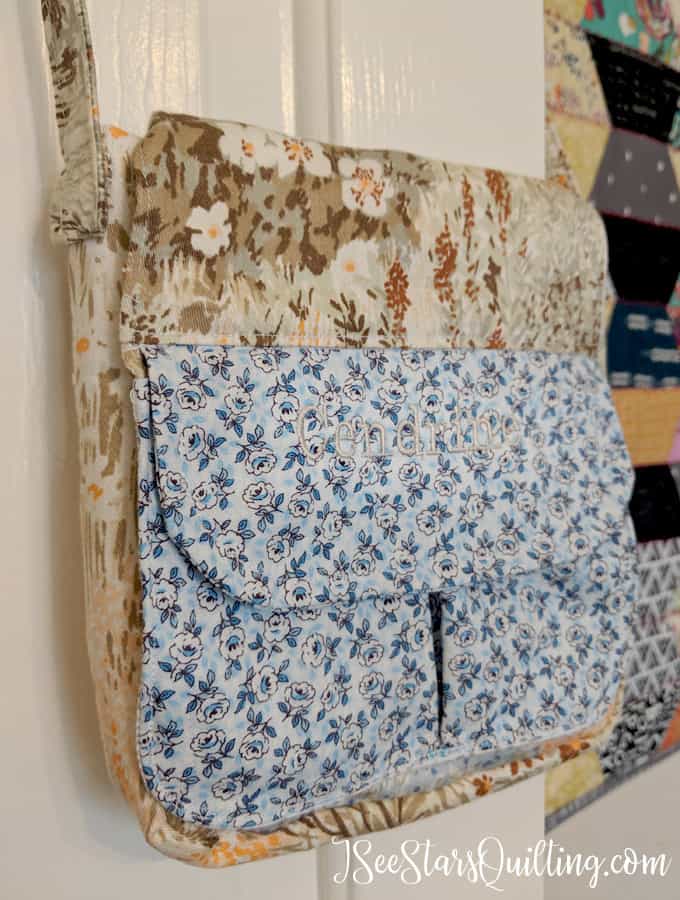
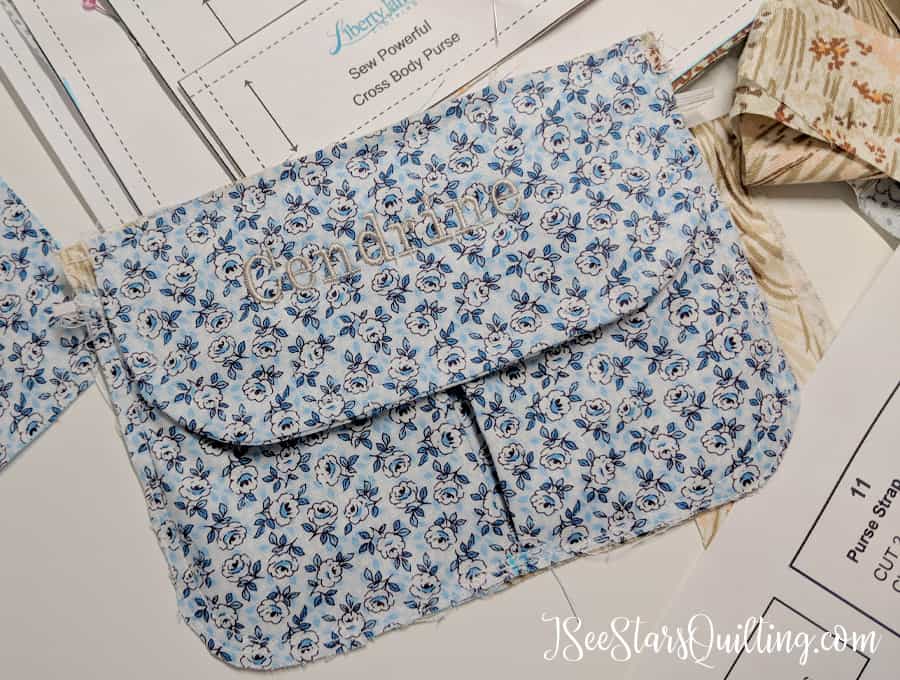
    It was my daughter’s idea to embroider the front pocket flap. She wanted to make sure Cendrine knew that this was her special purse 🙂

    Sew Powerful is a "sewing for good" organization that helps break the cycle of poverty and they need your help! Download the FREE purse pattern and change a life!
    Sew Powerful is a "sewing for good" organization that helps break the cycle of poverty and they need your help! Download the FREE purse pattern and change a life!
    Sew Powerful is a "sewing for good" organization that helps break the cycle of poverty and they need your help! Download the FREE purse pattern and change a life!

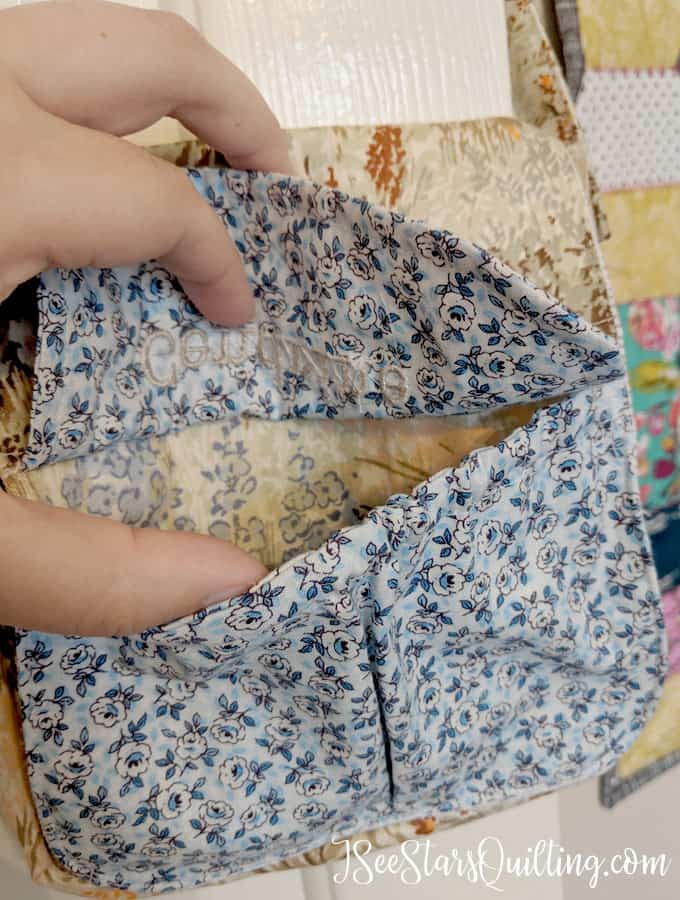
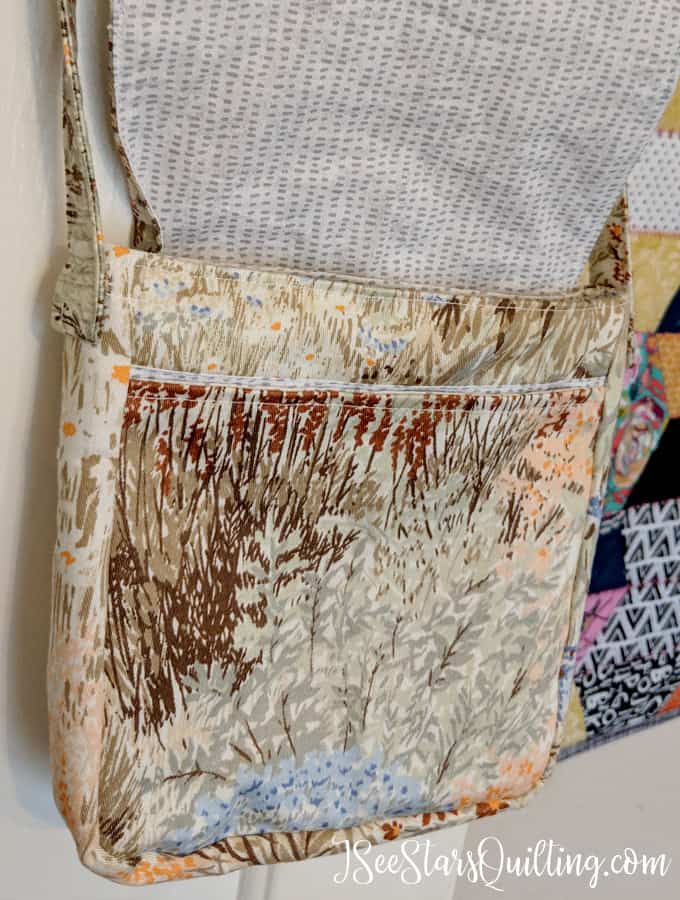
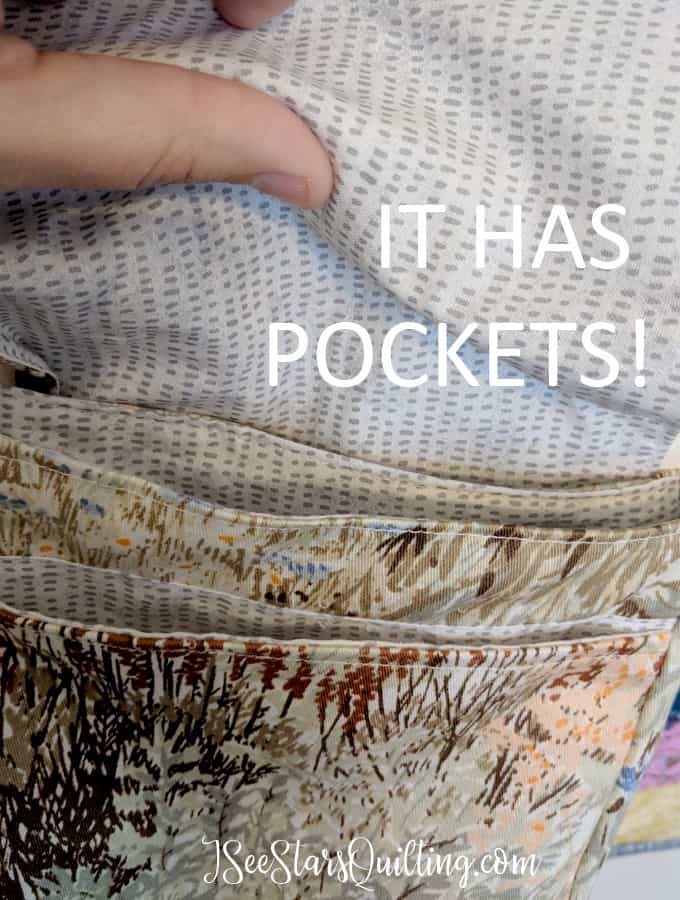
    A girl has to have pockets, right? We’re going to fill up Cendrine’s purse with more colored pencils and notebooks because she is quite the little artist.

    Sew Powerful is a "sewing for good" organization that helps break the cycle of poverty and they need your help! Download the FREE purse pattern and change a life!

    This is a fantastic use of scrap fabric! If you’ve been looking for a new project to take to your guild or a fun project to teach young sewists… please give this one a shot.

    Click here to download the FREE pattern!

    I love how this bag turned out and I can’t wait for Cendrine to receive hers!

    My daughter and I want to get a little more creative with the fabric choices on the next bags that we sew together… I can’t wait to sew more!

    Sew Powerful is a "sewing for good" organization that helps break the cycle of poverty and they need your help! Download the FREE purse pattern and change a life!

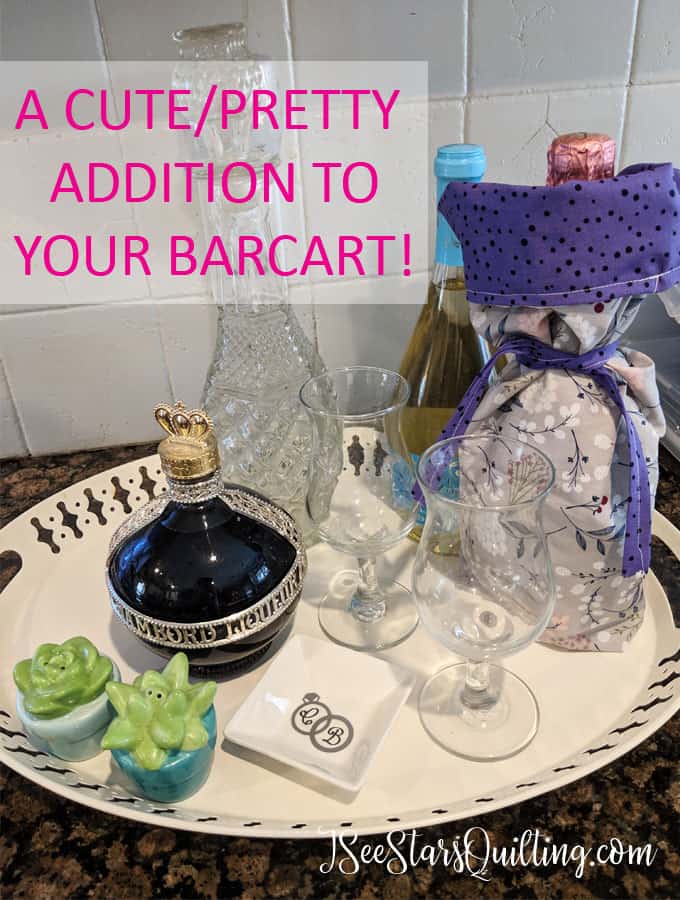
    They also carry these mini purses that are doll size. *Squee!* Yes! I know! Is that not the most adorable thing you’ve ever seen?

  • FREE Quilt Planner!

    Ah! Can you feel it? The anticipation of a new year is right around the corner. This year I’ve accomplished a lot but I think I could do better at getting around to my WIP (work in progress) quilts. I say this all the time, but this time I mean it, I swear!

    I’ve been working on something special that I knew I would want to share with you!

    Download this FREE quilt planner and get organized so that you can create more! 6 pages of everything you need. nothing you don't!

    I created a quilt planner! And it is a FREE Quilt Planner! I’ve been testing it out myself over the last few months and I must say that I think it has really helped me keep my quilting thoughts together.

    I’ve been tweaking it as I go and adjusting because I want this to be the most useful quilt planner out there.

    You know I’m not one to promise the moon and not deliver, right? So, I’m pretty excited to share this with you finally! 🙂

    Download this FREE quilt planner and get organized so that you can create more! 6 pages of everything you need. nothing you don't!

    No fluff, no extra wasted space, just pure potential to take the away chaos in your brain and allow you to do what you do best. 🙂 Which is, of course… create.

    Download this FREE quilt planner and get organized so that you can create more! 6 pages of everything you need. nothing you don't!
    Download this FREE quilt planner and get organized so that you can create more! 6 pages of everything you need. nothing you don't!

    Let me tell you a little story…

    Christen (me) Pre-Quilt Planner Days:

    Literally, like 5 spiral notebooks with chicken scratch drawings of random ideas I would have throughout the day or if I was out and about. I always have a spiral with me… and my phone, but often the spiral works better for quick notes. They’re full of checklists and notes to myself so I don’t forget.

    You get the point…

    Download this FREE quilt planner and get organized so that you can create more! 6 pages of everything you need. nothing you don't!

    Christen with the new (and improved) FREE Quilt Planner:

    Oh yes…. so productive. So fancy. All my quilt notes, target due dates, fabric swatches and supply lists as well as pattern names and project ideas live in one little binder. It is GLORIOUS.

    Seriously, when you find a system that works for you, you can hear the thread in the sewing room sing like an choir of angels!I’m on a bit of a productive high today because I also organized the kid’s play room. Oh yes, momma did!

    So if you’d like to also be organized in your sewing/quilting room, download my FREE Quilt Planner. (there is just a “sewing projects” version as well!)

    And be sure to let me know what you think, won’t you? If there are any tweaks that would work better for you, I would love to hear it.

  • Shimmer Quilt Reveal

    As we get close to wrapping up another year, I’ve learned a few things… I’ve learned to be more realistic with myself. Would I like to finish 27 quilts? Yes. I certainly would, but reality is that is not going to happen.

    I can shoot for the moon and aim high, but I can’t beat myself up for the ones I didn’t get to. Sometimes there just aren’t enough hours in the day and I can’t lose sleep over that. (oh my gosh, have I become that mostly chill woman in her 30’s or what?)

    I’ve been working on this quilt for several months. I’m going to share a review of the Shimmer Pattern and share the reveal of the Quilt Top.

    I also have a few tips for buying Solid Fabrics for you at the end 🙂

    I’ve been baking a few blocks at a time here and there. Its mostly been my project to come back to when I’m frustrated with another project and need a break 🙂

    I think it is always good to have these kinds of projects laying around. Keeps the brain happy and the work fresh.

    Shimmer is a pattern I fell in love with from CluckCluckSew. Her patterns tend to have a more traditional quilting/piecing vibe to them and I get lost in their simple beauty every time. She doesn’t even know I exist because I’ve been a quiet follower of hers for a while, but I encourage you to check out her website if you get a chance. It’s a real quality quilting site to follow!

    Shimmer Pattern by CluckCluckSew - sewing by ISeeStarsQuilting Quilt top reveal and Pattern Review

    Shimmer Quilt Pattern Review

    The pattern had me at “no Y seams to sew”. And it was absolutely true. Yay for the complicated block being broken down into simple terms! These are my favorite patterns to sew.

    This quilt pattern uses 20 fat quarters that are then cut up and interchangeably dispersed throughout the blocks.

    It is amazing how each time I finished a new block I had a new favorite 🙂

    There are many suggested sizes from a baby quilt to a king sized quilt.

    These beautiful blocks do take time.

    There are a lot of steps involved, but they were simple sewing tasks that a beginner-ish level quilter could tackle with a little practice. The hardest part for a newbie would be marching the corners, but you’ll never get there unless you try, right?

    Shimmer Pattern by CluckCluckSew - sewing by ISeeStarsQuilting Quilt top reveal and Pattern Review

    The instructions were clear and I am so pleased with the finished pattern and really enjoyed working on it between other projects!

    You can purchase this pattern on Amazon here.

    Pictures of my finished quilt top!

    Shimmer Pattern by CluckCluckSew - sewing by ISeeStarsQuilting Quilt top reveal and Pattern Review

    Disclaimer: I am a rule breaker… I’m sorry. I followed the pattern blocks but I didn’t finish the quilt the way the pattern intended.

    You can see here on my design board how the blocks are meant to be sewed right next to each other creating the secondary “block” in the middle of each starburst block.

    Shimmer Pattern by CluckCluckSew - sewing by ISeeStarsQuilting Quilt top reveal and Pattern Review

    I loved the way it looked but I felt like I needed a little space between the blocks to allow the eyes to rest between busy fabrics. I just wasn’t feeling the really busy quilt top.

    I think I was a little overly stressed with the holidays and needing more calm in my life. 🙂

    So instead, I added a 2.25″ strip of fabric between the blocks to make a grid layout.

    Shimmer Pattern by CluckCluckSew - sewing by ISeeStarsQuilting Quilt top reveal and Pattern Review

    You can still see all the lovely free spirit fabrics, but there is a little more room to breathe. I really loved the way it turned out. 🙂

    I could totally see myself making another one of these quilts in the future!

    A monochromatic quilt would be so stunning!

    Fabric Buying Tip: Please Read

    This is more of a suggestion, but I’d like to point out something that I ran into with this quilt.

    If you’re buying solid fabrics. I highly suggest buying them in bulk. Especially whites. You can see here that my grid lines were an afterthought because my white fabrics DO NOT match 🙁 – It isn’t as noticeable indoors, but in the sunlight its very noticeable.

    Shimmer Pattern by CluckCluckSew - sewing by ISeeStarsQuilting Quilt top reveal and Pattern Review

    I almost was tempted to rip it up and go with a light grey or something all together different for the grid fabric… but I believe that when I go to quilt this one the 2 color whites won’t be as prominent in my eyes.

    Shimmer Pattern by CluckCluckSew - sewing by ISeeStarsQuilting Quilt top reveal and Pattern Review

    Next time you’re in the fabric store, go to the solid whites and take a look, there will be similar whites but no two white bolts will be the same.

    Some have more of a yellow tinge to the color than others. – Maybe this doesn’t bother you like it does me? Years of art school have trained my brain and my eyes to look at colors differently.

    While I’m not ready to make another 15 of these beautiful
    Shimmer blocks just yet (I have so many more quilts I want to get to!) I might make a few of these for mug rugs or over-sized tea coasters!

    What do you think? Is this a pattern you would like to sew?

    Shimmer Pattern by CluckCluckSew - sewing by ISeeStarsQuilting Quilt top reveal and Pattern Review
  • Time Out Quilts: How to get the motivation to finish your quilt!

    I got this question in my inbox the other day and I thought I would answer it today: How do you get the motivation to finish your quilt? you know, the ones in time out that you’re sick of and don’t want to sew anymore.

    Haha, first, I have yet to meet a quilter who doesn’t have some form of a “time out” corner or drawer or closet of some sort. How long the quilt stays there is obviously up to the quilter. It varies from a few weeks to a few months to I don’t even know when that quilt was from?

    Enough is enough. Quit punishing your quilts by making them sit unfinished in their time out chairs!

    How do you get the motivation to finish your quilt?

    I am a semi seasonal purger. It comes in spurts out of no where. I suddenly feel like I can’t take one more second surrounded by all the clutter, unfinished projects and mental obstacles around the house.

    I want to be a hybrid minimal-mom-who-loves-trinkets. Does that exist? Not that I’m aware of…

    I can put my unfinished quilts in a nice folded pile where no one else sees the unfinished edges or the fact that it is only the pieced top and I have to still quilt it.

    But its still there… I know it’s secrets. It’s always taunting me in the corner, waiting for it’s turn.

    I can be good at hiding the fact that it still requires hours of work and I’m just not inspired by it anymore. 

    That is really what it comes down to, right?

    I was inspired by this (fabric, pattern, person… whatever) and it motivated at one point but now…. meh. I have other things that interest me now. 

    So how do you fix it?

    1. Find an another motivation.

    Seriously – If the reason that you started that quilt in the first place was to make it for someone as a gift, then set a new goal. Hey, their birthday is coming up in 2 months or arbor day is in 4 months! Whatever you have to do or tell yourself. 

    I am really goal oriented so this works for me.

    Create that initial desire again to finish it for the person. – Even if you have to Fake yourself out and make up some bogus reason (like Arbor Day, It is a real thing to celebrate if you have a quilt finished by then! I know from experience.)

    2. Pull that quilt out in the wide open where you are forced to see it every single day.

    Out of sight, out of mind works like a charm. If I pull it out in the middle of my home or my sewing room where I am forced to work around it and move it every time I want to get to something under it then….. oooooooh, *insert eye twitching*. Let’s just say things get done.

    This solution does not work for my kids. If I purposely put their toys in the middle of the room for them to clean up or laundry to put away, they will walk around it for a week and a half before even noticing it. – so this might not work for everyone 🙂

    3. Find another purpose for it

    I had several quilts that I adored the fabric at one point but it really has no place in my house. I would get started on a quilt with foxes and then halfway through, get distracted by the cute little squirrel print from TulaPink (true story).

    I like foxes with glasses but I know it won’t be my first choice for a cuddle up quilt. 

    So what do you do? – Finish it up and donate it! You can read more about charity quilts here and where you can donate here.

    looking for a way that you can give back and use those quilting skills? - I've put together a big list of places that you can feel good about contributing to to donate your finished (and partial) quilts!

    Quilters are loving and generous people. Donating a quilt is like donating a hug to someone who desperately needs it. 

    4. Simplify your design.

    Look, I get it. You started out ambitious and this is going to be the grandest quilt to ever be a quilt! and now you may be feeling like you jumped in too soon and too deep. 

    Take a step back and decide where you can cut a few corners. (Figuratively, not literally.) Quilting is an art form.

    Add in a few coordinating solid blocks.

    Remix that pattern and call it DONE!

    Done and finished is much better than unfinished and unused or sitting on a shelf waiting for “someday”.

    5. Sell it!

    Make that money and buy new fabric! (or add a little extra to your family vacay fund)

    Contact your friends and ask if anyone needs a handmade gift. Mention that your family has a goal or just say you’re looking to purge some really great quilts! Then, get your tail to the sewing machine and go at it!

    I don’t want to burst your bubble but MOST people will not be willing to pay what a quilt is actually worth. Let’s face it. Quilting is NOT a cheap hobby. Fabric is expensive and hours spent at the sewing machine … you’ll likely not get paid what YOU are worth. Unless of course, you have rich friends.

    So before you start counting your Scrooge McDuck Money take a really good look at your network and decide what is the likely price range you can offer. Don’t sell yourself short but be realistic.

    Heirloom quilts have a nostalgic beauty to them that ca not be replaced, but a target blanket will keep you warm too for a lot less $$. (*ugh. reality check*)

    6. Find a friend and swap projects. 

    I LOVE this. Swap the projects that you hate and challenge yourself to look at it in a new way. Set a few ground rules if it makes you feel more comfortable. 

    Sometimes, it doesn’t matter what your motivation is for finishing it, you just get sick of looking at the darn quilt and it is time for it to go!

    7. Set up a Reward system for yourself

    I’m a mom, ok? I thought I had perfected the whole “bribing system” until my daughter decided that the piece of chocolate I was offering was not worth taking a bath for and she could do without both.

    But it totally works on me. If I have a really tough week ahead, I will schedule out an open block of time on my calendar to do something fun. A reward for making it through the week! Woohoo!

    Usually, I’ll let me kids play on their tablets for a few hours (gasp! – Its educational games I’ve selected) and I will sit my happy self down to my sewing machine and take some me time. Does it mean that its uninterrupted or always the most productive? No, but I enjoy it.

    I’ve also been known to go and buy a new pattern or a new fabric and dangle it in front of myself like a carrot on a string until I finish a current project.

    What can I say? I’m basically a 2 year old when it comes to motivational techniques.

    Places to donate fabric, scrap fabric and unfinished quilts

    If all else fails and you just want it out of your hair and off your worry list… let someone else take care of it for you. 

    Consider Donating to:

    • Girl Scout or Boy Scout groups
    • Ask a guild if anyone wants it! – Lots of ladies may know beginner quilter who could use the practice and would be happy to add on to your quilt.
    • Local animal shelters (or make your own pet beds to donate by filling a pillowcase with scraps and sewing the opening closed)
    • Art teachers/elementary schools/home school groups
    • High school sewing classes
    • Local prison inmate sewing programs
    • Church missionary or charity groups
    • Local quilt guild charity projects
    • Ask your local quilt shop if they accept donations for charity quilts or community projects

    I hope this list helped you see there there are plenty of options for pulling your quilts out of time out… they have suffered unused without a purpose long enough, haven’t they?? 🙂

    If you have any other ideas please feel free to add to the list and let me know in the comments. This blog will be updated as a resource for future readers. Happy sewing!

  • 14 Winning Last Minute Sewing Gifts

    Hey there! Christmas is just around the corner and if you’re like me, the calendar timeline is beginning to feel a lot shorter than I would like it to be! If you’re looking for some great last minute sewing gift ideas, I’m here to rescue you!

    These 14 Winning Last Minute Sewing Gifts will save your tail when you're in a pinch and need something fast!

    Each one of these ideas is a super winner gift that will leave your recipient feeling loved and leave you with a few more ticks to your clock!

    1. ONE HOUR Zipper Box Pouch

    You can see the original tutorial here and the slightly alternate ending tutorial here. I made a bunch of these up for my kid’s teachers and stuffed them with goodies I found in the cosmetics section at Target. They were a really big hit and easy to customize to individual likes and personalities!

    DIY TLC Teacher Kit - This Zipper Box tote comes together in less than an hour! Fill it with goodies and take care of your teachers #teachergift #ZipperBoxtote #easygift

    2. Cute Fat Quarter Bags!

    Aren’t these precious? Amy over at Diary of a Quilter shows step by step how to sew up these cute little bags using fat quarter fabric. These would be darling to sew for tween girls! You can check out the tutorial here

    5 Minute Pin Cushion

    little details like this make all the difference in a sewing room with personality. which pins are the ones you simply MUST have on hand? Read here www.iseestarsquilting.com

    This pin cushion is one of my favorites to give. 1) We all could use an extra pin cushion, right? 2) This one is super easy to customize to each individual person. I have re-purposed chipped china cups found in a thrift store, cheap dollar store mugs, fancy mini teacups, even the travel souvenir shot glass… you name it! Add a little scrap fabric and voila!

    For the Homemaker

    In my head right now I can see so many possibilities for this kitchen towel and hot pad set from Crazy Mom Quilts. Happy spring colors, soothing neutral colors, a bright pop of yellow in the summertime…. I could go on!

    She also has a recipe for hot fudge sauce that I have made multiple times and totally puts the icing on the cake for this gift!

    Quick Table Runner

    This Quick Table runner tutorialfrom SewMuchAdo has 4 steps…. yes you read that right. 4 easy steps. Wrap it up with some scented pine cones or a plate of cookies… yummy and pretty!

    This Quick Quilted Table Runner is something I whipped up for a quick hostess gift, but it has so many endless possibilties I will be making several more for holiday family gatherings. These make great handmade gifts!

    You can also check out this tutorial that I created this year for a quilted table runner – Again the color options are endless to go with any occasion or holiday. (Edit: a reader of mine even mentioned how she made the table runner reversible!)

    Little Cutie Pouches

    I absolutely adore these little cutie pouches from Noodlehead. They are the perfect way to dress up a gift card. The tutorial is really detailed and lays out everything step by step. Make a few extra while you’re at it as quick grab and go gifts in a pinch!

    The Perfect Catch-All Fabric Bin

    This cute fabric bin can be made in an hour and can be used all over the house! No extreme sewing skills required... its so easy!

    I’ve made so many of these fabric catch-all bins around my own house I can’t even count them all. My kids develop these little “collections” of the most random things they can find. (Who collects acorns and is not a squirrel? My son, that is who. But that is beside the point.)

    What I mean to say is these little fabric bins are absolutely endless in versatility. They sew up fast too. Win-win.

    Mod Messenger Bag

    This is another one from Diary of a Quilter – This mod messenger bag takes a little bit of extra time the first time you sew it, but after that you’ll be a pro and can whip these up and customize them to your own liking super quickly. 

    OMG Aprons!

    I never get tired of the usefulness of a good apron. To your favorite creative baker or chef, you’ll be a godsend of a hero. I do a lot of baking and my aprons are always dirty or in the wash. And often I just like to wear it because I’m feeling a little spunky or maybe I like how I feel like a retro housewife when I wear one? 🙂

    Anyways, here are a few really fun tutorials.

    Crazy Little Projects has a super simple apron tutorial that walks you through step by step and gives you a few ways you can make it your own (See cute bow)

    And even Pint Sized Aprons for the tiny Chef’s in your life. Aesthetic Nest has a pattern and tutorial to cover all your culinary geniuses.

    Wine Bottle Bags

    Looking for the perfect Wine Bottle Bag DIY Tutorial? I've collected the best of the best to share with you! You're sure to find the perfect bag here to suit tastes and your skills! Check out my favorite go-to (#2!)

    I wrote up a post recently that had links to my favorite tutorials for wine bottle bags. If this is something you’re interested in making (and why not? because they’re super fast a cute way to dress up a bottle of wine for a dinner party) you can check out that post here.

    Easy Peasy Fleece Blanket

    I don’t know how your house is but sometimes I have more “help” than I know what to do with on my projects. 🙂

    This project is one that lots of little hands can help with for the majority of the steps.

    Easy Peasy Fleece Balnket from The Polka Dot Chair

    Quilt Block Oops to Zipper Pouch

    Honestly, why have I never thought of this before? – I said to myself when I came across this tutorial. I had cast away several blocks that we’ren’t just right for whatever reason and said I might make a few mug rugs eventually. 

    These Zipper Pouches are much more useful! I also love the tassel addition that she added. Check out this tutorial on The little Mushroom Cap.

    If you simply do not have time to whip up a few of these gifts or you are shopping for another quilter, don’t forget to check out my post with the 20 Amazing gifts for quilters.

    What are your favorite last minute sewing gifts? I’ll be adding to this post as I find myself in a pinch (as I often do!) 

    Good luck to us all in the last few weeks of the year. Slow down when you can and soak up the simple moments of creativity when you can get them 🙂

    Also, check out my free e-book download below for my best tips on Quilting for the busy girl!

  • 10 Tips to piecing the Perfect Quilt Top

    Today I’m going to share with you some tips for piecing the perfect quilt top. If you’re looking to improve your quilting skills there are a few things you should keep in mind. With these 10 tips, you’ll be on the road to better quilting in no time!

    The very first quilt you make will be full of flaws and many moments of learning along the way. This is to be expected… but how do you improve when you’re ready to take your quilting from “wow, you’re just starting out quilting, aren’t you?” to “Wow, you made this?!

    10 Tips for Piecing the Perfect Quilt Top

    *ha, say that 10 times fast*

    1. Make sure that your pieces are cut to the exact right size.

    I know I am guilty of fudging it in the past and “close enough” was good enough for me for a number of years, but when I really wanted to take quilting to the next level, I had to realize that quilting involves a lot of math. And math is exact. It isn’t up for discussion.  

    If you want to all those pretty seams and corners to line up without any fuss, make sure you trim your pieces to the right size before you sew them together.

    Take those extra 10 minutes and square up your pieces and trim off any little sliver of fabric that could cause you headache later.

    2. It really helps to have the right tools on hand.

    It can be a bit of an investment, but it doesn’t have to cost a fortune. With a few essential items, you can create a quilt that rival the pros. – What it will cost you in time and frustration without the right tools is a far greater cost in the end. (at least this is what I tell myself when I want to go shopping for new ones!)

    For me, these tools are an absolute must – bare minimum, every quilter should have…

    • Rotary cutter – with a good sharp blade (don’t even get me started on the dangers of a dull blade.)
    • Self Healing Cutting Mat – to protect your tables and surfaces
    • Cutting ruler – something wide and comfortable – see through
    • Sharp Sewing Needles – Did you know you’re supposed to change your sewing machine needles about every 10-12 hours of sewing? It really helps keep your machine in tip-top shape.
    • Sewing machine – It doesn’t have to be a top of the line fancy model. Most home sewing machines will work. As you get more into quilting, you can upgade your machine as budget allows.

    Here are a few other recommendations of mine if you’re wanting to make sure you have the essentials.

    3. Master your quarter inch seam

    Do it, practice it on scrappy fabric until you can do it in your sleep. Quarter inch seams are an industry standard in professional quilting. For more tips on how to master it, you can check out the post I wrote. How to Master the Quarter Inch Seam

    How to MASTER the quarter inch seam. Want to improve your beginner/intermediate sewing skills? do this and you'll be well on your way

    4. Nest Your Seams

    This is KEY to getting those laser perfect corner matchups. It’s much easier if I show you but I do not have a video (yet! – video is something I hope to add to my blog soon) For now, check out this tutorial from Sewcanshe.com

    5. Save Your Scraps!

    *This is not permission to be a hoarder. (Though your definition and my definition of the term may be different)

    When I first started quilting, I wouldn’t see the need for little pieces of fabric leftover from a project. I didn’t have the room to store things and I was more than happy to toss it. Then, I discovered “scrappy quilts”. Oh man, was I wrong to let go of so many pieces of fabric that had yet to live up to their full potential?

    This simple step will save you time in the sewing process and make your HST scraps a breeze! Quilt faster and use up those scraps!

    A scrappy quilt is exactly what you think it is. It is made from scraps of fabric. A scrappy quilt can be intricate and detailed. It could be wild and completely improv sewing or it could be something that takes you years to sew just a tiny bit at a time. But what it is, is beauty in what otherwise would have no further purpose.

    As a DIY addict, I love that.

    And when money is tight or your husband questions why you HAVE to go to the fabric store because he just doesn’t understand… you can make everyone happy by digging through your leftover fabric and creating something out of nothing!

    For ideas on storing your scraps, check out this link:

    Cheap Sewing Room Storage Ideas

    Scrappy Holiday Table Decorations

    6. Iron Your Seams

    Like with a real, hot and steamy iron. not just a roller or finger press. Press that fabric into submission and make it do what you want it to. Just don’t scortch the fabric, ok? Your quilting will turn out better, you won’t have to worry about wrinkles or fabric being askew.

    If you’re not sure if you have the right iron, check out this post

    Do You have to press your seams? ...And other ironing rules answered in this detailed post about ironing! Who has the time? Do you really have to? Or is it just a suggestion?

    7. Read through the Pattern

    Yes, do it… Take 10 minutes. Prep yourself. Just do a quick read through. This isn’t a novel where you want to be surprised by little fun moments in the middle of the story. 

    Those little surprises will lead to moments of torment and frustration..  

    Go ahead and read out all the steps. Get a clear vision of what you’ll be creating and how it will all come together.

    Treat this moment as a mini prep for a test. – Your test results will be your final quilt. 

    8. Prep your supplies

    This goes with number 7 and “things you should do before you quilt”.

    Productivity wise, you should cut all your pieces at the same time. I know not everyone does this but it has been an absolute time saver (and sanity saver) for this busy momma. 

    I like to use these wonder clips and clip each one of my blocks together.

    So whenever I get a few moments to sew a block together, I have everything I need in a nice neat package and ready to go. I don’t have to backtrack and try and remember how many 1×4″ pieces I need or what fabric was I using for the background again? 

    Basically, I’ve dummy proofed the fabric blocks for myself. 

    It’s all here and ready to go. 

    9. Do A Test Block

    If you have a particularly new pattern that utilizes skills you’re not 110% confident in, don’t waste your good fabric on your first block. Grab some scrap fabric or cheap fabric and do a trial run. 

    You’ll be able to work out the kinks and “oooooh! I get it” moments. without having to seam rip all over your desired fabric for the piece. 

    10. Don’t be afraid to be picky

    I am one of the WORST people I know with the phrase “done is better than perfect“. I would whip up a quilt top in no time flat. The seams would be slightly wonky, corners not perfectly met… I said “it shows character”… but that was a sorry excuse for I couldn’t be bothered to fix it at the time

    Over time, I realized that I was really insecure about my quilts. I knew (and remembered) every single flaw and felt really uneasy when people would want to inspect my work. 

    Hanging on a chair or draped over the laps of my children were one thing, but under the eyes of another quilter was an entirely different thing. (and a rather scary thing) 

    I didn’t have any excuses.

    I picked out a rather challenging quilt pattern and vowed that I would be meticulous no matter how long it took me. This was going to be a quilt for me and I was going to learn to perfect it along the way.

    Whenever something wasn’t JUST right. I used the seam ripper and did it again. – Don’t get me wrong, I’m not selling this as a sunshine and roses experience. I was not the most joyful person to be around at that time. 

    But it was a tremendous LEAP in quilting skills for me to finish this project. and really helped me perfect my quilt top piecing. 

    I really hope that you were able to gain some insight within these tips for piecing the Perfect Quilt Top .

    10 Tips for Piecing the Perfect Quilt Top! - These tips are essential for growing your quilting skills and getting your quilting to that next level.

    If you have other advice or tips, please leave them in the comments below. I’d love to hear from you!