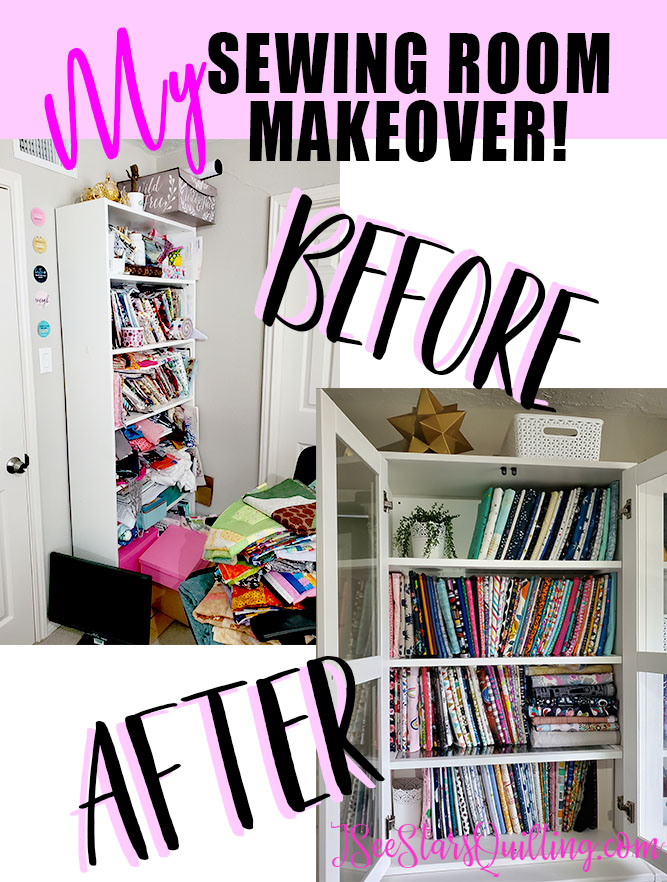
Hey hey! So it feels like I’ve been hinting at this sewing room renovation going on behind the scenes for like all of 2020 with little progress to show for it. This year has been rough in a lot of ways – but I finally have the official Sewing room Reveal before and after pics to show you!
Get ready because even I am quite shocked at the difference in the photos!
If you want to see more of the planning stages of this Sewing room renovation, check out this post: Sewing Room Face Lift: Planning Stages
It has been a really long project but it was definitely worth the sweat and the tears to get to this point. I hope that you get a little inspired and walk away with some ideas for your own space!
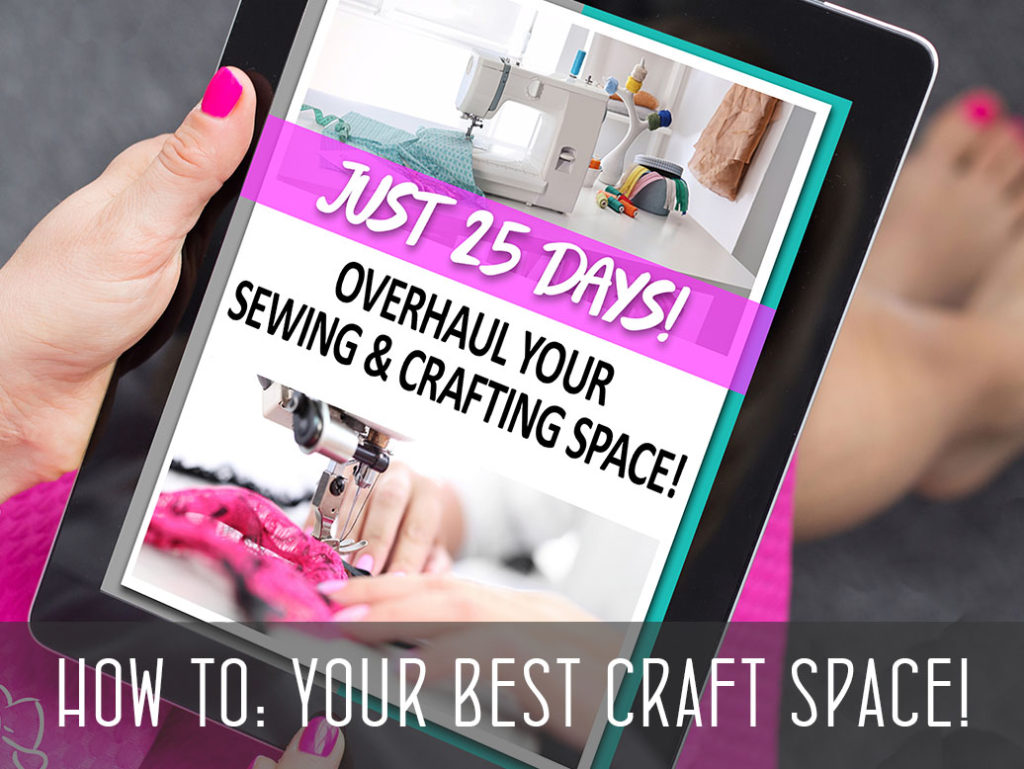
If you prefer to watch rather than scroll…
I have a couple YouTube videos where you can walk through it with me!
And because everyone loves a good makeover that shows all the icky parts in between – and oh yeah, that shot of me kicking in the wall and being all cool (Chip Gaines style)… I made a second video to document the journey and show you what happened behind the scenes! Enjoy!
Make sure you subscribe to my channel on YouTube so you can stay up to date with all the fun and wonderful tips, tricks, and tutorials that I share!
I am happy to finally be able to share the whole process with you. I think it’s really important to see all the not so pretty parts just as much as the final “wow” moment everyone loves to see.
How long did my sewing room renovation take?
Ok, so like I said… this process has been going on for a while. I made it way more complicated by doing a full purge, acquiring new furniture, selling things, knocking out walls, and waiting on the mailman to bring me my favorite organizing tools instead of going out and shopping a lot… oh and in the middle of a pandemic…
I officially started thinking about making this room renovation a reality around April/May-ish? And completed it about September-ish… while putting the finishing touches and little “sparkly” touches to it (calling it officially FINISHED) in October.
Holy cow, right? It has been a heck of a year and a LONG time living in a state of disaster. In hindsight, I could have made this easier on myself in a lot of ways…
Now, every renovation doesn’t have to take as long as mine did obviously!
I had many reasons for it taking an extra long time:
- I bought several new pieces of furniture that needed to be assembled. (Looking at you, IKEA…)
- I cleaned out A TON of my belongings and parted ways with many craft supplies I was holding on to for “someday” – This included selling and gifting purges. 👏
- We took out a wall and did some remodeling to absorb a closet into my space.
- I took my time to make sure I was solving my storage solutions for the long term needs and not just the short term
- Not everything I wanted was in stock and I had to put things on hold for a while.
- aaaaand the theme of 2020 taken into account – unexpected is just a way of life.
- We also had several other home projects that took priority including: re-doing an upstairs shower that leaked into our downstairs ceiling, working on our laundry room, replacing the windows in our house, and several other things I don’t even want to remember right now. It’s just been a long year lol
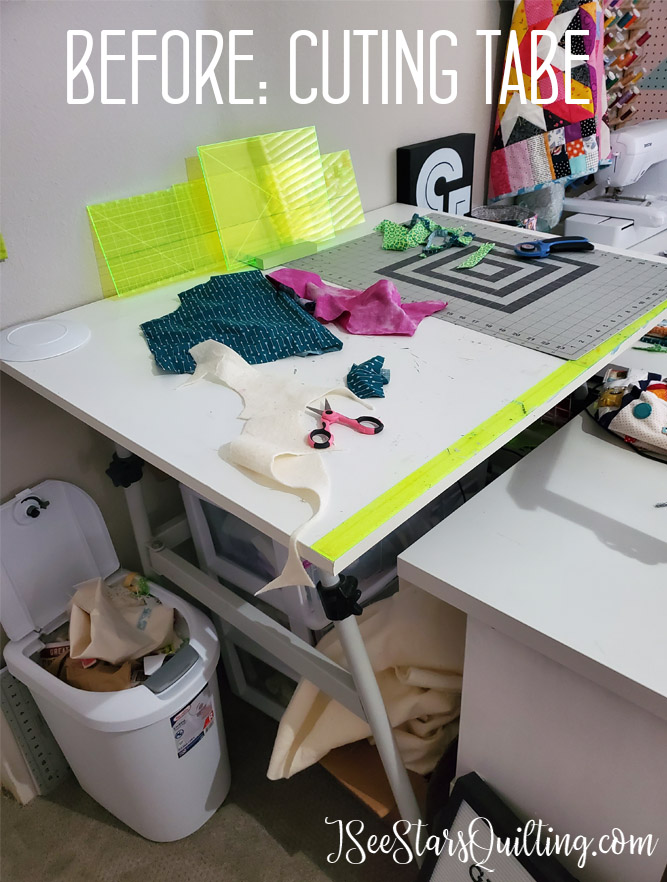
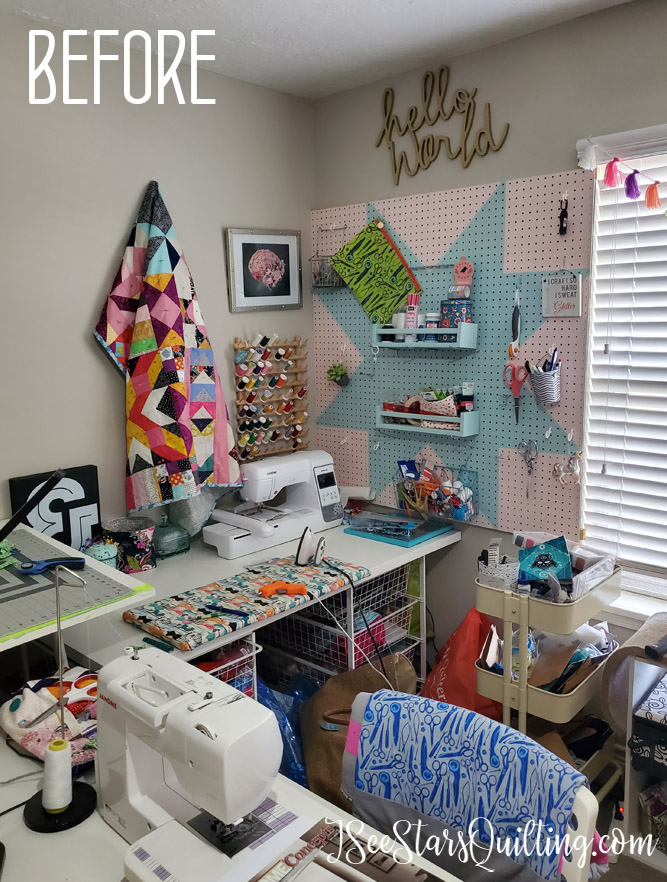
Let’s take a look at the before pictures!
This is where we started. A functional space, yes. but pretty? not so much.
I realize that having a space like the extra bedroom that I have is a blessing. If you want to see what my sewing space looked like in our old house and why I LOVE this new space, check out these posts:
Sewing Room Face Lift: Planning Stages
Fabric Storage: What Works For Me + A Video!
Keeping A Clean Sewing Space: A How to
Sewing Room Tour! (what it looked like after we moved!)
So, while I really was enjoying my new space with a door I could close and keep separate from the rest of the house, I felt like I wasn’t doing the space any favors by just using it as a storage room.
Can you really call it your zen zone if it is a disaster 80% of the time and gives you anxiety with all the piles laying around?
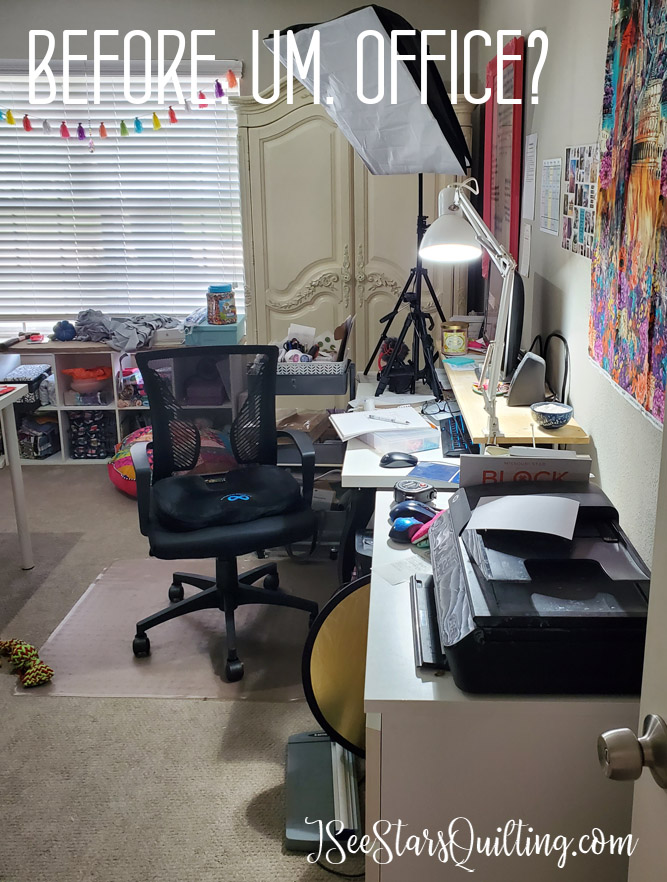
This is what I walked into every single day. I love the things in it, but I didn’t love that it felt cluttered all.the.time.
On one hand, it fills my heart with glee to see all my pretty crafty things around me. On the other hand, I felt like I was suffocating in constant clutter.
This “creative zone” is a really good and comfortable spare bedroom size room. I felt like I was working within tight confines and trying to come up with storage solutions constantly. – If you have a good size collection of crafty things… you KNOW it adds up fast, right?
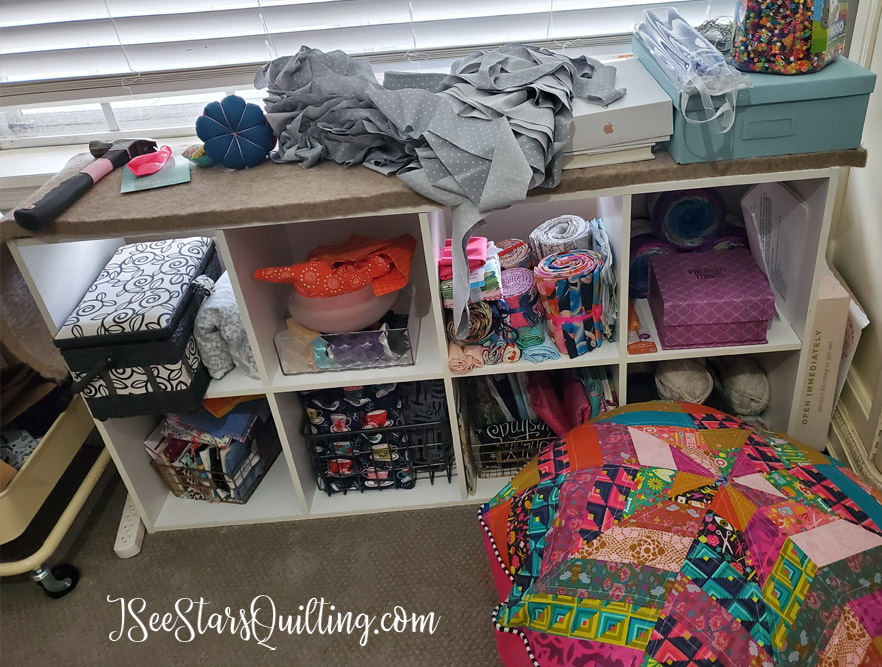
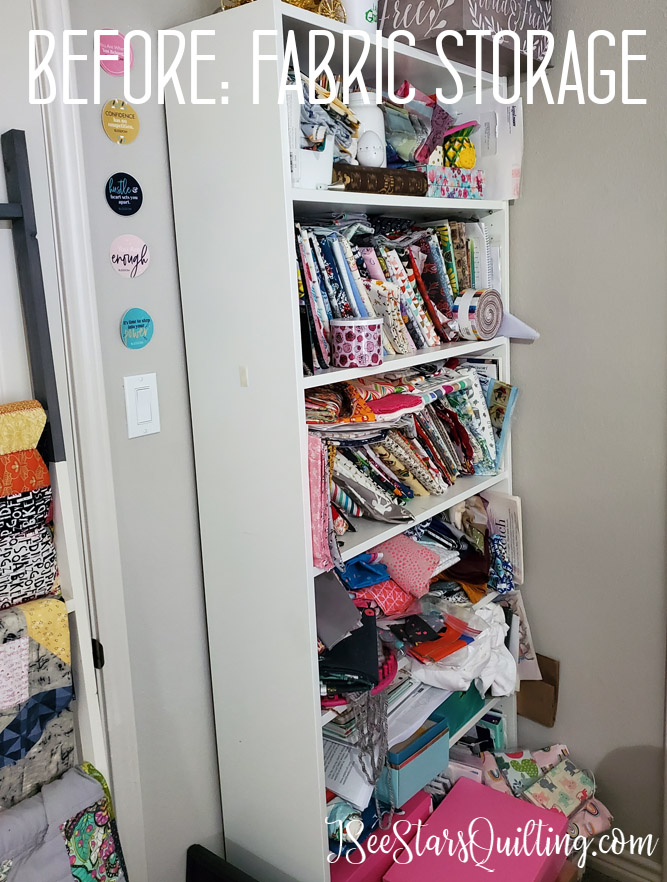
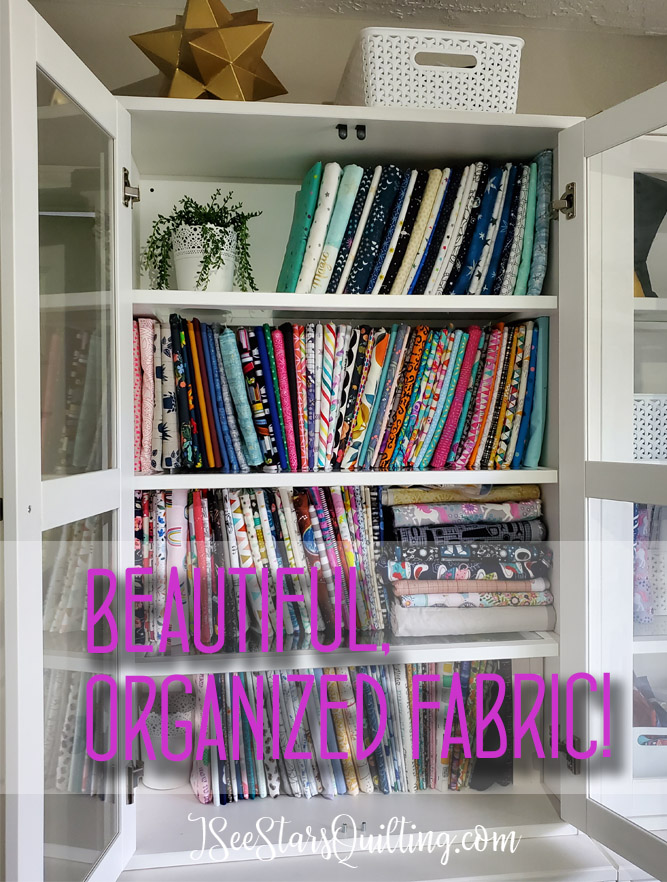
I really have no excuse for my fabric collection before – It was beautiful and organized before and then one day, I just didn’t take the 2 seconds to fold things nicely, and slowly it dissolved into… whatever this leaning tower of fabric is.
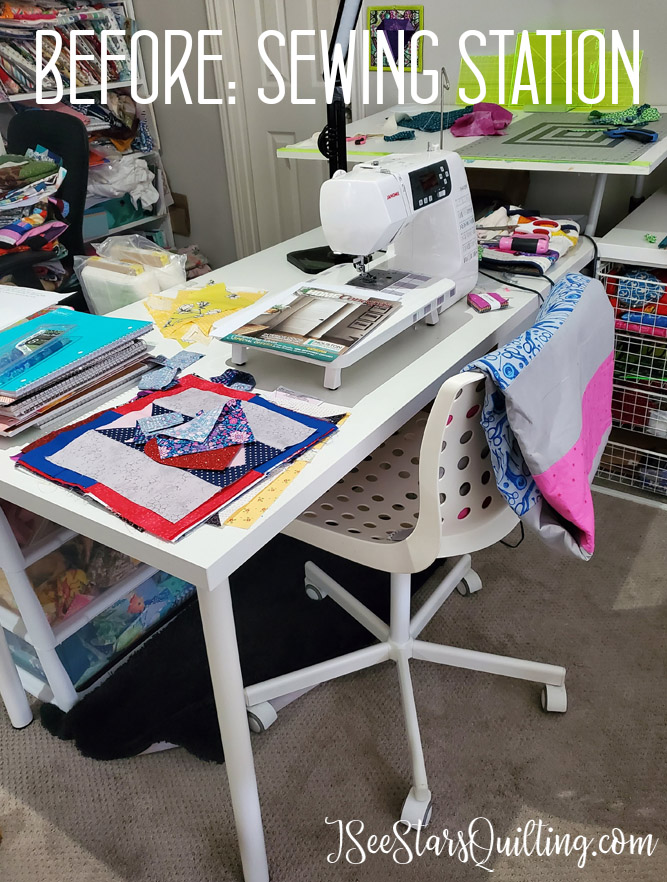
This space also serves as my office/video zone/editing room. So, while on one side I have my sewing space, this is what was on the other side. Functional? Yes. Absolutely. Pretty? – Nope. Not a bit.
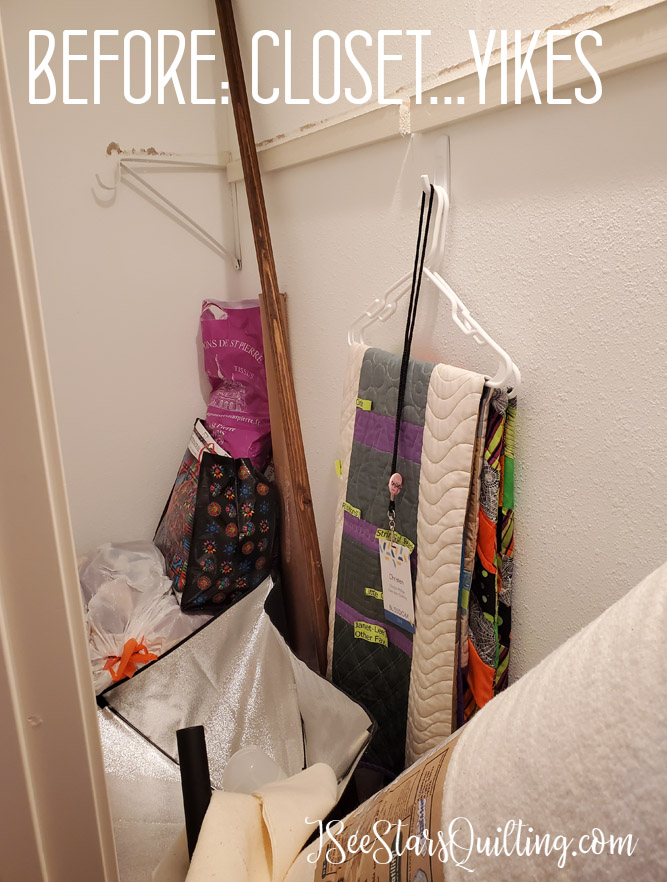
The last “before” picture that I am going to share is of the closet for the room. It was a very long, skinny and awkward design that made it nearly impossible to organize anything but perhaps seasonal clothing, if this were a bedroom… But for sewing supplies, it was a black hole of disaster. This was the largest project of the sewing room renovation
Deciding on priorities:
When re-organizing your space, it is important that you decide exactly what it is you want. I mean EXACTLY – specific achievable goals… not just a vague idea of a space that makes your heart flutter.
My “Must Have” needs for this room…
- Obviously, a crafty zone where I can spread out and be free to create!
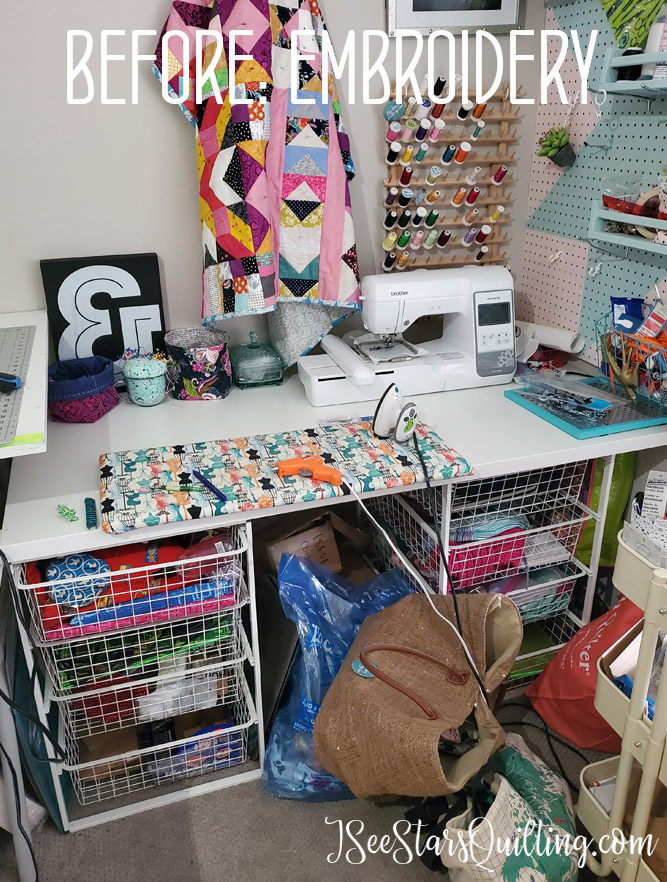
- Multiple zones: sewing, embroidery, cutting/ironing area
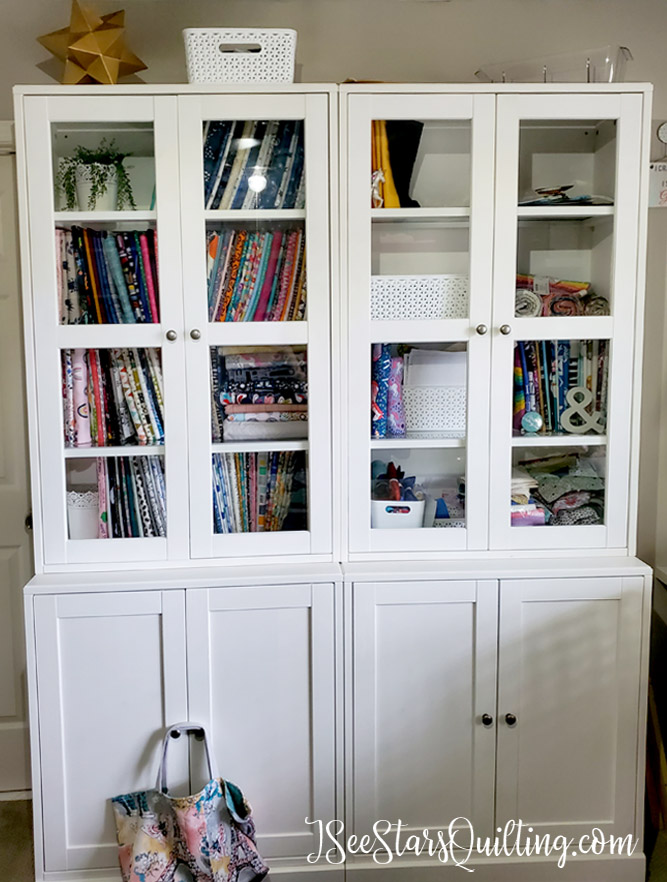
- Storage.storage.STORAGE – At the risk of sounding like a broken record, I wanted a place for everything and I didn’t want it to be out on display all the time.
- Clean and minimal feel with lots of open countertops
- Business/blogging area where I can handle office work and video editing – separate from my sewing area.
Things I would still like to add down the line… because no creative space is ever “finished”, right?
- Can lights in the ceiling for more light all over the room – for now, my table lamps are working just fine.
- Beautiful quilts stacked everywhere! I love using my quilting projects as a useful decor item – I’m working on this one 😉
- Super cushy/girly seating that would be approved by Elle Woods. PINK and comfy, yet also supportive for optimum posture is ideal.
(FYI – that’s a reference to the move Legally Blonde, if you’re wondering…😂)
The in-between stages: Sewing Room Renovation Progress Pics
While I was knee-deep in other projects going on around the house (more on the hic-up project in a minute) I played with rearranging my office space and sewing room to see what layout felt like it suited the room and my needs the most.
For example, Did I want an island in the room? There are so many cute ones on pinterest! But I also really like having floor space… so I opted out of that scenario and ultimately decided on a T-Shaped work area.
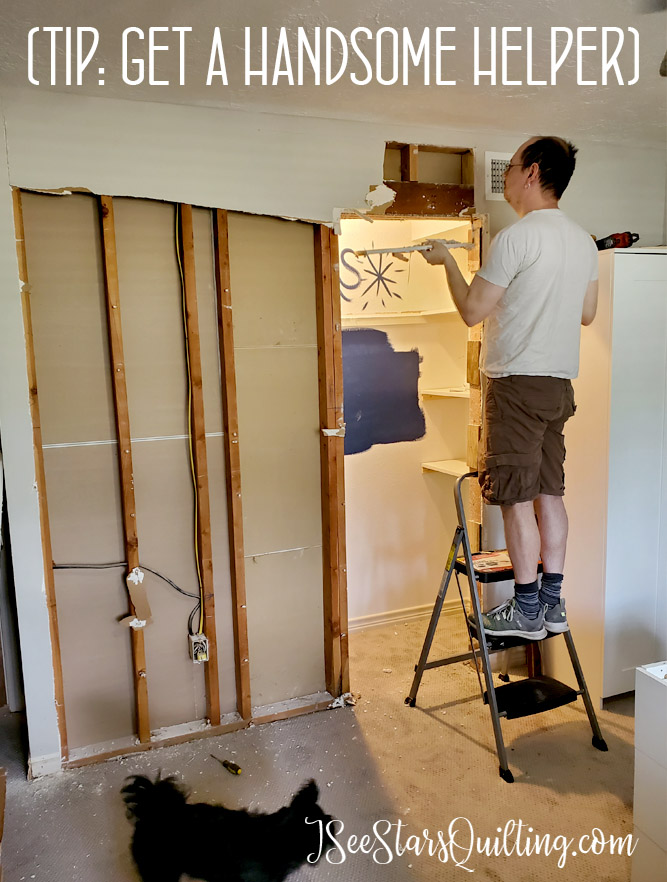
When it came to taking out the closet… it is beyond my skill set, so I enlisted the help of my 2 favorite guys. My dad and my husband were absolutely essential in this project and I couldn’t be more happy with how it came together!
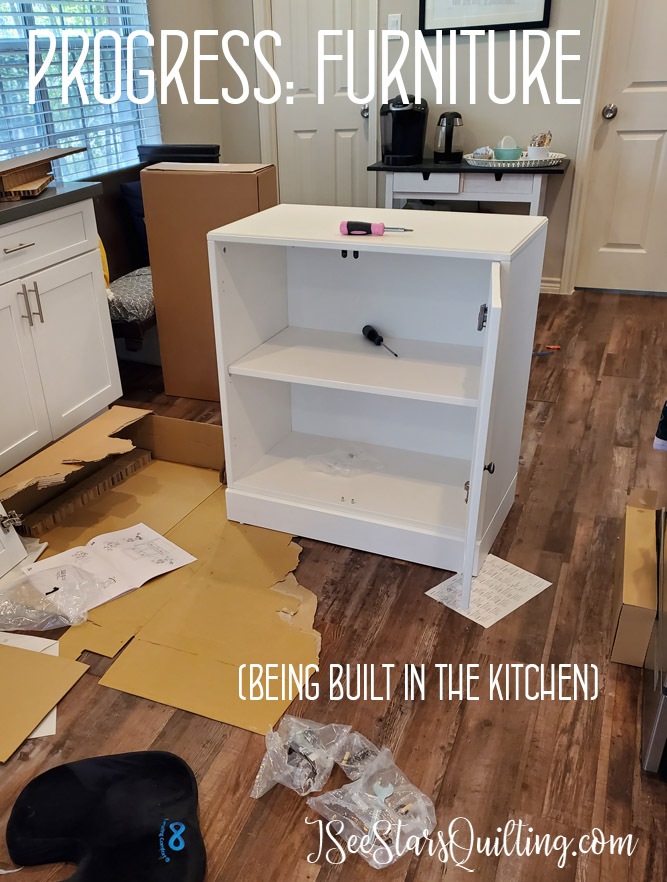
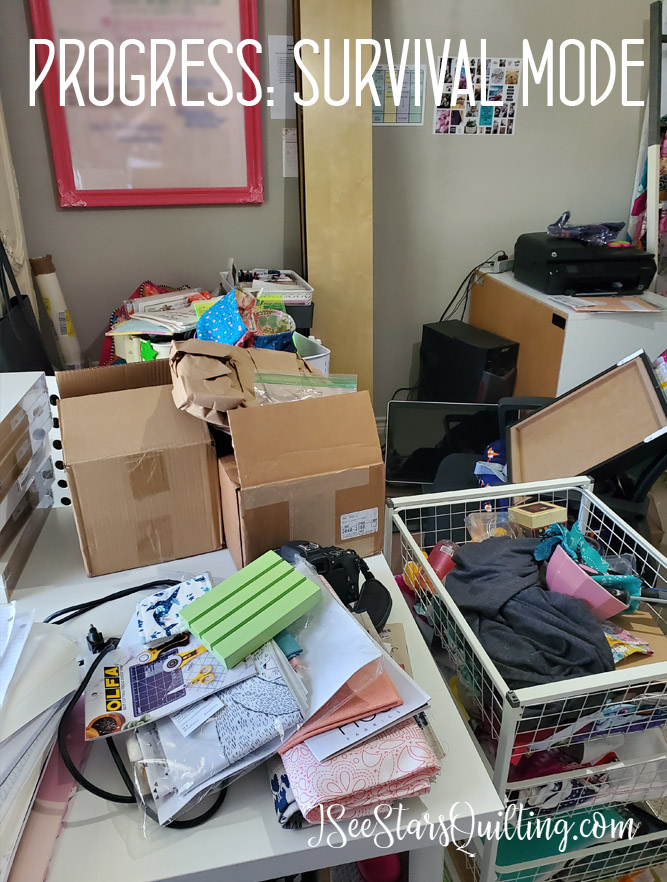
I remember at one point I was questioning what in the world I had gotten myself into because there just wasn’t any more floor space in my house and we were covered in cardboard boxes and bits and pieces of ikea hardware all over the place. This picture below was taken in my kitchen because I was that desperate at that point. 😜
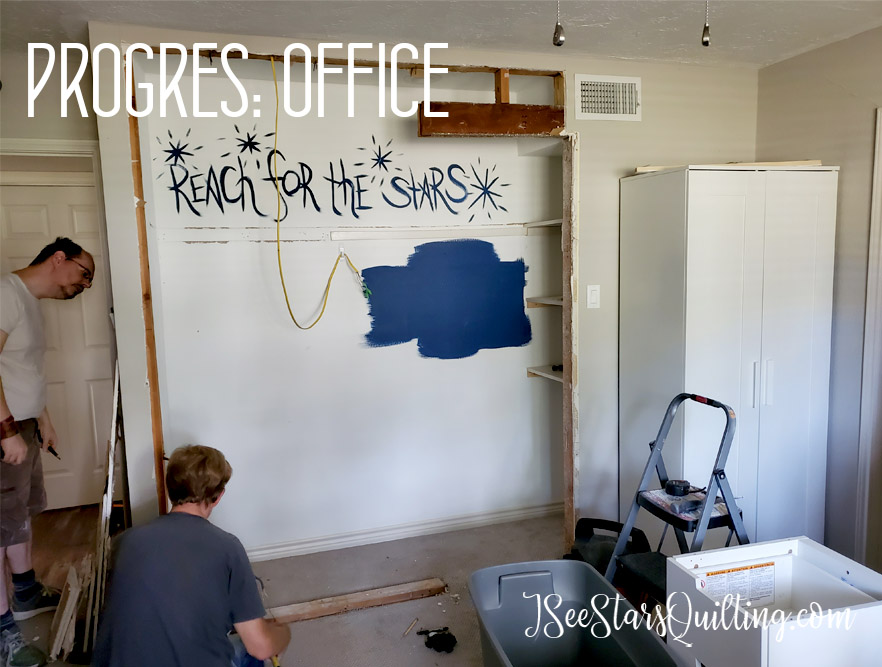
Note: The message on the back of the closet wall – On every single wall that I paint, I like to paint an inspirational secret message. It serves no purpose whatsoever as it gets painted over. I like to think that it adds a little extra magic to the room. 😍
I’ve done it for as long as I can remember. My kids knew about the ones that I painted in their rooms and will occasionally bring it up in conversation… Originally, I was considering a navy blue paint color for that nook but changed my mind thinking it would make that corner of the room feel too dark and closed in with the beautiful dark granite counter-tops. (I found them for a steal of a price through my neighborhood website!)
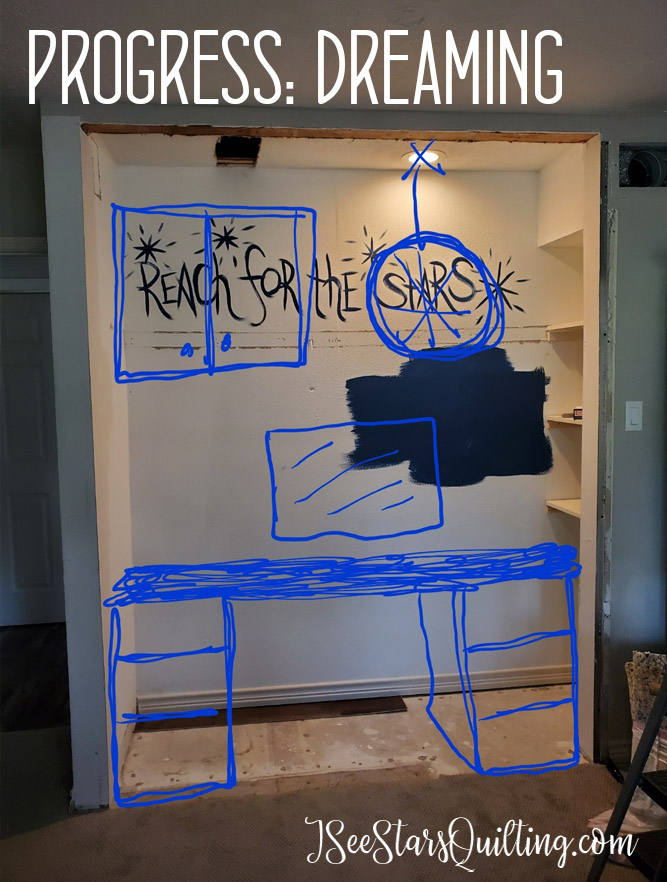
The pic below was my dreaming phase/sketch of how I wanted my desk area to look. See the shelves on the right? We kept those from the closet before. It is perfect storage for my camera, microphone and other office books! Accessible, yet out of the way so I have plenty of room to work.
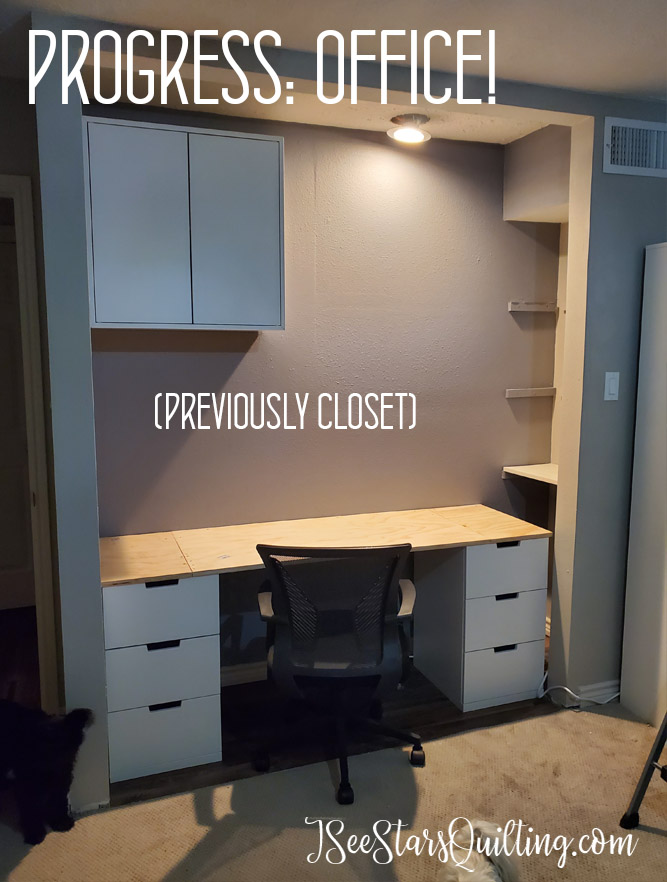
And here is the progress all painted and cabinets installed, plus the beautiful flooring!
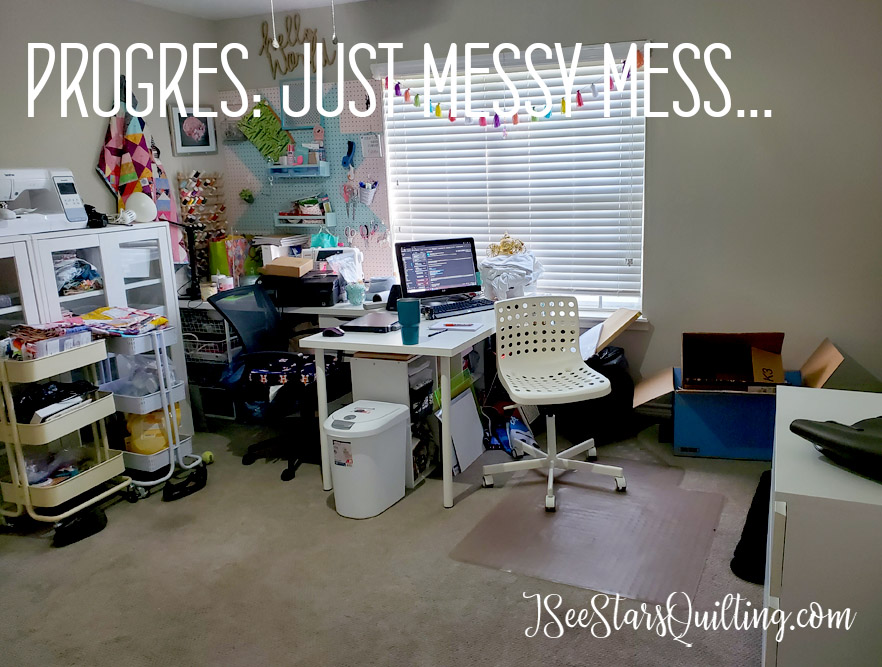
What the rest of the room looked like…
The behind the scenes was like a sewing war zone. It was an explosion of boxes and a very odd collection of piles everywhere
About that hic-up that I mentioned earlier. My Sewing Room renovation often got put on the back burner of home projects. We also ended up dealing with working on our laundry room, organizing various closets and other home sanity projects as well as new windows on our house. Oh yeah, and the pandemic too. It has been a weird year…
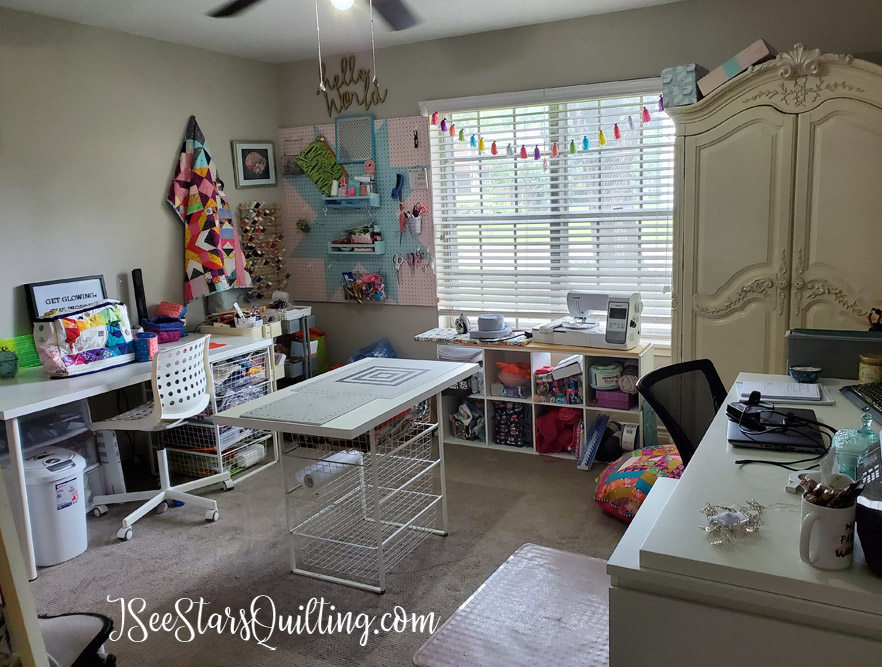
The After Pictures
For a full tour, make sure you check out the full video on Youtube.
I am loving creating in this space now. It serves every single one of my goals and I can’t wait to walk in here every single day! 🙌😘
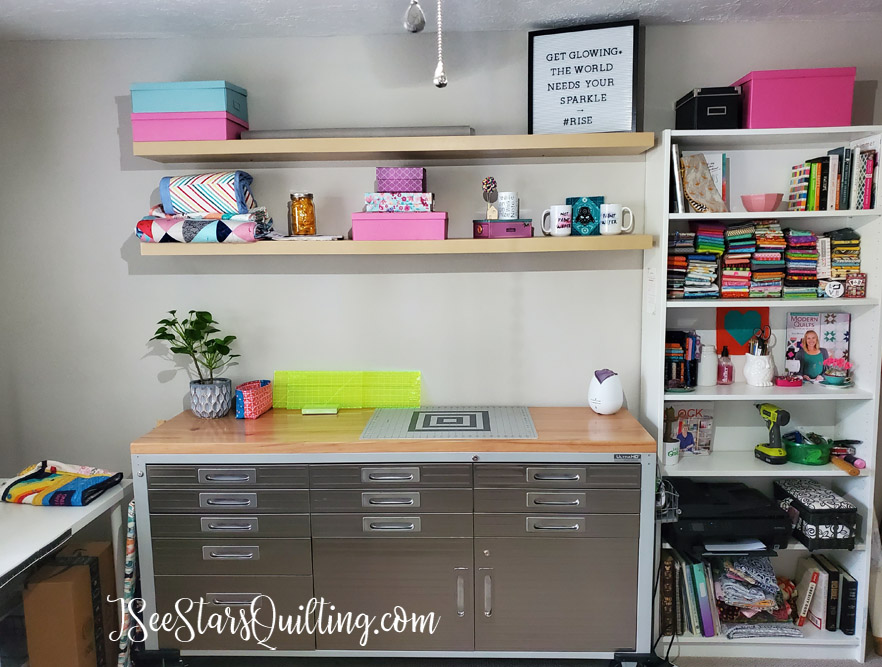
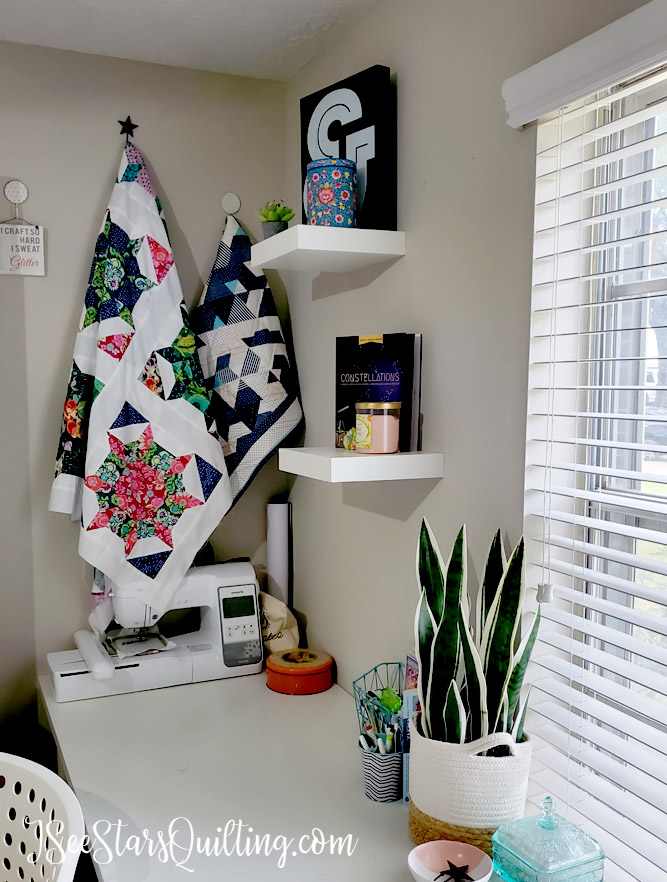
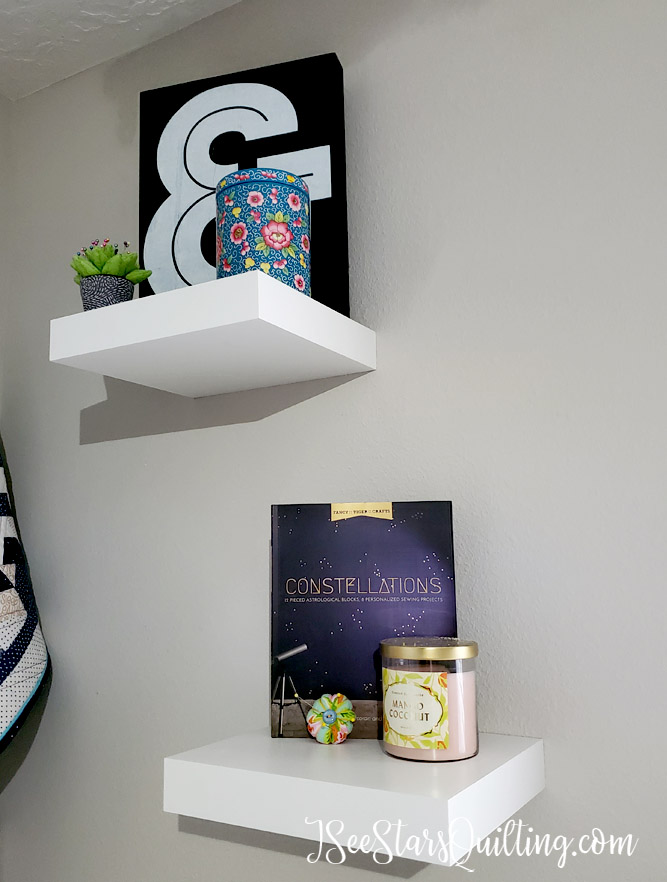
I made sure that I had display space for my most favorite décor items and books. Oh, how I love all of my art/craft books!
What I did to save money while renovating
I have several tips on saving money as a crafter. Everything from 8 Tips for Quilting on a Budget and Cheap Sewing Room Storage to Fabric Shopping – The Smart Way To Do It in 6 Steps.
I did a lot of research online and IKEA seemed to have the best reviews for durability, versatility, and cost overall.

I also constantly scrolled websites that has second-hand furniture in my area (be careful that you do this safely!)
Utilizing websites with used furniture was a big help. I found a few gently used pieces for FREE and I was able to sell a few of my pieces of furniture to turn around and invest back into the space.
If you have any questions, feel free to leave them below. I’m happy to answer them for you and go into detail on anything you wish to know more about.
It is a little hard to sit down and write absolutely everything that happened over the past 5 months or so. It was a long process, but well worth the sweat, mess, dust & tears!