Christen Phillips

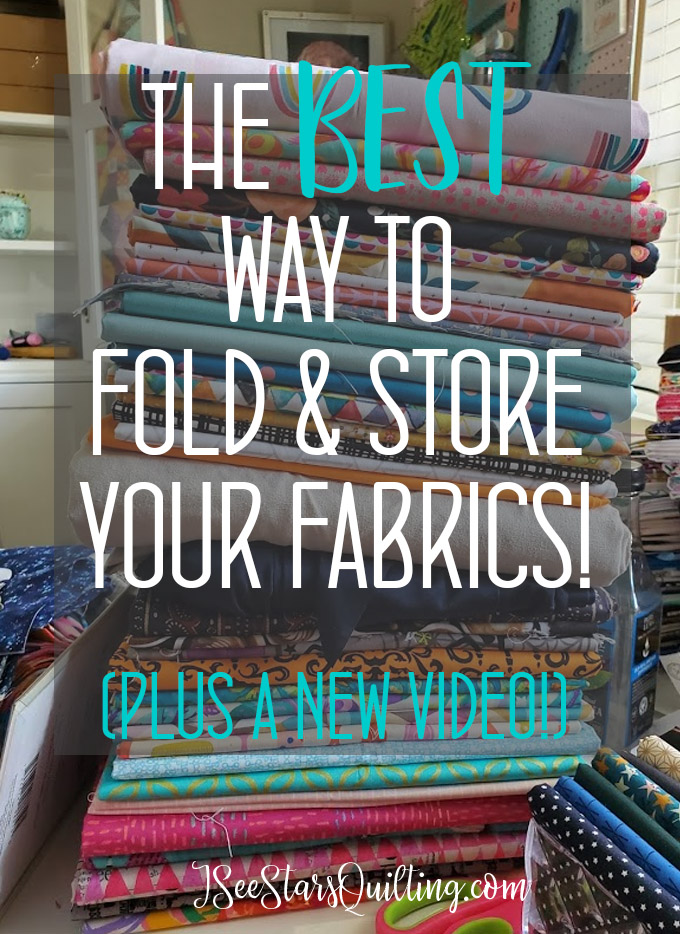
  • The Best Way to Fold and Store Your Fabrics!

    Hey howdy hey quilting friends! 😘

    I’ve got tips to share with you today (plus a video!) on the best way to fold and store your fabrics!

    Fabrics are precious little treasures… and it seems to be quite the hot opinionated topic to discuss how to store them. Everyone has an opinion or a way that they have that works for them…. or so it would seem. And then there are the rest of us who are just trying to figure out a sufficient way that makes sense (and you don’t lose anything while you’re at it).

    When I make a quilt, I always try to shop my own stash first.

    I love my fabrics so much.

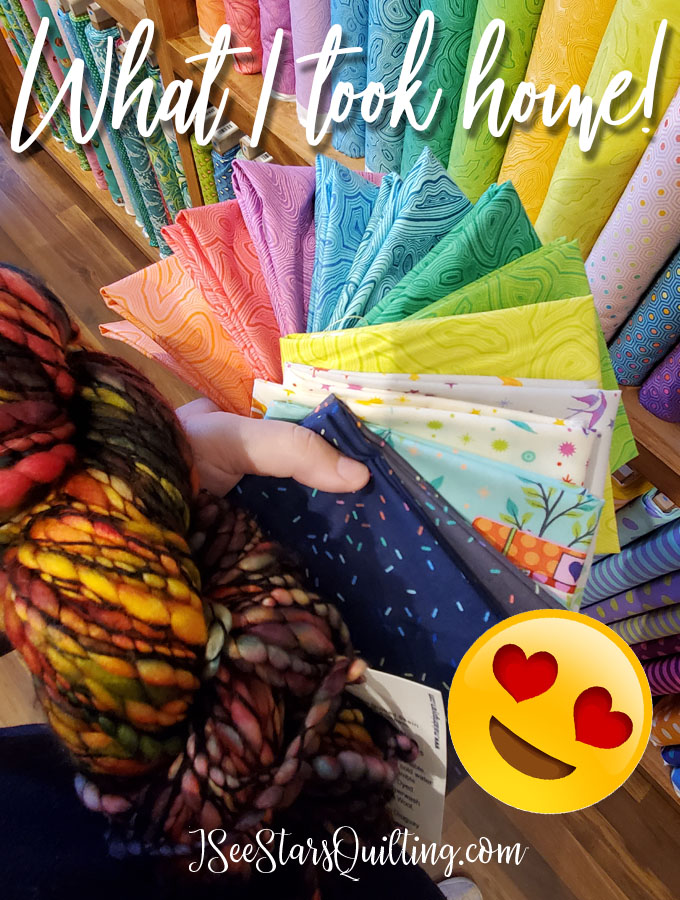
    Sometimes shopping is unavoidable if you’re looking for specific amounts or you just can’t find that spark of inspiration you’re looking for… because then you get to go to the fabric store and gaze at all the new beautiful fabric lines! 🀩 … and possibly come home with a little more than was on your shopping list.

    So how do you store your fabric stash?

    First, Let’s look at yardage fabric. (see below for fat quarters and scrap fabric.)

    My yardage has always been on a bookshelf of some sort… I really love to arrange my fabric on “mini-bolts” so it looks like I’m at the fabric store. 🀩 FYI, I use these boards here, from amazon.

    I also like that when they’re stored neatly on the shelf, you can easily inventory your stash and get a good look at what you have on hand.

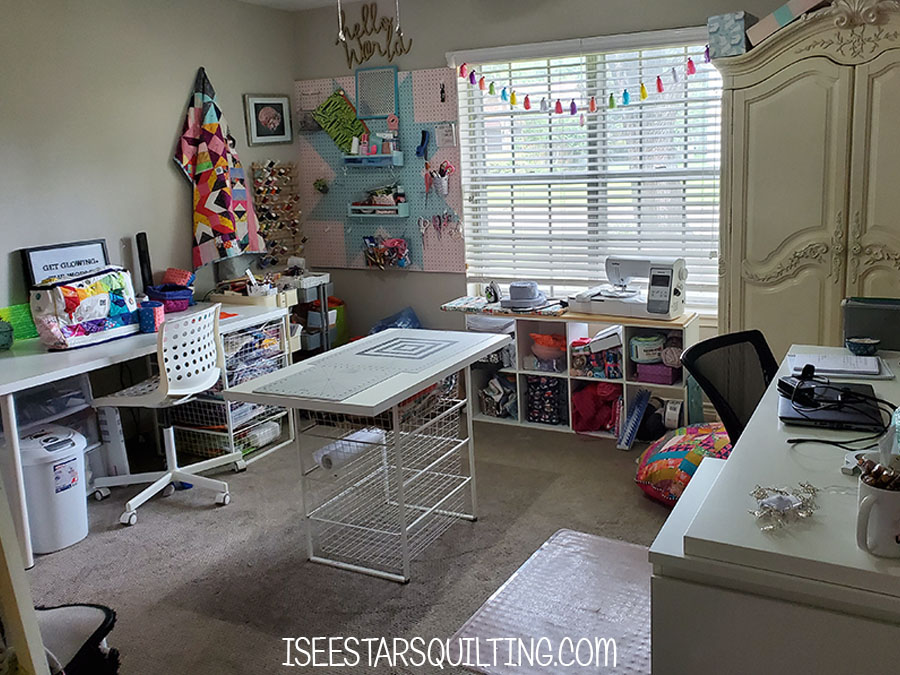
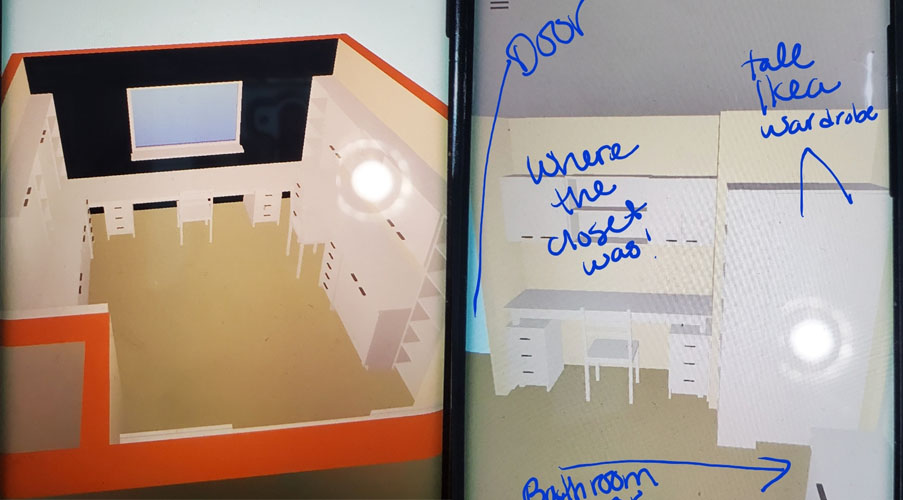
    Note: Right now, I’m in the middle of completely redoing my sewing room and storage is my main focus… because *um yikes, I can’t believe I’m going to share this with you, but here goes* this is what my fabric shelf used to look like…

    It is kind of a hot mess…

    Check out these tips and tricks that I have to share with you on the best way to fold and store your fabrics! Plus I have a new video to share!

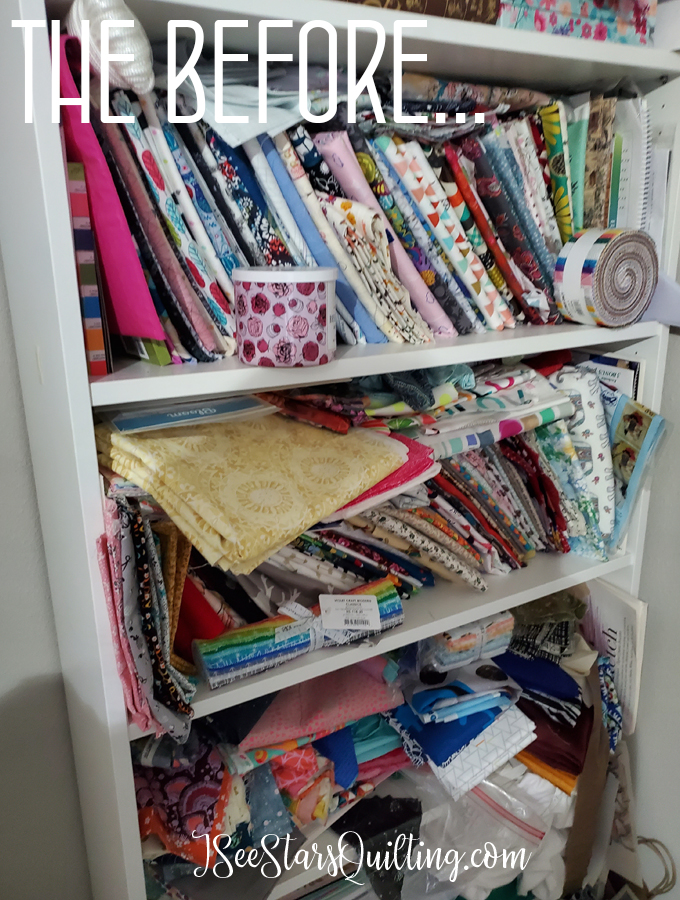
    Please don’t judge me lol…. all I can tell you is at some point I gave up, I think? I don’t really know… it was a million tiny decisions that were nonchalantly made to “deal with it later” and then all of a sudden I had this massive tidal wave of fabric to deal with. (Truth be told, I never wanted to deal with it. It was extremely uninspiring and I avoided the stack at all costs so as not to make it come tumbling down.)

    How is that #reallifemoment for you?

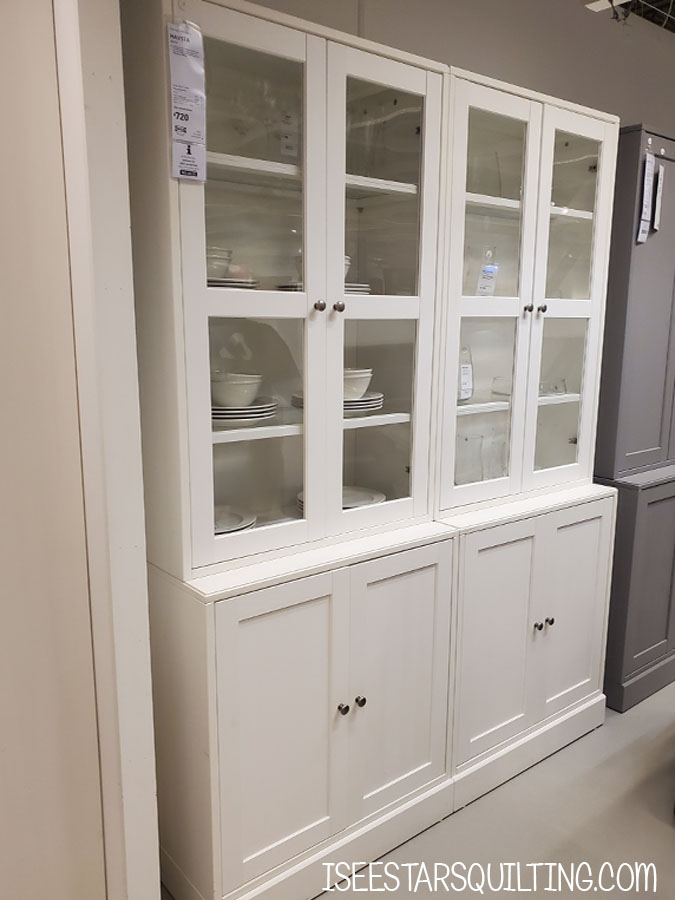
    Moving on to better storage arrangement…

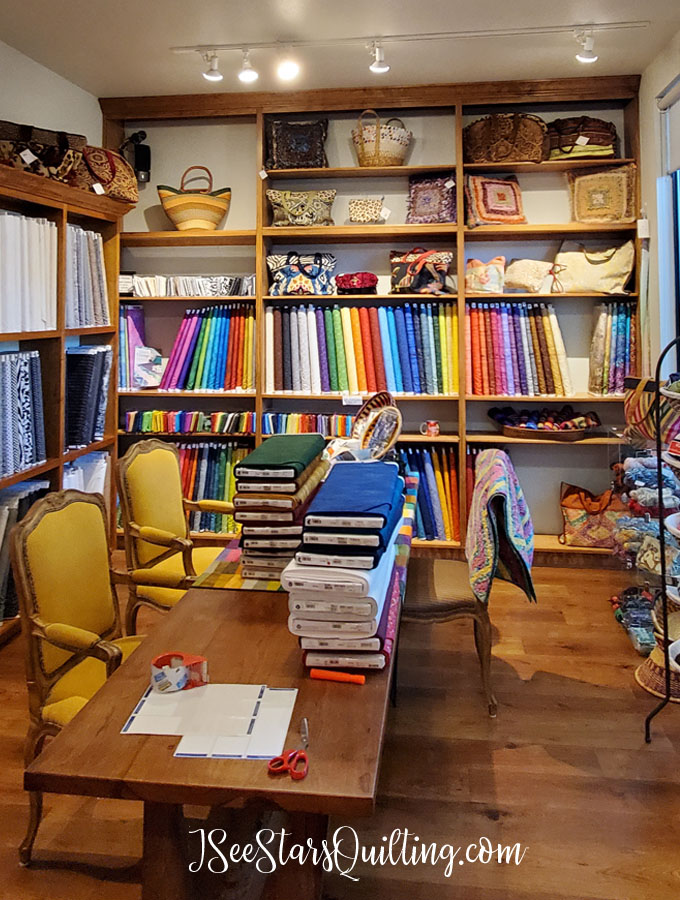
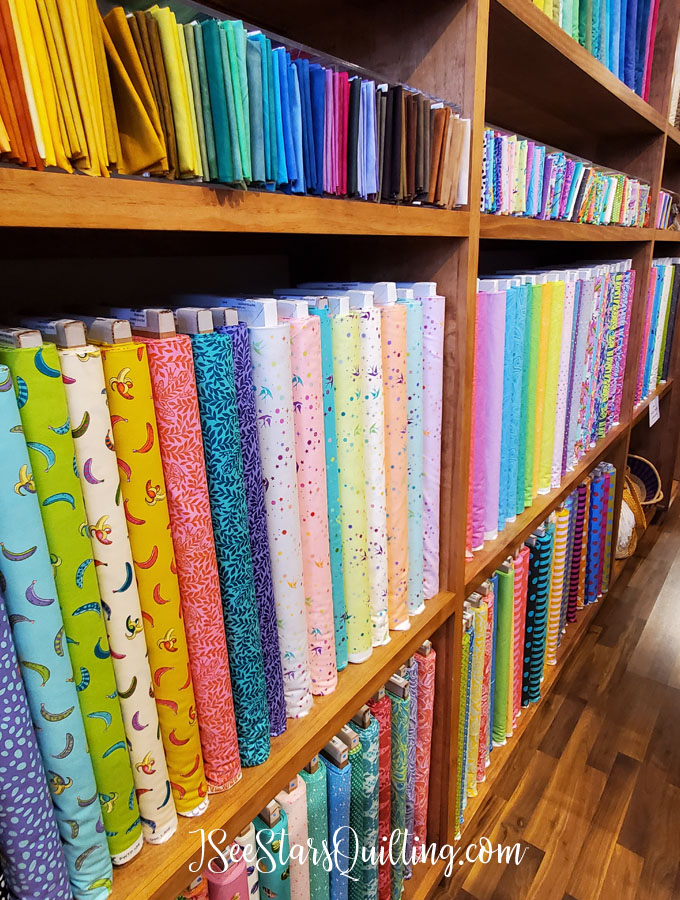
    I used the same method of storing my fabrics on mini “bolts” when I began to reorganize, but I really tried to focus on the “pretty” factor this time around.

    This is how things look when you’re shopping in a quilt shop. Things are nicely and evenly arranged. all the fabrics have their place to shine… (no tumbling tower of disaster)

    Check out more pictures from my fabric shopping adventure day through small Texas towns

    I really want my sewing space to feel luxurious when I look at my fabrics… like choosing to put your cherished diamond jewelry in a fancy display box or satin lined case instead of in a ziplock baggie. The intention behind it means so much more when you take the time and effort to show more care towards it.

    Maybe I’m being a bit extra here, but this is my space, ok?

    I wanted my fabric to be an art exhibit in my sewing space. πŸ₯³

    The boards that I use to wrap my fabric on are actually these comic book boards.

    They have held up really well for me over the years. You can buy them in different quantities and use them over and over again as you move through your fabric or acquire more fabrics.

    They’re also non-acidic so you don’t have to worry about anything happening to your fabric if it is going to be a while before you get back to it.

    So yeah, I had A LOT of fabric to fold and reorganize… this is bretty much what the inbetween looked like for about 2 afternoons of getting caught up on TV episode binges and folding fabric…

    Check out these tips and tricks that I have to share with you on the best way to fold and store your fabrics! Plus I have a new video to share!
    Check out these tips and tricks that I have to share with you on the best way to fold and store your fabrics! Plus I have a new video to share!

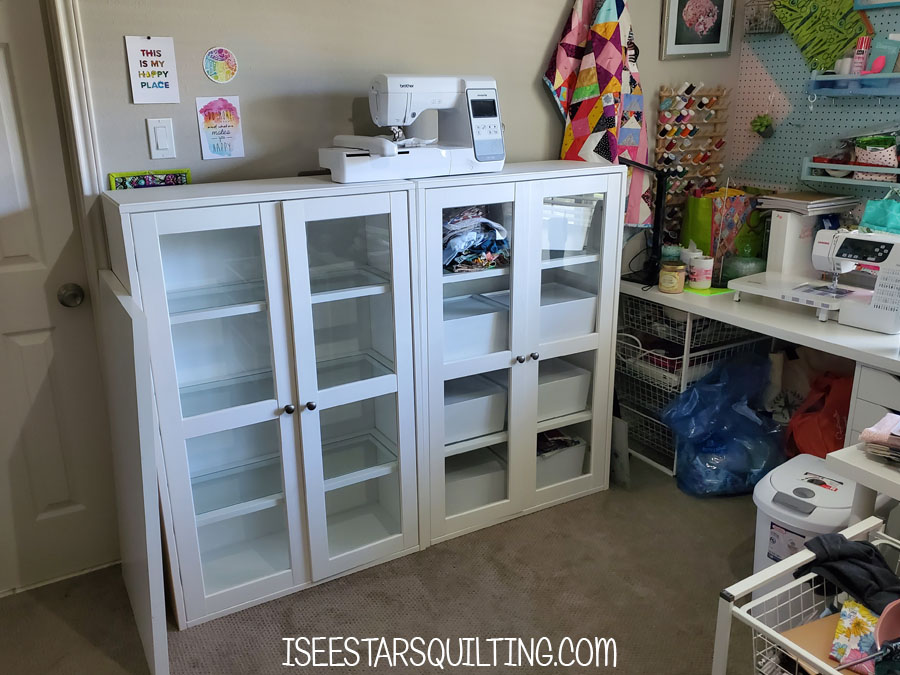
    But it was so worth it, because this is what the fabric shelf looks like now that I have it arranged much nicer.

    Check out these tips and tricks that I have to share with you on the best way to fold and store your fabrics! Plus I have a new video to share!

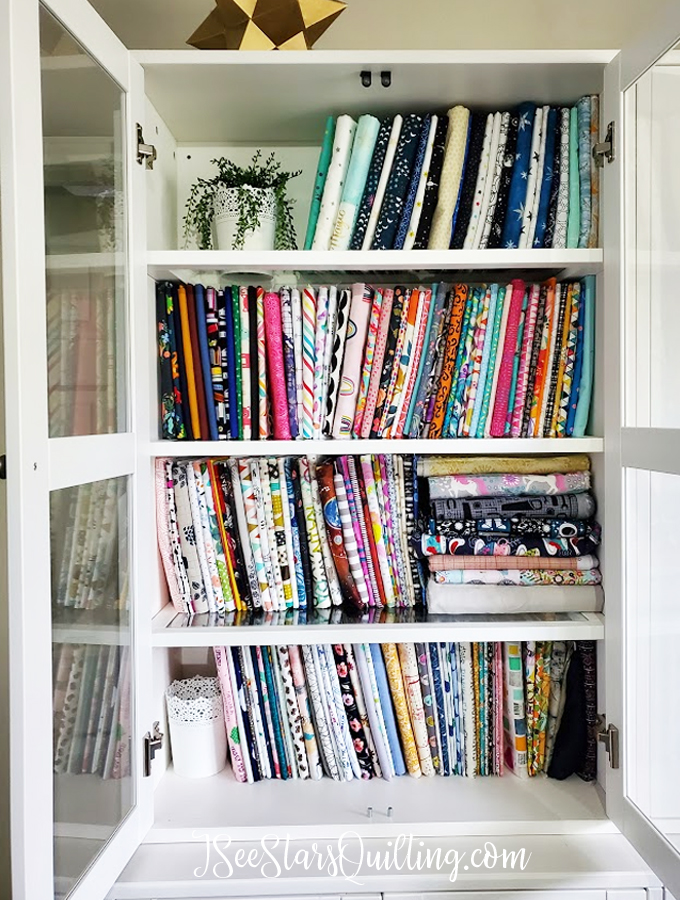
    Also, I haven’t decided how I want to categorize my fabrics just yet… so they’re not in any particular order at the moment. (just in case you’re looking for some sort of order or decoding system)

    THAT will be a project for another day…

    FYI, I know that I have a huge stash of fabric. I’ve been blessed to have acquired a lot of it at good deals and through sweet friends… There is no possible way that I could ever use it all so I chose to de-stash a lot of my fabric and pass it on to other people that will put it to good use. So in reorganizing my fabric, I downsized my stash and also increased my amount of storage overall so things are nicely spaced out now.

    The video: How to fold your fabrics

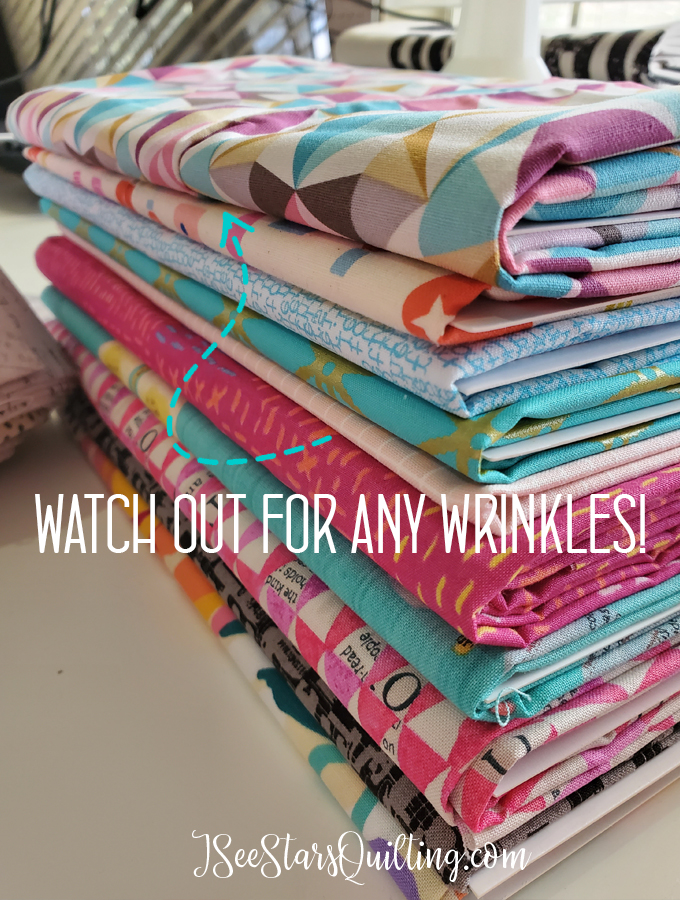
    I put together a short video that explains the best way to fold your fabrics so you can display them nicely! I’ve given step by step instructions on how I wrap my yardage fabric as well as my fat quarters.

    Um but what about scrap fabric?

    I don’t actually fold my scrap fabrics, but I do have suggestions for how you can store it and organize it! (That is a whole different level of OCD sorting, my friend!)

    I have several posts about scrap fabric storage ideas that you can check out here:

    This video has some more tips and ideas for fabric storage for you!

    I hope that was a big help and maybe a little inspiration if you’re looking for fabric storage ideas!

    I’m always on the search for more tips and tricks to share with you. I share anything I can share to make your time spent in your creative zone even better!

    Comment down below if you have any thoughts or if you have any tips to share with me πŸ™‚ Talk to you soon!

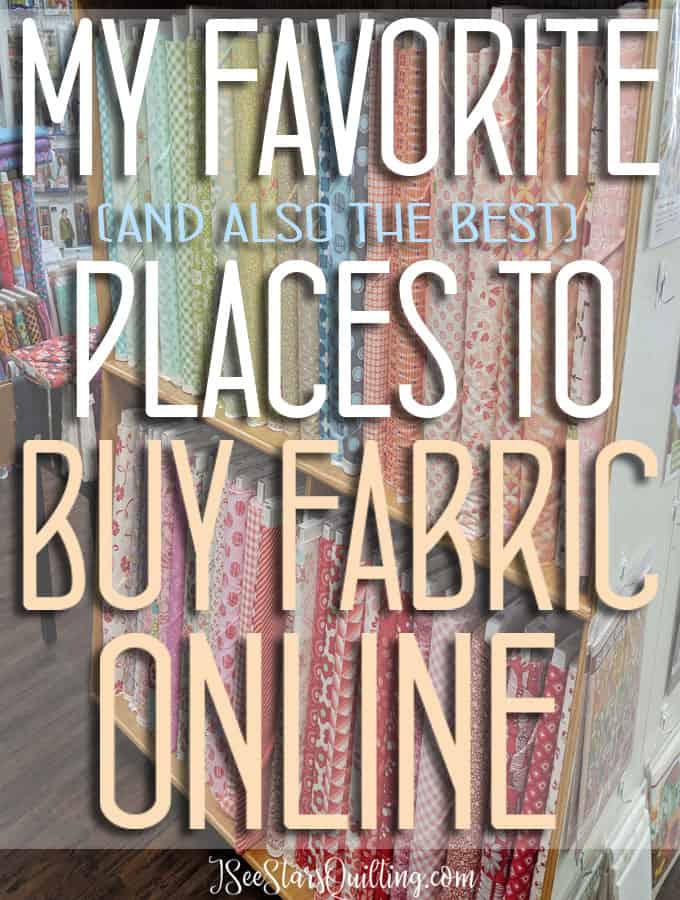
    Do me a favor and pin this image or share it with your other quilting friends? I would greatly appreciate sharing to help reach more quilters!

    Check out these tips and tricks that I have to share with you on the best way to fold and store your fabrics! Plus I have a new video to share!
  • Vacation-Getaway (With A Little Quilting Mixed In)

    We recently had the pleasure of taking a little vacation-getaway. I added in some local quilt shops to our travel “to-do” list.

    Since I know that not everyone is able to travel right now, I thought I would share some of my adventure with you

    On a quick mini get-away, I made it a point to drop into some local quilt shops and do a little fabric shopping! I wanted to share some of my finds with you

    [Be prepared, this post has a LOT of photos in it.]

    I’m not about to pull out a big slide projector, but I wanted to give you a sense of the joy and fun that this little trip brought for us.

    So here we go!…

    Normally, when my husband and I take the kids on a road trip, we do the normal stops for some car snacks and try to involve the kids when we choose where to go or where to stop. Being that they are homeschooled, I always try to add in a few educational stops as well. (mommas gotta teach when the opportunity presents itself)

    However, this trip… I was adamant about something that I don’t usually make it a point to work in… deliberately planning our route to include detours for quilt shops.

    *I won’t lie… it kind of felt a little selfish because I know that this isn’t an activity that everyone enjoys… but it made me completely giddy too* πŸ₯°I decided, with my husband’s blessing that I really needed to work this into our fun adventure!

    I mean, it tends to happen naturally when we travel and I happen to schedule us to roll into a town that has a quilt shop about the time we would be stopping for lunch anyways… so we might as well right? 😘

    Bit of backstory: Every single year for fathers day my family rents a big house out in the Texas Hill Country and we all gather together for a few nights of family fun, cooking, marshmallows, giggles and treats. It is a tradition that we look forward to every single year.

    On our way to Wimberly, Texas, We drove through LaGrange, Texas.

    This town is absolutely picturesque. A cute Texas town. Charming. So friendly and beautiful in every way.

    They also are home to the Texas Quilt Museum! Ahem *cough* coincidence? πŸ˜‰ Check out their website below and look at the upcoming exhibits if you’ll be anywhere in the area! It is absolutely worth the trip! http://www.texasquiltmuseum.org

    On a quick mini get-away, I made it a point to drop into some local quilt shops and do a little fabric shopping! I wanted to share some of my finds with you

    Unfortunately, the museum wasn’t open when I went. (Boo. It was a bit of poor planning on a Thursday afternoon on my part). However, they have a beautiful little garden next to the museum that we got to walk through!

    On a quick mini get-away, I made it a point to drop into some local quilt shops and do a little fabric shopping! I wanted to share some of my finds with you

    I would love to visit it in the spring time again. I took a lot of pictures, but please keep in mind that it is Mid-August and well over 100* F in Texas. So we’re kind of lucky that any of it is green at this point!

    This is the type of place that I would love to grab a cup of tea or coffee and go spend a few hours with a good book in! Doesn’t it look so shady and lovely?

    On a quick mini get-away, I made it a point to drop into some local quilt shops and do a little fabric shopping! I wanted to share some of my finds with you
    On a quick mini get-away, I made it a point to drop into some local quilt shops and do a little fabric shopping! I wanted to share some of my finds with you

    Despite the heat and really strong sunshine, there were still pretty flower blooms. You can tell that this is a very well loved garden!

    On a quick mini get-away, I made it a point to drop into some local quilt shops and do a little fabric shopping! I wanted to share some of my finds with you

    In the picture below, I realize that it looks like my kids are looking at their watches out of boredom or wondering how much longer mom is going to drag them around in the hot Texas sunshine…πŸ˜‚ but actually there was a legit sundial in the middle of the garden and they were checking the accuracy! lol (I told you I teach where I can!)

    On a quick mini get-away, I made it a point to drop into some local quilt shops and do a little fabric shopping! I wanted to share some of my finds with you
    On a quick mini get-away, I made it a point to drop into some local quilt shops and do a little fabric shopping! I wanted to share some of my finds with you
    The beautiful painted mural on the side of the Texas Quilt Museum!

    Do you see how beautiful that wall is? That is the side of the quilt museum. How stunning is it?! It almost makes me want to paint the side of my house… I wonder how my neighbors would feel about that though?

    On a quick mini get-away, I made it a point to drop into some local quilt shops and do a little fabric shopping! I wanted to share some of my finds with you

    A Little Shopping Trip Always Makes The Day Better!

    I was rather disappointed about not getting to go in the museum itself, but it wasn’t a total loss, because next to the museum is a lovely little quilt shop that you CAN NOT miss if you come this way! http://www.thequiltedskein.com

    On a quick mini get-away, I made it a point to drop into some local quilt shops and do a little fabric shopping! I wanted to share some of my finds with you

    I mean… holy modern quilter’s paradise!!!!

    This shop is adorable! It is also much larger on the inside than it appears on the outside.

    On a quick mini get-away, I made it a point to drop into some local quilt shops and do a little fabric shopping! I wanted to share some of my finds with you

    They also carried a lot of beautiful yarn, many different materials and price ranges as well.

    Honesty check: I love yarn. I have no idea what to do with it and I can’t knit to save my life. I’m a tragic attempter at crochet – meaning, I’ll pull it out every few years thinking I’m “ready” for it, but I don’t know… I don’t think God’s children were meant to be good at everything or something 🀣 Perhaps I should just leave it to the talented ladies that make beautiful things with it?

    My daughter uses a loom to knit scarves and hats on (that I can do!) so she was in heaven like I was!

    On a quick mini get-away, I made it a point to drop into some local quilt shops and do a little fabric shopping! I wanted to share some of my finds with you

    And this sheep… isn’t he just the cutest?!

    On a quick mini get-away, I made it a point to drop into some local quilt shops and do a little fabric shopping! I wanted to share some of my finds with you

    Another room full of fabric waiting to be scooped up by another creative soul… Also, I took this photo, because I am in LOVE with those mustard-colored upholstered chairs.

    On a quick mini get-away, I made it a point to drop into some local quilt shops and do a little fabric shopping! I wanted to share some of my finds with you

    I could have spent at least 2 hours walking around and touching all the fabrics, but because I had my entourage with me, I kept it as short as I could.

    On a quick mini get-away, I made it a point to drop into some local quilt shops and do a little fabric shopping! I wanted to share some of my finds with you

    These were the treasures that I took home with me. A lot of Tula Pink’s new line… and a random skein of hand died alpaca yarn that felt like touching the softest most rainbow cloud that ever existed. I am in LOVE with it!

    I told you I couldn’t resist yarn… even if I am not 100% sure what to do with it...

    A Few Other Texas Road Trip Treasures

    I mentioned that we always indulge the kid’s requests for a few treats when we vacation. These are from a small bakery in Ellinger, Texas called Hruskas. http://www.hruskas-bakery.com

    On a quick mini get-away, I made it a point to drop into some local quilt shops and do a little fabric shopping! I wanted to share some of my finds with you

    Also, that photo is not me being tricky with my camera or zooming way in. The cinnamon roll was split 4 ways because it was HUGE and loaded with cinnamon – just the way I like them. No skimping on the Cinnamon is the best way to get 5 stars in my book!

    On a quick mini get-away, I made it a point to drop into some local quilt shops and do a little fabric shopping! I wanted to share some of my finds with you

    The kids thought this water tower was adorable. I can’t say I disagree… it was a very friendly addition to our window views.

    In Wimberly, Texas

    As I said, we rent the same house every year. It has like 5 bedrooms, a large kitchen and dining area, horses to feed on property and plenty of space where the whole family can get together. We also enjoy the use of the private pool and lots of time to spend together making more memories each year.

    It is our haven. And it felt so nice to be able to escape for a little bit!

    On a quick mini get-away, I made it a point to drop into some local quilt shops and do a little fabric shopping! I wanted to share some of my finds with you

    Just look at these views from the back porch!

    On a quick mini get-away, I made it a point to drop into some local quilt shops and do a little fabric shopping! I wanted to share some of my finds with you
    On a quick mini get-away, I made it a point to drop into some local quilt shops and do a little fabric shopping! I wanted to share some of my finds with you

    If you’ve made it all the way down here, thank you πŸ₯° I hope that the next little vacation (or even working trip) that you get to go on you make it a point to stop at some craft shops along the way. Check out those little quilt shops and enjoy meeting some new quilting friends!

    You won’t regret the wonderful time spent looking in the small business run shops!

    If you have any small quilt shops that you adore, please let me know. I’m making a list so that we’ll have a good resource of the recommended shops!

    If you’re curious how to find find quilt shops in your area, check out this post!

    On a quick mini get-away, I made it a point to drop into some local quilt shops and do a little fabric shopping! I wanted to share some of my finds with you

  • How To: Find Local Quilt Shops

    One of my favorite things to do when we travel is to look up a few local quilt shops to visit during some of our downtimes!

    I’ll admit that 1) I am probably the only one in my family that enjoys this part of the trip… and 2) Any purchases and finds as my souvenir from each trip.

    I have found so many treasures while on vacation… and I’m not just talking about fabrics! Check out my fabric hunting post from my trip to Paris, France.

    The women and men who work at these shops are absolutely wonderful and several of them have become cherished friends.

    I fully support the growth of small businesses know that each of these shops are truly a work of heart and soul to run.

    Are you a regular at your local quilt shop?

    Let me be clear that I am not knocking the big chain fabric stores and brands.

    I think that the fabric industry is big enough for lots of fish to swim!

    Each industry has its benefits.


    As far as local quilt shops go: Here are a few more blog posts you might be interested in.

    How To Find Local Quilt Shops

    The ‘hope for the best’ google search

    I like to start off with a quick google search… seems simple but usually, it gets you off on the right foot and your search in the right direction…

    Want more adventure in your quilting life? Try shopping at local quilt shops in your town or while you're traveling! Here is how to find the best shops.

    More and more quilt shops are getting internet savvy and trying to make their presence known to the world.

    Note: If you have a local quilt shop that you would like the world to know about, e-mail me! I’m in the process of making a big list that makes it easy for us traveling quilters to find these secret treasure spots.!

    When you are searching on google, “[town name] Quilt shop” should be a step in the right direction, but if it doesn’t… here are a few other internet searches to try.

    • “[town name] yarn shop”
    • “[town name] fabric supplies”
    • “[town name] craft store”
    • “[town name] sewing machine repair shop”
    Talk And Ask Around

    Really all you need to dip into the wonderful world of quilt shops is just one little source.

    Let me ask you a question… do you have a friend who “knows a guy” for absolutely everything? Then that also makes you a person who “knows a guy”, right?

    All you need is one person who knows someone and you’re IN!

    Quilters are some of the nicest people… most everyone I’ve met is very open and happy to help answer whatever questions a newbie can come up with.

    So… talk to your quilt buddies and guild friends… If things are safe in your area to travel, make a group list of places to visit and pull out your calendar!

    Ask the workers in the quilt shop! Talk to the wonderful people when you are in a quilt shop and ask if there are other quilt shops in the area that are worth visiting.

    You can also ask around at sewing machine repair shops too. They tend to have a wealth of knowledge.

    Make a game of it!

    See if you can make a game of it and tackle one quilt shop a month until you’ve visited several in the area!

    Schedule a few half day trips to the other side of town and check out a few new restaurants or dessert shops while you’re at it!

    Maybe I’m a little crazy, but turning a simple shopping trip into an absolute adventure (even just a few hours) is a wonderful way to make it more exciting and shake up your creative inspiration!

    Seriously, if you’ve found yourself stuck in a creative rut or you’re feeling like you are missing that little spark that you had when you first started quilting and everything was new and exciting… perhaps a shopping adventure is exactly what you need!

    Quilt shops inventory varies from store to store…

    You’ll find that different quilt shops have different inventory and cater to different crowds and tastes in fabric.

    In my area, there are a few shops that cater to traditional fabrics and a few that cater to more modern fabrics. If you haven’t found quite what you’re looking for… keep looking.

    Search just a little outside of your comfort zone

    If you live in a small town or you live in a more rural area… plan a few small day trips with your girls (or a husband/friend that is willing to trade some time waiting around the quilt shops with you for some road trip snacks).

    If you can’t find what you’re wanting to find in your area, expand your search and look a little further out.

    You can easily make a short weekend get away and hit up a few smaller towns if you carefully plan your tip as well!

    Want more adventure in your quilting life? Try shopping at local quilt shops in your town or while you're traveling! Here is how to find the best shops.
  • Sewing Room Face Lift: Planning Stages

    We’ve been in our “new house” for just under a year now. So it is safe to say we’re mostly settled in and everything has found it’s place… (for now at least). We’ve completed a few projects here and there… but my sewing room has been in need of a facelift.

    When we moved in, I made things work because this is my sanity safe haven. I needed to set up shop fast and make it work.

    I love this room and everything in it.

    Here is something to know about me… I move around furniture… a lot. I think there is a perfect arrangement that makes the sunbeams shine down and everything aligns for perfect productivity… It can be a challenge sometimes, but when you find that perfect melding of function and beauty *cue angels singing* you’ll forever be chasing it in the other rooms of your home as well.

    I thrive on order and a clean workspace to think.

    I’ve been relatively happy with making things work for a while… but in the back of my mind has always been the adjustments I wanted to make…

    Current Sewing Room Tours:

    You can see my other sewing room tours in the links below.

    The next post has pictures from the sewing room in my old house, but I go a lot more into how I organized my tools and my methods for organizing. Though slightly outdated for what I sew with now, it is still a good read and full of information!

    Creativity is best in a room filled with the things that bring you joy! I'm going to give you a tour of my sewing room today and share all my organization tips along the way!

    Back to current planning stages… Recently, I’ve decided to give my sewing space/home office a bigger facelift.

    In the past, I do all this work behind the scenes in the late-night hours and then I choose to write a reveal post about it when it is all complete and lovely. 😍

    I do still like to show you all the ugly behind the scenes photos because… I’m not HGTV and this can get ugly, right?

    But this time... I decided to go a little bigger… Ok, so a lot bigger and more complicated than just a simple room rearranging.

    I decided to take you along for the ride with me and document the process in a series of posts. You’ll get to see the whole process… the conception, ideas, nitty gritty ugly bits and hopefully sooner rather than later, the finished product!

    You can also check out some current pictures on my Instagram page!

    The Starting Place

    Here is what I’m working with right now. A little messy? Yes!… Functional and a joy to sew in? Absolutely. I’m very blessed to have this space in our home to create. (You’ll notice that it is different from my “official” tour post because well… things change a lot around here lol)

    The Purpose Of The Room

    First off, when you want to make a change, you can’t just jump on the internet and start ordering new things. You really need to hone in on what the purpose of the space is.

    For me, this space is…

    • A sewing/quilting and craft space
    • also embroidery things
    • A home office where I run my business
    • A safe haven and should feel peaceful for me to be in
    • It also has the only access door to the half bath that guests use
    • A pretty space that I can be me in

    Let’s dissect the problem areas that I have with my current room.

    Some of these are nit picky remarks, but thats the beauty of creating a new space… you get to be picky!

    I like to make a list of everything. I call it my “If I had a million dollars” list. If money was no object and I could have everything I wanted, here are the things I wish I could fix…

    • I have a lot of hobbies that happen in this room… I want to maximize my space.
    • I lack hidden storage areas – most everything I have is easily seen when you walk in the room. It feels cluttered and even when the room is clean, it looks like a creative explosion went off in here.
    • The closet in the room is nearly unusable. I have no idea what they were thinking when they built it. The measurements are 22″x76″ with only one normal-sized door on one end. access is really awkward
    • When a guest comes over, they have to walk through my mess to use the bathroom. I need to be able to maintain a clear pathway from door to door.
    • I could use more desk/workspace.
    • I don’t have an ironing station/area.
    • I need a place to store my photography equipment/lighting.
    • My fabric storage is maxed out and I need to clean out the fabric I have that I will not be using – Maybe I should plan a future de-stash sale?

    You can see that there is an overall pattern of my storage solutions that could use some work.

    An important note about the “if I had a million dollars” list:

    Just because it is on the list, doesn’t mean that I am going to get everything I want. So, while it is something that I would fix “if I had a million dollars” it doesn’t mean that I get to go broke making it happen.

    With a little planning, thought and ingenuity… you usually can make things work with a much much MUCH smaller budget!

    Planning Some Solutions/Ideas

    My favorite planning tool to get inspiration from is Pinterest. Obviously… they’ve revolutionized internet searches and being a visual person… it is my first go-to for ideas.

    PS – You can follow my Pinterest boards here!

    I created a vision board with some of my ideas to give myself a little further inspiration. It helps pull together a lot of ideas and really help to clarify the vision for the final product.

    The planning stage for me is always the longest because I resist just jumping in and spending the money on something that I don’t feel like I’ve completely thought through just yet.

    It can be a good thing, but also… I really have a hard time pulling the final trigger… which brings me to my next little bit of advice…

    Involve a friend – It’s more fun with two!

    If you have the opportunity, involve a friend who understands what you do in your crafting space!

    They can not only help you come up with a plan and inspire you… but can help you make sure you don’t chicken out before the dream becomes a reality!

    A friend created a group board on Pinterest for her and I to contribute ideas to and she came up with so many solutions that I wouldn’t have even considered… she is a sewist as well… so she understands we need storage, and lots of it!

    She also gave me great advice when I was thinking that I was in over my head.

    Don’t limit yourself based on what you think you can’t do. Design your dream space and then make it work within your budget.

    My parents gave me some great ideas, because they are really good long term thinkers. My mom is amazing at making things look like a model home. (Seriously, Better Homes & Gardens has nothing on her) And my dad is amazing at home remodeling projects.

    Making a Plan

    Excuse the length of this post… This is like a months worth of thinking, formulating and planning all rolled into one post…

    I have a really good idea of what I want everything to look like, how I want things arranged.

    I found an app on my phone called “Floor Plan Creator”. It is a free app, but you have to buy it if you want to export or send any of your creations. The free version worked really well for what I wanted to do.

    You can add in all your measurements/dimensions and it makes a 3D model of your room. You can add all the doors, windows and architectural features you need, plus it has a lot of stock furniture that you can change the dimensions on as well.

    Here is a very rough layout of what I want to work towards…

    Again, please excuse my messiness… this was texting pictures back and forth to my mom and I hadn’t decided at that point to share them with you just yet!

    Also, almost everything I currently own is from IKEA… so… obviously, we will be taking several trips there to add more of the same style to the room! woohoo!

    Shopping Trips

    I saw the Havsta line while shopping at Ikea and fell in love with the glass doors. It is also a solid wood line so the quality of the overall piece is higher than the standard budget pieces.

    Can’t you just see it full of beautiful fabrics? 😍πŸ₯°πŸ€©

    Unfortunately, IKEA stock is really varied right now with the pandemic (like everyone decided to re-do their home office, but didn’t want to spend the big bucks?) so I will be closely stalking monitoring their stock to see when I can pick up my other items as they become available.

    I was able to get the glass cabinets, and have already built them, but I will have to wait on the lower cabinets a little longer… This is what I have so far…

    Can you see my vision? lol no? well… it is a work in progress…

    That is where I will leave you today because I really don’t have much else to show but a very messy space… I’ll keep you updated as it unfolds though!

    I think I am most looking forward to going all #demoday on my closet wall. I’ve always wanted to knock down a wall like some powerful goddess of destruction.

    I have no idea if that is how it will be in real life, but I’ll be able to check that off my bucket list at least! 🀣

    …more to come!

    If you’re interested in the step by step methods I use to determine what my needs are, you can check out my very popular ebook that tells everything!

    I walk you through the planning stages and show you how you can transform ANY space into the space of your dreams, PLUS I share a bonus budget guide with you!

    Check out out here!

  • What To Do With Leftover Quilt Batting Scraps

    We usually have at least two leftover dinner nights in my house each week. We try to make use of what we have so it doesn’t go to waste. That’s the whole idea, right?

    Did you know that you can take the same principle and apply it to your sewing room? If you have leftover quilt batting scraps laying around, don’t just let them collect or *gasp* throw them away! Put them to good use!

    I prefer the term “collector” rather than “hoarder”… but if you don’t sugar coat it, the fact remains that after a while, my scrap drawer was over run with little saved bits and pieces.

    Do you save your used batting scraps to use as fillers for pincushions and small pillows, dog beds, and random small projects here and there? Me too.

    I would feel lucky if I could find the right size pieces intact to make a small wall hanging or a mugrug. (check out free mug rug patterns that I share in this post)

    I overheard a term from another quilter in passing while shopping for fabric one day… she said, “I made a frankenbatting quilt with all of my scraps! You can’t even tell!”

    um, excuse me… WHAT?!?

    Us quilters like to come up with a million different acronyms and cute sayings and nicknames for all of our tools… we’re adorable, aren’t we? 😘

    However, to a newbie or self-taught quilter, it doesn’t make for a very even playing field!

    Do you know all the terms that the professional quilters use? Check this list out and see where you stand. Pin it for later so you can refer back to this extensive list.

    So, what in the world is “Frankenbatting”?

    As I came to find out… it is simply the stitching together of all of your scraps to make “new” whole pieces of batting.

    Sewing scrap pieces together to make larger, bigger “new” pieces… thats like the very definition of what quilters do, isn’t it?

    BUT WITH BATTING! It is SO smart, right?!

    And the best part?… If done correctly, no one will EVER know!

    You wouldn’t believe how simple it is…

    See this photo right here. It is a piece of my own “frankenbatting”.

    Once this is covered up with a quilt top and back absolutely no one will ever know I used scraps and leftovers from other projects, right?

    How to make Frankenbatting using leftover quilt batting scraps

    • Trim up your leftover quilt batting scraps. If you have wonky angled or curved edges, square them off evenly. Frankenbatting works well with nice square corners and even rectangles.
    • Take your pieces to your machine and press the edges next to each other without overlapping. This will help to create a seamless feel. No bumps or uneven areas of your quilts will show because it is all the same thickness.

      You can see in the photo below that the edges just touch on the red line and do not overlap.
    • Stitch your pieces together. I like to use a nice wide zigzag stitch with a long stitch. (again, to minimize any extra layers or bulk within your finished quilt)

    This is what the settings on my machine look like. I sew on a Janome 3160QDC.

    If you’re in the market for a new sewing machine, check out this post: The Best Sewing Machine Deals on Amazon

    And that is that. That is all it takes to use up your leftover quilt batting pieces and create brand new pieces… BIG pieces without spending anymore money.

    It is a very simple idea that makes use of all your odds and ends of scrap batting… even trimmings from your quilts!

    I may or may not have created a new obsession for you, but I hate to see good money being thrown into our trash cans! Don’t you?

    If there is a use for it, we will find a way, right quilters?

    I’ll be honest, it feels really good to be able to use those scrap pieces and turn them into something beautiful!

    TIPS TO KEEP IN MIND

    I find that this really helps to have your pieces cut as even and square as possible.

    Lay our your frankenbatting pieces out on a table before you start layering your quilt sandwiches. Make sure there there are no weird gathers, bumps or wrinkles! – Except for a few small almost invisible seams, the piece should look just like normal quilt batting.

    Use a thread that is very similar in color to your batting. I usually just use my standard white cotton thread. My quilts tend to be very colorful and not a lot of large light-colored fabric areas. I could see how if you did have a large background and used a bright colored thread, it might show through your finished quilting… a disaster!

    Do not limit yourself on the scraps you can sew together! I have used this technique for projects large and small! Quilted bins? Purses? Wall hangings? Large quilts? Small quilts? There is no limit!

    This piece right here…. totally frankenbatting… but let’s keep that between you and me, ok? (or the rest of the internet too, I guess… why not?)

    What do you do with leftover quilt batting scraps? I have a wonderful solution to turn them into frankenbatting... if that confuses you, it is not near as hard as it sounds. It's a great way to make use of leftovers!
  • 10 Answers To The Most Popular Quilting Questions

    It has been a long while since I’ve sat down to write a blog post… honestly, it is 2020… so a few weeks might as well seem like a few years with all that has happened. Right?!? I’m really happy to be back writing educational blog posts that I hope this brings you answers to all of your quilting wonderings!

    These are the quilting questions that most often come up in emails from quilters.

    FYI – You’re always welcome to contact me if you have any questions. I’m available and happy to help sort out any issues you’re having or if you just need a second opinion. 😘

    Hey, make sure and pin the image below so you can come back to this post whenever you need to!

    Do you have quilting questions? Here are the answers to the 10 most popular questions quilters have! Plus links to free patterns and the know how to increase your quilting confidence and skills!

    What stitch length should I use?

    When I am quilting on my machine I like to stick to a 3.0 or a 3.2. (That is just personal preference. A longer stitch makes things go a little faster and it kind of resembles the classic hand quilting stitch length in my opinion.) When I am piecing, you’ll need a much smaller stitch length. I like to use a 2.2 or 2.4 length. Your pieces have less likely a chance of coming apart on the edges as well as a stronger hold on the quilt over time. You can read more and see pictures here.

    Do I need a fancy sewing machine to start quilting?

    This is often the biggest drawback for people who are just getting into quilting. wondering if you have to spend a lot of money to get a “good” sewing machine. The answer is no, it doesn’t have to be fancy and have all the bells and whistles. Some of those bells are nice later on if you want to experiment more but the only requirement is that the machine is in good working order. The less trouble shooting you have to be doing, the more time you can spend sewing and enjoying your craft.

    The other thing to consider is making sure that the sewing machine you choose has a wide throat for quilting. The “throat” is the open part in between where your needle sews and the outer right side of your machine. Once you start quilting, you’ll end up rolling your quilt up and feeding it through that space. the tighter it is, the harder you’re going to find the quilt struggle will be.

    You can also read this post about the best sewing machine deals as well as read more about the machine I chose and why I absolutely LOVE my Janome machine.

    What do you suggest for quilting/craft room organization?

    Well… I suggest what works best for your brain.

    If you’re a really neat and tidy (everything has it’s place, order is king) then you need to work with that and design your space around that mentality…

    If you’re good with just a box to throw your tools in or a few drawers where things are roughly where you know where they should be… work with that.

    I have lots of posts on organization, but I can’t stress enough that as beautiful as some of those spaces may turn out to be… you can’t fight who you truly are! Once you find a perfect blend of your personality and a way to organize your tools… THATS when you find the perfect sweet spot of contentment.

    Here is a list of my favorite tools and organization products: My Favorite Things

    For more ideas on organization, see some links below:

    Um… Triangles are hard & scary! Help?

    Yes, they SEEM hard… but you can do them! (and I promise you won’t shed a tear while you do it!) Check out this FREE pattern of mine πŸ™‚ You can get it here. I give you a way to make a wonderful triangle quilt without all the fuss and not one single Y seam!

    What is a good pattern for a beginner quilter?

    How detailed do you want to get? Simple Free patterns like the ones in this post and this one are a good place to start. Find a pattern that you LOVE. Make sure it doesn’t have a whole lot of curves or odd sized pieces. And if you can… make sure you have a quilting friend you can call on if you need help.

    This super colorful quilt pattern is a free download! Windy Days by www.iseestarsquilting.com

    I can’t seem to get my seams/corners to line up?

    There are a few things you need to check on this one.

    1) Are all of your pieces cut accurately? If yes, then...

    2) Are all of your seams an even 1/4″ (or whatever the pattern specifies?) It may not seem like it but the tiny-est fraction of an inch can throw off your row of fabric and by the end of it you’ll have no hope of getting those seams to line up. If they are accurate and consistent…

    3) Have you tried nesting your seams? This is a method in which you can get the seams to sit right when you’re sewing that will keep them from shifting under your needle. Check out this video below.

    Where can I get deals on fabrics?

    Hey, we all try to save when we can. What we do isn’t a cheap hobby.

    I have lots of suggestions for getting the best deals on fabrics for you!

    If you are shopping and you happen to find a really good deal on fabric, stock up. You can use simple fabrics for backings or incorporate it with other more expensive fabrics to keep the overall cost down.

    $2 a Yard on Fabric? - Is this for real?! WOW! These 6 tips are an awesome game changer in the fabric store!

    Check the remnant bin when you shop. A lot of times you’ll find odds and ends of bolts that are around 15-30% off just to get rid of anything that is less than a yard… aka a “remnant” fabric.

    Always check for coupons or discounts. Big chain stores tend to jack up their prices a little bit so they can offer super good coupons every once in a while and we all feel like we’re getting an amazing deal. It is kind of a part of shopping now in just about every industry… so knowing this, USE those coupons! Don’t pay full price for it if you can help it.

    In smaller quilt shops, don’t be afraid to ask if they have any type of frequent buyer program or coupon programs. My local quilt shop offers a 10% discount to quilt guild memberships.

    They also give you a $25 gift card when you spend a certain amount… I always turn right around and use it in their store right away haha but still! Yay for more fabric, right?!

    Every little bit helps!

    What do all the quilting abbreviations and terms mean?

    When you’re first starting out it is almost like some secret alien language that you’re forced to try and decipher…. QAL? WIP? RST? HST? …….WHAT THE WHAT?

    I made a long list of really helpful terms that you will probably run across at one point or another on your quilting journey.

    We quilters might be a little odd at times, but we’re not aliens… you’ll pick up on the terminology rather quickly with this FREE handy guide.

    Do you know all the terms that the professional quilters use? Check this list out and see where you stand. Pin it for later so you can refer back to this extensive list.

    Do you have tips on caring for your quilt to make it last?

    Yes! When I first started quilting, my kids were little and I was completely germ-paranoid… My solution (for everything) was to wash on extra hot setting in the washer and basically boil away any dirt on my precious quilts.

    Seems like the best solution, right?

    Wrong. Once I learned better, I started washing my quilts differently and I can completely tell the difference in wear and tear from those first sweet quilts.

    We spend so much time, energy and money making these quilts… you really want to give them their best shot at lasting at least as long as you do, right? One would hope that these quilts will be treasured gifts from you for loved ones to hold onto, snuggle under, use and pass on down to another generation in the future!

    I can’t change the fate of my first few quilts… but I can make sure that people out there don’t follow their instincts and make the same mistakes.

    I created a FREE download that has resonated with so many quilters. I actually created and designed it so nicely that you can GIFT it with your quilts and rest easy knowing the recipient will know how to care for their quilts too!

    Save the quilts of the world, my friends!

    Which brings me to… what should I gift with my quilt?

    As if your time, blood sweat and (probably) tears weren’t enough! – Make sure that your recipient knows how much you put into making their quilt.

    You don’t have to brag or go into a long detailed story about the night you were up until 4am picking out stubborn seams and going cross eyed… but I think people who don’t quilt don’t quite understand the level of intuition and creative planning that goes into making a quilt.

    We don’t just slap some fabric scraps together and stitch it up real quick… no. There are so many steps involved!

    Thats why with the above Quilt Care 101 Download I also included a Quilt history form so that you can record those little details that went into making the quilt. Maybe state the reason why you chose the color pink and why the pattern with peony flowers represents the strength you see in your future granddaughter, even though she is 2 years old and fierce as can be. She will ADORE reading about it one day.

    I think those memories are really important to record.

    I also have a list of 4 Important things you should do when you gift a quilt (psst… I already told you about the quilt care sheet so… really, there are only 3 more things, but they’re pretty important so don’t skip them!)

    I hope that I’ve answered some of your most important questions. If you have any other questions, please feel free to contact me. I’m happy to help!

    Happy Sewing!