Tutorials

Step by step tutorials for quilting and sewing projects from ISeeStarsQuilting.

  • Keeping A Clean Sewing Space: A How to

    Sometimes I manage that amazing superpower of keeping a clean sewing space!… where everything has a place and the tabletops are clear of clutter… ahhh, It is so nice to know that creativity could happen at any moment!

    However, more often than I like to admit, my sewing room used to look like a tornado a path of destruction. I couldn’t find a single thing. Like that rotary cutter, I swear was on the table a minute ago? oh, it’s over on my desk now… Why? I don’t know. It just is.

    I felt uninspired when my sewing room was a mess… There was so much going on, I couldn’t even think… much less find room to create!

    Maybe you know how I feel?

    Are you drowning in clutter and fabric scraps?

    Is your space to cramped and feels like it’s impossible to work in?

    Are you overwhelmed or don’t even know where to start to make it better?

    I got so tired of feeling frustrated and out of control…
    Losing your creativity vibe because your space is a mess? Completely clueless with how to keep your space clean? I can help you! Check out these ideas that will help you keep your space perfect! (Even if you're prone to being messy)

    How I fixed it: Keeping A Clean Sewing Space

    I decided that I had had it one day. No more was I going to let the place that I called my “sanctuary“, “my happy place” and “my very own little slice of sanity” be a major source of stress for me!

    When I thought about it like that, it was absolutely ridiculous that I couldn’t be happy in my own happy place, right?!

    It took a while to figure out how to make things work and I have had a lot of trial and error over the years. My space isn’t “fancy” and you probably won’t find it in the pages of HGTV magazine… but I LOVE where I sew.

    You can take a tour of my sewing room in this post.
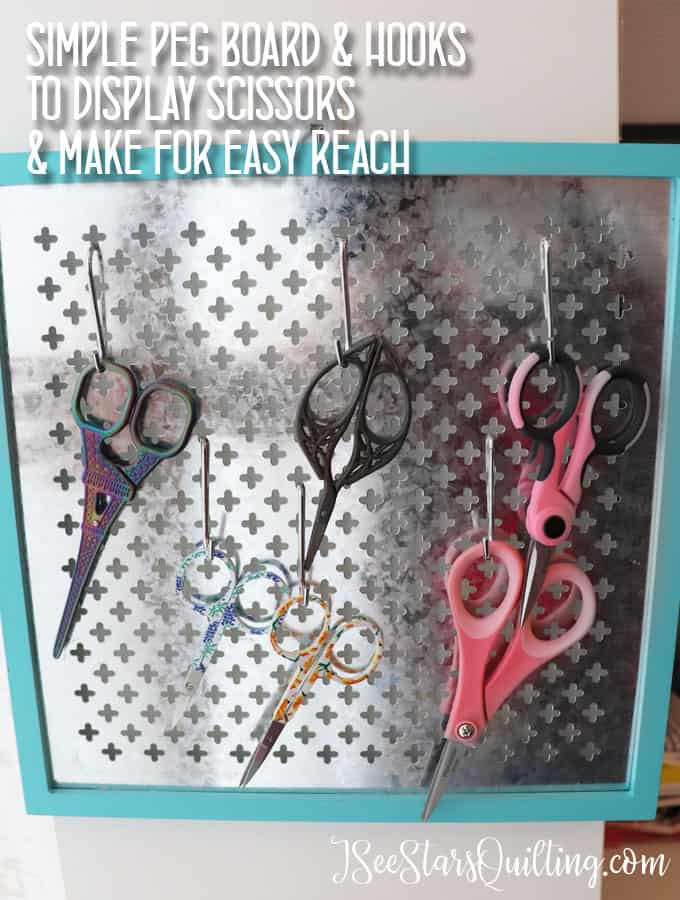
    Creativity is best in a room filled with the things that bring you joy! I'm going to give you a tour of my sewing room today and share all my organization tips along the way!

    Steps to Keeping a Clean Sewing Space: The Space Itself

    1. Give yourself a good talking to and be honest with yourself

    I mean like a mom talking to her toddler threatening to give away all the toys unless she cleaned them up kind of tough love talk.

    If you have too much stuff that there is simply no way that it will fit nicely in the space that you’ve allotted for yourself, you have 2 options: 1) find more space or 2) get rid of some of your stuff

    You can be as tough or as lenient in this that you want to be. After all, you are the only one who is the boss of you.

    2. Assess Your Storage Needs

    I used to have a bins and boxes problem. Do you know how I had a problem? I had empty boxes FOR my empty boxes!

    It is the crafty/DIYer curse… you just NEVER know when you might need it right? So I couldn’t bring myself to throw it away or pass up a good deal on a pretty box.

    I knew I really needed to be more organized and I was sure that not enough boxes to put things in was my problem. It absolutely was not! I would forget what was in my boxes and be unable to find things so I would end up buying duplicates or forgetting what I owned.

    3. Sort and purge everything you possibly can

    Purge the things that you know you will never end up using. Just get rid of it. Also, even though it is hard, let go of the things that you once were absolutely in love with but either realize that you will never have the time or just you simply just don’t feel that spark for anymore.

    It does you no good to hold onto and let it take up physical space for years and years.

    Don’t hold on to it unless it has a purpose or it really brings you joy.

    The items you are purging, you can give to friends who are just building their collections or bring your stuff to a guild meeting to see if anyone wants it. You can donate your scraps. There are tons of charities that take fabric too!

    Click here to read more about my favorite charities for quilters.

    Or you can see if your guild is interested in doing a remnant sale! Everyone brings in unwanted scraps and remnants and sells it for a bit of cash. Win win!

    4. Downsize your collections

    Gather all of your tools and make piles of the duplicates. Make a goal to only own 5 scissors or whatever it is that you have.

    Sometimes all it takes is putting everything into one place to realize you miiiight just have a problem.

    After you’ve cleaned out your space it is time to organize it and keep it that way!

    Ok, once you have it down to the essentials in your space and you are not wasting any space… you need to realize something…

    Your space can still get messy! Ugh, I know. I’m so sorry.

    Losing your creativity vibe because your space is a mess? Completely clueless with how to keep your space clean? I can help you! Check out these ideas that will help you keep your space perfect! (Even if you're prone to being messy)

    I turn around after a particularly good sewing session and my space looks like someone left a toddler unattended for 10 minutes!

    1. Have a specific place for everything.

    Every tool, every pattern, every project.

    Give everything a home and do your absolute best to return everything to its spot as soon as you are done with it.

    Read more about how to organize your space with items from the dollar store!

    2. Create zones in your sewing/crafting room.

    If you have more than 1 hobby, create sections for each hobby and try your best to keep all the supplies in that area. Not only is it easier to reach, but it helps keep you organized and from things quickly spreading to the whole room!

    3. Always Clean up 3 times.

    • Do a quick tidy before you start any new projects.
    • Clean up while you’re working on your project. Make sure you’re working as efficiently as possible. Keep trash off your worktable.
    • Always do a thorough cleaning after you finish a project. (Like the queen is coming to visit!)

    4. If you work on multiple projects at a time…

    If you take no other advice from this list, do this one thing! It will help you immensely in the sewing room.

    Have a dedicated box for each project and all its pieces/instructions. When you have to switch projects, pack everything up and put it on the shelf. You won’t accidentally misplace anything and when you’re ready to start again, you’ll have everything you need

    I really hope this list helps you in keeping a clean sewing space.

    Remember that it is your space and you can make it however you want it to be… as long as you make sure you surround yourself with the things you love and you leave yourself room to create!

    Need more of an Action Plan?
    Check out this 25 Day Guide that I created to give you a step by step plan to creating the sewing/crafting space of your dreams!!

    I will be with you every single step of the way with detailed instructions!

    So many people have used this guide to clean up their act in their sewing space and make it a place that they just can’t wait to get into! It is now the space of thier dreams!

    Click here to learn more information about how YOU can create the space of your dreams too 🙂 You won’t regret it!


  • How to Print your Quilt Patterns for FREE!

    I love that most Quilt patterns are available online for instant download. Isn’t it just great?! What a time to be alive right? …Well… I love it until I realize that the amount of ink that I’ll have to use for the pattern! Yikes. Today I am going to tell you how to print your quilt patterns for FREE!

    Yes! I said FREE!

    FREE: As in, give me all the high-quality full-color pages you can throw at me! I have been printing all my quilt patterns and pages for the total price off FREE! Did you see that? That was FREE, nada, zilch, nothing!

    I used to be such a scrooge with my ink cartridges. It is perfectly ok to admit that you have a problem when you’re looking hard at your PDFs and wondering just how much of the material specs you can remember in your head to avoid having to print it out and waste that liquid gold, right?

    I even used to print everything in “economy mode” and picked which of the pages I absolutely NEEDED to print.

    It seemed like every time I turned around we were out of ink. And every single time I was spending $50-$60 to replace the ink.

    It was slowly driving me crazy.

    I started shopping for laser printers (holy cow that’s an investment). Then, I dove into research mode and weighed out the costs over time… switching to just black and white all the time (boring!) and different printer brands (so so many)… I even looked at commercial office printers! …I was in deep.

    So what did I do to fix my problem!?

    (because you know I fixed it AND you KNOW I’m going to share my hack with you so you can know how to print your quilt patterns for FREE too!)

    I ran across a program from HP called HP Instant Ink.

    And it totally changed how I use my printer!

    I’m going to share with you a little about the program and then I’ll jump into spilling my secrets on how I get it all for FREE!

    If you’ve never heard about it, here’s what HP Instant Ink is:

    HP Instant Ink is a by-mail ink cartridge replacement service. You decide from several HP Instant Ink plans. The plans vary in their monthly service fee based on the number of pages you print each month.

    Your printer sends ink level information to HP, and when ink levels get low, HP automatically ships ink replacement ink cartridges. You can save up to 50% on ink that’s ordered by your printer and delivered to your door before you run out. All included in the monthly rate. How cool is that?

    To sign up for this service you need a printer that is HP Instant Ink eligible. They have eligible printers that fit all budgets.

    If you don’t have an HP printer, I’ll explain to you how in the long run when compared to your current printer and ink costs, A new printer from HP is really are quite affordable and make a lot of sense.

    Printing get expensive! I'm going to share this simple trick I use for how to print your quilt patterns for FREE! It is so easy!

    Why I LOVE using the HP Instant Ink program

    When you sign up for HP Instant ink you can get several months for FREE immediately

    I got 6 months of FREE HP Instant INK when I signed up. 6 months!

    And because you can change your plan level at any time… you better believe that I took advantage of those free months and set it at the highest level right away. 300 Pages/month! 6 Months X 300 Pages = Up to 1,800 for FREEEEE! And it is whatever quality page I want to use!

    I could keep going on and on about it because I love it, but I bet you want to know how to print your quilt patterns for FREE too, right?

    The first thing you need to do is:

    • Get 1 month FREE by signing up with a referral link/code :
      You can get 1 month free by signing up with my referral link try.hpinstantink.com/BfDsr or code BdDsr to get 1 free month. (Just so you know, I’ll get a free month too if you sign up using my link, thanks!)
    • My new printer came with a 3 months free trial – most new printers do I believe. Look for any promo code that would be included with your printer, or contact HP Instant Ink customer service if you can’t find it.
    • After that, I tried out every discount code I could find online and managed to score an extra 2 months of Free HP Instant Ink. I’m going to list the codes that I know of right now for you.

      You’ll want to stack as many of these on at the beginning as you can!

      Discount codes often change, so it is anyone’s guess what will work and what will not. You just have to try them all out one after the other (you can use multiple coupon codes on your order). You can also google for more if needed.

      I definitely recommend you try these promo codes:

      FREE INK
      3FREEINK
      SAVE50PERCENT
      HPINSTANTINK4U

    What happens after the free months are up?

    After you’ve used the program for a little while, you should have an idea of how many pages/month you actually use and can downgrade (or upgrade) your plan from there to find one that fits your budget more.

    HP Instant Ink offers several plans to fit everyone’s printing needs. And I think they’re super affordable. You can also change your plan at any time.

    Here is what I did: I signed up for the Frequent Printing Plan (up to 300 pages) during my free trial/free months to take full advantage of the free months, and then switched to a cheaper plan (moderate) that more fits our actual printing needs.

    Below are the Instant Ink plan costs:

    My best guess is that most people will be totally fine with the occasional (50 pages/month for $2.99) or moderate (100 pages/month for $4.99) printing plans.

    I spend that amount going through the drive-through coffee place ONCE (you know the one!) So, for less than the price of a fancy coffee, you can always print as much as you want, using the best printing quality every time, and never worry about running out of ink!

    How do I know how many pages I’ve used?

    HP thought of everything because you can log into your Instant Ink account and see immediately how many pages you’ve printed this month so far.

    What if I don’t use all my pages for the month?

    If you don’t use every single page allowance, it’ll roll over to your next month and you’ll have a little bit of a cushion so you can print what you want when you want it. Absolutely NO worries!

    What if I go way over and print too many?

    And if you go over your plan limits, you’ll only pay $1 for every 15/20/25 additional pages (depending on your plan). $1!

    Still so much cheaper than taking it down to the copy shop!

    Is it hard to cancel?

    You can totally cancel this service at any time (on your last free month for example) if you’re not convinced by this system… but I doubt you will want to cancel. 🙂

    My favorite part about the whole program is I don’t have to sit and think “is it worth it to print this and waste my precious ink?” It has completely erased my fear of running out of ink and having to spend more money as well.

    Printing get expensive! I'm going to share this simple trick I use for how to print your quilt patterns for FREE! It is so easy!

    Want to earn more months for FREE?

    Here is the best part, there is no limit to the number of FREE months that you can earn!

    Once signed up, you’ll have your own referral link and codes that you can share with your friends and family or anyone who will listen. They will get a FREE month thanks to you and you’ll get an extra free month too! Every single time someone signs up using your referral links.

    It’s that easy.

    So, essentially, you could keep on using HP instant ink for free for a long long while!

    I mean, you share your favorite products with people anyways, right? Why not spread a little love and get a little love in return?

    When you checkout, make sure your total due is $0 and you see (at least) the referral code for a free month from me in there! With any luck, you’ll be able to start off with 4-6 months of completely FREE printer ink! Woah…

    How does that sound? Hit me up in the comments section and let me know if this awesome hack answers your questions on how to print your quilt patterns for FREE!

  • How To Create A Mitered Corner In Your Quilt Binding

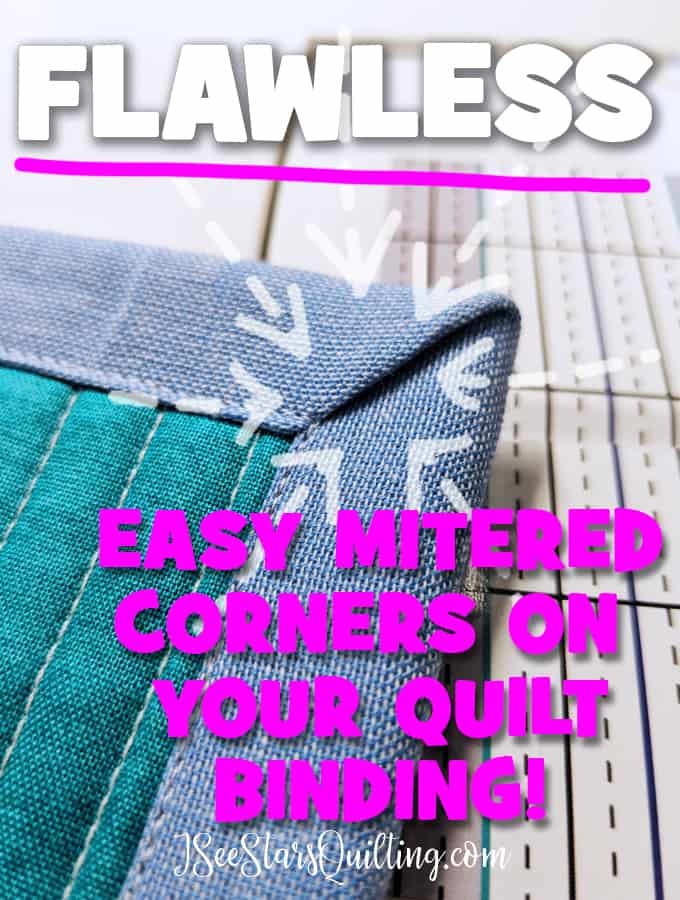
    In the beginning days of your quilt journey, every single step of the quilt-making process is new and kind of confusing. You marvel over details of beautiful stitching and perfectly matched pieces! I’m going to show you how to create a mitered corner in your quilt binding.

    It is actually really easy once you know the steps. (So don’t panic when you see all the photos below… I just like to be thorough in my tutorials!)

    Creating a mitered corner in your quilt binding is a really important step to learn!

    A step by step tutorial with a video and photos to show you how to create a mitered corner in your quilt binding! Don't get frustrated, I can show you how.

    Seriously, after you’ve worked so hard on the piecing and all the quilting and who knows how many times you had to pull out the seam ripper?!

    A sloppy quilt binding is just giving up when you’re so close to the end of making a beautiful quilt!

    First of all, if you aren’t comfortable with sewing on your binding with a machine yet, you need to watch this video. It details out step by step – the whole binding process!

    It is the exact steps that I go through for every quilt binding that I sew.

    How to Create A Mitered Corner In You Quilt Binding

    NOTE: I use a 2.5″ Binding strip to start out with.

    1. Begin sewing your binding to the BACK of your quilt. (Start in the middle of one of the sides of your quilt)

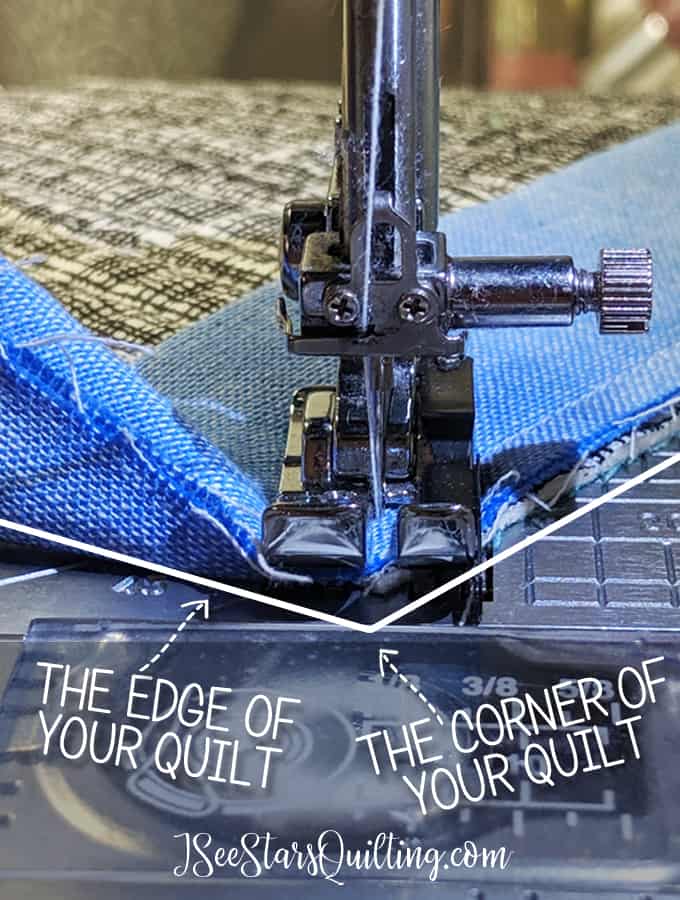
    2. When you come close to the corner of your quilt, stop sewing 1/4″ from the edge of the quilt.

    3. Leave your needle down. Rotate your quilt 45-degrees. The corner should be pointing towards you.

    A step by step tutorial with a video and photos to show you how to create a mitered corner in your quilt binding! Don't get frustrated, I can show you how.

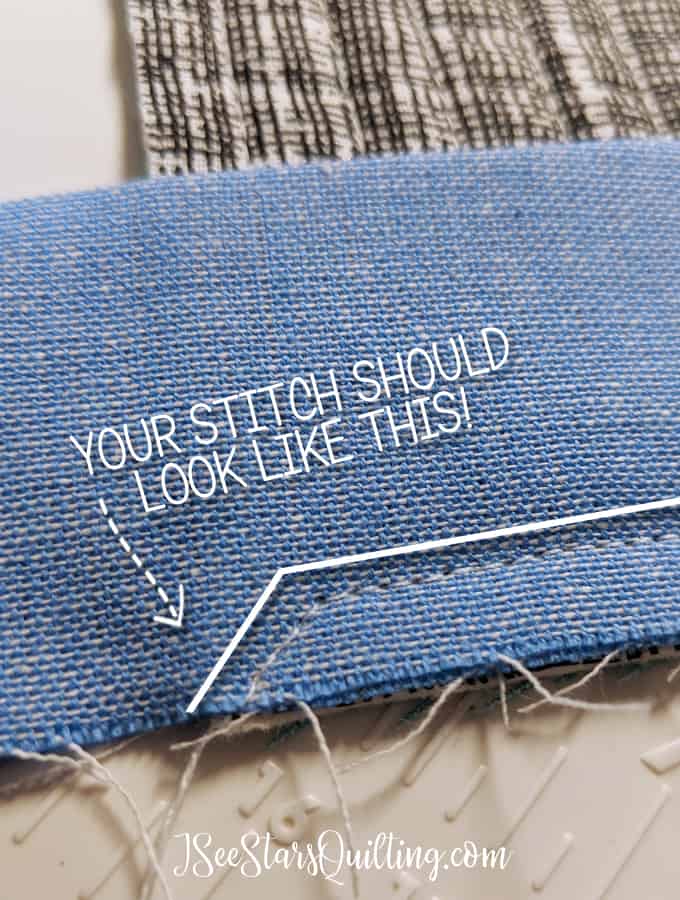
    4. Sew straight through the corner of your quilt.

    A step by step tutorial with a video and photos to show you how to create a mitered corner in your quilt binding! Don't get frustrated, I can show you how.

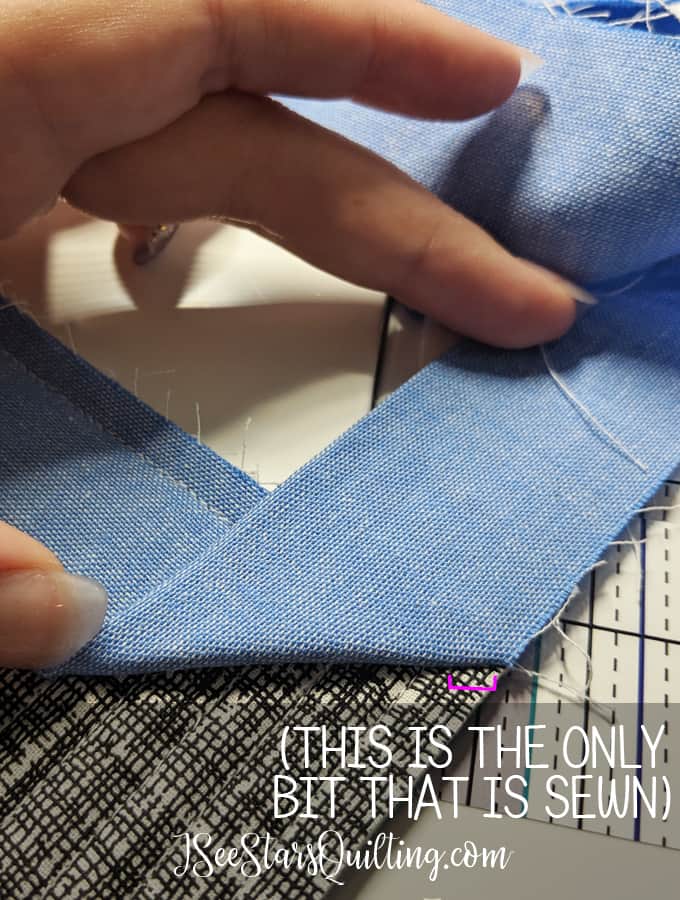
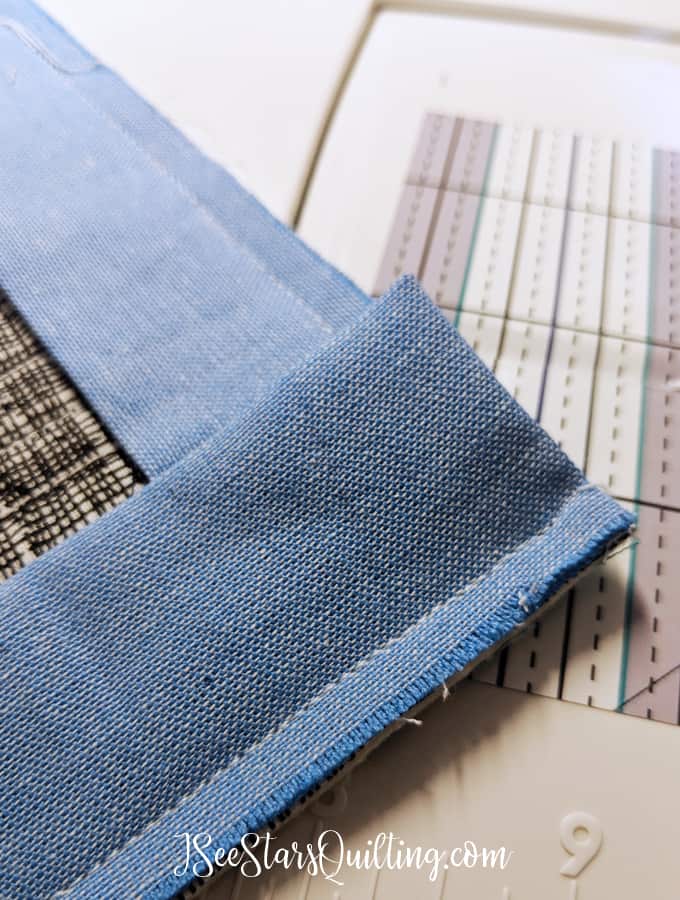
    5. Take your quilt off the machine and flip your fabric up along the 45-degree line you’ve just sewn.

    A step by step tutorial with a video and photos to show you how to create a mitered corner in your quilt binding! Don't get frustrated, I can show you how.

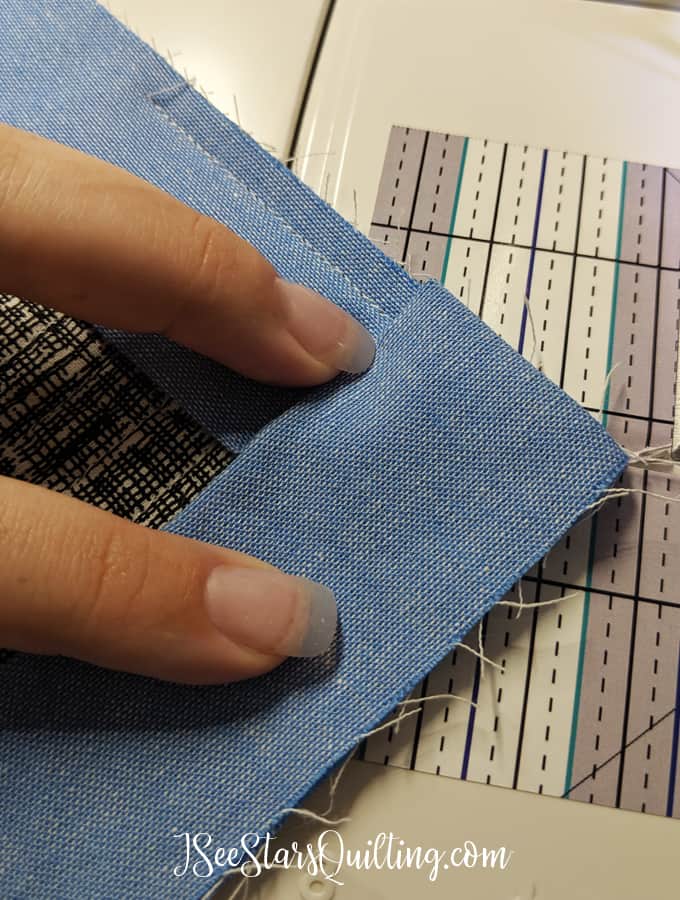
    6. Keeping the 45-degree line tucked under.

    Fold your binding line down where the raw edges of the fabric match up with the raw edge of your trimmed quilt.

    Notice in the photo how the folded edge aligns with the top edge of the quilt?

    A step by step tutorial with a video and photos to show you how to create a mitered corner in your quilt binding! Don't get frustrated, I can show you how.

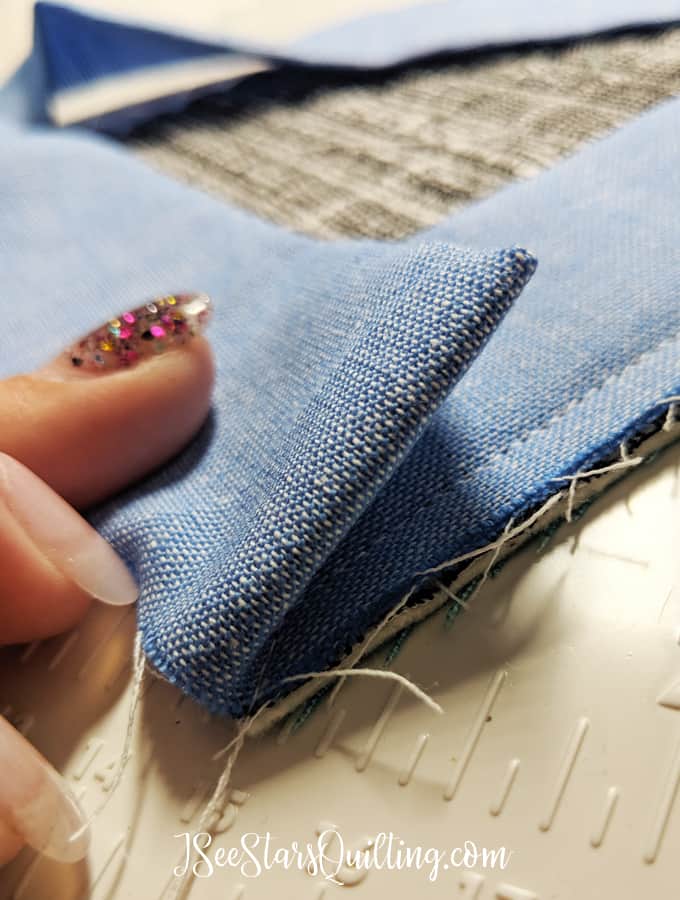
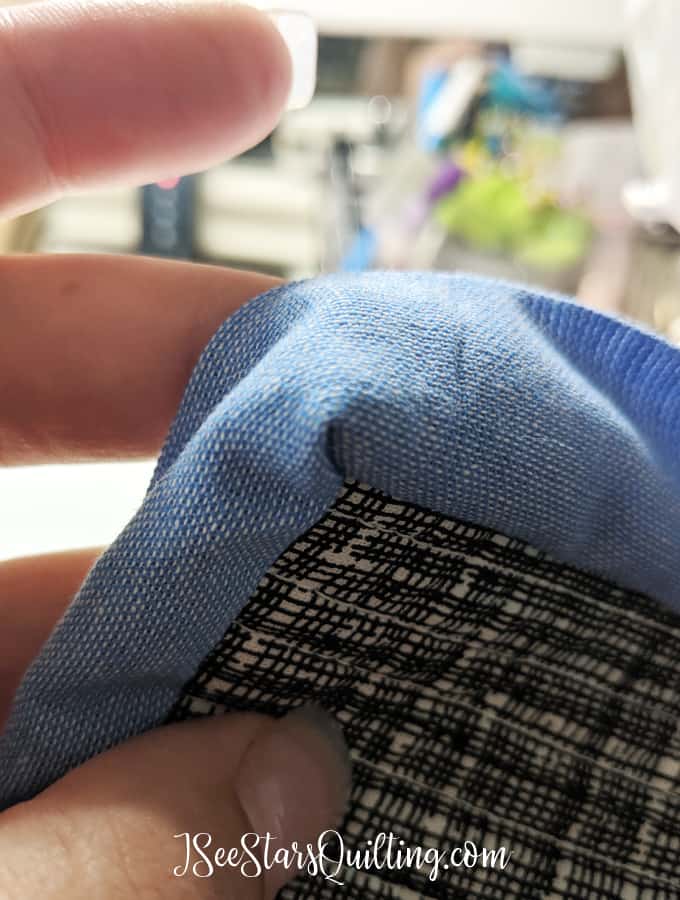
    Here is another angle of the same folded corner.

    A step by step tutorial with a video and photos to show you how to create a mitered corner in your quilt binding! Don't get frustrated, I can show you how.

    7. Pinch the quilt to keep the layers from moving and put the quilt back in your sewing machine. Sew the same 1/4″ stitch line all the way down until you get to the next corner.

    A step by step tutorial with a video and photos to show you how to create a mitered corner in your quilt binding! Don't get frustrated, I can show you how.

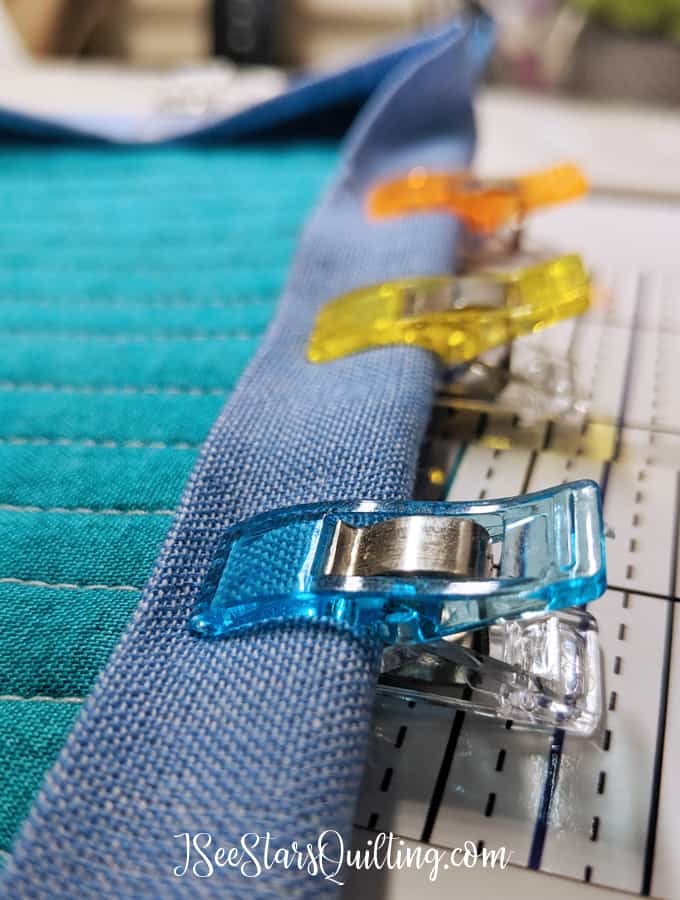
    8. Repeat until 4 your quilt corners are sewn. Flip your quilt over. Now it is time to fold the binding around the edges.

    I like to use these Wonder Clips to hold everything in place while I sew. (They actually are amazing all over your sewing room!)

    A step by step tutorial with a video and photos to show you how to create a mitered corner in your quilt binding! Don't get frustrated, I can show you how.
    A step by step tutorial with a video and photos to show you how to create a mitered corner in your quilt binding! Don't get frustrated, I can show you how.

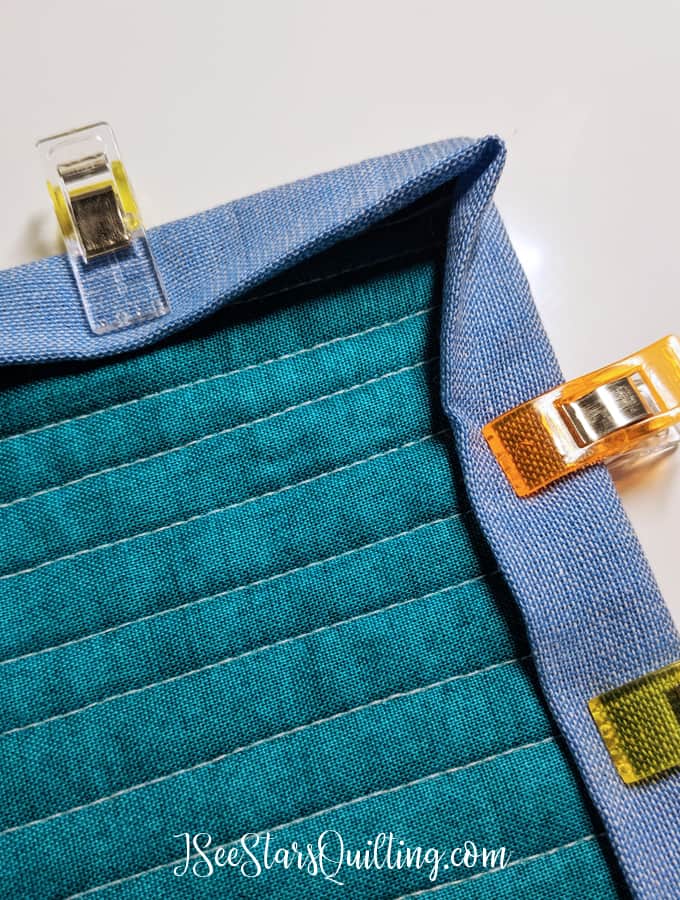
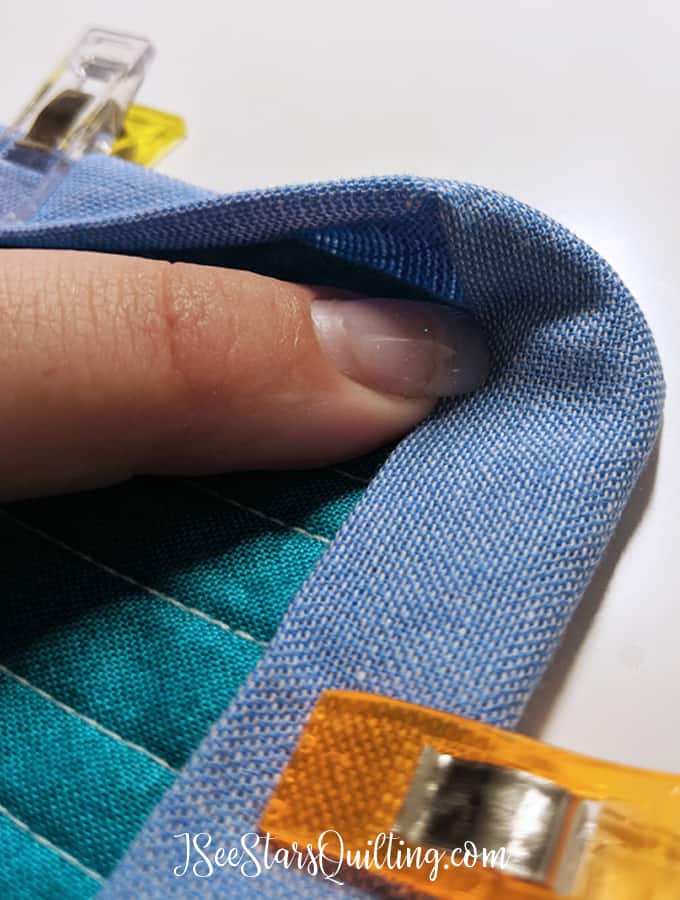
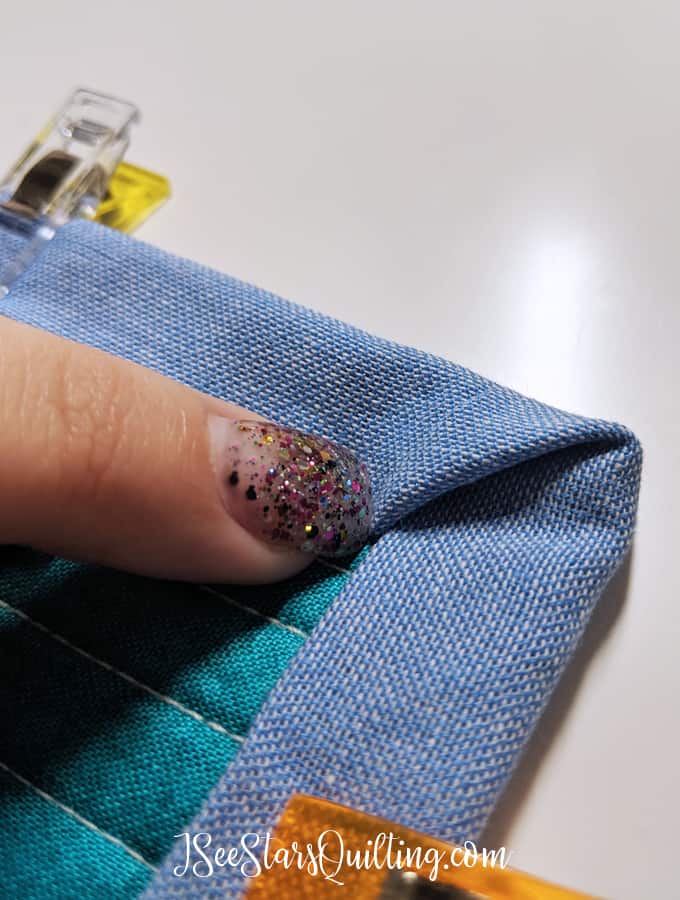
    9. To fold your quilt corner into a mitered corner, you’ll want to fold in one side of the binding like the photo below. Tuck it all the way flat up in the corner. This will create a 45-degree angle with your other binding strip/

    It might take a little practicing to get the mitered corner perfect, but you can do it! Keep at it. I believe in you!
    A step by step tutorial with a video and photos to show you how to create a mitered corner in your quilt binding! Don't get frustrated, I can show you how.

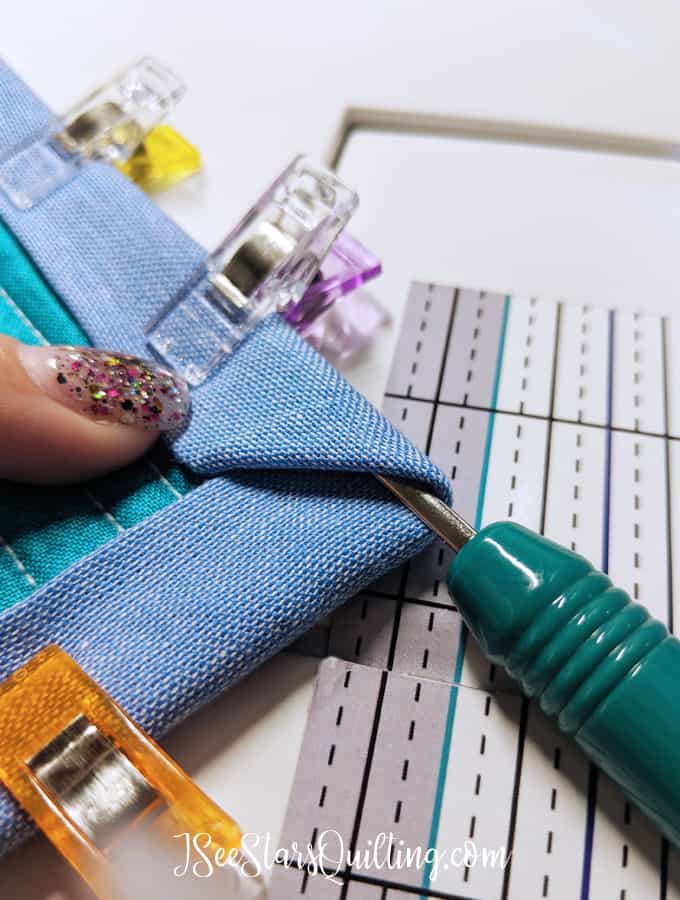
    10. Holding the fabric in place, the next thing you want to do is to fold the top fabric over.

    You’ll want to make sure the first fabric that you folded down stays in place so you can create that 45-degree angle in your second fabric.

    A step by step tutorial with a video and photos to show you how to create a mitered corner in your quilt binding! Don't get frustrated, I can show you how.

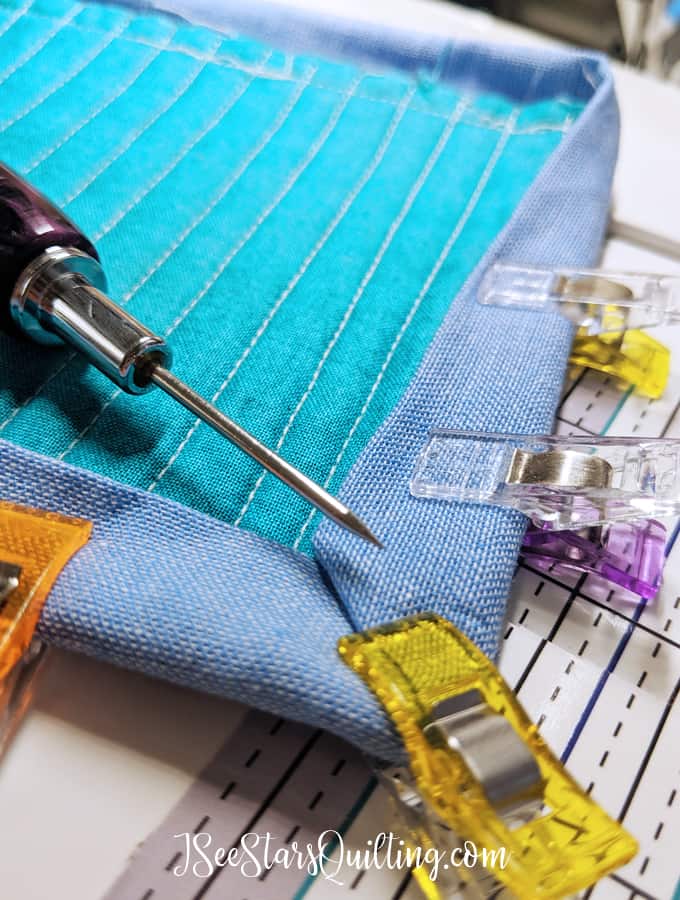
    I like to use my seam ripper or the other end of my seam ripper which has a pointy end (the official name for this tool escapes me at the moment. If you know what it is called, hit me up in the comments!)

    A step by step tutorial with a video and photos to show you how to create a mitered corner in your quilt binding! Don't get frustrated, I can show you how.
    A step by step tutorial with a video and photos to show you how to create a mitered corner in your quilt binding! Don't get frustrated, I can show you how.

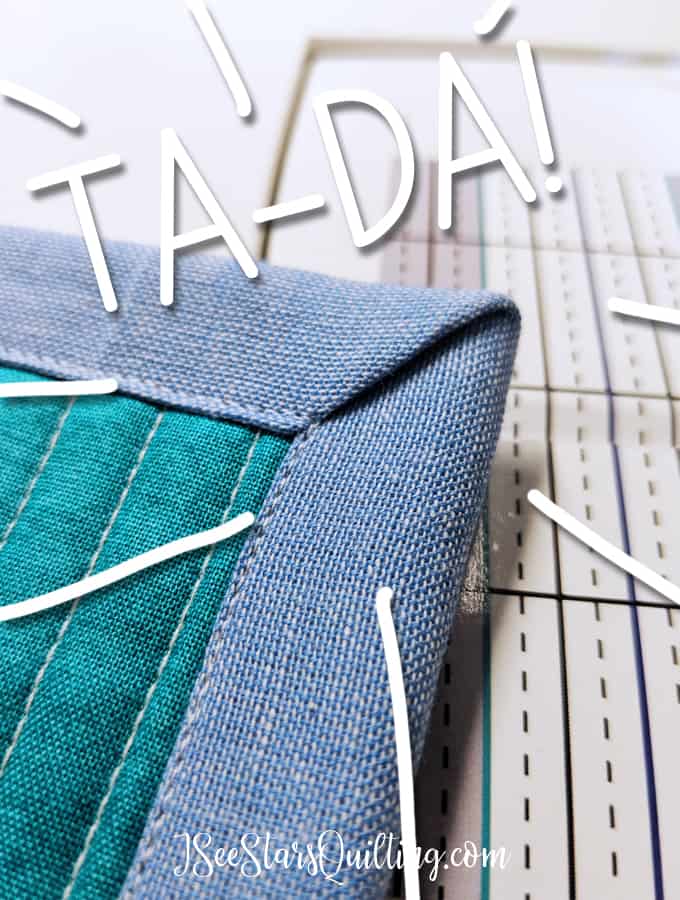
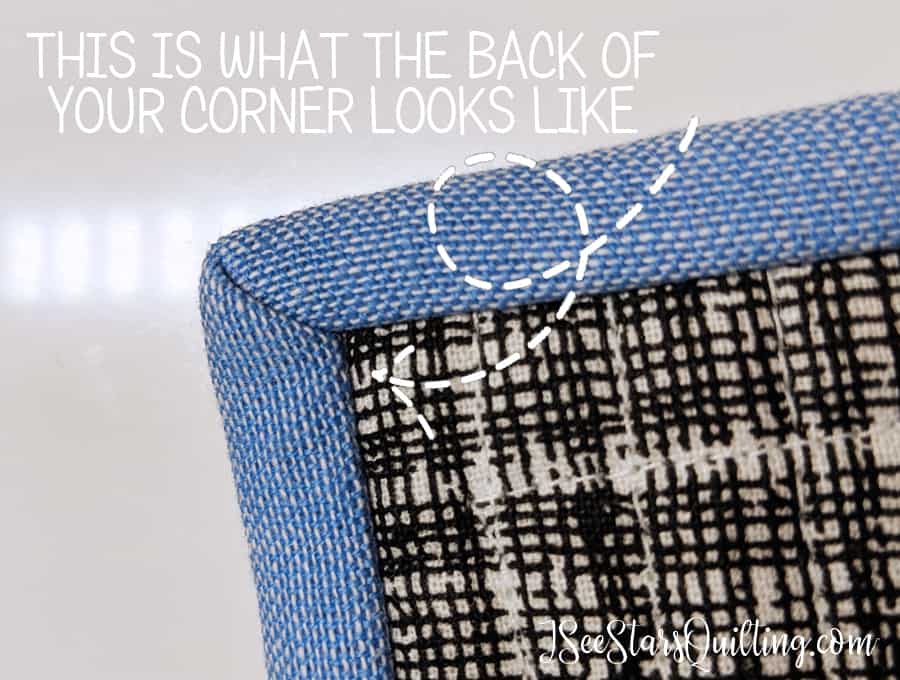
    11. You’ll know that you’ve got it right when the edges of your folded fabric line up perfectly.

    A step by step tutorial with a video and photos to show you how to create a mitered corner in your quilt binding! Don't get frustrated, I can show you how.

    12. Sew your binding on the front using your sewing machine – or- you can sew it on by hand if you prefer! …Voila! 🙂

    A step by step tutorial with a video and photos to show you how to create a mitered corner in your quilt binding! Don't get frustrated, I can show you how.

    Hopefully, that wasn’t as painful as you thought it was going to be!

    It does take a little practice to get the feel of how to manipulate the fabric, but I assure you that it gets easier with each quilt you create!

    So, how did you do when you tried to create a mitered corner in your quilt binding? Were you successful? Do you need to work with your fabric a little bit more? Let me know in the comments.

    For more tutorials and ideas for basic quilting tasks, check out my blog category Quilting 101. I have so many tutorials already posted and I’m adding new ones all the time 🙂 If you have a suggestion or a question, please contact me and let me know!

  • How To Get Really Flat Seams When You Sew

    Today I’m going to share with you a fun little trick! You’re going to love it. It works every single time without fail. Here is how to get really flat seams when you sew!

    Learn how to get really flat seams when you sew with just a few simple steps, and a tool you already have in your house right now!

    I bet you even have everything you need in your house right at this very second…

    *announcer voice* Are you tired of those wonky seams that will not stay where you put them? Pressing and pressing with your iron can stretch and pull your fabric throwing off your measurements and eventually ALL your hard work of extra precise cutting!

    [*Insert really bad infomercial lady struggling with even the simplest of tasks*]

    When you’ve had enough, you’ve had enough!

    There has to be a better way, right?

    *ding ding ding* YES! There is a better way!

    Ok ok… no more bad infomercial… just simple practical advice from here on out! …I think I might have had too much Coke Zero today?

    First, I’m going to show you the easiest way to press your seams. You can probably start doing as soon as you reach the bottom of this post…

    And then I’m going to give you some of my recommendations on tried and true products that can help ease your fabrics into submission and make you their Queen.

    The Easy Method

    Here is what you need:

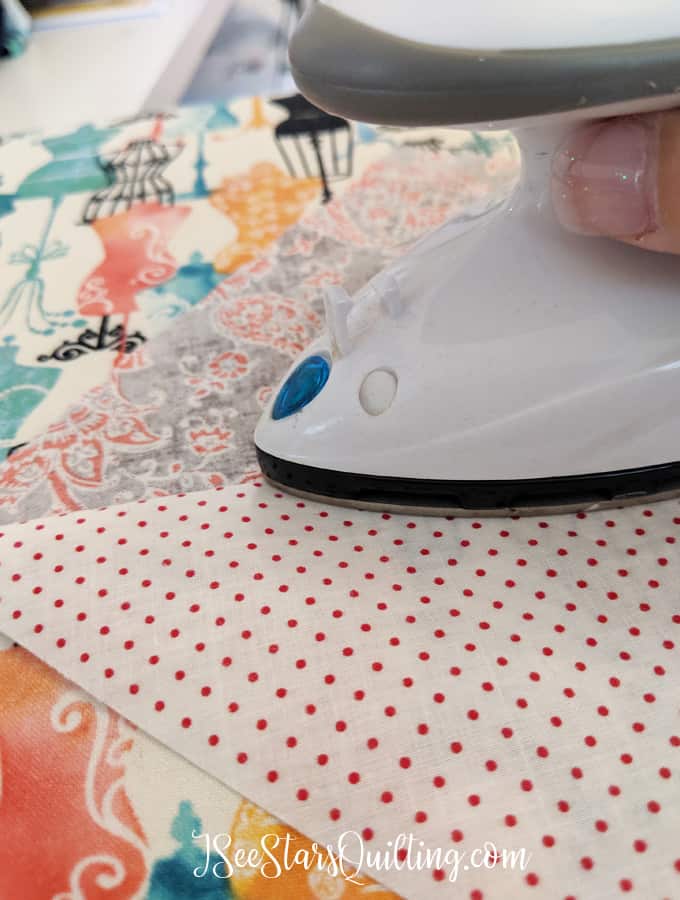
    1. Iron (This one is my favorite!)
    2. Ironing board (or this really really amazing wool mat)
    3. Your pieced fabric
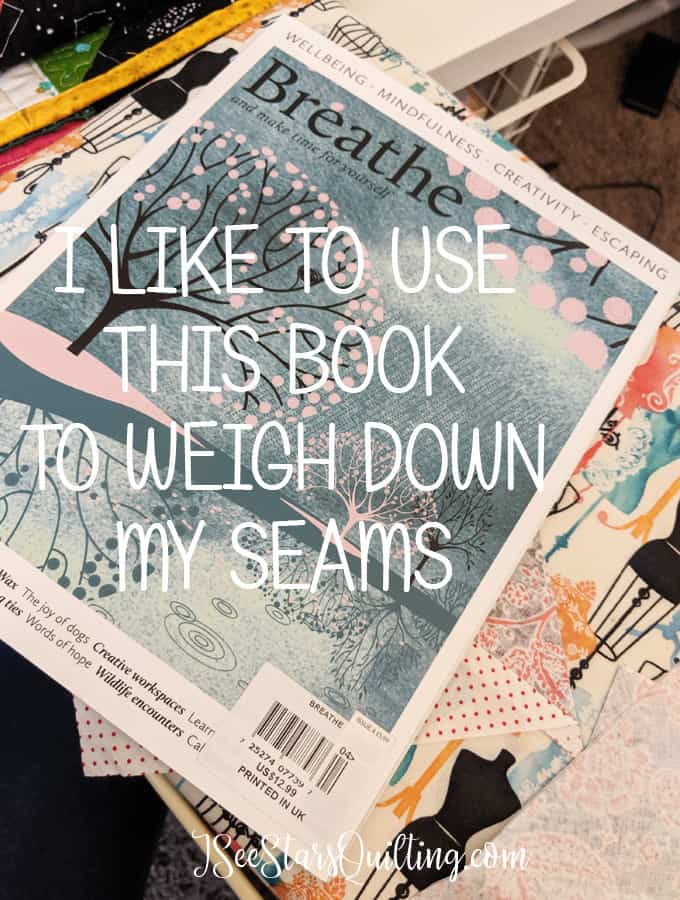
    4. And a really thick magazine

    Wait, what?…

    Yes! Think like… Ikea Catalog – thick and heavy. A phonebook will work (if anyone even still has those?) but it is a little over kill. You don’t have to go that heavy. Just thick enough to have some weight to it. A Time Magazine will not do the trick.

    A good hardcover book will work as well, but please be aware that you’re going to be laying it on top of really hot fabrics, over and over and over again. I haven’t personally experienced any damage over the years, but I wouldn’t trust it with my favorite books, ya know?

    Learn how to get really flat seams when you sew with just a few simple steps, and a tool you already have in your house right now!
    Learn how to get really flat seams when you sew with just a few simple steps, and a tool you already have in your house right now!

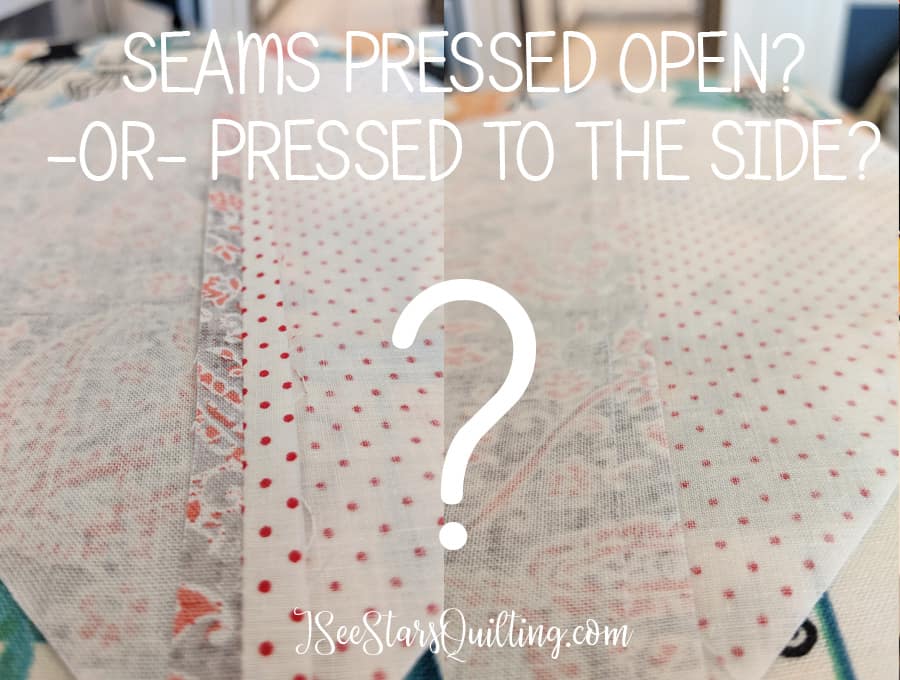
    Pressed To One Side or Open?

    Choose: Do you you want to press your seams to one side or open? Ah, that is a good question that will leave any new quilter scratching their head.

    Is there a right way? Is there a wrong way?

    Personally, I like to press my seams to one side. BUT if you take a poll of other quilters, you’ll get all kinds of answers and some will even dare say that I’m a crazy fool!… we quilters can get pretty heated when it comes to the big stuff…

    I think it is a choice you have to make for yourself and depending on the fabric and project as well. There isn’t a wrong way, I can answer that for you.

    From here on out, I don’t care what you do with your seams, the steps to follow will be the same if you want to know how to get really flat seams when you sew!

    Here is what you’re going to do:

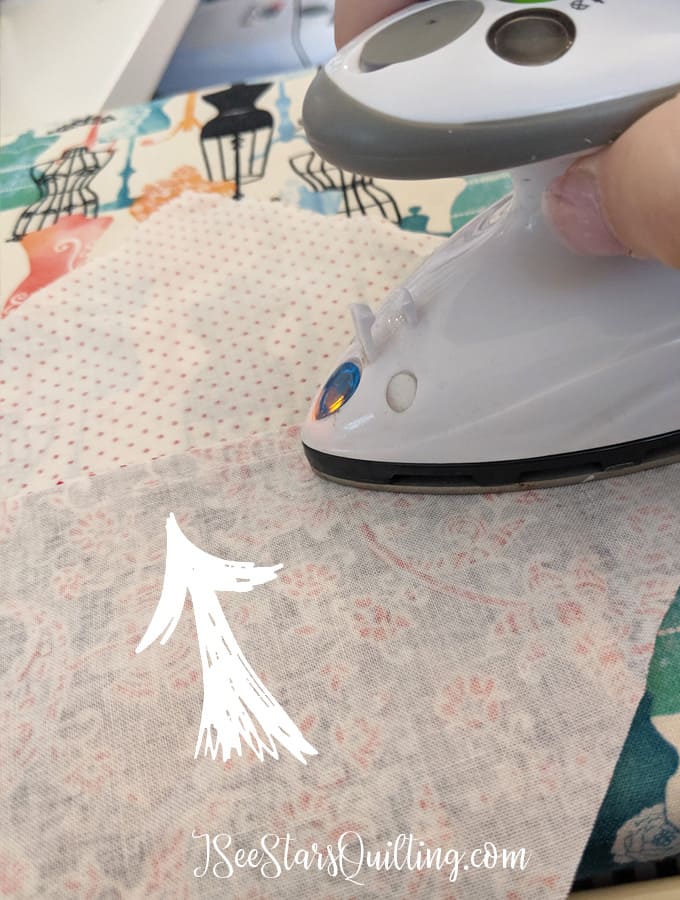
    Start by getting your iron to the right temperature for your fabric.

    Learn how to get really flat seams when you sew with just a few simple steps, and a tool you already have in your house right now!

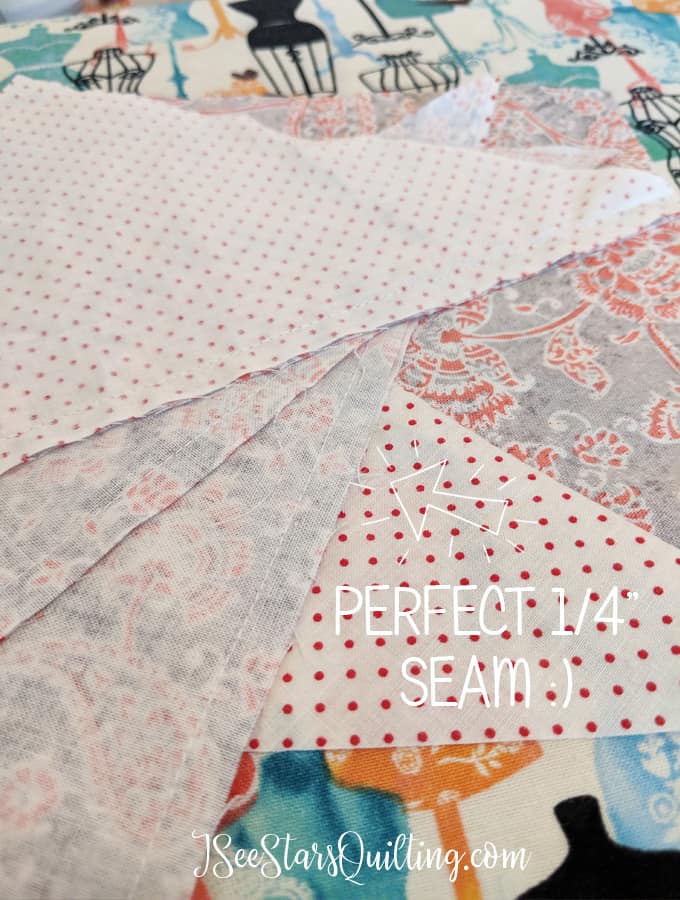
    Press on the backside of your fabric piece first to get the seam to lay flat.

    Press your seams however you like.

    Learn how to get really flat seams when you sew with just a few simple steps, and a tool you already have in your house right now!

    Then turn your piece over and give it a light pressing on the front side of your seam as well. This will set the seam from both sides.

    Learn how to get really flat seams when you sew with just a few simple steps, and a tool you already have in your house right now!

    A quick note about fabric: It expands when it gets hot. That is why sometimes, you can iron it all out and then when it cools, there is some curly/warped situations that can happen. It is a form of fabric rebellion.

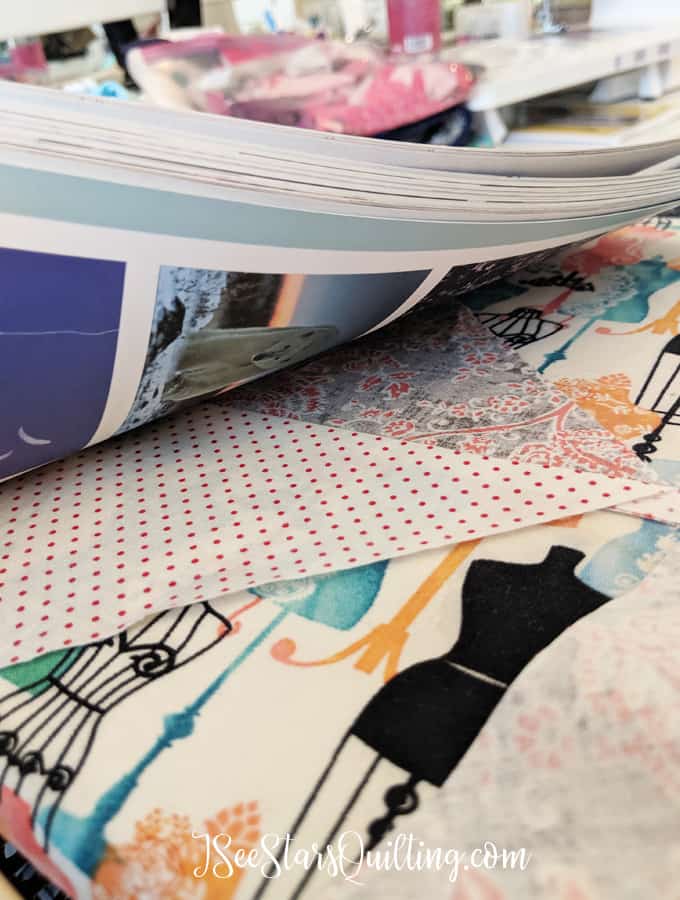
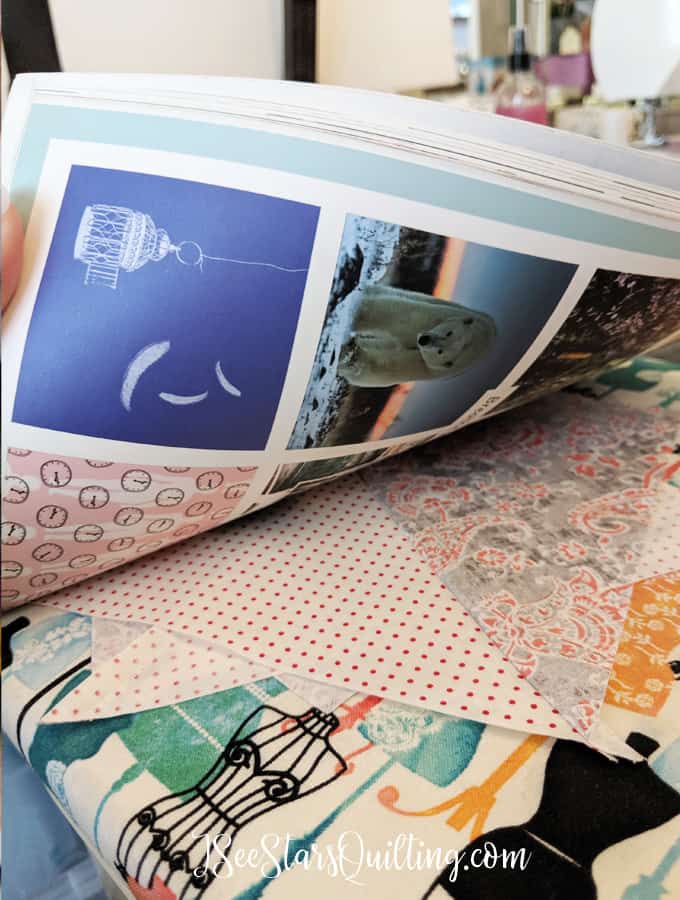
    After you iron your seams and before it can cool all the way, place it under your magazine/book.

    Learn how to get really flat seams when you sew with just a few simple steps, and a tool you already have in your house right now!

    The weight of the magazine will ensure that your seams stay put and as the fabric cools off, it will stay perfectly flat. So simple, yet amazing, right?!?

    I usually will have a few layers of fabric cooling in a stack under the magazine at a time. Then I swap them out for fresh hot ones every 4-5 layers so that I know they are cooling nicely and really really flat.

    Learn how to get really flat seams when you sew with just a few simple steps, and a tool you already have in your house right now!

    …Other tools I like to have up my sleeve to make the chore of ironing less of a pain.

    1. Magic Sizing

    I don’t know what this stuff is made from, but if you have a fabric warp issue, this stuff will fix it. When you want that quilt to lay flat and the fabric just isn’t cooperating… magic sizing is your answer.

    It is a fabric starch that makes all the fabric fibers step back in line like the day it rolled off the machines in the factory. Ta-da… magic!

    2. Mary Ellen’s Best Press

    Best Bress is absolutely loved by quilters everywhere. It has been around for ages and is a really great product. I’ve owned several bottles over the years and if you’re looking for a good spray with bang for your buck, you won’t be sorry!

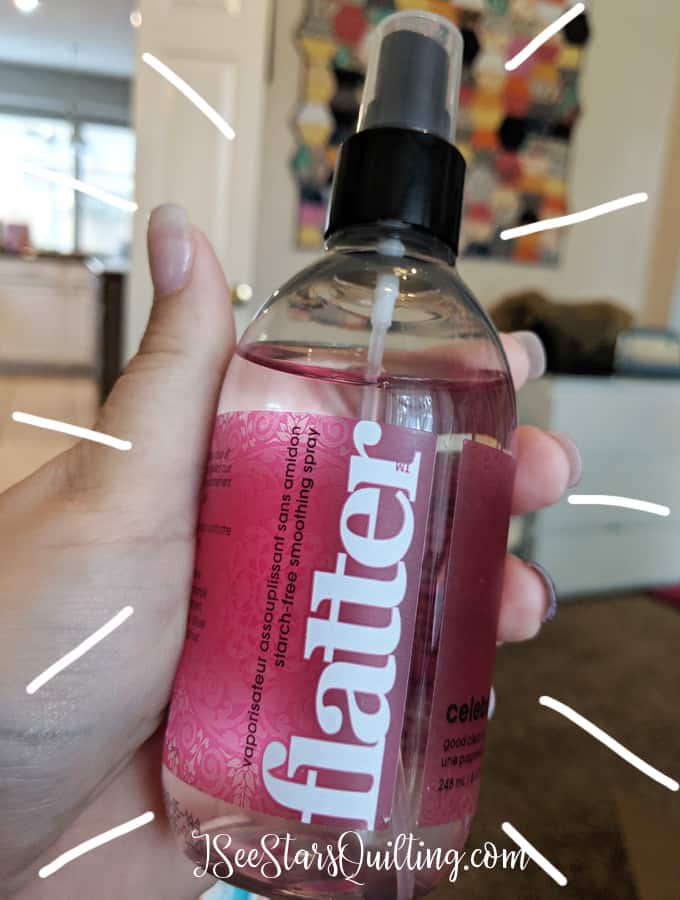
    3. Flatter Spray

    This one is relatively new to me, but… I love it so much. First of all, flatter spray smells lovely. (I have the pink one… because well… pink!) It doesn’t leave any feeling of stiffness to your fabric but you won’t see a single wrinkle in sight when you use the flatter spray prior to ironing! No white flakes or crusty bits either!

    I use this when I really want perfection beyond the grasp of this universe. And my flatter spray always delivers.

    Learn how to get really flat seams when you sew with just a few simple steps, and a tool you already have in your house right now!

    4. Wool Ironing Mat

    Maybe I’ve been in a cave for a while or something, but I’ve really taken notice lately to these wool ironing mats. I assume they must have been around forever though. Have you seen them?

    When you iron with them, the wool maintains the heat (not enough to scorch your fabric) so it kind of warms the underside of the fabric as well and you have good even heat all around and lovely lovely pressed fabric.

    Genius!

    By following these tips, you will be well on your way to discovering how to get really flat seams when you sew! Easy Peasy, right?

    If you have any questions, feel free to comment down below and I will do my best to answer your questions!

  • HST – More piecing in less time!

    I am all for a good quilting trick to get more done in less time. You know that. Today we’re going to dive into the most popular ways of making HSTs – Or Half Square Triangles. More Piecing in less time!

    For more quilting terminology, check out The Quilter’s Code Unlocked.

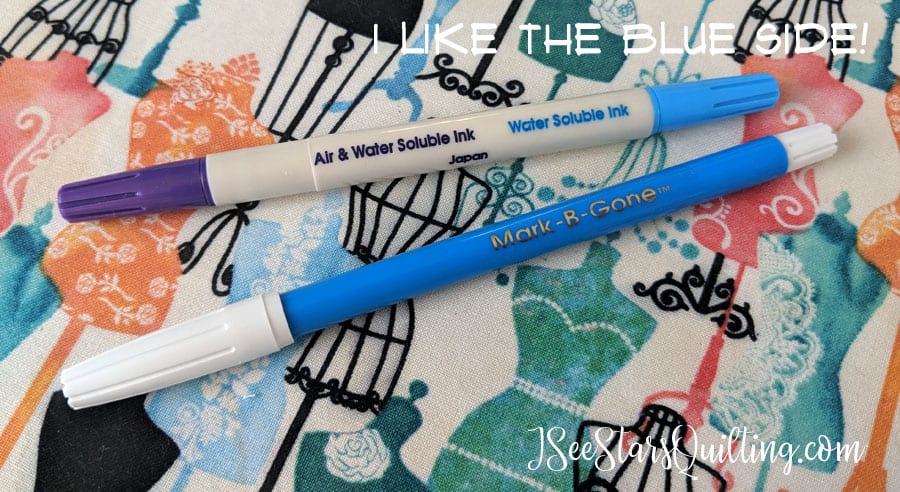
    Sometimes you need to draw a line on your fabric to ensure straight sewing or cutting, I really like these markers because the line stays when you need it to and disappears when you don’t need it anymore. All it takes is a few squirts from a mist spray bottle. and you’ll never even know it was there!

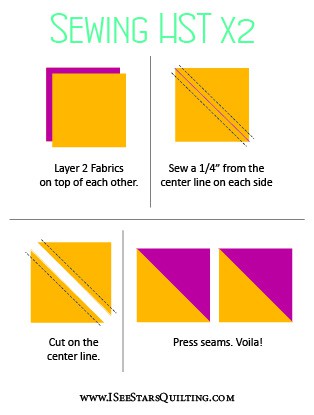
    These 5 little steps are going to be essential in stepping up your HST game! More progress in less time! I'll show you how to use it in my Quick Quilted Table Runner pattern.
    Learn how to sew 2,4 & 8 HSTs in no time! More HST mean quicker quilts and beautiful works of art in a fraction of the time!

    1. Making HSTs two at a time (the “traditional” method)

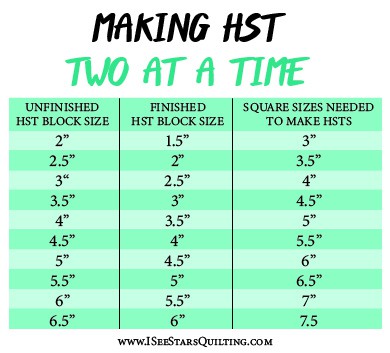
    Unless you have a specific pattern to go by which tells you all the measurements up-front, you’ll need to do a little math.

    Decide the size you want your unfinished HST block to be (the size of your block PLUS your typical 1/4″seam allowance). Add 1″ to that number.

    This is the measurement you want to cut the squares to make your two half-square triangles.

    UNFINISHED HST BLOCK + 1″ = SQUARE SIZES TO MAKE TWO HSTS

    Learn how to sew 2,4 & 8 HSTs in no time! More HST mean quicker quilts and beautiful works of art in a fraction of the time!
    Learn how to sew 2,4 & 8 HSTs in no time! More HST mean quicker quilts and beautiful works of art in a fraction of the time!

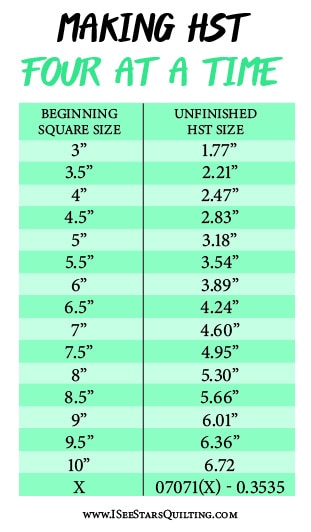
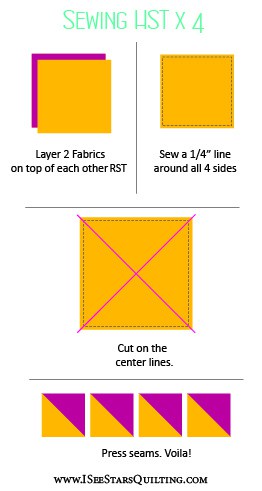
    2. Making HSTs four at a time

    Making HST is definitely more piecing in less time! But the math becomes a little more complicated.

    I usually make HST 4 at a time if I am creating pieces where I need them to all be the same size but the size isn’t specific. i.e – If I am just playing with fabric.

    Learn how to sew 2,4 & 8 HSTs in no time! More HST mean quicker quilts and beautiful works of art in a fraction of the time!
    Learn how to sew 2,4 & 8 HSTs in no time! More HST mean quicker quilts and beautiful works of art in a fraction of the time!

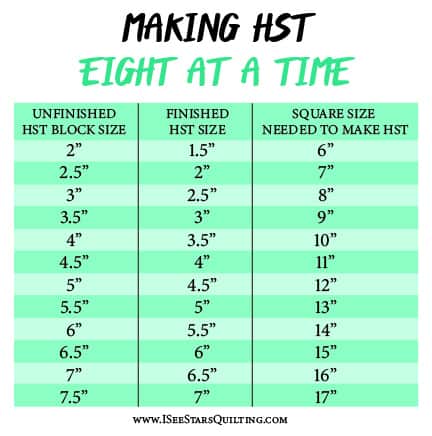
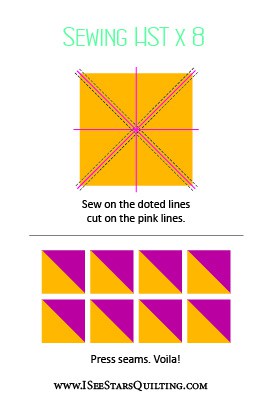
    3. Making HSTs eight at a time

    Making eight HST is certainly fewer calculations than making 4 at a time. You’ll find it extremely satisfying to have so many HSTs in such little time!

    Learn how to sew 2,4 & 8 HSTs in no time! More HST mean quicker quilts and beautiful works of art in a fraction of the time!
    Learn how to sew 2,4 & 8 HSTs in no time! More HST mean quicker quilts and beautiful works of art in a fraction of the time!

    And there you have it! All the useful charts and measurements for making HSTs quicker than quick. You’ll be creating beautiful masterpiece quilts built with HSTs in no time!
    With these HST tricks. you’ll be sewing more piecing in less time!

    Do you know all the terms that the professional quilters use? Check this list out and see where you stand. Pin it for later so you can refer back to this extensive list.
  • DIY Pineapple Pin Cushion from the Dollar store!

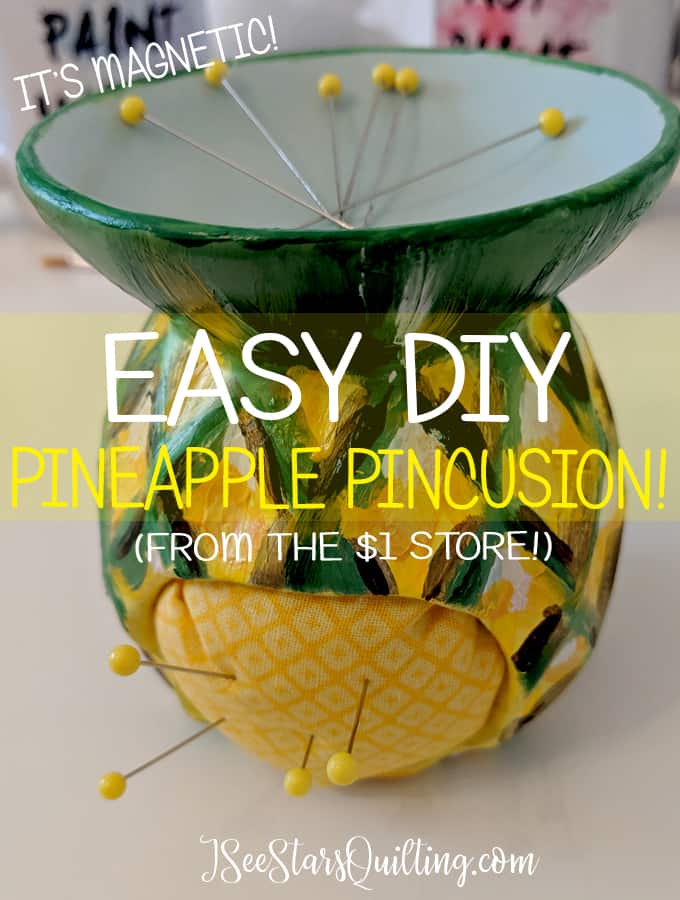
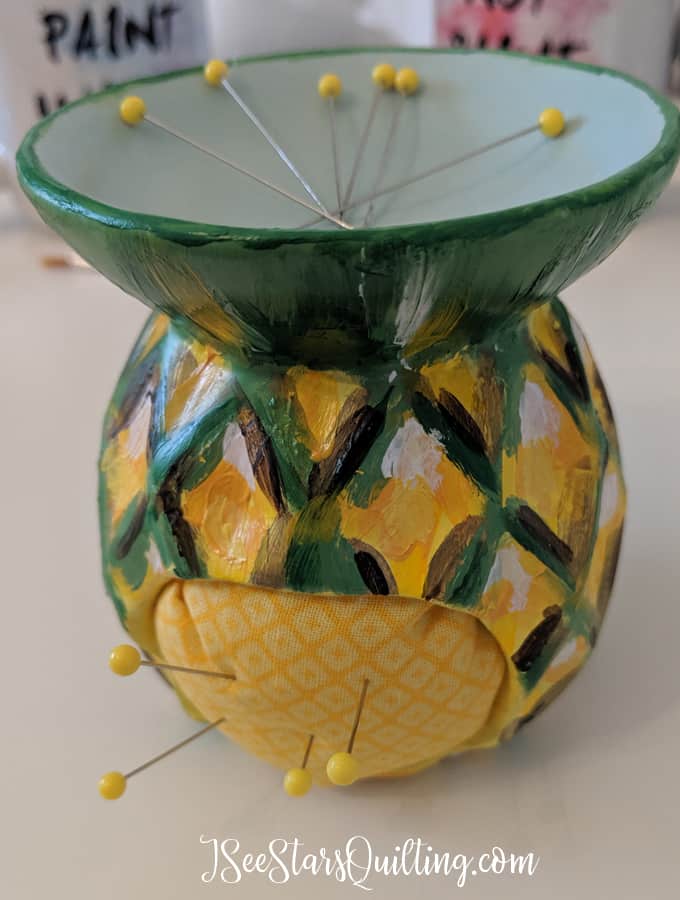
    I didn’t really NEED a new Pin Cushion. What I really wanted was a fun creative DIY project and the satisfaction of turning one cheap thing into a completely different and useful other thing… the result was this DIY Pineapple Pin Cushion from the dollar store!

    And know what? I LOVE it turned out! A win-win! I’m sharing a step by step tutorial today so you can make one too!
    I’ve seen this saying floating around Pinterest…

    DIY Pineapple Pin Cushion from the dollar store! Super cute and super easy! Make this for yourself or for a gift as a reminder to Always be a Pineapple! #Pineapplequote #Quilter #besweet

    …And I really love it, but it feels too cliche to just print it out and frame it for myself. I’ve been looking for a way to add it into my decor somehow as a reminder without being quite so blunt about it.

    I created this pincushion that will be a visual reminder of the sweet (pun intended) message whenever I use it!

    DIY Pineapple Pin Cushion from the Dollar store! - How cute is this little reminder to stand tall, wear a crown and be sweet on the inside?! #Pineapple #Pincushion #DIY #sewing #quilting

    First off… I have a confession. Above is a picture of the finished product. What it started out as, does not look at all like a pincushion or a pineapple.

    It takes a bit of imagination to see the whole project though.

    In our family, we shop the dollar store a lot. It seems like there is always something we need from there. When you’re on a budget and looking for something to transform, it is a total crafter’s playground!

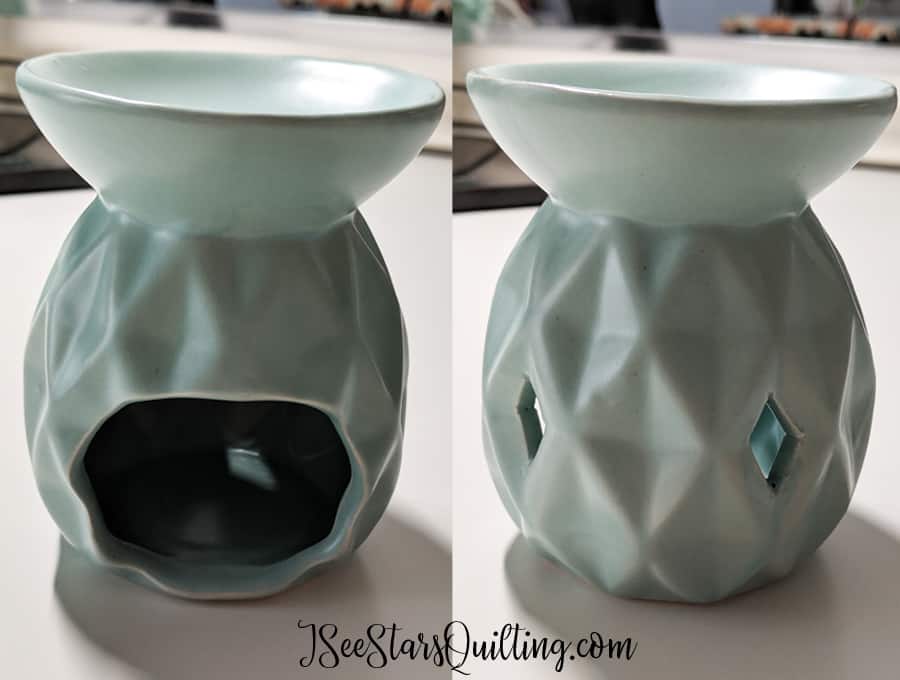
    I looked in the plates and dishes isle but couldn’t find anything worth transforming there. I went over to the arts/crafts/candle aisle and I came across this item:

    DIY Pineapple Pin Cushion from the Dollar store! - How cute is this little reminder to stand tall, wear a crown and be sweet on the inside?! #Pineapple #Pincushion #DIY #sewing #quilting

    It is a wax melter? I don’t know the official name for it… but you put a little tea light in the open part and a few scented wax cubes at the top. It slowly warms to wax and voila… beautiful smells!

    The more I looked at it, the more the patterns on the sides drew me in and I could slowly see my symbolic pineapple piece emerging!

    The pineapple was going to happen!

    DIY Pineapple Pin Cushion Instructions

    After you have your dollar store treasure, you’ll need just a few more things…

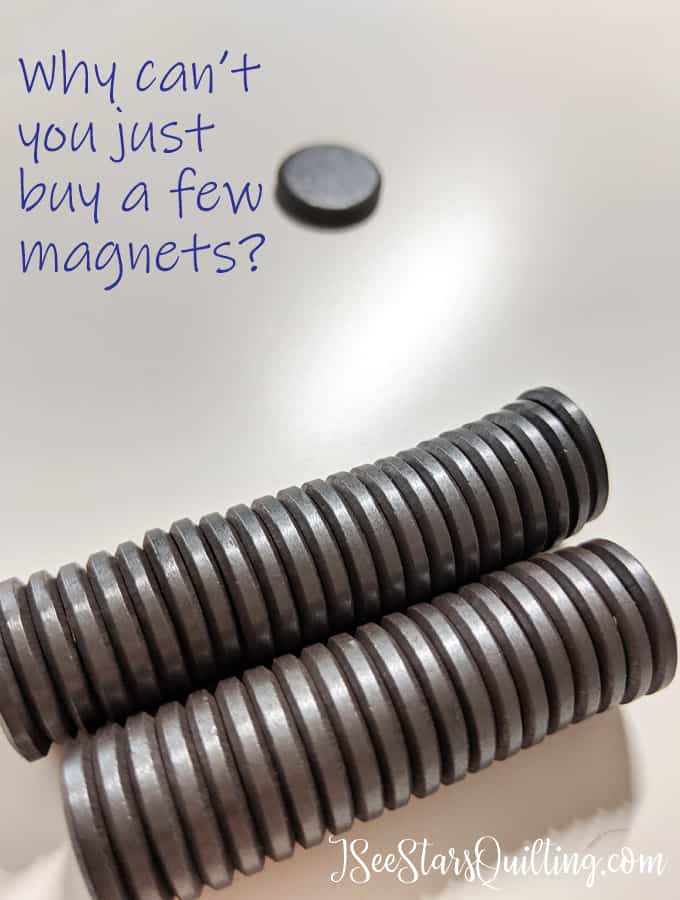
    I really wanted a magnetic spot to drop pins. The easiest way to DIY that is to glue your own magnets on the underside of whatever you want to drop your pins in!

    DIY Pineapple Pin Cushion from the Dollar store! - How cute is this little reminder to stand tall, wear a crown and be sweet on the inside?! #Pineapple #Pincushion #DIY #sewing #quilting

    They come in packs of like 50+ so you could easily make a bunch of these for friends or split a pack with a friend.

    Gluing the Magnets
    What didn’t work & what did:

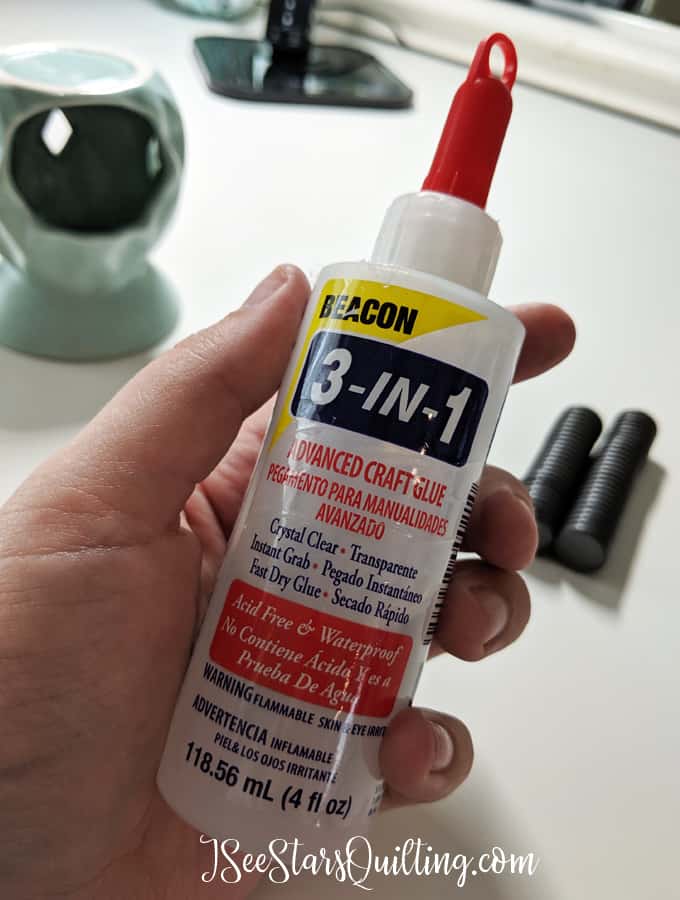
    On every single other occasion (except today!) I recommend this glue. It is amazing! It is my favorite. If you don’t have a go-to craft glue, I highly suggest this one.

    DIY Pineapple Pin Cushion from the Dollar store! - How cute is this little reminder to stand tall, wear a crown and be sweet on the inside?! #Pineapple #Pincushion #DIY #sewing #quilting

    BUT again… NOT today… Perhaps I was just impatient and wanting instantly dry glue instead of waiting the 4 minutes for it to set up?

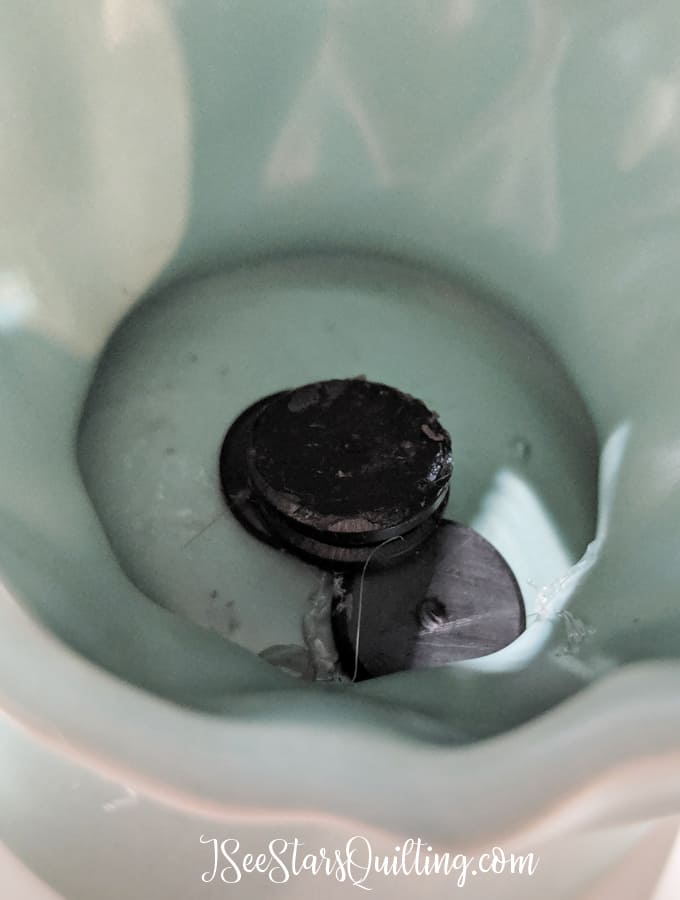
    I went to add a second magnet to the inside of my piece and the magnets popped off and stuck to one another quickly.

    DIY Pineapple Pin Cushion from the Dollar store! - How cute is this little reminder to stand tall, wear a crown and be sweet on the inside?! #Pineapple #Pincushion #DIY #sewing #quilting

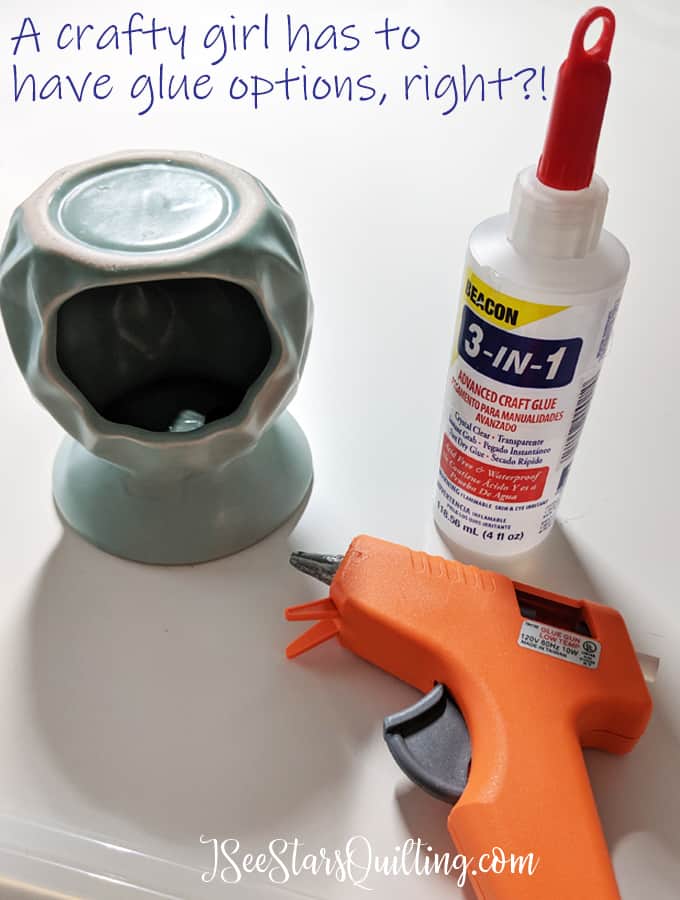
    That is why today, I suggest going with the trusty craft glue gun. Instant hold. Instant gratification and no waiting for your glue to dry or making a mess (see above…)

    DIY Pineapple Pin Cushion from the Dollar store! - How cute is this little reminder to stand tall, wear a crown and be sweet on the inside?! #Pineapple #Pincushion #DIY #sewing #quilting

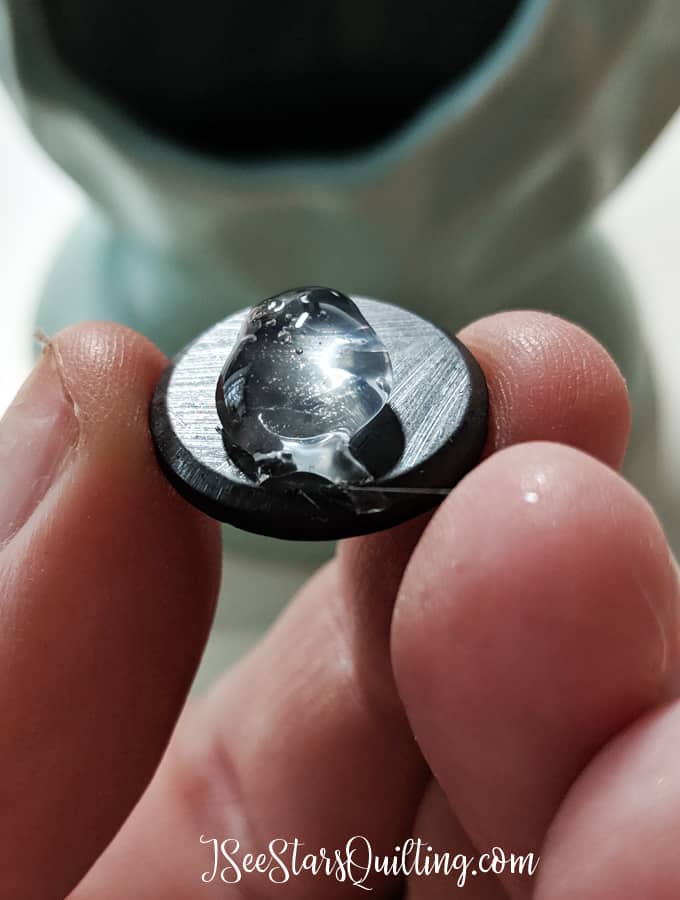
    I put a nice big glob of glue on the magnet and it held really nicely on the underside of the “wax melting plate”

    DIY Pineapple Pin Cushion from the Dollar store! - How cute is this little reminder to stand tall, wear a crown and be sweet on the inside?! #Pineapple #Pincushion #DIY #sewing #quilting

    Once you glue your magnets on, flip your soon to be pineapple back over and test out the magnets with a few pins. You should have a pretty good hold.

    Painting your DIY Pineapple Pin Cushion

    If you aren’t the best at painting… don’t worry! I did a really sloppy job at this pineapple and it still came out looking like a pineapple. I’m just going with “abstract pineapple”… and it’s art! Therefore, it is beautiful.

    You also could get out a can of gold spray paint or glitter paint or whatever makes your heart happy and make it completely your own. 🙂

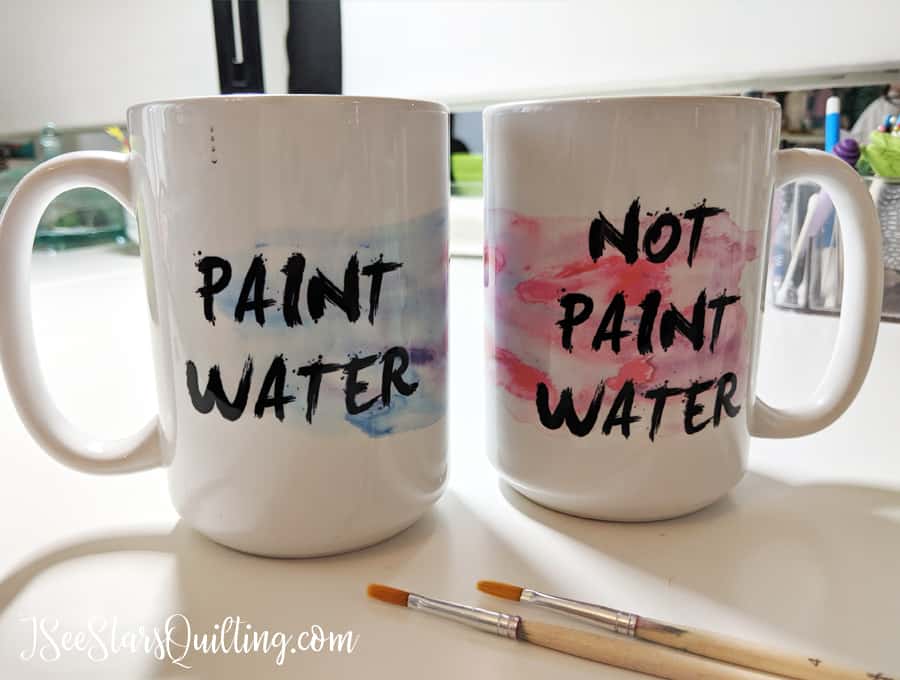
    I do enjoy painting. See my 2 favorite mugs? Yes, these must BOTH be used when I paint and one of them usually has water or wine, depending on the time of day.

    DIY Pineapple Pin Cushion from the Dollar store! - How cute is this little reminder to stand tall, wear a crown and be sweet on the inside?! #Pineapple #Pincushion #DIY #sewing #quilting

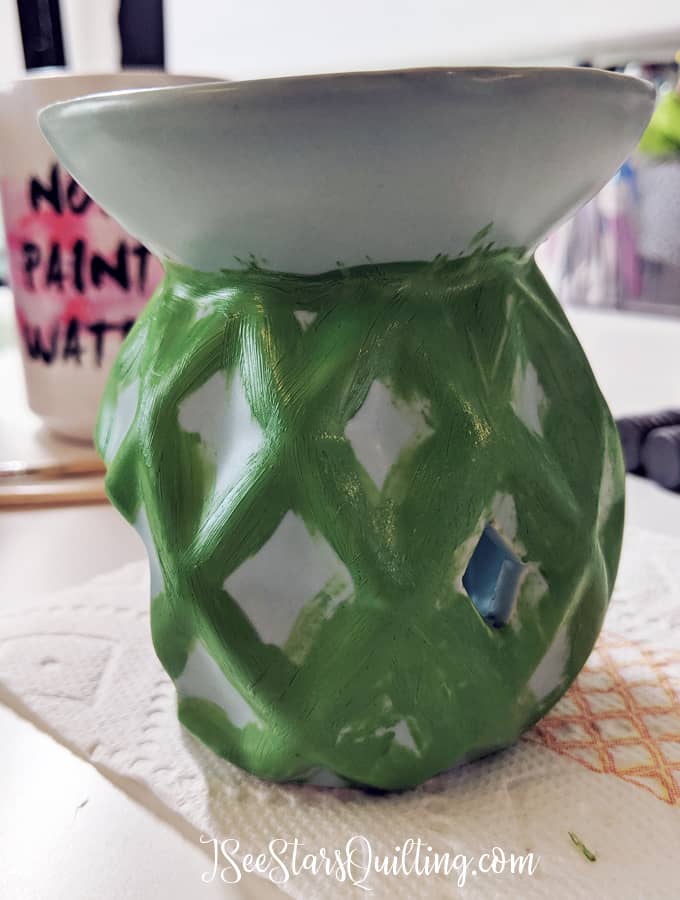
    I started painting the greens in the pineapple first. Most of it will be covered up by yellows and eventually browns so you don’t have to be too neat with your painting.

    DIY Pineapple Pin Cushion from the Dollar store! - How cute is this little reminder to stand tall, wear a crown and be sweet on the inside?! #Pineapple #Pincushion #DIY #sewing #quilting

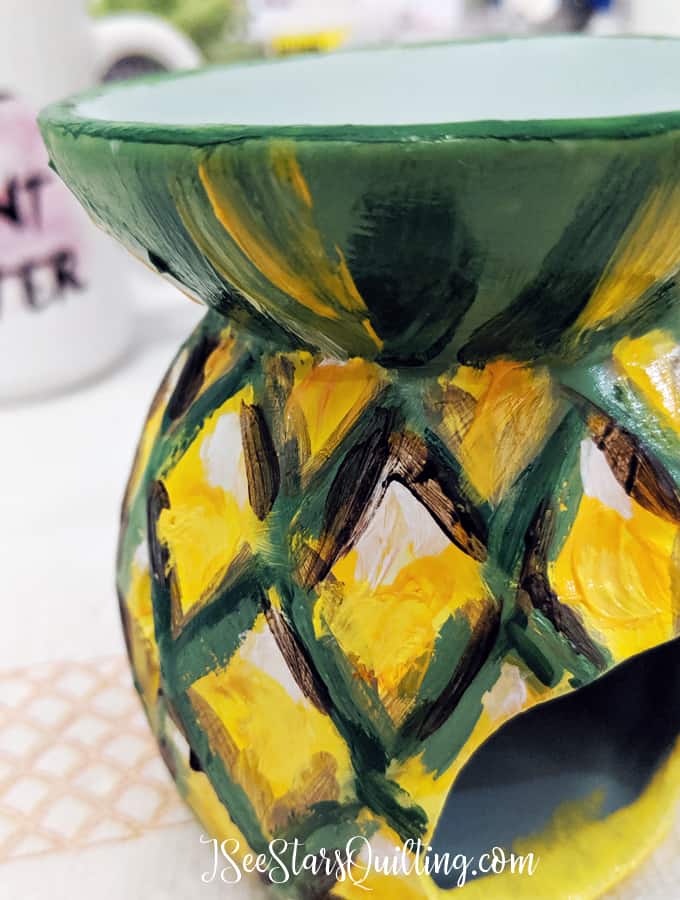
    Then I added 2 different colors of yellow, white, brown and a slightly darker green strokes for a little more demention.

    DIY Pineapple Pin Cushion from the Dollar store! - How cute is this little reminder to stand tall, wear a crown and be sweet on the inside?! #Pineapple #Pincushion #DIY #sewing #quilting

    Let all your paint dry well before proceeding to the next step.

    The Pincushion Part

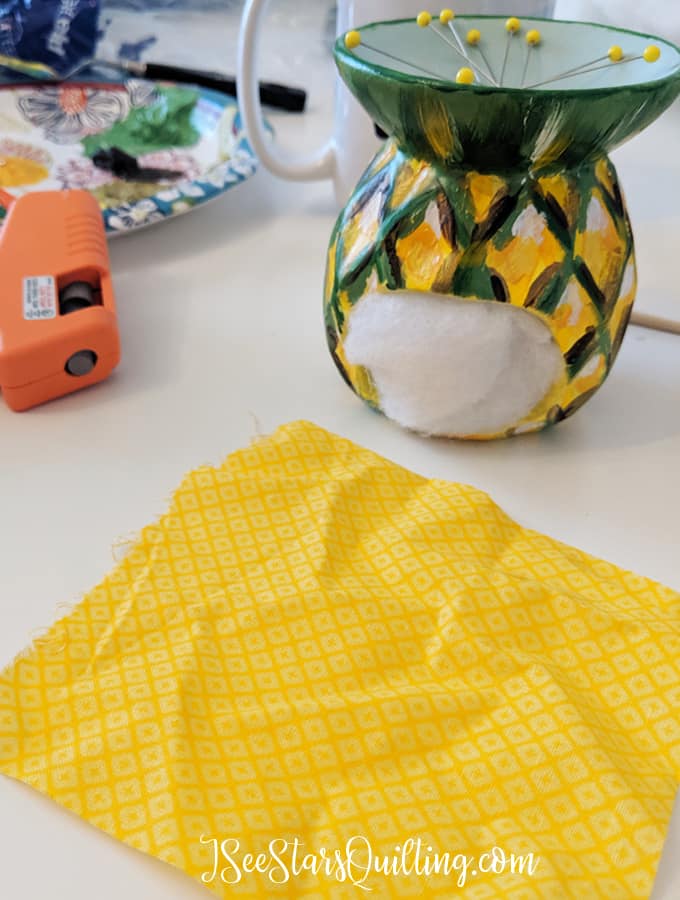
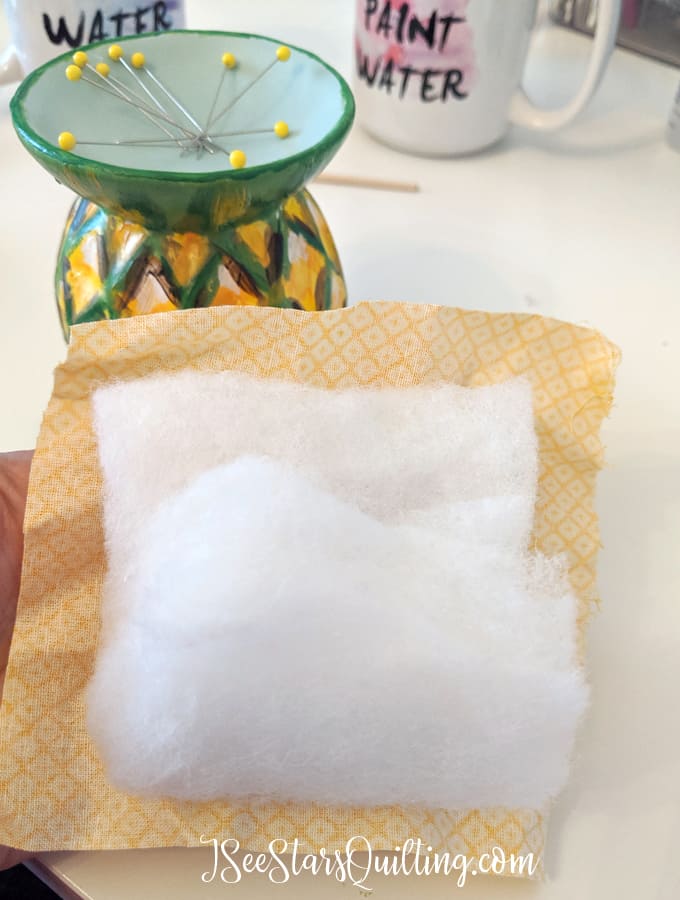
    I used a small scrap of yellow fabric that I dug out of my scrap pile. I really like the criss-cross lines that echo the pineapple theme.

    For the filling, I used some polyester batting scraps simply because that is what I found first. You can fill your pineapple with other fabric scraps or steel wool or whatever you have on hand.

    Test measure your pincushion to find the right amount of filling to put in. Check the firmness when you insert a pin. If it is too soft, add more stuffing/filling. You’ll want to make sure your pin cushion area is tough enough to hold a good number of pins.

    DIY Pineapple Pin Cushion from the Dollar store! - How cute is this little reminder to stand tall, wear a crown and be sweet on the inside?! #Pineapple #Pincushion #DIY #sewing #quilting

    Wrap your chosen fabric around the inside stuffing or batting and tuck in all the edges inside your pineapple.

    DIY Pineapple Pin Cushion from the Dollar store! - How cute is this little reminder to stand tall, wear a crown and be sweet on the inside?! #Pineapple #Pincushion #DIY #sewing #quilting

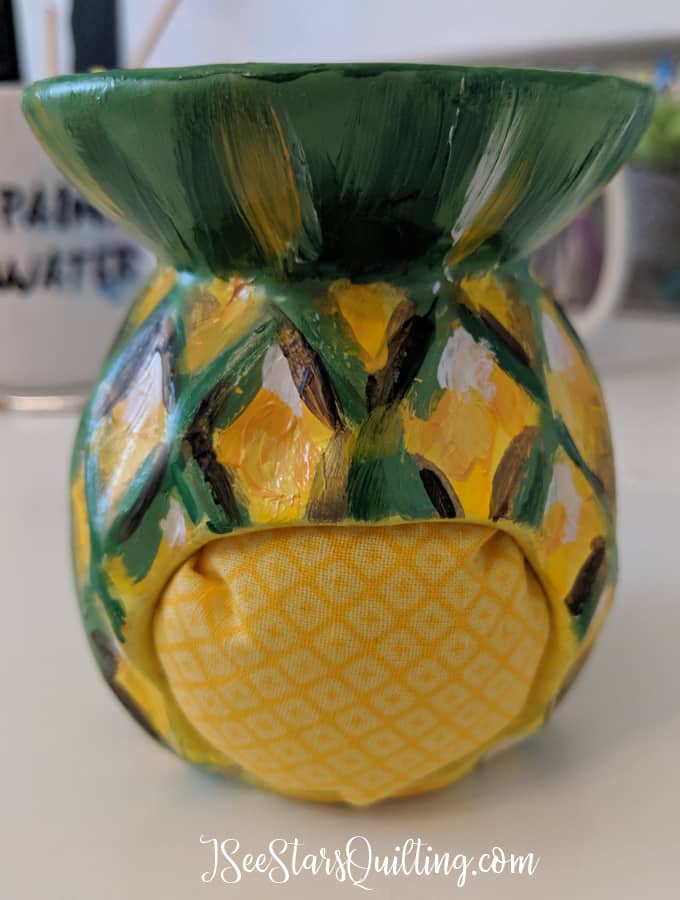
    I did like the smooth flat surface that the batting gave when I stuffed it in the pineapple.

    DIY Pineapple Pin Cushion from the Dollar store! - How cute is this little reminder to stand tall, wear a crown and be sweet on the inside?! #Pineapple #Pincushion #DIY #sewing #quilting
    Pineapple Belly 🙂

    To complete the project, I didn’t find that any glue was really necessary. I just tucked in the raw edges of the fabric and called it done. You’ll have to be the judge on this part for yourself. Glue certainly isn’t going to hurt anything if you like it to be a little more secure. 🙂

    Enjoy your DIY Pineapple Pincushion! If you decide to DIY this project, let me know in the comments down below.

    Happy Crafting!

    DIY Pineapple Pin Cushion from the Dollar store! - How cute is this little reminder to stand tall, wear a crown and be sweet on the inside?! #Pineapple #Pincushion #DIY #sewing #quilting