Tutorials

Step by step tutorials for quilting and sewing projects from ISeeStarsQuilting.

  • Teacher TLC Bags – AKA The One-Hour Zipper Box Tote

    Is summer coming to an end already? Yikes… Meet the teacher is next week for us. I love to spoil my kid’s teachers because honestly… their dedication is worth celebrating every.single.day. I had a brilliant idea to create these little TLC bags AKA One-Hour Zipper Box Tote for the kid’s teachers on the first day of school.
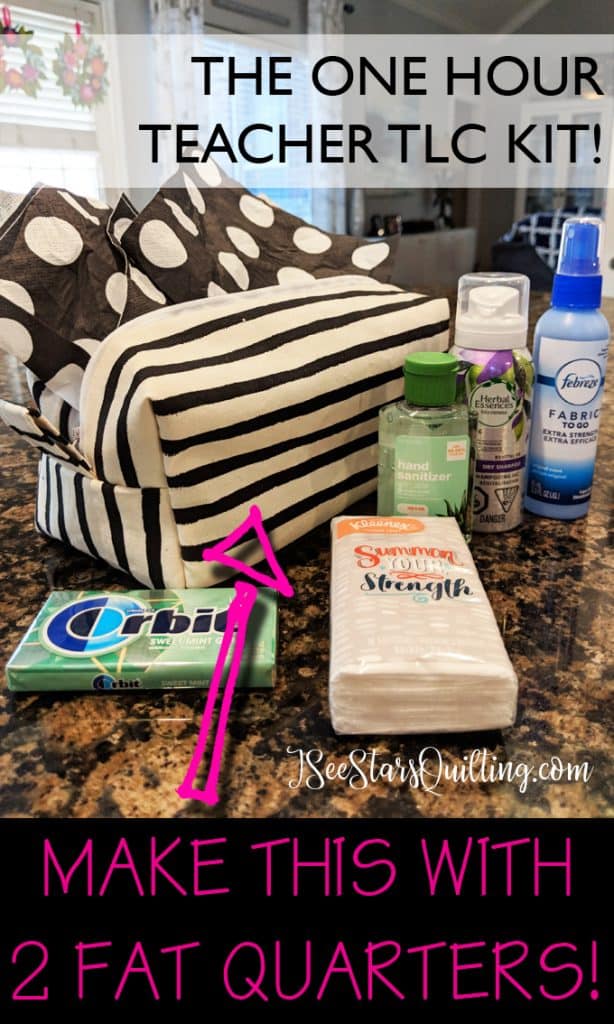
    DIY TLC Teacher Kit - Box Zipper Pouch

    First, I’ll let you in on what essentials I packed the bags with, then we’ll get to the tutorial so you can make your very own!

    This started with a little trip to Target (….like so many of my other adventures do?) I love the travel container aisle. All the cute little bottles and fun sized soaps. Things are so much cuter when they are tiny, right?

    Each of these was also under $2 each, most were $1. So, you can easily stock up on several essential items and remain within a decent budget. I’m a huge believer that you shouldn’t have to spend a fortune to make someone feel special… just being thoughtful can go a long way. Here was the haul that I scored for these gifts. The total for these items was $5.83
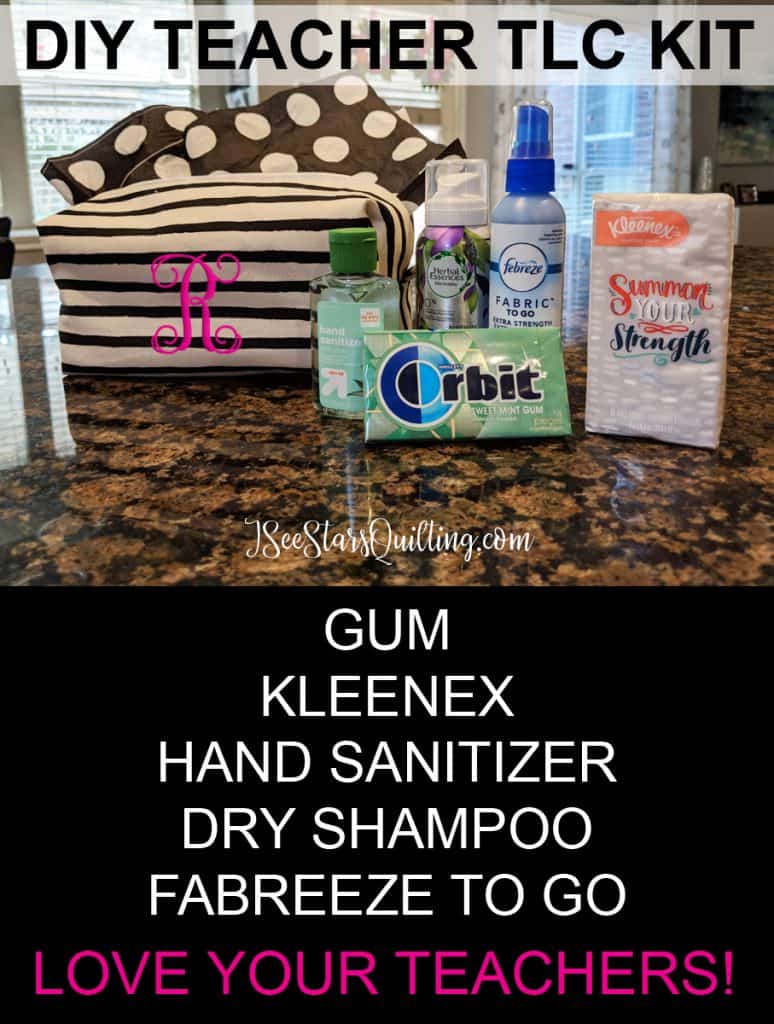
    DIY TLC Teacher Kit - Box Zipper Pouch

    The Kleenex came in a pack of 3 for $1. Look at these designs! Oh, I just fell in love and had to grab them! Now that I look at them, I don’t know if the messages refer to germs or to kids… but… same thing, right? ha!
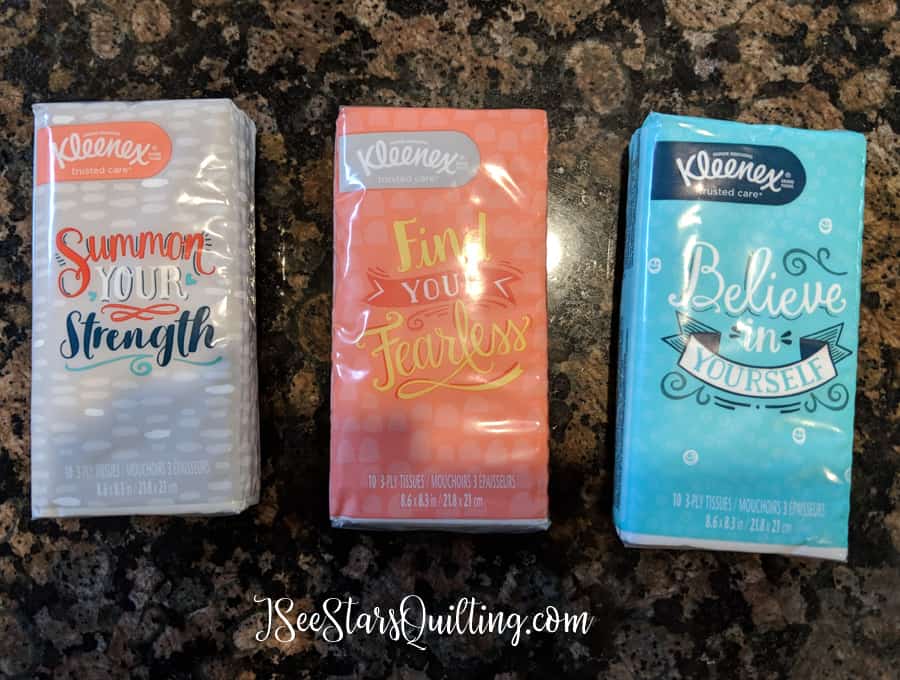
    DIY TLC Teacher Kit - Box Zipper Pouch

    Ok, now onto the making of the Zipper Box Tote!

    I love love love this pattern! It’s really quick and easy to pull together. All you need is 2 fat quarters, and about an hour (less if you practice a few of these… you’ll be cranking these babies out like a machine!)

    This post may contain affiliate links, for more information you can click here.

    DIY Teacher TLC kit – AKA The One Hour Box Zipper Pouch

    What you’ll need:

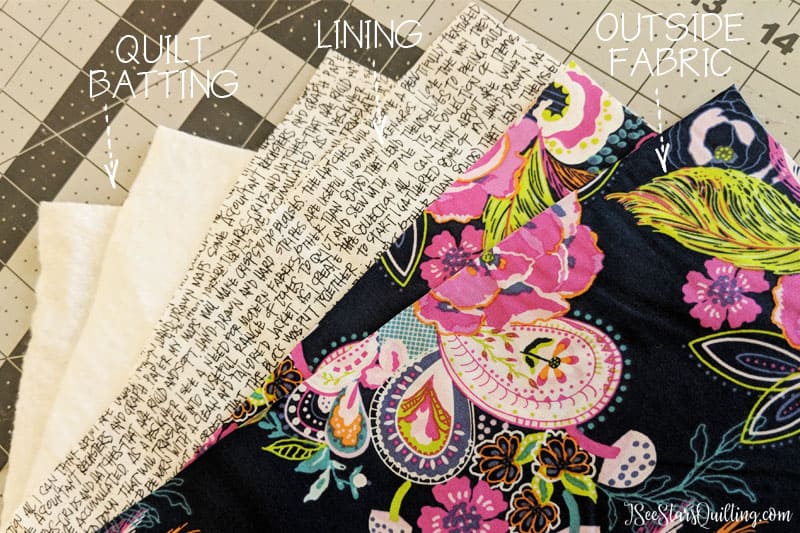
    2 fat quarters (1 for the lining, one for the exterior of the bag) FYI The prints I used are from Cotton + Steel. I love them and wrote a whole post that you can read here if you are interested!
    12 Inch Zipper
    Quilt Batting or interfacing fabric
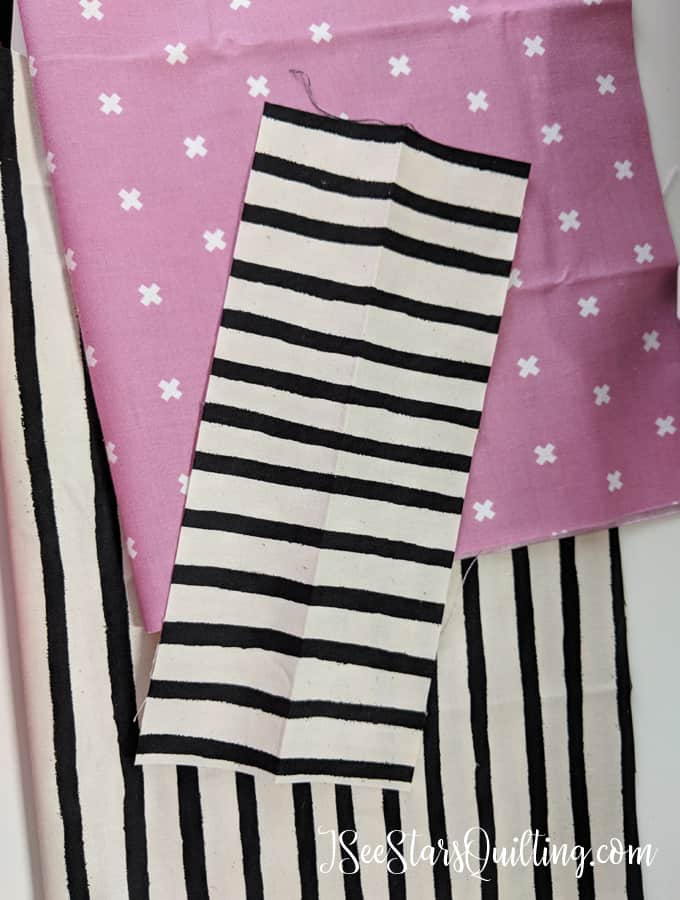
    DIY TLC Teacher Kit - Box Zipper Pouch

    Cuts to make:

    Lining Fabric – 13″x17″
    Exterior Fabric – 13″x17″ AND 4″x7″ for pull tab pieces
    Quilt Batting – 13″x17″

    ****Note: Do not use a directional print with these cuts. This pattern works best with a non-directional print. ****

    Assembly:

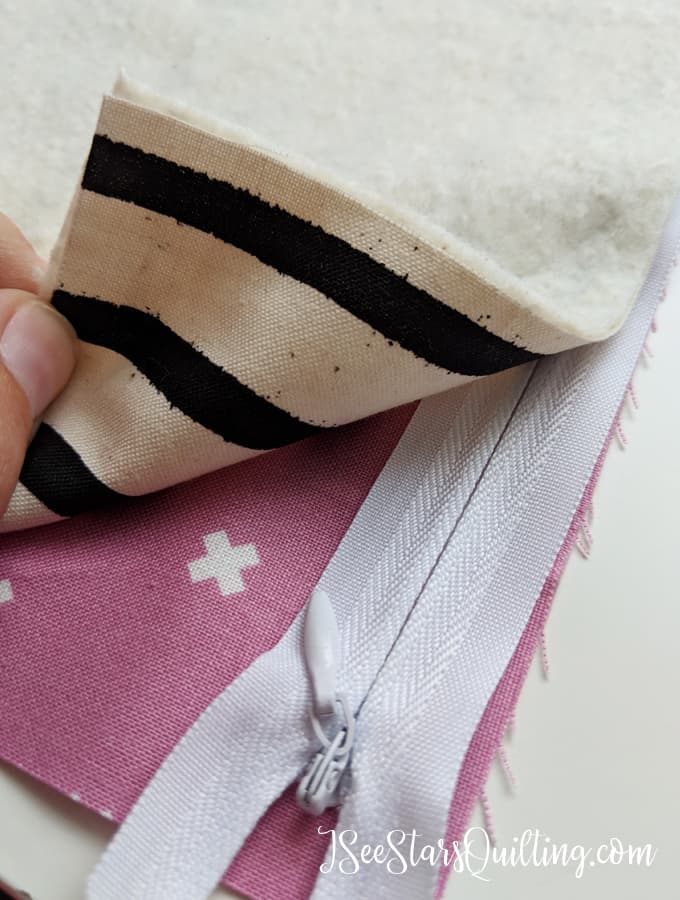
    1. It is time to make your zipper sandwich! Place your lining fabric right side up. (mine is the pink cross fabric) Then, line up one side of your zipper with the edge of your lining fabric on the 13″ side Make sure you lay the zipper right side up! Don’t mess this part up or you’ll have an upside-down zipper and quite a mess.
    2. Next, layer your exterior fabric followed by your batting fabric. If you’re having trouble with the layers, you can pin the exterior fabric to the batting, just remember to take the pins out after it is secure.DIY TLC Teacher Kit - Box Zipper Pouch
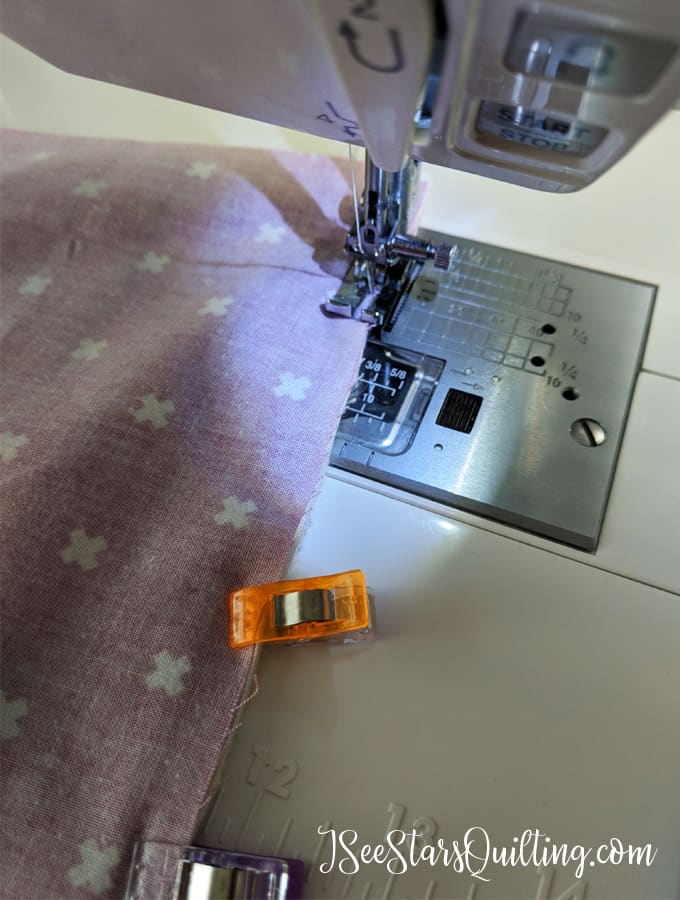
    3. I use clips to keep everything in place while I sew.  It’s much easier than pins in my opinion… but, whatever floats your boat and makes you feel more comfortable! Use a 1/4″ seam allowance and stitch all the way down one side of the zipper STOPPING about 1″ from the zipper pull. DO NOT sew the area where the zipper pull is.
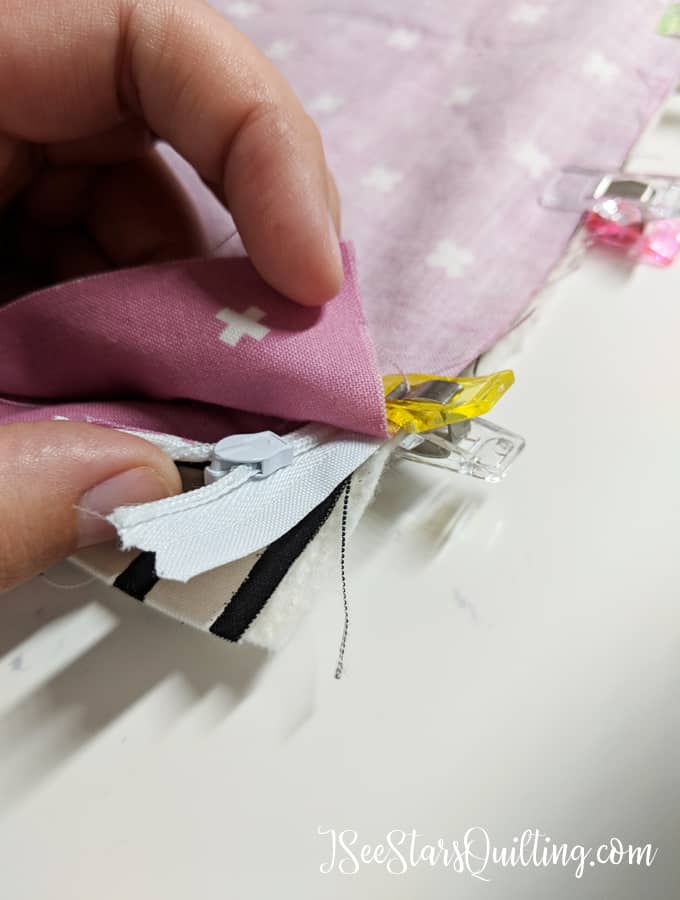
      DIY TLC Teacher Kit - Box Zipper Pouch
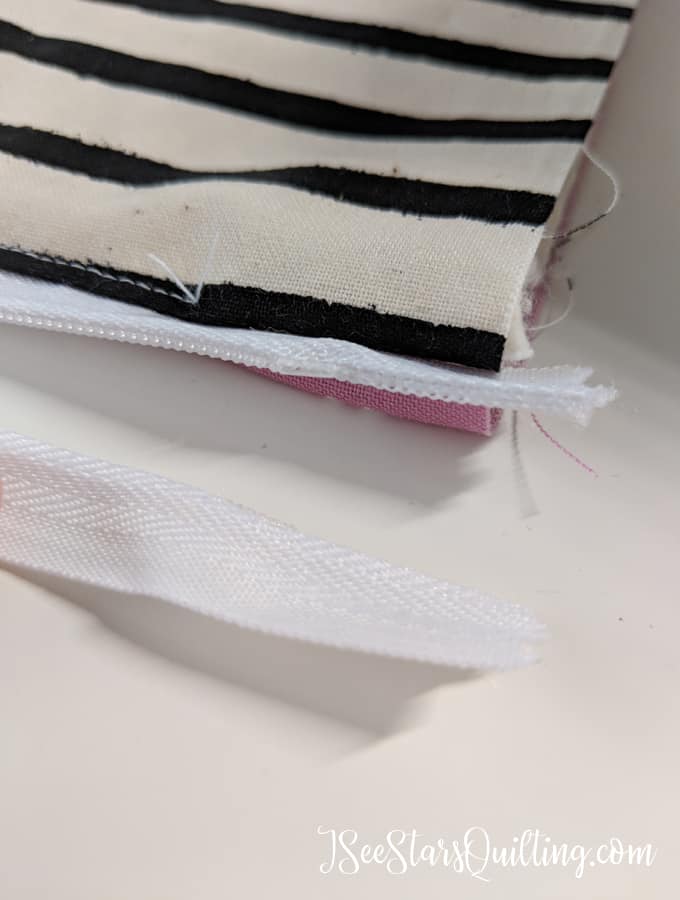
    4. Take your fabric off the machine and unzip the zipper pull past the area where you have just sewn. This will make it easier to get an even straight seam. Finish sewing where you left off.  This makes it easier and yields a cleaner, more even result along your zipper. I usually will do just a short backstitch to keep the threads in place and secure the zipper as it gets a lot of use and you want the fabric to withstand the wear and tear of the zipping.DIY TLC Teacher Kit - Box Zipper Pouch
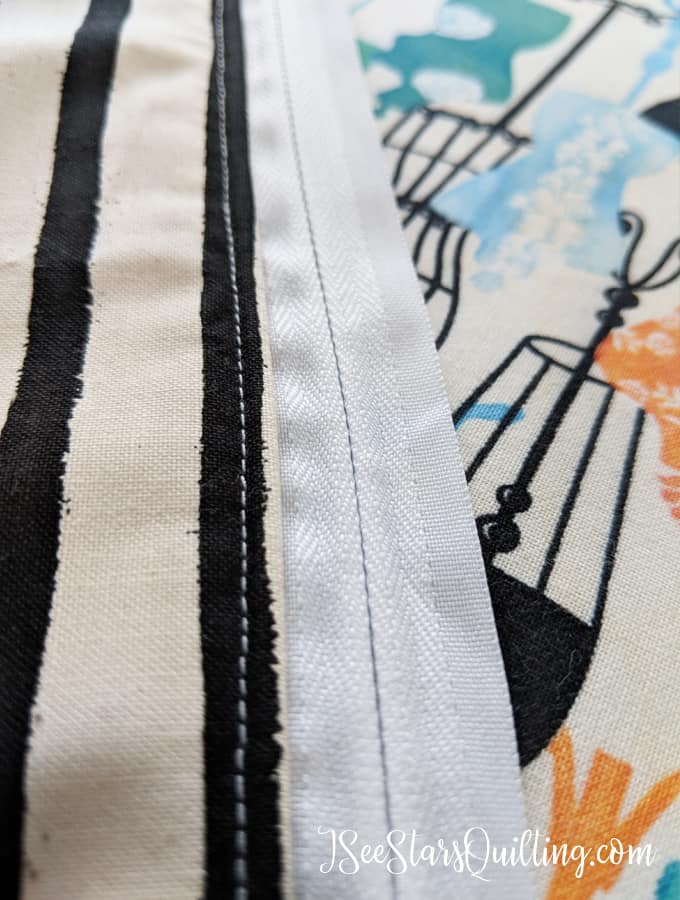
    5. Next, we will be topstitching!  Press your fabric away from your zipper. I suggest using an iron for this. You don’t want the fabric to get bunched up around the zipper or have an excess because it will look less professional. PLEASE be careful… metal zippers get hot under the iron… ahem… or so I have heard… — just a friendly warning! And if you have a plastic zipper… do NOT iron on it. duh.Go back to the machine and stitch just next to your newly pressed fabric. About 1/8″ from the fold. This looks really sharp on your zipper pouch and adds another layer of security to keep your pieces together. I just love top stitching!
      DIY TLC Teacher Kit - Box Zipper Pouch

    6. Now it is time to repeat this same zipper stitching process on the other side of the fabric. Layer the lining right side up, the zipper and then the exterior fabric right side down. The fabrics will make a “w” shape with the zipper being at the center of the middle peak… it can be a little confusing the first time you do this, but after you get it, it will all make sense. Trust me and persevere! Use your clips or pins to keep things steady and in place while sewing.DIY TLC Teacher Kit - Box Zipper Pouch
    7. Stitch all the way down your zipper. If you choose to the side where your zipper pull is, just skip down to about an inch below your pull and start sewing there. You can go back and unzip like before to finish it out. Your seam allowances will be nice and even if you don’t try to sew around the pull part! Do yourself a favor and just take the extra 3 seconds for this step!
    8. Again, Press the fabric away from the zipper gently and top stitch down the side. I unzipped as far as I could go without letting the zipper slide out for this part. It can get a bit tricky to maneuver the fabric “tube” that you have created but doable. Just go slowly and ensure that the rest of your fabric doesn’t get snagged and drawn in by the machine.DIY TLC Teacher Kit - Box Zipper Pouch
    9. Turn your pouch wrong (lining) side out and then flatten the pouch so that the zipper (zip it up again!) is centered on top and the exterior sides are facing inside. **Forgive me, I thought I got a picture of this, but apparently, I got excited and forgot or it didn’t save somehow. I’ll try to illustrate so you can understand. I’m sorry!**
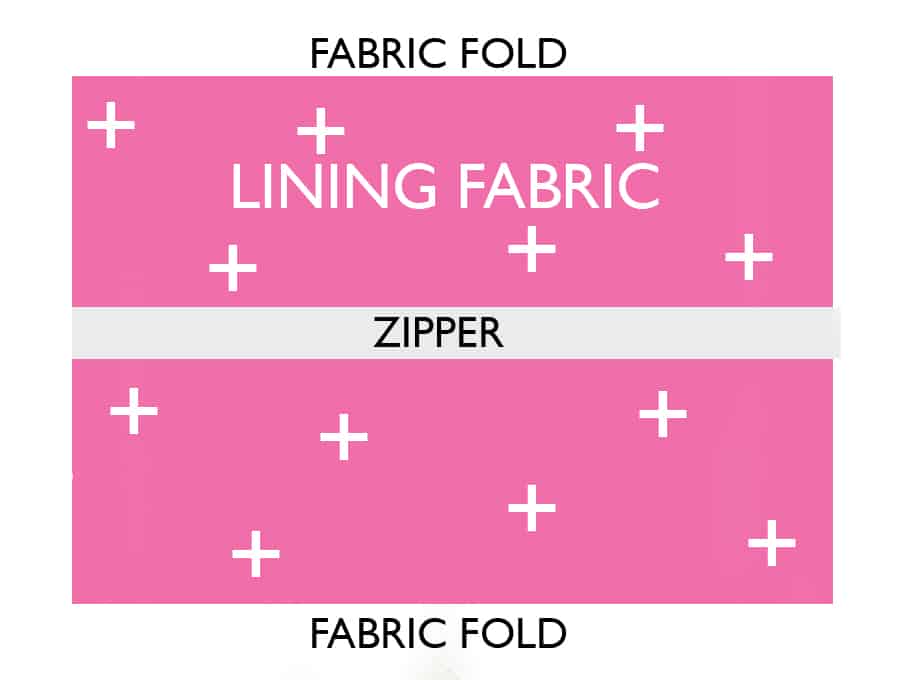
      DIY TLC Teacher Kit - Box Zipper PouchI typically eyeball it and don’t mess with rulers or measuring on this step. It’s not an exact science kind of moment. Place a few Pins on either side of the zipper. I really recommend pins over clips here because you do not want this to shift around.
    10. Unzip your zipper about halfway. Do it right now and DO NOT SKIP THIS STEP. Do it. Do it Do it. Unzip it about halfway.
    11. Did you unzip your zipper? Good. 
    12. Set aside your pinned zipper pouch. Take your 4″x7″ pull tab pieces and press in half length-wise. Then fold the 2 raw edges toward the center seam. Press again. (see pic below) Lastly, Fold again along that original center seam. Press it real good.DIY TLC Teacher Kit - Box Zipper Pouch
    13. Your strip should be about a 1″x7″ strip now. top stitch about 1/8″ down both sides of the 7″ length.
    14. Cut in half to get two 1″x3.5″ pieces.  These will be your tab grabs/pulls. These are very helpful for this type of pouch when you try to open and close it.
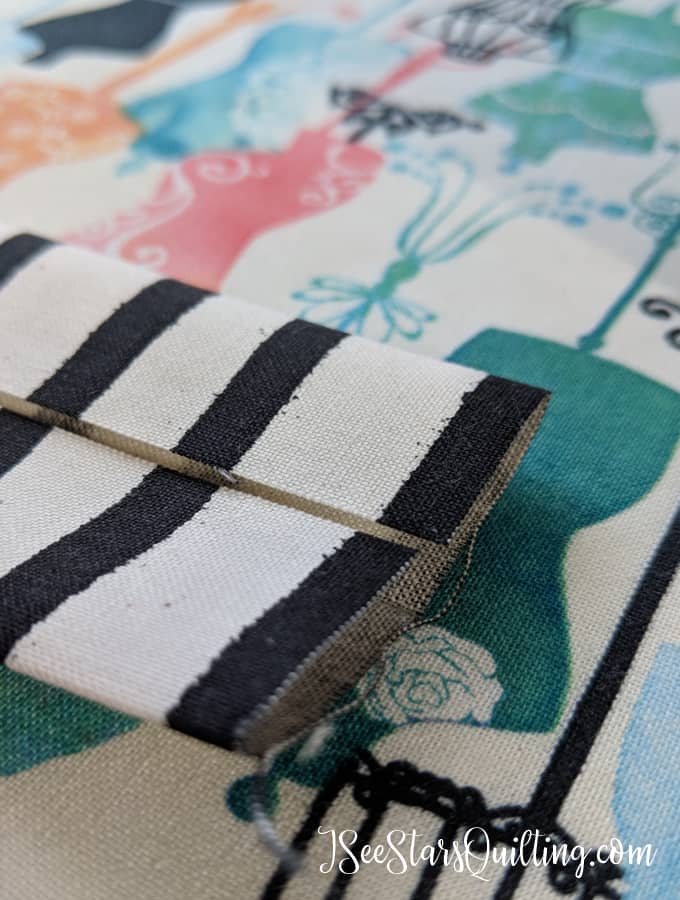
    15. Fold your tab in half, lining up the raw edges.DIY TLC Teacher Kit - Box Zipper Pouch
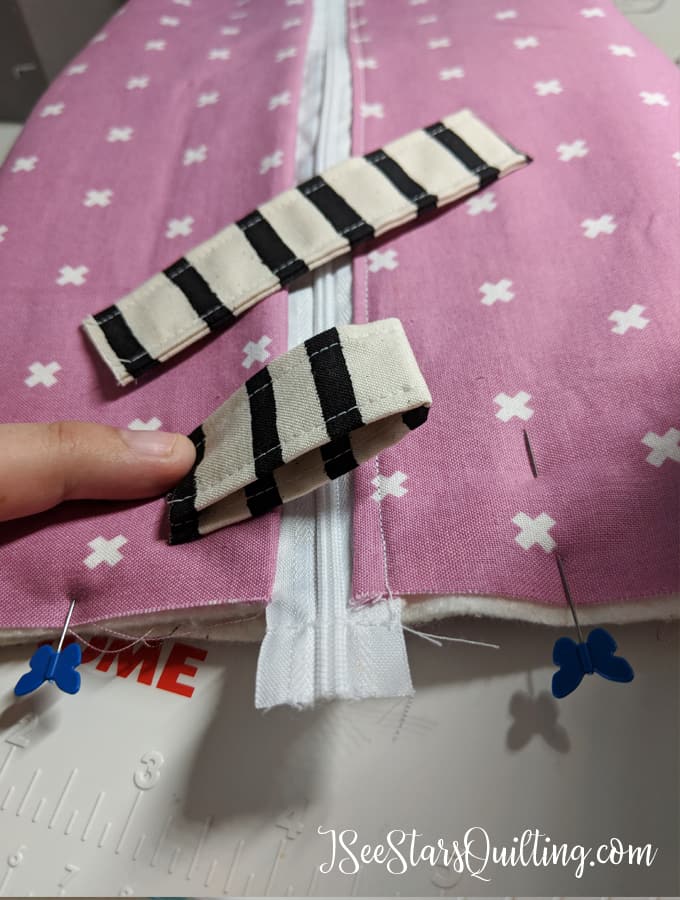
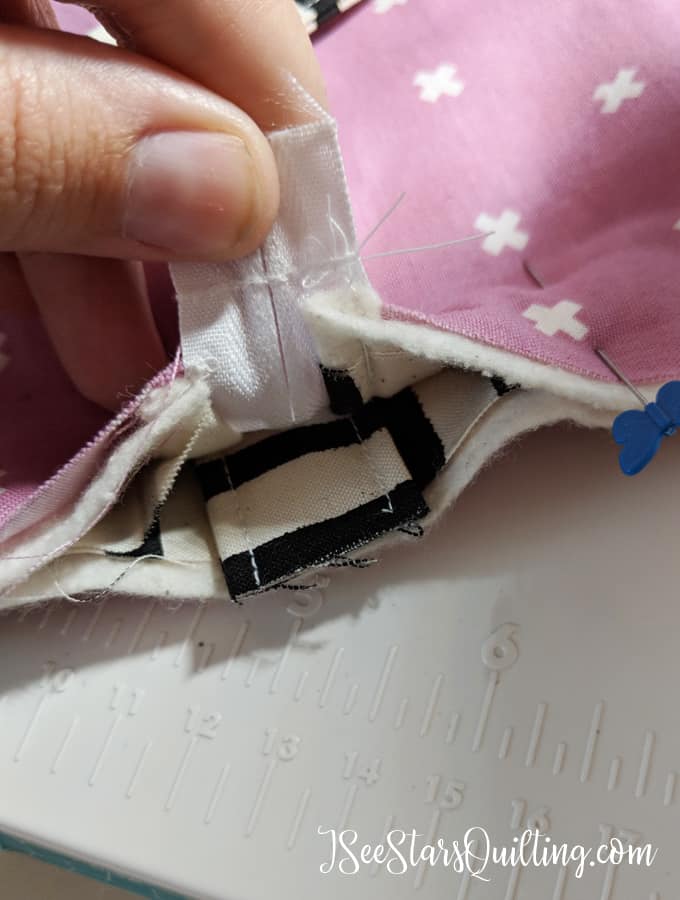
    16. Insert the tab between the exterior sides of the fabric. it should be CENTERED at each side of the zipper. If it is not centered, you will notice it on the finished bag like a sore thumb. Make sure it is centered. The raw edges of the tab should be lined up with the raw edges of the flattened pouch.DIY TLC Teacher Kit - Box Zipper Pouch
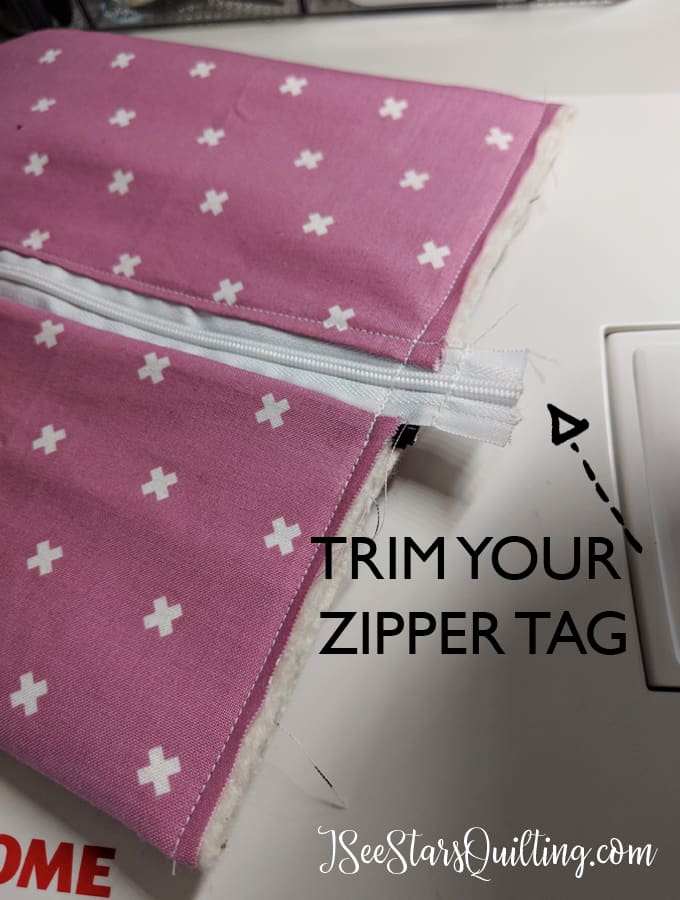
    17. Pin the sides of your pouch and the pull into place. Repeat for the other side of your pouch/pull. On the unzipped side, slightly overlap the tails of your zipper to ensure that when they get pulled through the machine they will line up perfectly without a gap.
    18. Using a 3/8″ seam allowance, sew along the sides of your zipper pouch. It’s a flat rectangle right now. We will fix it to be cute and boxy soon! Never sew over a metal zipper!
      DIY TLC Teacher Kit - Box Zipper Pouch
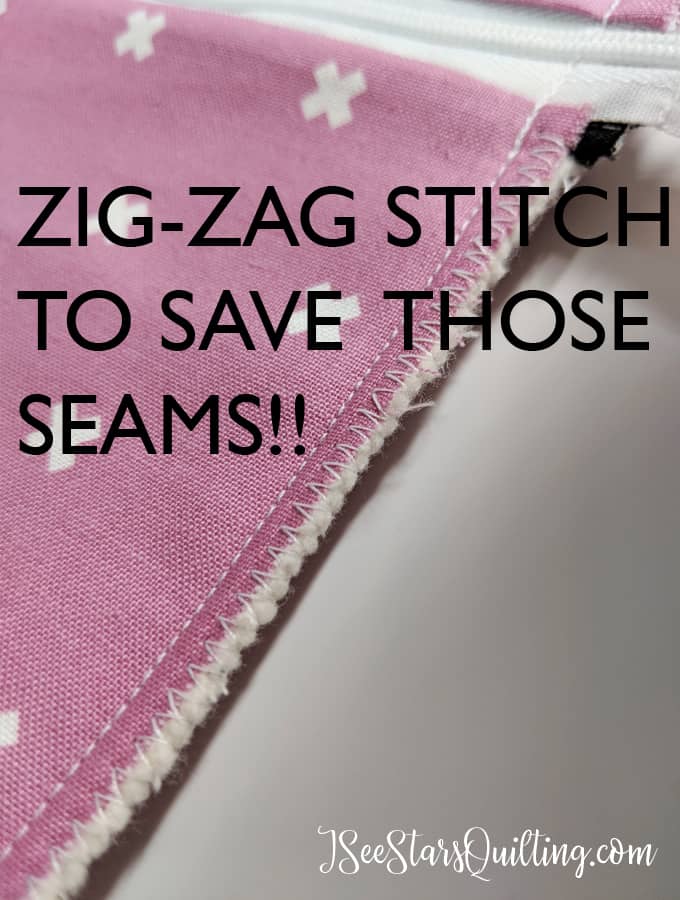
    19. (This step is OPTIONAL, but its quick and makes for a really nice seam for the lining of your bag!) Does your machine have a zig-zag stitch? I always get excited when I get to use this stitch. DO NOT zig-zag over any exposed zippers. Just sew as close as you can, skip over it and start again on the other side.DIY TLC Teacher Kit - Box Zipper Pouch
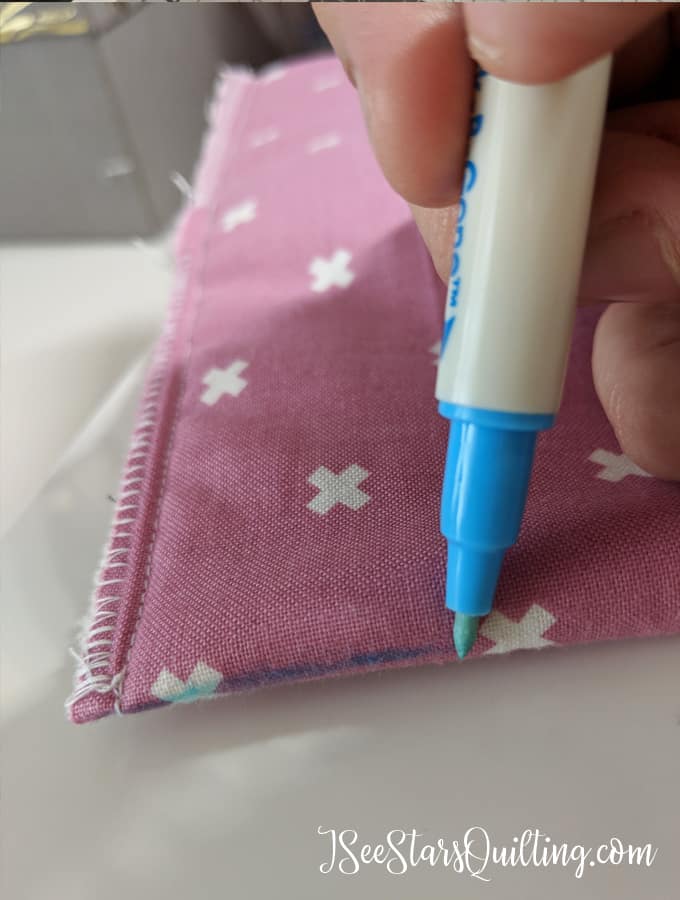
    20. This next step is tricky the first time you do it but it will make sense in just moment. With your pouch laying flat, mark the side seams about 2″ up. Do this for all 4 sides. I use a water-soluble fabric marker. FYI, a pencil doesn’t always come off of the fabric.DIY TLC Teacher Kit - Box Zipper Pouch
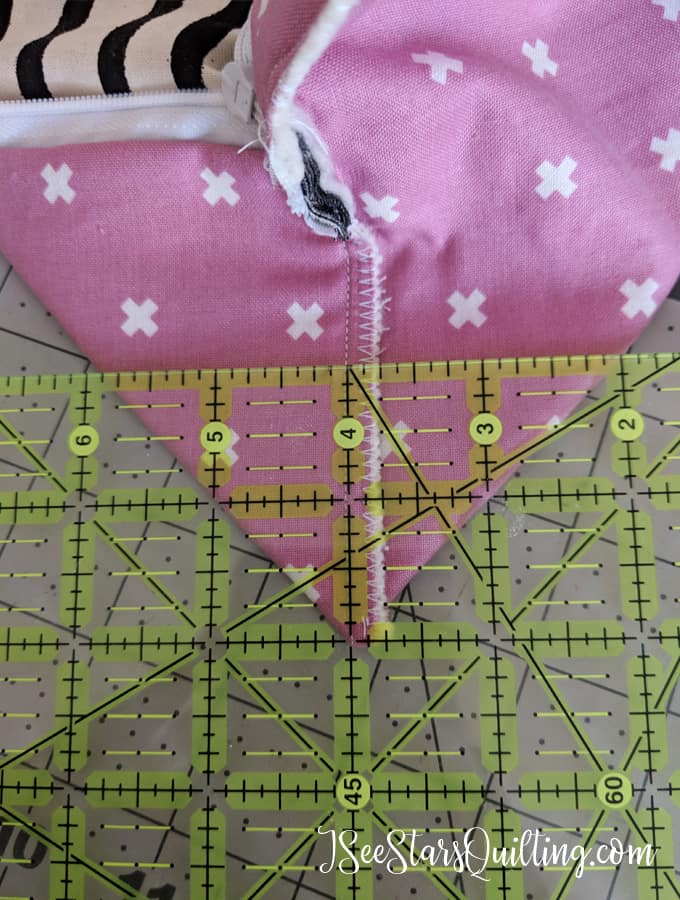
    21. Next, you are going to poof up your pouch and align your zig-zagged seam to the mark you just made. Double check to make sure they line up. Stick a pin in it to keep it in place. You should have a 90-degree angle with your seam coming right up the 45-degree line. Lay it flat on your table. Seam side up. Use your ruler and measure 2″ up the seam of your bag and draw a line across.DIY TLC Teacher Kit - Box Zipper Pouch
      This is what your box should look like with all 4 lines drawn.DIY TLC Teacher Kit - Box Zipper Pouch
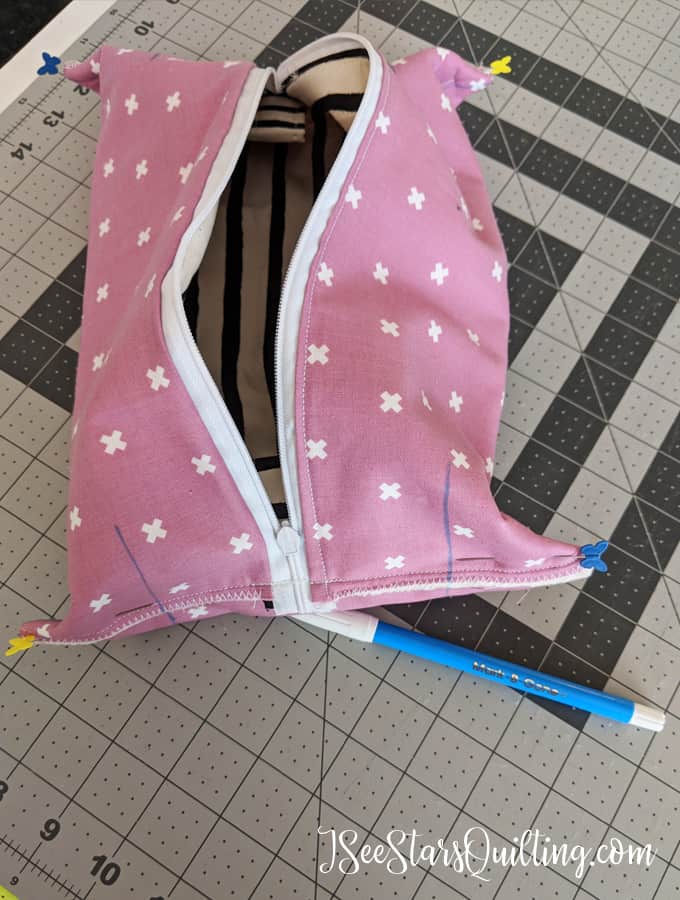
    22. Take it to the machine and sew along each newly drawn line. When you do each corner, make sure that your zig-zagged side seam to your pouch lays the same way. If you happen to get it twisted, it is not going to hurt anything but it will lay better if it folds the same direction.
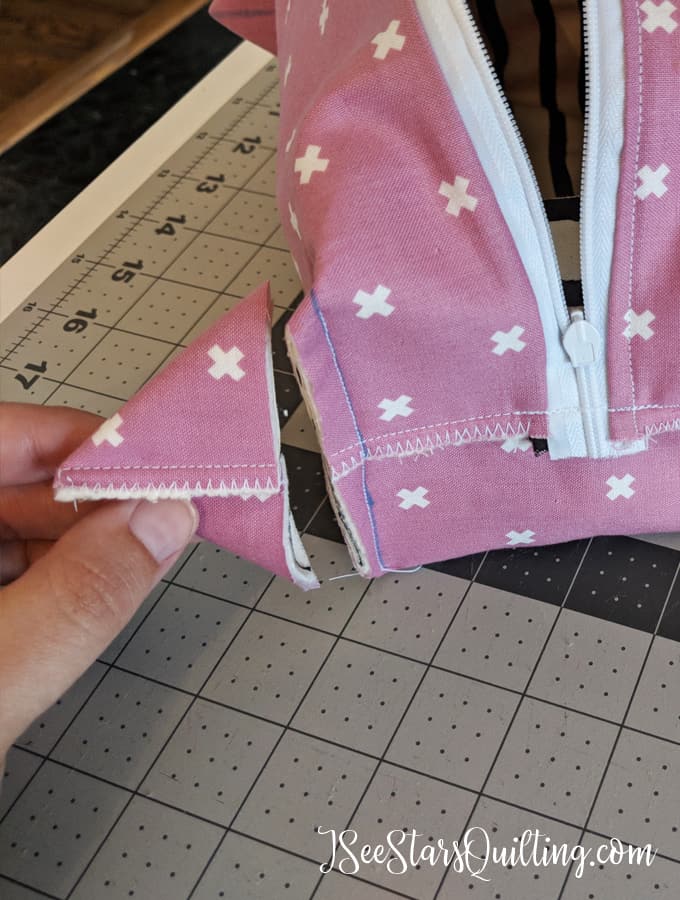
    23. You’re so close to being done! Using your ruler and a rotary cutter, measure 1/4″ from your seam and trim off the extra triangle of fabric. Zig-zag stitch those seams too!
      DIY TLC Teacher Kit - Box Zipper Pouch
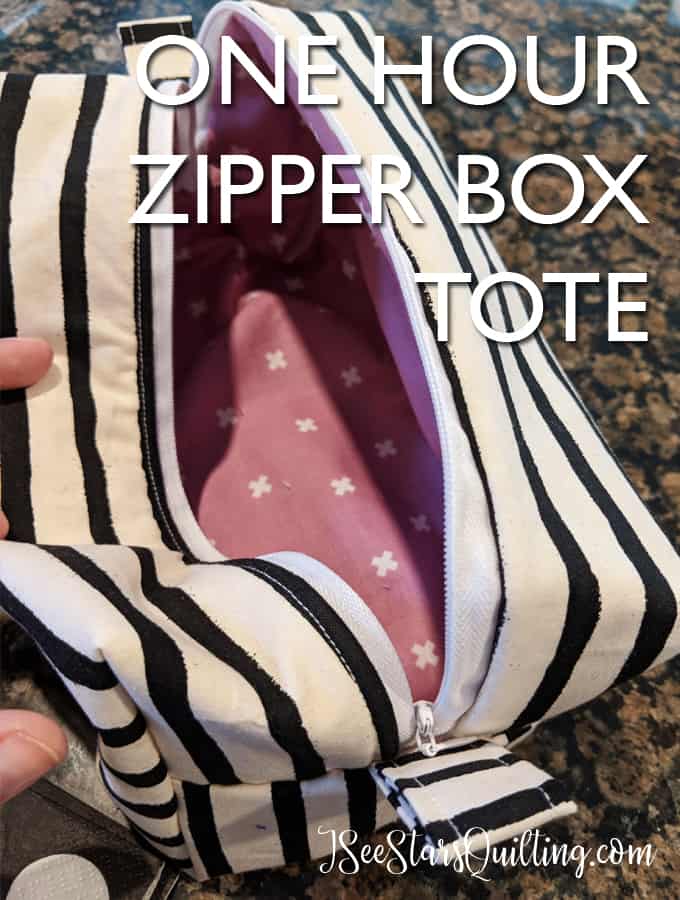
    24. AND that’s a wrap! Turn your Zipper Box tote right side out. Zip it up and marvel in just how quick and easy that was to create!
      DIY TLC Teacher Kit - Box Zipper Pouch

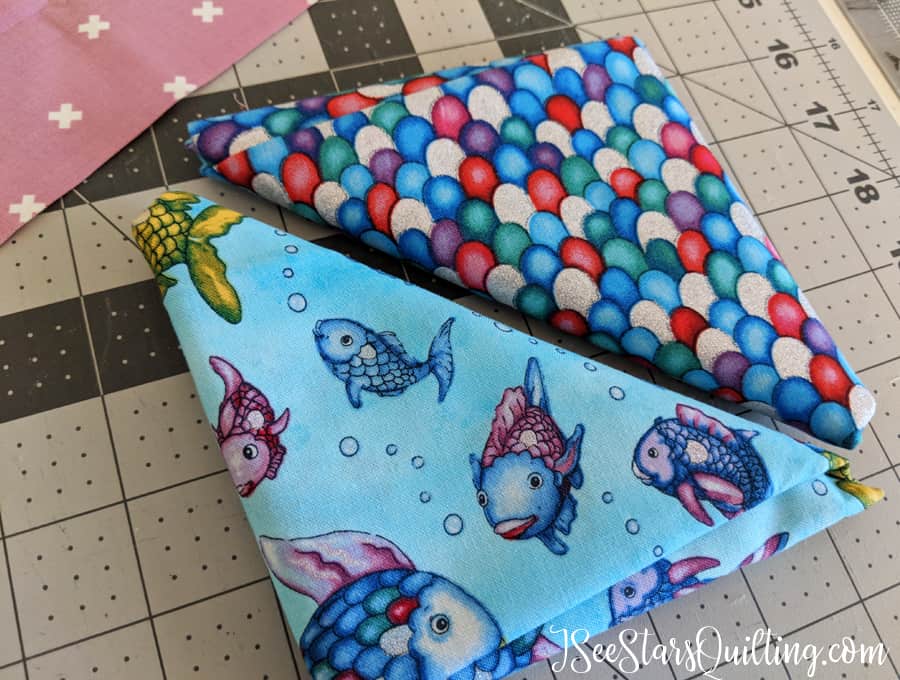
    Wouldn’t you love to have one of these special box totes filled with all your favorite things? I can’t wait to make more 🙂 I found these rainbow fish fat quarters several months back at a little quilt shop. My inner child squealed with delight because I’ve always loved books. I just HAD to buy them… these teacher pouches are absolutely the perfect project for them!

    I’m also planning to embroider the box totes before I give them to the teachers to add just a little something extra!

    A little Rainbow Fish lesson anyone?
    DIY TLC Teacher Kit - Box Zipper Pouch

    If you have made it this far, thank you! I try not to be so long winded but yet provide plenty of instruction. Did you make your own one-hour zipper box tote? Don’t forget to tag me so I can see your beautiful work!

    Let me know if you have any questions. I’m happy to help!

    Cheers & Happy Sewing!

  • Full Review of The Atomic Starburst Quilt Pattern from Violet Craft

    AtomicStarburst Pattern by Violet Craft

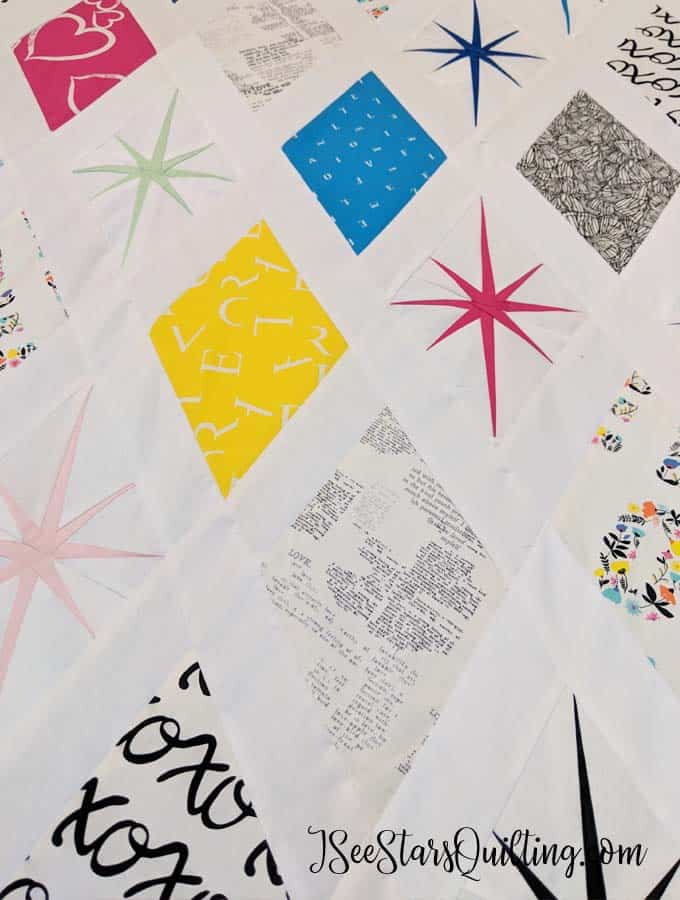
    Hey there happy quilters! As promised, here is a full review of the Atomic Starburst Quilt Pattern from Violet Craft. Plus I went ahead and shot a video to share some tips with you on the paper piecing process.

    You can purchase the pattern from Violet Craft’s website and download it immediately, or I’ve seen this pattern in person at several quilt shops as well. (Side note: if you aren’t familiar with Violet Craft, take a few minutes to pop on over to her website. She is an absolute gem and a genie with fabric!)

    I just wrapped up my Sewing Room Challenge! (to catch up, you can read part one and part two) And I had some questions from people who were tentative to dive into this pattern. I get it. All those pointy stars… I lurked and gazed at this pattern from afar for several months before I purchased it. And then, I had it in my stash (with all the fabric I had chosen!) for another month before I did any cutting or sewing. Wimpy baby steps, right?

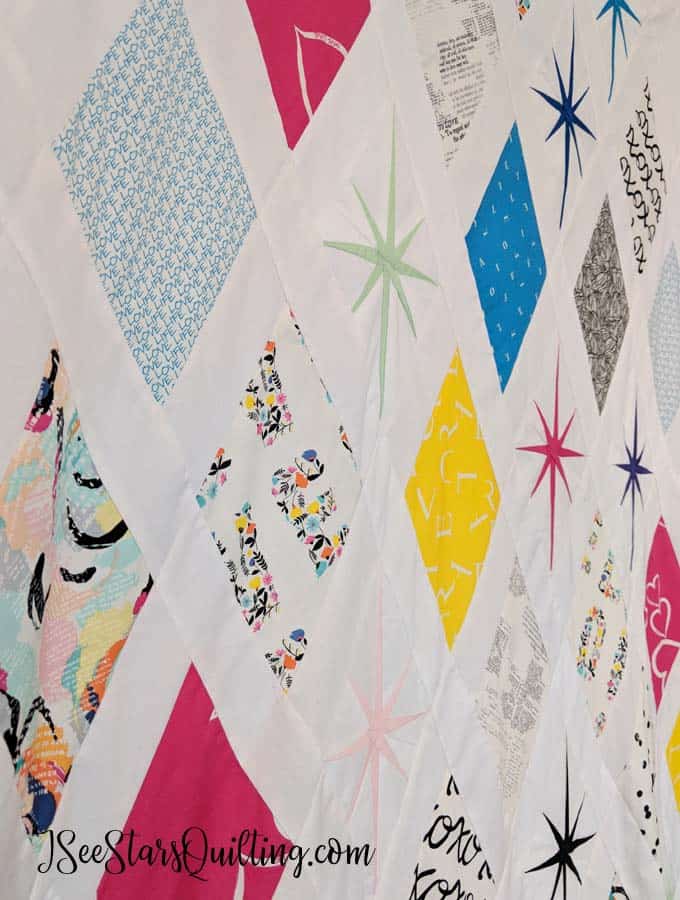
    I’m not the best at paper piecing. It doesn’t come naturally to me. I don’t know why. But after working on this quilt top, I have decided that I want to work some more with it in the future because I love the results that it yields! Just look at these stars! They turned out so lovely, and the quilt just sparkles.

    Atomic Starbust Quilt Pattern

    The Description:

    This quilt is speckled with mid-century-inspired paper pieced stars laid out in a modern diamond pattern. The simple, light background makes the colorful Palm Canyon fabrics and coordinates pop. A generous lap size at 62 x 66.

    This quilt is made by combining foundation paper pieced Starburst blocks with traditional piecing. The result is a vibrant, happy mix of stars and solid blocks.

    Paper Piecing Advice:

    I put together a video that goes over some of the tips and tricks that I used while paper piecing the Atomic starbursts. I hope you find it helpful 🙂 Keep reading below!

    Links to the tools I used, just FYI: Rotary Cutter, Add a Quarter Ruler, Cutting Mat

    Review of the Atomic Starburst Quilt Pattern by Violet Craft

    The Review:

    This Atomic Starburst quilt pattern has 5 stars on Amazon. And 5 Stars on several Etsy shops as well. Actually, I couldn’t find a single review site that has any less than five stars.

    This pattern has been very well received by the quilting community, and people have been giving it glowing reviews from day one. (I told you I stalked this pattern for a while before I purchased it!)

    ISeeStarsQuilting 5 Star Review

    I give it a full five stars (now that the quilt is finished. Keep reading for more explanation). I’m entirely in love with the result and I can’t wait until I quilt the whole thing.

    The Process:

    I love the atomic starbursts. They are my favorite part of the pattern. There are 20 total in the pattern, and they are stunning scattered throughout the quilt.

    I’ll let you in on a little secret. It wasn’t all sunshine and roses the whole piecing process… In my personal experience, it seemed like some on again off again teenage romance between me and the atomic starbursts.

    There are 20 stars in the pattern, so that equals 40 halves to the stars. (you paper piece each half and then sew together to complete each star) For a while, I thought I had been caught in some time loop alternate universe where it didn’t feel like I was making much progress at all. I was trying my best to sew in tiny chunks of time to make progress any way I could. It still felt slow and I was slowly getting more and more frustrated.

    One Saturday morning I let the kids play and watch a few movies (hey, it doesn’t happen too often, but they were happy, I was happy). I sewed and sewed and sewed and I finally turned a corner. After that day, I tried to work in larger chunks of time for at least 30 minutes.

    I think once you turn that corner, and have just over half of your starbursts created, THAT is when the 5-Star review mode kicks in.

    I don’t want to be all doom and gloom, but I do want to give a frank depiction of the process.

    Don’t let the work discourage you. It was totally worth it.

    The rest of the quilt was an absolute joy to continue making, and I couldn’t be more pleased with the way it turned out!

    Atomic Starbust Quilt Pattern

    The Finished Product:

    I wish I could put down the beautiful photo shoot with my quilt right here, but the truth is… It is going to be a little bit before I call this one finished. 🙁 I have a friend who has a lovely long arm machine and has agreed to teach me to sew on it. So I am saving this quilt top for the long arm machine. As soon as it gets done, I’ll post a few update pics.

    Instagram sees most everything first and you know I’ll be posting pictures of the whole process and the in-between shots. Follow me on Instagram here. You can also tag me @iseestarsquilting

    Also, It is worth mentioning that as slow as this quilt top felt at the start, by the end of the piercing, I was already planning another quilt with the same pattern! I’ve seen a few pictures where someone used a dark/navy background, and it was stunning! – I won’t be working on it just yet… but someday, I would love to make another Atomic Starburst Quilt.

    Are you going to try out the Atomic Starburst Quilt?

    What do you say? Have I convinced you how awesome this pattern is? Did I scare you with the amount of work involved? Have you already started this pattern? Let me know in the comments. I would love to see your versions of the atomic starburst quilt out there!

    Happy sewing!
  • What is a quilter’s “Flying Geese”?

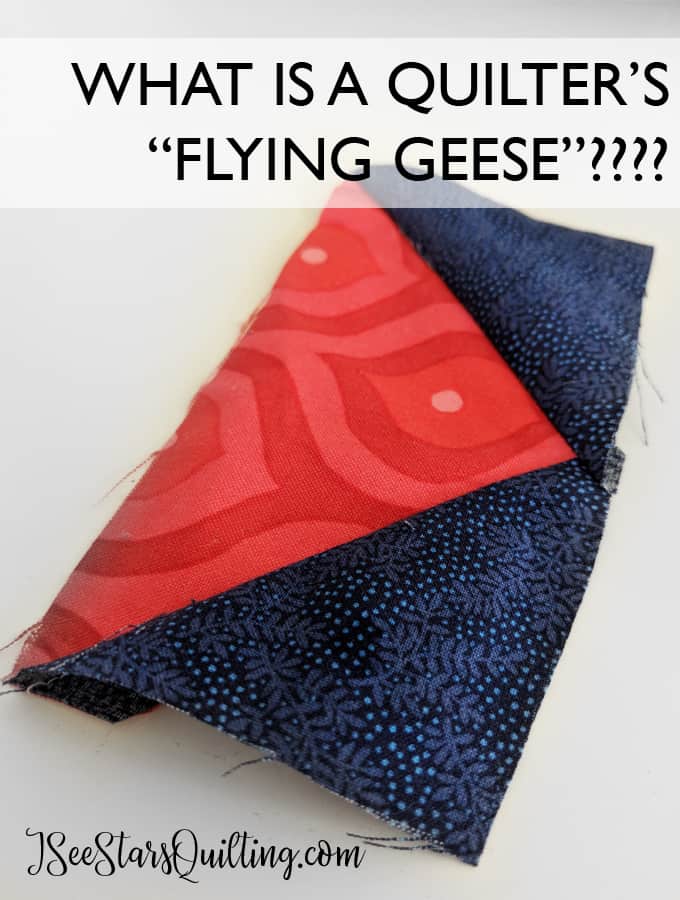
    When I first started sewing I quickly picked up on the fact that sewists have their own terminology and a catchy clever phrase for just about everything related to our craft…. like a secret club language if you will. As a newbie, this can be overwhelming and confusing… but nothing tops the day I heard about a quilter’s “flying geese”…

    Excuse me… What the what? 

    Don’t worry… we’re not zoo-ologists now or anything. The flying geese is a sewing technique that gets your perfectly perfect “v” shapes in your designs very single time. And it is absolutely beautiful!

    As for what I can discover about the origins of the term “Flying Geese”… there area few theories floating around. A lot of it is folklore going back to the civil war times. It is said that these quilts were displayed on front porches etc to convey secret messages along common paths that would point/guide fleeing slaves toward the northern free states. Geese fly north to Canada, hense the goose reference. Geese fly in a “V” formation… you can connect the dots 🙂

    So let’s learn the simple steps how to create these beautiful “v” shapes with fabric, shall we?

    What is a Quilter's flying geese?

    Today I have 2 methods to show you on how you can make a flying geese block. You’ll be a pro in no time! I’ll even link to a few free patterns out there that use this block should you get really goose happy and want to create more!

    Supplies:

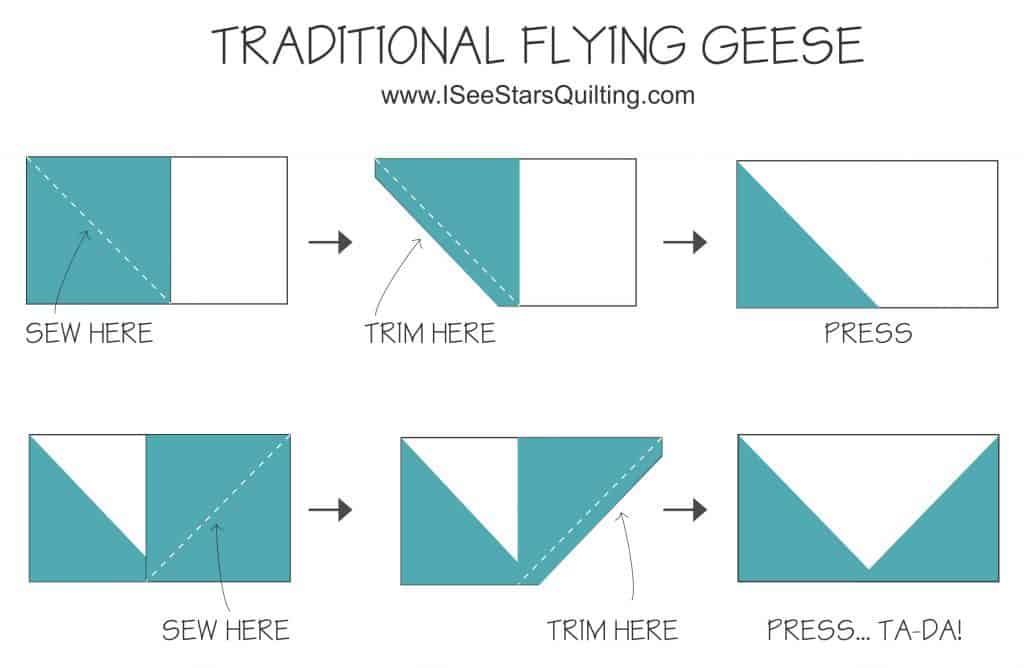
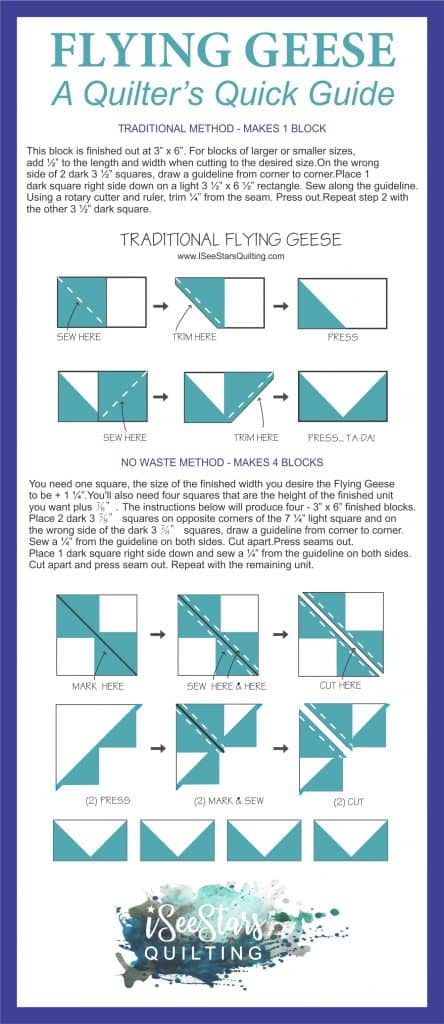
    Traditional Method – Makes 1 Block

    This block is finished out at 3” x 6”. For blocks of larger or smaller sizes, add ½” to the length and width when cutting to the desired size.

    1. On the wrong side of 2 dark 3 ½” squares, draw a guideline from corner to corner.
    2. Place 1 dark square right side down on a light 3 ½” x 6 ½” rectangle. Sew along the guideline. Using a rotary cutter and ruler, trim ¼” from the seam. Press out.
    3. Repeat step 2 with the other 3 ½” dark square.

    Traditional Flying Geese for Quilting how-to

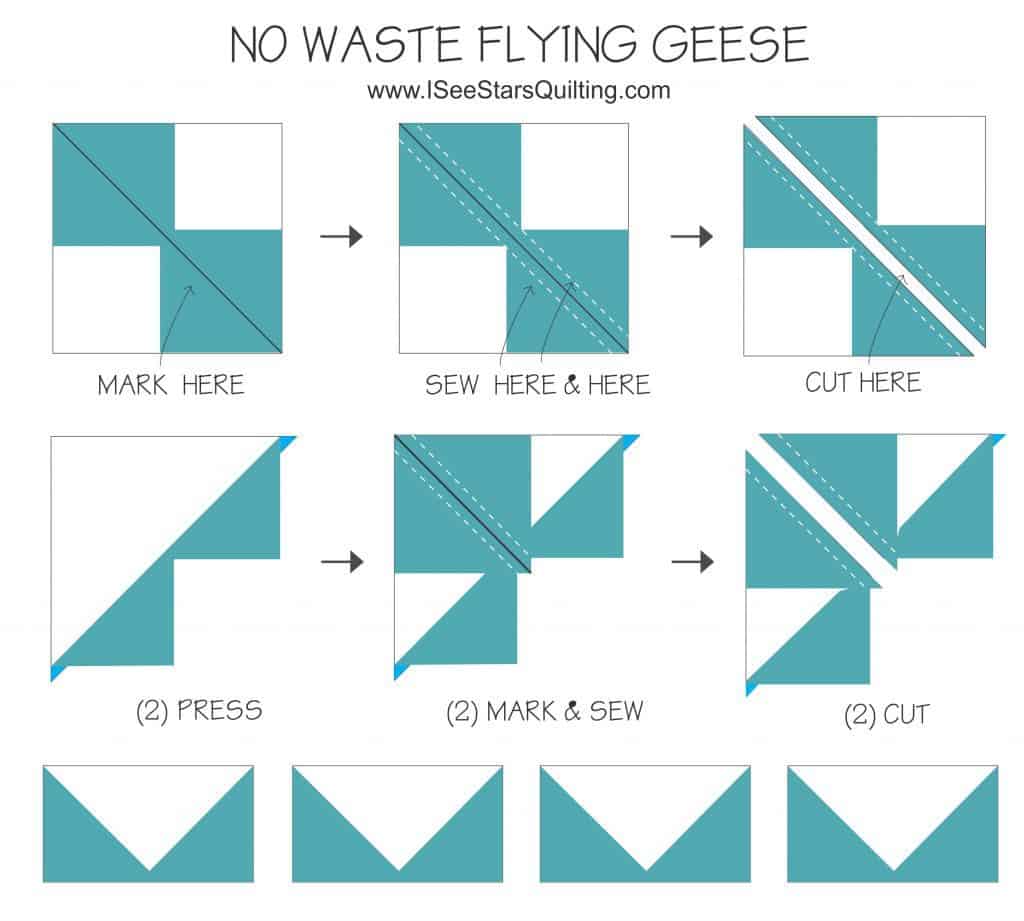
    No Waste Method – Makes 4 Blocks

    You need one square, the size of the finished width you desire the Flying Geese to be + 1 ¼”.

    You’ll also need four squares that are the height of the finished unit you want plus ⅞”. The instructions below will produce four – 3” x 6” finished blocks.

    1. Place 2 dark 3 ⅞” squares on opposite corners of the 7 ¼” light square and on the wrong side of the dark 3 ⅞” squares, draw a guideline from corner to corner.
    2. Sew a ¼” from the guideline on both sides. Cut apart.
    3. Press seams out. Place 1 dark square right side down and sew a ¼” from the guideline on both sides. Cut apart and press seam out. Repeat with the remaining unit.

    Traditional Flying Geese for Quilting how-to

    What quilts can you make with flying geese?

    There are so many different quilt patterns out there that use flying geese blocks. So many of them are really quite stunning. Check out some of my favorite patterns below.

    Note: while several of the images contain a much more traditional feel of fabric… keep an open mind and picture some really bold and modern fabric pairings! – the possibilities of modern quilting are endless!

    FREE PATTERNS

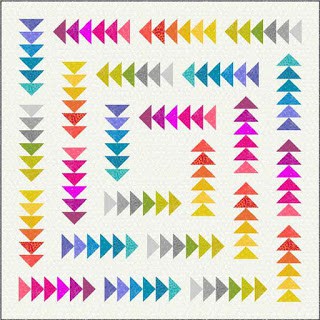
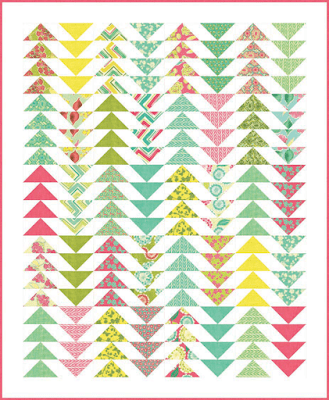
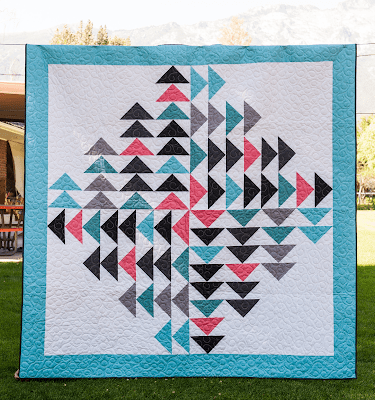
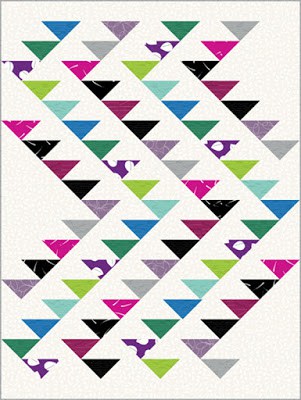
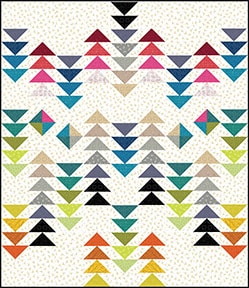
    Chasing Rainbows quilt, 74 x 74″, free pattern by Lynne Goldsworthy for Makower (PDF download)

    Imperial Token table runner, 16 x 48”, free pattern at Art Gallery Fabrics (PDF download)

    Flying Geese for Quilters - Free Pattern

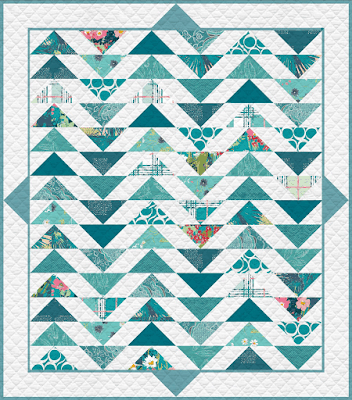
    Plenum quilt, 64 x 73″, free pattern at Art Gallery Fabrics (PDF download)

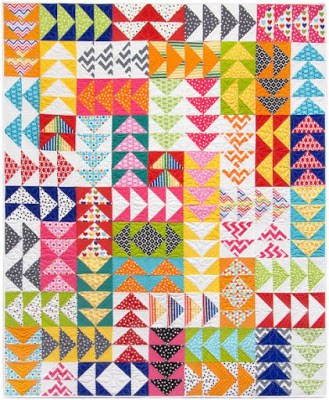
    Remixed Geese quilt, 54 x 66”, free pattern at Robert Kaufman (PDF download)

    Spring House quilt, 55 x 67”, free pattern at Moda Fabrics (PDF download)

    Every Which Way quilt, 74 x 74”, free pattern at Riley Blake Designs (PDF download)

    Funky Zen quilt, 60 x 80”, free pattern by Heidi Pridemore for Benartex (PDF download)

    Fly Away Home quilt, 54 x 63”, free pattern at Benartex (PDF download)


    Faded Geese quilt, ~65 x 91”, free pattern at Robert Kaufman (PDF download)

    The Chipper quilt, 68 x 68”, free pattern by Tula Pink (PDF download)

    Flying Geese for Quilters - Free Pattern

    FREE Easy Flying Geese Reference Guide

    I’m going to make this easy for you, my quilter friends!

    Pin the image below so you’ll have a quick guide to refer back to later when you’re creating your own little flock of flying geese on everything!
    I hope you found this short article helpful. You can always feel free to contact me if you have any questions! I’m happy to help!

    Flying Geese for Quilting how-to

  • Scrap Fabric Storage! & What to do with them! (cheap fabric storage)

    Hi, I’m Christen and I’m an absolute fabric hoarder.. you know what? I love it. Once I started collecting beautiful fabrics, I couldn’t bring myself to let go of the small scraps… It wasn’t long before I was faced with a bit of a problem. Scrap Fabric Storage… so many options… and I needed it asap. What is a quilter to do?

    “Save the fabric scraps!” I say! “You never know when a pattern could come along that you could use it again!”

    What do you do with all your fabric scraps?

    Where do you keep them while you’re waiting for the perfect heroic moment to pull them out and give them purpose again?

    You’ll find no less than 1,000 different storage ideas on Pinterest (follow me here).

    I’m a mom with little kids. I can’t spend a fortune on walls of glorious pristine custom white shelving. Cheap and effective are my favorite kind of projects.

    I must have tried out hundreds of ideas before deciding that sometimes simplicity really is the best way to go.

    Simple, effective and no fuss.

    Do I have your attention now?

    Below you can see the system that I used to use, what I currently use and a few of my favorites from my “if I had a trillion dollars” dream ideas… just to spark some inspiration!

    Scrap Fabric Storage Solutions

    This post contains affiliate links You can read more here.

    Fabric Scrap Storage – The Beginner Stage

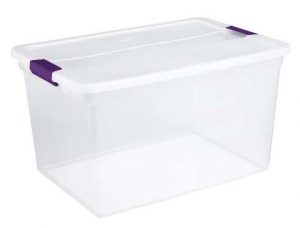
    For a long time, my scrap fabric storage was one of these babies… I told you. Simple, Cheap (less than $10)… yet very effective. You may even have one in your garage that you could toss old Christmas lights out of and re-purpose.

    Pros: In the beginning it was perfect. I found it really nice to be able to toss scrap pieces of fabric from different projects into one collective place separate from my whole pieces/yardage fabrics.

    It has a lid – This is awesome to stack on top of or slide under a table. Keep the mess contained.

    Clear sides made it easier to see while digging around.

    Cons: After 2 years (and a lot of quilts) I outgrew the bin. oops.

    There was no organization to the big giant bin and I can’t count how many times I dumped it out to look through my collection. It was sometimes difficult to find that ONE scrap once it got a little fuller. This is a minimal complaint, but worth mentioning.

    Thoughts: Overall, this solution was exactly what I needed at the time and it worked perfectly. I was able to use up a lot of my scraps. Unfortunately, with all the sewing and quilting I’ve been doing in the last few years, I have made more scraps than I am able to use up. Thus bringing me to the next level of storage…

    Fabric Scrap Storage – The Intermediate Stage

    You know those lightbulb moments where you know you’re in the right place at the right time? I had one of those moments.

    I was shopping at Target and I came across this set. I’ll give you a link to it on Amazon because it is actually $7 cheaper there AND has free shipping. (woohoo!)

    Scrap Fabric Storage Solutions

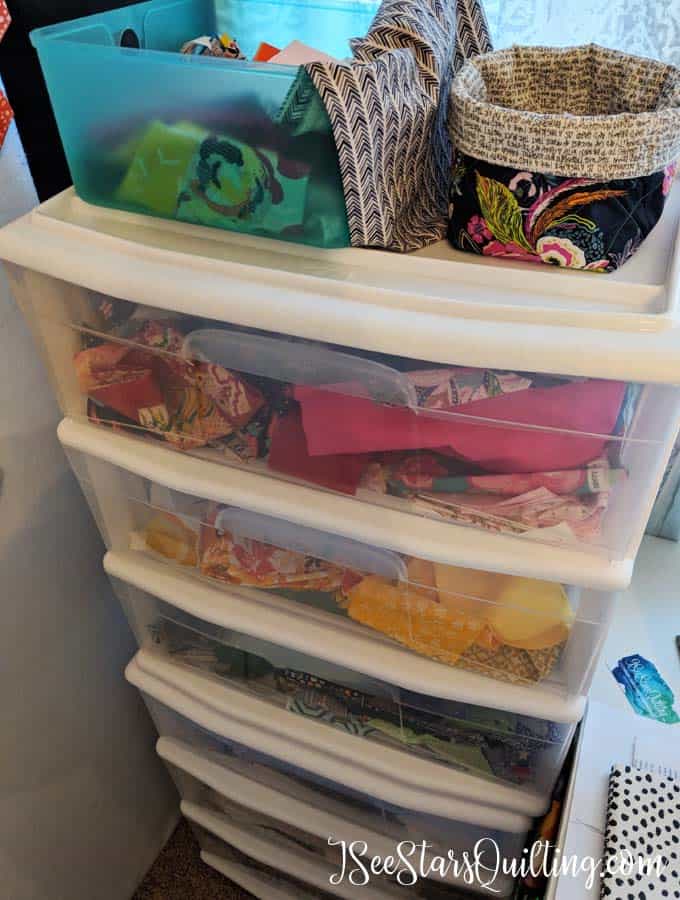
    Pros: I bought 2 (as you can see) because they stack. I wouldn’t recommend more than 2 high because I’m 5’9″ and I don’t see how you would be able to utilize the top drawers if you can’t even reach them. The 2 I have puts the top drawer just above chest height for me. East to see and grab what you need.

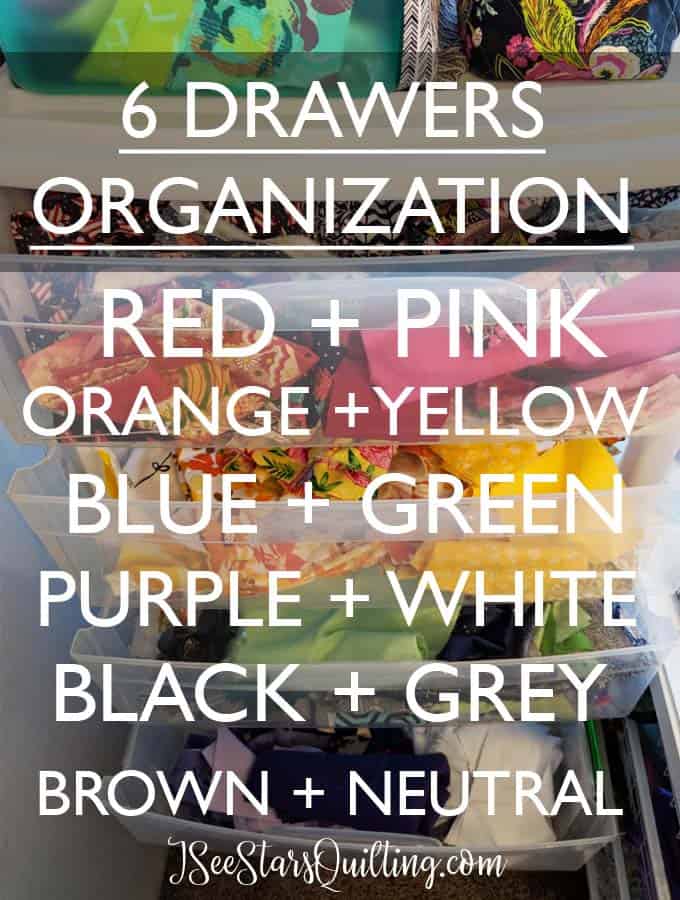
    Boom… instantly increase your capacity. 6 drawers for perfect fabric organization.

    Organization! I did mine by color because I love rainbows 🙂

    Clear fronts make it easier to see what you are searching for. Easier to find the piece you’re looking for if you’re searching by color or whatever your organization method of choice is.

    They come with casters to make it easier to roll around if you desire that. I only put the casters on the lower set.

    Cons: It does require a bit more of a permanent space in your home. It isn’t as easy to just tuck under a bed or toss in the bottom of a closet somewhere.

    Thoughts: I have literally found no other drawbacks in the 6 months that I’ve been using this system. Rainbows make me happy.

    Scrap Fabric Storage Solutions

    Other ideas I aspire to create in my trillion dollars + free time dreams

    You know what I’m talking about…. if a, b and c happened and the stars aligned… If the kids could give me 3 hours alone to create whatever I wanted to without interruption… I could rule the world… blah blah blah.

    The ideas featured below are by other quilters that I follow and admire.

    I love the way they marry the pretty aesthetic aspect and useful organization in a fantastic scrap fabric storage utopia! Check them out.

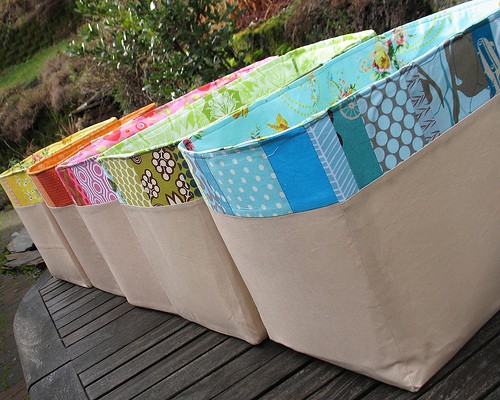
    These fabric bins from Trillium Designs are perfection! And made from scrap fabric too! That’s like a double win, in my book! (and a cute blog too)

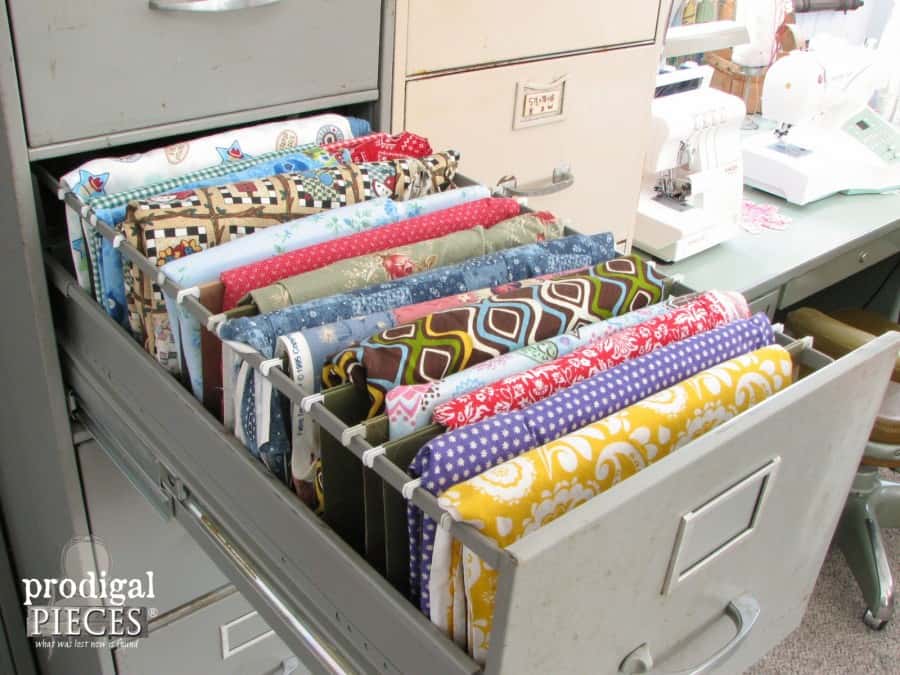
    These filing cabinets from Prodigal Pieces are a refurbisher’s dream. Nothing says organization more than a filing cabinet, right? But these are filled with fabric, carefully folded so you can see EVERYTHING. Amazing!
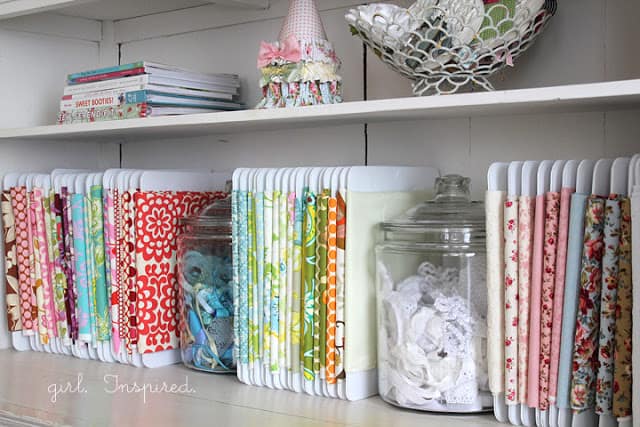
    This next storage idea is how I store my larger pieces and yard fabric. But TheGirlInspired uses it to store her scrap fabric in plain sight, on display in all its loveliness.

    You can buy ‘comic book boards‘ from Amazon.  They are basically designed for people who collect comics and want to preserve them and keep them for collectors, I think.  It’s a thin but stiff cardboard board, glossy and the ideal size for folding and storing fabric!


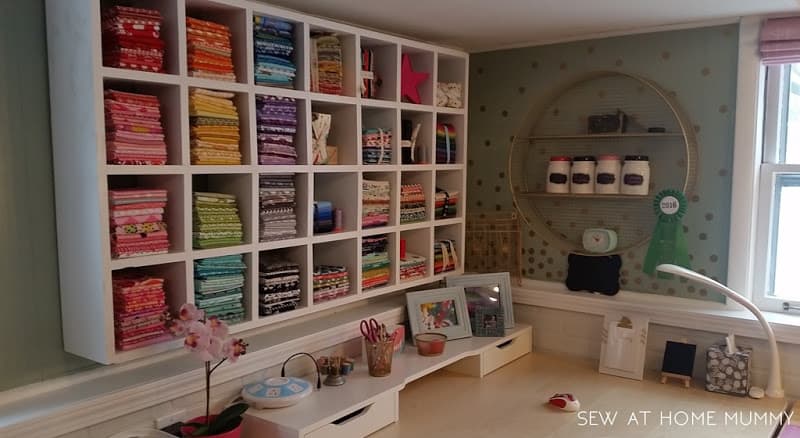
    OK, last bit of eye candy for today… If you’re a super DIY kind of person, this is beautiful. SewAtHomeMummy includes a step by step tutorial on how she created this hanging wall storage solution.


    Do you have a favorite way to store fabric? Let me know in the comments below so we can all share in the brilliant sewists and quilters out there! Happy Quilting!

  • No-Fail Quilt Binding Formula

    Today I’m going to share with you my absolute No-fail Quilt Binding Formula secrets. Whether you like to make your quilt binding the star of your quilt or you prefer it to just hold everything together and be more subdued… you need to know how much of it to make. Making too much binding is frustrating because it feels like a waste of fabric and time… but make too little binding and … ugh. It’s so so much worse!

    So, let’s get it right the first time and every single time after this, shall we? Then you’ll never have to question your measurements or pray that it all works in the end again! Sound like a dream?

    No Fail Quilt Binding Formula

    If you can calculate your binding length in advance, you can more effectively use the fabrics you have on hand or know exactly how much fabric you need to purchase.

    Any major pattern should come with all your fabric requirements already calculated. If you are sewing your own project (go you and your creative self!) you’ll need to do a little math to determine the yardages you will need to complete your quilt top.

    At this point, you should have your quilt top plus your batting and backing already assembled and quilted as the binding is usually the last and final touch put on a quilt.

    No Fail Quilt Binding Formula

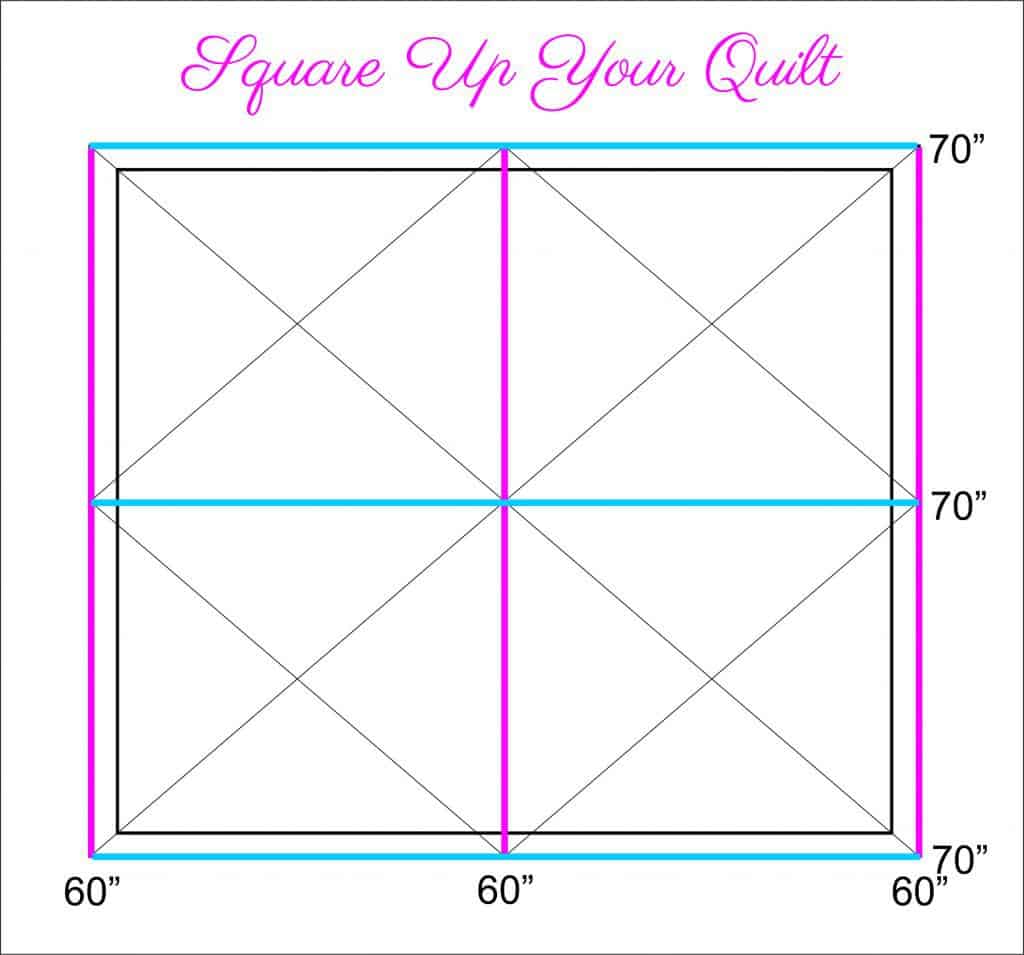
    1. First, Square Up Your Quilt. There is no going back to re-do this part. Do it now and do it right.

      Your quilt will need straight 90 degree corners. Measure the center of your quilt.  The left and right sides of your quilt should be the same length as the quilt center. Do these measurements horizontal and vertical.

      No Fail Quilt Binding Formula

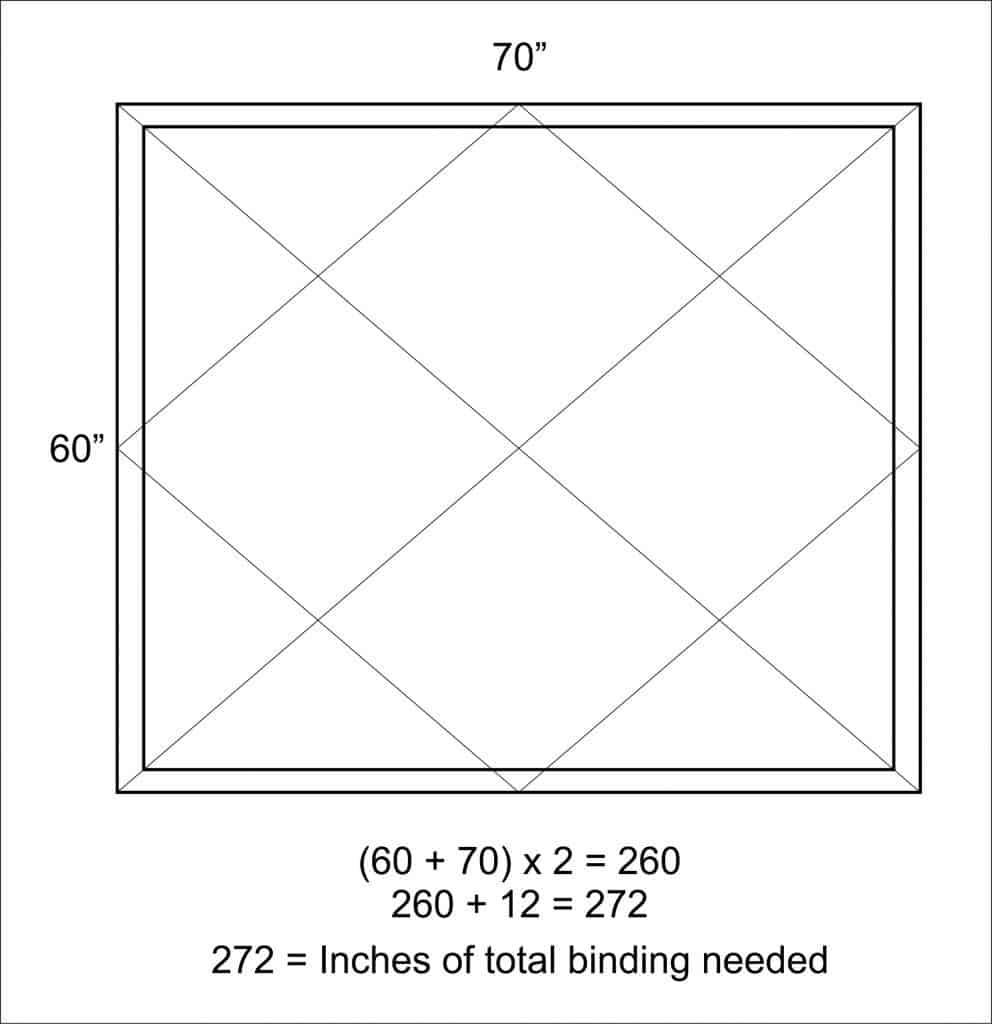
    2. Calculate the binding requirement – First, you need to figure out the perimeter of your quilt. This is the measurement all the way around your quilt.

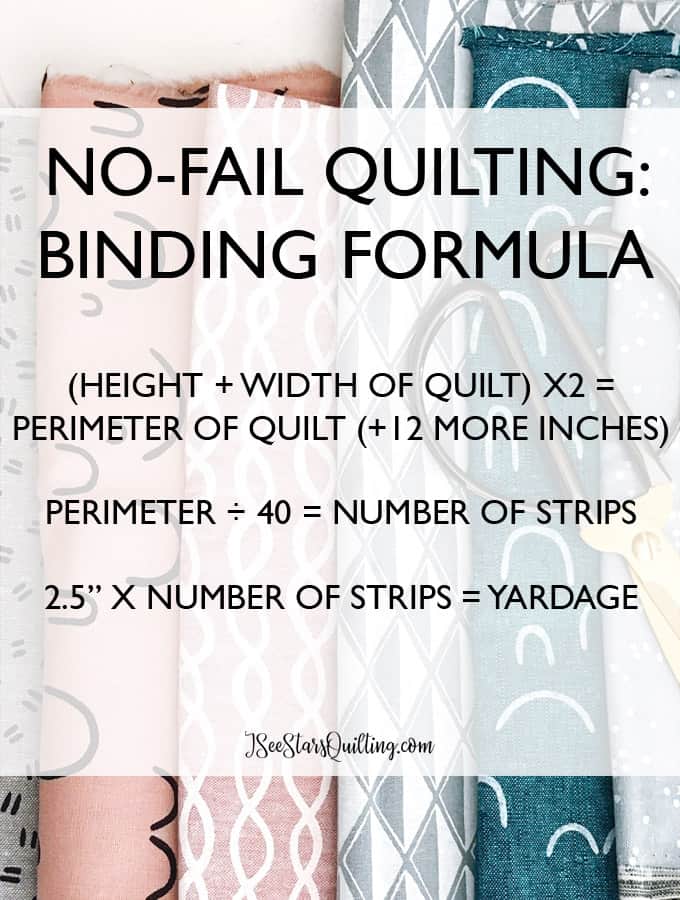
      Measure the width and the height of your quilt, add those numbers together and multiply by 2.

      (Width + Height = Number) x 2 = Total perimeter of your quilt.

      Take Perimeter measurement of your quilt and add 12″ for seams, corners, and finishing.

      This number is the total binding length needed! See this example below

      No Fail Quilt Binding Formula

    3.  Piecing your binding – Using the example above, odds are that you do not have a continuous piece of fabric that is 272″ long. You’re going to need to piece it together from pieces of fabric.

      Most fabric is about 44” wide, but once you trim off the selvages, you’re left with about 40-42” of workable yardage. Let’s go with 40” to be safe because you also have to account for joining the strips, plus a mitered corner. Better to be safe than sorry!The next step is to work out how many strips we need to cut to make at least 272” of fabric. To figure that out, you’ll need to divide the perimeter of your quilt by 40, and round up to the nearest whole number. For this quilt, that’s 272 ÷ 40 = 6.8. So you’ll need 6.8 strips that are 40″ long… or just round up to 7 whole strips.

      All these numbers mean nothing when you’re trying to gauge how many yards of fabric you’ll need… which leads me to the final step.

    4. The last step is to multiply the number of strips by the width of the strips to work out how much yardage you need.

      Using our example quilt, 7 strips x 2.5″ width = 17.5. So we’d need 18” of fabric to make the binding for this quilt.

    I know its a little math, but us quilters have learned to be absolute wizards with fabric. A few little, simple calculations are nothing we can’t handle! Let me know if you have any questions or give me a comment below. If suddenly a light bulb went off and you’re now feeling extra equipped in your sewing knowledge today, tell me!

    Happy Quilting!

    PS – I made this chart that you can pin for easy reference to the no-fail quilt binding formula.

    No Fail Quilt Binding Formula

  • The Perfect (Easy!) Catch-the-MESS Fabric Bin

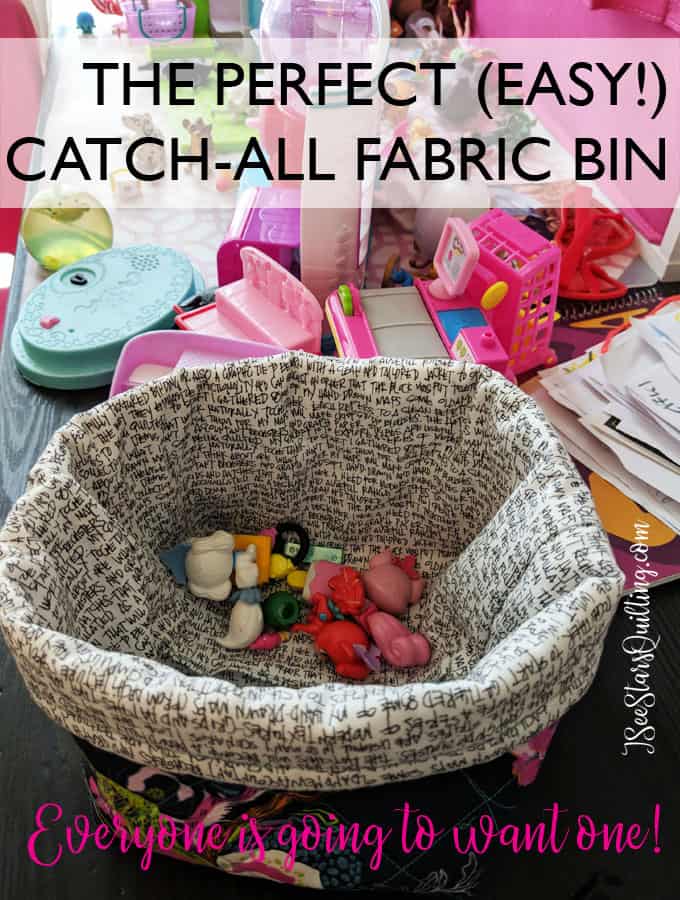
    Are you up to your ankles in tiny things? Toys, Legos, and shopkins (why oh why?) from the kiddos, sewing supplies and thread from you, oh who knows what piles from the rest of the family!… Let me introduce you to…

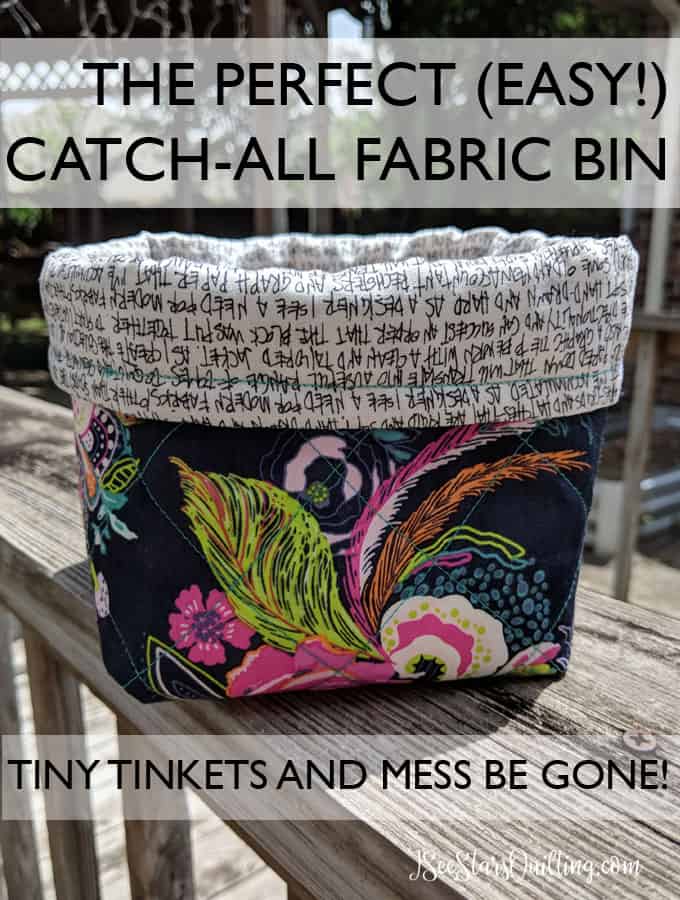
    The Perfect (Easy!) Catch-the-MESS Fabric Bin

    I have a way to contain the mess and make it pretty! I do! And do you have to spend a fortune?… you do NOT! I bet you already have all the supplies in your house right now.

    Do I have a fun little easy project for you today! I’ve been a bag making fool the last few weeks because, well, I honestly didn’t know how much I needed these in my life until recently. And I’m going to tell you that you totally need them too.

    This tutorial is an easy one. And the perfect little project to make for everyone in your family. My kids love these bins, and it’s easy to make them custom too. Batman fabric? Rainbow kitty cats? Favorite sports team? Beachy? — Make it classy and cohesive with your home decor or use random weird themed fabric because your kid literally thinks he is THE Iron Man and needs everything to reflect this obsession. Whatever floats your boat.

    What can a momma make in less than an hour and not want to pull her hair out?

    I’ve been testing theories and patterns and deciding if zippers were worth the hassle. I love pockets and the more storage organization, the better… but I wanted to streamline this fabric storage bin idea!

    I wanted it to be quick and fun to make and not leave you scratching your head in confusion. The end result is a project that can be accomplished in one nap time. Start to finish.

    Yes, I’m serious. [Unless you have a kid that takes power naps. In that case, ugh… I’m so sorry.]

    Dig through your scraps or go to that sacred stash of fabrics that you bought because you LOVE it but you’ve been holding back on using because you wanted to wait for the PERFECT project. Not just any project will do. uh-huh… you’re not alone. I have that stash too.

    It’s time to use it and love it even more!

    Here is what you will need:

    (2) 12″x10″ Pieces of Fabric for the outside

    (2) 12″x10″ Pieces of Fabric for the Interior

    (2) 12″x10″ Pieces of quilt batting (told you I would make it easy, right?)

    Rotary Cutter, Cutting Mat, fabric marker, Ruler, Pins

    Here is how to make it:

    1. Once you have all your supplies and your pieces cut to their proper size, line up one piece of the outer fabric on top of your quilt batting. *You will do the following steps for both outer fabric pieces* (right side of the fabric down, then batting on top.) If you are using a directional fabric, make a note which side you want the top to be.
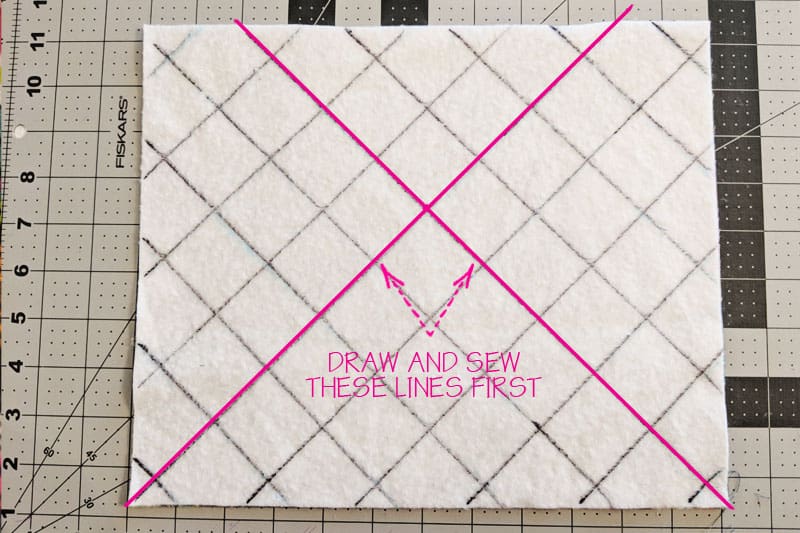
    2. Use a fabric marker (I used a sharpie because the lines were too faint to see on camera. You can do this also if neither one of your fabrics is light enough to see through)Starting in the lower corners, make a 45-degree line. Note: Your line will not go corner to corner (see below). Using a 45-degree mark ensures that your ‘quilting’ won’t be wonky on your bag and the points on your stitching will run parallel to the bottom of your bag.
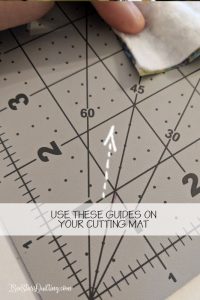
      A helpful tool for the exact 45-degree line is to use your cutting mat. Mine has a few added lines to it and I’ve seen many others with this as well.
    3. Continue making lines that run parallel to your original lines. You can make them as close together or as far as you like. I did mine at 1.5″ apart.
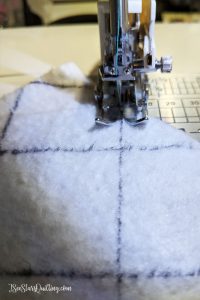
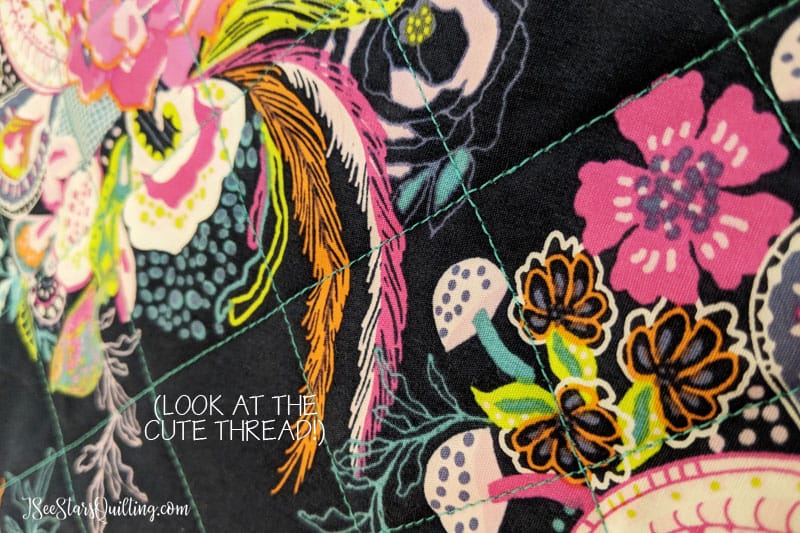
    4. Being careful not to move or let your fabric slide (pin if you like), stitch along each line.We’re not about wasting time here. You don’t have to worry about sewing a knot or backstitching at each end. Just get as close to the edge as you can and all your ends will be inside the seams later.Modern Quilting tip: Use a fun coordinating thread! Modern quilting is the perfect venue to just go wild and have fun. I personally have lots of pretty thread colors that don’t get near enough use. This detail will add a touch of personality to your finished piece. Your outer pieces should look like this when you’re finished stitching. FYI – I used a 2.6 stitch length.
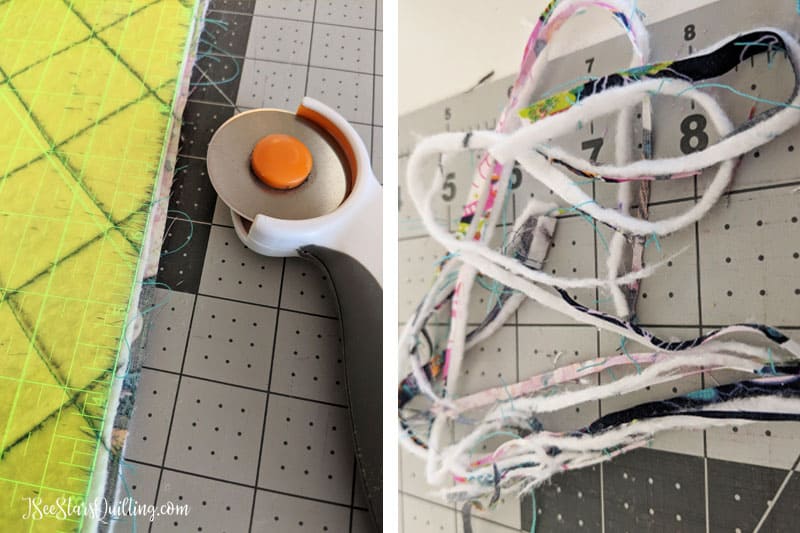
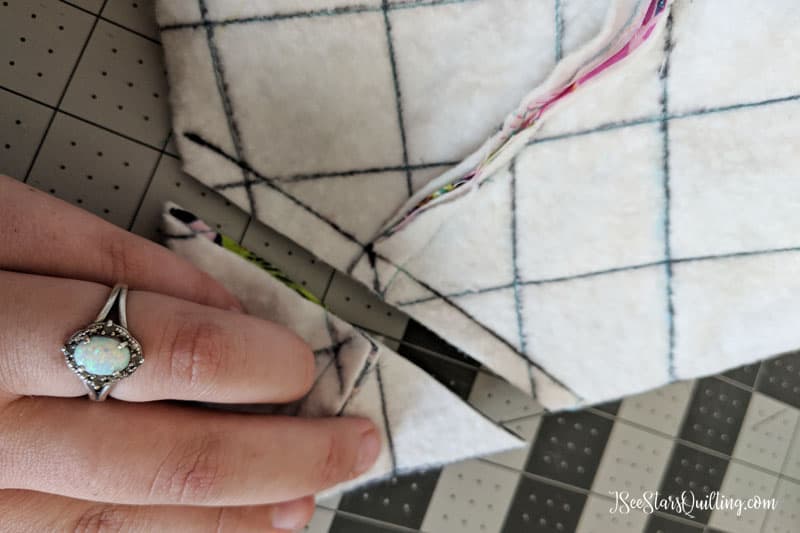
    5. Do you have both outside pieces stitched up with their own layer of batting? Good! Place them together. Right sides facing each other.If things aren’t lining up juuuust right… don’t sweat it. Things are bound to shift just a bit. Use your rotary cutter and trim off the littlest sliver of fabric that you possibly can to get things nice and cleaned up square again.
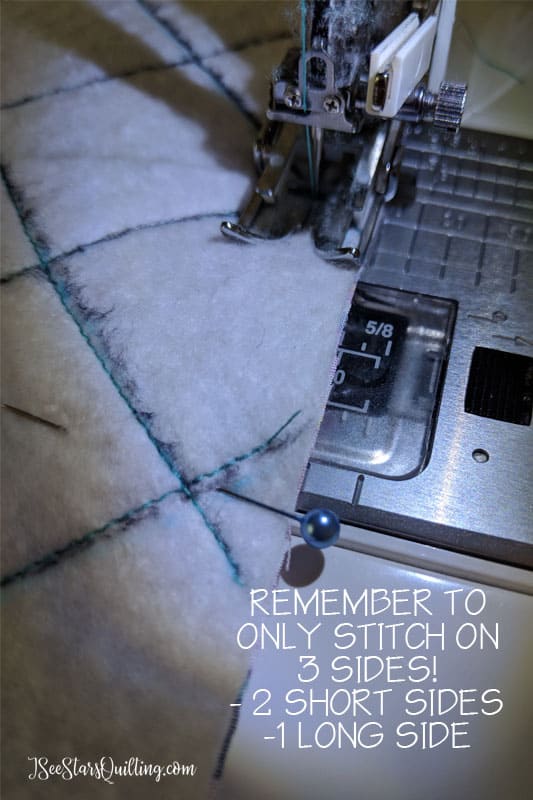
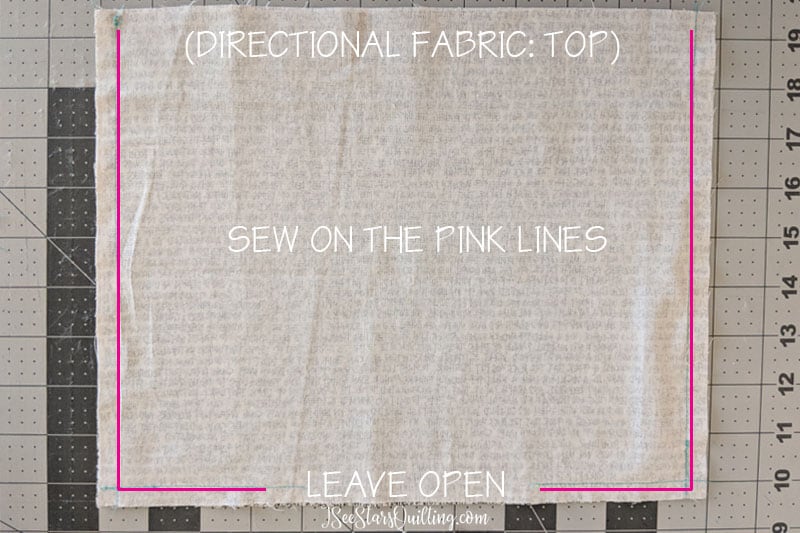
    6. Pin your pieces together to keep them from shifting and sew along three sides of your bag. Sew along two short sides and one long side using a 3/8″ seam allowance.Note: This is where you need to pay attention if you are using directional fabric! Do NOT sew along the top of your bag. duh.
    7. Grab the two pieces of lining fabric and place right sides together. Sew them according to the picture below and make sure you leave about a 5-6″ gap along the bottom.
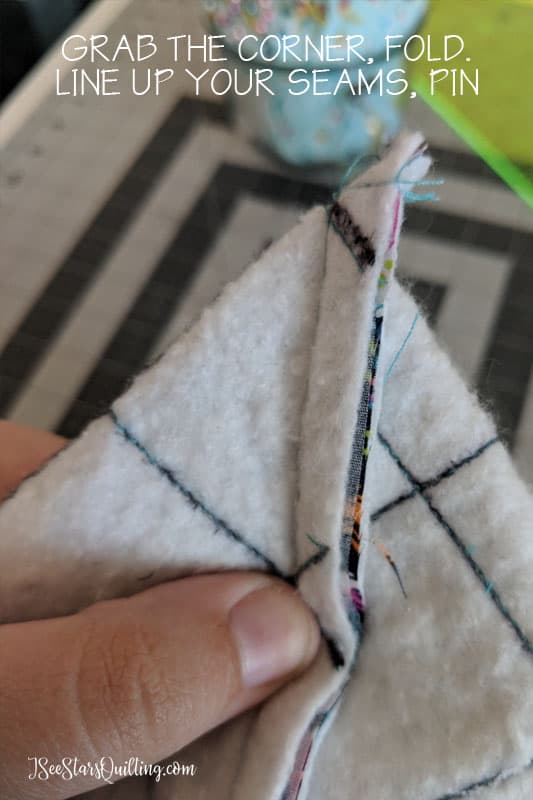
    8. Next, we’re going to make the bottom of our fabric basket. (Keep everything wrong sides facing out for this part.)Start at a corner and pinch your fabric until you can make your side and bottom seams line up inside of your bag. You can feel this when you roll it between your fingers. It is a little tricky at first, but it’s easy to catch on.
      Put a pin in it. Do this for both corners on your outer fabric layer and your lining.
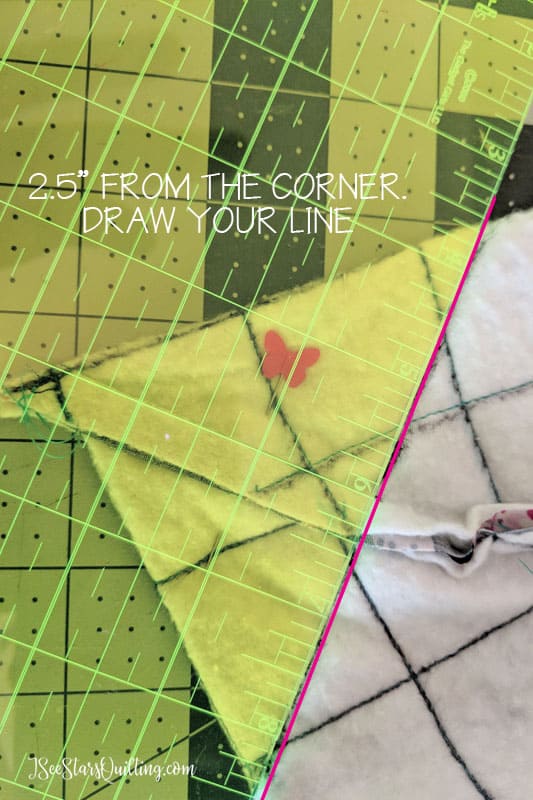
    9. If you have a see-through ruler, this is going to be a cinch. You want to make a line that is 2.5″ from your corner that runs perpendicular to your seam line. Do this for all four corners that you’ve pinched.
    10. Stitch across each corner line you just made. Make sure you knot or backstitch these lines to keep them secure.
    11. Trim up up your sewn corners with a 1/4″ seam. Turn your outer fabric with the batting facing inside. Pretty side out!
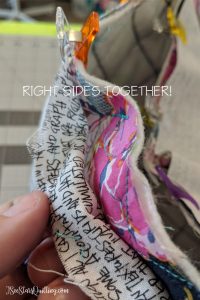
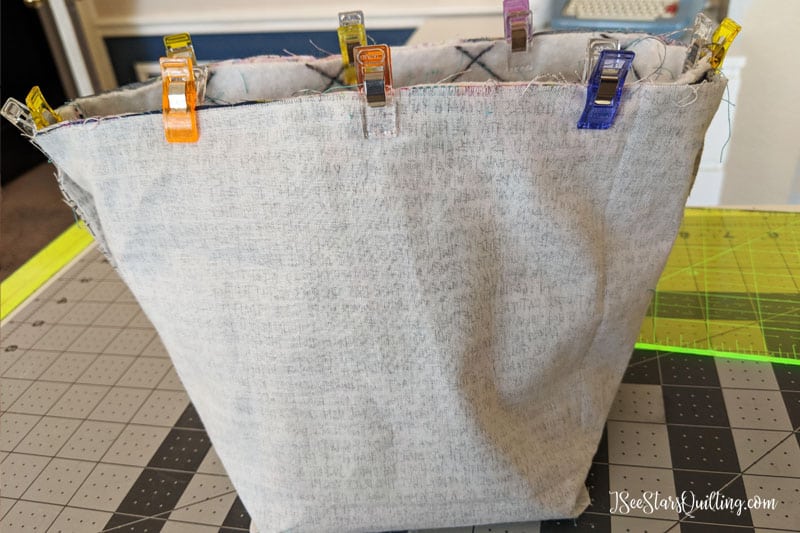
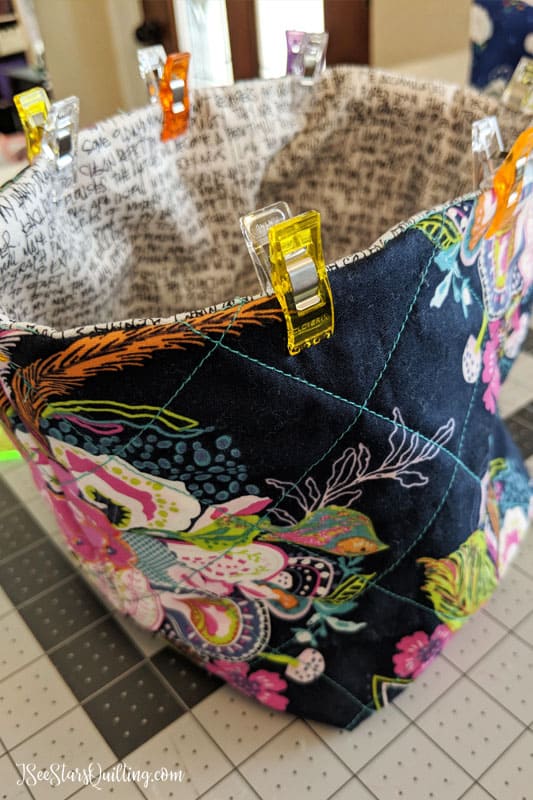
    12. This is the fun part! It’s starting to look like a cute little bin now!… Keep your lining fabric with the right side facing inward. Place the outer fabric inside the lining fabric. The right sides of both fabrics should be facing each other. (I added a picture below)It takes just a little bit of fussing with to get it to sit nicely inside but shouldn’t give you too much trouble. Line up the side seams first and use a clip (I LOVE these ones) or a pin to keep it in place. Then place a few more clips/pins around the circle to make sure the top of both pieces is aligned.
    13. Stitch with a 3/8″ seam allowance all around the mouth of your bag.
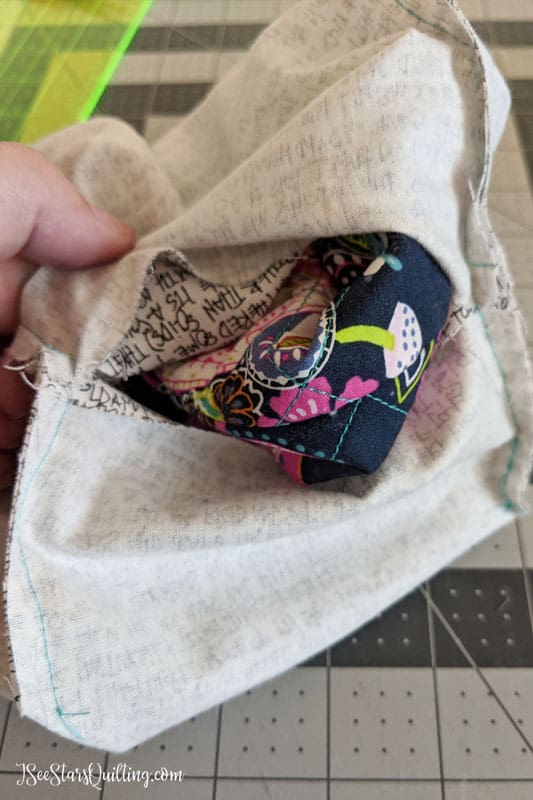
    14. Remember that weird 5-6″ gap we left at the bottom of the lining piece? It’s time for it to come into play now.Gently pull the bottom of your outer fabric through the lining fabric hole.It should look like this when you have it all pulled through. It is still without a lot of shape at this point and really soft. But, oh! that quilting! 😉
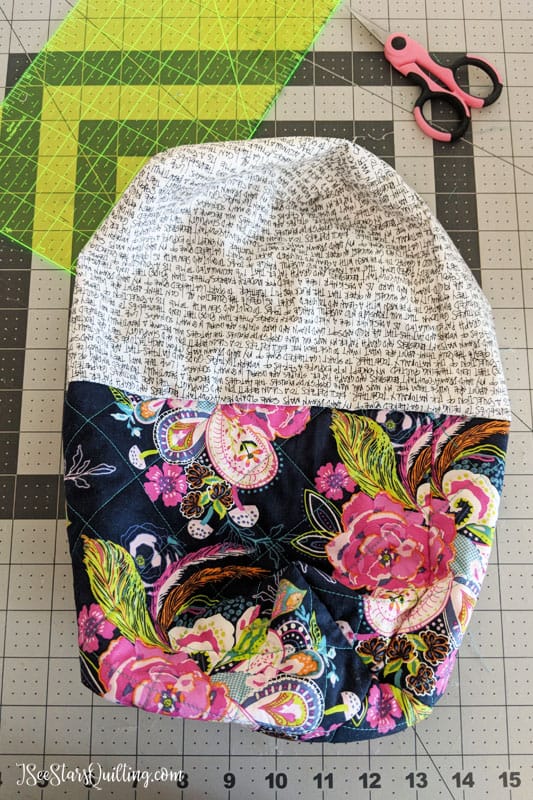
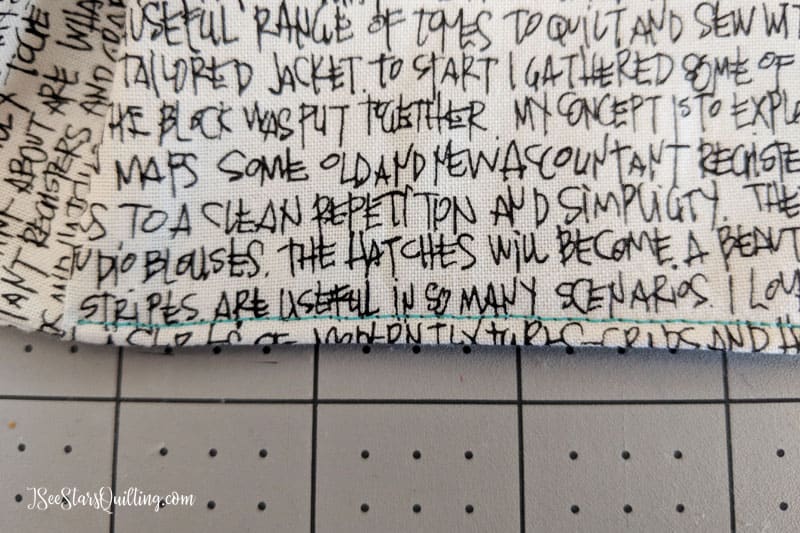
    15. Closing off the gap in the lining fabric – You can do this by machine, or you can ladder stitch it by hand to hide your seam. Personally, the seam is so slim, the little ridge you get from a machine stitch doesn’t bother me.Use your fingers to get the seam just right where it feels like the fabric would be if it were already sewn.
      Then using your sewing machine, stitch as close to the edge as you can to close the gap. You can even do this in a coordinating thread to your lining if you want it to blend in a little more.
    16. Tuck the lining into your outer fabric and use your fingers to push everything in its place inside. Corner to corner. It doesn’t have to be perfect. The lining will be loose in your bag.
      Use clips or pins to secure the top, just like we did before.
    17. Stitch all the way around the mouth of your bag again at a 3/8″ seam allowance. This will keep the top of your bag looking nice and crisp and add a finishing touch.
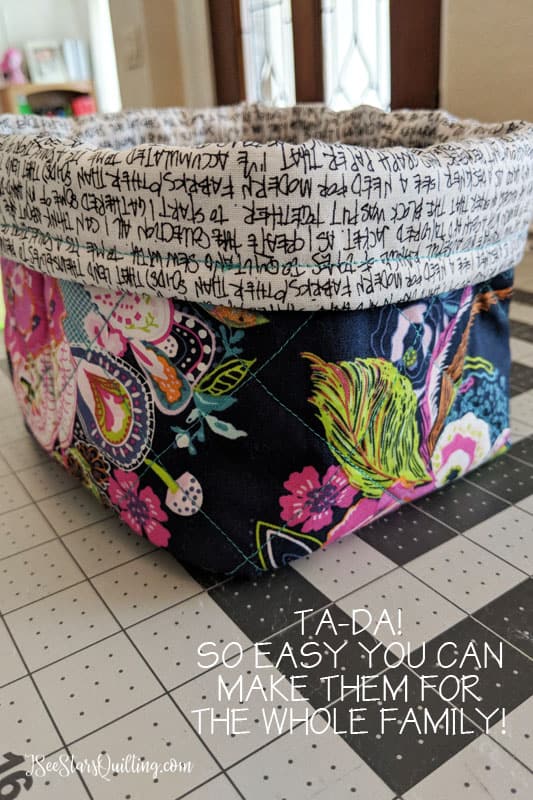
      And you’re done! Fold down the top edge of your basket to expose the inner lining and give the corners a little pinch with your fingers to shape up your bin. It will be soft but should hold the shape just fine.

    These fabric bins come together so quickly once you get the hang of it. Just after I made the one for this tutorial, I turned my back for 5 minutes to make lunches and came back to a disappearing bin!

    Two minutes of searching lead to a very guilty little girl who said she couldn’t help it because it was just so pretty! – She likes to hoard all the pretty things… just like her momma 😉 I can’t blame her… but this one is MINE!

    What do you think? How cute would these be to help catch all the tiny clutter “messes” in your house?

    I tried really hard to cut out all the unnecessary or complicated steps so this is something you can make for your family, for yourself or to give away to a friend. Something from the heart that didn’t cost you weeks or months of time! win-win!

    Did you have any questions along the way? You’re welcome to contact me. I’ll respond asap.

    I’m curious how long it takes you to make this fabric bin. If you get a chance, comment with your time below. The race is on!

    Also, please tag me on Instagram @iseestarsquilting or send me a picture of your finished bin! I’d love to see it!