Tutorials

Step by step tutorials for quilting and sewing projects from ISeeStarsQuilting.

  • The Best Wine Bottle Bag DIY Tutorial!

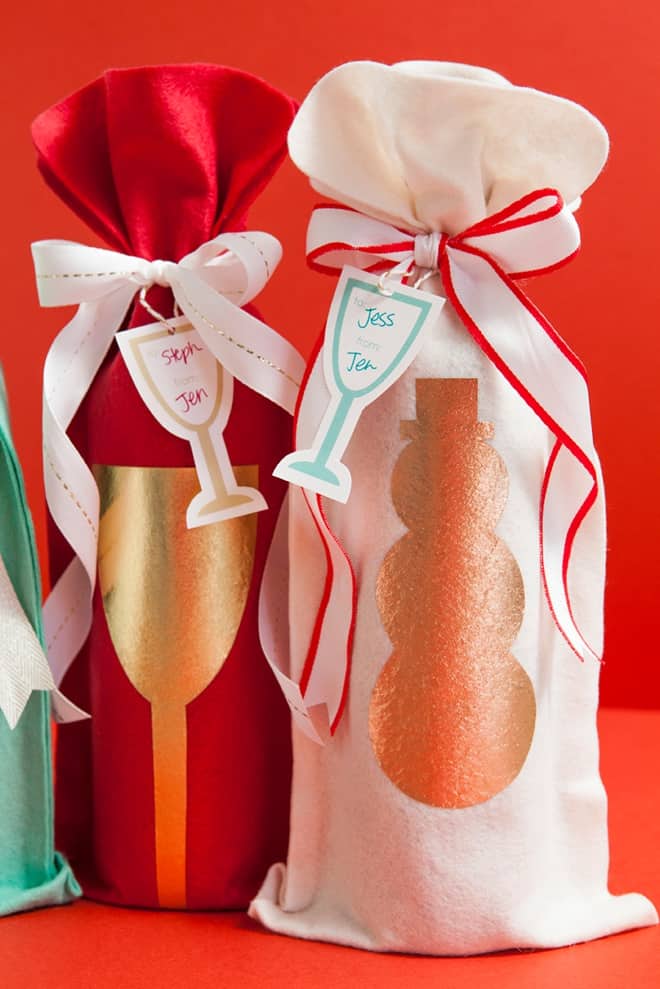
    If you’re looking for a great little handmade gift, you’re in the right place! How cute and fun are these wine bottle bags? I’ve linked to several Wine Bottle Bag DIY Tutorial posts from some of my favorite other bloggers… you’re sure to find one that is just right for your tastes and skill level! Have fun!

    The best part? 

    You can customize these any way you like. I plan on making grownup neighbor gifts this year 🙂 A bottle of wine for mom and dad, a plate of cookies for the kids with some hot chocolate mix… the makings of a fun family evening!

    You can make these in less than 10 minutes!

    Yep! And I’ve found the best tutorials to share with you so that you can make your own little wine bottle gift bag!

    Things you’ll need…

    Two bottles of wine (1 for gifting, one for drinking)

    Your favorite fabrics!

    That’s it… make these beautiful gift bags and enjoy!

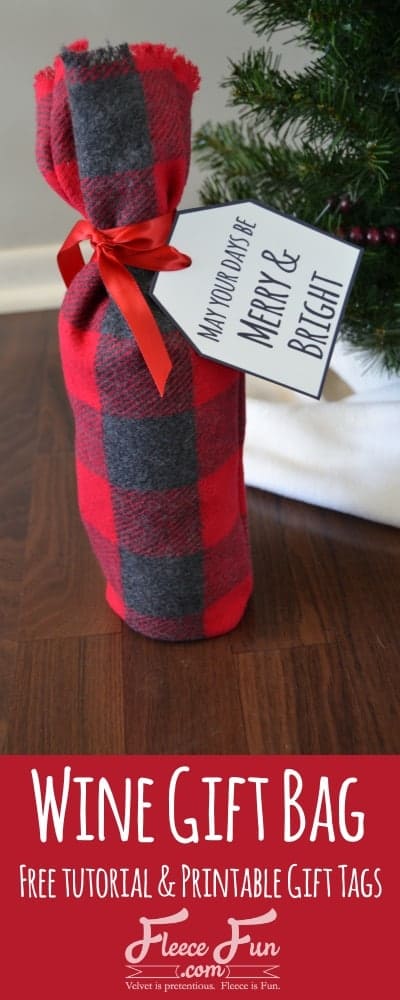
    1. This one has such a cozy/wintery feel to it. It’s perfect for a true beginner because there is no lining fabric. Easy-peasy, a few stitches and you’re done! Check out the tutorial at FleeceFun.com here
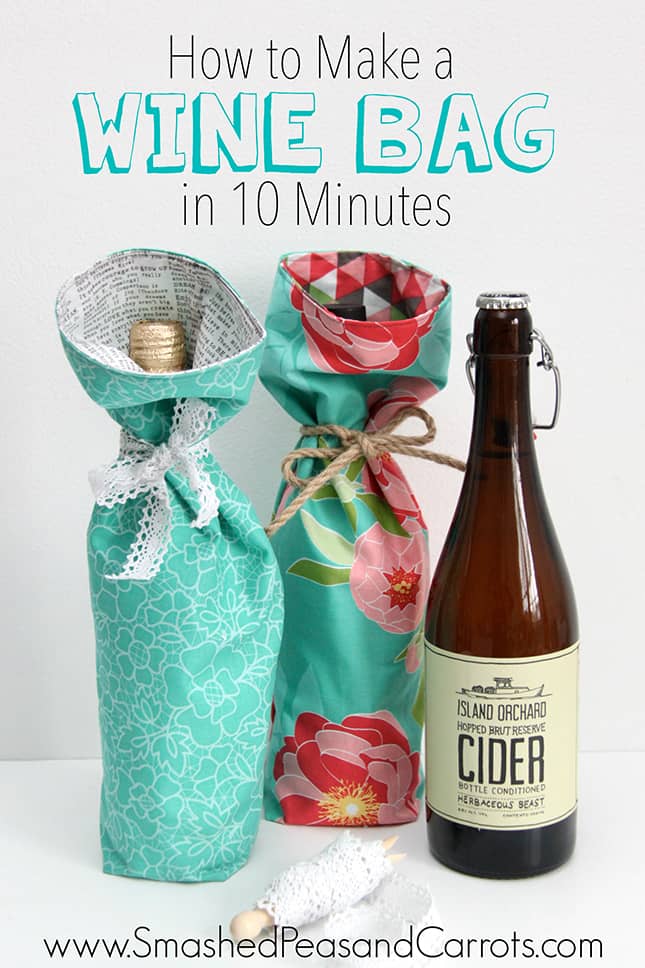
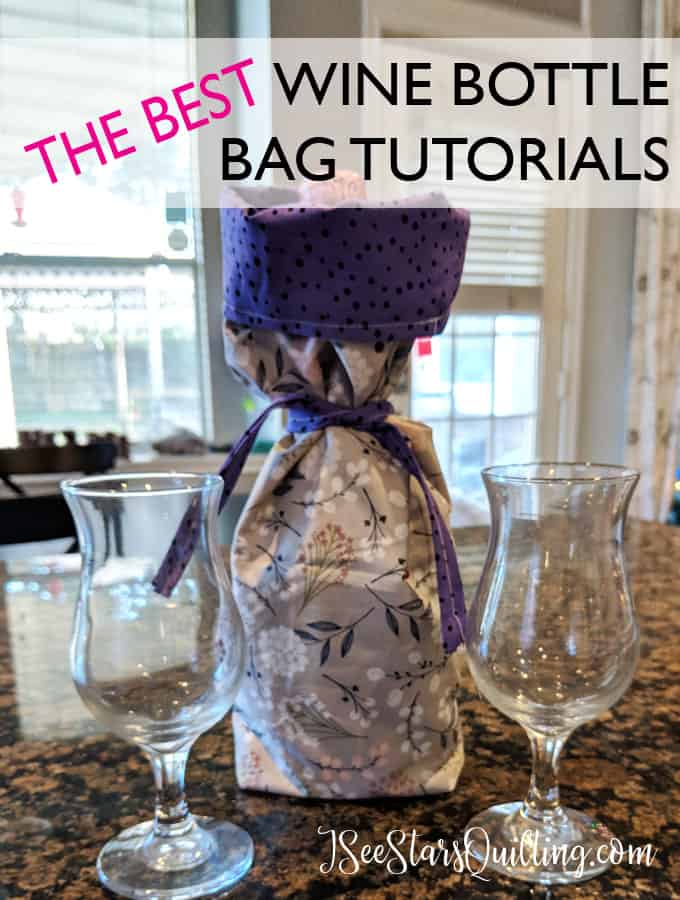
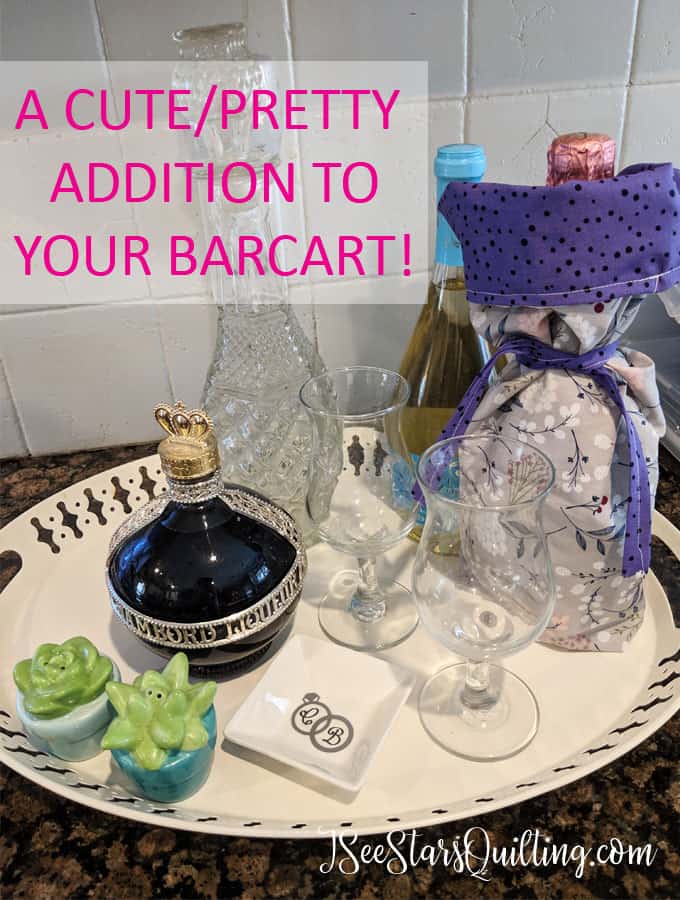
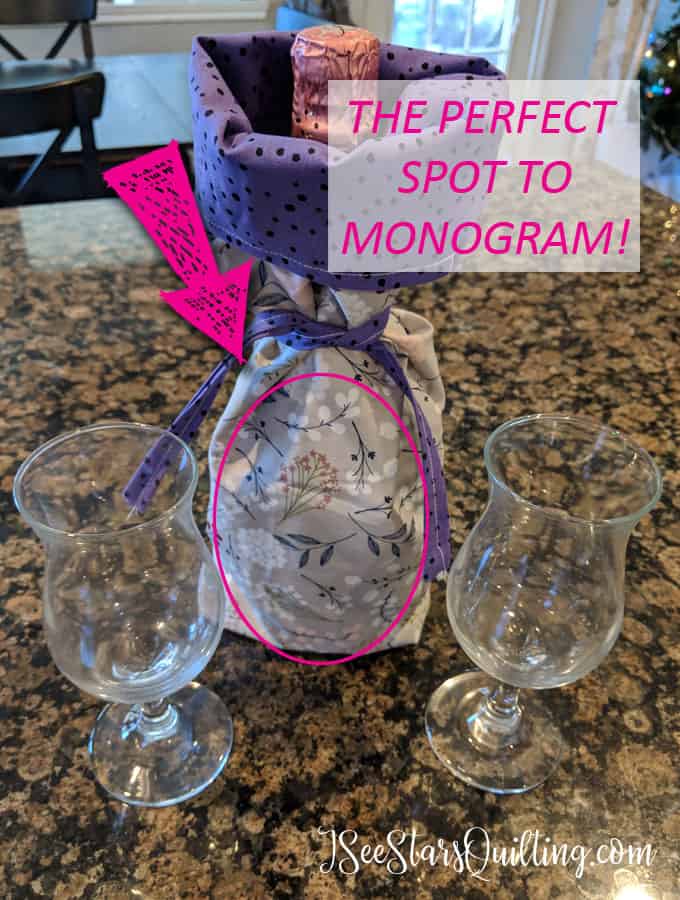
    2. Slightly more advanced but still beginner friendly is this adorable bag! (This is the tutorial I used for the pretty purple bag that is in my pictures.)  Pair your outer fabric with a contrasting lining, and you have a super classy gift! Check out the tutorial at Smashedpeasandcarrots.com here.
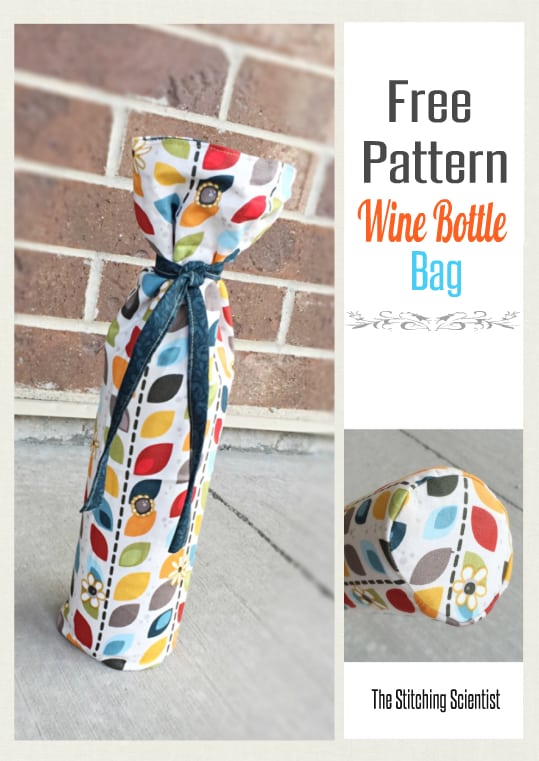
    3. This next tutorial I really liked because the bag looks sharper with a rounded bottom to match the wine bottle. Her bag also fits a little more snug around the wine bottle. I could absolutely see this being classy enough to give as a company/work gift. Check out the tutorial at TheStitchingScientist.com here.

    4. And finally… if you’re in a pinch or want to host an easy girl’s night in craft night (totally recommend!) this no-sew wine bottle bag is too cute not to share in this list. Check out the tutorial at SomethingTurquoise.com here.
      Looking for the perfect Wine Bottle Bag DIY Tutorial? I've collected the best of the best to share with you! You're sure to find the perfect bag here to suit tastes and your skills! Check out my favorite go-to (#2!)

    What is your favorite pattern? Let me know if you decide to make one today and comment below! I love to see what you’re working on in your sewing rooms 🙂 Happy festive drinking… I mean… um… Happy Sewing!

    Looking for the perfect Wine Bottle Bag DIY Tutorial? I've collected the best of the best to share with you! You're sure to find the perfect bag here to suit tastes and your skills! Check out my favorite go-to (#2!)

  • Help! How do you stop a bleeding quilt?

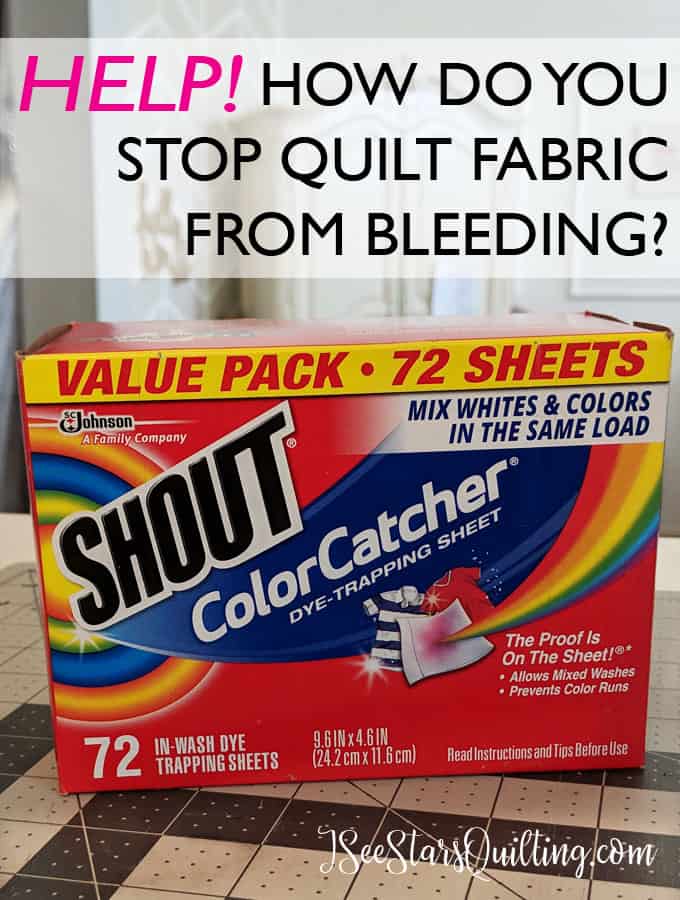
    You may have found this page because, in a moment of pure panic, you turned to google because your lovely beautiful quilt is bleeding fabric dye where it shouldn’t. How do you stop a bleeding quilt? — It is all going to be ok!

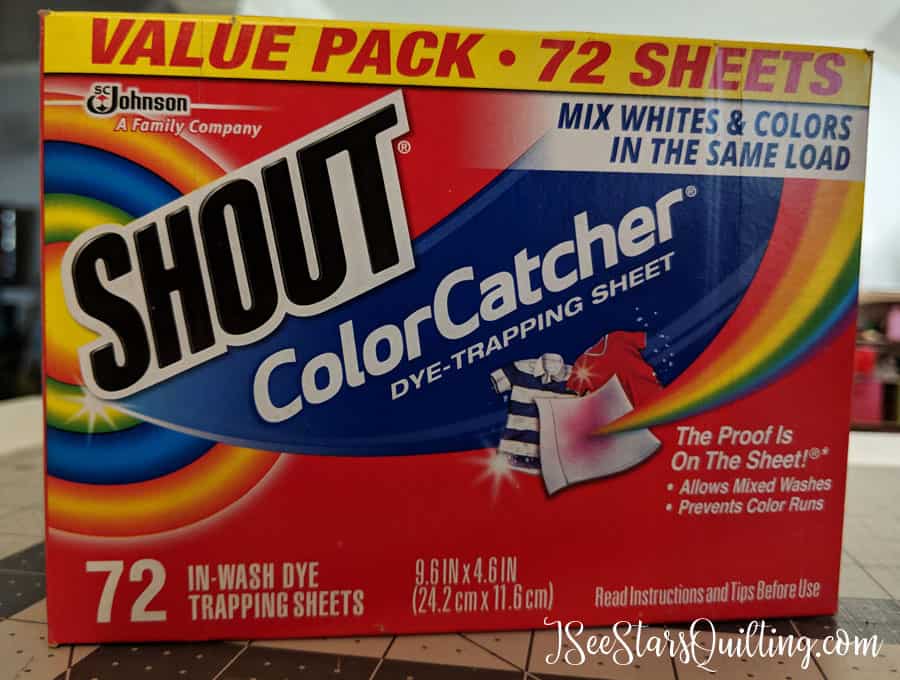
    I might live under a rock at times… I think all mommas sometimes do, right? If you do too, then I’m about to blow your mind. Have you heard of these Shout Color Catchers? When I came across these…. ooooh… the light rays shined!

    They’re going to be your new best friend!

    I’m always up for something that makes my job easier…

    I’ve been making more and more quilts over the years for other people; I want them to maintain the best color quality possible, so they look just like the day they were created for years to come. Do I always prewash my fabrics to prevent color dye from spreading?…. um… so, about that…

    Honestly moment…

    No, usually, I get excited about a project and jump in with a pair of scissors and rotary blades flying and get started right away! I don’t always pre-wash my fabric… ok ok… most of the time I don’t even think about prewashing it. Does this make me a bad quilter? Not when I have a little secret up my sleeve.

    Have you ever made a quilt and then stopped to cry when you realized the fabrics were bleeding after being washed? - Relax! I have the solution you've been looking for! This little secret will save your fabric sanity!

    I’ve been using the Shout Color Catcher on my Quilts and …wow

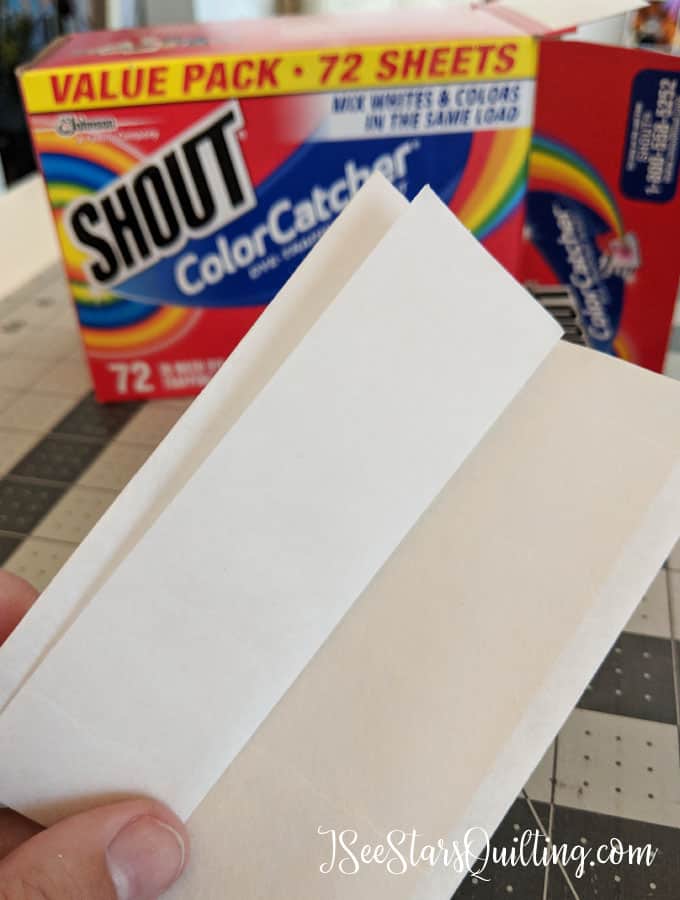
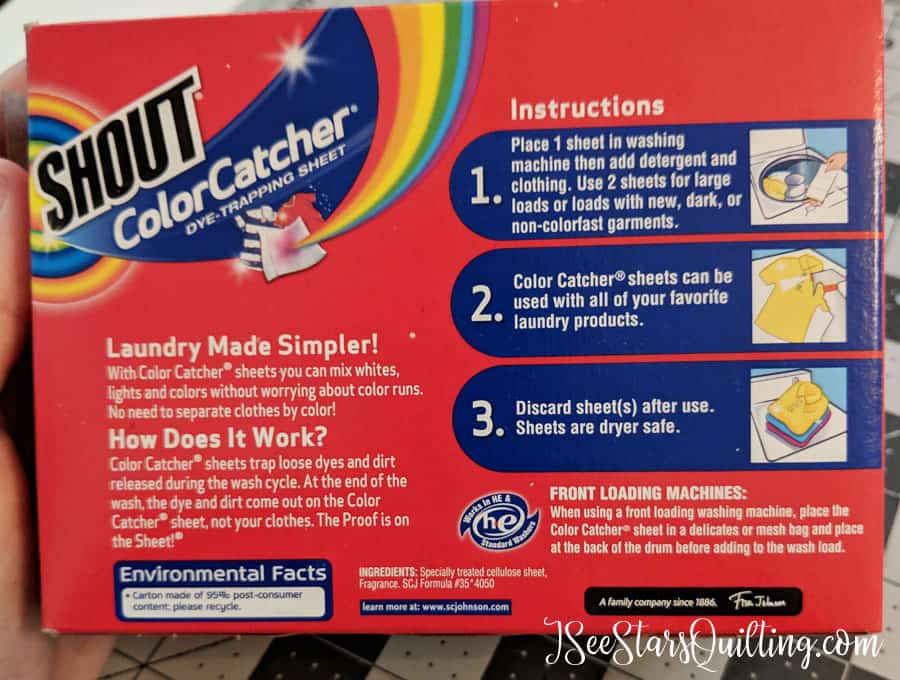
    So these shout color catchers… They are single-use sheets that go in with your non-sorted laundry that claim to “absorb and trap loose dyes in your wash water, protecting clothes against color bleeds and helping preserve original colors” (a quote from the Shout Color Catchers website).

    Before I gift a quilt…

    I wash every single quilt before I give it to its final recipient. Always. I need to know what it is going to do in the wash…I want the quilt to be used and loved over and over again! I want to make sure it can withstand many washes over the years.

    I’ve never had one have any big surprises and completely fall apart or anything, so call me crazy for still thinking it still could happen one day. I would rather have it happen in my washing machine than someone else’s.

    Have you ever made a quilt and then stopped to cry when you realized the fabrics were bleeding after being washed? - Relax! I have the solution you've been looking for! This little secret will save your fabric sanity!

    These babies are my secret weapon.

    I usually throw one of these color catchers in with any quilt I’m washing for the first time as an insurance policy.

    I’ll even wash it again with another color catcher if its a really bold bright quilt. Double Insurance Policy. (*It’s like the equivalent of a pinky promise between me and my quilts*)

    I’ve even used the shout color catcher to clean up a quilt that bled a little when I forgot to put in the color catcher sheet. Does anyone else have those sleep-deprived brain moments?

    Have you ever made a quilt and then stopped to cry when you realized the fabrics were bleeding after being washed? - Relax! I have the solution you've been looking for! This little secret will save your fabric sanity!

    So have I convinced you that these need to sit on your laundry shelf yet?

    You can find them in the laundry aisle of your grocery store, or you can prime order them from Amazon (woot-woot!), and they are worth every single penny when it comes to quilting!


    For more tips on what you should do when you gift a quilt, click on over to this article 4 Important Things to Include when you gift a quilt.


  • Quilter’s Christmas Decor!

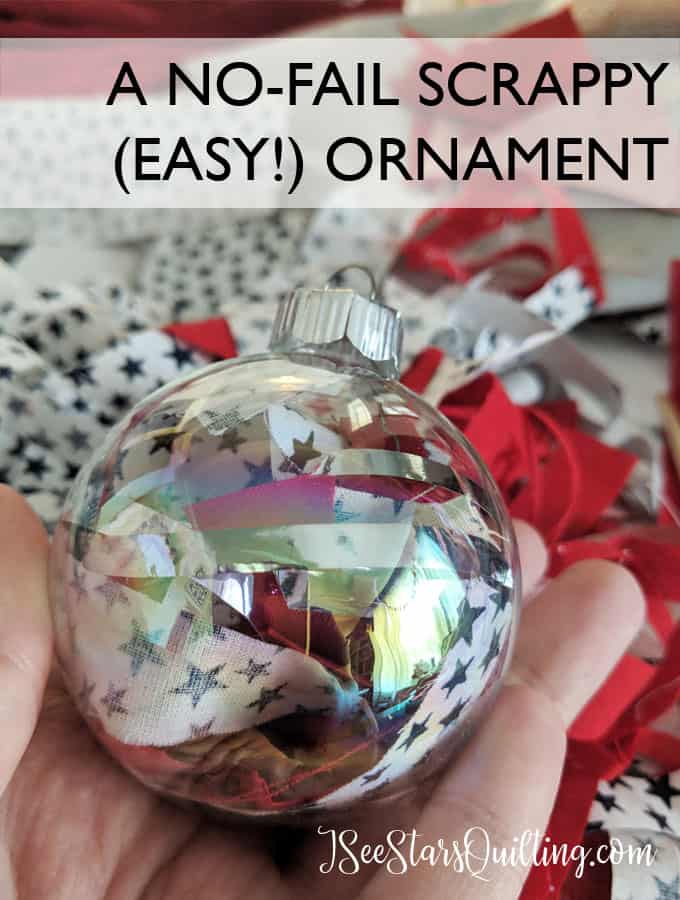
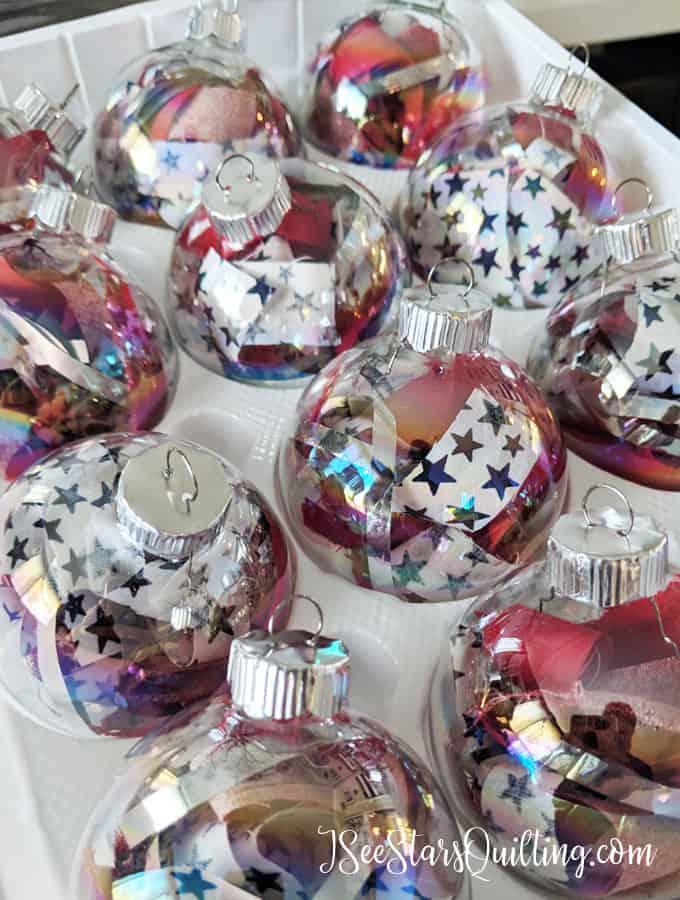
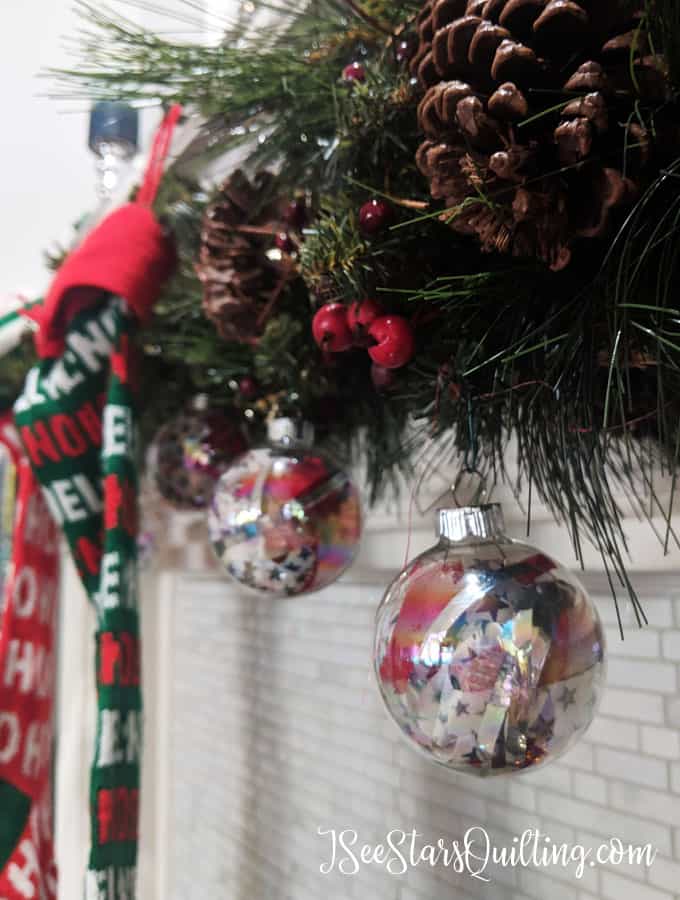
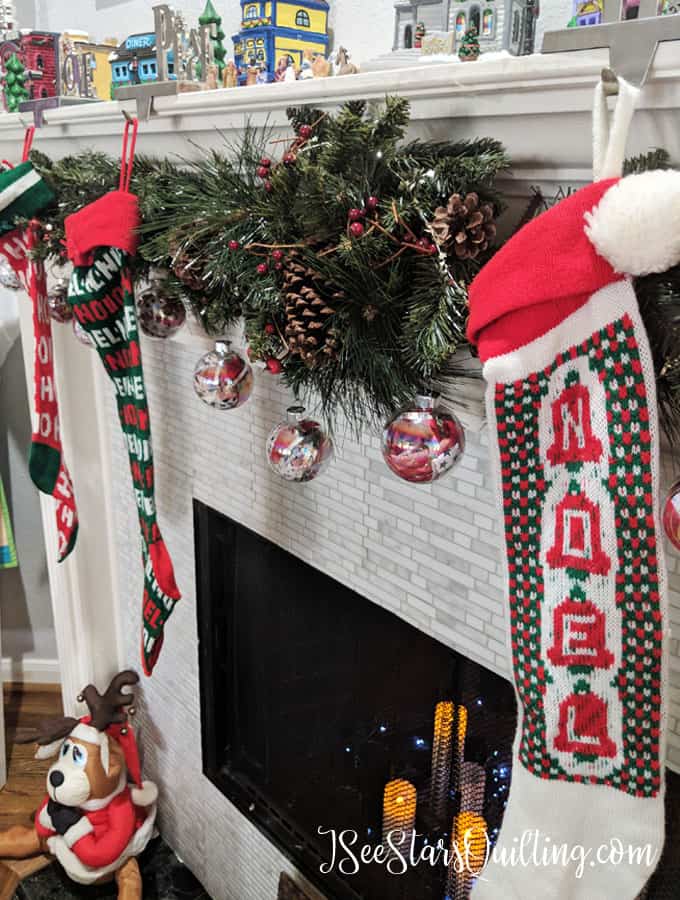
    I got bit by the holiday decorating bug this past weekend and got to work creating several little touches around my house that marry my love of Christmas with my love of quilting! I created some Quilter’s Christmas decor that I’m absolutely in love with!

    And the best part is… it was so easy!

    I took lots of pictures along the way just for you… and because I absolutely fell in love with the way the whole project turned out!

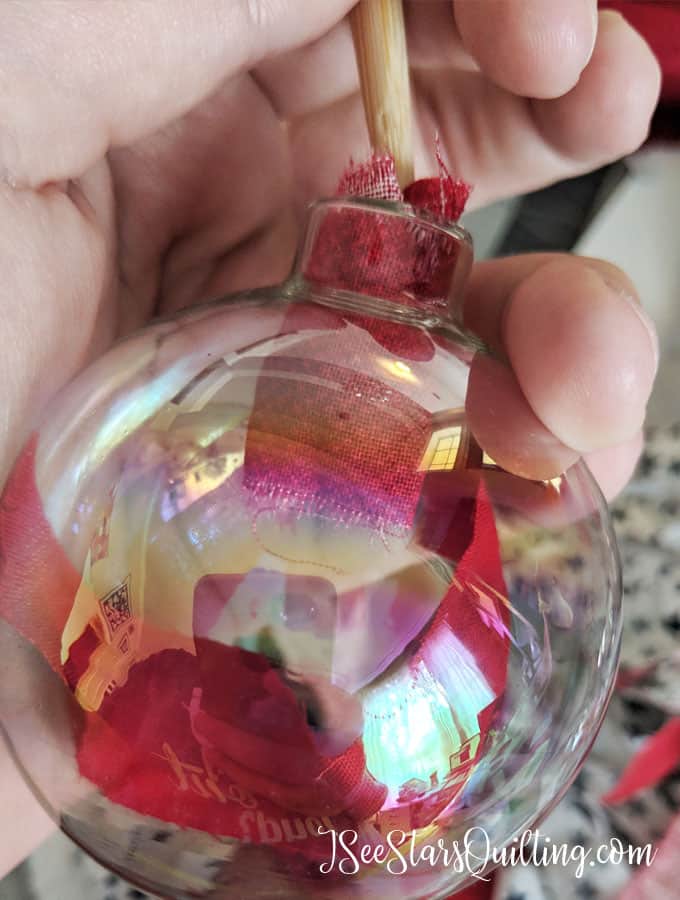
    I found a box of clear glass ornaments in our Christmas stash, cut up some scrap fabric… anyone can do this!

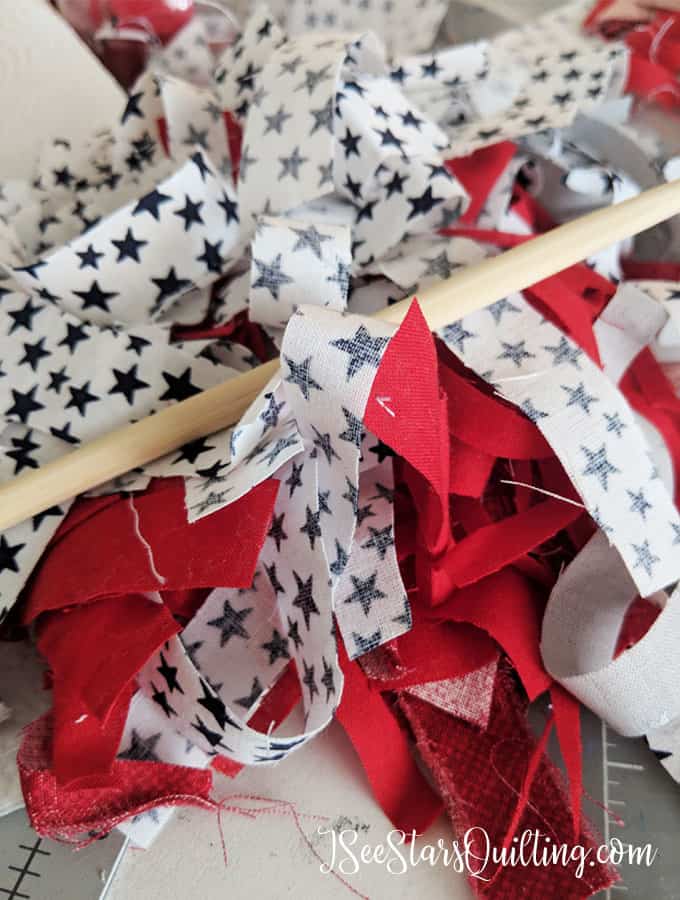
    You might have noticed that I have a thing with stars… a bit of an obsession really 🙂 So, of course, I had some strips of scrap fabric with stars to incorporate with my Christmas decorations.

    Add a little spice to your Crafty/DIY gifts this year with this instant download that you can print at home! 12 different designs and a whole lot of Christmas fun! USE CODE: HOLLY FOR 25% off!

    What you’ll need:

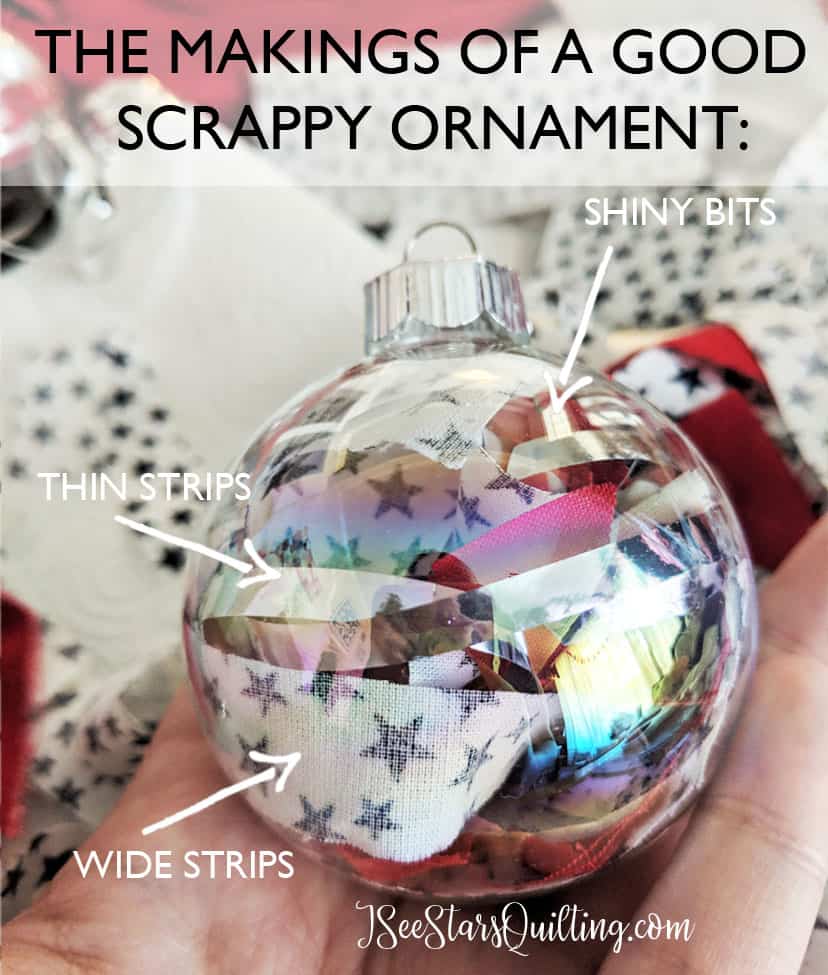
    1. Scrap Fabric – I also used shiny ribbon to add a little more glitz and texture to the ornament.
    2. Clear glass Christmas ornaments
    3. Chopstick or pencil

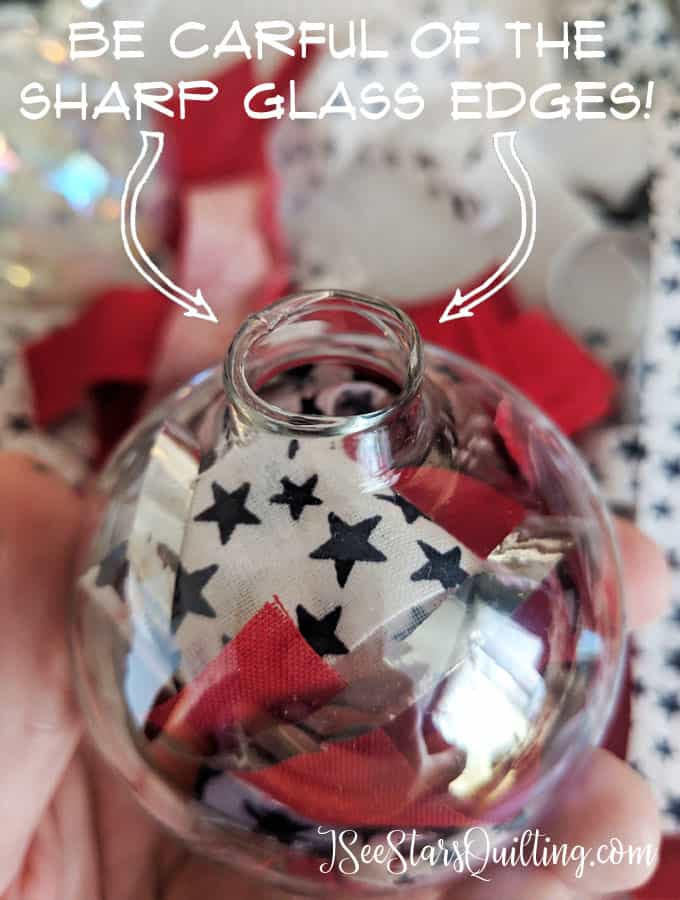
    The chopstick or pencil is helpful to get the pieces inside the Christmas ornament because let me give you a warning… the edges of the glass ornaments may be sharp unfinished edges. Also, if you have enlisted the assistance of younger little helpers, make sure they are aware of the danger as well!

    It is easy to get the fabric and ribbon in the ornament, but almost impossible to get back out so let me give you a few tips that I learned while experimenting!

    The widest strip that I used was about 3/4″ and the thinnest strip was about 1/4″

    I used them to decorate my fireplace because our tree if full of handmade ornaments and little trinkets from the children already.

    You could make these as guild swap gifts as well!

    The important thing is to have fun with it! 🙂 If you make some ornaments, tag me in them so I can see your beautiful work. @iseestarsquilting #iseestarsquilting

  • Free Walker Bag Pattern & Carry all

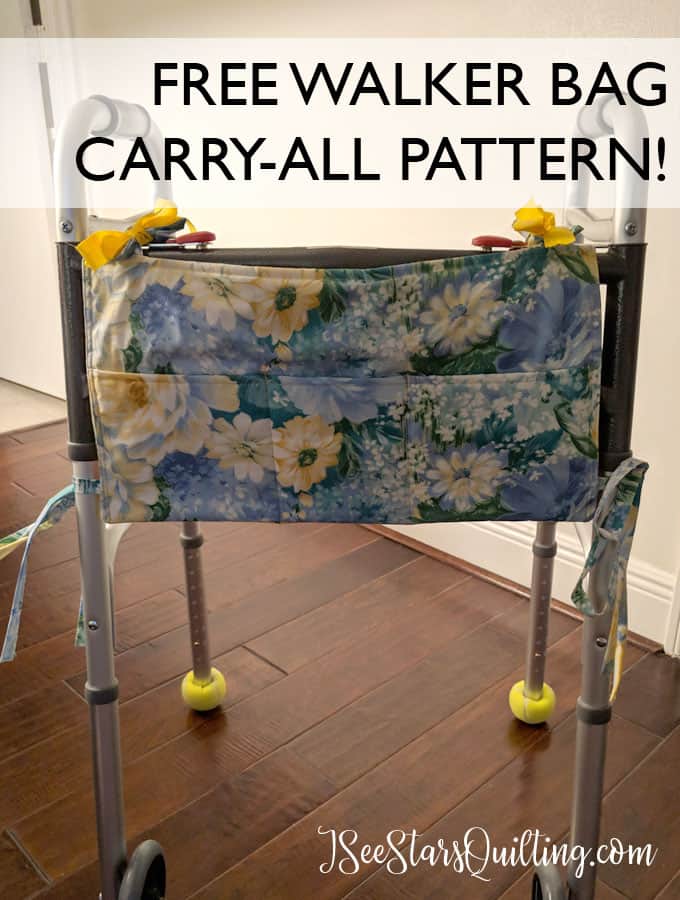
    I’ve got a bit of a different project for you today. This Walker bag pattern came into being because of a sweet sweet dear friend of mine.

    God Bless her, but she isn’t one to sit still for very long!

    When she made the courageous decision to have back surgery, I knew I had to make something special for her.

    I whipped this up one night to help her carry her things and various notebooks from room to room as she worked towards recovery.

    It has proved to be so useful for her that I’m sharing it with you too.

    I found a few other options out on the internet for walker and wheelchair bags, but honestly, most of them were way more complicated than they needed to be, in my opinion.

    So I kept it simple.

    All my walker bag needs to do is give easy access to the things we normally carry in our hands or our pockets.

    Plus maybe a little more room for the occasional stray remote or water bottle.

    I also made it sturdy and quilted so the fabric wouldn’t be flimsy or wrinkly.

    You can download the FREE Pattern here.


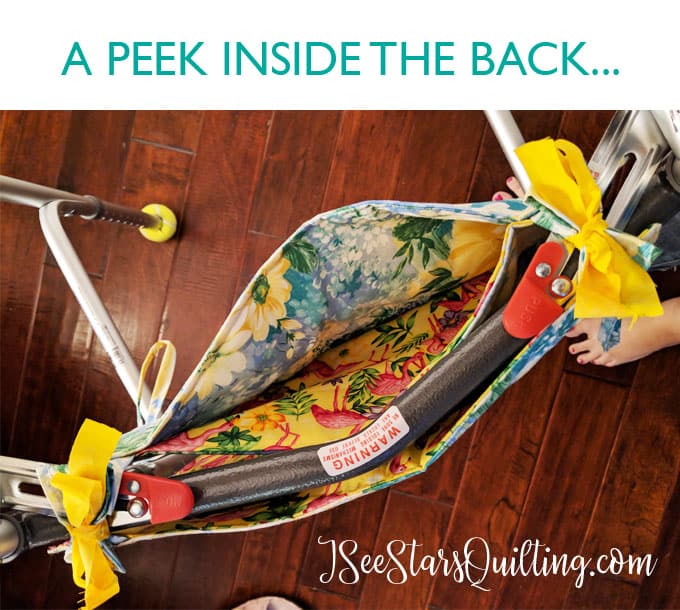
    One last photo peek… Look at that cute flamingo fabric! 🙂

    Pay It Forward

    I would like to urge you to always pay it forward if you can. If you have a friend who just had surgery or if you have a friend or relative in a nursing home, make a few and share the love!

    Tell me what you think! Leave a comment below. Is this something you plan to make in the near future?

    I’d love to see it. You can tag me on Instagram @iseestarsquiltling

    Happy Sewing!

  • Quick Quilted Table Runner

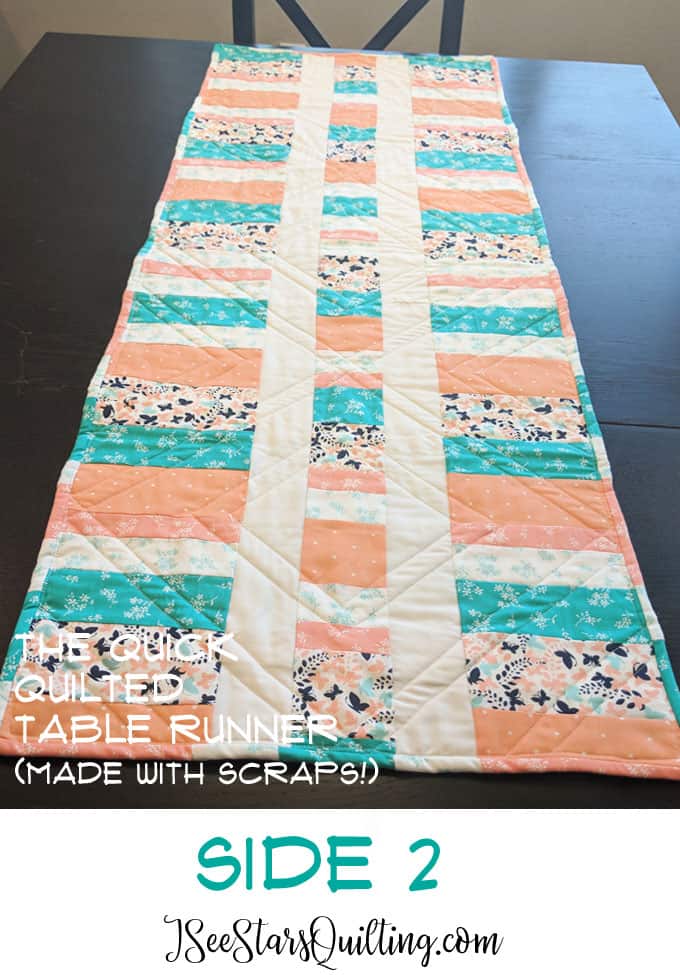
    This week, I found myself in need of a quick hostess gift. I came up with this Quick Quilted Table Runner, and I’m sharing it with you today because it was so fun and so easy to make.

    I’m also going to share a quick tutorial on the simple way to make HST for blocks. (Spoiler alert: You’re going to love it)

    I wanted to make something using scrap fabric only. Let’s just say that I’ve hit the fabric store a little too much lately and the hubs (who I totally adore) maaaaaay have mentioned that it is time to take a step back and chill…

    Yikes, yeah. I know…

    So, It’s totally cool though. I can handle it… uh huh. I’m good.

    Someone, please pet the Minky fabric for me?…

    If you want some of my best tips, you can read the whole post I wrote on how to quilt on a budget. It is full of super helpful tips to make the most of whatever you’re working with budget wise.

    Quick Quilted Table Runner Requirements:

    Again, this was all scrap fabric. Use what you have and make it work!

    Finished size: 16″ x 48″

    Fabric: You will need (48) 5″ squares.

    I made 24 of the squares the same color to get a uniform “background” color. The other 24 were just a mix of scraps. You could easily just layout your pieces as half light colors and half dark colors so that you get the same diamond pattern.

    Backing Fabric: I created mine with more scrap pieces. (See pictures below)

    Batting: You will need a piece 16″ x 48″ – This is a great project for scrap batting! You can piece together batting scraps by doing a zig-zag stitch on its widest setting and overlapping your batting edges just a little.

    Binding: 140″ of binding. You can do one continuous piece, or you can piece it together using scraps.
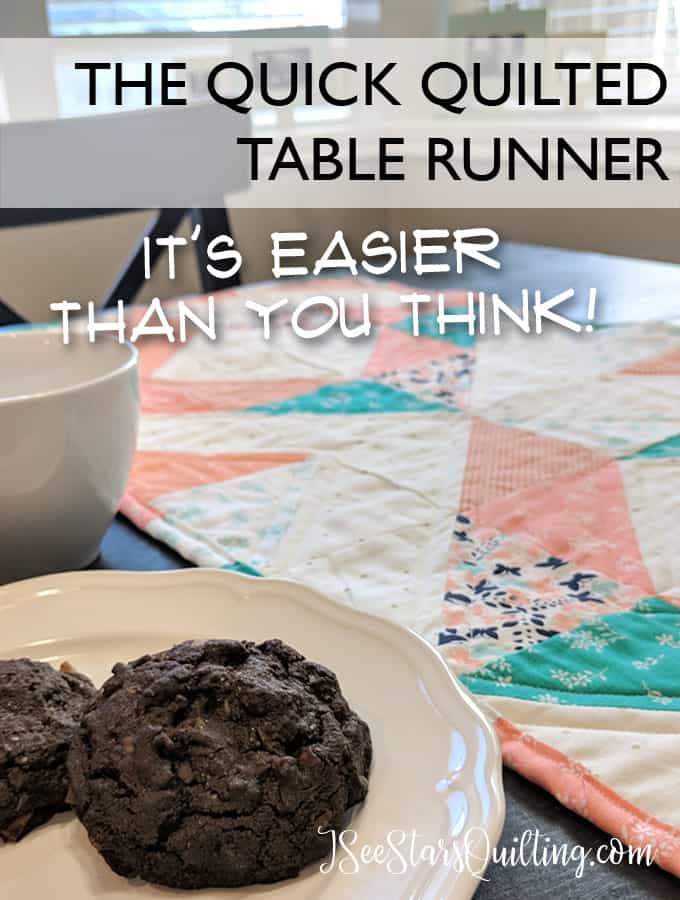
    This Quick Quilted Table Runner is something I whipped up for a quick hostess gift, but it has so many endless possibilties I will be making several more for holiday family gatherings. These make great handmade gifts!

    Easy HST Tutorial

    This will give you two HST (half square triangles) in just a few easy steps using two squares!

    Step 1: Match up your squares! (1) Light color/background and (1) dark color. Put RST (right sides of fabric together)

    Step 2: Use a ruler and draw a line down the diagonal, from point to point.
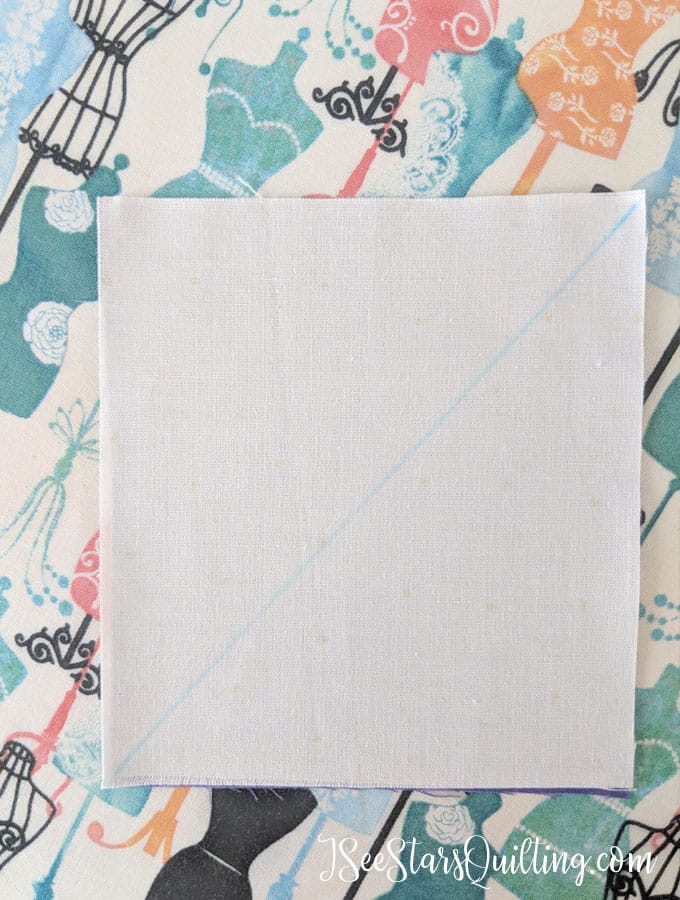
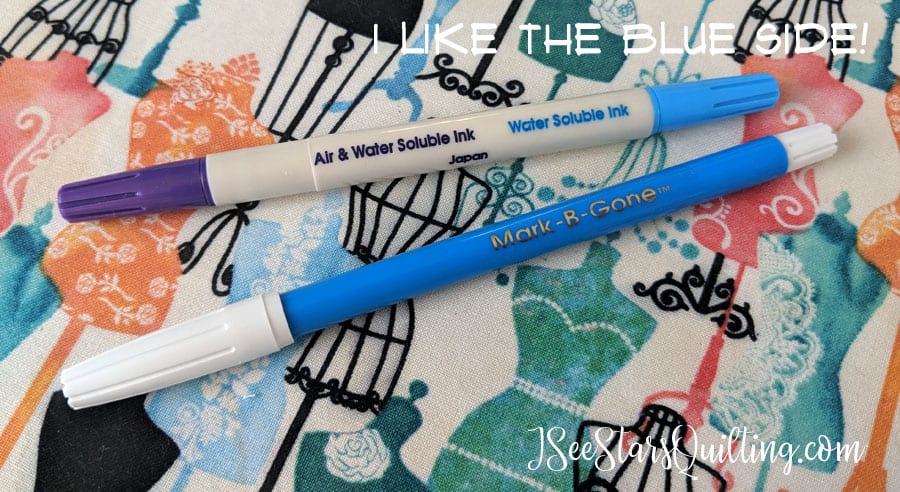
    I really like and use this marker. It stays put until you wash your fabric. The purple end is good too but disappears with air, so sometimes I find I have to work quickly to make sure I sew while I still have my marks.

    The blue disappears with water. You can also use a wet washcloth to take off the blue line.

    However, on this project, you don’t have to worry about making sure you erase your marks on this project… you’ll never even see the blue on the finished table runner. 🙂


    Step 3: I like to use my quarter inch foot here. You will sew a quarter inch on either side of the line we made.
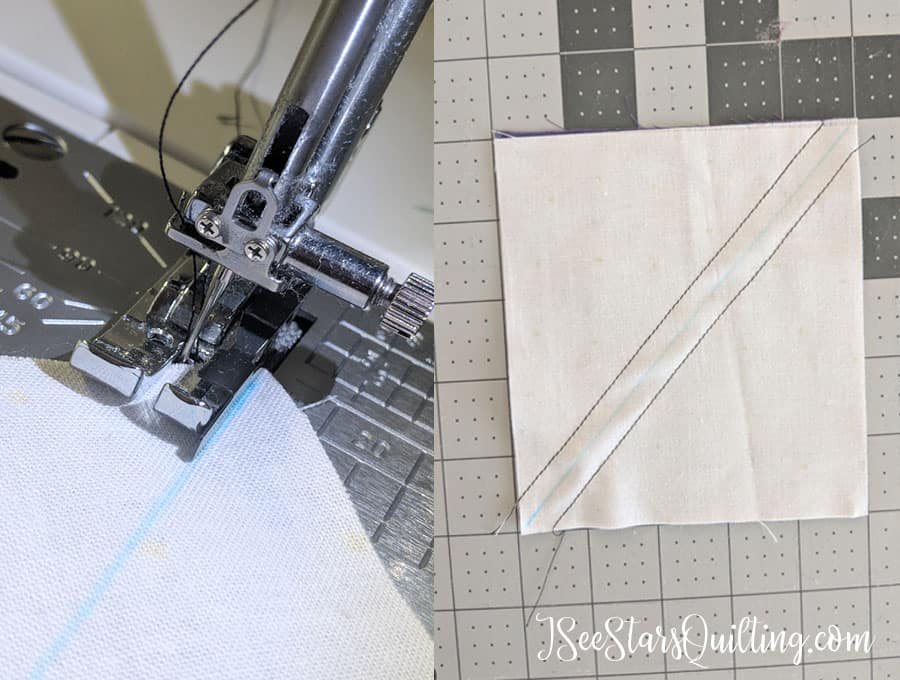
    Step 4: Use your rotary cutter and a ruler to cut right down the center on the line we drew in the first step.
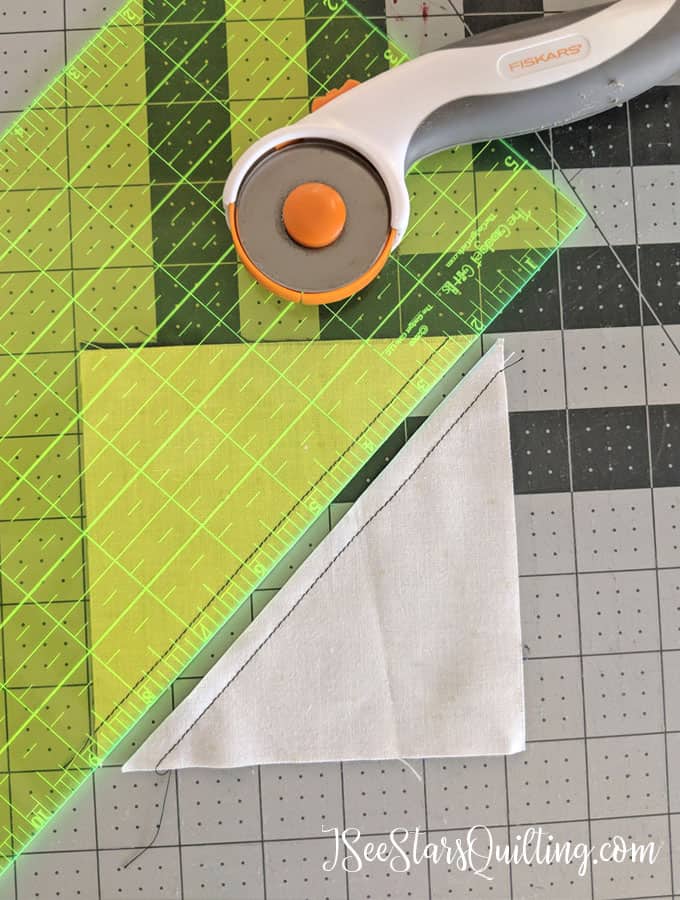
    Step 5: Press your seams open or to one side and…Ta-da! You’re all done! 2 Perfect HST (half square triangles)
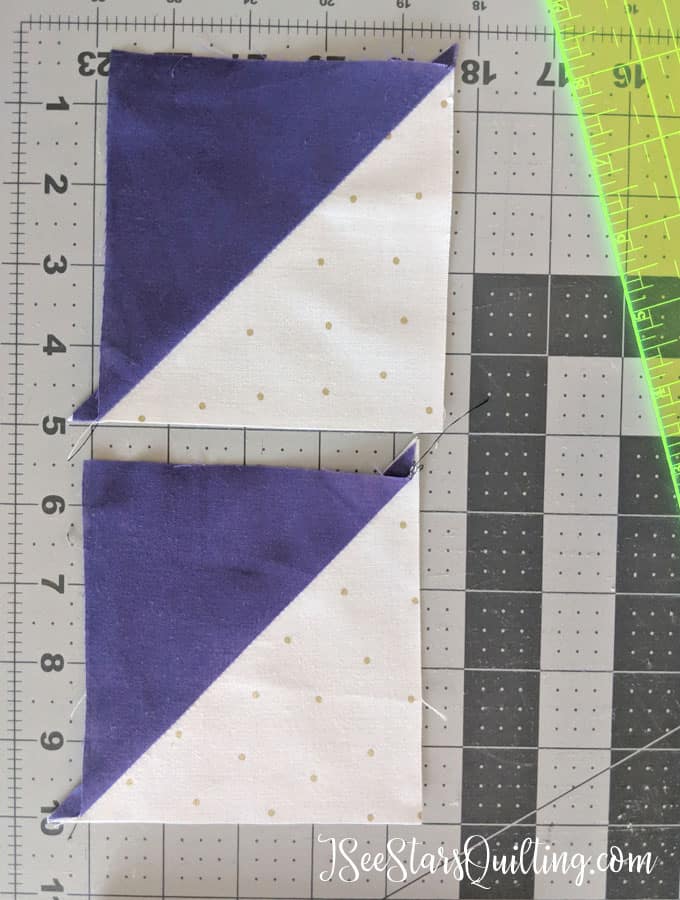
    Now that you have your HST’s made and cut… You should have 48 total… It is time to layout your table runner.

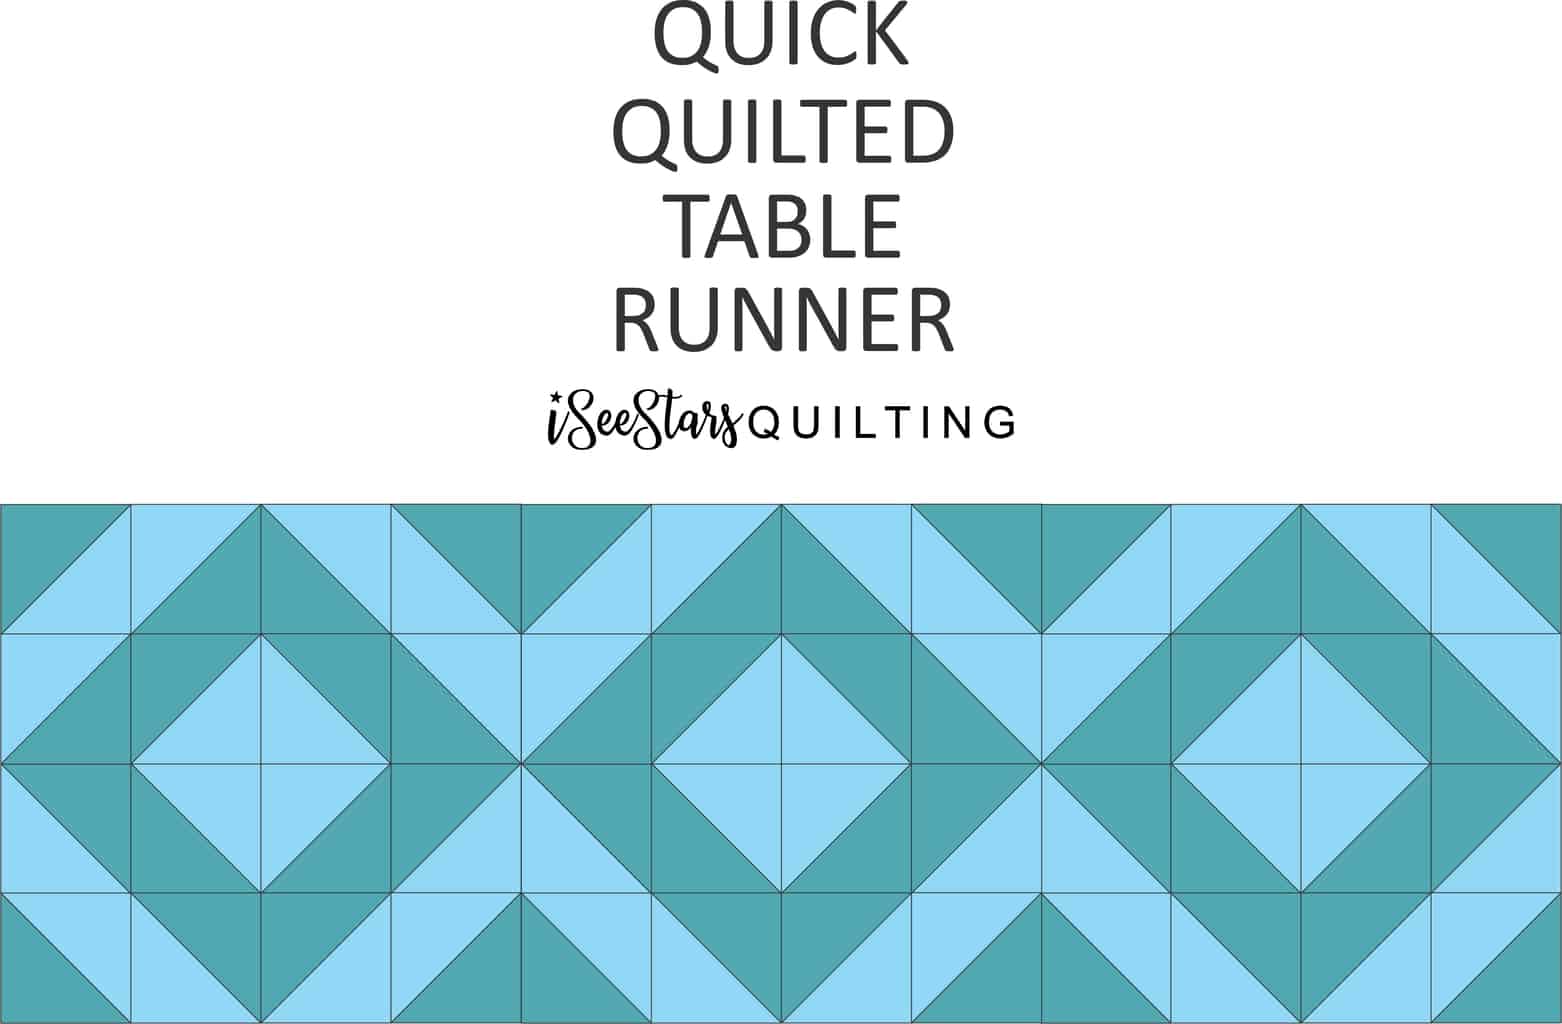
    Quick Quilted Table Runner Layout + Tips

    See below for how to lay your “dark” colored triangle pieces vs. your “light” colored pieces.
    More Pictures of the Quick Quilted Table Runner that I made…
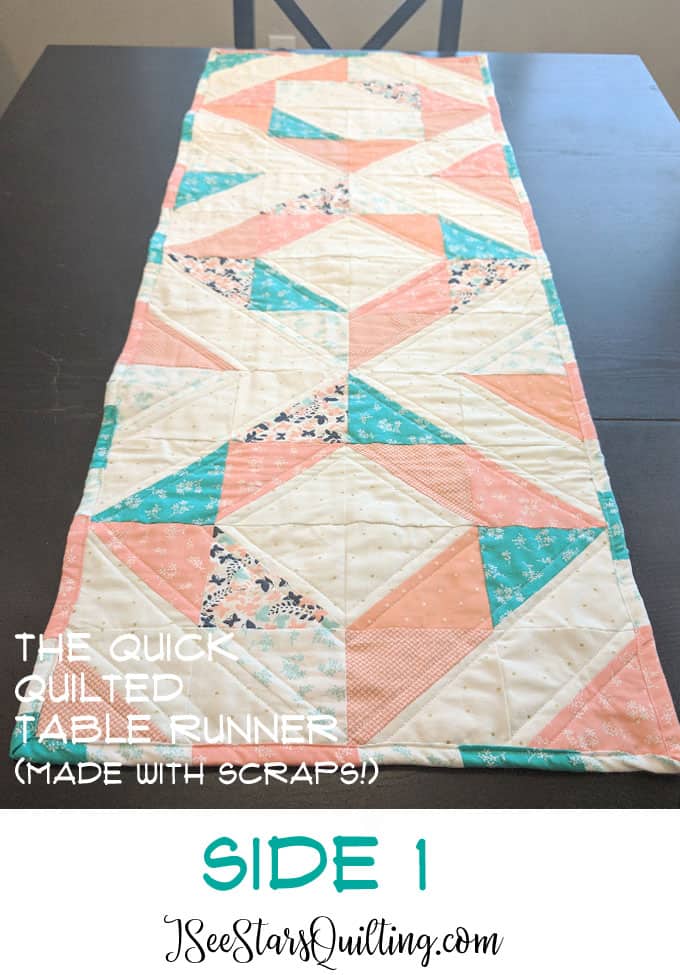
    This Quick Quilted Table Runner is something I whipped up for a quick hostess gift, but it has so many endless possibilties I will be making several more for holiday family gatherings. These make great handmade gifts!

    This Quick Quilted Table Runner is something I whipped up for a quick hostess gift, but it has so many endless possibilties I will be making several more for holiday family gatherings. These make great handmade gifts!


    Notes on the backing:

    As you can see for the backing, I made the Quick Quilted Table Runner reversible!! This is essential because sometimes spills happen. (I would guess 90% of the world’s spills happen in my house. It’s not scientific. It is just a guess, but I’m pretty sure of it) If it is just a little blemish, you can flip it over and go right on with your life without having to ruin your table display.

    I created the backing using strips of fabric in varying widths. This was great because I used the scraps from those same strips that I cut to make the binding!

    Notes on the Quilting:

    You can see in the “side 2” picture a little more detail on how I chose to quilt this piece. All straight stitches. Easy Peasy. You can choose to quilt it however your heart desires. There is no wrong or right, but please to take into account that as a table runner, this will probroly get washed quite a lot. You want to make sure you read on your batting how far apart your stitches can be before the batting turns to mush in the washing machine.


    Whew! Talk about a scrappy project… I really loved making this. It is a great reminder that you don’t HAVE to go out and buy new things when you want to sew a project. Sometimes you just have to put your thinking cap on and brew up a bit of your own magic to make it happen!

    Leave me a comment and let me know if you worked on this project and quilted your own table runner. You can tag me on Instagram too so I can see it @ISeeStarsQuilting
  • HST Scrap Trick!

    I love when I learn something that is completely new and transforms my thinking brain! This half square triangle/HST Scrap trick just… yeah, I have to tell you about it and share it with you! You know those moments where you learn something and… woah. It just blows your mind? *Boom!* This was me the other day.

    This simple step will save you time in the sewing process and make your HST scraps a breeze! Quilt faster and use up those scraps!

    I am working on a block pattern from Cluck Cluck Sew called Shimmer. It’s beautiful, and I love it so much. I’ve put up a few peeks behind the scenes on my Instagram, that you may have seen if you follow me.

    I love the pattern. It is coming along nicely though slowly because life keeps getting in the way. (…but that is another story for a different day)

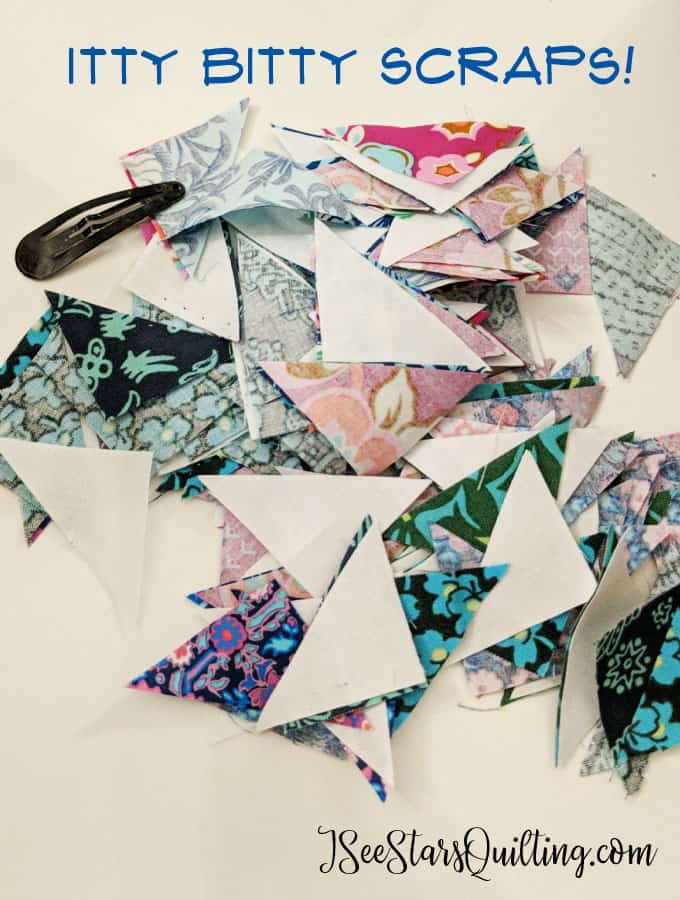
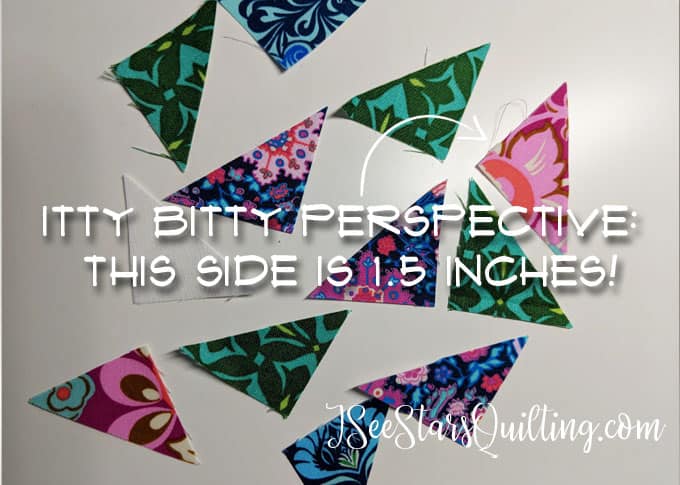
    As you sew, press and trim (etc.) you’re left with all these tiny scraps of baby triangles.

    Being a scrap fabric hoarder, I couldn’t bring myself to throw them away, but I didn’t know what to do with them.

    I took a quick poll with my Instagram followers and found that were unanimous and shared my gut feeling: DO NOT THROW THEM AWAY!

    You guys really are my people. Absolute enablers, but I love you so much.

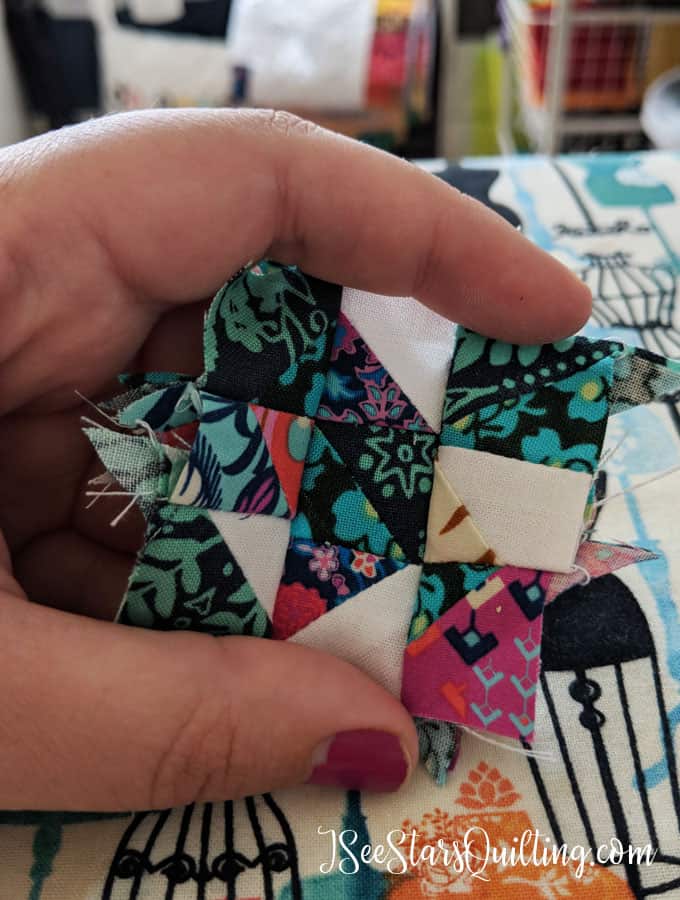
    The Shimmer pattern is going to leave me with a TON of these little scraps, so I made this tiny small block as a test. I know its not perfect… but isn’t it precious?

    Ready for your mind to be blown? –

    Same amount of work… less time…..

    Here is the HST Scrap Trick that I learned that totally made my day.

    I’m really a visual learner… so I’ll show you in a succession of pictures. Step by step. This happens to be from the pattern I’m working on… but you can use these steps on any piece you’re working with HST!

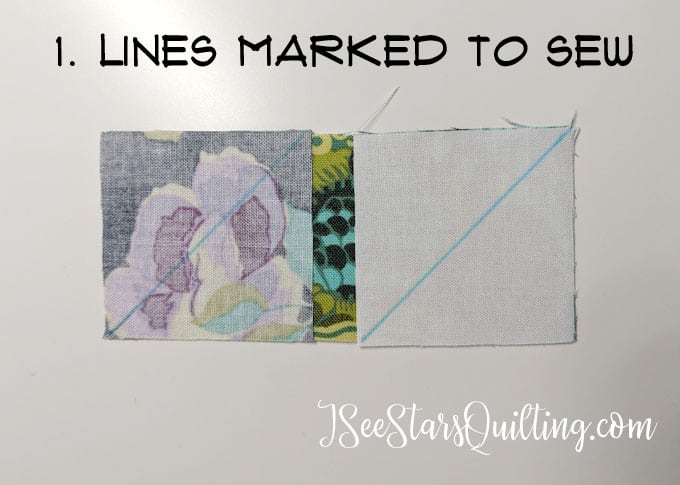
    1. Mark your corner to corner lines to sew.
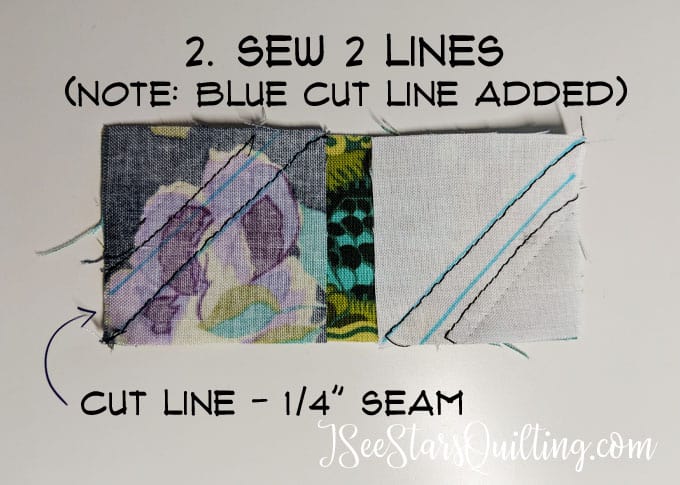
    2. Sew 2 lines on each block. One along your original marked blue line and another just to the outer edge of your standard 1/4″ seam. This will leave you with a scant (less than) 1/4″ inch seam. Because I’m sewing with such tiny pieces, I’m good with scant seams.  Note: You can sew a half inch from your original seam which will leave you with a 1/4 inch seam on each piece after cutting. See my little booboo on the white square where you can see I picked my seam back open? I decided I wanted a tiny bit more fabric in there.

      I also made a mark for my cut line so you could see. I don’t usually go to the trouble of marking before cutting.

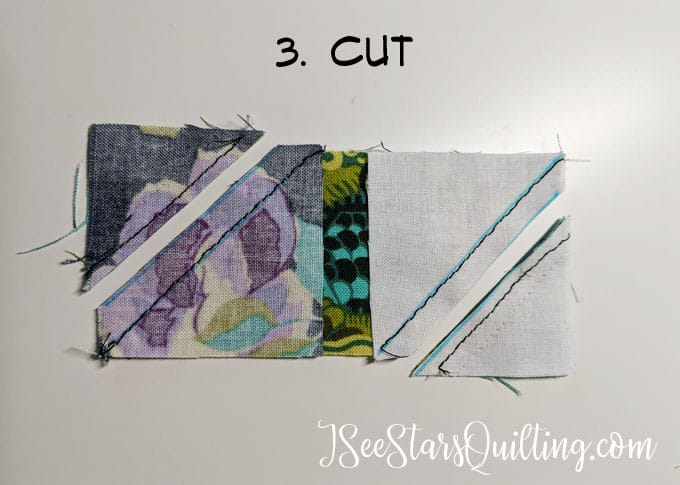
    3. Go ahead and cut off your corners!
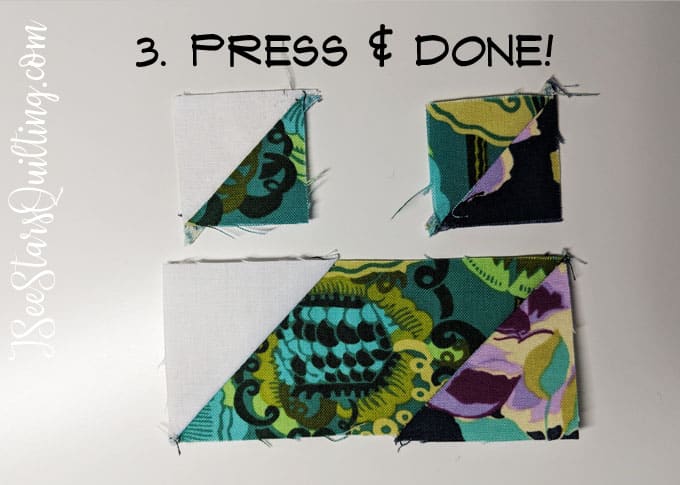
    4. Press your seams open or to one side, and you’re done!

    It takes the same amount of work, but cuts your time down when you use this HST trick!

    The alternative is to take this mess of scraps and line them up and sew each individually. Same results but more time involved lining up fabric and working with itty bitty pieces.

    This simple step will save you time in the sewing process and make your HST scraps a breeze! Quilt faster and use up those scraps!

    Bonus Content:

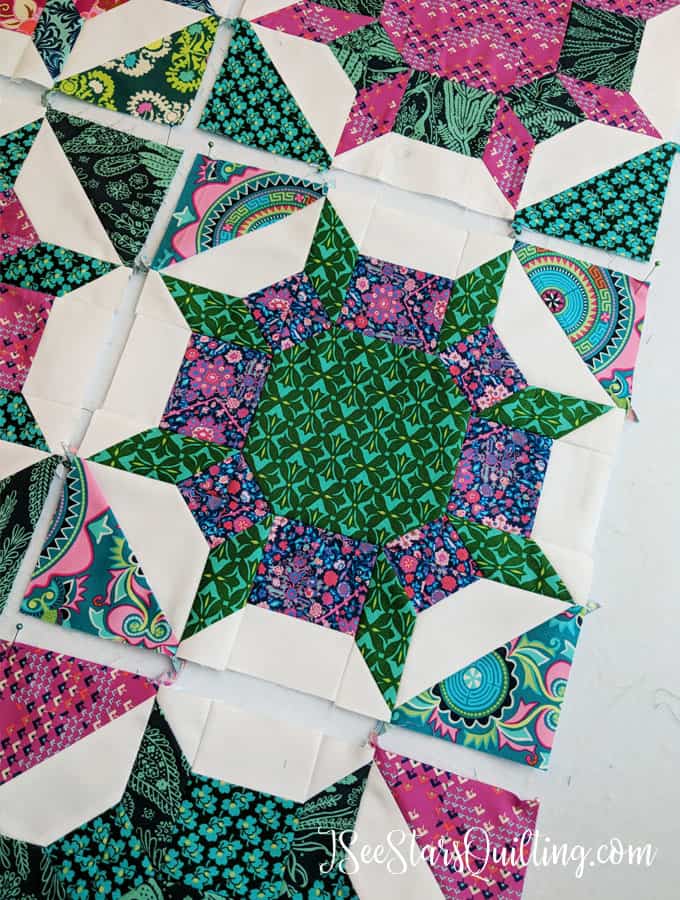
    This is just a little extra because I’ve already shown you my HST Scrap Trick but I just have to dish a little because… isn’t this fabric pairing from Amy Buttler just AMAZING!?! I LOVE this grouping, and I can’t wait to see this quilt top finished!

    I also thought you would like to see what this shimmer block looks like finished out. I’ll do another post when the whole quilt top is put together!

    This simple step will save you time in the sewing process and make your HST scraps a breeze! Quilt faster and use up those scraps!

    Happy Sewing, friends! Did you catch the post I wrote last week on unlocking the quilter’s code? It is so full of information that will have you talking like a quilting pro in no time! Check it out and let me know what you think 🙂