Tutorials

Step by step tutorials for quilting and sewing projects from ISeeStarsQuilting.

  • 5 Steps You Can Take to Gain Confidence in Your Quilting!

    Hi there! Do you know what it feels like to have it all together? Like really, all together… Your life is perfect. It is amazing! You have the time to quilt and you’ve already learned all the skills to perfection. YOU are a master quilter now!

    Do you know how perfect that feeling is!?

    ………………….. yeah, me either.

    I can guess that you maybe DO know the feeling that you’re struggling and the pattern you once felt joy for suddenly now might as well be in Greek…. and if you have to pull that seam ripper out ONE MORE TIME… ARGH! (Well… let’s not go there right now)

    If you are looking to gain confidence in your quilting skills…

    This is the real truth is this…

    You’re not alone! We all feel less than confident from from time to time. I have seen it in every single quilter that I have ever met.

    In fact, I was having a conversation with a quilter friend just today. She has been quilting A LOT longer than I have and I watched her struggle with matching some of the pieces in her pattern. the planets were all out of line and for whatever reason… it just wasn’t working right.

    It just was one of those days.

    I thought that as much quilting as she had under her belt and as many years experience in classes etc, SURELY she must be so confident in her skills that she never ever second guessed herself! No way!… I was apparently wrong.

    This really brought about a new feeling of love and appreciation for quilting for me. We’re all the same and we all struggle with confidence, no matter how long you’ve been quilting!
    5 steps you can take to gain confidence in your quilting skills - Not feeling like you're all that great? implement these 5 steps to get better!

    5 Actionable Steps to Gain Confidence in Your Quilting Skills:

    1. Give up on perfection.

    (Hear me out, ok? I’m not telling you to give up everything and quit.)

    When you take perfection off the table as an option, things always get a little easier.

    Just strive for being better than you were yesterday. I promise you will be amazed at what you can accomplish if you work in small steps!

    How do you eat an elephant? – One bite at a time.

    As for your quilts – we all want them to be the absolute best they can be! Especially if your quilt recipient is a really cherished loved one.

    Really be honest with yourself and know your limits. If you’ve only made 1 or 2 quilts so far, a king sized quilt maaaaay be a bit of a leap for you instead of the small step you should be looking for (hello, me in 2013 – I speak from experience on this one)

    2. Step just slightly outside of your comfort zone

    I wrote an entire blog post on this. You can read the whole thing here. I highly recommend you give it a read.

    Cliff notes version is this: Stagnant water grows stinky and yucky. Its not flourishing with life and new amazing things!

    If you feel like you even sort of have an idea what you’re doing, it is time move forward to kick it up a notch!

    If you see a new pattern or idea that kind of scares you a little bit, but you love it… figure it out as you go. Challenge yourself and learn how to make it happen.

    I’m not saying it is going to be easy, but imagine how amazing you’ll feel once you’ve finished it. It will be worth it!

    3. Take a class

    blow the dust off and g learn something new! Make your brain work a little bit.

    This is a great way to build your confidence! The more comfortable you are with a variety of different skills, the less daunting some of the others will seem.

    Me, when I figured out how to do the quilt binding and it actually looked good? – boom! I was ready to take on the world! hallelujah! note: I made a video to show step by step how I do my quilt bindings.

    You can check out your local quilt shops and see if they can point you in the right direction for local classes or you can check out a few online classes. I personally really love Bluprint (formerly known as Craftsy). You can search absolutely everything there.

    myBluprint.com

    4. Teach

    You don’t have to teach a whole lecture in front of 100 people!

    Just find the kid down the street who seemed interested in your sewing machine or invite another friend over who is curious about quilting with some of the old fabric she has laying around.

    Bonus points if they already know how to sew a little bit and you can learn from each other. Work on a project together!

    Best Girl Friends

    5. Don’t let failure scare you

    This is a hard one to learn sometimes, but goes along with what I said earlier on shooting for small steps forward instead of frustrating big leaps.

    If you know if your heart that you are not quite ready for a quilting skill or pattern, but still really want to try it… go for it. You may surprise yourself. -or- you may fall flat on your face in a heap of ‘well that didn’t work out‘. ouch.

    Either way, don’t let it deter you from setting it aside to come back to it later and move on to trying other things!

    You never know if you don’t even try, right?
    In conclusion, confidence isn’t something you just inherantly have. It is something you build over time.

    If you want to gain confidence in your quilting skills, you’re going to have to work at it. Give yourself win after win and really allow yourself be proud of what you accomplish!
    5 steps you can take to gain confidence in your quilting skills - Not feeling like you're all that great? implement these 5 steps to get better!

    Quilting isn’t always easy and we all have our struggle days… but the more you can move forward with these 5 steps, the more you will really let that confidence flourish inside of you.

    Hey! Let me know what you do on your worst quilting days and how you give yourself a pep-talk when things aren’t going your way. I would love to hear it! 🙂

    Fat Quarter Shop Daily Flash Sale
  • Fool-proof Quilt Binding Method (A how-to + Video)

    So you’ve got your quilt 85% complete and you are rocking this whole “quilting thing”! Congratulations! … now it is time for the binding. You may be feeling a little uneasy about it all, possibly even dreading this step because you haven’t figured out a method that really works flawlessly for you, yet? Would you laugh and say that a fool-proof quilt binding method doesn’t exist? — oh it does, and I’m going to show you how!

    How to bind your quilt - A no fail easy approach to quilt binding

    With my first several quilts, I struggled with the binding so much. There are so many different ways to do it and everyone claims their way was ‘fool -proof‘ — which really left me to wonder just how big of a fool I am if I couldn’t do it, right? yikes.

    So I did what I normally do and became hyper-obsessed with figuring out how to hack this quilt binding method thing into something I could do without stress.

    I really do love quilting, but it’s not ok to gift someone an 85% finished quilt! I knew I would have to figure it all out eventually…

    If you struggle with quilting binding, you are not alone! I'll show you how I learned to hack this step in the quilting process and make it fool-proof (I promise!) so you never struggle with it again!

    So, I started doing my research, I watched video after video on youtube. This also included looking at other bloggers that I admired to try and gain their wisdom.

    I asked all my quilting friends and I even approached a stranger in the fabric store that looked like she really knew her stuff (totally true story).

    What I wound up with was a quilt binding method that wasn’t complicated. It didn’t require me doing any gymnastics or pulling out my magic wand. It isn’t rocket science and I certainly didn’t re-invent the wheel here!

    But it works. And it works well… every single time. Flawlessly.

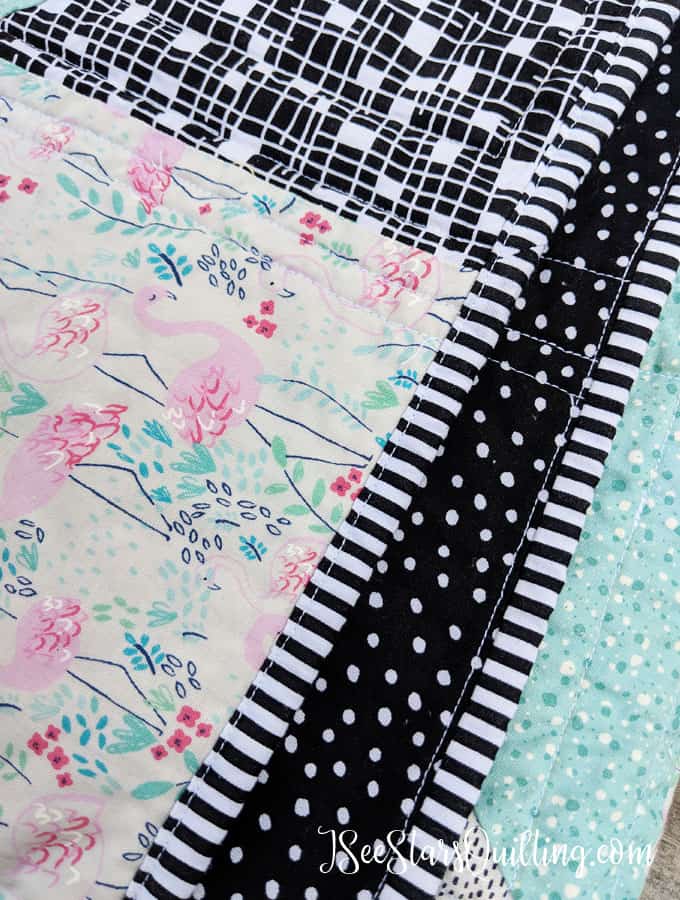
    This sweet baby quilt pattern is a FREE download that I designed to be easy fro all levels of quilting! Just look at this sweet flamingo print! Its adorable! Did I mention the FREE pattern? ;) Check it out, download it and save it for later!

    So what is my secret no stress, Fool-proof binding method?

    If all of the above rings true for you and you’re maybe starting to feel a little defeated by this whole quilting world… I want you to stop. Stop it right now.

    Sit up a little straighter and puff out your chest a bit.

    Do it.

    I don’t know why, but if you can fake a little confidence, you actually really do gain just a little bit. Fake it till you make it! 😉

    You got this. I promise!

    You know that I have a desire to make all the complicated hard parts of quilting accessible and attainable for the beginner quilter. – Everyone should really enjoy quilting!

    I made this video that goes over step by step – everything you need to know – detailed explanation of how to sew your quilt binding on. No extra fluff stuff, I promise. 🙂

    Video highlights:

    • Calculating fabric needs
    • Common binding sizes
    • Connecting binding pieces together
    • Attaching it to your quilt
    • How to be the boss of those corners – perfect corners every time!
    • Alternatives to sewing a straight seam
    • Ideas on ways to make it your own!

    Really, this is THE video you need to watch on quilt binding. 🙂

    Check it out. Let me know what you think! Leave me a comment that lets me know your thoughts. Give my fool-proof quilt binding method a try and see if you stress a little less with your next quilt binding!

    If you would like other tips on how busy people fit quilting into our days, check out the FREE download below! It is one of my most popular downloads! You can also join the ISeeStarsQuilting Community and stay up to date on all the fun tips and videos that I share as well as when a new pattern is released 🙂

  • An Answer to Quilting Woes! aka A Rescue for the Busy Girl!

    I can’t speak for how people in other parts of the world answer the question “how are you doing?” but here (and for a while now) the answer has been “busy, but good!” I hear other mamas say it to me all the time!

    And honestly, life IS good. But we’re always on the go and always busy. There is that word again… It’s a mystery how we can fit in one more single thing into our schedules much less a time-consuming hobby like quilting!

    But I can’t help it! I LOVE to quilt. I LOVE to sew! And I really love making things for my family. Seeing them snuggled up on the couch with one of my quilts brings me so much joy!

    I’ve learned that doing things for myself makes me a better mom and a better wife, but doing those things for myself doesn’t have to come at the cost of not being able to care for my family.

    It is totally possible!

    And I think its really a necessary part of life to try and figure out how to squeeze it in.

    “BUT HOW?” you ask…

    I get it, we all want to quick fix answer. I’ve never been one to hold back secrets that can help others!

    Over the past several years I have developed little tricks and figured out how to squeeze in bits of time to do the things I love. Quilting being one of them! And I’m going to share them with you today!

    I’ve created a FREE download e-book that explains my whole philosophy on the idea and how to implement it into your own life. Don’t worry it is short! and you can start working through it TODAY!

    I’m also really excited to announce that I’m releasing 5 new patterns in my shop today that are made for YOU!

    Yes, YOU – The busy girl who desires to create beautiful quilts that look complicated but are actually achievable in the midst of our busy lives!

    Yes! You can totally do this! 🙂 Click on over and check them out! The feedback that I’ve had from my pattern testers is amazing. I can’t wait to see what you create with these patterns!

    Think you're too busy to quilt? - I can show you how to make it work without giving up precious time with you family! FREE download with instant tips for success!
  • Why You Should Nest Your Seams

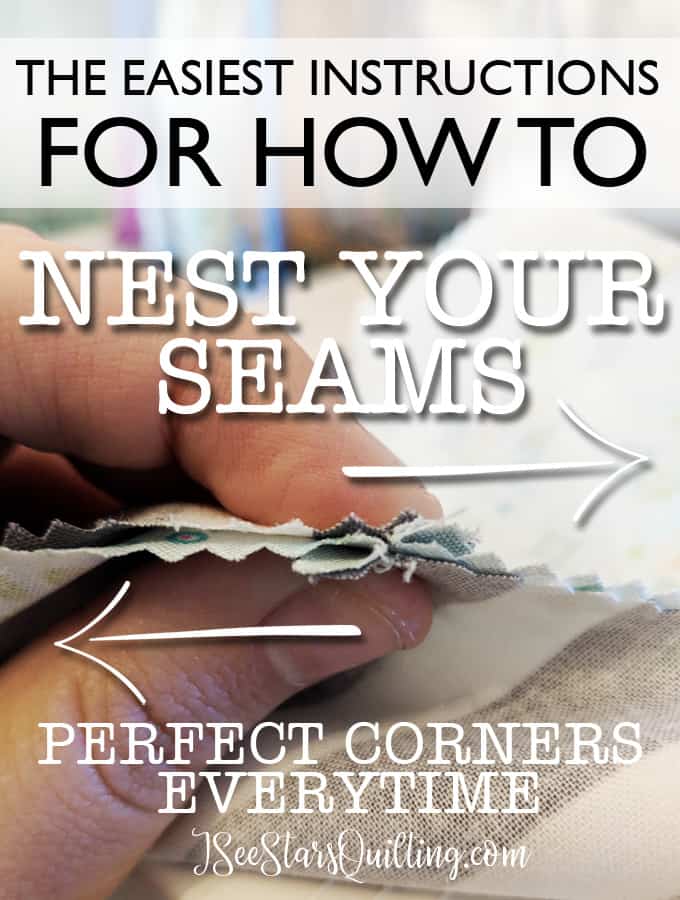
    This is powerful-quilt-skill-altering-stuff here today, happy people! We’re going to learn one of my favorite tricks in quilting: How to Nest Your Seams.

    (If you’re impatient, there is a quick video at the bottom of this post!)

    Nesting your seams is a VITAL tool in quilting. It will help you get that finished and polished look on your quilt and cut out those rookie mistakes where your corners shift and seams don't line up. This is an easy trick that any quilter can use! Try it out on your next quilt. You won't be sorry!

    Are you ready for this? Because It is going to be great!

    We’re going to dive into the what, why and how of it all.

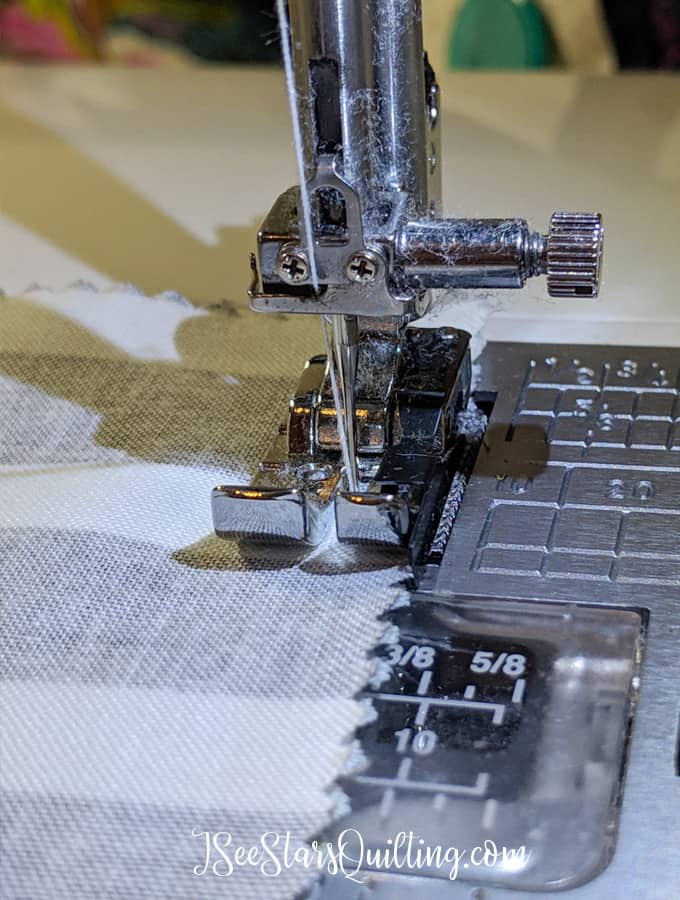
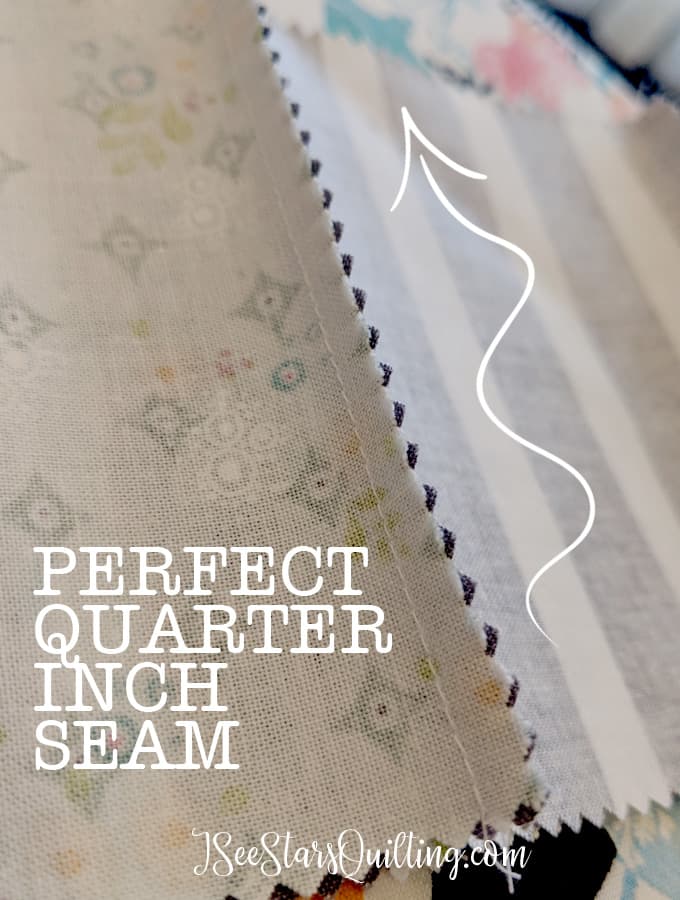
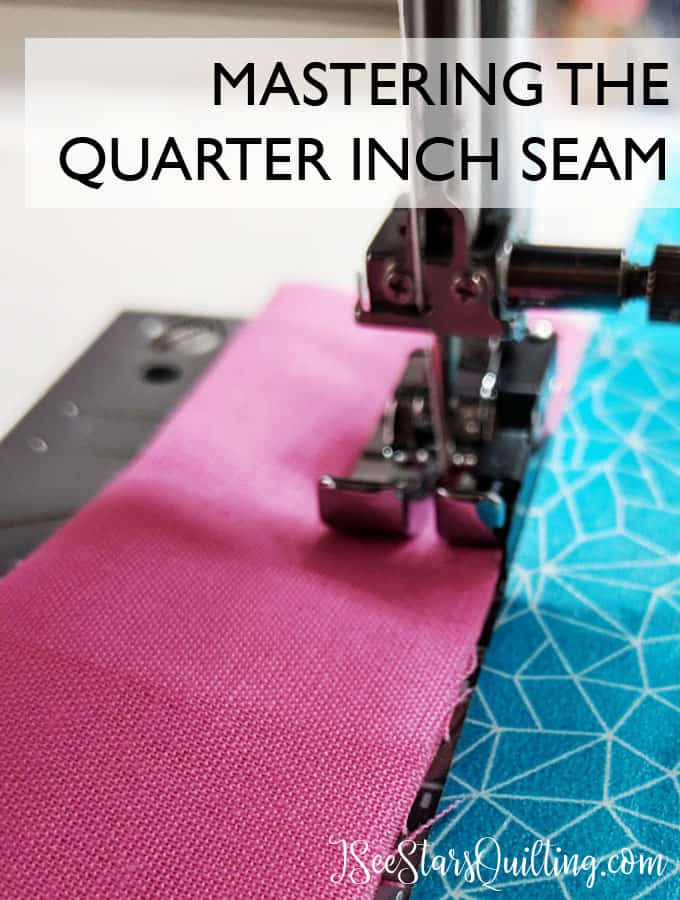
    First… make sure your seam allowances are all the same measurement. Your seams will not line up if you’re off in your seam allowances! For tips on that, you can read more about mastering that skill in this post: Mastering The Quarter Inch Seam

    *Yikes! Look at all that fuzz!*

    What is nesting your seams?

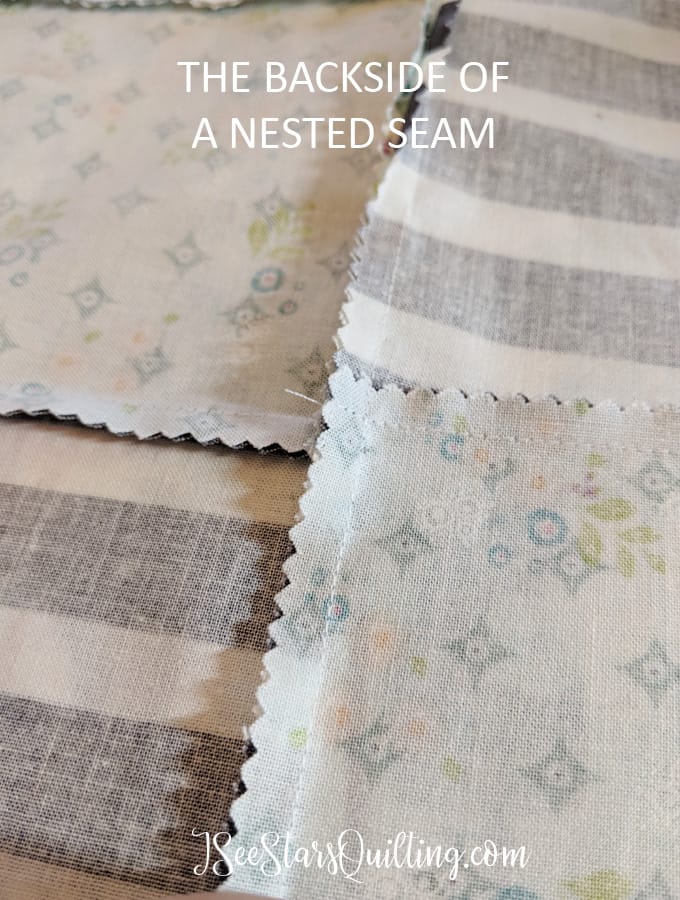
    Nesting your seams starts with how you press your seams after you sew.

    Yes, I’m going to be one of those pesky quilters that tells you how important it is! A few years ago, I was on the opposite side of the fence and you couldn’t make me touch an iron on each and every seam. I learned my lesson and my quilting has improved so so much since then! So I don’t want to hear your whining. Just suck it up and do it, ok?

    Some quilters prefer to press their seams open to make the quilt top lay flatter… it is a personal preference, but I usually press my seams to one side, which allows me to nest my seams and have nice tight hold between my seams without using pins. 

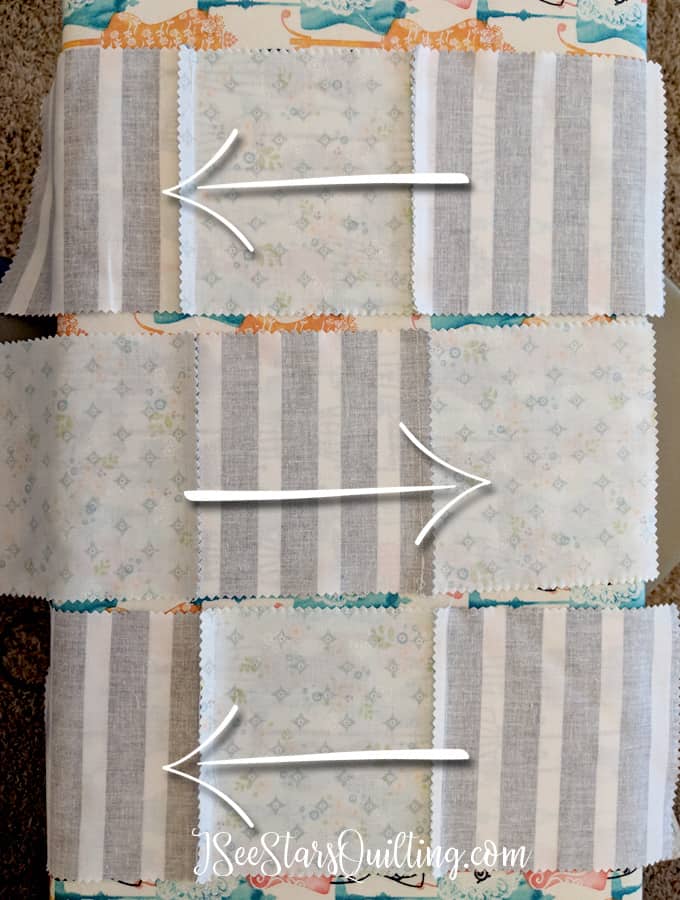
    Ok now that we’ve all decided that ironing is best…. Start by ironing all your seams like the picture below. Each row will alternate seam pressing directions.

    Next, you’re going to sew your rows/columns together!

    Why Should you Nest Your Seams?

    I think this one is obvious and probrobly why you came to my site in the first place, but really… we want out quilts to be as perfect as we possibly can get them to be, right?

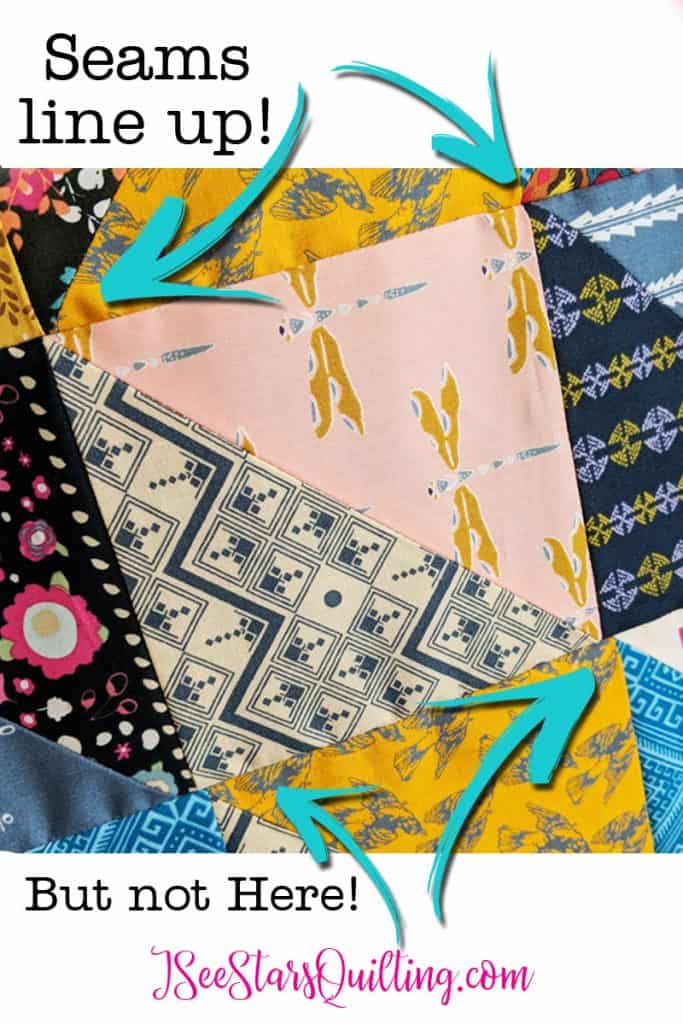
    Take a look at this quilt I did a while back, you will see the glaringly obvious error. And we don’t want our seams to be off, right? I COULD argue that its supposed to be that way… modern quilting does allow us a lot of liberties in the name of art, but you and I both know the pattern didn’t call for it to be that way.

    How to MASTER the quarter inch seam. Want to improve your beginner/intermediate sewing skills? do this and you'll be well on your way

    How to Nest Your Seams?

    So let’s get to fixing it so the above issue doesn’t sneak up on you!

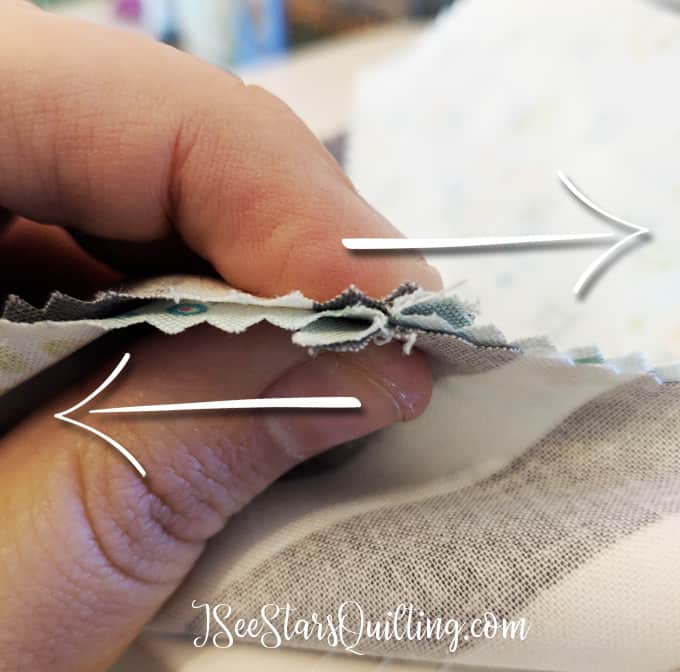
    With your fingers, I want you to line up the seams. Rub it between your fingers just slightly. You’ll be able to feel it when that seam finds its sweet spot! The seams will nestle in right next to each other.

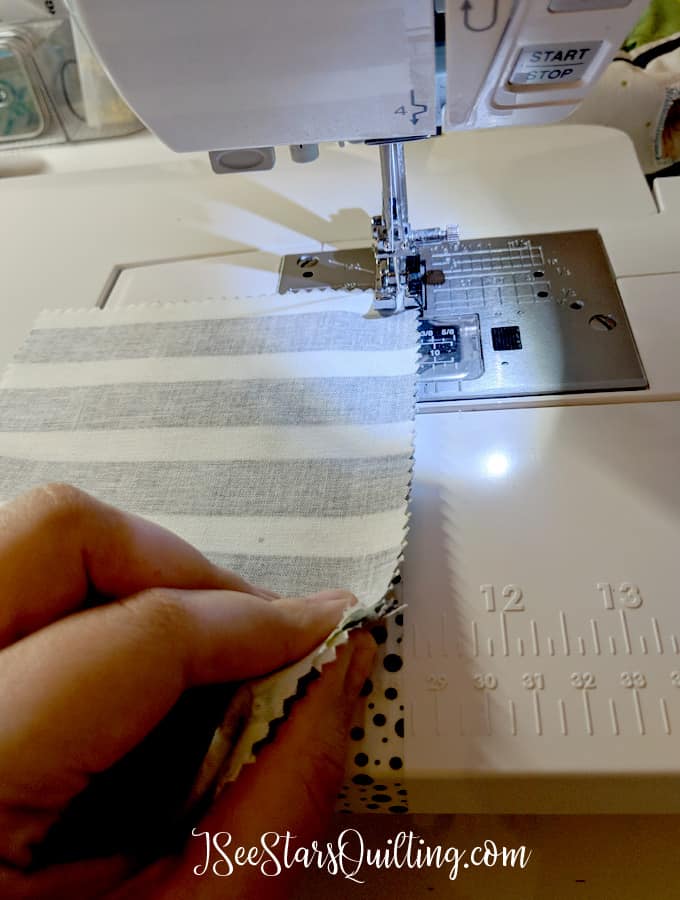
    You can put a pin in it if you like but I want you to still hold onto it with your fingers when you sew because its the absolute worst to sew a whole long line of a seam only to find out a few of the little guys have shifted and then out goes the seam ripper (and my grumpy side).

    Pinch the seam between your fingers while you’re sewing so that it’ll be perfect and the fabric will be evenly distributed in between each little nest.

    When you come to it, make sure the fabric doesn’t shift. This may take a few times to get comfortable with but I rarely have to check this anymore because I’ve got this and it is like second nature.

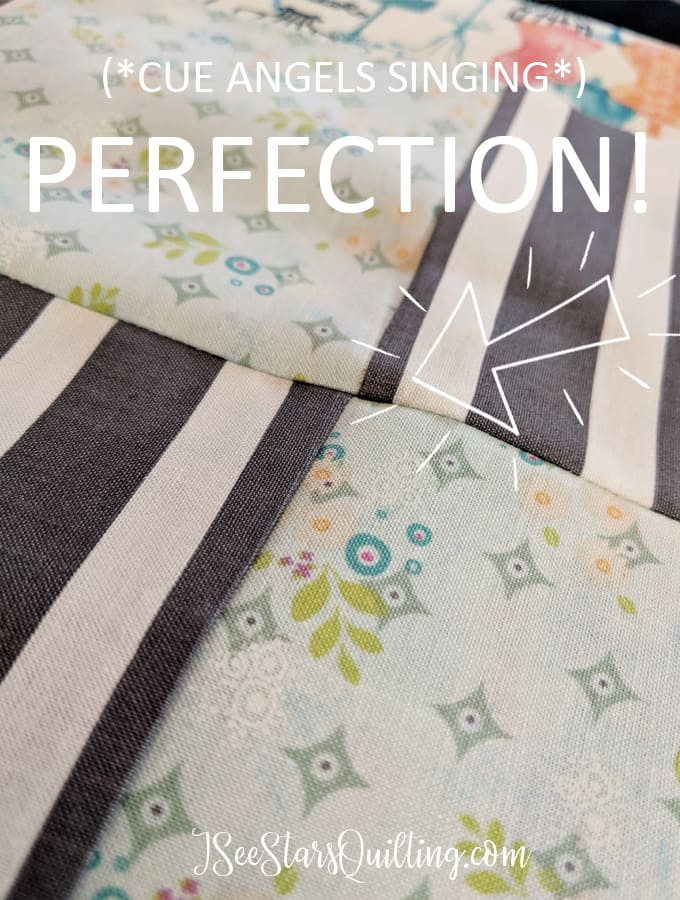
    Flip it over, press your new seam anyway you like and VOILA!

    This little trick will save you so much time and really help to give your quilt that polished look! (one more rookie mistake will vanish from your future quilts!)

    Let me know what you think in the comments after you give this a shot, won’t you? I love to hear from you!

  • A Simple Plan to Improve Your Sewing Room

    We all have dreams of a big beautiful sewing room that is stocked with walls of gorgeous fabric and beautiful shiny fancy tools. Oh *big puffy pink heart eyes* all the counter space and shelving of pretty threads! ooh! and big glass french doors to close the mess off from the rest of the house! Yesssssss! Chances are that it won’t happen today… but I do have some simple Ideas that can improve your sewing room to share with you!

    A Simple Plan to Improve Your Sewing Room - tips to make a difference today! When you have a space you love your quilting and productivity increases! Read how you can change your soon today!

    When you create a space you love, it loves you back by allowing you to create more efficiently and in turn more amazing quilts!

    These ideas don’t involve a house remodel or a weekend doing DIY projects pretending to be Johanna Gaines. They also don’t involve a giant budget because well… I’m a mom and honestly, I have never had a big giant budget to work with so, work with what you have, ok?

    The key in improving your sewing room is…

    1. Clean what you have!

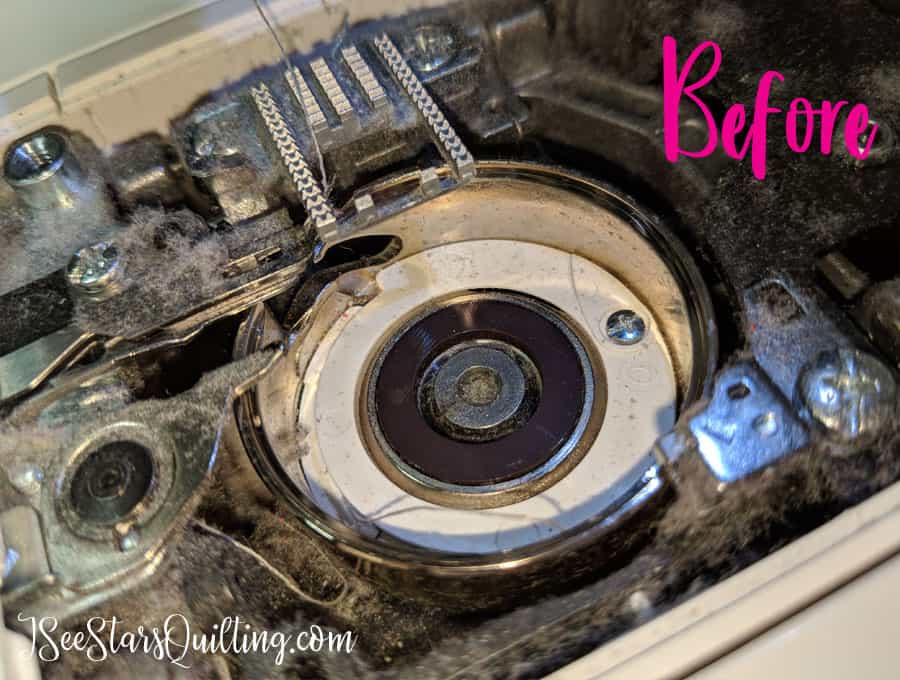
    I know, I’m awful, right? That is such a “duh!” thing to say, but when was the last time you REALLY cleaned everything? Do you dream of a spa day? So does your machine!

    This super easy tutorial will tell you everything you need to know to give your sewing machine a quick clean and tell yo how often you should clean your sewing machine too! - Hint, you have most everything you need in your bathroom!

    You can read this post with step by step instructions to clean your sewing machine here!

    Your machines could use a good cleaning but how about everything else? The nitty gritty of whiping everything down and dusting? And a little fabreeze to freshen up the place?

    2. Go through your supplies and purge your ‘clutter’

    As creatives, we hoard. Go on and admit it… You are not alone.

    I define “clutter” here as anything that you have hanging around that doesn’t serve your goals or interests right now.

    What do you have in your possession right now that you’ve been holding on to for “someday”?

    It is time to get honest with yourself and really decide if “someday” is ever going to really happen! (I know, this is tough love speaking)

    Go through these top areas of clutter:
    * Tools
    * Fabric
    * UFOs & WIPs (unfinished objects and work in progress)
    * Decorative clutter – Those things that are precious collectibles and things given to us over the years that are so hard to part with!

    Make 3 boxes: Donate, trash and sort
    Then, get to it. Take no more than 5 seconds to decide on a box to place your items. Clean off an entire area of clutter quickly.

    Purge the items you labeled trash and be done with them.

    Move the box of donated items to another room. Do it right now. Those items no longer have a place in here. If you leave it by the door, you may be temped to find a place for them again. Take a deep breath and let them go!

    3. Clean again!

    I mean it. The hidden corners the dark spaces… Really give your space a good wipe down again now that your stuff is moved out of the way.

    4. Decide on the storage you need.

    [Notice I didn’t put this first – It is important to really see exactly the items that you’re going to be storing before you go out and buy a bunch of random containers!]

    This is optional. Some of us quilters are blessed with shelves of storage and have built up our stash of storage containers.

    If you’re in need of some ideas… check these posts out!

    These easy solutions will have your organized and happy in no time! (and you don't have to spend a lot of time or money!)
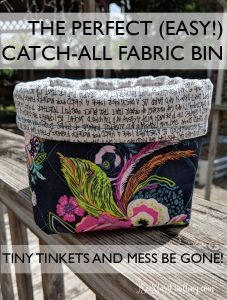
    This cute fabric bin can be made in an hour and can be used all over the house! No extreme sewing skills required... its so easy!
    If you're looking for Cheap Sewing Room Storage Ideas, you'll find all my favorite picks here so you know what is worth the money and what isn't worth your time

    There are also several products on Amazon that I just LOVE having around my sewing room. I’ll link them here for you 🙂

    5. My favorite Part – Organize!

    Now it is time to add back in the things that really matter to you – the things that truly bring you joy!

    Once you have your bins or shelves or totes… whatever it is you decide works best for your space you can organize your items and make it a space you truly LOVE. It makes such a difference to be surrounded by the things you love.

    When you improve your sewing room, you will notice a difference in your creativity too!

    These are your standard sewing skills that every quilter should know. How many on this list can you say that you know really well? - Personally, I'm going to use this list to practice my skills from!
    8 Sewing Skills Every Quilter Should Know

    What is your favorite part about your sewing room? Tell me down below in the comments! I would love to know!

  • 10 Tips to piecing the Perfect Quilt Top

    Today I’m going to share with you some tips for piecing the perfect quilt top. If you’re looking to improve your quilting skills there are a few things you should keep in mind. With these 10 tips, you’ll be on the road to better quilting in no time!

    The very first quilt you make will be full of flaws and many moments of learning along the way. This is to be expected… but how do you improve when you’re ready to take your quilting from “wow, you’re just starting out quilting, aren’t you?” to “Wow, you made this?!

    10 Tips for Piecing the Perfect Quilt Top

    *ha, say that 10 times fast*

    1. Make sure that your pieces are cut to the exact right size.

    I know I am guilty of fudging it in the past and “close enough” was good enough for me for a number of years, but when I really wanted to take quilting to the next level, I had to realize that quilting involves a lot of math. And math is exact. It isn’t up for discussion.  

    If you want to all those pretty seams and corners to line up without any fuss, make sure you trim your pieces to the right size before you sew them together.

    Take those extra 10 minutes and square up your pieces and trim off any little sliver of fabric that could cause you headache later.

    2. It really helps to have the right tools on hand.

    It can be a bit of an investment, but it doesn’t have to cost a fortune. With a few essential items, you can create a quilt that rival the pros. – What it will cost you in time and frustration without the right tools is a far greater cost in the end. (at least this is what I tell myself when I want to go shopping for new ones!)

    For me, these tools are an absolute must – bare minimum, every quilter should have…

    • Rotary cutter – with a good sharp blade (don’t even get me started on the dangers of a dull blade.)
    • Self Healing Cutting Mat – to protect your tables and surfaces
    • Cutting ruler – something wide and comfortable – see through
    • Sharp Sewing Needles – Did you know you’re supposed to change your sewing machine needles about every 10-12 hours of sewing? It really helps keep your machine in tip-top shape.
    • Sewing machine – It doesn’t have to be a top of the line fancy model. Most home sewing machines will work. As you get more into quilting, you can upgade your machine as budget allows.

    Here are a few other recommendations of mine if you’re wanting to make sure you have the essentials.

    3. Master your quarter inch seam

    Do it, practice it on scrappy fabric until you can do it in your sleep. Quarter inch seams are an industry standard in professional quilting. For more tips on how to master it, you can check out the post I wrote. How to Master the Quarter Inch Seam

    How to MASTER the quarter inch seam. Want to improve your beginner/intermediate sewing skills? do this and you'll be well on your way

    4. Nest Your Seams

    This is KEY to getting those laser perfect corner matchups. It’s much easier if I show you but I do not have a video (yet! – video is something I hope to add to my blog soon) For now, check out this tutorial from Sewcanshe.com

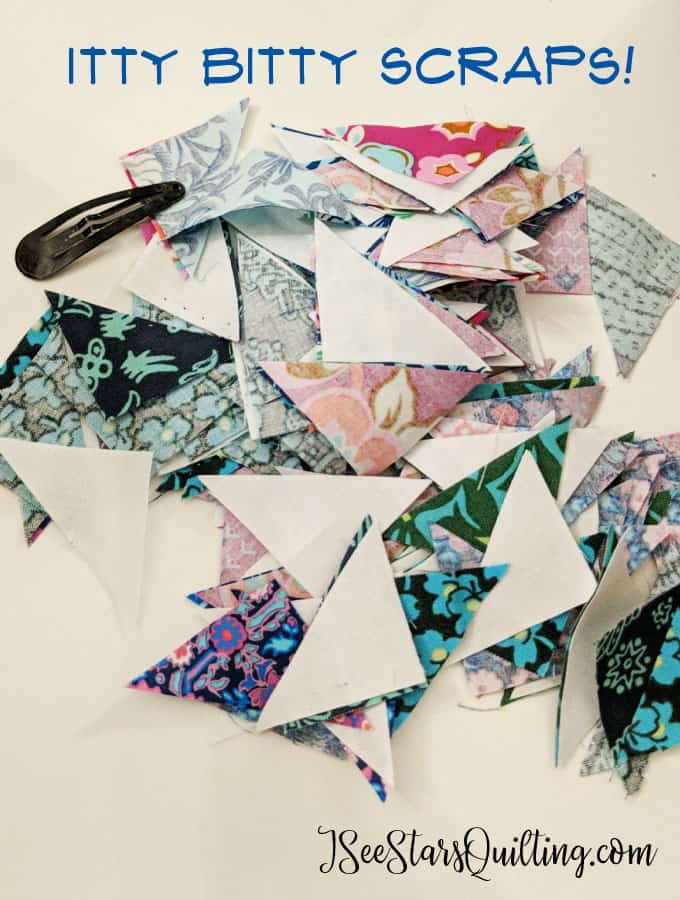
    5. Save Your Scraps!

    *This is not permission to be a hoarder. (Though your definition and my definition of the term may be different)

    When I first started quilting, I wouldn’t see the need for little pieces of fabric leftover from a project. I didn’t have the room to store things and I was more than happy to toss it. Then, I discovered “scrappy quilts”. Oh man, was I wrong to let go of so many pieces of fabric that had yet to live up to their full potential?

    This simple step will save you time in the sewing process and make your HST scraps a breeze! Quilt faster and use up those scraps!

    A scrappy quilt is exactly what you think it is. It is made from scraps of fabric. A scrappy quilt can be intricate and detailed. It could be wild and completely improv sewing or it could be something that takes you years to sew just a tiny bit at a time. But what it is, is beauty in what otherwise would have no further purpose.

    As a DIY addict, I love that.

    And when money is tight or your husband questions why you HAVE to go to the fabric store because he just doesn’t understand… you can make everyone happy by digging through your leftover fabric and creating something out of nothing!

    For ideas on storing your scraps, check out this link:

    Cheap Sewing Room Storage Ideas

    Scrappy Holiday Table Decorations

    6. Iron Your Seams

    Like with a real, hot and steamy iron. not just a roller or finger press. Press that fabric into submission and make it do what you want it to. Just don’t scortch the fabric, ok? Your quilting will turn out better, you won’t have to worry about wrinkles or fabric being askew.

    If you’re not sure if you have the right iron, check out this post

    Do You have to press your seams? ...And other ironing rules answered in this detailed post about ironing! Who has the time? Do you really have to? Or is it just a suggestion?

    7. Read through the Pattern

    Yes, do it… Take 10 minutes. Prep yourself. Just do a quick read through. This isn’t a novel where you want to be surprised by little fun moments in the middle of the story. 

    Those little surprises will lead to moments of torment and frustration..  

    Go ahead and read out all the steps. Get a clear vision of what you’ll be creating and how it will all come together.

    Treat this moment as a mini prep for a test. – Your test results will be your final quilt. 

    8. Prep your supplies

    This goes with number 7 and “things you should do before you quilt”.

    Productivity wise, you should cut all your pieces at the same time. I know not everyone does this but it has been an absolute time saver (and sanity saver) for this busy momma. 

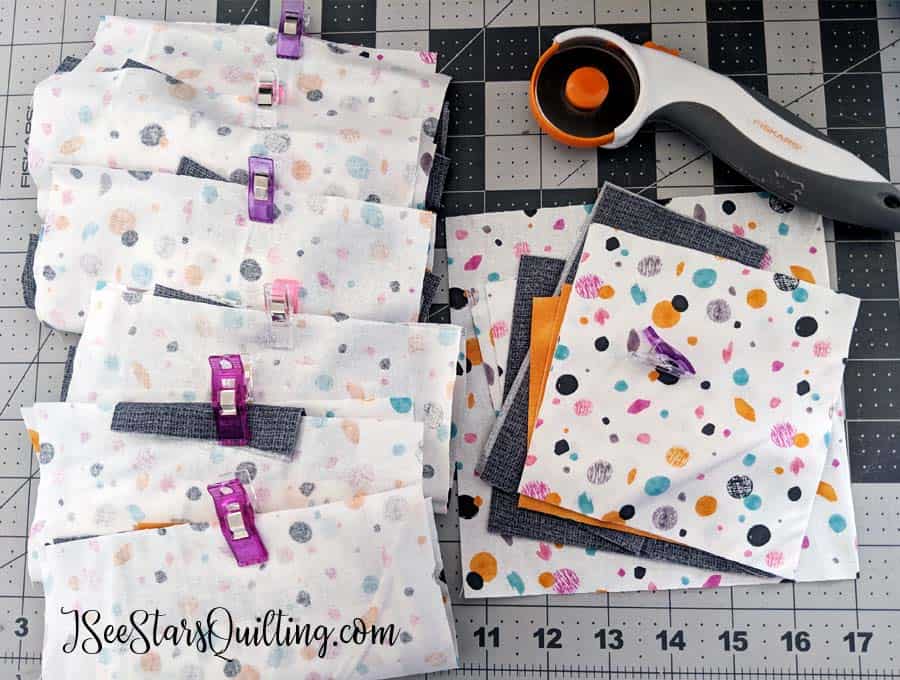
    I like to use these wonder clips and clip each one of my blocks together.

    So whenever I get a few moments to sew a block together, I have everything I need in a nice neat package and ready to go. I don’t have to backtrack and try and remember how many 1×4″ pieces I need or what fabric was I using for the background again? 

    Basically, I’ve dummy proofed the fabric blocks for myself. 

    It’s all here and ready to go. 

    9. Do A Test Block

    If you have a particularly new pattern that utilizes skills you’re not 110% confident in, don’t waste your good fabric on your first block. Grab some scrap fabric or cheap fabric and do a trial run. 

    You’ll be able to work out the kinks and “oooooh! I get it” moments. without having to seam rip all over your desired fabric for the piece. 

    10. Don’t be afraid to be picky

    I am one of the WORST people I know with the phrase “done is better than perfect“. I would whip up a quilt top in no time flat. The seams would be slightly wonky, corners not perfectly met… I said “it shows character”… but that was a sorry excuse for I couldn’t be bothered to fix it at the time

    Over time, I realized that I was really insecure about my quilts. I knew (and remembered) every single flaw and felt really uneasy when people would want to inspect my work. 

    Hanging on a chair or draped over the laps of my children were one thing, but under the eyes of another quilter was an entirely different thing. (and a rather scary thing) 

    I didn’t have any excuses.

    I picked out a rather challenging quilt pattern and vowed that I would be meticulous no matter how long it took me. This was going to be a quilt for me and I was going to learn to perfect it along the way.

    Whenever something wasn’t JUST right. I used the seam ripper and did it again. – Don’t get me wrong, I’m not selling this as a sunshine and roses experience. I was not the most joyful person to be around at that time. 

    But it was a tremendous LEAP in quilting skills for me to finish this project. and really helped me perfect my quilt top piecing. 

    I really hope that you were able to gain some insight within these tips for piecing the Perfect Quilt Top .

    10 Tips for Piecing the Perfect Quilt Top! - These tips are essential for growing your quilting skills and getting your quilting to that next level.

    If you have other advice or tips, please leave them in the comments below. I’d love to hear from you!