Tutorials

Step by step tutorials for quilting and sewing projects from ISeeStarsQuilting.

  • How To Make More Time For Sewing And Quilting

    Thats right… did you know you actually can make more time for sewing and quilting in your day?? No magic potions required. Just a proven strategy to add in more of what you love.

    You may be thinking… ‘But I’m super busy, Christen!

    I would be so rich if I had a dollar for every time someone told me “we all have the same 24 hours in a day!”… ugh… if you could only see my eyes rolling back in my head… because while TECHNICALLY it is true… it is so not a valid reason as to why some of us are able to accomplish everything our hearts desire and us others are left floundering around and never able to find a single moment to produce creative work.

    I’m about to share 10 tips that you can start to put into practice today that will give you more sewing and quilting time.

    Most of them are centered around being a busy mom, because hey… I can only teach what I know, right? But these tips work for every single busy person in this world who needs a little help juggling life and a passion for quilting!

    (And as promised, NO magic wands involved… but if you happen to find one, I would *LOVE* to borrow it… just for a few hours? I do promise to give it back!)
    10 Tips to make more time for sewing and quilting

    Plan Out Your Calendar

    I use google calendar because I like having the notifications and reminders come up on my phone. I really love paper planners but I’m helpless if I accidentally leave it at home. Use whatever you feel comfortable with.

    You need a place to write everything down – Everything that is going on in your week. Every appointment. Every commitment. Everything.

    You need to be able to look at your week at a glance and see what is taking up all of your time.

    See if you can make any adjustments right away such as making all appointments or meetings on one day of the week instead of different days.

    I really love this planner! It is one of my favorites and I always feel so much more organized and on top of things when I have this planner in use!

    Write “creative time” on your calendar

    That’s right. It really can be that simple.

    Make a date with yourself. Write it in pen and don’t let it get tossed around like it doesn’t matter. Make the commitment.

    You wouldn’t ever miss an appointment with a doctor, would you? No, because you respect that that time is important for your health. Give yourself the same respect. Your creative time is important for your mental health and happiness.

    Even if you can only squeeze in 30 minutes here and there… it is absolutely worth the time spent because it will add up in the long run to making big progress towards your project goals!

    Remember when you were a teenager and you had plans to go out Saturday night? Remember looking forward to it all week long?! Yes, bring back that giddy happy feeling again!

    I find that it really helps me get through a particularly tough spot in the week if I know I have an hour planned to sew in the evening!
    Finding more time to sew and quilt in your day can be difficult... but it doesn't have to be impossible! here are 10 ways you can find more time in your day TODAY!

    Pick Your Projects With Purpose

    You may already have a list of projects that is a mile long. I know I do.

    I tend to get super excited about a project and am all in. (nevermind about those other projects I have that aren’t finished yet) I buy a new pattern. then I’ll buy the fabric and I start making plans. I have tunnel vision for only that project… until something comes up and I have to take a break. Then the project has to take a backseat for a while and the initial inspiration spark dies off a little at a time.

    Choose a project that speaks to your soul and has a specific purpose (even if it is just that you really want to make a turquoise quilt!)

    If you have a quilt that you are making for another person, you’ll be more likely to finish it because you’ll have the motivation of seeing how much they love your beautiful quilt to help push you through the less than inspired moments.

    Only work on things that bring you joy

    This goes with what I said above, but it is important to point out that you’ll have a lot more fun working on things you love than forcing yourself to work on things that you don’t.

    Example: I don’t like working with dull colors. Bright and happy bold colors inspire me and leave me feeling energized. If I have to make a whole quilt out of dull fabrics… I can do it, but I will find much more joy working on a quilt in my favorite fabrics.

    To keep up with your project list – I created a FREE handy Quilt Planner!
    Download this FREE quilt planner and get organized so that you can create more! 6 pages of everything you need. nothing you don't!

    Clean Out Projects That No Longer Inspire You

    If you were working on something and you have lost that spark of joy for it… it is ok to let it go.

    Take one more thing off of your plate and cross it off of your to-do list.

    There is no sense in letting it hang around on your to-do list if you really deep down have no desire to work on it again. It is just causing you to dread it forever at that point.

    Sometimes when you have both money and time invested in a project, it is hard to let it go… but it is taking up physical space and mental space at this very second. How much is that worth to you?

    Make some more room for things that you really do love and are really inspired by right now!

    Give up all house chores!

    haha… just kidding. I wish this were a possibility. I feel like I’m really the only one who cares about the state of our home. My kids would be happy to live in a dump.

    I hate laundry and I hate doing the dishes… but I know myself. If I leave those chores until “after I sew”… I can guarantee they won’t get done and I’ll be sorry tomorrow.

    I’ve developed a reward system (yes, like I’m a total child). I will set a timer for 10 minutes and do a total speed clean of my dishes and kitchen, then throw a load of clothes into the washer and after the timer goes off… THEN, I SHALL SEW!

    You would be surprised what you can accomplish in 10 minutes if you have something really great as a reward!

    Quit saying Yes to everything

    Its really hard when the opportunity for plans comes up and you want to say yes to everything.

    It might be because coffee out with friends does sound really fun even though you’re already really busy. Or it might be because you don’t want to hurt anyone’s feelings by saying that you can’t help out with the community project right now. Of course, you feel like you SHOULD want to babysit your grandchildren every week, right?

    Let’s get one thing straight here… Saying “yes” isn’t the problem… the problem is saying ‘yes’ to everything! It leaves you overscheduled and unable to find the time for yourself that you crave.

    When faced with a commitment decision as yourself:

    “Would I rather do _____ or sew?” – then, you will have your answer to if you should say yes or not! πŸ™‚

    Evening Sewing Dates

    I like having set nights during the week where I know I am going to be able to sew.

    My kids are relatively hard sleepers and have never complained about the noise of the sewing machine. Even still… I think I could figure out a way to get all my cutting done at night or plan my next quilt etc.

    My husband and I sat down and discuss our weekly evening plans. I work out what plans we have for the week regarding the kids, friends etc… then I set aside an evening for us to relax together. We like to watch movies or play a game… whatever. It changes weekly.

    Then, I set aside an evening for us to work on our own individual items. He will work on whatever projects he has going on and I will work on my sewing.

    No one feels left out because it is something we discussed prior and we have already made each other a priority by making sure we have other evenings scheduled. win win!

    Finding more time to sew and quilt in your day can be difficult... but it doesn't have to be impossible! here are 10 ways you can find more time in your day TODAY!

    Put your phone away

    Quit wasting pockets of time by checking your social media and other outlets or playing mindless games on your cell phone.

    I get a lot of inspiration and ideas from looking at Pinterest and other creative blogs… but if I spend all day looking, I’ll never actually get to the point of creating! and that becomes wasted time!

    Set a timer or make it a point to remember that you are the boss. You decide when enough is enough and you need to have a break from looking and start using that time to create!

    The Sticky Note Bread Crumb Trail Method

    Sometimes I only have 10 minutes to sit down and work on a project, but 10 minutes is better than nothing so I’ll get to work right away.

    If I have to get up and leave, I jot a quick note down on a sticky note. I like to leave notes about where I left off or what I was about to do next.

    Sticky notes are like a bread crumb trail for the next time I sit back down to sew. I’ll quickly remember what I was doing and be able to pick back up right away.

    Stop Making Excuses as to why you “can’t”

    A bit of tough love here…

    You are the only one who is keeping you from being able to find more time to sew and quilt.

    Ouch, right?

    If you are just dying to find more time to sew and quilt and the hours in your day feel really limited… Show yourself some love, sister! It’s time that you buckle down and find the time you so desperately want!

    You can do this!
    Finding more time to sew and quilt in your day can be difficult... but it doesn't have to be impossible! here are 10 ways you can find more time in your day TODAY!

    For more helpful tips that give you more actionable steps that you can take today, download my free guide: A Busy Girl’s Guide to Quilting.

  • Do You Want Better Quilt Piecing? Here is how to get it!

    The easiest way to improve the craftsmanship of your quilts is to perfect your piecing. (say that 5 times fast!) If you’re not entirely happy with your piecing and you want to have Better Quilt Piecing, I’m going to share my tips with you today!

    First, the difference between a total beginner quilter and an expert quilter is obviously practicing… More experience = more knowledge on how to work around the ins and outs of sewing and this issues that come up… but that doesn’t mean that you have to wait years down the road to be a better quilter!

    You can start TODAY!

    Right now even!

    Want better piecing? - You don't have to wait until you have years of experience behind you! You can totally be better today with these few tips!

    The biggest differences between the beginners and advanced can be seen in the tiny details…

    How many times have you thrown up your hands in frustration and said “ah! I don’t care if that seam doesn’t meet up perfectly. I can live with it not being perfect”? Then, instead of picking out that seam to fix the errors, you just kept moving forward, and never looked back?

    Don’t be shy. I’m guilty of it too… it is ok!

    In fact, I used to tell everyone “don’t look too close” when they would ooh and ahh over my latest sewing masterpiece.

    How is that for confidence???

    If anyone had a terrible case of sewing insecurities, it was me! I wasn’t worried things would fall apart at the seams or anything… but I didn’t want anyone inspecting my handiwork.

    Too many of those quick little “oh well!” decisions and my quilt tops looked like someone gave a 13-year-old a sewing machine and some half-hearted instructions and left her to fend for herself.

    It was pretty rough, let me tell you…

    It was a decent attempt, but nowhere near what I had pictured in my dreams.

    There was a lot that I would let slide back in those days because I didn’t want to take the time to go back and re-do it.

    I’m not sure if it was laziness on my part or just sheer willpower to plow my way through thinking more practice was all I needed to get better…

    It was the voice of a sweet friend that finally called me out on this vicious cycle of making something that took A LOT of time, effort and money and then not being able to be proud of my work because all I saw were flaws.

    Bless this sweet woman for calling me out. When someone who knows way more than I do tells me what to do… I listen.

    If you're looking to up your quilting game with some new tools, you're in luck! Don't just go buy what you THINK is going to be useful... read this first so you KNOW from a seasoned quilter what is going to be the best bang for your buck!

    I’m sharing her advice with you today You should listen too…

    If you want better piecing, pick a pattern and work on your piecing until its perfect.

    This “piecing project quilt” doesn’t have a time limit unless you give it one… but it will be the one that you give the title of No EXCUSES to.

    I’m not going to lie and tell you it was all rainbows and unicorns. There were some frustrating moments and some lessons learned along the way… but I promise you will have better piecing and more confidence to show for it if you follow these steps!

    Proper cutting is essential

    You can’t expect things to work out properly if you aren’t cutting your pieces precisely. That is step #1. It is just like a recipe without any measurements. You’re never going to get the exact right outcome if you don’t start with the right pieces.

    Check out this post on which rulers are my favorite and most used!

    I pulled out my seam ripper more times that I want to admit.

    If something isn’t right, fix it now. Don’t move on and say “oh well” or “I’ll come back to it later”. Re-do the seams that aren’t perfect and make it right.

    Check and Measure Your Seams

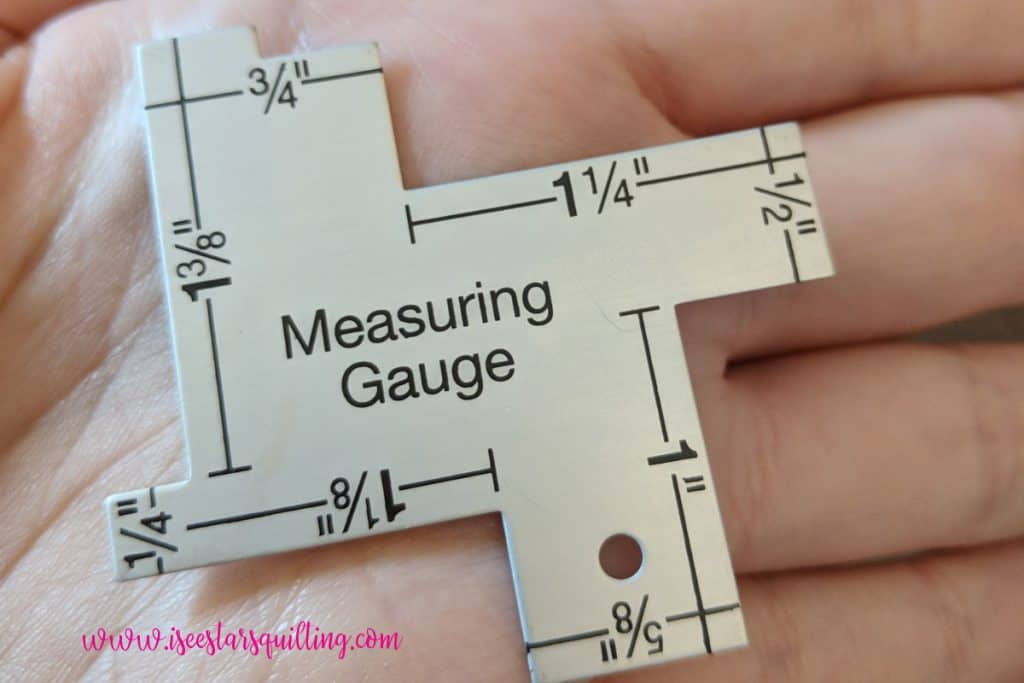
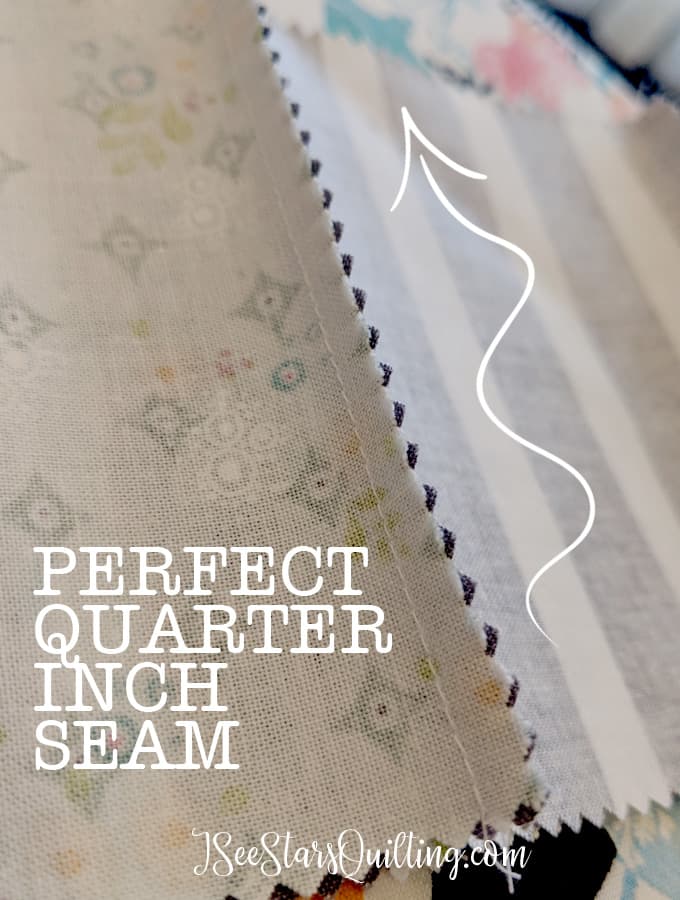
    I became obsessed with measuring my quarter inch seams for accuracy (something I wasn’t diligent with before)…

    Tiny Quilting RulerQuilting rulers are essential in the sewing room for quilting and DIY projects. which ones are absolutely essential so you don't spend a fortune? Read here www.iseestarsquilting.com
    This little handy guide stayed next to me as I worked!

    Staying consistent with your seams

    Guess what? Just by mastering my quarter inch seam and being consistent…. 70% of my inaccuracies disappeared.

    I was kind of shocked… no, REALLY shocked actually…

    Seams began to line up without having the stretch the fabric so tight to MAKE it work.

    Nesting your seams is a VITAL tool in quilting. It will help you get that finished and polished look on your quilt and cut out those rookie mistakes where your corners shift and seams don't line up. This is an easy trick that any quilter can use! Try it out on your next quilt. You won't be sorry!
    Sew straight seams

    This one takes some concentration, but it is a big one that goes with seams consistency. Here is a whole post about How to Sew Straight Seams even!

    I also created a product that has helped improved my straight seams so much. Y’all, I can’t even put it into words sometimes. I’ll even pay the shipping for you anywhere in the world (Yay! FREE shipping!!) and you can find it here in my store if this is something that you struggle with. So many people have had wonderful success with the Straight Seam Guide.

    Nest your seams

    I know, I know… everything has to do with yous seams! But it really is completely in the tiny details of your quilts!

    If you don’t know how to nest your seams, you can check out a whole post complete with a tutorial video. It will change your life.

    Measure measure measure

    In my old quilts… I really prided myself on being kind of a hippy quilter? (if that is a thing?) I didn’t have to measure everything… good enough was good enough and I liked being able to go with the flow and sew how I wanted to. aka, typical artist thinking she knows everything she needs to know and likes doing her own thing haha…

    The problem is, I was not a hippy quilter when it came to the end of the process. I morphed into ashamed and naive quilter who wasn’t all that proud of what she had made.

    And that is totally ridiculous. I’m so happy that I finally said enough is enough and I fixed it!

    I had to learn to measure more than once. Check check and double check everything.

    The pattern said that A + B will equal C, and darn it… I was going to have C! So I figured out how to get my As and Bs just right!

    What I wish I had known all along…

    Do you know all those quilts that I had made where I just assumed that I “needed more practice” as I zoomed past those little mistakes and left them in the dust? If I had just taken the time to fix them as they came up, I would have been a better quilter years ago!

    I didn’t need more practice sewing (though mastering my seams was a HUGE improvement) I just needed to slow down and work on those tiny little steps one at a time.

    Now, measuring and checking and precise cutting… it is all second nature behavior in my sewing adventure! I’m like a precision MACHINE!

    Now, I can still make a quilt where I don’t have to measure and can let my inner hippy free spirit quilter come back out… but even she has higher standards now πŸ˜‰

    Want better piecing? - You don't have to wait until you have years of experience behind you! You can totally be better today with these few tips!

    My quilts still have flaws

    They always will… every single quilter I know still makes mistakes and is “still learning”.

    I’m not a perfect quilter by any means, but I don’t hide my quilts like I used to. I love them.

    Be proud of yourself at any level you are and know there is only room for improvement as you work on each quilt slowly progressing towards the next one!

    I can’t wait to see how your next quilt looks after you put these steps into practice! Let me know in the comments what you think!

  • Link Party of Quick Sewing Projects!

    We all could use more of these fun projects in our arsenal of future projects, right? Like, I know there aren’t already enough hours in the day to finish what I want to sew… but yes, I still need more ideas so I can have options. Options for more quick sewing projects to suit my every mood!

    Have you noticed how I’ve really been focusing on using up my scraps lately? I think I’ve been super productive! It has forced me to really look at just how useful even the tiny scraps of fabric can be used over and over in different ways.

    Here are 13 Quick Sewing Projects you can add to your collection of Amazing skills!

    These Quick Sewing Projects are going to rock your world! There are tons of ideas and ways to use up your scrap fabric as well as give you quick satisfaction and maximum gratification! I LOVE sewing!

    Patchwork Coasters

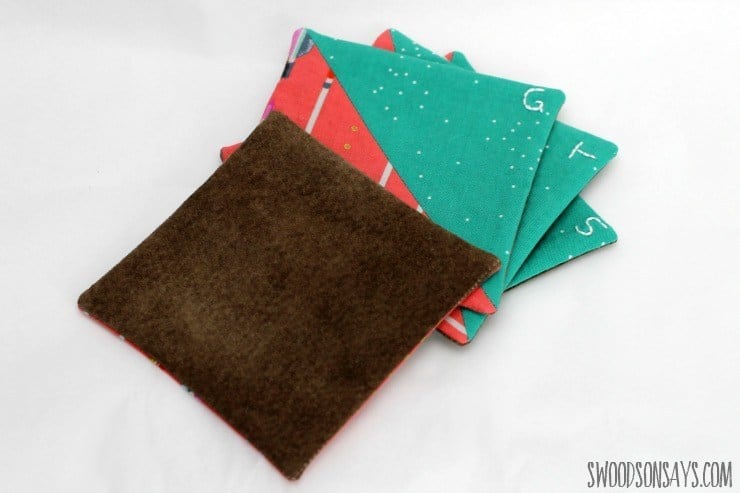
    These patchwork coasters from Swoodsonsays are super cute and such a fun scrap fabric buster. She even used an old suede jacket from a thrift store find as the backing! Absolutely genius!

    She uses a simple HST (half square triangle) to make these come together really quick. You can use this idea as a starting point and come up with your own block patterns.

    These would make precious gift sets for a housewarming present!

    Pretty Little Tissue Holder

    As a crafty momma who loves all things handmade, I HAD to make up several of these years ago when I first saw them on Pinterest. (follow me!)

    They have held up really well and allow me to use my favorite fabrics (or leftover scraps!) and keep them close to me where I see them often.

    The Gingerbread House gives a superior tutorial with nice photos so you can know exactly what you should be doing at every single step!

    Check out this tutorial here.

    Easy Zipper Pouch

    This sews up so fast that you can easily make several of them in an afternoon and knock off half of your gift list! I used them for teachers gift at the beginning of the year and filled them with goodies! Check out the tutorial here.

    DIY TLC Teacher Kit - This Zipper Box tote comes together in less than an hour! Fill it with goodies and take care of your teachers #teachergift #ZipperBoxtote #easygift

    The Pillow Pocket

    Seriously such a favorite gift for every single kid that I’ve made one for (and there have been A LOT who have received this gift…)

    But don’t count this as just a kids gift! College students and all grownups alike enjoy a comfy pillow that holds all their favorite lazy day essentials!

    It comes together fast. Sew Simple Home gives a FREE step by step tutorial on her site. Check it out here.

    Taggie Blanket

    Don’t act like you haven’t made at LEAST one of these cute little taggie blankets for a baby gift! They’re so quick and much more coveted than anything you can buy in the stores! Just make sure you back-stitch over the ribbon sections to ensure a strong and lasting hold!

    Amber Oliver gives an awesome tutorial on just how to make the perfect one! Click here to see her tutorial.

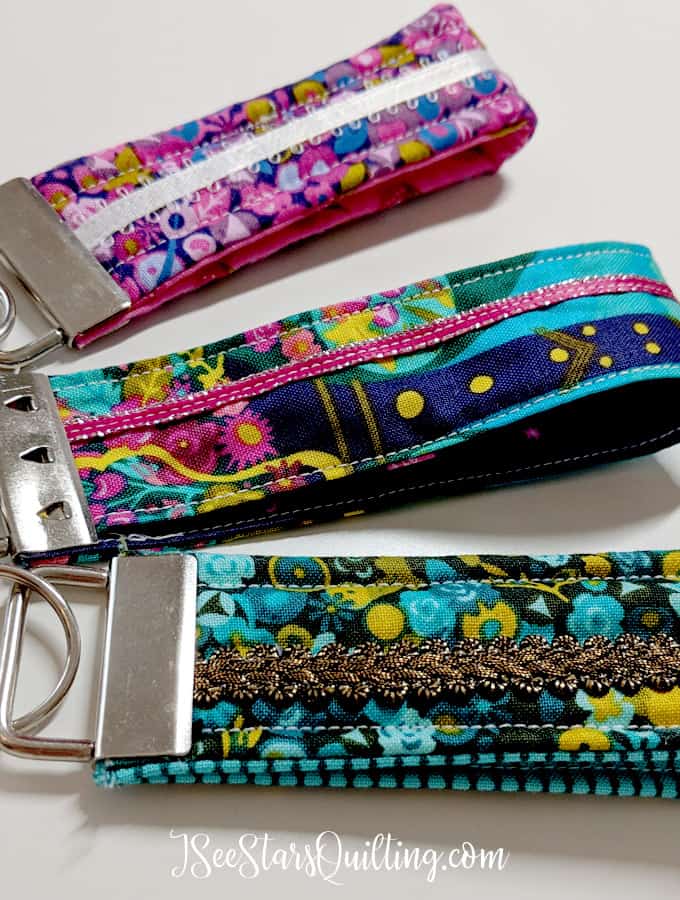
    Fancy KeyFobs

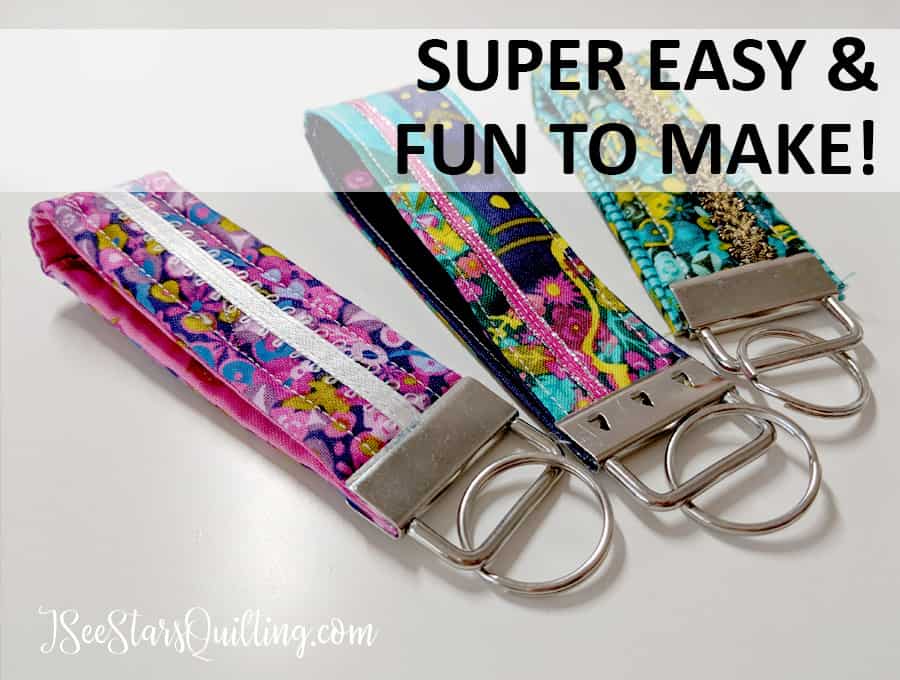
    I love making these up for graduating high schoolers about to embark on their college years! Check out just how easy and fun these are to make (and use up your scraps too!

    DIY Easy Key fob project sews up super fast and is perfect for teens, pre-teens and happy people of all skill levels! These are such a fun DIY gift... AND an amazing scrap stash buster!

    Child’s Apron

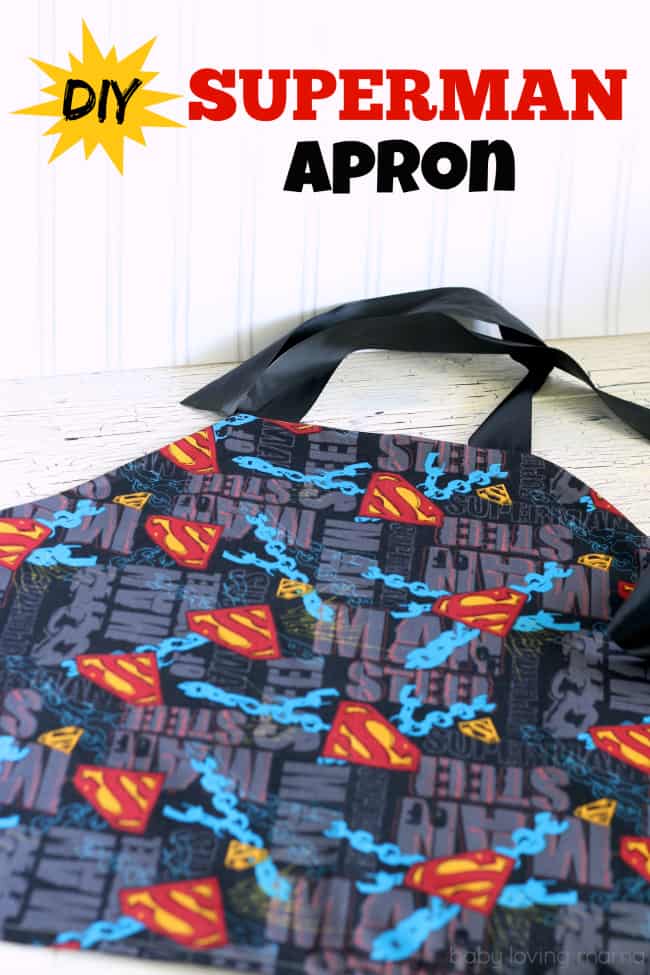
    Emilie over at Finding Zest shares how to quickly pull this super cute apron together! See her tutorial here.

    Throw Pillow Covers

    Ever just look around at your house and feel… blah? Like you just need a little change? Throw pillow covers are your solution! Change them out seasonally or just because you feel like it πŸ™‚

    Jessica Welling Interiors will show you a quick and easy way to DIY your own throw pillow covers. Check out her tutorial here.

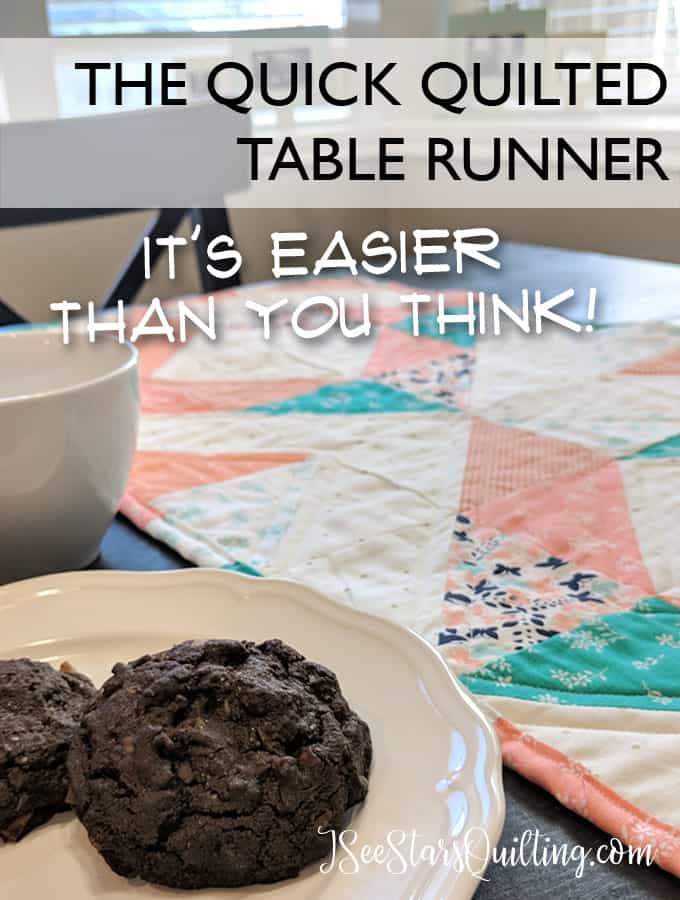
    Quilted Table Runner

    This is another easy way to add a little color and change up your house for the seasons! Check out the tutorial here.

    This Quick Quilted Table Runner is something I whipped up for a quick hostess gift, but it has so many endless possibilties I will be making several more for holiday family gatherings. These make great handmade gifts!

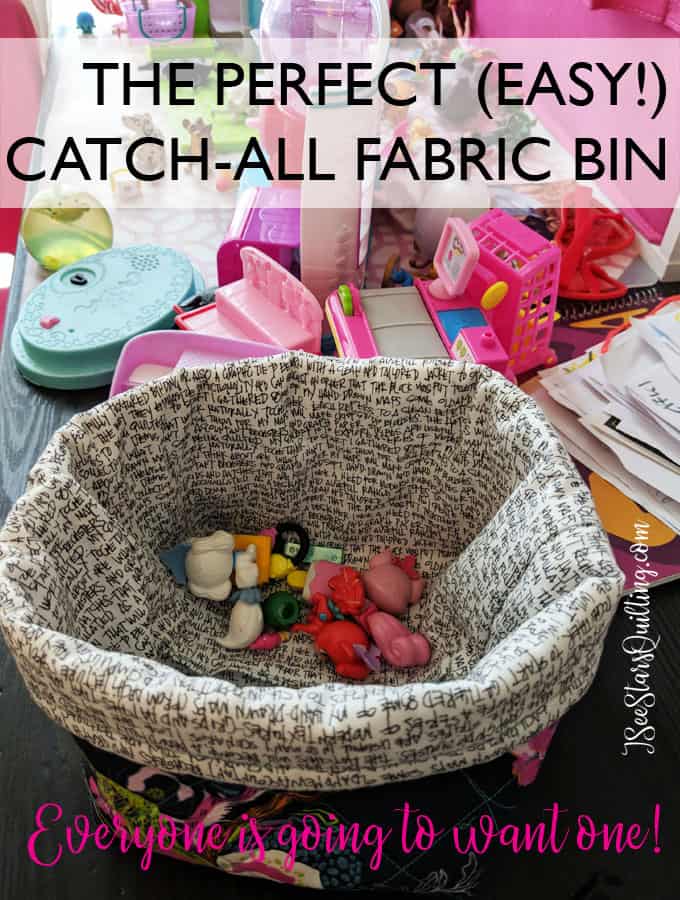
    Catch-All Fabric Bin

    These are an awesome use of fat quarter fabrics! Check out the tutorial here.

    This cute fabric bin can be made in an hour and can be used all over the house! No extreme sewing skills required... its so easy!

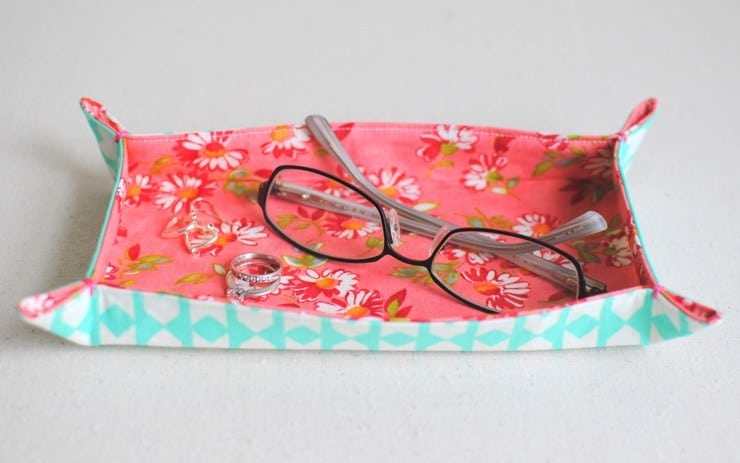
    Fabric Catch-All Fabric Tray

    Did someone ask for ANOTHER use for pretty scrap fabrics?!

    These fabric trays are a wonderful addition to your home. I like to use them a lot in my sewing room because I’m always needing a way to corral little tiny things I’m working on whether is it little bobbins or a thread catcher etc.

    Clover & Violet shares just how easy it is to make your own fabric tray! See the step by step here.

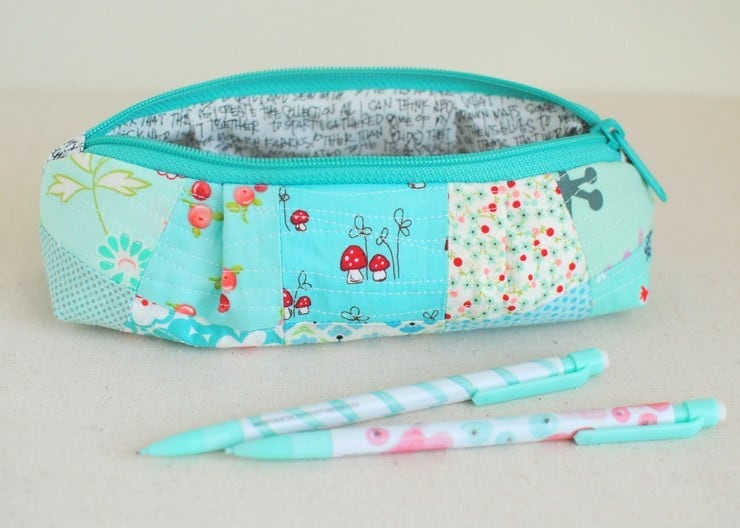
    Cute Pencil Pouch

    This one is also from Clover & Violet. I love love love how cute this pouch turns out! Check out the tutorial here.

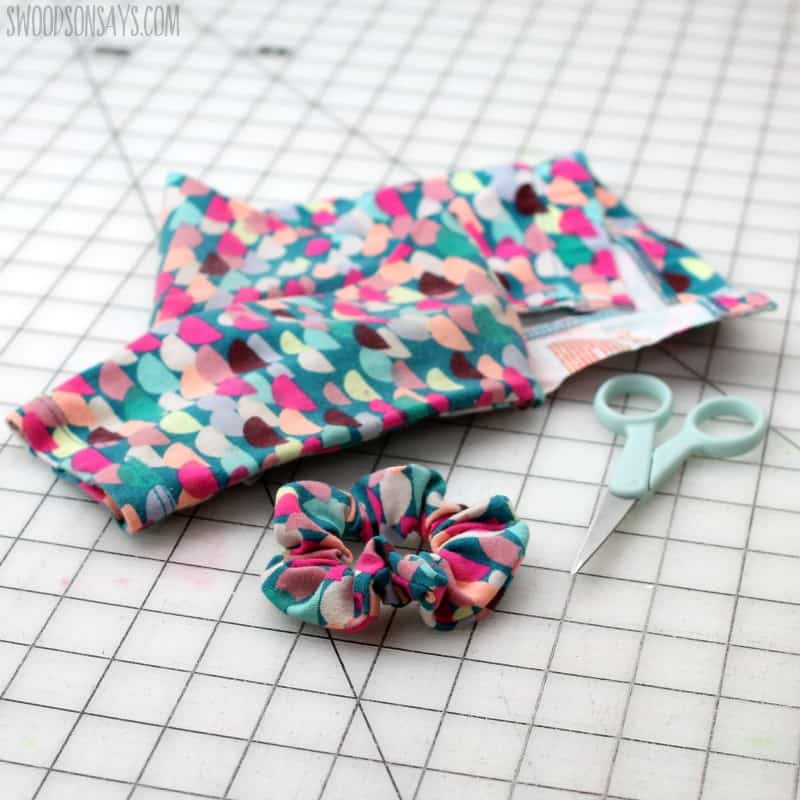
    DIY Hair Scrunchie

    Yes, these were like… all the rage in the 80’s and as a collective whole, humanity kind of left them there for a while but ponytail headaches are real and cute scrunchies are making a comeback again. (yay girls!)

    now you can make your own to coordinate with your favorite outfits and be stylish and handmade wherever you go!

    Swoodsonsays has a super easy tutorial for you here.

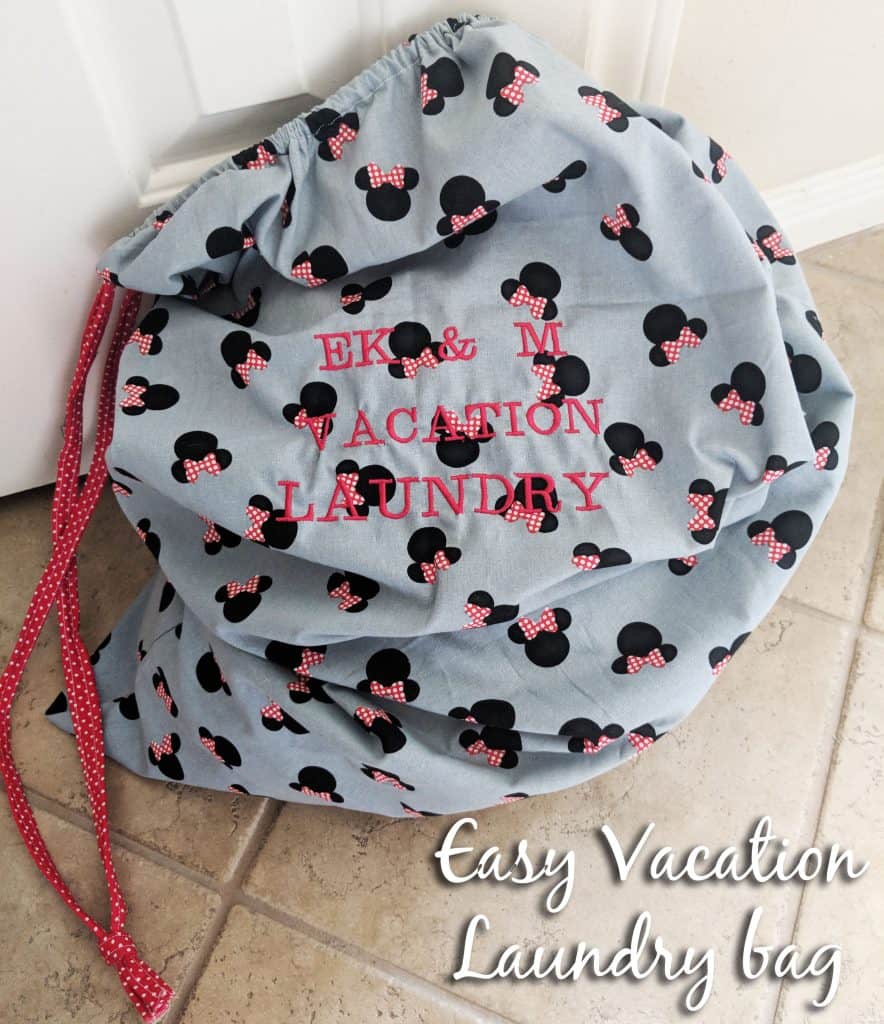
    Vacation Laundry Bag

    This has been one of my most popular blog posts… It sews up in less than 15 minutes and you’re ready to set off on a magical vacation! Click here to see the details of how quickly it comes together!

    This darling vacation Laundry bag will take no more than 15 minutes of your time and will be a Sanity saver on your trips!

    Whew! That should be enough to keep you busy for a little bit!

    I hope you enjoyed my list of quick sewing projects! Leave em a comment and let me know which is on the top of your list to try out!

    Happy Sewing,! — Christen

  • Scrap Fabric Projects: Easy DIY Key fobs

    I shared a fun DIY project last week that was so successful and I had such great feedback that I decided to share another fun and easy DIY project this week again! And this one is a scrap fabric buster! – All those pretty little leftover bits can get repurposed into these lovely little easy DIY Key fobs!

    We quilters LOVE fabric… one might even happily accept the accusation of a “fabric hoarder” and not even bother trying to deny it… (And by ‘one’, I mean me… we’re talking about me.)

    I love fabric. Isn’t it beautiful to just keep it and stack it up all nice and pretty and display it like beautiful fine art… I just can’t help it! You can take a tour my sewing room and see my space here

    I have this area where I keep all my scrap fabrics, but I also have a separate little area where I keep my tiny scrap fabric bits. (organization is not entirely insanity)

    These itty bitty bits are all pieces of fabric that I just couldn’t part with but do not necessarily have enough fabric to do something really big and grand with.

    I have hopes of finding their perfect project use someday… so I only save the best scraps and tuck them away until an idea like the one I’m going to share with you comes along…

    How to make your own scrap fabric DIY Easy Keyfobs

    These are so so easy and so useful! They make super cute homemade gifts and are completely custom for the gift recipient.

    First things first – Dig through your scraps

    I looked for long and skinny strips. At least 3″ wide x 10″ long.

    You an also sew several smaller pieces together and create a patchwork effect to your keyfob if you desire.

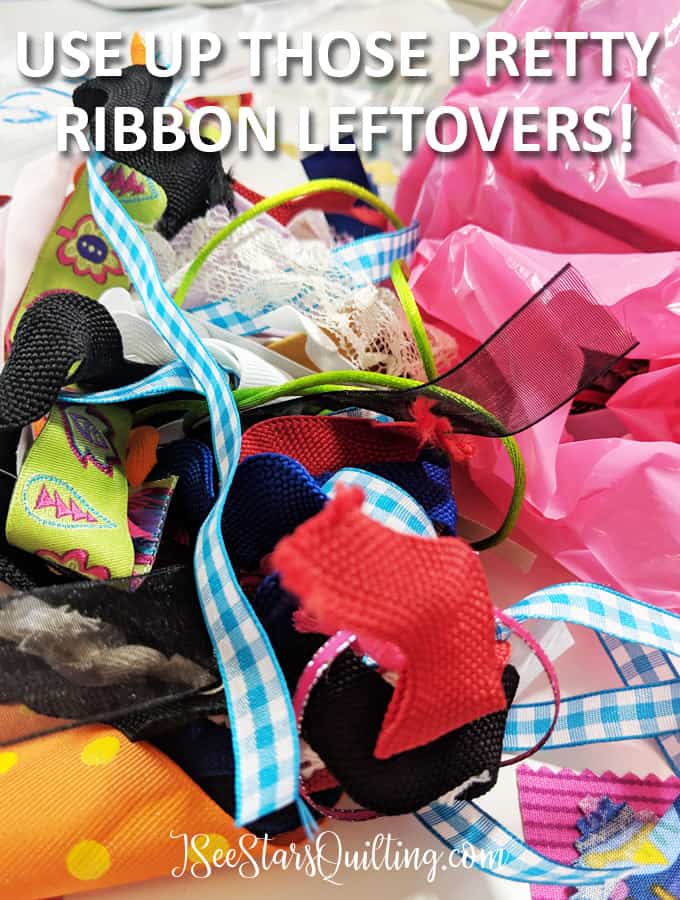
    I also hit up my ribbon and sparkly things stash to add just a little touch of extra pizzazz to my creations.

    Whats that? You don’t have a huge selection of craft ribbons? That’s ok… get together with your sewing friends and do a trim and ribbon exchange! See if anyone has anything they’d like to donate or offer to make them a key fob in exchange!

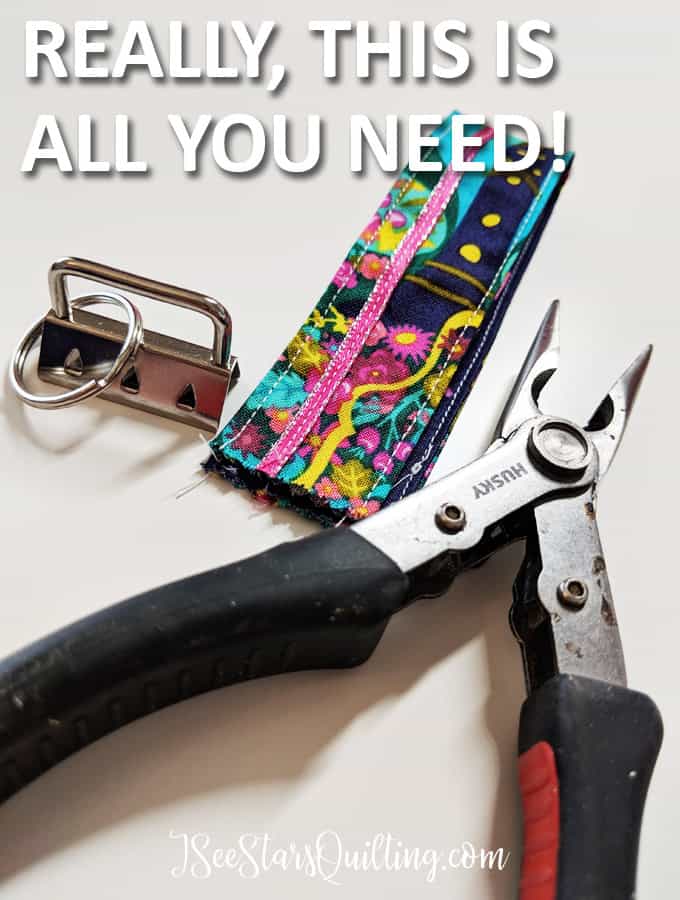
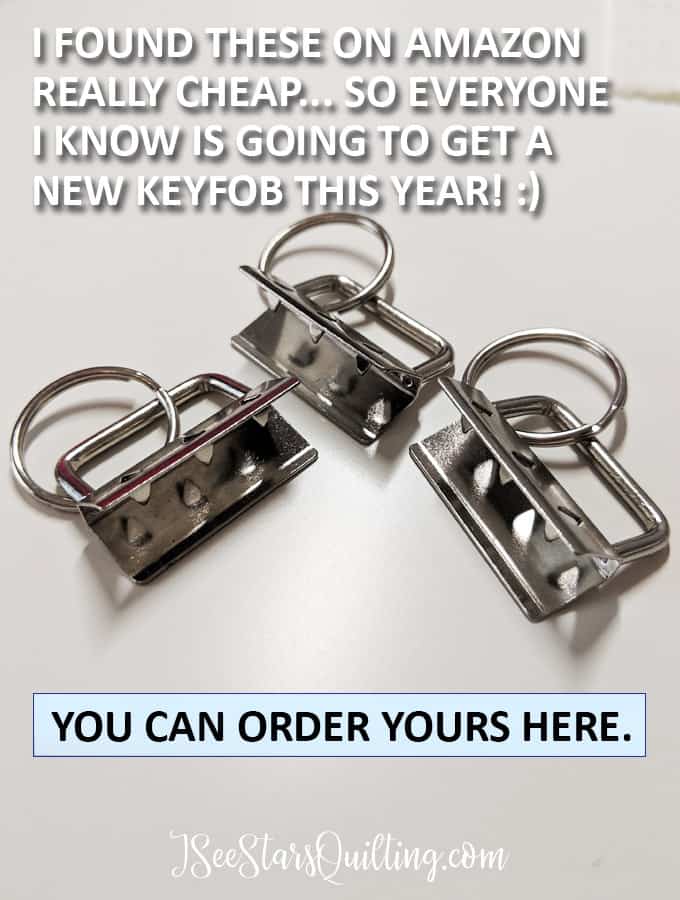
    You’ll also need the keyfob hardware and a pair of pliers or something that you can squeeze the hardware shut with.

    Next, measure your hardware

    I used this exact brand of keybob hardware. While I imagine that they are mostly similar no matter what brand you buy, you should measure your exact piece to make sure the finished product fits as you want it to.

    Mine measure exactly at 1.25″ wide.

    Then, cut your fabrics

    I added 1/8″ seam allowance for each side and cut my fabric:

    1.5″ wide by 7″ long (do this for 2 different fabrics)

    Why would I do 1/8″ instead of 1/4″ seam allowance?? – Simple trial and error. I did the 1/4″ seam allowance first and found it to be too bulky in the finished product. Just preference, but you can try it out for yourself and let me know what you think!

    Get ready to sew

    Lay your fabrics right sides together and sew 1/8″ down both sides. do not sew over either of the ends of your fabrics.

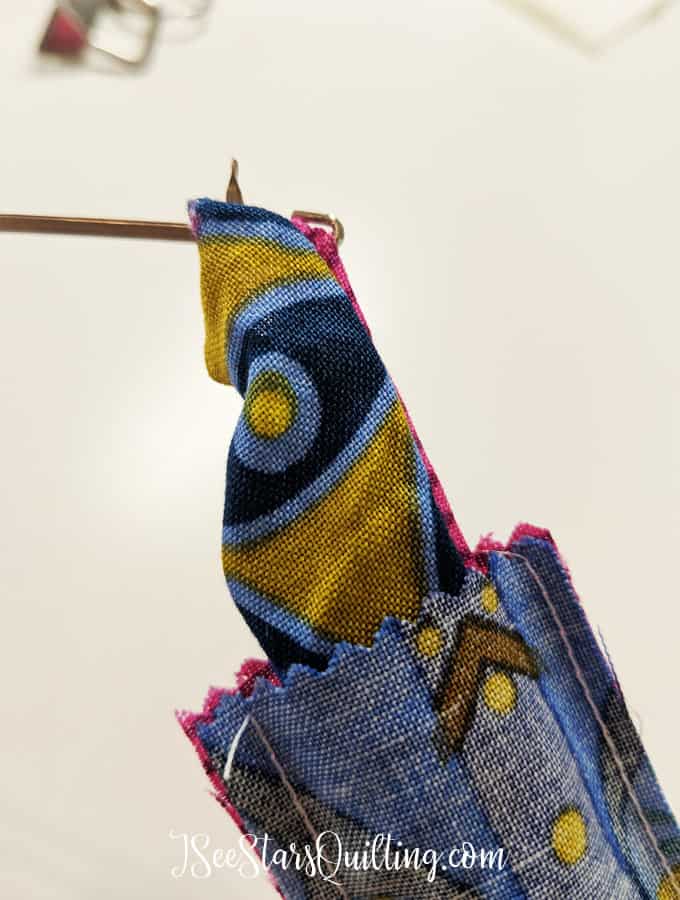
    Turn the piece right sides out

    This can be a little tricky. But once you practice a few times, you’ll be a pro at it.

    I use this little device that is specifically for turning your seams out. it has a really fancy name and everything… it’s called a loop turner. haha We sewists really are creative folks… just maybe not in the tool naming department?

    PRESS flat

    Sorry, I didn’t ask if you wanted to drag out your iron. You just have to, ok? and don’t whine about it either. No one likes whine unless there is cheese with it (get it? whine? … wine?… cheese and wine?? ok maybe that one is better out loud…)

    Pressing is essential in this step to get everything where it should be and where you can confidently proceed to the next step…. which is….

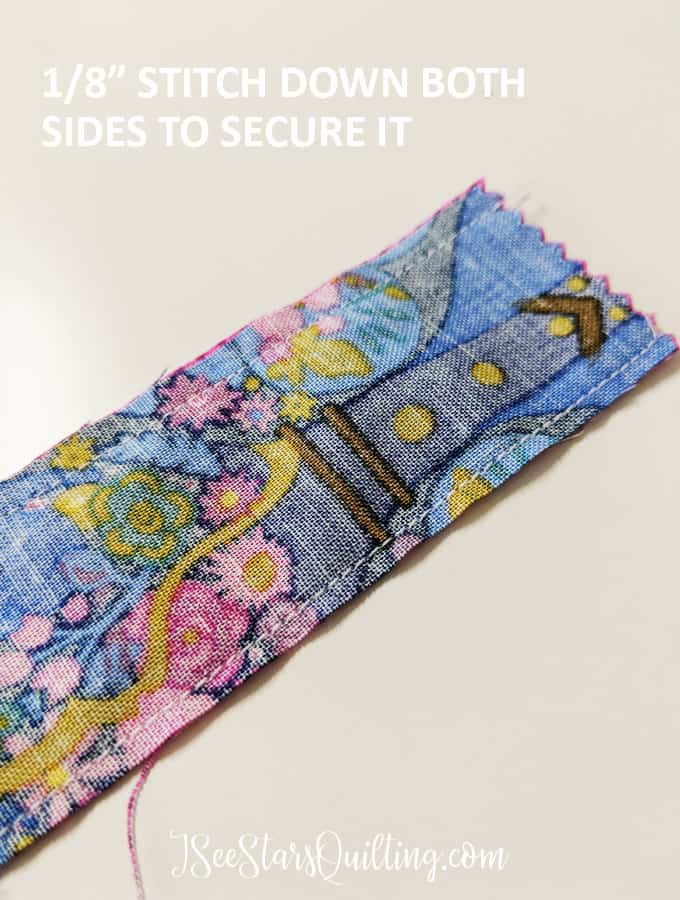
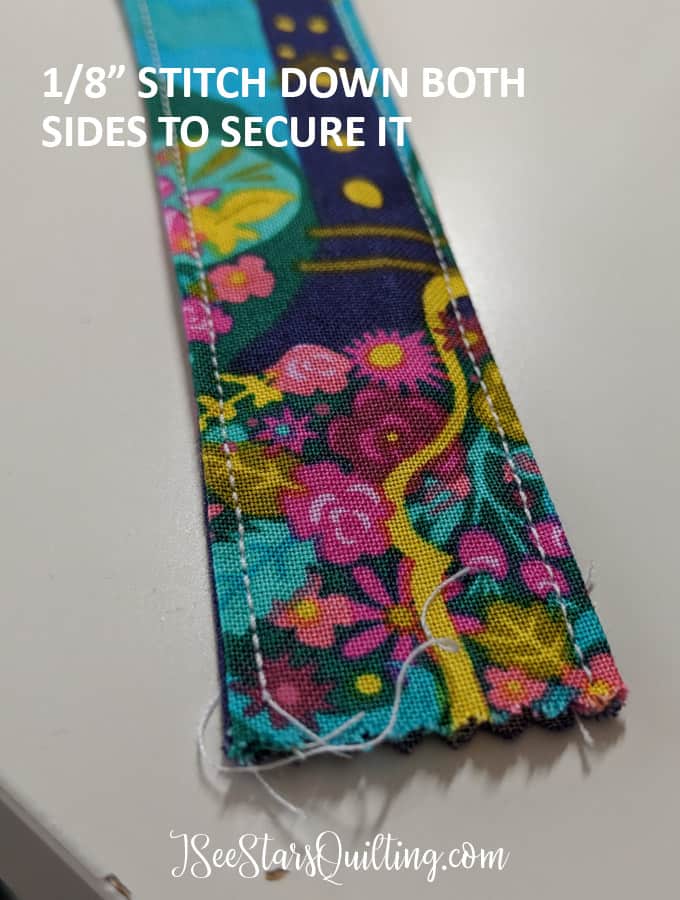
    Secure both sides by stitching again

    don’t worry about the ends, they’ll be tucked inside the hardware so you don’t need to do anything with them. just sew down each side at an even 1/8″.

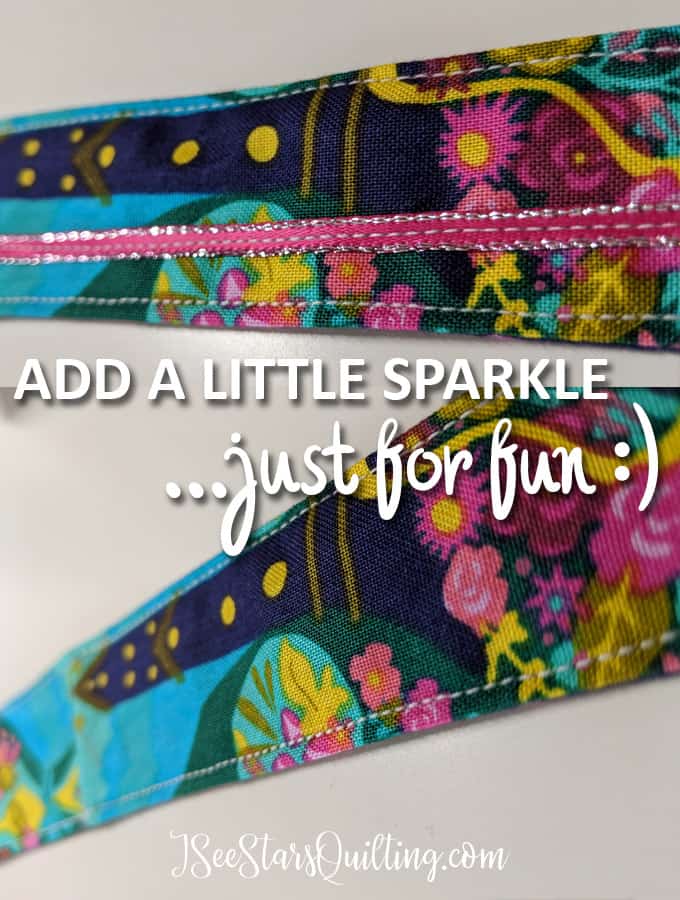
    If you want to break out some of your fancy sparkly thread or decorative stitches to add some extra flair, go for it! You be you and add some of your own sparkle!

    Decorate! Add even more sparkle and flair to it!

    All those little bits of pretty ribbons? this is the perfect place to use them! you only need a bit… so add it in and make it beautiful!

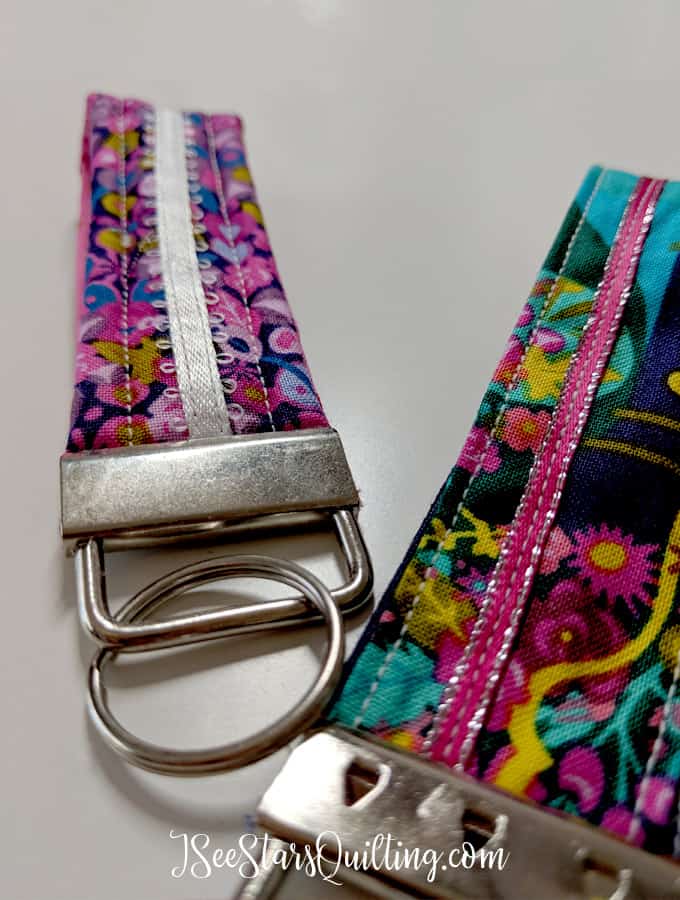
    Fold in half with raw ends together

    There is an actual tool that is made to clamp your key fob hardware together. I ordered it, but the hardware got to my house first and being the impatient person that I am, had to try it out anyway πŸ™‚

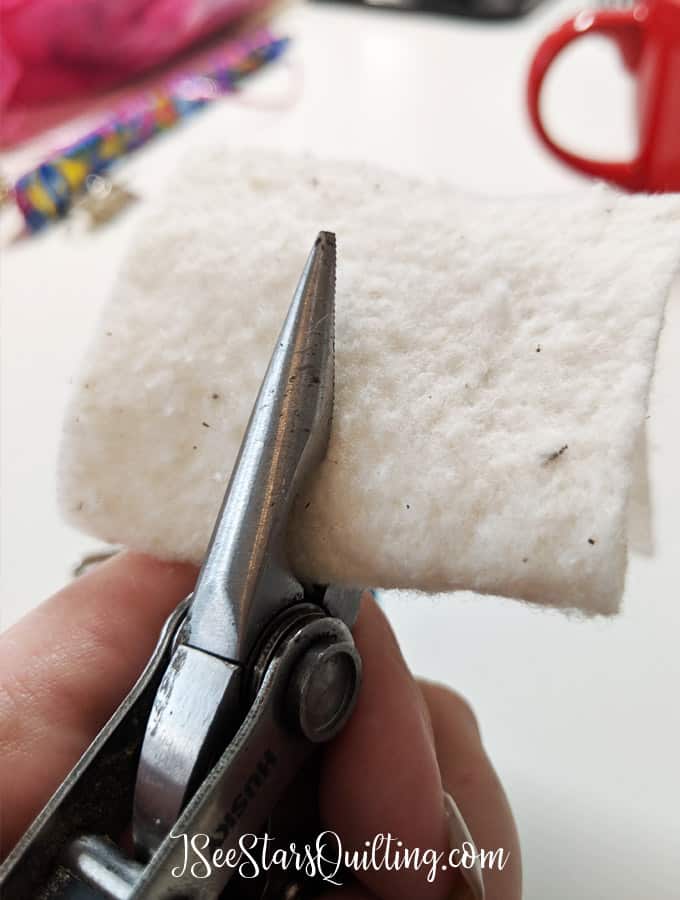
    My brain said that the regular set of needle nose pliers would work just fine.

    I was a little afraid of scratching the shiny hardware or leaving dents with the teeth on the pliers so I just padded them down with a little scrap of quilt batting.
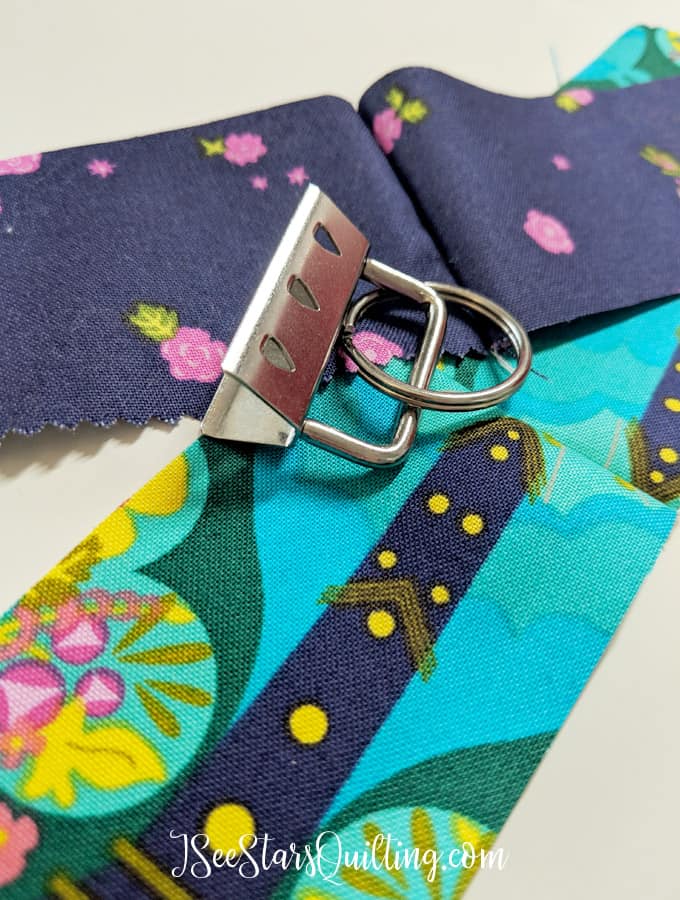
    Place the raw edges inside your own hardware and secure it

    I worked slowly, keeping an eye that my fabric wasn’t shifting out of place and worked on either end of the open clasp until it was securely shut.

    Voila πŸ™‚ … now go many another one!

    While using standard pliers is a totally cheaper and do-able method… I suggest using the pliers that are meant for squeezing the key fob hardware shut because it creates a more even force to shut the jaws around your fabric. it was much easier my second time around.

    Experiment

    Now that you have the basics of a DIY easy key fobs project… play with it some more!

    Use those decorative stitches, even if it is just playing with your zig-zag stitch. play with fabrics on the interior and exterior.

    Play with ribbons and trims and sparkle, oh my!

    You can embroider and embellish to your hearts content and then give to your favorite people so they can carry it with them everywhere!

    Who are you going to make one for first? Let me know in the comments!

    Happy Sewing!

  • DIY Fabric Bookmarks – What to do and what NOT to do

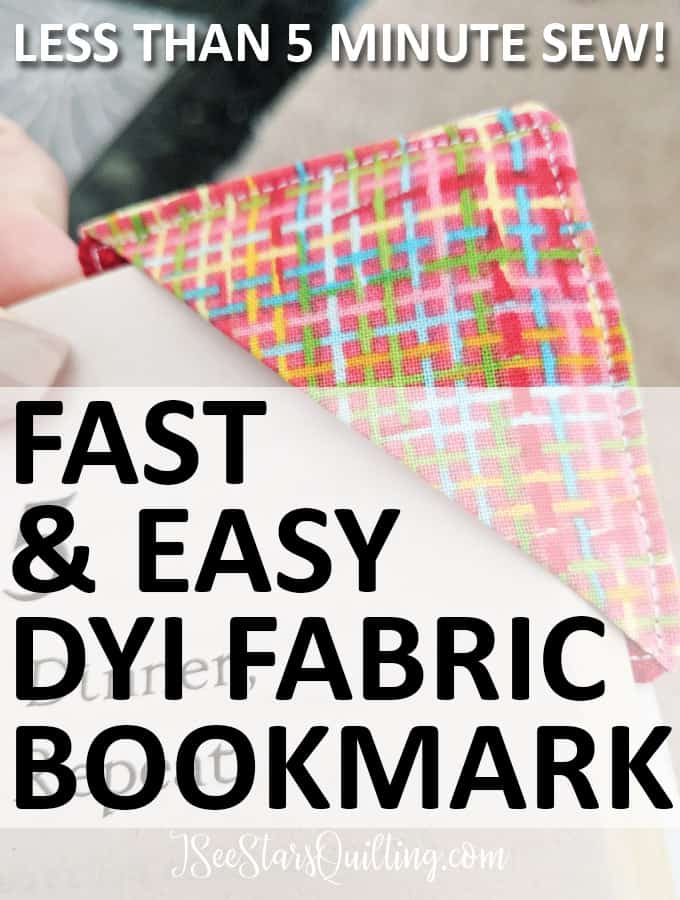
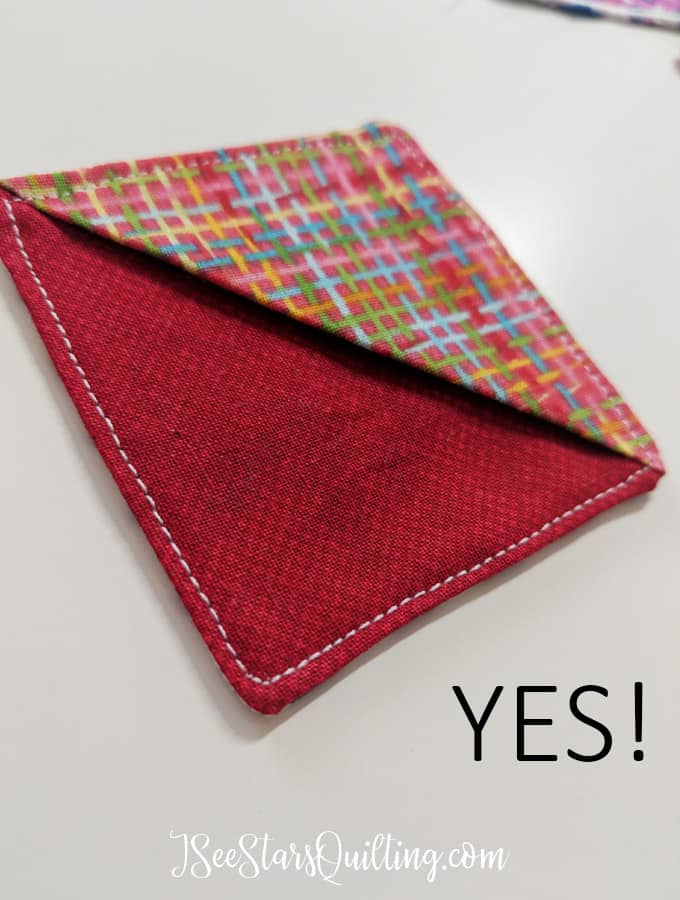
    I made something fun yesterday. *Spoiler alert* It’s not a quilt! (gasp, I know) and I just had to share it with you because it is so simple and so quick that you just HAVE to block off your schedule. There I said it. Forget your adulting responsibilities or whatever you have and make these DIY fabric bookmarks tonight! … no really, you’re going to love them!

    I went into this cute little boutique shop the other day – you know the one… where everything is handmade by amazing artisans and you instantly desperately wish you could afford to take it all home with you? Yeah… I was smitten by some earrings that spoke down to my very soul I tell you… But the price tag and I did not see eye to eye. Cest la vie.

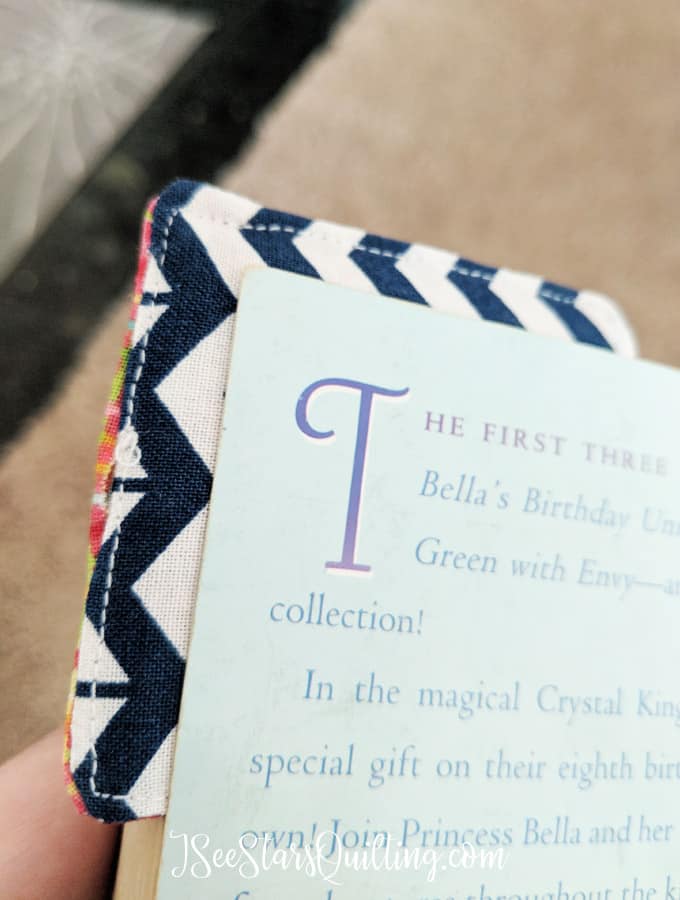
    At the register, they had these cute little fabric bookmarks for the corners of your books. I immediately wanted to buy them all… but the DIY-er inside me got the best of me and I said: “I can make that, and make it cuter too.”

    DIY Fabric Bookmarks

    Scrap Fabric to the rescuuuuuuuueeeeee!

    Side note: My family needs bookmarks. Like, thousands of them… We love to read. I don’t know why none of us can just read one book at a time. It is one of the great mysteries in life.

    First, I went and I found all the tiny of my most favorite scraps that I stashed away for a “one day I’ll use this” project. (This was my favorite part! finding uses for pretty fabric that would have otherwise just stayed in my drawer forever)

    Just look at the pretty fabrics!

    Step by step – How I did it

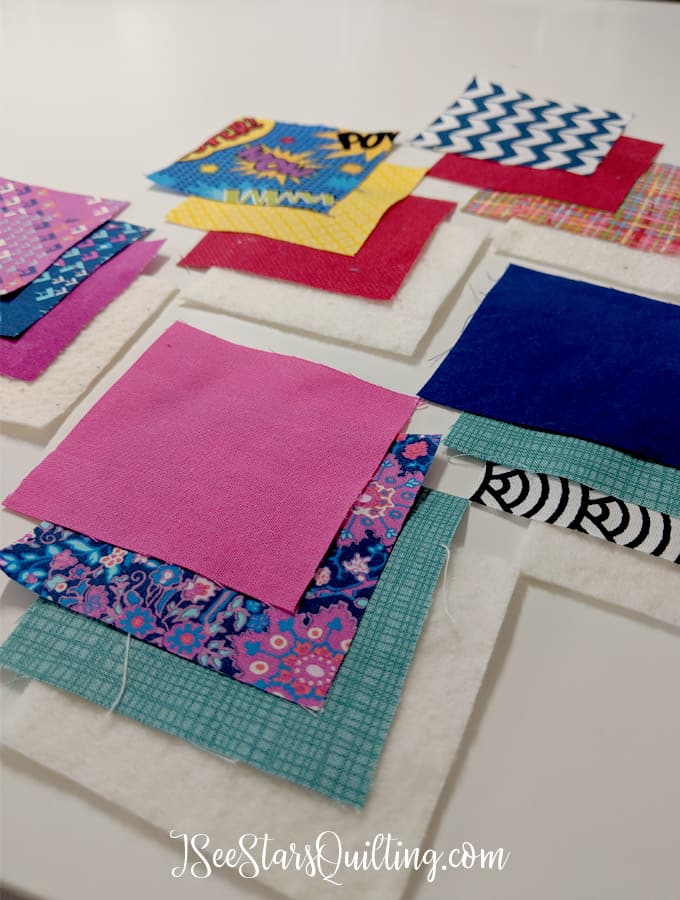
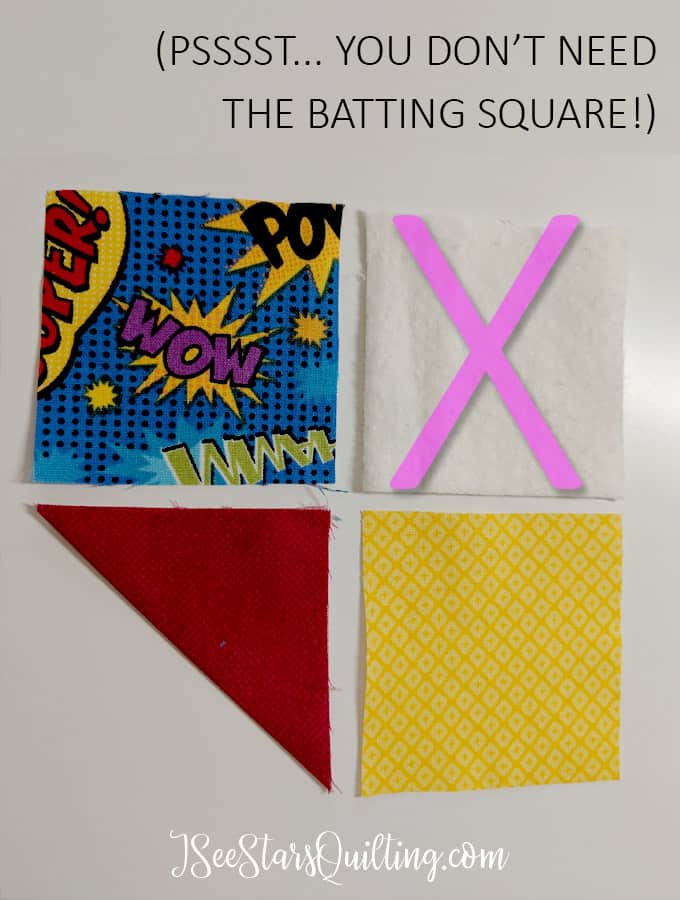
    I started with little 2.5″ squares of random (but oh so cute!) scrap fabric.

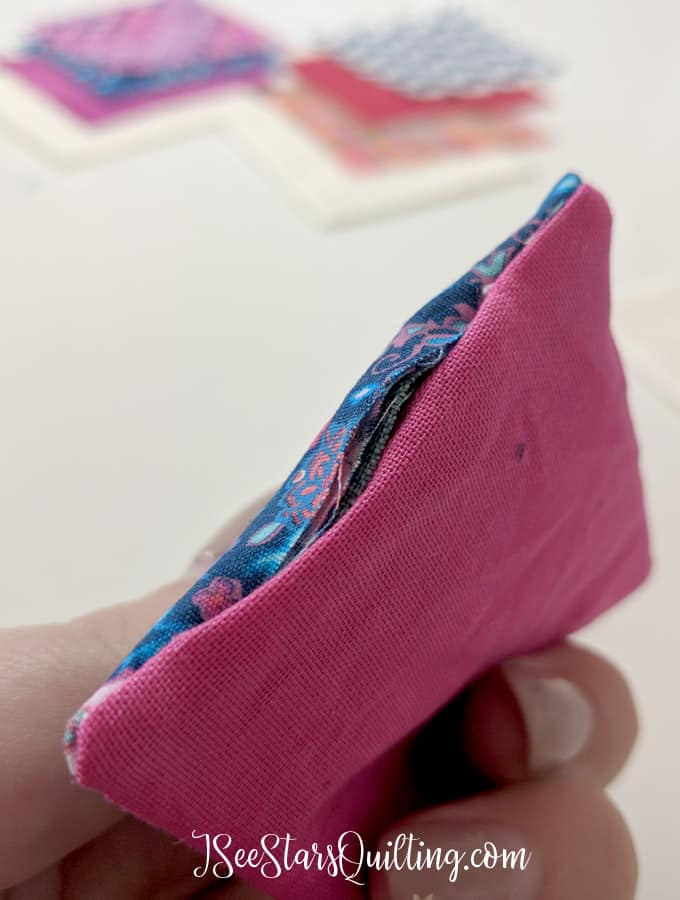
    I thought perhaps it would be precious to make the bookmark look quilted… (I’m a quilter to my very core, you know) but it didn’t prove to be my best idea as it was a little too thick between the book pages and made the corners harder to square.

    So ignore the batting squares in the photos… that is just when I THOUGHT I knew what I was doing πŸ˜‰

    To make the angled piece:

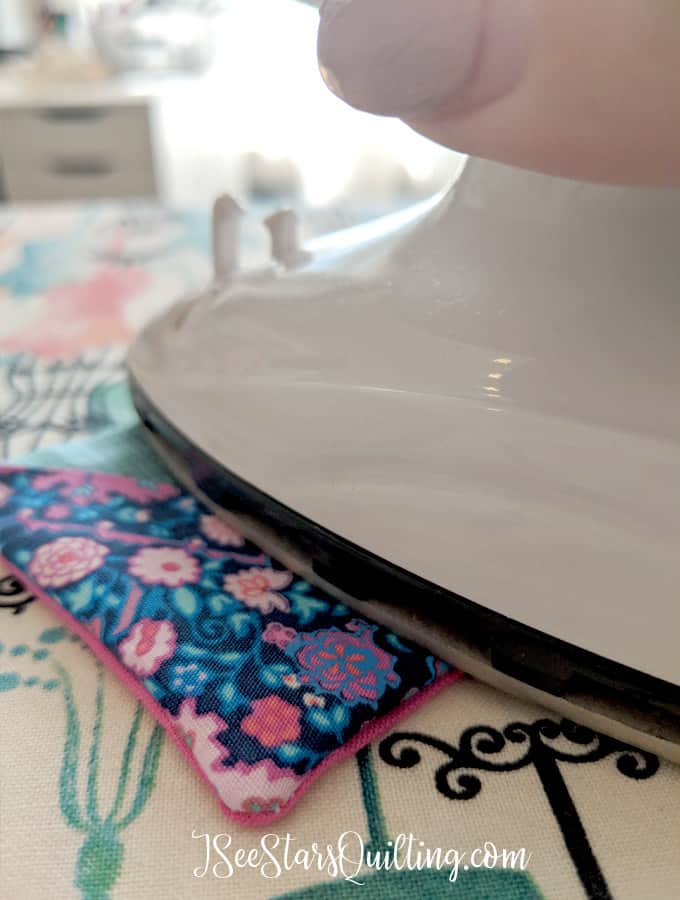
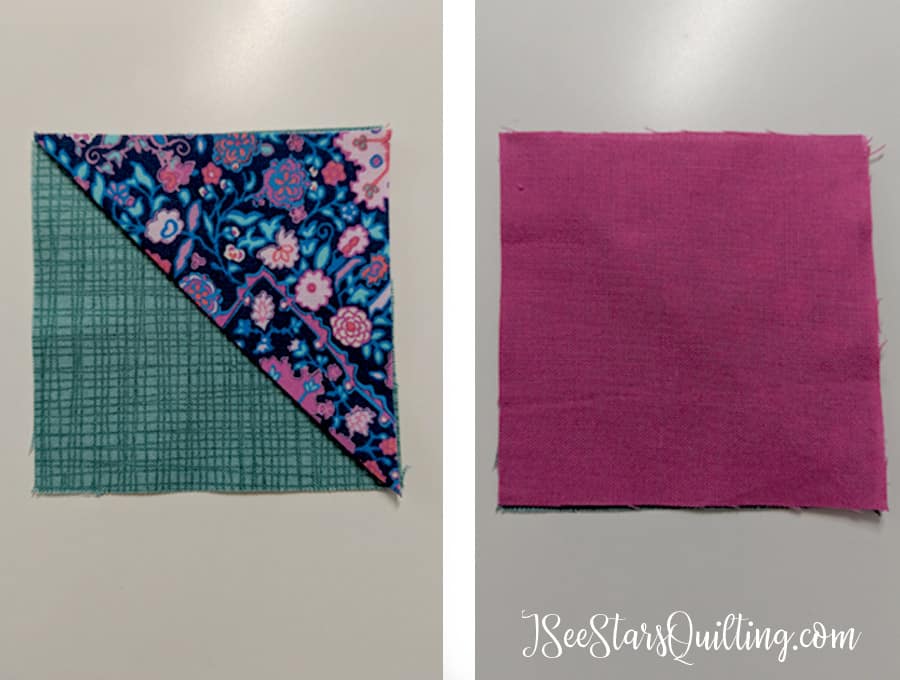
    For the angled piece, I folded the 2.5″ square (wrong sides together) along the diagonal and pressed with my iron. Easy peasy.

    There is no need to sew it as the next few steps will keep everything in place in the finished product.

    How to layer your fabric pieces:

    Layer your fabric pieces in this order…

    1. Fabric 1, Right Side up.
    2. Angled/corner fabric
    3. Fabric 2, Right side down.

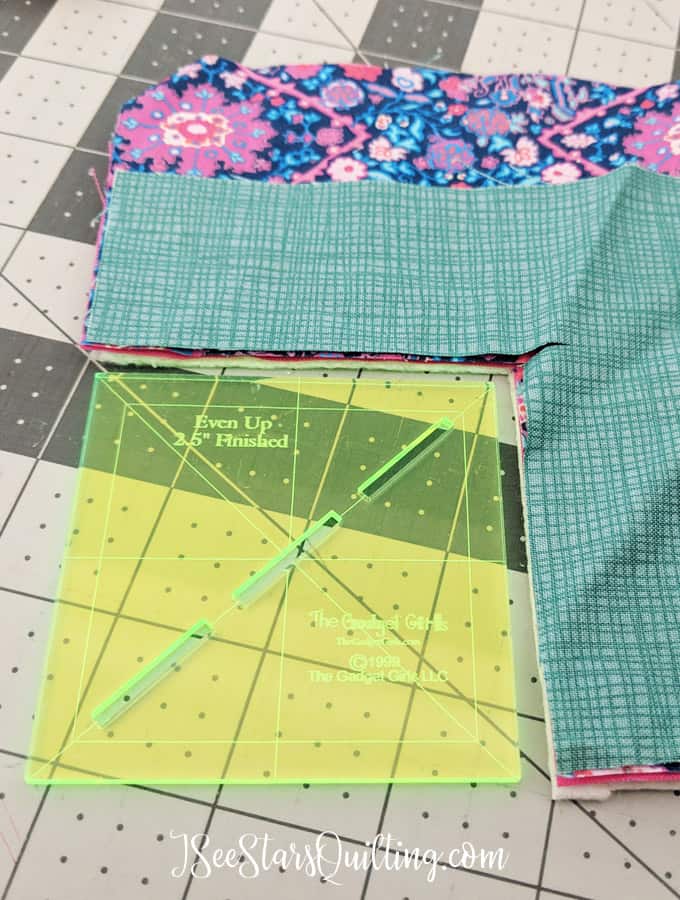
    All sides should match up evenly.

    Get ready to sew!

    Up until this part, everything was grand! Here is where things were a little unclear and I had to make it up as I went.

    Let’s first go over what didn’t work and then I will share with you what ended up being the winning process!

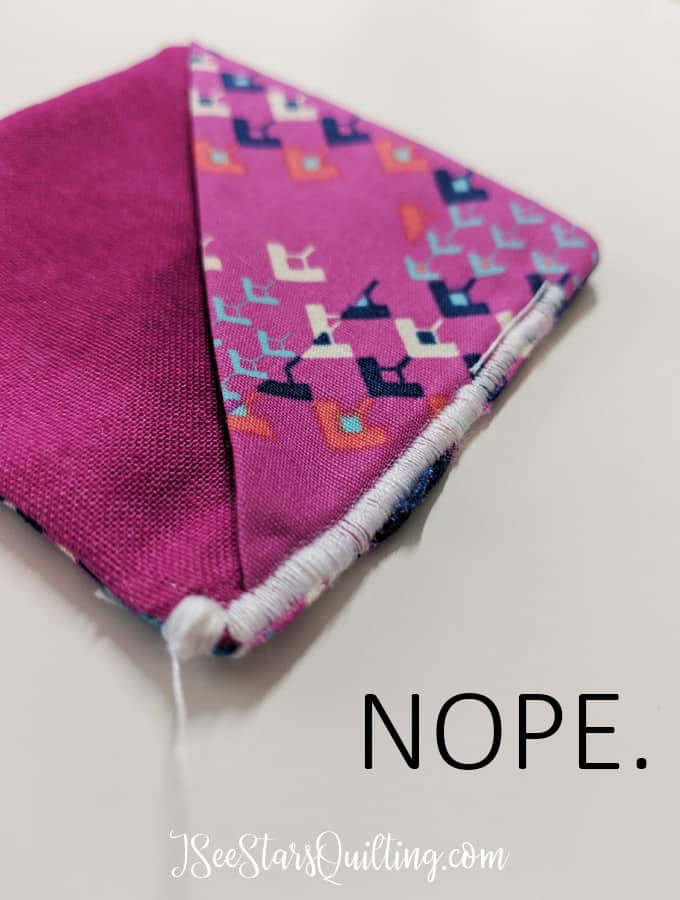
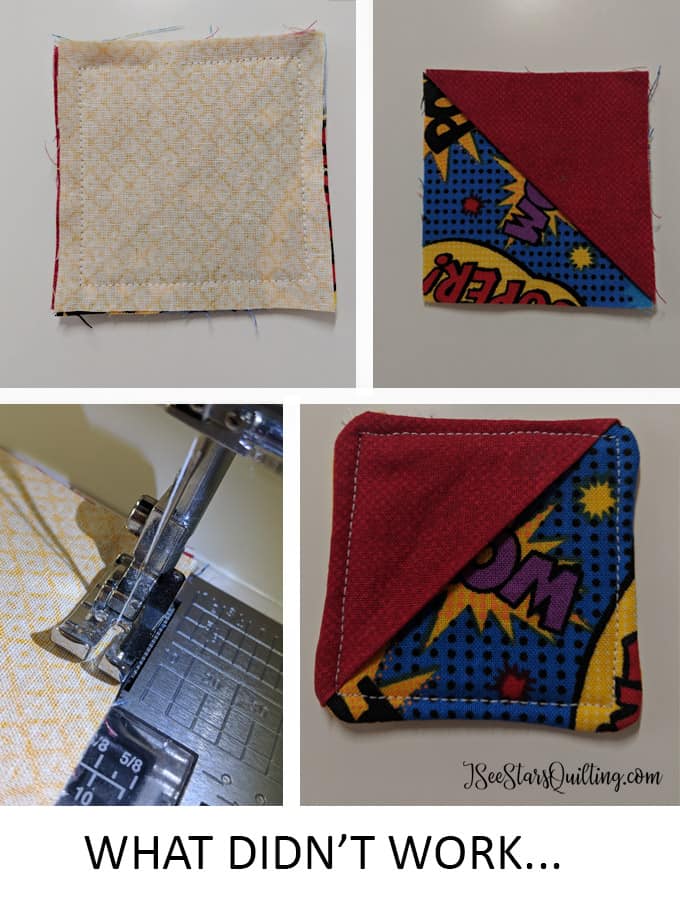
    What not to do…

    I tried stitching at 1/4″ from the edges of the square because I LOVE my 1/4″ sewing foot (read more about it here) and I found that the corners were too bulky when I turned the piece right side out.

    I couldn’t get the nice crisp square corners that I was looking for… See below how round the sides ended up being?

    Another mistake: I did not leave a large enough hole to turn the piece right side out the first go-around. This made things a little more difficult than they needed to be. (I’m totally stubborn so still made it work)

    What DID work…

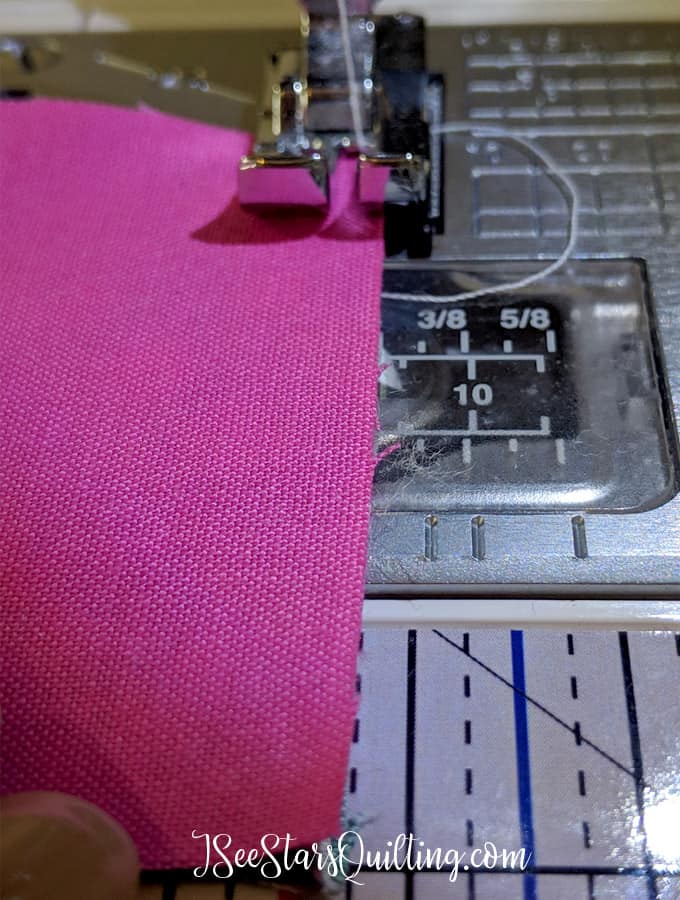
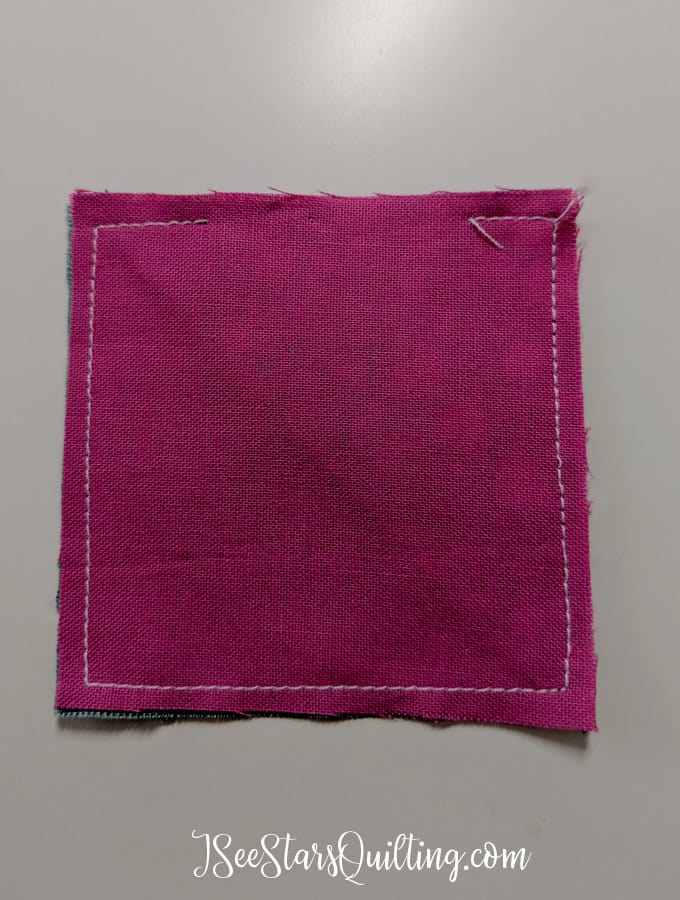
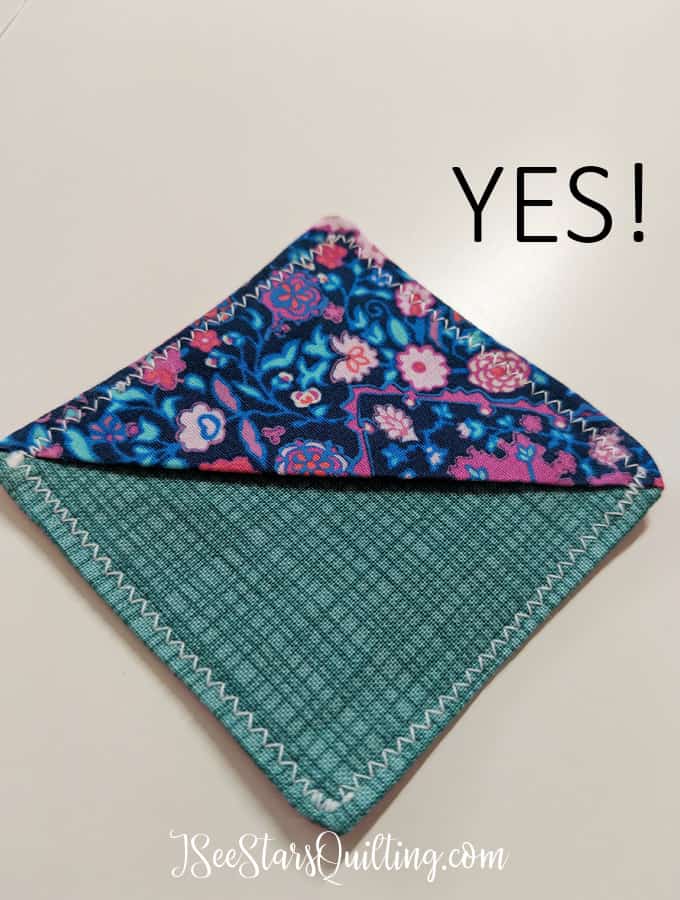
    I tried sewing 1/8″ from the edges and it was juuuuuust right πŸ™‚ Perfect solution to those bulky corners!

    FYI: You can purchase my Straight Seam Guide with easy to read measurements in my shop!

    I also left a little larger section un-sewn so I could turn the piece right side out a little easier too…. this really made things less cumbersome.

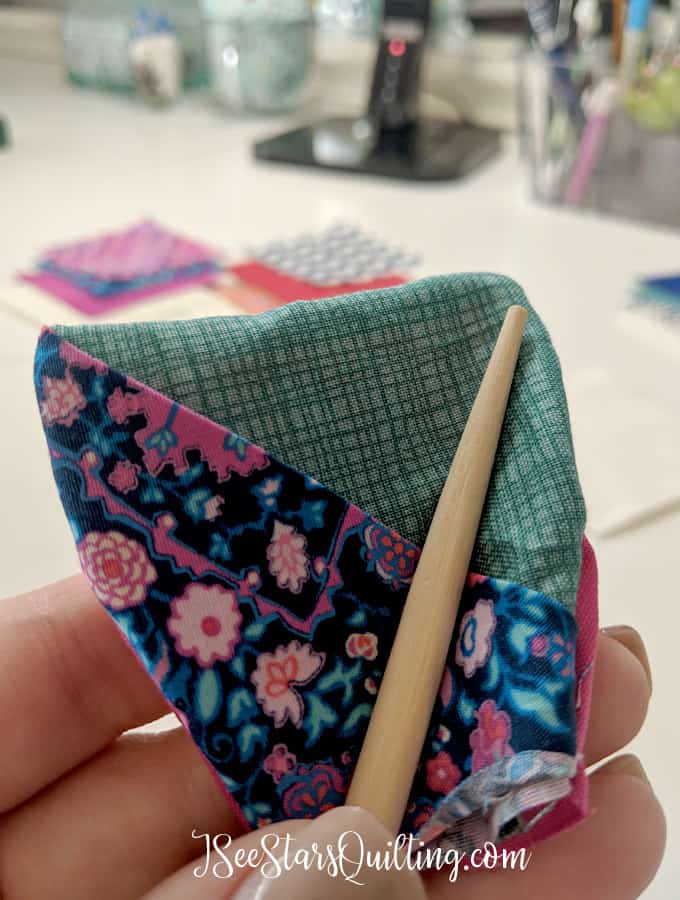
    To get those nice square corners, I pulled out one of my favorite weird sewing tools… a Chinese take-out chopstick! Unused on my general tsos, of course. These work great for shaping the corners.

    It really helps to push it up into those corners and move the fabric around to where you want it to go.

    Next, I pressed the piece to get those corners and seams even more crisp, because I knew that after the next step… there was no going back!

    We still have to deal with the open side that was used to turn our DIY fabric bookmark right side out.

    You can deal with this one of 2 ways.

    1. Get out your needle and thread and ladder stitch it closed by hand… or
    2. Tuck the ends in, press it and make sure you catch the raw edges in when you sew! (duh, I chose this one because… obviously faster, right?)

    Last step! How to finish the edges:

    What didn’t work…

    The first thing that I tried was a zig-zag stitch because I love that look… Yeah yeah, it looks terrible. I know. I’m not that great at it because I have terrible patience in letting it do its thing and it usually ends up looking like a mess.

    So even though I like that look, I decided that THIS was not the project for it if my focus was quick and easy…

    What DID work…

    Next I tried a smaller zig-zag and kept my needle about 1/8″ in from the edge to make sure I caught the unfinished edges of the opening.
    I really liked this one – but the corners are a little awkward for me on the zig-zag stitch.

    I feel that unless I perfect that… it is always going to look a little more “amateur” DIY-er and not polished professional sew-ist, like I was going for… but It did the job just fine and even added a little decorative look to the bookmark.

    Simple really is sometimes the best solution!

    Lastly, I just stuck it through with the plain old boring standard straight stitch. (Like I should have done in the first place)

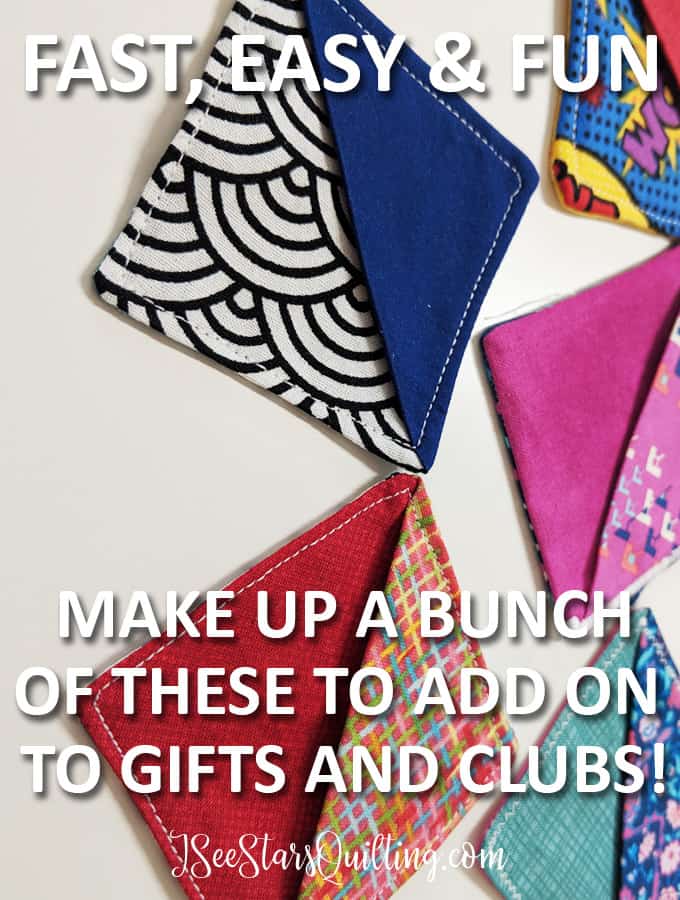
    I made several more after I finished this one and I have squares cut for dozens more (yes, I told you we’re crazy people over here!)

    You could seriously have yourself a HUGE stash of these in just a few hours one afternoon.

    My most favorite part about these is how many people I know who would LOVE these… I’m thinking just about everyone will get one of these for Christmas or a birthday or… arbor day perhaps? …I don’t know!

    I could see these being a peppy addition to guild swaps, cooking classes, book clubs, Kid’s gifts, classroom party gifts etc…

    These DIY fabric Bookmarks are just FUN and the fabric possibilities are endless to customize!

    These DIY Fabric Bookmarks were such a fun project to play with.

    I went through a few different ideas trying to find the best way to make them with the least amount of time. I feel like I came up with the real deal… with all the kinks worked out.

    My wish is for you and your loved ones and lucky friend enjoy them. Let me know what you think in the comments!

  • Tricks to Sewing Straight Seams

    Sometimes I wish for the simplest things in life – like sewing a line with your sewing machine and expecting it to be straight. That shouldn’t be too much to ask, right?… wrong. – But fear not! – For today I am going to share with you my tricks to sewing straight seams!
    When it doesn’t happen the way you want it to, you have to find ways to make it happen.

    Frustrated with wavering seams? Try these 3 tricks to sewing straight seams and go live your happy carefree life!

    Sewing straight and even lines when you’re piecing a quilt or following a sewing pattern is kind of… how can I put it nicely?

    Absolutely positively non-negotiable… yeah. Exactly that.

    Even the slightest waver of your stitches and you’re suddenly the queen of fudging it to make things right and hoping no-one notices.

    Or you just have to come to terms with the fact that this beautiful piece that you dreamed of in the planning stages just isn’t going to perfect. You either have to learn to live with it, or dramatically crumple it up and put it in the corner to collect dust until you have the patience to pull it out again.

    I mean, maybe its because I am a mom and therefore I sometimes have the defiant mentality of a toddler, but I am the boss of my quilts… not the other way around. Sometimes there are tantrums too, but that’s a whole different post.

    Frustrated with wavering seams? Try these 3 tricks to sewing straight seams and go live your happy carefree life!

    Anyways, today I am going to share with you a few different tricks to sewing straight seams so you won’t have to throw a tantrum yourself!

    You’re welcome πŸ™‚

    It is worth mentioning that if your fabric cuts are not straight and even… you might as well quit reading now.

    How can you judge the straightness of your seams if your fabric is all wonky?

    Being able to have a clear guide for your fabric is one of the biggest keys in sewing straight lines.

    Here is a fact: Your needle sews a straight line… Always.

    It only goes up and down… so the real culprit in your wonky sewing lines is your fabric.

    If your fabric is moving around, your lines are going to be off and not straight.

    You need to find a way to tame your fabric so you can feed it into your sewing machine correctly.

    I have a few helpful suggestions for you!

    HOW TO SEW STRAIGHT SEAMS

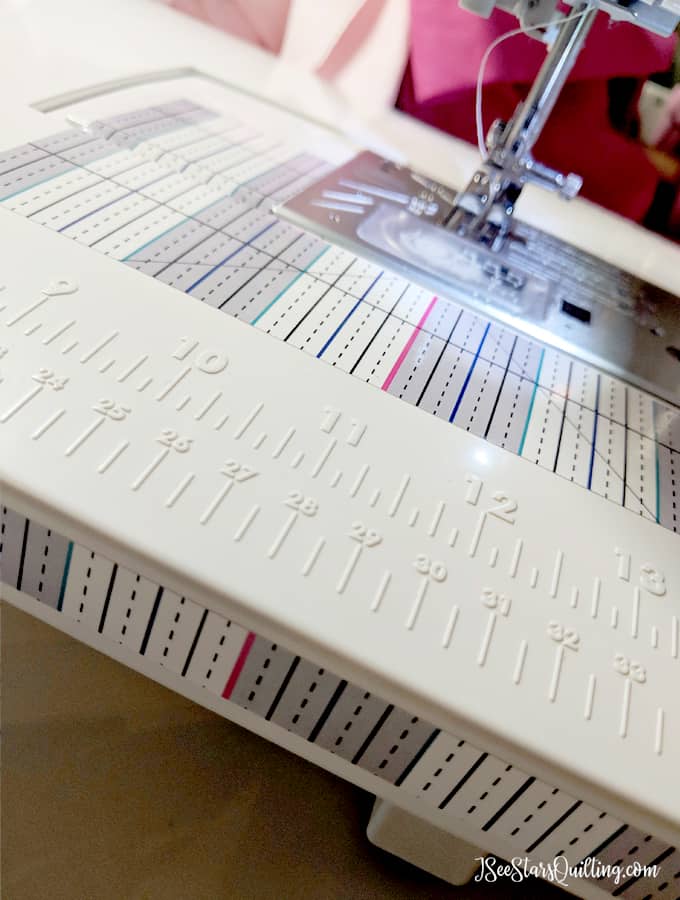
    The first one I’m going to share with you is an invention of my own creation because I got fed up with following the faded and almost nonexistent lines on my sewing machine.

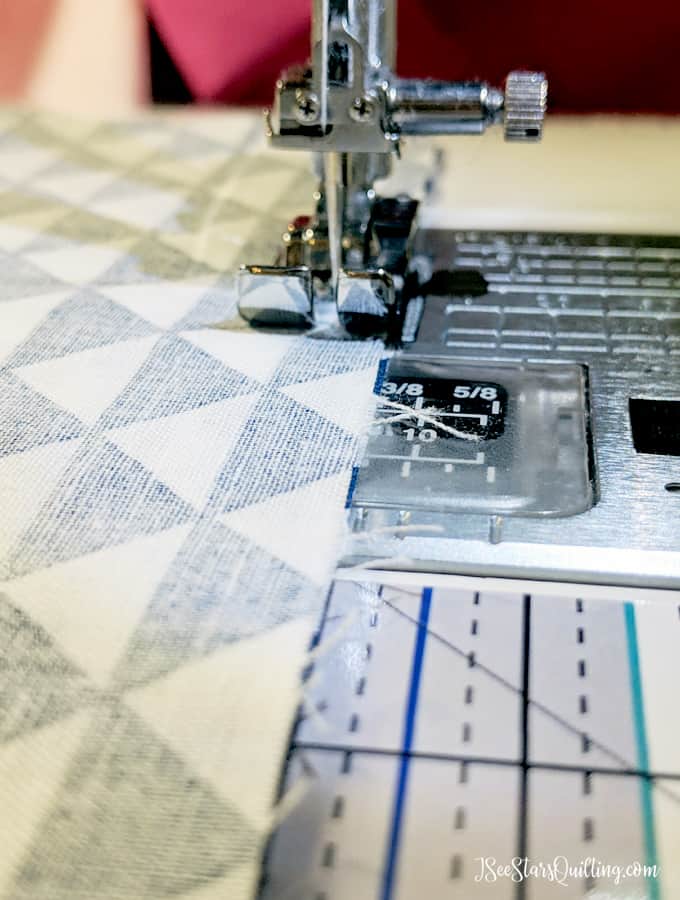
    The Straight Sewing Guide

    In a quick moment of inspiration, my designer background served me well and I created this Straight Sewing Guide. I know I’m not the only one who struggles with this so I made it available to us all!

    It is a vinyl sticker that you adhere to your sewing machine. It gives you longer guidelines, allowing you to keep your fabric straight while sewing.
    [Notice the front, middle and back guidelines!] –Yes! I love them too!

    You can grab your very own Straight Sewing Guide in my shop! Also, I am offering worldwide free shipping for my sewing friends around the globe! πŸ™‚

    WASHI-Tape Guidelines

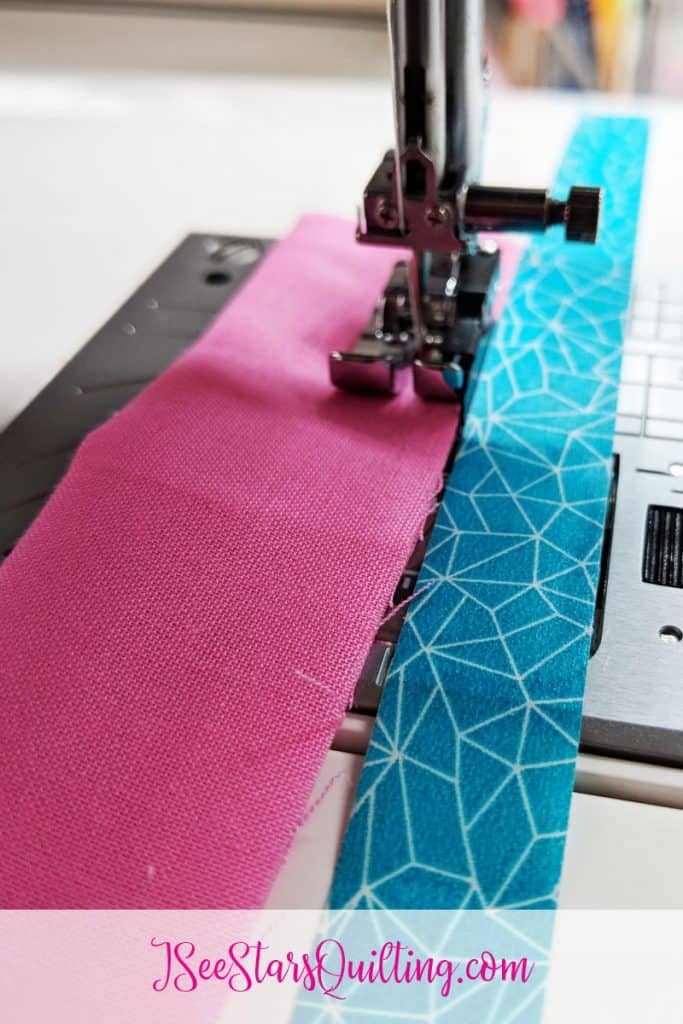
    Another trick that I used for a long time was simple line of Washi-tape.
    It may not be fancy, but hey… it did its job. If you’re not yet a fan of washi-tape… it is an amazing low-tack decorative tape that is super popular in the craft circles… just… imagine the possibilities of pretty tape!

    I used the washi-tape to to make my 1/4″ seam guide on my sewing machine. This gives you a guideline to keep your fabric aligned to.

    Provided your cuts are accurate, your seams will also be straight.

    How to MASTER the quarter inch seam. Want to improve your beginner/intermediate sewing skills? do this and you'll be well on your way

    As you can see in the image above, I had to take the tape off every single time I wanted to change out my bobbin thread, but you could just use a craft knife and make a few slits in the tape to make it easier on yourself.

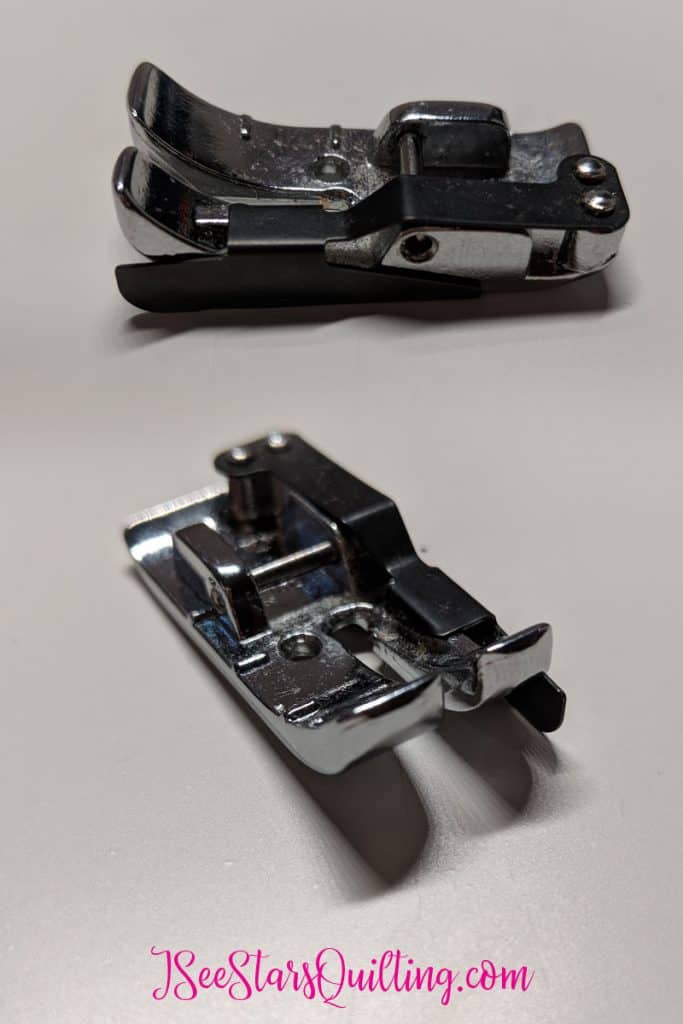
    Quarter Inch Machine Foot

    This is a little more focused than just a straight seam, but if you’ll notice on the quarter inch foot, there is a little guide that keeps your fabric in check.

    How to MASTER the quarter inch seam. Want to improve your beginner/intermediate sewing skills? do this and you'll be well on your way

    As long as your fabric stays nicely aligned with the little guide, you should have beautiful quarter inch seams!

    I wrote another post on Mastering the Quarter Inch Seam. It goes into more detail about why you should and also shares some other tips for how you can really be the master of your quarter inch seams!

    I hope these Tricks to Sewing Straight Seams help you master it.

    Remember…

    You are the boss of your quilt… not the other way around! πŸ™‚

    Happy Sewing!

    Frustrated with wavering seams? Try these 3 tricks to sewing straight seams and go live your happy carefree life!