Start Here – Quilting 101

New to quilting? Looking for some help with the basic skills and terms? Start here! Quilting tips tricks and little bits of inspiration for the newbie to intermediate quilter.

  • The Ultimate Guide To Quilt Backings

    As quilters, we often spend so much time working on the quilt top. Getting the perfect piecing, spending time on the design work and the fabric choosing… There is so much to it! – But what about the back of your quilt? Today I’m going to talk about just that. This is the Ultimate Guide to Quilt Backings!

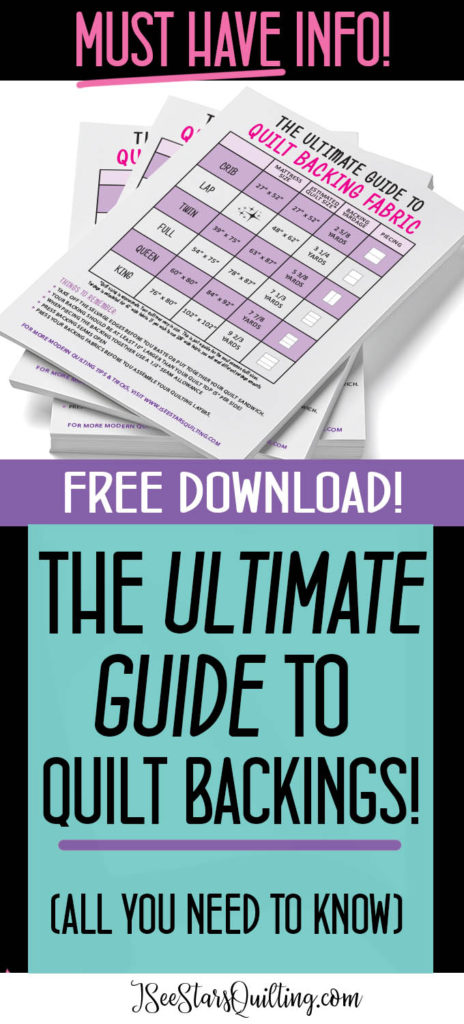
    Be sure to check out the FREE download quilt backing
    reference chart that I have for you!

    Are you guilty of just looking at your quilts as a flat 2D piece?


    It’s totally ok. You spend all your energy on the quilt top and then when it comes to the end, you just slap something on the back and call it done! I mean, for goodness sakes, this quilt project didn’t start out as being your entire life’s work… (maybe it was just a small craft project that morphed into a big obsession?)

    I get that by the end your brain might be ready to move on to the next project and be done with the quilt entirely… but if you give yourself just a few more moments to make the right decision, it will be so worth it.

    Taking a little extra time preparing the backing can make a huge difference in the quilt’s longevity as well as how easy it will be to quilt it

    While you generally only look at one side of a quilt at a time, your quilt really is a 360-degree piece of art! …yes, ART!

    Every single decision that you make, no matter how small, further differentiates your quilt from every other quilt out there.
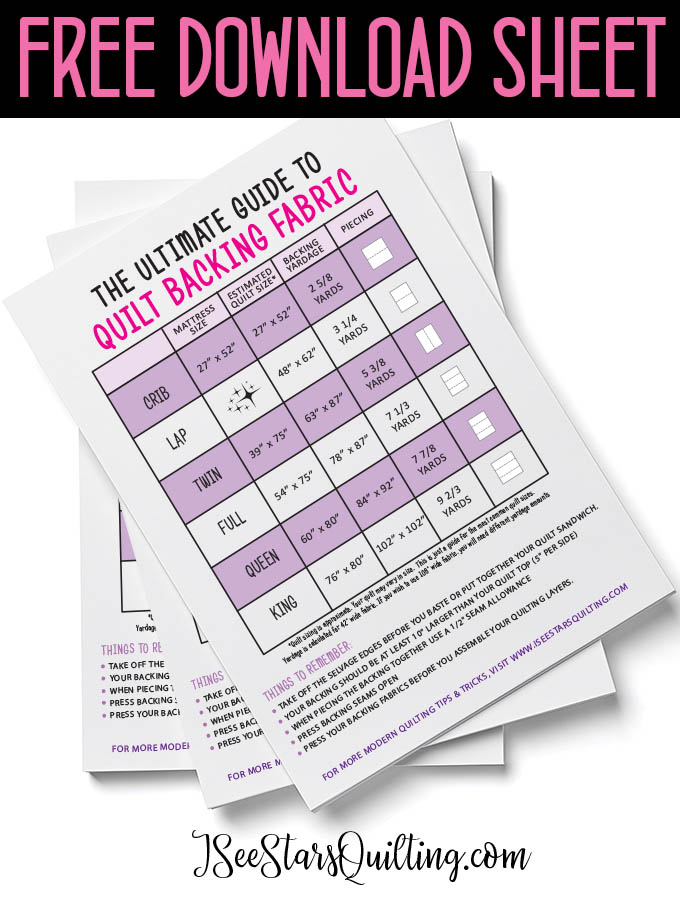
    The Ultimate Guide to Quilt Backings! - All you need to know plus a FREE handy download sheet to print out so you'll always know the most efficient way to piece your quilt backings!

    Have you ever been a part of a sew/quilt-a-long and seen two quilts that turned up identical? I never have.

    You are an artist with your quilting. That tiny mistake that you sewed over and over and decided to just let it stay because you couldn’t be bothered to pick out the threads again… it becomes part of your beautifully unique quilt!

    Your quilt is one of a kind and every single angle should be celebrated!

    Backing fabrics can be so expensive!

    Quilters know this. Fabric can get expensive. And if you have a love of fabric and a need to keep hoards of it untouched in your home… well, it can get REALLY expensive really fast.

    Sometimes it feels like so much money has been spent on the fabric for the front, you can’t bear to drop another $50+ on the backing, right?

    Hey if you want to know the easiest way to calculate the worth of your quilt, check out this blog post that I wrote! I have a FREE download sheet for you that walks you through and details out every step!
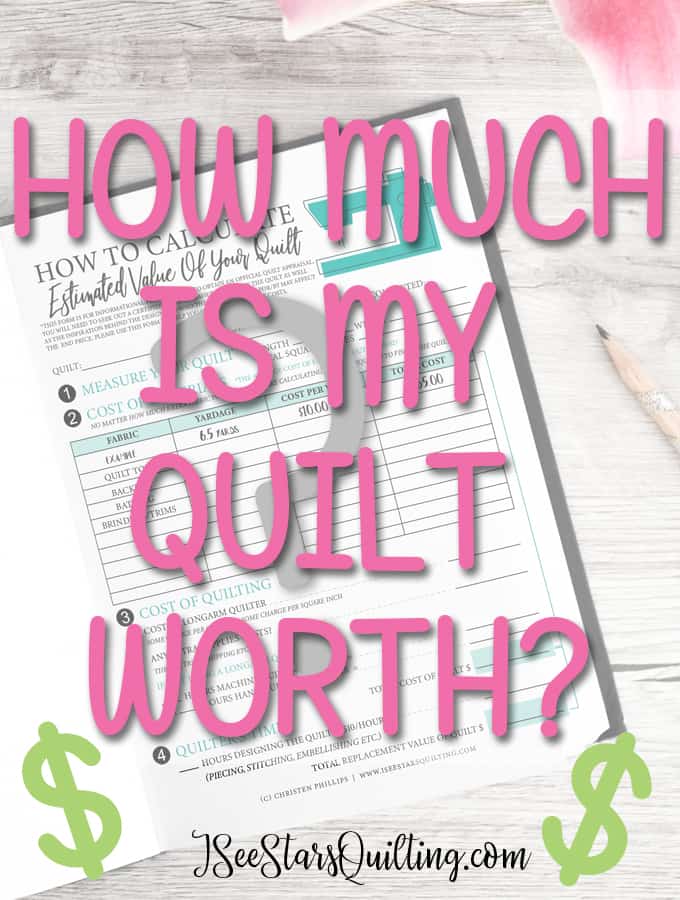
    FREE Download Worksheet to calculate just how much your quilt is worth so next time you get the question... "How much would you charge for..." you'll know exactly what your time and resources are worth!

    When you have already spent what feels like a fortune on fabric for the front of your quilt, going and buying even more fabric for the back… ugh… it can be tempting to find whatever is cheap and easy… because no one will really see the back will they? (*ahem* Read the above section, please!)

    One way that I like to save a little money on quilt backings is to check the sale racks when I’m shopping for other fabrics. Always. every single trip… because you never know what you’ll find.

    I even wrote a whole post on How I find cheap fabrics – (Let me clarify real quick. When I say “cheap” I mean in price. It is best not to mess with cheap/low-quality fabrics when quilting.)

    You might also find this post helpful for quilting on a tight budget… or just making sure that you’re using your crafting money wisely.
    Figuring out that quilting is not a cheap hobby? Here are 8 PROVEN amazing ways to save a little money while continuing doing what you LOVE!

    I’m a bit of a treasure hunter. I really like finding bargains and I feel triumphant when I find a good one. I’ve even found good quality quilting cotton for $2 a yard! – And it was pretty! It has been used for many of my quilt backings.

    Quilting can be an expensive hobby, but it doesn’t have to break the bank… even when you are shopping for quilt backing fabric.

    How much fabric will you need for a Quilt Backing?

    Perhaps your pattern didn’t specify the fabric requirements? Or didn’t specify how you should arrange/piece your backing fabric?

    Here is a general chart that is helpful to keep on hand!

    Remember to PIN this image so you can refer back to it later!!
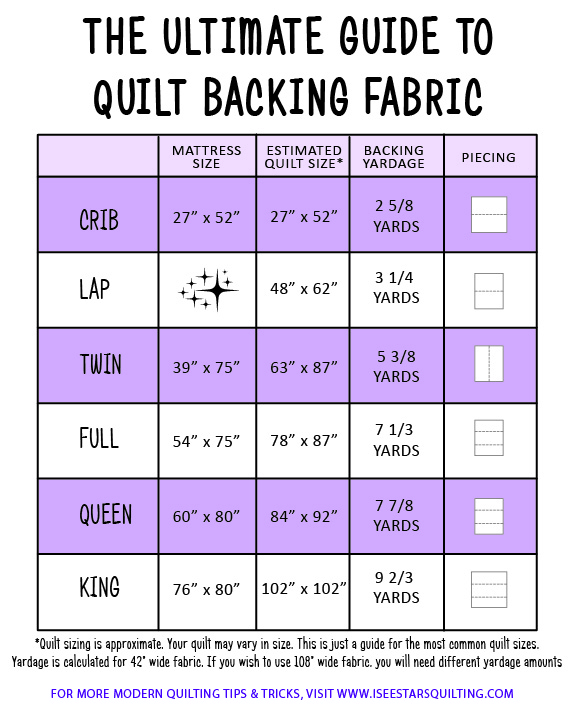
    The Ultimate Guide to Quilt Backings! - All you need to know plus a FREE handy download sheet to print out so you'll always know the most efficient way to piece your quilt backings!

    To make even more information available to you, I created a FREE download with more tips for when you’re thinking about or planning your backing.

    I tried to pack as much useful content as possible into the one-page download sheet!

    Should I still use a 1/4″ seam measurement?

    Actually, it is recommended on the back of your quilts to use a 1/2″ seam measurement.

    Using a 1/2″ seam allowance instead of a traditional ¼-inch allowance on the backing helps reduce bulk at each seam and makes it lay flatter.

    Also as with piecing, it is recommended to use a shorter stitch length of 10 – 12 stitches per inch for a sturdy seam that will hold up well over time. I usually keep my stitch length on a 2.2 for piecing.
    If you have a hard time keeping your seams straight when you sew, I created something just for you! This is a really popular add on to your sewing machine… and I’m offering FREE shipping!

    Are there any other specific requirements for sewing backing?

    Actually yes… I mean with everything in quilting there are guidelines… and you can choose to follow them or… do your own thing, but general things to keep in mind are:

    • Take off the selvage edges BEFORE you baste or put together your quilt sandwich. – just trust me.
    • Your backing should be at least 10″ larger than your quilt top (5″ per side) if you are planning on giving it to a longarm quilter to finish. They need the extra wiggle room.
    • If you are doing the quilting yourself, you should be safe with 4″ extra per quilt side.
    • When piecing the backing together use a 1/2″ seam allowance instead of your general 1/4″. It is just a little stronger.
    • Press my backing seams open so that the fabrics lay flatter.
    • Give your backing fabrics a good press before you assemble your quilting layers. You don’t want a rogue wrinkle to come up that you have to go back and fix later or accidentally quilt over.

    Lastly, try not to sweat it too much 🙂 Quilting is fun, right?

    For more tips on what to do on the back of your quilt, check out this post. I tried to keep the above post more on the technicalities of your quilt backing, but I went into a lot more about the design of your quilt backing and how you can use up fabric scraps in this post!
    The Ultimate Guide to Quilt Backings! - All you need to know plus a FREE handy download sheet to print out so you'll always know the most efficient way to piece your quilt backings!
  • How To Tie A Quilt

    There are several ways to finish off a quilt. Today we’re going to talk about one of the simplest ways! – I’m going to show you step by step pictures on how to tie a quilt.

    Your quilt usually consists of 3 layers: The backing, the batting or middle layer and the quilt top.

    It is important to connect those layers together so they don’t shift and come apart and receive more wear and tear when washed etc.

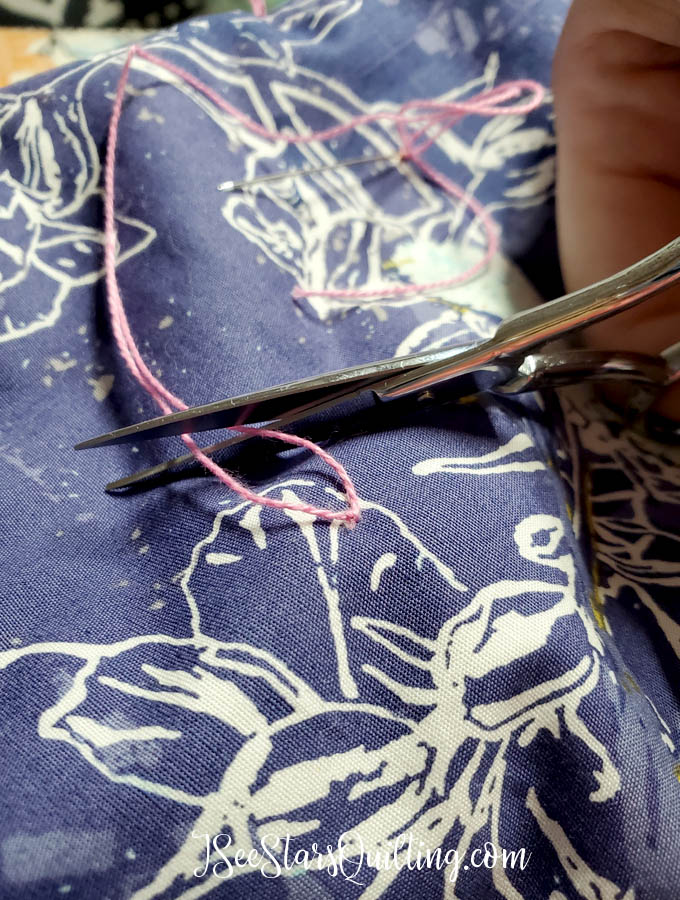
    When you hand tie a quilt, usually you will use a tough heavy yarn or thread that will go through all of the quilt’s layers and then tie a knot to secure the layers permanently.

    The knots that you hand tie are placed at regular intervals all over the quilt.

    Why hand tie a quilt?

    Hand tying a quilt is a really easy way to secure the layers of your quilt together that doesn’t involve fancy stitching or using your sewing machine. It is also a good solution for very thick or puffy quilts that have a harder time going through the throat of some machines.

    The process of hand-tying a quilt also has a bit of a nostalgic feel to it for me. It is very similar to hand quilting in the fact that I get to spend time snuggled up under the quilt that I am making and really have the opportunity to look at it and study it as I work on it.

    See the step by step directions below and continue reading for more answers to your questions about hand-tying a quilt.

    Step by Step Directions: How to tie a quilt

    Chances are likely that you already have everything on hand to tie a quilt right now!

    You’ll need the following common sewing items:

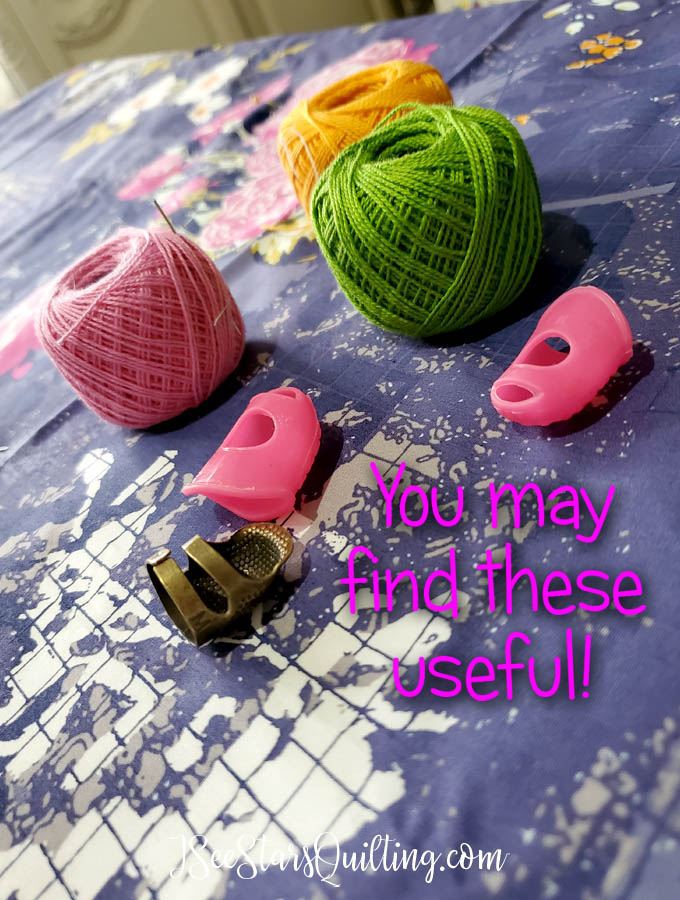
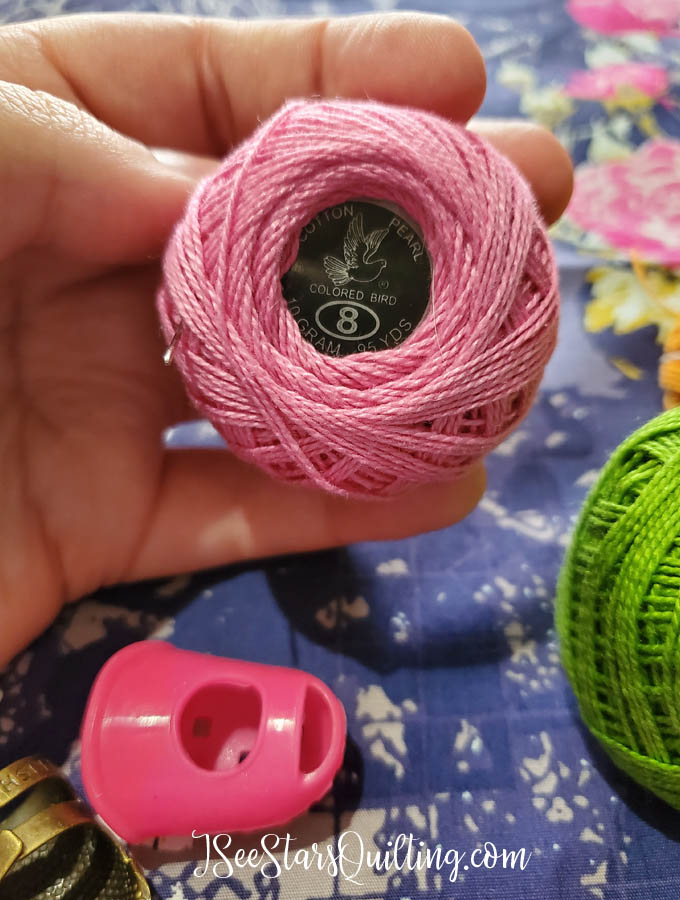
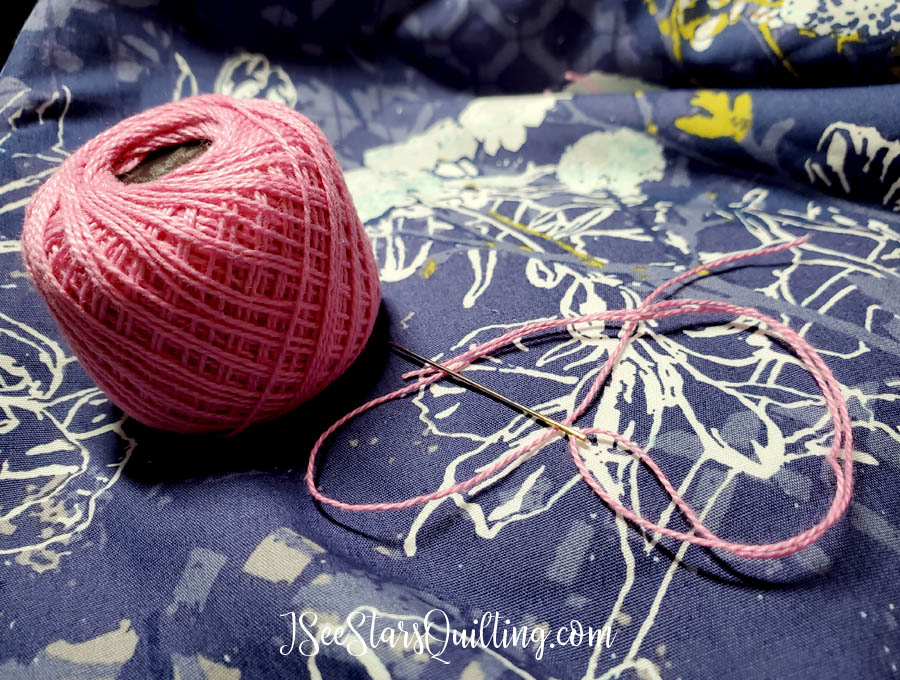
    • A heavier thread than you would normally machine quilt with – such as perle cotton, embroidery floss, or crochet cotton.
    • Sewing needle with a large eye to fit thicker threads.
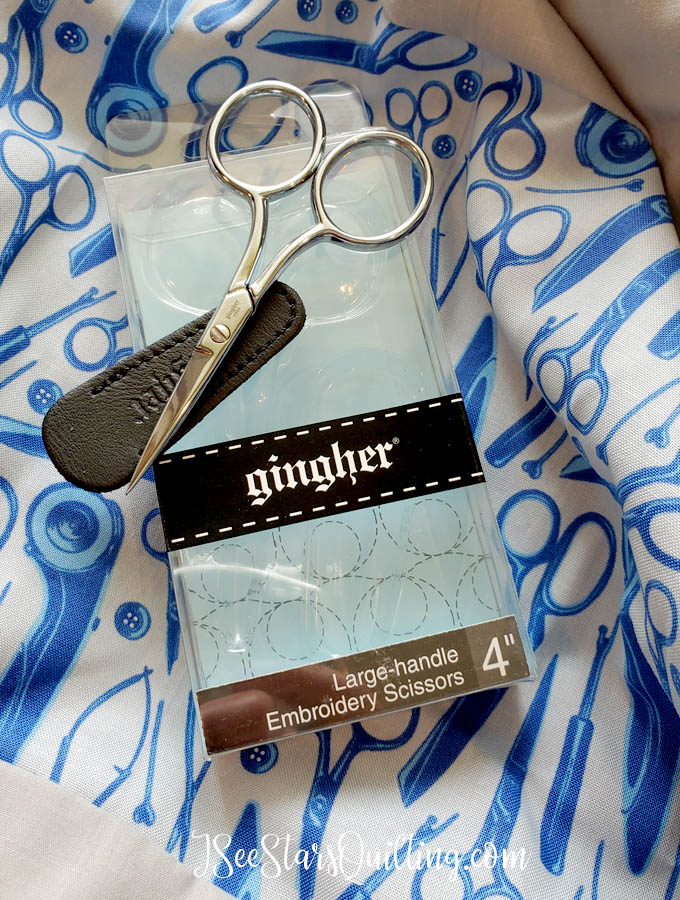
    • Scissors – I just got these and I LOVE THEM!
    • Washable marker to mark where your knots will be
    • OPTIONAL: buttons or charms to embellish if you desire.
    • OPTIONAL: Thimble or finger guards if you prefer to sew with them

    Thats it!… Really, I promise! You won’t need anything else but you and your quilt and… well… maybe a really good movie or TV show to binge watch for a few hours!

    I prefer the perle cotton threads for hand quilting and many of the little hand projects I work on in my sewing room. They’re a really great quality, come in a huge variety of colors.

    Can you see the thickness in the thread? It has a a beautiful chunky weight to it that keeps to itself and doesn’t get all hairy like a yarn would. I like that it keeps its shape nicely.

    I also recently ordered these scissors from Amazon to use with my embroidery machine because I need the super precise pointed end to get in the tiny areas… And I might need to order a second pair now because I’ve been using these them all over my sewing room. They are so sharp and I love them 🙂

    … You know… just in case you need some good scissors too!

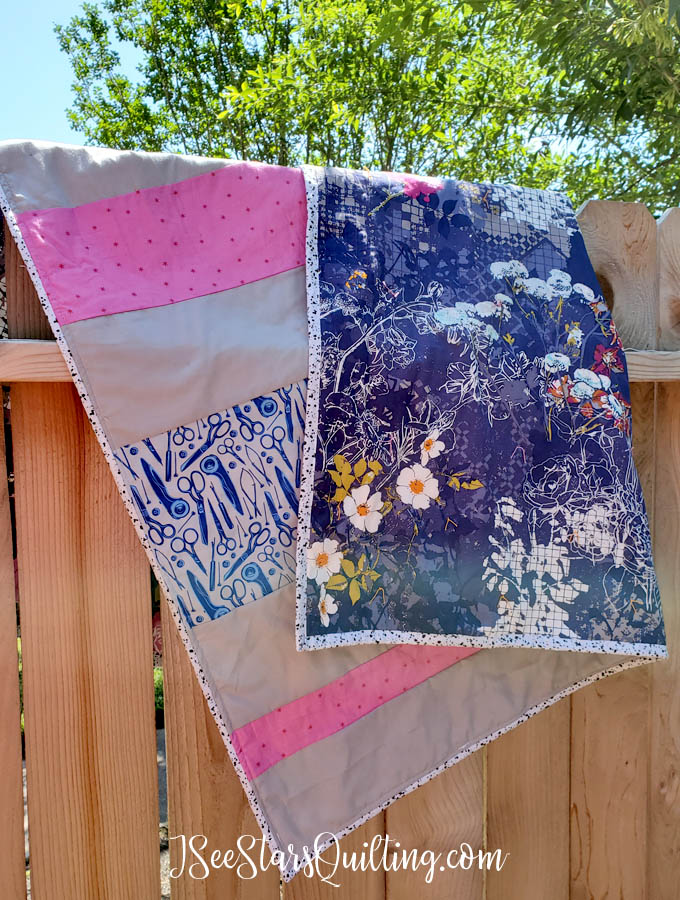
    FYI the quilt that is shown in all of the photos is a quilting project I just finished. I’ve named it my “Social Distancing Quilt” haha You can see more photos of it here in this post if you like!

    OK are you ready for the step by step instructions?

    Step 1: Prepare you quilt layers

    It is always important to make sure your layers are evenly laid out and you don’t have extra fabric bunching up.

    This process is the exact same thing that you would do for any other quilting process.

    Lay out the backing of your quilt on a smooth surface nice and flat. 
    
    Then, layer the quilt batting or middle layer on top of it making sure you aren't creating any wrinkles. Again, make it nice, smooth and flat.
    
    Add your quilt top layer and make it smooth again with no big wrinkles or folds.

    You’ll want to secure the layers temporarily before you start tying.

    You can do this with safety pins or regular sewing pins.

    Step 2: Decide where you are going to put your knots

    Decide where you would like your knots to be and if you want the ties to be on the front or on the back of your quilt.

    Use your fabric marker or washout marker to mark on your quilt where the knots will go so you will have a guide.

    This is an essential step because if you think you can eyeball it wheile you’ve got the quilt all spread out on your lap while you’re watching TV later, you are wrong! Son’t skip this step!

    Step 3: Thread your needle

    Thread your needle with the yarn or thread you have chosen.

    I find it easier to work with smaller sections of thread. There is less chance of it getting tangled while it is under the quilt and you really only need a few inches for the whole tie.

    I usually will pre-cut a lot of several pieces before I begin tying that are about 10 inches each. Yes, it is more than you will need, but I find that it is a comfortable length. Not too short, not too long either.

    Step 4: Begin tying your quilt!
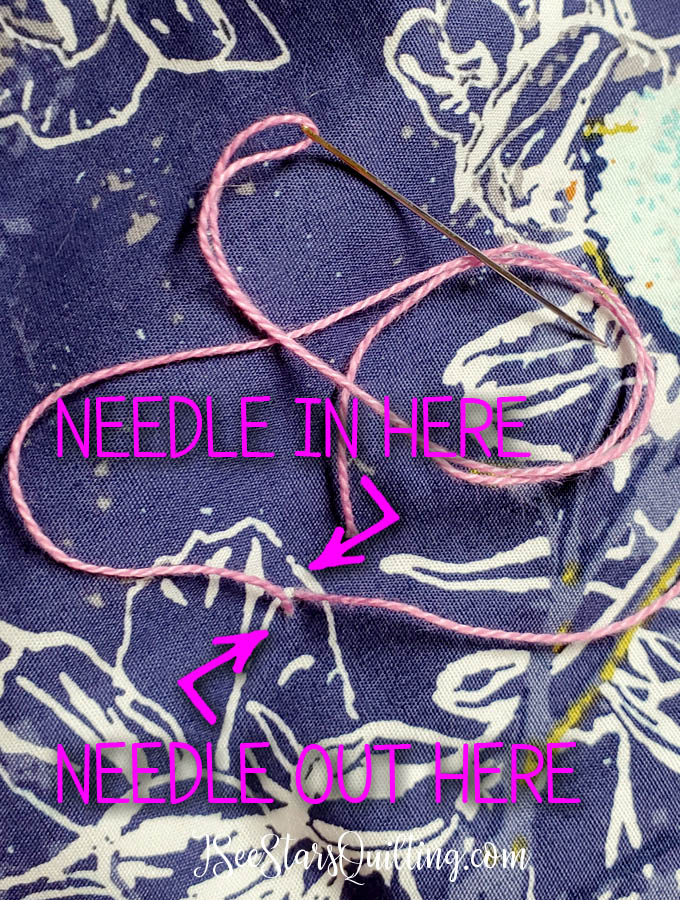
    Starting from the center of your quilt and working out, insert your needle through all 3 layers of your quilt and pull it back up as close as possible to your original hole.

    Try to make the distance between the two insertion points no more than 1/4″.

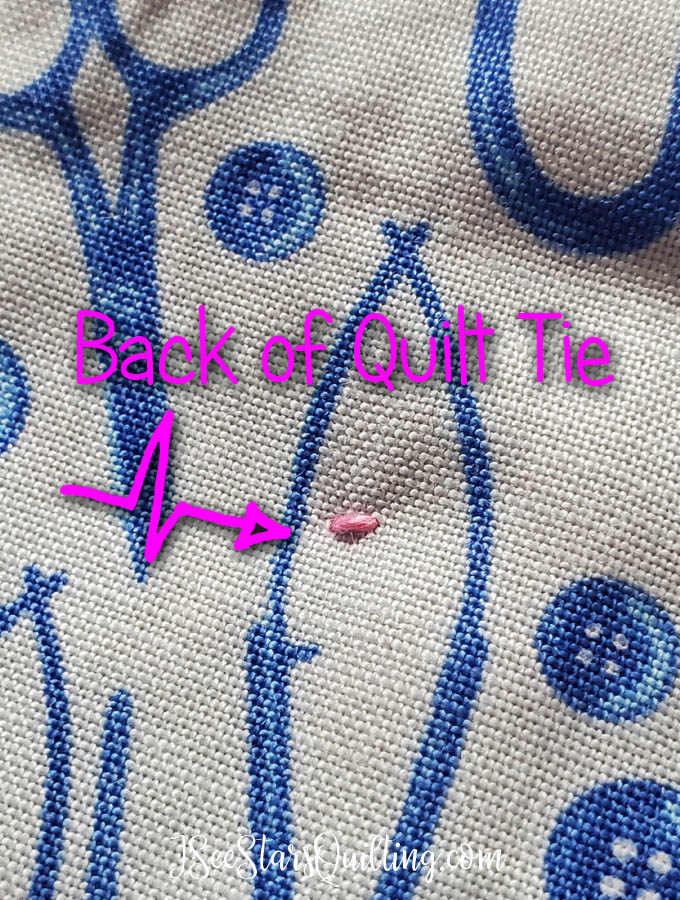
    NOTE: This is also the point where if you wanted to add a button or charm to your quilt, you would do so. add the embellishment on the side opposite where you will tie your final knot.

    Leave about 3-4″ of thread still hanging out of the first hole you made. It will be part of the tails we’ll be tying in the next step.

    Step 5: Tie the knot

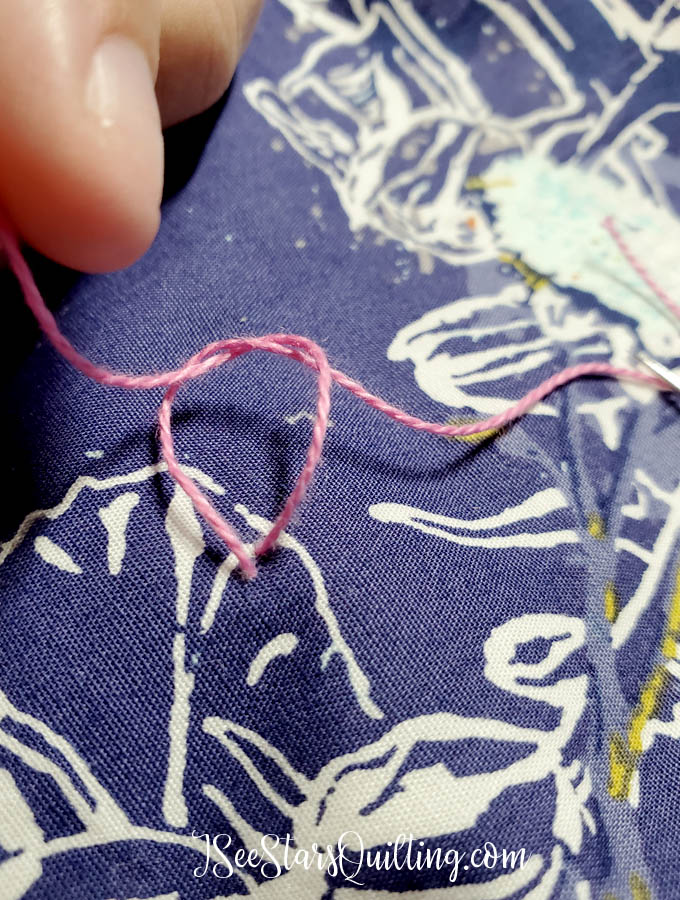
    You’ll want to tie the two ends of your thread together using a surgeons knot.

    A regular knot like you would tie in a shoe lace is acceptable, but a lot of quilters prefer the surgeon’s knot because of the durability over time.

    It is a very simple knot that you can see in the video below.

    Step 6: The Finishing Touches

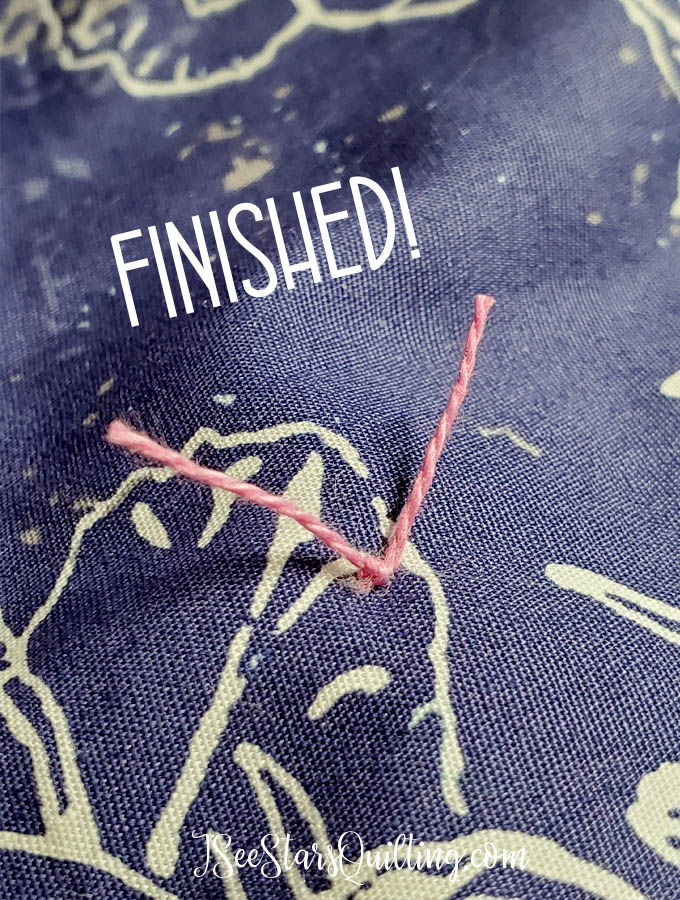
    After your threads are tight and secure, you’ll want to trim up your thread ends.

    I usually leave mine to be about 3/4″ long. I’ve seen some people prefer a 1/2″… It is up to you. You’ll want it short enough that the threads don’t get really super frayed and hairy after being in the washer a few times, but long enough that they don’t have a tendency to want to come un-knotted over time.

    Step 7: Keep going until you’ve finished your quilt!
    It really is that easy! Keep going by knotting in the places that you marked along your quilt in the beginning. You’ll find that time passes quickly once you really get the hang of the steps!

    More Tips for hand tying a quilt

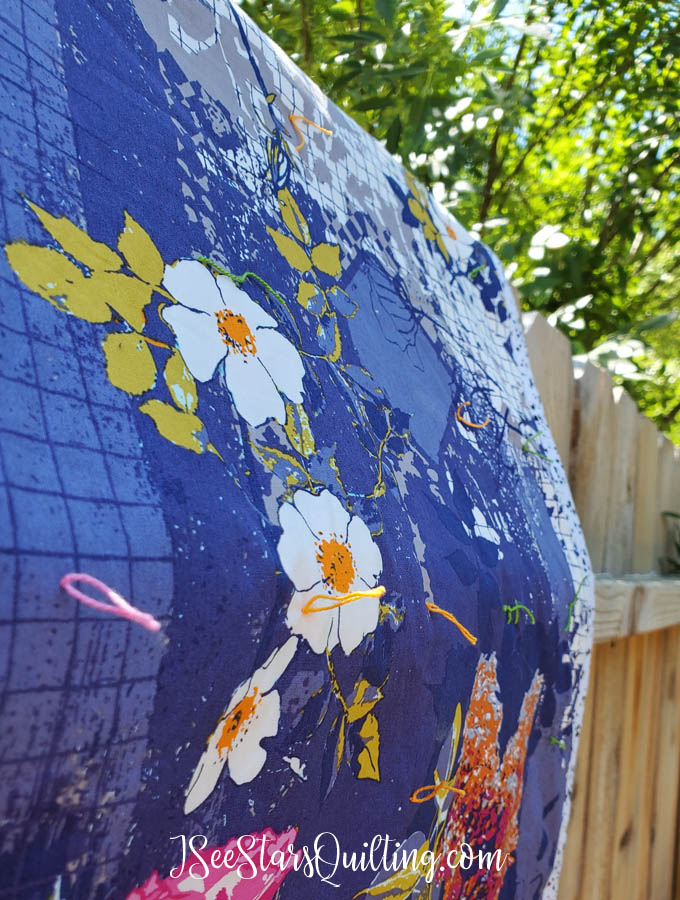
    One of my favorite ways to make hand tying a quilt even more interesting is to change up the colors of thread.

    It could be because I was a bit indecisive on this particular quilt project… but I chose three different colors of thread that coordinated with the fabric for an all over colorful fun look!

    You can also add charms or buttons to your ties that add dimension and personality to your quilts.

    Just a word of caution: buttons or charms of any sort should not be used for quilts that will be used by children ages 3 or under. There is a chance a child could swallow and choke on a button.

    How far apart should the knots be?

    Check your batting recomendations – each material is different in what it reccomends for the distance in your quilting lines. Your knots should be no further apart than the recommended distance for the batting.

    If you do not knot the recommended distance, the knots should be close enough to prevent the layers of your quilt from shifting around.

    Usually, I prefer to look at the design of the quilt and make my choices based on where my blocks fall.

    For example, my favorite batting – Warm and natural brand – has a recommendation of quilting every 8-10″.. but when I tie a quilt, I may place my knots every 5-6″… at that point, it could be considered overkill on making sure it is secure but for asthetic reasons… it is just perfect!

    So make sure you are doing at least the very minimum for what your batting requirements are… but make the right decision for your quilt’s design needs as well.

    Binding, before or after tying a quilt?

    Always tie your quilt layers first, then trim your quilt and add the binding on last.

    So What Do You Think? Will You Try It?

    Tying a quilt is a really simple yet effective way to finish a quilt. You’ll find that the more practiced you are at it, the quicker it gets finished.

    Next time you don’t feel like sitting at your machine anymore or want to spend more time in your family room, try tying your quilt!

    Let me know what you think or if you have any other questions in the comments below!

  • What size is a baby quilt size?

    Nothing gets me wanting to make a cute brand new quilt than someone announcing that they’re having a baby! – Seriously, I’m a sucker for those cute, little, beautiful, helpless wonders!

    Becoming a mom is what really got me into quilting in the first place. I wanted to create something that both made me feel creative AND was useful in our every day lives.

    For us, two kids are enough… so my love of making baby quilts lives on through friends and family having more babies!

    I’ve made so many baby quilts, I’ve lost count by now… in all different sizes and shapes.

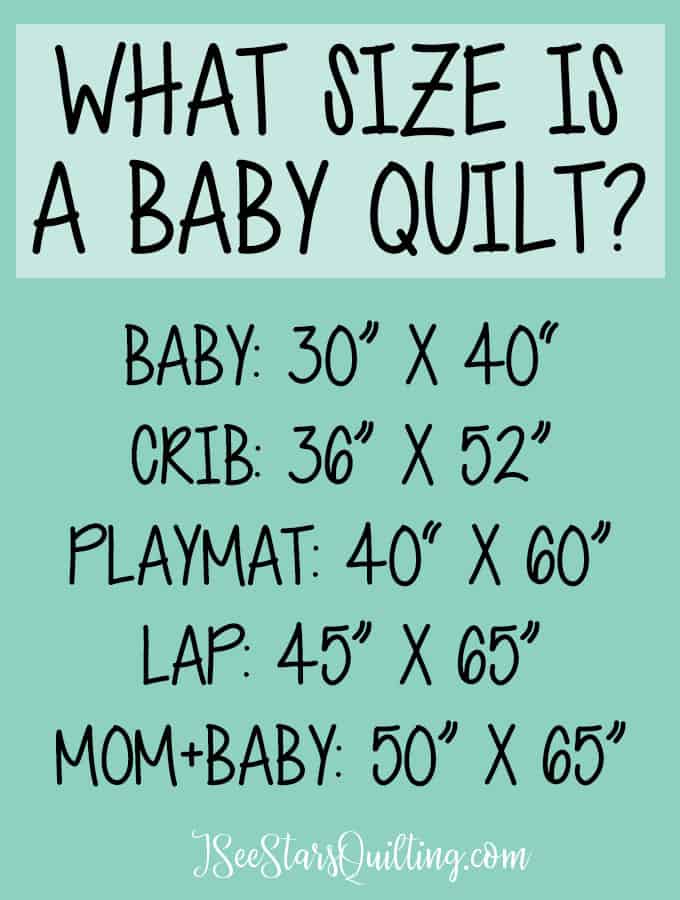
    A chart with the most common baby quilt size. Plus, how to choose what size your quilt should be based on the use. Included are other common quilt sizes!

    What is the most useful baby quilt size?

    First of all, there is no wrong answer here… but if you’re just here for some standard guidelines, I created this chart for you.

    …Wait, there is no wrong answer?

    What? Just because a crib quilt is usually 36″ x 52″ does not mean that you have to make all of your baby quilts those exact measurements!

    I’ve created square baby quilts, hexagon-shaped quilts and even an adventurous circular one on occasion.

    The baby quilt size is best left to your interpretation… using your own judgment and approximations.

    A quilt can vary 4″ – 8″ depending on the pattern you choose.

    If you are using a pattern for your baby quilt, follow those instructions.

    If you are just winging it and planning the quilt as you go – My personal choice apparently as that is how most of my quilts turn out…

    Take a minute to really figure out how your baby quilt is going to be best used…

    • Do you want it to be a cute crib quilt? (*note that it is not recommended to have anything inside a baby’s crib but the mattress while he/she is sleeping)
    • Do you want it to be a fun playmat for the baby to lay and play on daily?
    • Or maybe your quilt will be a big snuggle quilt for baby and momma during those late-night feedings?

    This will help you determine the general size that you should work towards for your quilt top!

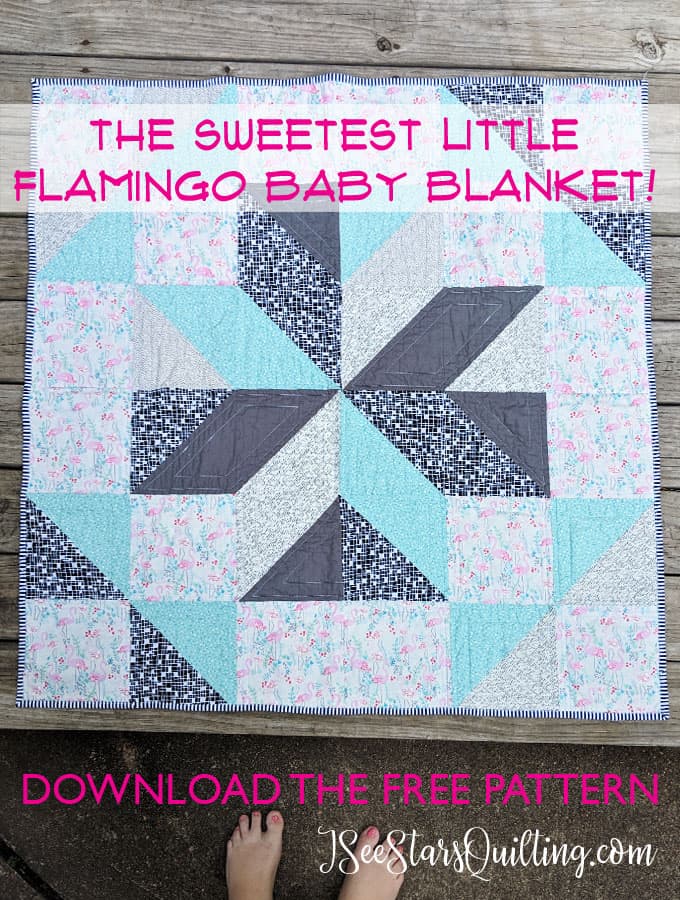
    This sweet baby quilt pattern is a FREE download that I designed to be easy fro all levels of quilting! Just look at this sweet flamingo print! Its adorable! Did I mention the FREE pattern? ;) Check it out, download it and save it for later!
    The pattern above is called Sweet Baby Quilt and it sews up super fast. You can download it for FREE here.

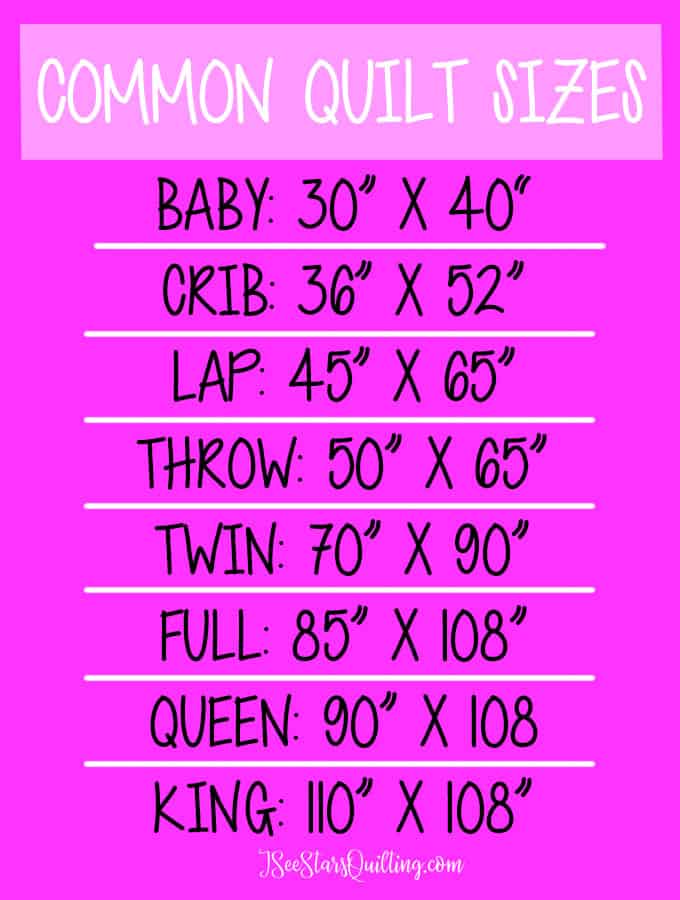
    Here is another handy chart to keep for even more common quilt sizes.

    4 reasons you should never apologize for taking a sewing day. Even 10 minutes can boost your mood, decrease your stress level and leave you feeling energized and better able to handle everything else in your life.

    What size should the batting and quilt backing be?

    If you plan to quilt your baby quilt yourself:

    When you baste your baby quilt and do the quilting yourself, plan on making the batting and backing of your quilt a few extra inches larger all the way around for overhang and wiggle room.

    If you plan on sending your quilt to a long-armer:

    A long-armer has slightly different specifications for your quilt. If you would like a long arm quilter to do the quilting for you, most require an overhang of 4″ (or more) of both the batting and the backing fabric. If you haven’t worked with the long-armer before, double-check with them to make sure you can meet their requirements.

    What is your favorite baby quilt size to make?

    I tend to create more playmat quilts for babies than the other sizes… what do you gravitate towards? Do you have a favorite? Tell me down below in the comments.

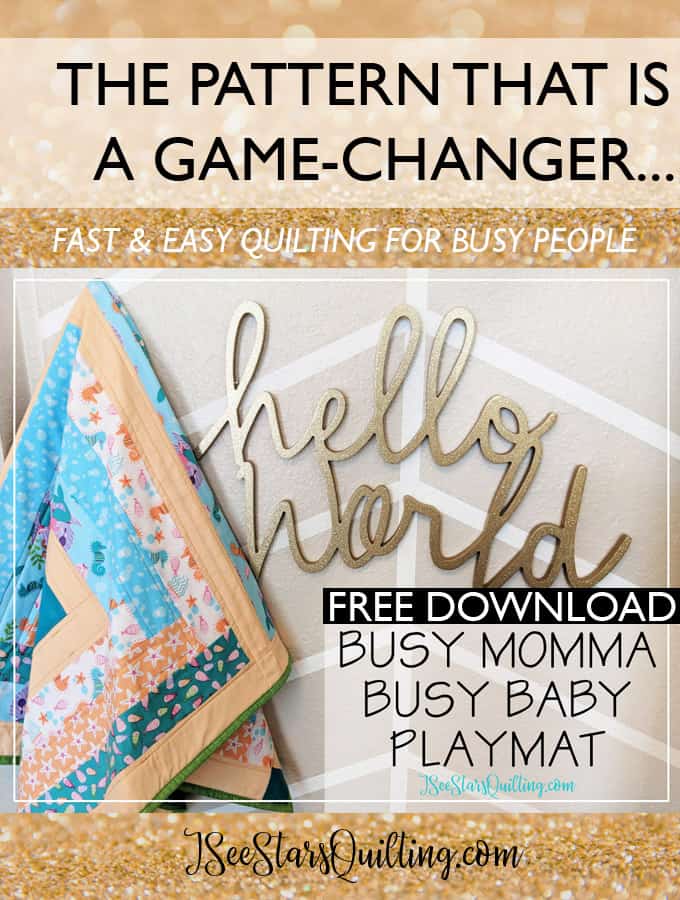
    Think you're too busy to quilt? The Busy Momma Busy Baby Playmat Pattern is game-changer. Seriously beautiful quilt that comes together fast and easy, all level friendly... and it is a FREE DOWNLOAD. Seriously. You don't want to miss this!
  • My Favorite Quilting Classes On Bluprint

    Have you heard of Bluprint?! It is an amazing online hub of classes for everything crafty you could imagine… I’m going to share my favorite quilting classes that you can find on Blueprint today! (plus links where you can own the class too)

    Seriously, if you are prone to getting lost down the rabbit holes of the internet and you have somewhere to be in an hour, do yourself a favor… bookmark this post and come back to it when you have time to look around. You’ll thank me later 😉

    Shop deals of the week at shop.mybluprint.com!

    Bluprint by far has the best selection of crafting classes/education on the internet – You might remember a few years ago, it was called Craftsy. (I wrote a review about it here)

    While I have learned many skills since the day I wrote that post about Craftsy, I still stand by the fact that Bluprint is one of my go-to learning destinations!

    Ok, I also like YouTube too. I usually will do a quick search on YouTube when I want to learn something quickly or I’m having a hard time with a particular skill… but YouTubers are sometimes like a box of chocolates… you never know what you’re going to get, right?!

    **I say that so nicely and with a lot of love because I have a YouTube Channel where I share tips and tutorials too… and that job is not an easy one!**

    Still, if you’re looking for more quilting education and more quilting classes, check out the ones I suggest below.

    Should you try Bluprint? Is it worth it? I'm sharing all the details PLUS what my favorite quilting classes are and more!

    How does Bluprint work?

    The good news is that once you buy a class on Bluprint, it is yours forever!

    But there is another option too… you can be a monthly member to their site and have access to TONS of classes that are included with your membership. It is really an amazing opportunity to soak in so much knowledge! (more on that down below)

    myBluprint.com

    As if the courses weren’t enough… there are also kits and supplies that you can purchase from Bluprint at members-only discount prices as well.

    *heart eyes for the embroidery kits! They are to die for!*

    OK, but that’s for another day because I promised that I was going to share my favorite classes on blueprint!

    My favorite Quilting Classes on Bluprint

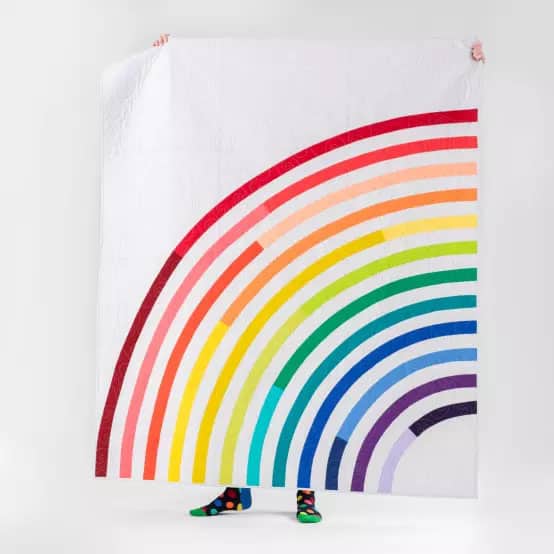
    Rainbow Bias Tape Appliqué Quilt

    This one is so fast and so fun! I love a good happy rainbow. And it’s Applique, so you have fewer worries of the seams matching up and wondering if you’re at the right skill level etc… YOU ARE! This Rainbow Applique Quilt is for everyone and this quilt is beautiful every single time.

    You can find it here.

    Here’s How to Pick the Perfect Quilting Thread Color Every Single Time

    This is a free read! Yay! It has some really good tips to read over! No purchase required… just knowledge.

    Read it here.

    Your Perfect Project: Starry Path Quilt

    Hi, I’m Christen. If you didn’t know, I’m obsessed with stars… 🙂 haha I really love this quilt design and the beautiful endless options for fabric that it lends itself to!

    You can check out The Starry Path Quilt Here.

    28 Days to Better Free Motion Quilting

    Angela Walters… I love this girl. She has no idea I exist, but I know we could be fast friends – I tell you this, not to make this weird…er? but because I know you’ll love learning from her too!

    Check out the video course here.

    The Scrappy Market Tote

    It is a scrap project!!! Looking for a fun way to use up those little scraps? I adore this one! How about fun Christmas presents? – unique gifts? – talk of the local farmers market? — uh huh, thats you, babe. 😉

    Check out the class for The Scrappy Market Tote here:

    Quilted Tree Skirt

    This Quilting class is actually really easy, but super enjoyable! I love my tree skirt! Every single time I’ve made one I think that it will be my ‘last one’ and it will be a tradition to put it out every year, but soon I find myself looking at all the beautiful fabric out there and… I get a spark for another tree skirt!

    Quilted Tree Skirt Class

    FREE Own-Forever Classes With Bluprint Subscription at myBluprint.com.

    English Paper Piecing – Beyond The Basics

    This class opened my eyes so much to the possibilities of this wonderful fabric craft.

    I see inspiration everywhere now and I want to EPP forever! (well, as much as I want to quilt forever too lol)

    Click here for The English Paper Piecing Class.

    So, is it worth it to become a member?

    Ok… I hear you… the cost of quilting classes can add up!

    The good thing about buying these courses is that they are yours to own forever after you purchase them.

    You can find some classes and materials on sale. – Check out the Deals of the Week sale section here.

    My favorite way to do Bluprint is the membership option. It makes learning almost too easy… actually, who am I kidding… it is SO easy!

    With their membership program, you have access to OVER 1300 classes! Boom. Just like that. Instant access, to become a master at just about anything craft related.

    Decide that embroidery isn’t for you? no big deal… move on to beading! or knitting! or… decorate a cake to wow your family!

    Should you try Bluprint? Is it worth it? I'm sharing all the details PLUS what my favorite quilting classes are and more!

    My honest opinions on Bluprint

    I highly recommend Bluprint to anyone who enjoys a little bit of everything and to someone who wants to become an absolute MASTER at just one thing.

    All the training that you need is right at the tip of your fingers on your computer screen, whenever you want it. No need to drive or wait for a class to visit your local shop. You can start today.

    Also, I am a huge fan of things I can do while wearing my pajamas – This is definitely one of them! (don’t worry… I always wear cute ones haha)

    myBluprint.com

    Are you a member of Bluprint? Or are you thinking about it? Tell me your opinions on it in the comment section. I would love to hear your thoughts!

  • Fabric Storage: What Works For Me + A Video!

    Fabric storage has always been a big challenge for me. I know that other quilters and crafters struggle with it as well.

    I thought I would give you a few suggestions from things I’ve learned over the years through trial and error (and WAY too much money spent on the hopes of simply having MORE organizational products to force myself into being organized – spoiler alert, it didn’t make me more organized at all. It just made my mess a little cuter lol)

    Keep reading for my tips, but if you’d like the quick tour of what I am working with right now, check out the video below.

    I’ve been working on getting settled and slowly crafting my sewing room into the space that I’ve had in my dreams for years and years.

    It will always be a work in progress in some form or another. At this moment, we’ve been here for about 4 months, 2 of which I didn’t do anything to my sewing room because I was working on making the rest of the house livable.

    To claim that “I have it perfected” would be a lie lol… but I’ve learned a lot over the years of what works and what just won’t no matter how hard you try or how much money you spend!

    Scrap Fabric Storage Ideas

    Why oh why is scrap fabric the downfall of so may creatives?!

    I want to hold on to every single scrap in the spirit of not being wasteful, but in doing so… I become a hoarder of the tiny-est beautiful fabric pieces.

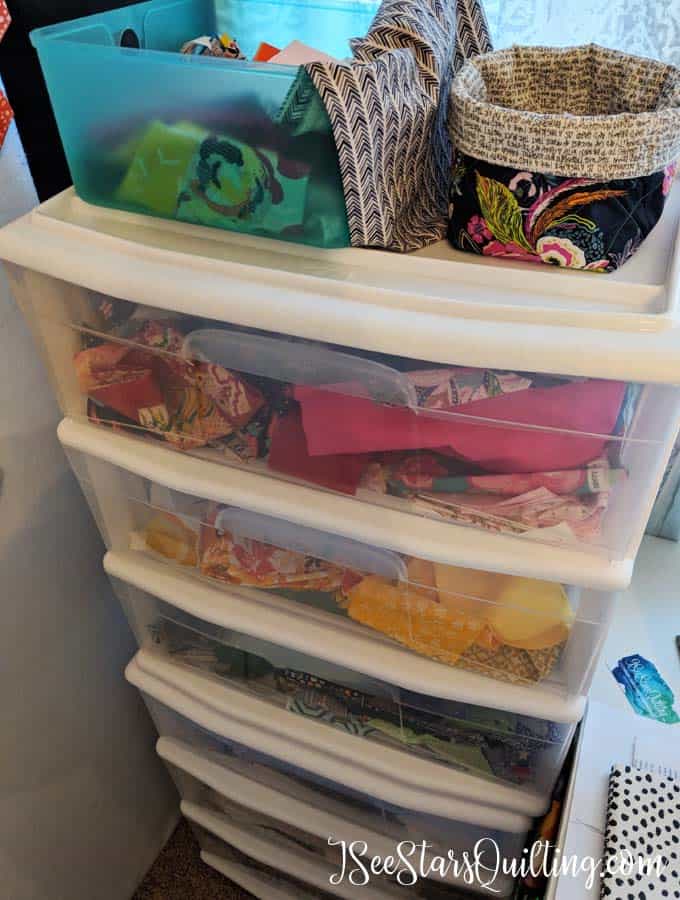
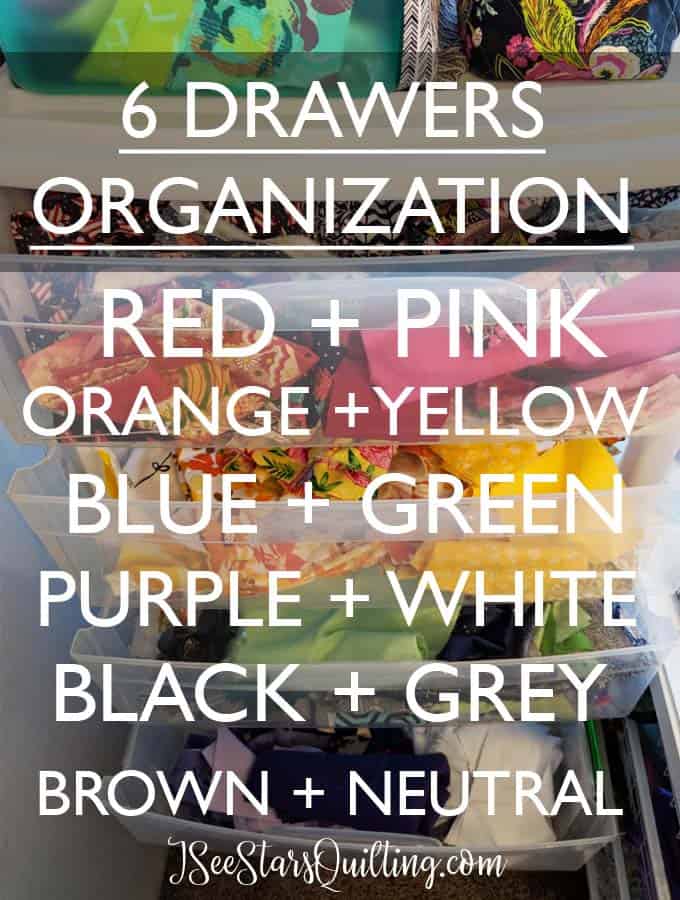
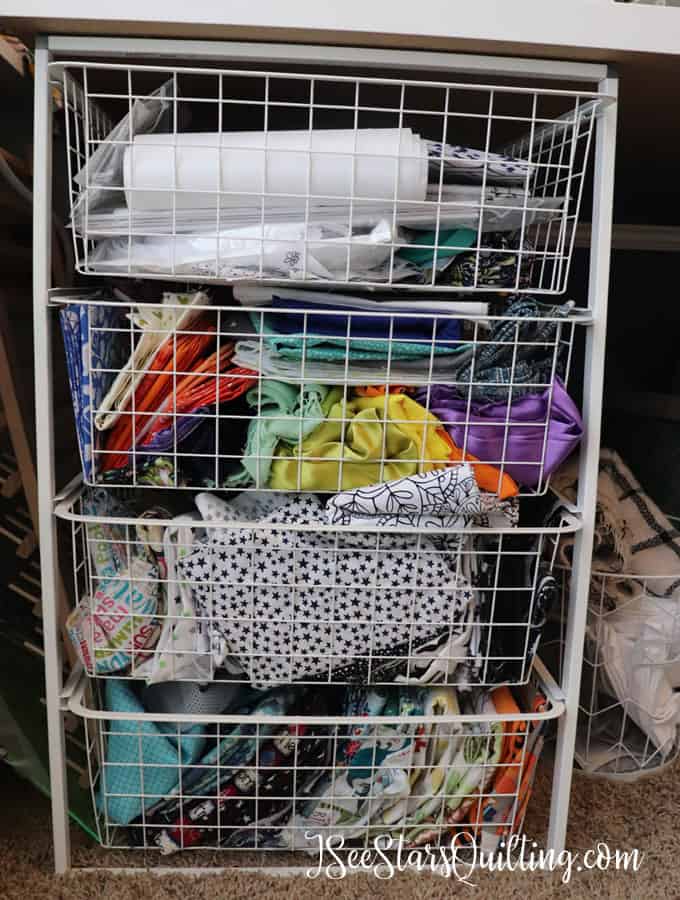
    Currently for my scrap fabric storage needs, I have been really happy with these plastic drawers. They’re really deep and they hold a lot of scrap fabrics!

    I have each of the six drawers divided up by color groupings.

    These easy solutions will have your organized and happy in no time! (and you don't have to spend a lot of time or money!)
    These easy solutions will have your organized and happy in no time! (and you don't have to spend a lot of time or money!)

    Project Bins Are Essential

    I can’t stress enough how much these have saved my tail as far as organization goes…

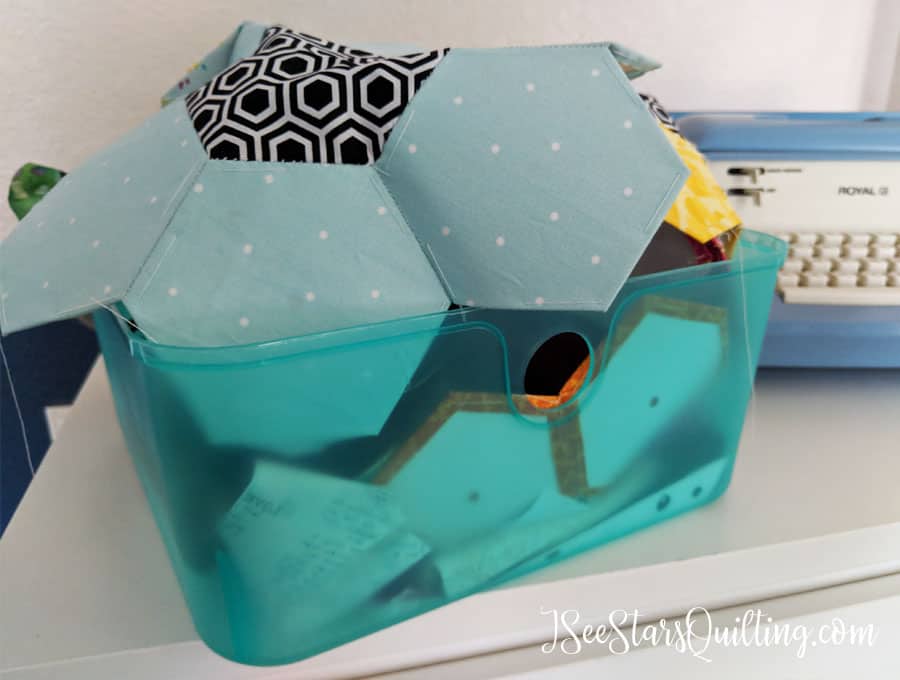
    When I’m working on big projects that I know are going to take a while, I like to utilize big storage bins.

    I keep everything for the project in the bin until the project is complete.

    It helps me stay organized by keeping all the pieces together.

    It makes clean up a breeze, because all I have to do is shove it into the box. No running all over the place to put things away only to have to drag them out again tomorrow. Fast, easy clean up in a hurry.

    If you're looking for Cheap Sewing Room Storage Ideas, you'll find all my favorite picks here so you know what is worth the money and what isn't worth your time

    Use Your Space Wisely

    Ok so this next picture isn’t the prettiest… I get that.

    But its more about using your space wisely so you can easily SEE and get to your tools than it is about making it look pretty for Martha Stewart to drop by unannounced at any given moment, right? … at least, that is how I feel.

    I love using the space under my work tables for more storage. These drawer sets are from IKEA, but I’ve seen similar copy-cat setups at target and walmart that you can buy and use your own desktop.

    Creativity is best in a room filled with the things that bring you joy! I'm going to give you a tour of my sewing room today and share all my organization tips along the way!

    Use Your Tall Wall Space Where You Can For Shelving

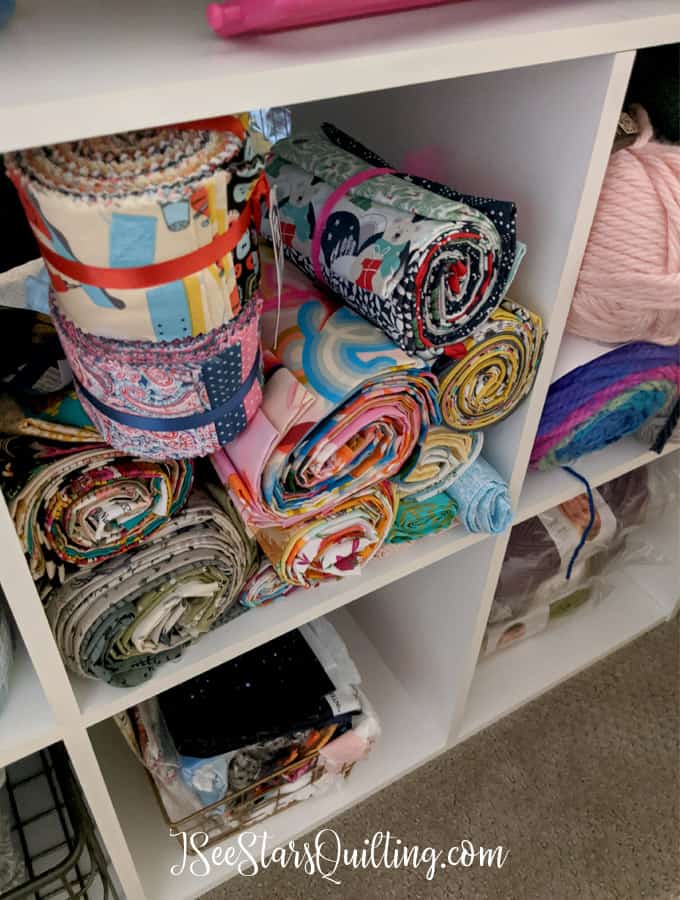
    If you have vertical space for shelving, make use of it!

    We moved! Come tour my New Creative space and see how I arranged all my tools to create the most amazing crafting space!

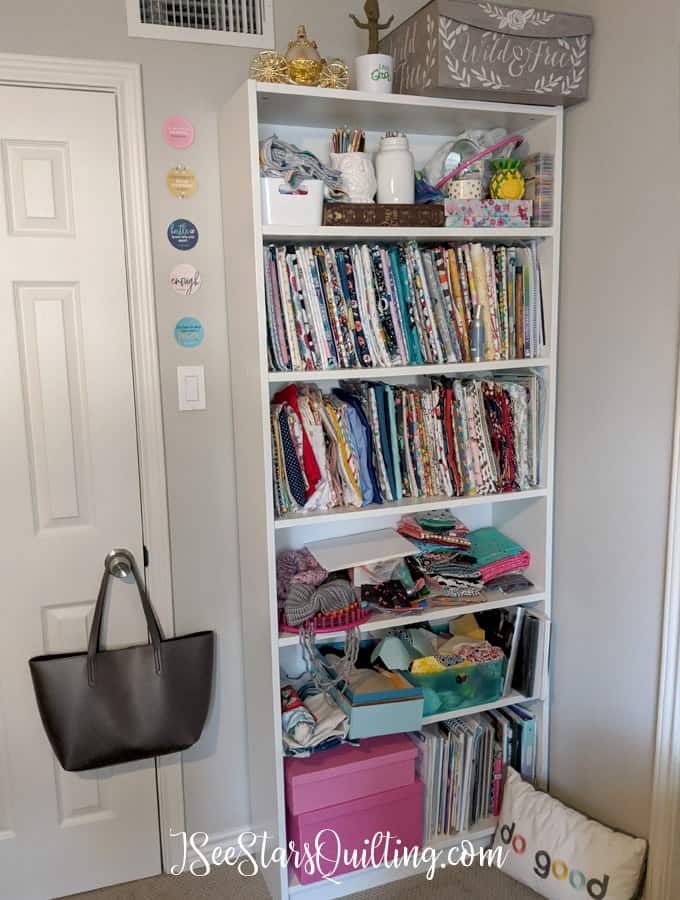
    I like to use these comic book boards to wrap my fabric around and make mini “bolts”. It makes a big difference in how nicely my fabric stands up on the shelves.

    [In the picture above, you can see on the second from the top shelf how nice and neat everything looks vs. on the shelf under it the fabric to the left is much more slouchy and tired looking… I ran out of boards! oops.]

    You can also just use whatever stiff boards you have on hand. Cardstock is a little too flimsy, in my opinion, but it can work. You can use cardboard, or foam-core board to customize your boards to fit your shelving!

    Group Your Fabric By Quilts/Projects, Not By Color or Designer

    This is just a suggestion, but one that I’ve found has helped me A TON over the years…

    When I go to the fabric store and I pick up extra fabric (because… if you like it and are afraid they won’t have it next time, you do buy it too, right?) or I pick out a few coordinating pieces that would make a cute quilt together, I group them together in my sewing room. It makes it easy for the next time I’m looking for inspiration or I need some quick project ideas, I’m already halfway there!

    Let me know in the comments down below where your fabric storage struggles are and what are your biggest pain points in your sewing space!

    We moved! Come tour my New Creative space and see how I arranged all my tools to create the most amazing crafting space!

    There you have it! I know it sounds rather simple and I feel like a lot of my ideas may be intuative and simple, but you know what?

    Fabric storage doesn’t have to complicated!

    It doesn’t have to cost a ton of money and it doesn’t have to run your life!

    If your organizational issues run a little deeper than your fabric, I have a ebook + workbook that I have created to help you create the sewing and crafting space of your dreams.

    It doesn’t have to be complicated. I’ll show you how and walk you through step by step over the course of 25 days 🙂

    AND You can use code “CREATEMYSPACE” at check out for 20% off 🙂

  • How to Iron your Quilt Seams

    Hey there! We know to iron your quilt seams as you sew… It is a really big deal – like, non-negotiable for some people, right?

    But what if you’re new to quilting and you’re asking yourself…

    Why?

    Why do I HAVE to iron my seams? – I hate ironing.

    DO I HAVE to iron my quilt seams? – I really hate ironing.

    What will happen if I don’t? – I really really hate ironing.

    I’m here to answer those questions today as well as show you a video at the end that will hopefully further answer your most pressing questions! – (pun, totally intended. I couldn’t resist!)

    Do you NEED to Iron your Quilt Seams?

    The short answer is that you SHOULD. Yes.

    But why do you HAVE to iron your quilt seams?

    Because the pattern tells you to.

    Just kidding. I wouldn’t expect an answer that simple to be the end of it!

    Listen, I hate to iron!

    I actually will pick up a super cute shirt in a store and then put it back if the material looks like it’s going to need ironing after every wash. No thank you. I don’t have time for any extra chores in my life. Sorry, cute shirt.

    When it comes to quilting (and sewing), however…

    I do iron.

    I do iron my seams when I sew. (we’ll get to ironing fabric before you start sewing in just a minute. I have advice about that too.)

    I like to think of the pattern like a cooking recipe. If you want to make a cake, you have to follow the directions, right?

    You can’t add in a little extra flour, skip the eggs, and double the milk… and then expect to get a cake. It doesn’t’ work that way.

    Sewing and quilting are a little more forgiving and lenient when it comes to creativity, but you still should take the suggestions of the pattern designer.

    I’m sure they aren’t into wasting time any more than you are. So if they make a suggestion, it is best to follow it.

    When you do iron your seams…

    The biggest difference that you are going to notice is that your quilt top is going to lay flatter.

    Why does this matter?

    If you’ve ever tried to quilt on a top that has the seams all wonky, you’ll notice the extra bulk in areas of your quilt – especially if you have a quilt where many pieces come together. There is just a lot of fabric in those places and it takes some careful laying down of the seams to minimize the bulky-ness.

    We all have little mistakes and places on our quilts that aren’t perfect. No one expects it to be and I think that it’s perfectly normal.

    You can say that the mistakes “add character”… (Side note: I had a quilter actually tell me that) but don’t just let it be an excuse for pure laziness. 🙂

    You spend so much time, creativity and effort on your quilts… why skip one of the major steps that are going to give your quilt an overall more professional look?

    Check out the video below to learn more about ironing your quilt seams and see my tips as well as a few favorite products of mine!